
Mat TheMadKing King
New Member
- Joined
- Aug 27, 2015
- Messages
- 1
- Reaction score
- 0
No, I'm not talking about the Eugene, Oregon-based brewery, though they do make some fine beers. I'm talking about the Sumerian goddess of brewing; the oldest brewing deity known to historians. The Sumerians took their brewing seriously. Depictions of beer and even recipes occur in their artwork and clay tablets dating back more than 6,000 years. Barely recognizable to us as beer today, their drink made of fermented grains and date wine and consumed in honor of Ninkasi may be the great great grandfather of our modern conception of beer.
So if the ancient Sumerians, who had not yet invented the wheel, could brew beer, then how hard can it really be?
I have brewed with extracts for a number of years and just switched to all-grain brewing this summer. I remember my first recipe like it was yesterday. It was a brewing kit boiled in an enamel canning pot and fermented in a bucket under my buddy's stairs. You all know the kind. It was Nink-awful. I had somehow failed to produce a drinkable product despite thousands of years of brewing knowledge at my fingertips.
So what was my big mistake?
Its pretty simple: I tried to do too much too fast. Well that and I tried to make a 5 gallon batch with a 3 gallon kit because reading directions is hard for some of us.
Brewing is so easy, in fact, that there is absolutely zero need to understand the chemistry and biology of whats happening before making your first beer. If you can cook ramen noodles, you can make beer. As the now famous saying goes, relax, don't worry, have a homebrew (RDWHAHB).
I would argue that brewing beer is one of the most forgiving hobbies there is. But how can that be? There's so many variables, so much to worry about, and so many places to go wrong! While there are a few ways to go drastically wrong on brew day, consider the number of methods available to make sugar water (wort).
Extract Brewing
Extract brewing is the most common way for new brewers to begin. You heat water, pour in the malt extract, bring it to a boil, add your hops, cool it, throw in a packet of yeast, come back 2 weeks later and you have flat beer in need of bottling. These ingredients are even sold in kits with easy to follow step-by-step instructions, and if that's not enough, YouTube is a great resource. The amount of information conveyed in a 10-minute video is the same as, if not more than, an entire book in my opinion.
The pitfall that I fell victim to when I was brewing my first extract beer was being totally overwhelmed by the amount of information available. I was so excited about brewing beer that I plowed head first into websites and YouTube and books, and thanks to my excitement, it all became a jumbled mass of information. Mistakes were made. That's where the relax from RDWHAHB comes into play. You don't have to have a masters degree in brewing science to make an extract brew (or any brew for that matter). Just follow your recipe and relax. The learning will come; just getting the process down is more important the first time.
All-Grain Brewing
If brewing for the first time with extracts seemed daunting, brewing with all-grain seemed like climbing Everest to me. I started by reading John Palmer's How to Brew. That was a great place for me to start, but it was (again) an information overload. Remember, in the Matrix, how they just download information into their brains, and its all there and makes perfect sense? Well imagine a data uplink like that being controlled by one of our major cable companies today. The info was all there, but it was garbled, missing some things, and hopelessly confused in my mind. I solved this problem by turning to YouTube. The video that helped me the most was this one:
At 46 minutes long, it is a bit lengthy for YouTube, but it is well worth it. Watching this video (along with John Palmer's book) helped to solidify many of the concepts in my mind, and helped to get a single streamlined idea of what the process looked like. Wrapping your head around it is the first step to losing the fear of making the switch from extract to all-grain.
All-grain brewing, in its most basic form, is extracting sugars from malted grain (mashing), then boiling and hopping, and then fermenting. There are so many different ways to accomplish this simple task that I didn't know where to start. The general intent of this article is to give you, the new brewer, a quick rundown of some of whats out there so that you can narrow your search and focus your studies. The problem isn't a lack of information, its filtering through all of it!
The Three Vessel Process
This seems like the best place to start with all-grain brewing. This method is common and widespread because its streamlined, time tested and it works. The basic idea is that you have three vessels: one for hot water (referred to as the hot liquor tank or HLT), one for mashing and lautering (called the mash/lauter tun or MLT), and one for boiling (the brew kettle).

A Standard Three Tier Gravity Fed Brewing System
The gravity fed system pictured above is the simplest to build but they can quickly become as complex as a brewers crafty heart desires.
Recirculating Infusion Mash Systems (RIMS) and Heat Exchange Recirculating Mash System (HERMS) are just two different methods of manipulating the temperature of the mash water and can be incorporated into a three-vessel system.

An All Stainless Steel RIMS System
RIMS and HERMS systems are a brewing technology that allows for some more advanced mashing techniques and greater temperature stability during the mash. In fact, the RIMS and HERMS systems are a technological solution to make the very old methods of decoction mashing and step mashing more streamlined for the modern brewer.
These techniques are certainly not necessary for brewing a first all-grain batch, but just knowing what all the terms mean is half the battle. And remember: dont let all the acronyms and terminology put you off! Never forget that all this modern technology is being used to accomplish virtually the same process that the Sumerians were using thousands of years ago.
Just as there are many methods of achieving, manipulating, and maintaining mash temperatures, there are also many ways to lauter. Lautering is just filtering your grain from your wort. That's it. The most common methods of filtering are use of a perforated "false bottom" or a manifold, usually consisting of a section of PVC or copper tubing with small holes cut into the bottom of it, both of which allow liquid, but not grain, to pass. These two methods both have pros and cons, but both work well. A stainless steel braid taken from a household water line or electrical flex-conduit is also a cheap alternative when used as shown below, though they are more prone to a stuck sparge (a clogged filter).

A Stainless Steel Braid Lautering Device
These are just a few of the way that lautering can be done in a three-vessel system. If you ask the internet which is the best way, you'll find a thousand different answers and a million different reasons for them. I tend to believe that the best way is whichever is within your budget and can accomplish the goal. All of these solutions can be made to work equally well in the right hands. Its not about the right way and wrong way; its about your way and my way. Remember the Sumerians!
Brewing in a Bag (BIAB)

A Typical Brew In A Bag (BIAB) Setup
This is a relatively recent development in homebrewing, and my personal favorite. Brewing in a bag takes the traditional three-vessel system and condenses it down to a single vessel. You just heat your water, put in a giant tea bag of your grains, let them sit for the duration of the mash, and then just pull your bag back out and you're off to the boil.
This process is becoming increasingly popular for new and experienced all-grain brewers alike due to its simplicity and cost-savings. The basic process is explained here by one of our own, and my variation on the technique is explained here. One more reminder: this is just a different method for doing the same thing! They all work.
Turning Wort Into Beer
Once you've settled on your mashing and boiling processes, all you have left is chilling, fermenting, and bottling or kegging.
It doesn't really matter if you're chilling with an immersion chiller, a counter flow chiller, a plate chiller, or with good old fashioned time, as long as your wort gets down to around 60-70F before you pitch your yeast, you're doing it right.
Its important to try and select yeast that's appropriate for the style of beer that you're making. Different yeasts will produce vastly different flavors in the same wort, so be sure to research your intended style and choose a strain of yeast that will get you there. It doesn't matter if you choose dry yeast or liquid yeast, both work well. If you do choose liquid yeast, a yeast starter is recommended to ensure that you are pitching the proper number of yeast cells. I say recommended because plenty of people make good beer without them! Its all about whats comfortable for you, the brewer.
Now read carefully, as this is the hardest part of brewing any beer - you have to wait.
Put your beer in a cool room at 60-70F, or in a tub of cool water with a wet t-shirt draped over it and fan blowing on it, or in a fermentation chamber with temperature control, whatever option you have, and wait.
Its worse than waiting on Christmas, and the temptation is always there to smell or taste your progressing brew. Don't do it! Infections are easy to acquire by excessive fiddling with a fermenting beer. Leave it alone until your hydrometer readings stabilize, your beer has dropped clear, and you have a few hours free; now its time to bottle or keg.
Most new brewers like me start out with bottling since it is by far the cheapest method of packaging. It is also the most labor-intensive part of brewing, and a real PITA in my opinion. If you cant tell, I'm ready to buy a kegging system, but Ive bottled for years and it works perfectly well.
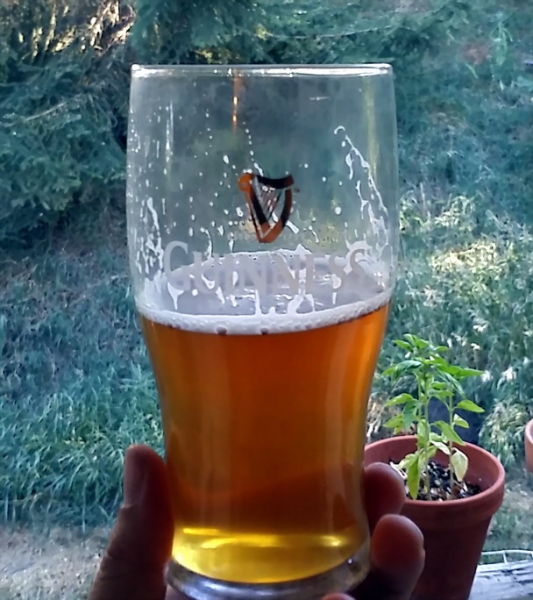
Once your beer is in its package of choice, its time to wait for a while longer. Three weeks is the recommended minimum time for carbonating and bottle conditioning, while kegged beer can be ready to drink in just a few days. Either way you do it, at the end of all this waiting there should be the nectar we all dream of. Homebrew in all its glory!

There's Something Special About Our Homebrewed Beer!
It doesnt have to win awards to be delicious, and often times our first brews and our one-hundredth brews can come out barely drinkable, but its our beer, and damn-it well drink it whether the neighbors politely decline a second pint or not!
Whichever way you choose to navigate the maze of homebrewing information, just remember to relax. There's more than one way to soak some grain, and Ninkasi is indeed a forgiving goddess.
//www.pinterest.com/pin/create/extension/
So if the ancient Sumerians, who had not yet invented the wheel, could brew beer, then how hard can it really be?
I have brewed with extracts for a number of years and just switched to all-grain brewing this summer. I remember my first recipe like it was yesterday. It was a brewing kit boiled in an enamel canning pot and fermented in a bucket under my buddy's stairs. You all know the kind. It was Nink-awful. I had somehow failed to produce a drinkable product despite thousands of years of brewing knowledge at my fingertips.
So what was my big mistake?
Its pretty simple: I tried to do too much too fast. Well that and I tried to make a 5 gallon batch with a 3 gallon kit because reading directions is hard for some of us.
Brewing is so easy, in fact, that there is absolutely zero need to understand the chemistry and biology of whats happening before making your first beer. If you can cook ramen noodles, you can make beer. As the now famous saying goes, relax, don't worry, have a homebrew (RDWHAHB).
I would argue that brewing beer is one of the most forgiving hobbies there is. But how can that be? There's so many variables, so much to worry about, and so many places to go wrong! While there are a few ways to go drastically wrong on brew day, consider the number of methods available to make sugar water (wort).
Extract Brewing
Extract brewing is the most common way for new brewers to begin. You heat water, pour in the malt extract, bring it to a boil, add your hops, cool it, throw in a packet of yeast, come back 2 weeks later and you have flat beer in need of bottling. These ingredients are even sold in kits with easy to follow step-by-step instructions, and if that's not enough, YouTube is a great resource. The amount of information conveyed in a 10-minute video is the same as, if not more than, an entire book in my opinion.
The pitfall that I fell victim to when I was brewing my first extract beer was being totally overwhelmed by the amount of information available. I was so excited about brewing beer that I plowed head first into websites and YouTube and books, and thanks to my excitement, it all became a jumbled mass of information. Mistakes were made. That's where the relax from RDWHAHB comes into play. You don't have to have a masters degree in brewing science to make an extract brew (or any brew for that matter). Just follow your recipe and relax. The learning will come; just getting the process down is more important the first time.
All-Grain Brewing
If brewing for the first time with extracts seemed daunting, brewing with all-grain seemed like climbing Everest to me. I started by reading John Palmer's How to Brew. That was a great place for me to start, but it was (again) an information overload. Remember, in the Matrix, how they just download information into their brains, and its all there and makes perfect sense? Well imagine a data uplink like that being controlled by one of our major cable companies today. The info was all there, but it was garbled, missing some things, and hopelessly confused in my mind. I solved this problem by turning to YouTube. The video that helped me the most was this one:
At 46 minutes long, it is a bit lengthy for YouTube, but it is well worth it. Watching this video (along with John Palmer's book) helped to solidify many of the concepts in my mind, and helped to get a single streamlined idea of what the process looked like. Wrapping your head around it is the first step to losing the fear of making the switch from extract to all-grain.
All-grain brewing, in its most basic form, is extracting sugars from malted grain (mashing), then boiling and hopping, and then fermenting. There are so many different ways to accomplish this simple task that I didn't know where to start. The general intent of this article is to give you, the new brewer, a quick rundown of some of whats out there so that you can narrow your search and focus your studies. The problem isn't a lack of information, its filtering through all of it!
The Three Vessel Process
This seems like the best place to start with all-grain brewing. This method is common and widespread because its streamlined, time tested and it works. The basic idea is that you have three vessels: one for hot water (referred to as the hot liquor tank or HLT), one for mashing and lautering (called the mash/lauter tun or MLT), and one for boiling (the brew kettle).
A Standard Three Tier Gravity Fed Brewing System
The gravity fed system pictured above is the simplest to build but they can quickly become as complex as a brewers crafty heart desires.
Recirculating Infusion Mash Systems (RIMS) and Heat Exchange Recirculating Mash System (HERMS) are just two different methods of manipulating the temperature of the mash water and can be incorporated into a three-vessel system.
An All Stainless Steel RIMS System
RIMS and HERMS systems are a brewing technology that allows for some more advanced mashing techniques and greater temperature stability during the mash. In fact, the RIMS and HERMS systems are a technological solution to make the very old methods of decoction mashing and step mashing more streamlined for the modern brewer.
These techniques are certainly not necessary for brewing a first all-grain batch, but just knowing what all the terms mean is half the battle. And remember: dont let all the acronyms and terminology put you off! Never forget that all this modern technology is being used to accomplish virtually the same process that the Sumerians were using thousands of years ago.
Just as there are many methods of achieving, manipulating, and maintaining mash temperatures, there are also many ways to lauter. Lautering is just filtering your grain from your wort. That's it. The most common methods of filtering are use of a perforated "false bottom" or a manifold, usually consisting of a section of PVC or copper tubing with small holes cut into the bottom of it, both of which allow liquid, but not grain, to pass. These two methods both have pros and cons, but both work well. A stainless steel braid taken from a household water line or electrical flex-conduit is also a cheap alternative when used as shown below, though they are more prone to a stuck sparge (a clogged filter).
A Stainless Steel Braid Lautering Device
These are just a few of the way that lautering can be done in a three-vessel system. If you ask the internet which is the best way, you'll find a thousand different answers and a million different reasons for them. I tend to believe that the best way is whichever is within your budget and can accomplish the goal. All of these solutions can be made to work equally well in the right hands. Its not about the right way and wrong way; its about your way and my way. Remember the Sumerians!
Brewing in a Bag (BIAB)
A Typical Brew In A Bag (BIAB) Setup
This is a relatively recent development in homebrewing, and my personal favorite. Brewing in a bag takes the traditional three-vessel system and condenses it down to a single vessel. You just heat your water, put in a giant tea bag of your grains, let them sit for the duration of the mash, and then just pull your bag back out and you're off to the boil.
This process is becoming increasingly popular for new and experienced all-grain brewers alike due to its simplicity and cost-savings. The basic process is explained here by one of our own, and my variation on the technique is explained here. One more reminder: this is just a different method for doing the same thing! They all work.
Turning Wort Into Beer
Once you've settled on your mashing and boiling processes, all you have left is chilling, fermenting, and bottling or kegging.
It doesn't really matter if you're chilling with an immersion chiller, a counter flow chiller, a plate chiller, or with good old fashioned time, as long as your wort gets down to around 60-70F before you pitch your yeast, you're doing it right.
Its important to try and select yeast that's appropriate for the style of beer that you're making. Different yeasts will produce vastly different flavors in the same wort, so be sure to research your intended style and choose a strain of yeast that will get you there. It doesn't matter if you choose dry yeast or liquid yeast, both work well. If you do choose liquid yeast, a yeast starter is recommended to ensure that you are pitching the proper number of yeast cells. I say recommended because plenty of people make good beer without them! Its all about whats comfortable for you, the brewer.
Now read carefully, as this is the hardest part of brewing any beer - you have to wait.
Put your beer in a cool room at 60-70F, or in a tub of cool water with a wet t-shirt draped over it and fan blowing on it, or in a fermentation chamber with temperature control, whatever option you have, and wait.
Its worse than waiting on Christmas, and the temptation is always there to smell or taste your progressing brew. Don't do it! Infections are easy to acquire by excessive fiddling with a fermenting beer. Leave it alone until your hydrometer readings stabilize, your beer has dropped clear, and you have a few hours free; now its time to bottle or keg.
Most new brewers like me start out with bottling since it is by far the cheapest method of packaging. It is also the most labor-intensive part of brewing, and a real PITA in my opinion. If you cant tell, I'm ready to buy a kegging system, but Ive bottled for years and it works perfectly well.
Once your beer is in its package of choice, its time to wait for a while longer. Three weeks is the recommended minimum time for carbonating and bottle conditioning, while kegged beer can be ready to drink in just a few days. Either way you do it, at the end of all this waiting there should be the nectar we all dream of. Homebrew in all its glory!
There's Something Special About Our Homebrewed Beer!
It doesnt have to win awards to be delicious, and often times our first brews and our one-hundredth brews can come out barely drinkable, but its our beer, and damn-it well drink it whether the neighbors politely decline a second pint or not!
Whichever way you choose to navigate the maze of homebrewing information, just remember to relax. There's more than one way to soak some grain, and Ninkasi is indeed a forgiving goddess.
//www.pinterest.com/pin/create/extension/
