Need some electrical help

Homebrew Talk - Beer, Wine, Mead, & Cider Brewing Discussion Forum

Help Support Homebrew Talk - Beer, Wine, Mead, & Cider Brewing Discussion Forum:

This site may earn a commission from merchant affiliate links, including eBay, Amazon, and others.

FloppyKnockers

Well-Known Member
Joined
Nov 11, 2014
Messages
2,630
Reaction score
3,145
Location
Fort Worth
I'm setting up a new fermentation chamber and ran across a little annoyance. When this freezer's temperature raises beyond its threshold of 21°F it will sound an alarm. As I am using an Inkbirg to control the temp, it will sound every time the Inkbird kicks it on. I found the little control board that has the speaker (black circle), but I'm not sure how to disable (bypass) just the speaker. If I unplug the harness, the freezer will not come on.

So the question is: Which wire needs to be cut, shorted, or otherwise MacGyver'd to silence the alarm?

Any help would be appreciated.

fridge alarm.jpg
 
NOT A ELECTRICIAN, but I would think if you cut all 4, wire nut them all, and then electric tape them(safety precaution, you will not get the buzzer anymore. Or after looking at the pic better, pull the plug off.....
 
Pry off the speaker. Or drill a hole in it. Not kidding.

Also it's almost certain buz + and - are for the speaker / buzzer, simply nipping one of those should also do it. You could try it by unplugging it and shoving one of the wires terminals backwards out of its plug. If it works leave it. if not it's a fixable change.
 
Unplugging the connector takes the NTC temperature sensor out of operation. Not sure what a system does when that happens - it might go into a failure mode?

Anyway, it's pretty clear there is one pair of wires for the NTC thermistor and a second pair of wires for the buzzer.
I would be comfortable clipping either of the connector leads for the Buz+ or Buz- pins, right above their PCB solder joints...

Cheers!
 
How about a pic of the foil side of the board? I would think cut the BUZ+ if nothing else attaches to it. If nothing else attaches to either buz+ or- then cut either of the visible wires for those. if you cut carefully you could solder it back later if needed.
 
Pry off the speaker. Or drill a hole in it. Not kidding.

Also it's almost certain buz + and - are for the speaker / buzzer, simply nipping one of those should also do it. You could try it by unplugging it and shoving one of the wires terminals backwards out of its plug. If it works leave it. if not it's a fixable change.

[expletive] Yeah!! Since discharging a firearm is illegal within city limits here, I decided to use pliers. Plugged it back in and no buzzer!

I'm drafting up a write-up on a freezer turned fermentation chamber and will definitely add this little gem. Thanks a bunch!
 
How about a pic of the foil side of the board? I would think cut the BUZ+ if nothing else attaches to it. If nothing else attaches to either buz+ or- then cut either of the visible wires for those. if you cut carefully you could solder it back later if needed.

Unplugging the connector takes the NTC temperature sensor out of operation. Not sure what a system does when that happens - it might go into a failure mode?

Anyway, it's pretty clear there is one pair of wires for the NTC thermistor and a second pair of wires for the buzzer.
I would be comfortable clipping either of the connector leads for the Buz+ or Buz- pins, right above their PCB solder joints...

Cheers!

I considered doing this first and it does sound like a much more graceful solution, but my man mention drilling holes in and/or prying things off. You had me at 'breaking stuff'.
 
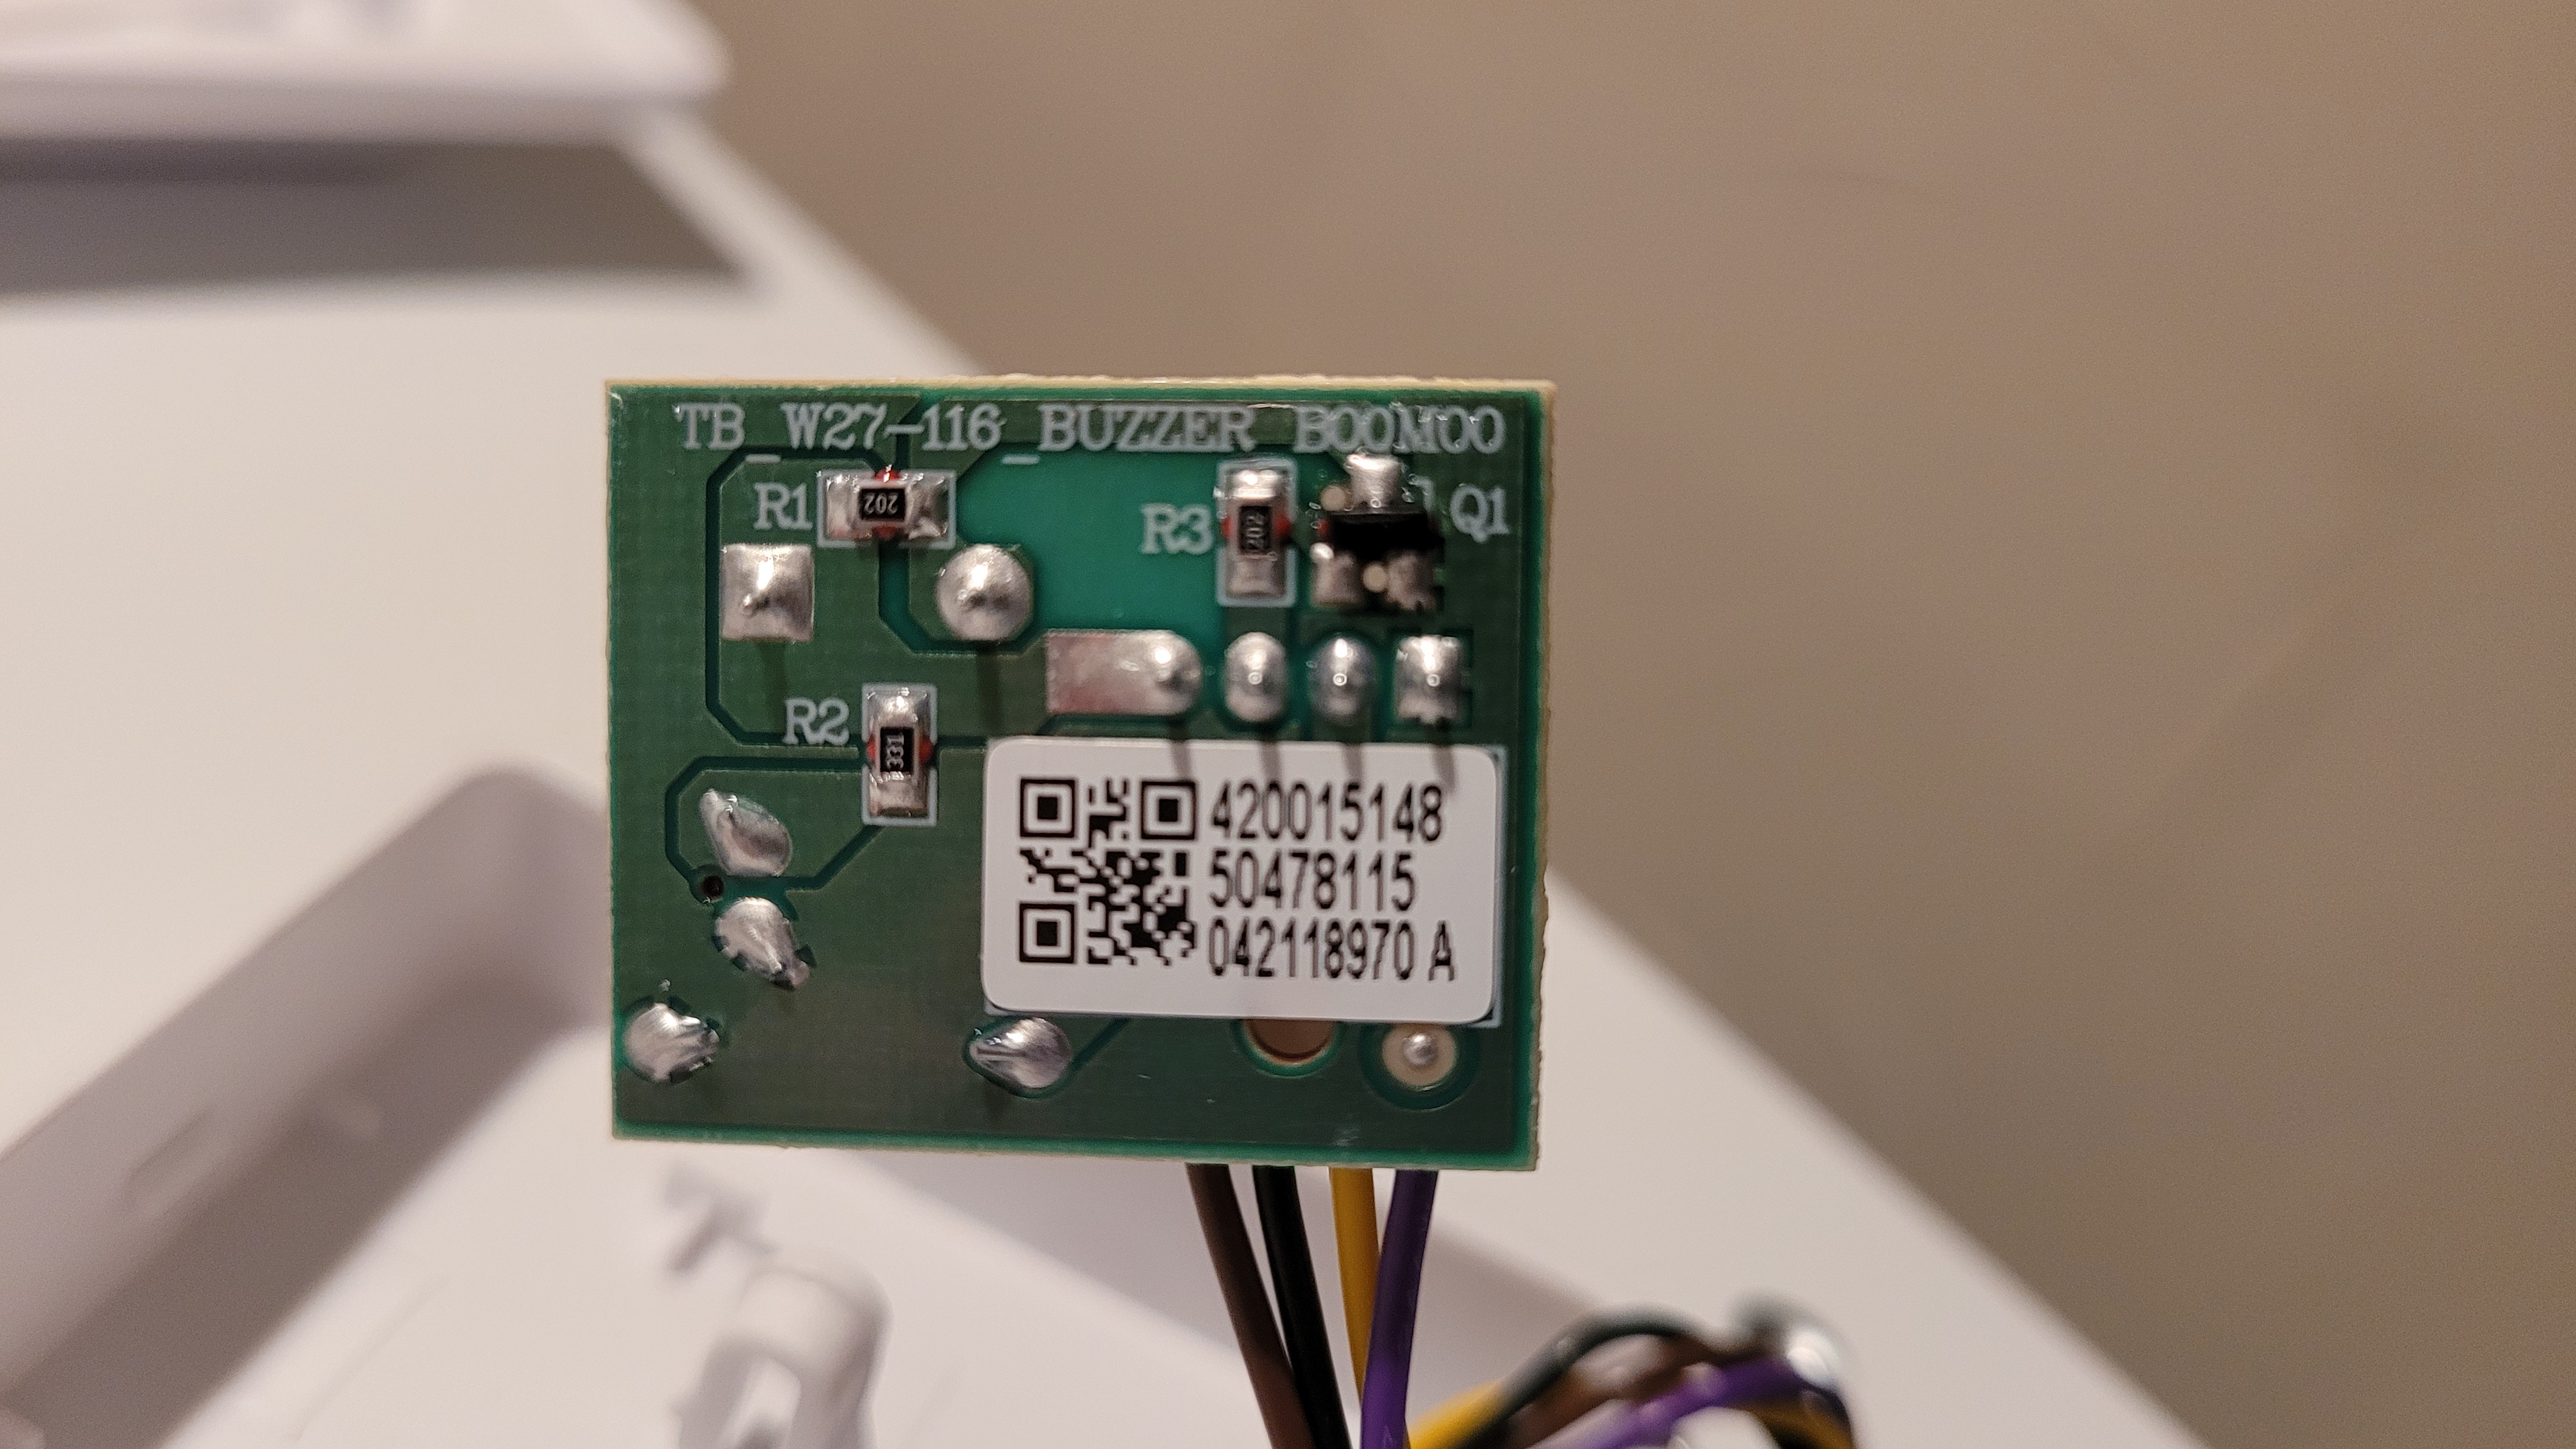
How about a pic of the foil side of the board? I would think cut the BUZ+ if nothing else attaches to it. If nothing else attaches to either buz+ or- then cut either of the visible wires for those. if you cut carefully you could solder it back later if needed.

For sheets and Googles and in case this thread is useful to anyone else in the future, here is the back side of the board. The buzzer was attached to R1 and R2 (upper left).
back side.jpg
 
Back
Top