It is nice to work there.
It is a CFC but I use it for chilling and controlling the mash temp. I figured if you can run cold water thru the jacket line to cool it, why can't you run hot water thru it to keep it hot? Before I recurculated the wort thru a coil that sat inside my HLT. I wanted to take it out of the HLT and came up with the coil you see. Since stainless isn't a great temp conducter like copper I went with a wall thickness of .022 for the small line that runs thru the larger line.
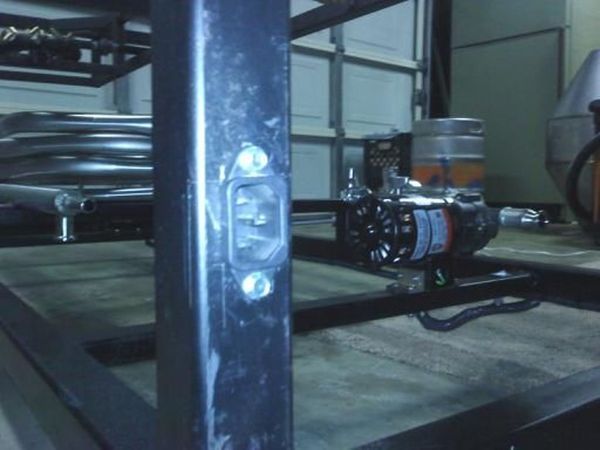
The square plug was taken from an old computer power supply and I'm using a computer power cord. That way no one will borrow the extension cord for something else
")
I wanted an electrical hook up that was clean and not something that was hanging off.
I checked out your pics. Nice setup you have going on! I'm going to work on my cold room today and hook up the electronics. I have a two chamber cabinet that is going to be hooked up to a chest freezer. The top is cabinet is going to be the "serving" chamber with the kegs and taps. The bottom is going to be the fermentation chamber. I'll try to post some pics later today.
How well does your plastic conical work? Any contamination issues? I have one as well but a little nervous to use it for the first time. I like your stand. I'll have to weld up some leg extensions for mine. I also have some sankey kegs and large stainless conical cones. I was thinking of cutting those up and building some fermentors.
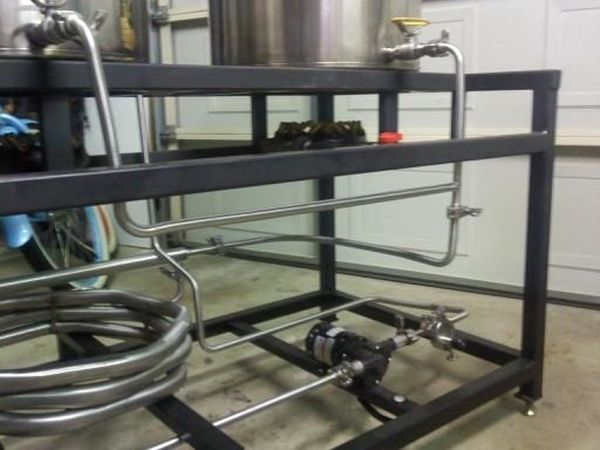
The switch is green when the pump is running, red when it is off (but has power) Notice the sampling valves, they also prime pump.
Gas tube
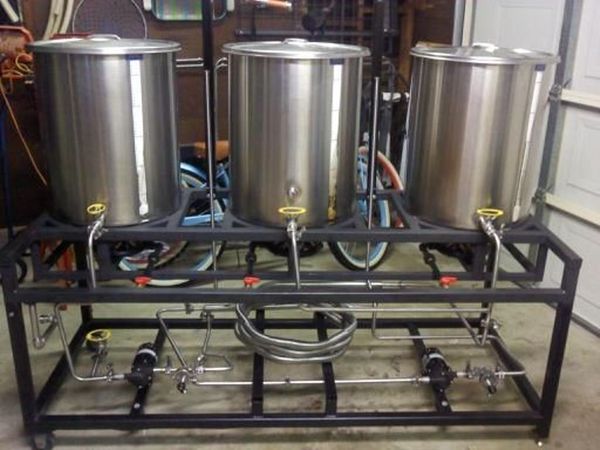
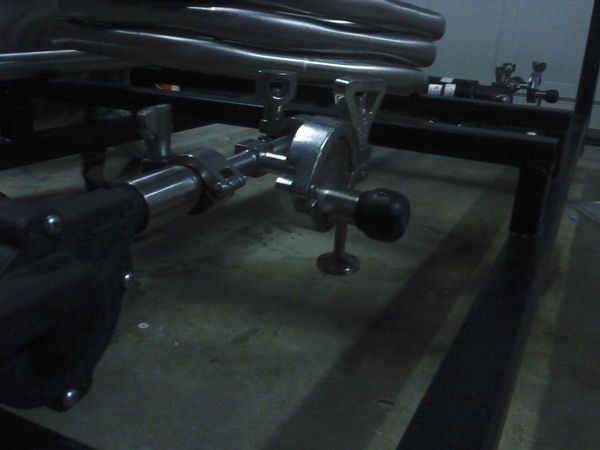
Notice union joint. Plan is to purchase a set of propane burners so they can be easily switched out if I take the stand somewhere and have to bring my own fuel.
Hooked up to house gas. They all burn just fine and are easy to control.


![Craft A Brew - Safale BE-256 Yeast - Fermentis - Belgian Ale Dry Yeast - For Belgian & Strong Ales - Ingredients for Home Brewing - Beer Making Supplies - [3 Pack]](https://m.media-amazon.com/images/I/51bcKEwQmWL._SL500_.jpg)