- Joined
- Nov 1, 2010
- Messages
- 344
- Reaction score
- 28
I've been working on getting my panel together over the last two months while deployed and I am almost done with it. I'll will post more pictures of the build in the coming weeks when I have a steady internet connection.
I cloned Kal's panel but went with the 16x20x8 box on eBay. I sourced all my switches, contactors, SSR's, PID's and heatsinks from Auber. I purchased a 12x12 diamond plate from cut2sizemetals.com and had frontpanelexpress.com mill all of the holes. I purchased the wiring kit from Kal which I can say is excellent for anyone undertaking this. The receptacle outlets and various other stuff was purchased from Amazon and Radio Shack.
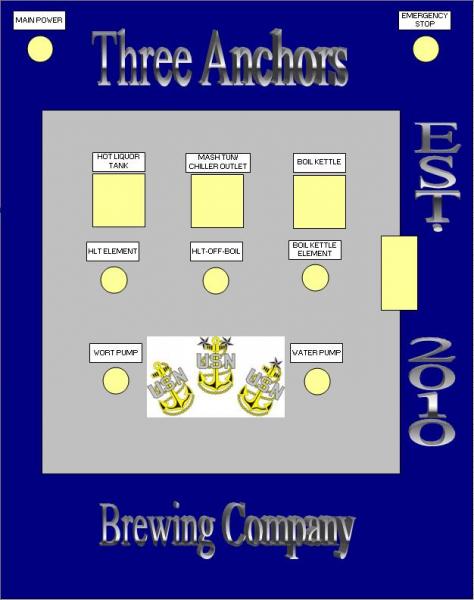
Here is an image of what the finished control panel front will look like. The Main Power is a selector switch and the center switch for the HLT/OFF/BOIL is a three way selector switch. The other switches are all illuminated pushbutton switches. I wanted extra protection from dry firing so I chose to go with a switch for each of the elements that will control the contactors for those elements. The three way switch will be controlling power going to the pushbutton switch for each element. I will be using P-J's E-Stop as well.


![Craft A Brew - Safale BE-256 Yeast - Fermentis - Belgian Ale Dry Yeast - For Belgian & Strong Ales - Ingredients for Home Brewing - Beer Making Supplies - [3 Pack]](https://m.media-amazon.com/images/I/51bcKEwQmWL._SL500_.jpg)

