• Please visit and share your knowledge at our sister communities:
  • If you have not, please join our official Homebrewing Facebook Group!

    Homebrewing Facebook Group

Indoor BIAB

Homebrew Talk

Help Support Homebrew Talk:

This site may earn a commission from merchant affiliate links, including eBay, Amazon, and others.
Gavin,

I'm looking to update my brewing setup and it will be very similar to what you have detailed through this post. Wondered if you would not mind giving your thoughts on this setup and if you had to make any changes to your setup what would it be.

I have a gas stove with a 14,000 BTU burner. With my old 7.5 gallon aluminum pot, I can get 7 gallons of wort boiling. I brew the occasional 5 gallon batch but mostly do 3 and 2.5 gallon batches.

This is what I'm thinking of getting.

From Northern Brewer:
8 Gallon Maga Pot w/ Valve
Transfer Quick Pump Connection kit
Chugger SS inline pump

From More Beer:
Counter Flow Chiller with 1/2" FPT fittings

I already have a Swirl-Boss wort whirlpool wand and an immersion chiller.

I'm thinking with this setup, It will simplify my brew days and save my back some lifting. I'm also in Texas so the plan is to use a bucket of iced water to make a pre chiller with the immersion chiller.

So the biggest thing, I'm not sure about is the pump. Do you regulate the flow of the pump with a valve. Can you get too big of a pump. Is one type of pump better than others?

Thanks!
 
Gavin,

I'm looking to update my brewing setup ..

My setup as illustrated sort of evolved over a series of brews at the outset of the hobby. Improving the setup to solve various problems I identified as I learned.

I would advise against a pot smaller than 10 gallons (mine is 11 but called 10)

I stopped using a prechiller after a few summer brews. Didn't bother this summer and simply accept the need for more coolig the the fermentation chamber before a cold pitch. It did work but I didn't see much need after experimenting with one.

I would not bother with a thermometer on the pot. It's redundant and gets in the way during lautering. A good instand read thermometer is a much better investment.

I'm happy with the chugger pump. I regulate the flow with a valve on the out port. Anything from a trickle to full bore is doable.

Plate chillers get a bad rep but I like mine and how it fits my stove-top counter-top setup. No problems cleaning it after a brew.

An IC might be easier but I like not having to trail a garden hose in from outside to get the flow rate I would want. If going the IC route I would go big.

I might install a better dip tube at some point but that's minimally important. The dip-tube I cobbled together works well.

I really like having a whirlpool arm. There are neater ways to install one that I would chose if doing it again but I just wanted to repurpose the hole in the pot from the dial thermometer I removed.

Hope that ramble is of some use. Let me know if there are any other bits and pieces you want outlined in more detail. I'm happy to share what little experience I have. If it's of use, all the better.

Cheers NTex. (You entering BBBO this year? I'll hopefully be there for 1 of the days)
 
Just a follow up to your question.

____________________________
Hibiscus Saison

I carried out an overnight mash for this morning's brew. The plan is a dry finish on this beer so one could argue there is minimal downside to a prolonged mash.

  • A saison.
  • ~8hour mash duration.
  • 77% Mash efficiency.
  • 74% BH efficiency

Grain-Bill
View attachment 384587


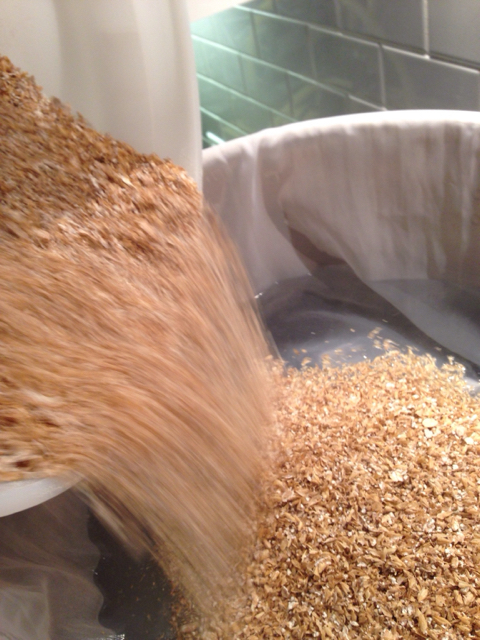
Dough-In
064f414b5afea7072870ce131b57101e.jpg


Full volume no-sparge. Single infusion at 151°F
673ba52b48e9c3e90a2bb14d6e5fe281.jpg


Insulation placed
d3076299eff9e7ec2f2619ce58223157.jpg


A temperature measurement 8 hours later. (Mash stirred before reading was taken to eliminate any thermal stratification.)

1222122b8ac81fe25303a696134b29c6.jpg


OG 1.068
View attachment 384589

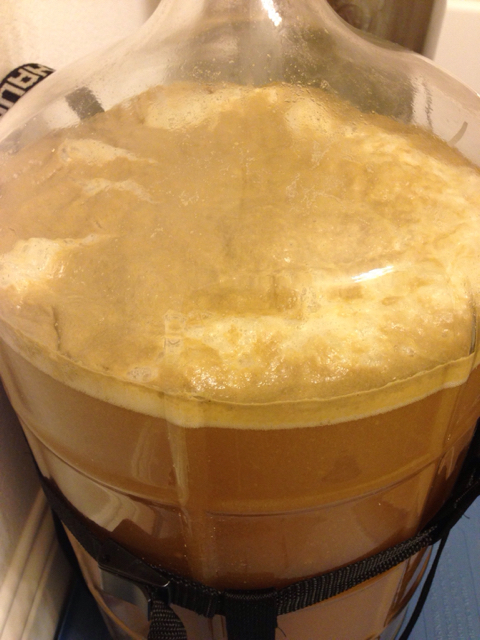
~12 hours after pitching Belle Saison (no temperature control)
1dd5dfc940c0796c1929acbb0919afad.jpg


_____________________
clock-animated-gif-18.gif

6 Days later dry hops & Hibiscus Tea added to FV

14oz Hibiscus Flowers and 96oz of water (chloramines removed) ~2L of tea final volume.

attachment.php

attachment.php


View attachment 385399
View attachment 385400
View attachment 385401

97421500997db1424ee198644bf184af.jpg


12 days of fermentation. FG is reached.
View attachment 386429


Looking good! @gavinc love the pictorial of the brew day. Now if we can only get you to brew a science Brett saison. I have a nice collection of Brett yeast [emoji6] I can send you.
 
My setup as illustrated sort of evolved over a series of brews at the outset of the hobby. Improving the setup to solve various problems I identified as I learned.

I would advise against a pot smaller than 10 gallons (mine is 11 but called 10)

I stopped using a prechiller after a few summer brews. Didn't bother this summer and simply accept the need for more coolig the the fermentation chamber before a cold pitch. It did work but I didn't see much need after experimenting with one.

I would not bother with a thermometer on the pot. It's redundant and gets in the way during lautering. A good instand read thermometer is a much better investment.

I'm happy with the chugger pump. I regulate the flow with a valve on the out port. Anything from a trickle to full bore is doable.

Plate chillers get a bad rep but I like mine and how it fits my stove-top counter-top setup. No problems cleaning it after a brew.

An IC might be easier but I like not having to trail a garden hose in from outside to get the flow rate I would want. If going the IC route I would go big.

I might install a better dip tube at some point but that's minimally important. The dip-tube I cobbled together works well.

I really like having a whirlpool arm. There are neater ways to install one that I would chose if doing it again but I just wanted to repurpose the hole in the pot from the dial thermometer I removed.

Hope that ramble is of some use. Let me know if there are any other bits and pieces you want outlined in more detail. I'm happy to share what little experience I have. If it's of use, all the better.

Cheers NTex. (You entering BBBO this year? I'll hopefully be there for 1 of the days)

Thanks for the info. I saw the one picture where you removed the thermometer but missed where you converted that to a whirlpool port. I have to sit down with some of my recipes and volumes to figure out the best size pot that will let me do the most. I'm pretty sure that a 10 gallon pot will be too large a diameter for my stove burner to achieve a rapid boil. My plan for a chiller is counterflow.

I have a few beers in BBBO this year. Hoping to be there as well.
 
Would it be an increase of efficiency this route?.
Thanks

It has no impact on efficiency. (I suppose in theory if you're losing less stuff to dust it will have a negligible positive impact but it would not be measurable on this scale)

Isn't grain conditioning incredible!?!?

Yes. It really makes a difference to the grist's appearance.

Given what I saw, I'm surprised it's not considered the norm for folks using a conventional mash-tun where intact husks are going to be to the brewer's benefit.

I've been meaning to give it a try for ages. I really liked the absence of dust and the light fluffy grist that resulted.
 
It has no impact on efficiency. (I suppose in theory if you're losing less stuff to dust it will have a negligible positive impact but it would not be measurable on this scale)


Yes. It really makes a difference to the grist's appearance.


Given what I saw, I'm surprised it's not considered the norm for folks using a conventional mash-tun where intact husks are going to be to the brewer's benefit.


I've been meaning to give it a try for ages. I really liked the absence of dust and the light fluffy grist that resulted.


I am probably going to be the only person to disagree. I started grain conditioning about a year or so ago and loved it at first too. For some reason my efficiency suffered though. I was missing my target OG by 2-3 points every time. Last week I decided to try it without doing that again and hit my numbers spot on for both brew sessions. Nothing else in my process changed.

My only thought is that when comparing the crush, the conditioned grains seem more intact and the inside of the grain less split open/exposed.

I suppose I should have qualified my assertion WRT the lack of effect on efficiency being based on just theory.

Obviously with me having just 1 personal data point I could neither back up or refute any claim on efficiency with any weight. Seems your bigger data set should give your opinion given greater credence than mine.

I'll continue to condition my grain for the foreseeable future and see how my numbers trend. I'm a bit of a dataphile so always value these sort of insights. Thanks mate.
 
I suppose I should have qualified my assertion WRT the lack of effect on efficiency being based on just theory.


Obviously with me having just 1 personal data point I could neither back up or refute any claim on efficiency with any weight. Seems your bigger data set should give your opinion given greater credence than mine.


I'll continue to condition my grain for the foreseeable future and see how my numbers trend. I'm a bit of a dataphile so always value these sort of insights. Thanks mate.


That would be great if you could chime back in later! It could be that it was just a coincidence during those brews, but my data showed that something was definitely going on and I want to get to the bottom of it!
 
My stove won't bring my 8 gallon pot to a boil. It has trouble with a 22 quart canner if I have more than 3.5 gallons in it. I'm thinking seriously about getting a brewhardware.com "hot rod" to supplement the heat. It's kind of pricey, but it looks like it will last forever, and cheap immersion heaters don't.

Do you think 875W is enough heat to make a difference? (they are out of 1500W elements, and I have a 3500W 240V element already) I'd really like to use my larger kettle. Worst case is I can try it and it's not enough, then buy a larger element later.


While the 875w element may get you to boil, heating times would be much quicker with a 2000w element, assuming you have a 20 amp circuit in your kitchen.

Since you already have the 3500/4 or 875w element give it a try.

With the larger element, you would just run the element at 100% and use the stove dial to control the boil.
 
@Gavin, are you double crushing your grain after you condition? What gap are you using?

No. I use a single crush. Double milling is pointless. No benefit for extra dust/work/time. Not a wild lot of extra work but still pointless based on my numbers over repeated brews across multiple variables. Single crush is as effective as double based on my data.

I use the narrowest possible setting on my mill.
 
While the 875w element may get you to boil, heating times would be much quicker with a 2000w element, assuming you have a 20 amp circuit in your kitchen. Since you already have the 3500/4 or 875w element give it a try.

With the larger element, you would just run the element at 100% and use the stove dial to control the boil.

I ordered the HotRod today. And I decided to get a 1650W stainless steel element and some other junk I wanted from Amazon Prime. My 3500W element is not stainless and I don't know how important that is.

I can buy a 40' SJEOOW extension cord at Fleet Farm (the 'E' is important for the temperature rating) and cut however much I need off the plug end, then put a replacement plug on the scrap for a nice outdoor cold-weather cord.
 
@Gavin C thanks for the help with my first Dunkel a few pages back. This is the second lager I have done and it came out FANTASTIC! It is almost exactly the Dunkel I was going for. Cheers!

View attachment 396083

View attachment 396084


Those are great beer pics mate. Lovely looking head. Delighted my recipe didn't bork things up for you.

Thanks for sharing.
Cheers.
 
Hey Gavin,

Not looking to stir any pots on your thread, but ive been wondering if you've become a LODO convert at all yet. I trust your opinion since you've seemed to nail a few german beers down -pat and have medals to show for it.

Specifically, have you taken to experimenting with pre boiling, smb, or spunding?

No worries. Stir away. That thread is quite a chuckle. Plenty of solid specious reasoning going on.

I do have an opinion on the matter but have not to date made any changes to my hot side approach that would be in line with a purist's LoDO approach.

I've tried grain conditioning and underletting but for other reasons rather than the reduction in hot side oxygenation objective cited in the thread to which you refer. Both were useful for other reasons in and of themselves.

To be honest I've been on a bit of a brewing hiatus, having relocated to a different state. As a result I sold much of my cold side gear and will be starting afresh with a new setup when everything is settled here in WA. Bigger batch size and I may in all likelihood switch to a multi vessel approach.

I've always sought ways to reduce oxygenation on the cold side. If I can get my beers better by applying the same philosophy on the hot side all the better. In theory, much of it makes sense to me.

TLDR version
  • Haven't been brewing in a bit
  • Haven't gone LoDo.
  • I will likely experiment and see what happens to comp scores. if more bling I'll be a convert. If not the corollary will apply.

Hope you and yours are well in Canukistan JWalk. If you're ever in the Seattle area give me a shout. We can talk bollox over a beer or two.
 
Hope you and yours are well in Canukistan JWalk. If you're ever in the Seattle area give me a shout. We can talk bollox over a beer or two.

Will do! Just save some hops in the yakima valley for the rest of us, eh?

Truth be told I made 1 batch so far this year:New baby, new house. I even went quiet on HBT to avoid all temptation. But im looking towards September when things settle down a bit.

Re: LODO I agree. Ive read the internet abridged Kunze and was always convinced that oxidation is a thing, but without stale cardboard flavor in my beer I couldn't be sure whether or not I had cause for concern.

Ill probably practice the preboil and chill, and low doses of SMB for a batch or two while I work on acquiring the parts for a spunding valve.

Cheers,

Jeff
 
In my opinion, for what it's worth, LoDO works and is definitely worth it - especially for pale lagers. The level of oxidation that most intermediate-to-advanced level brewers are used to doesn't taste like wet cardboard. It's what it doesn't taste like that is the real point, i.e. what you're missing by oxidizing above 2ppm O2. With LoDO, you get to taste what's really behind that malt, and preserve more of your hop aroma as well.

My $0.02

Good to hear from you E

It's folks like yourself (among others who I've learned from) advocating for the approach that make me want to explore the process.

Having enjoyed your carefully crafted beers and having benefited from your thoughtful posts and help I guess I am justifiably biased in that regard.

Experimentation in process is fun. That's reason enough for me to delve a bit deeper.

I don't trust my own palate so would need some data (consistently better competition scores) to make me a convert. Sure sounds like fun acquiring the data. Love me some pale lagers.

I am itching to get brewing again. Maybe toward the end of the year. Sooner if my situation allows.
 
Back
Top