• Please visit and share your knowledge at our sister communities:
  • If you have not, please join our official Homebrewing Facebook Group!

    Homebrewing Facebook Group

How To: BrewPi LCD Add-On

Homebrew Talk

Help Support Homebrew Talk:

This site may earn a commission from merchant affiliate links, including eBay, Amazon, and others.
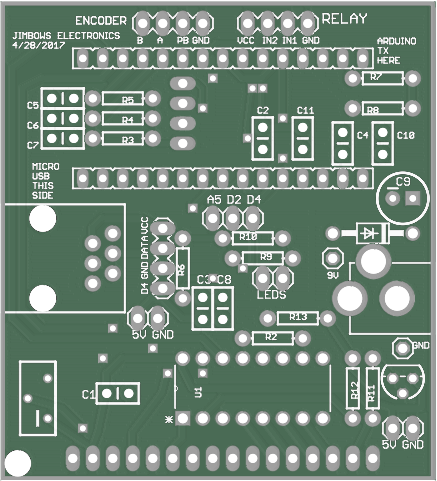
The newest version of the shield has been ordered. V2.01 incorporates the Nano backpack, direct plug into the LCD, a header for the rotary encoder, breakout pins for the door and other BrewPi functions, power pins to make the GPIO pins work, RJ11 jack and a traditional header for the probes, and a barrel jack and header pins for the 9v power input. I've made the board slightly larger for the 2.01 version so it lines up with three edges of the LCD. I've also added a drill that should correspond to the drill on the LCD so that you can add a screw and a couple of nuts to secure the shield to the LCD.

I've put the files on my google drive folder below. Feel free to use them as you wish. I've ordered a set from Oshpark so I don't have to wait for the slow boat from China to test this version. I'll let everyone know how the testing goes and I'll provide pics of the finished product in a couple of weeks.

https://drive.google.com/drive/folders/0BwakCoACNDsmSWNQeS0xNVBBRFk?usp=sharing
 
I loaded it up in Eagle.That's a busy little board. Looks like a lot of hard work. Thanks . BTW -what was the issue with the rotary encoder on the last version?
 
Somehow in my versioning, I sent a file to the PCB house that didn't include a 5v connection to the encoder. day_trippr found it after some troubleshooting. I still have no idea how it happened because I can't find a version like that. But anyway, it's fixed. The board can be made to work with one jumper wire.
 
Before anyone starts looking for a 5V connection to their encoder switch...
The missing 5V connection was to the three pull-up resistors for the three encoder signals.
That left the three switch signals talking to each other through the resistors.
As one might imagine that made for some "interesting" behavior ;)

I've had the 2.0 using an HC-05 running on my desk ever since.
Works great, no doubt the 2.1 will be even better :)

Cheers!
I know -right?:)
 
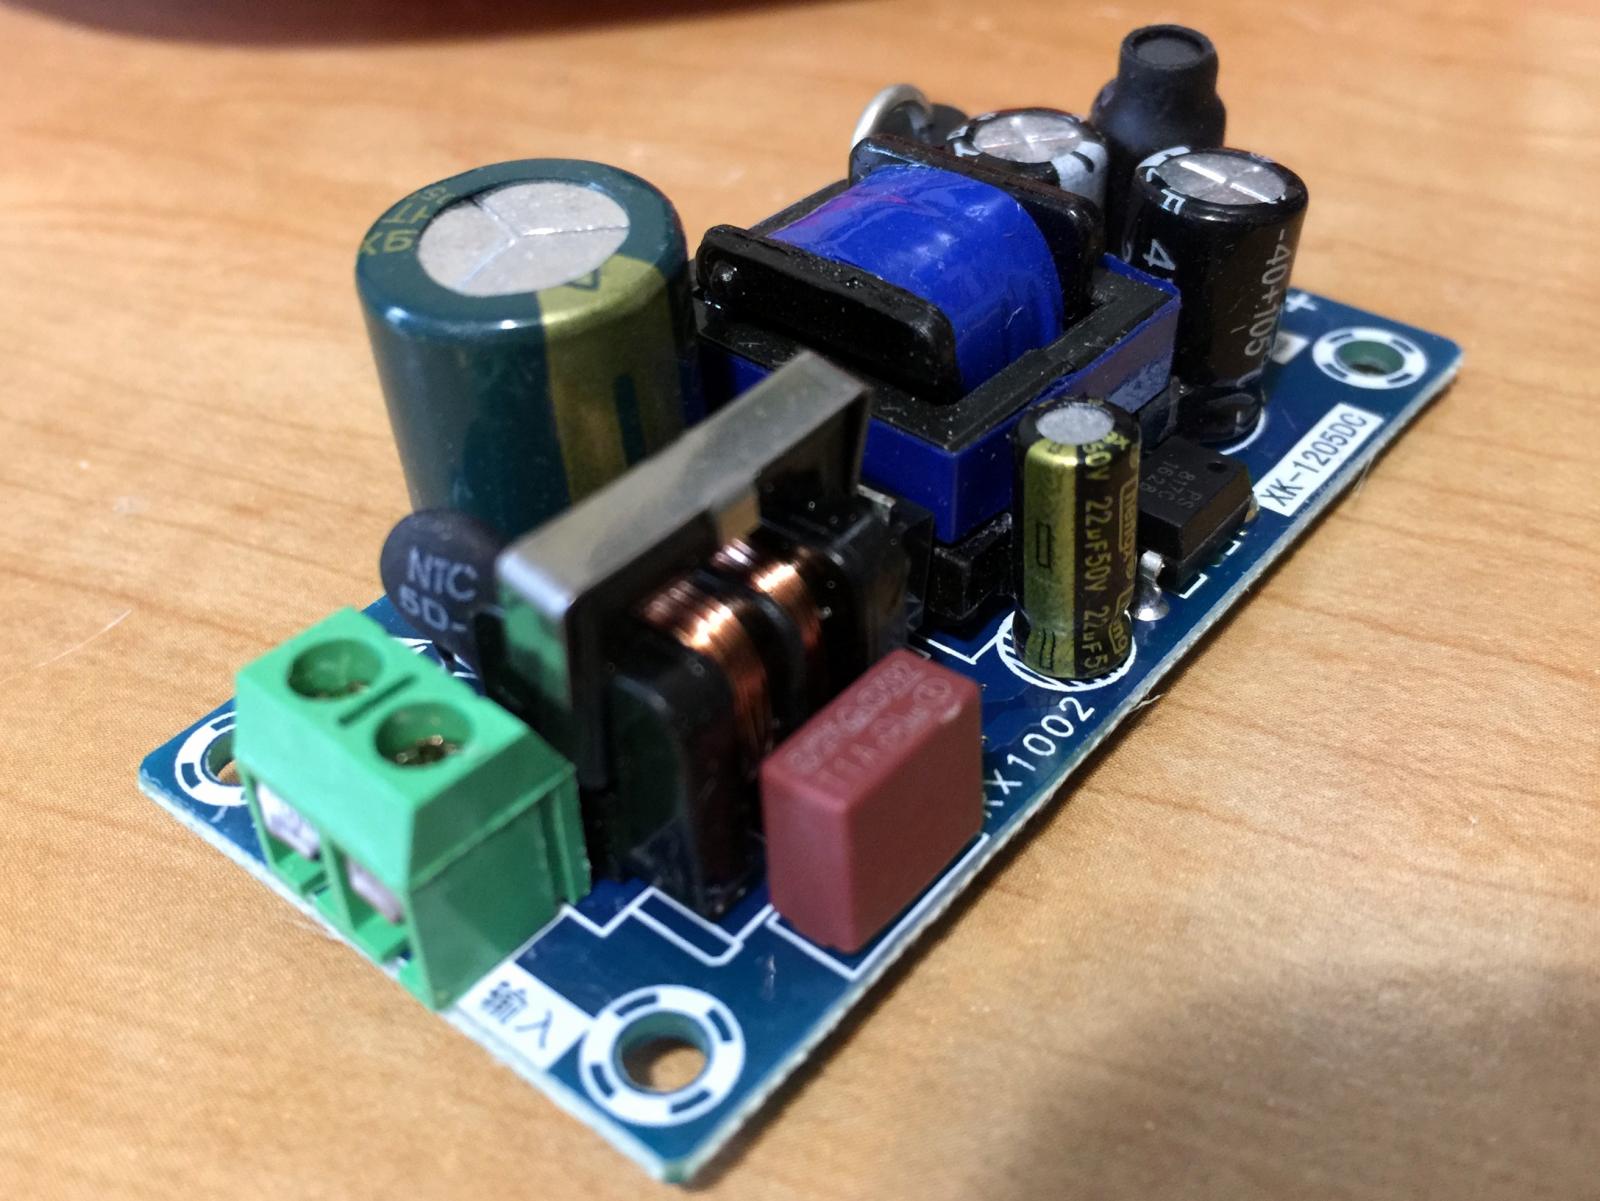
Hey @LBussey, I'm building a BrewPi box with your 3D printed enclosure and the recommended parts list. I just received the 5v power supply board from Ali Express. I'll attach header pins to the board for the 5v output from the board. How did you attach your 110v input wires to the 110v side of the board? Did you just solder 14 or 16 gauge wires straight to the board? Do the pads accept a pcb mounted screw terminal? What do you recommend?
 
It's tough to mention me and get my attention with a misspelling. :D

I soldered my leads directly to the board. I never considered if it would accept a screw terminal. I only had a bag of 100 sitting right next to me on the bench. It does, in fact, accept a screw terminal.

Be sure to use a ferrule or solid core wire on that connection.

IMG_5840.jpg
 
Thanks! Funny, but I purposely pulled up your name to check the spelling and still got it wrong. And I hadn't even had a beer yet. 😀

So, does that mean I should be using solid wire or ferrules on the screw terminals on the relay board? I've been using 14 gauge stranded wire on all of my builds.
 
So, does that mean I should be using solid wire or ferrules on the screw terminals on the relay board? I've been using 14 gauge stranded wire on all of my builds.
That is how I've been taught. Stranded can loosen up and you end up with heating of the terminal because of the bad connection. I've seen melted terminals from that (not in a BrewPi though.) Use a good crimper though if you go that route.

The one nice thing about solid wire in an application like this is you can make the routing very neat.
 
Twist the strands tight, tin the result, and stuff that into the screw terminal.
Best of both worlds.
I hate using solid wire for anything other than house wiring...

Cheers!
 
Received the boards from Oshpark yesterday. $25 is a bit spendy for 3 boards, but they arrive relatively quickly. I'll solder one up this weekend and see if things work as they should...
 
Soldered up a board. I have to figure out how to load the bootloader on my Chinese nano before I can fire it up. Great job with the boards Cadibrewer and Day_Trippr. Busy little board with a lot of stuff on there.
EDIT I just noticed the NANO is in backward when I took the photo.

18558663_10209511036597987_4519012099188541479_o[1].jpg
 
Soldered up a board. I have to figure out how to load the bootloader on my Chinese nano before I can fire it up. Great job with the boards Cadibrewer and Day_Trippr. Busy little board with a lot of stuff on there.


Might need another arduino to do that. a genuine uno should do the trick
 
When you get that far, you'll likely need to edit /home/brewpi/autoSerial.py
and add this line for the Nano clone:

{'vid': 0x1a86, 'pid': 0x7523, 'name': "Arduino Nano Clone"},

Unless it's the last line in the table be sure to include the trailing comma.

fwiw, I used Xloader on Windows to burn the Nano clone I received from Mark to debug the 2.0 protos. Then I used the BrewPi eeprom reset button (on 0.2.10) after making the above edit. After that it would allow the devices to be configured...

Cheers!
I have to look at the code but that looks like what I did. I think I'm just going to use Xloader and see what happens. I'm just frustrated because I thought I knew what I was doing.Just goes to show you don't know what You don't know
this is the website I used.https://community.brewpi.com/t/solved-cant-seem-to-program-arduino-uno/1319/25
 
Well, don't feel special. Mark's Nano clone drove me a bit bonkers before I got it running.
And I've lost count how many BrewPi builds/rebuilds I've done :)

What really slowed me down was the eeprom reset. Until I got that accomplished I couldn't even display devices, never mind configure them and have them reappear after a power cycle.

But all of my BrewPi hosts were still running 0.2.4, which doesn't have that reset feature built-in.
So I had to add an 0.2.10 instance to my back-up host system just to get to that function.

And, yes, you can have 0.2.4 and 0.2.10 peacefully co-exist on the same host...

Cheers!

[edit] btw, it doesn't look like the OP brunoayub in that linked thread ever got the reset thing figured out, but the thread got closed anyway...
 
Sorry for the clone troubles, Dave! I never intended to use the Nano, so I figured that I'd buy the cheapest ones I could find. I was only buying them to make sure the footprint would work on the backpack board. But then when I got the stuff working, I found a use for the smaller package. If I'd intended to use a Nano from the start, I would have sprung for the genuine ones.

Sorry 'bout that!
 
Yes, I used xloader to get the hex loaded up, and then used the eeprom reset feature in brewpi to get things working.
 
[...]Sorry 'bout that!

Aw, jeeze, it wasn't a horror show or anything - and it's not like I paid for the adventure ;)
No worries. I just wish I had written it up for the next victim - I'm pretty much going by memory.

So, have either of you gotten 2.01 up and running yet?

Cheers!
 
Back
Top