How to add permanent volume markings to a kettle (illustrated)

Homebrew Talk - Beer, Wine, Mead, & Cider Brewing Discussion Forum

Help Support Homebrew Talk - Beer, Wine, Mead, & Cider Brewing Discussion Forum:

This site may earn a commission from merchant affiliate links, including eBay, Amazon, and others.
Dam I just purchased 2 sight glasses; If I only saw this two days ago I could have saved some $$.
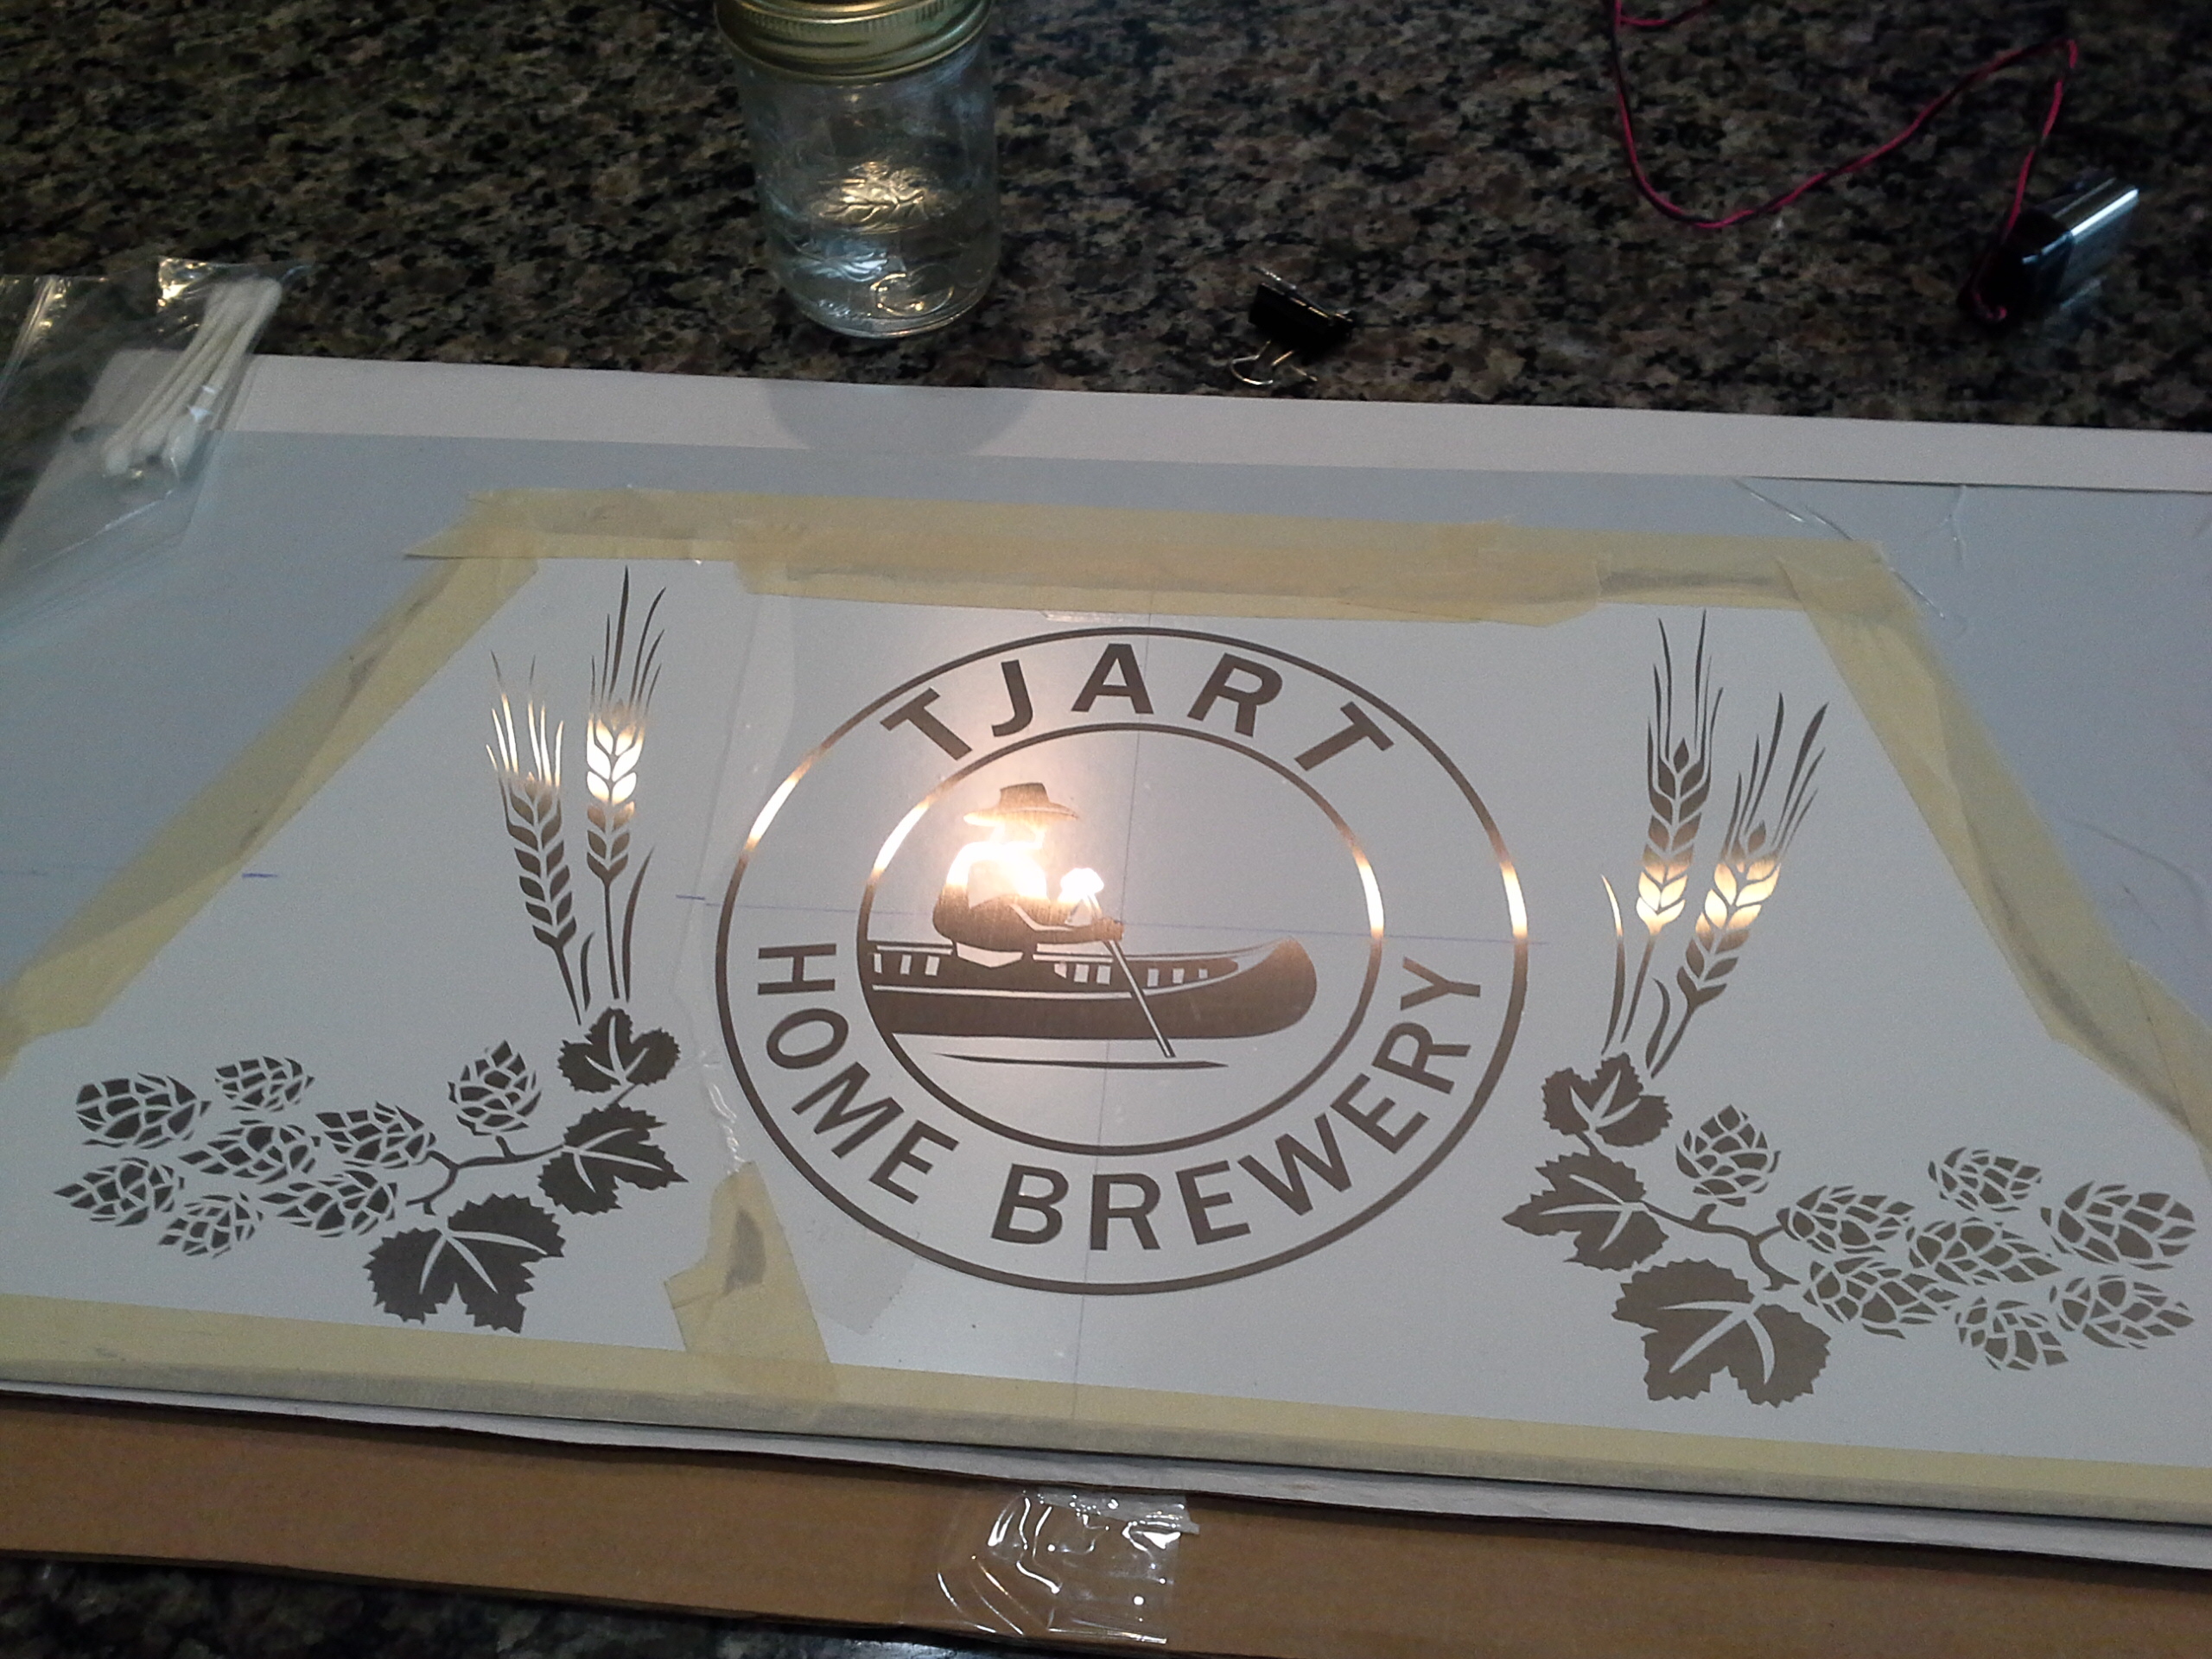
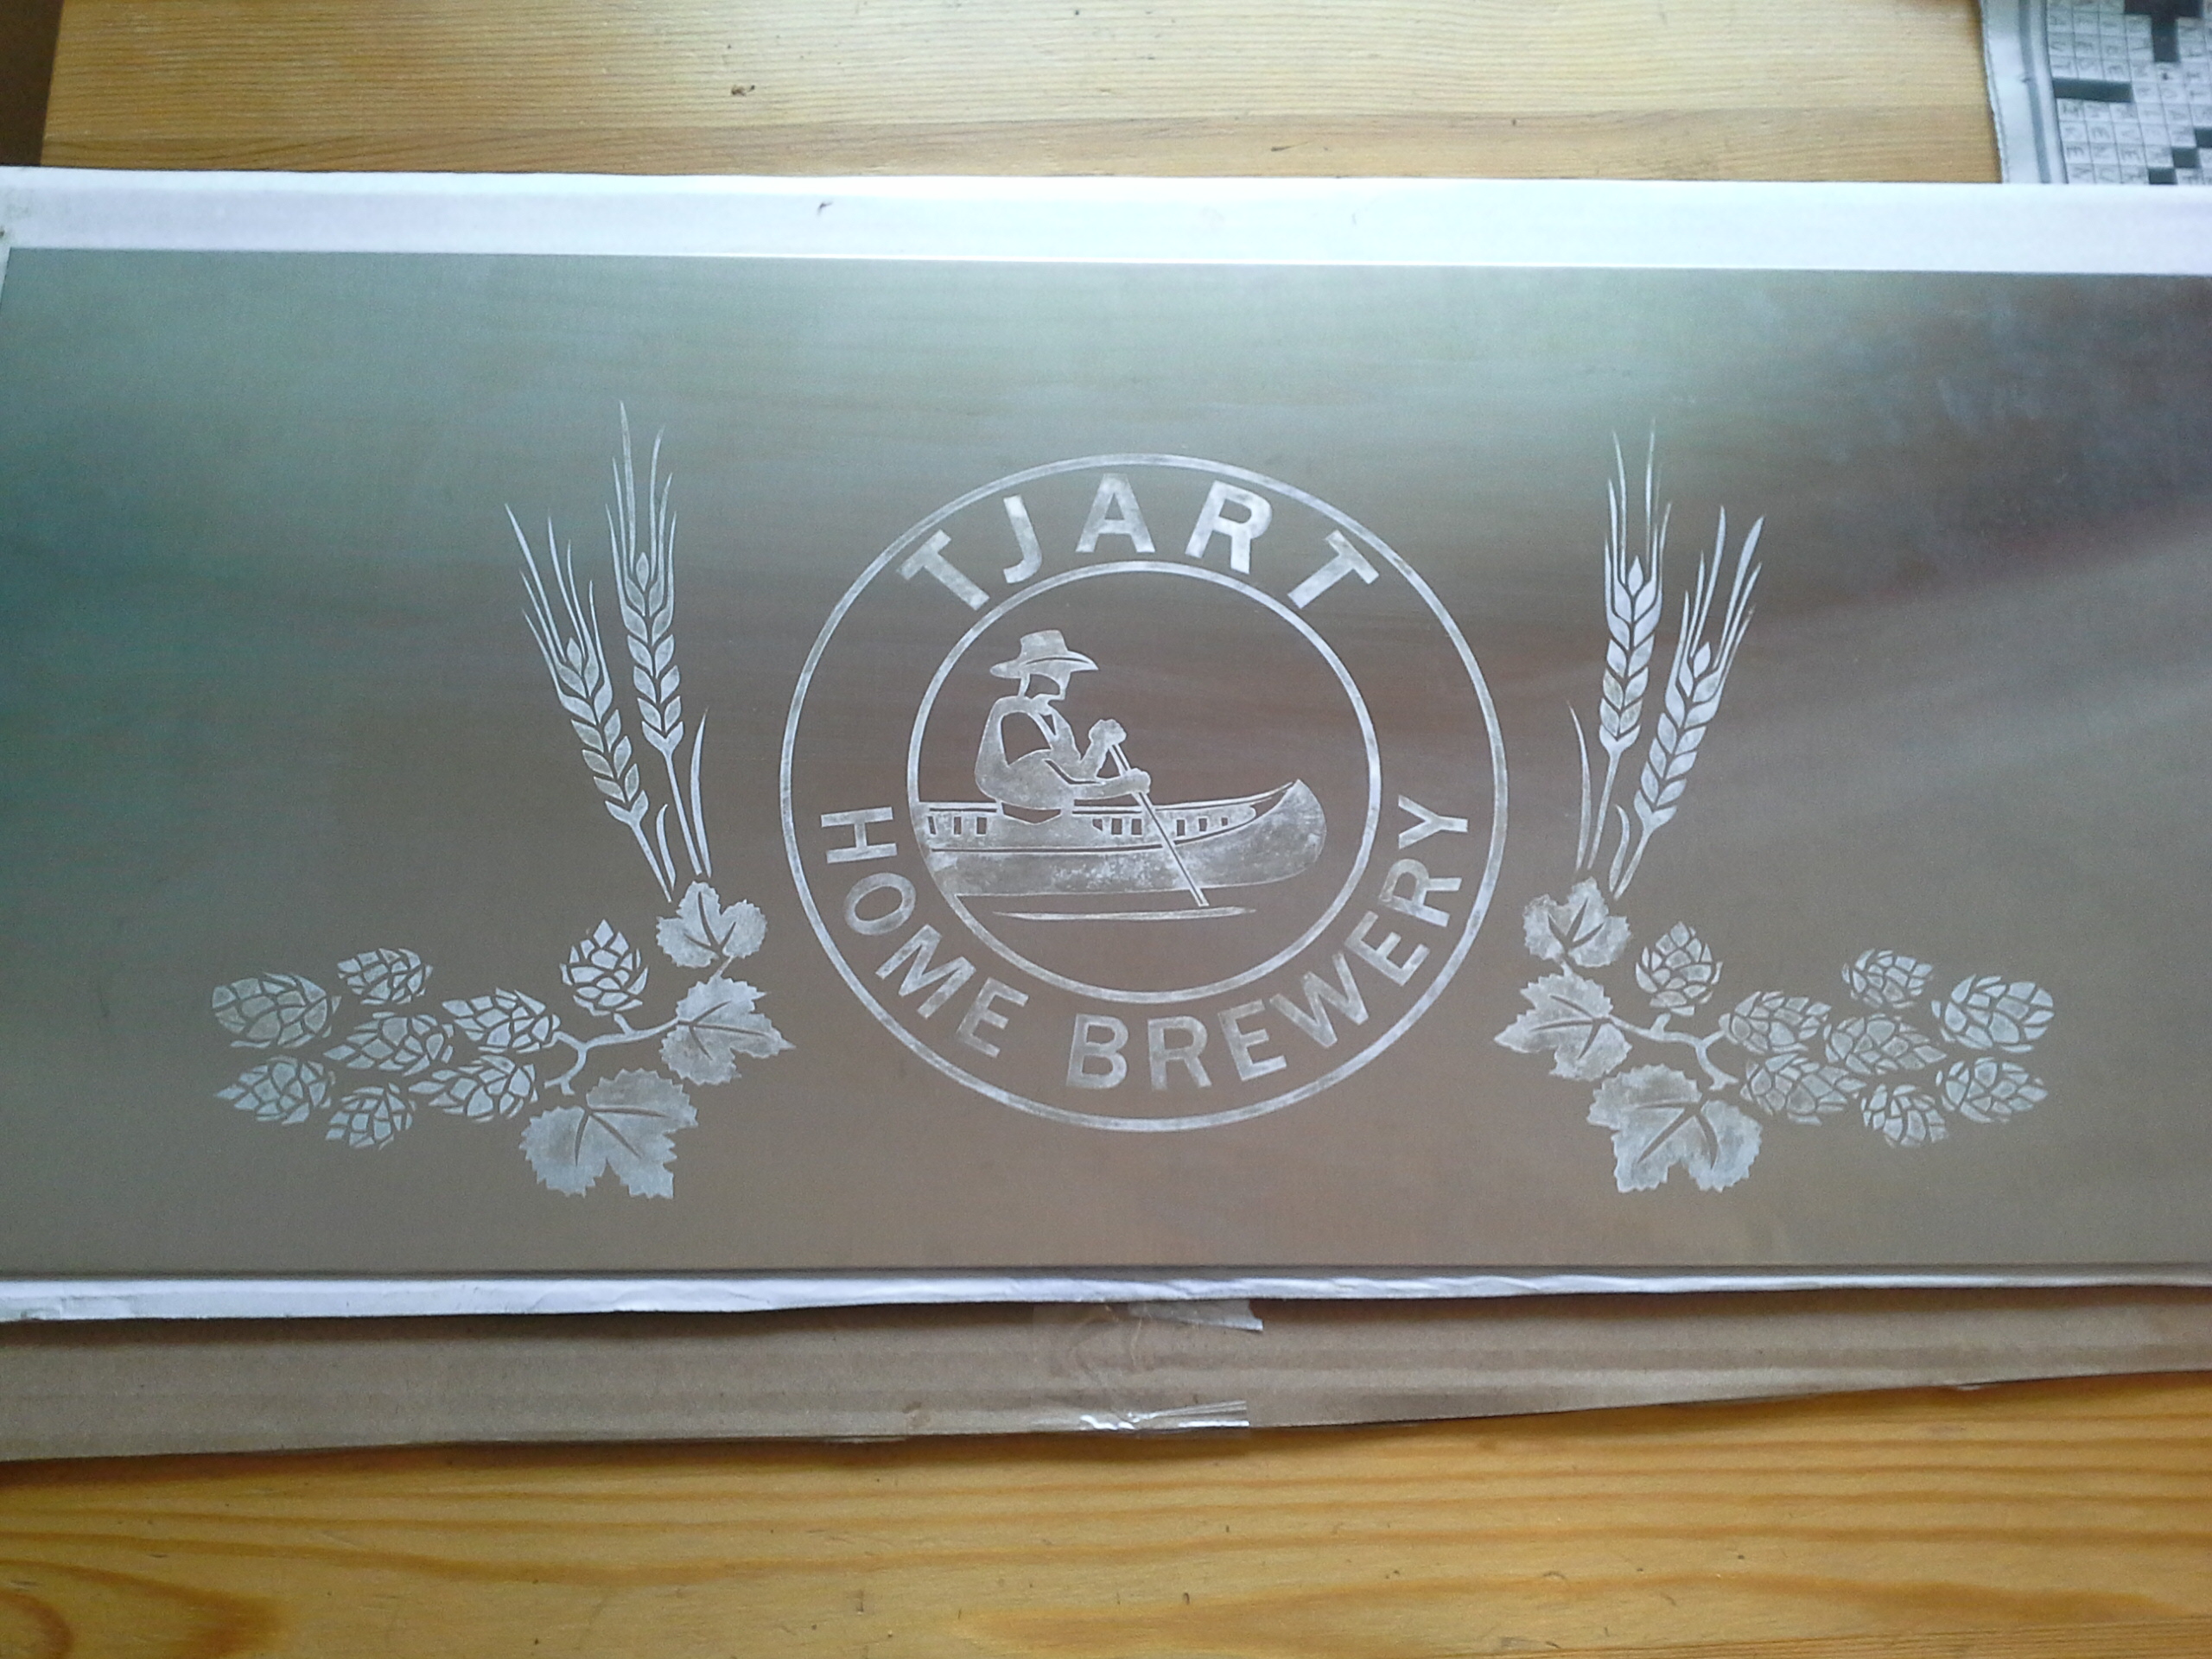
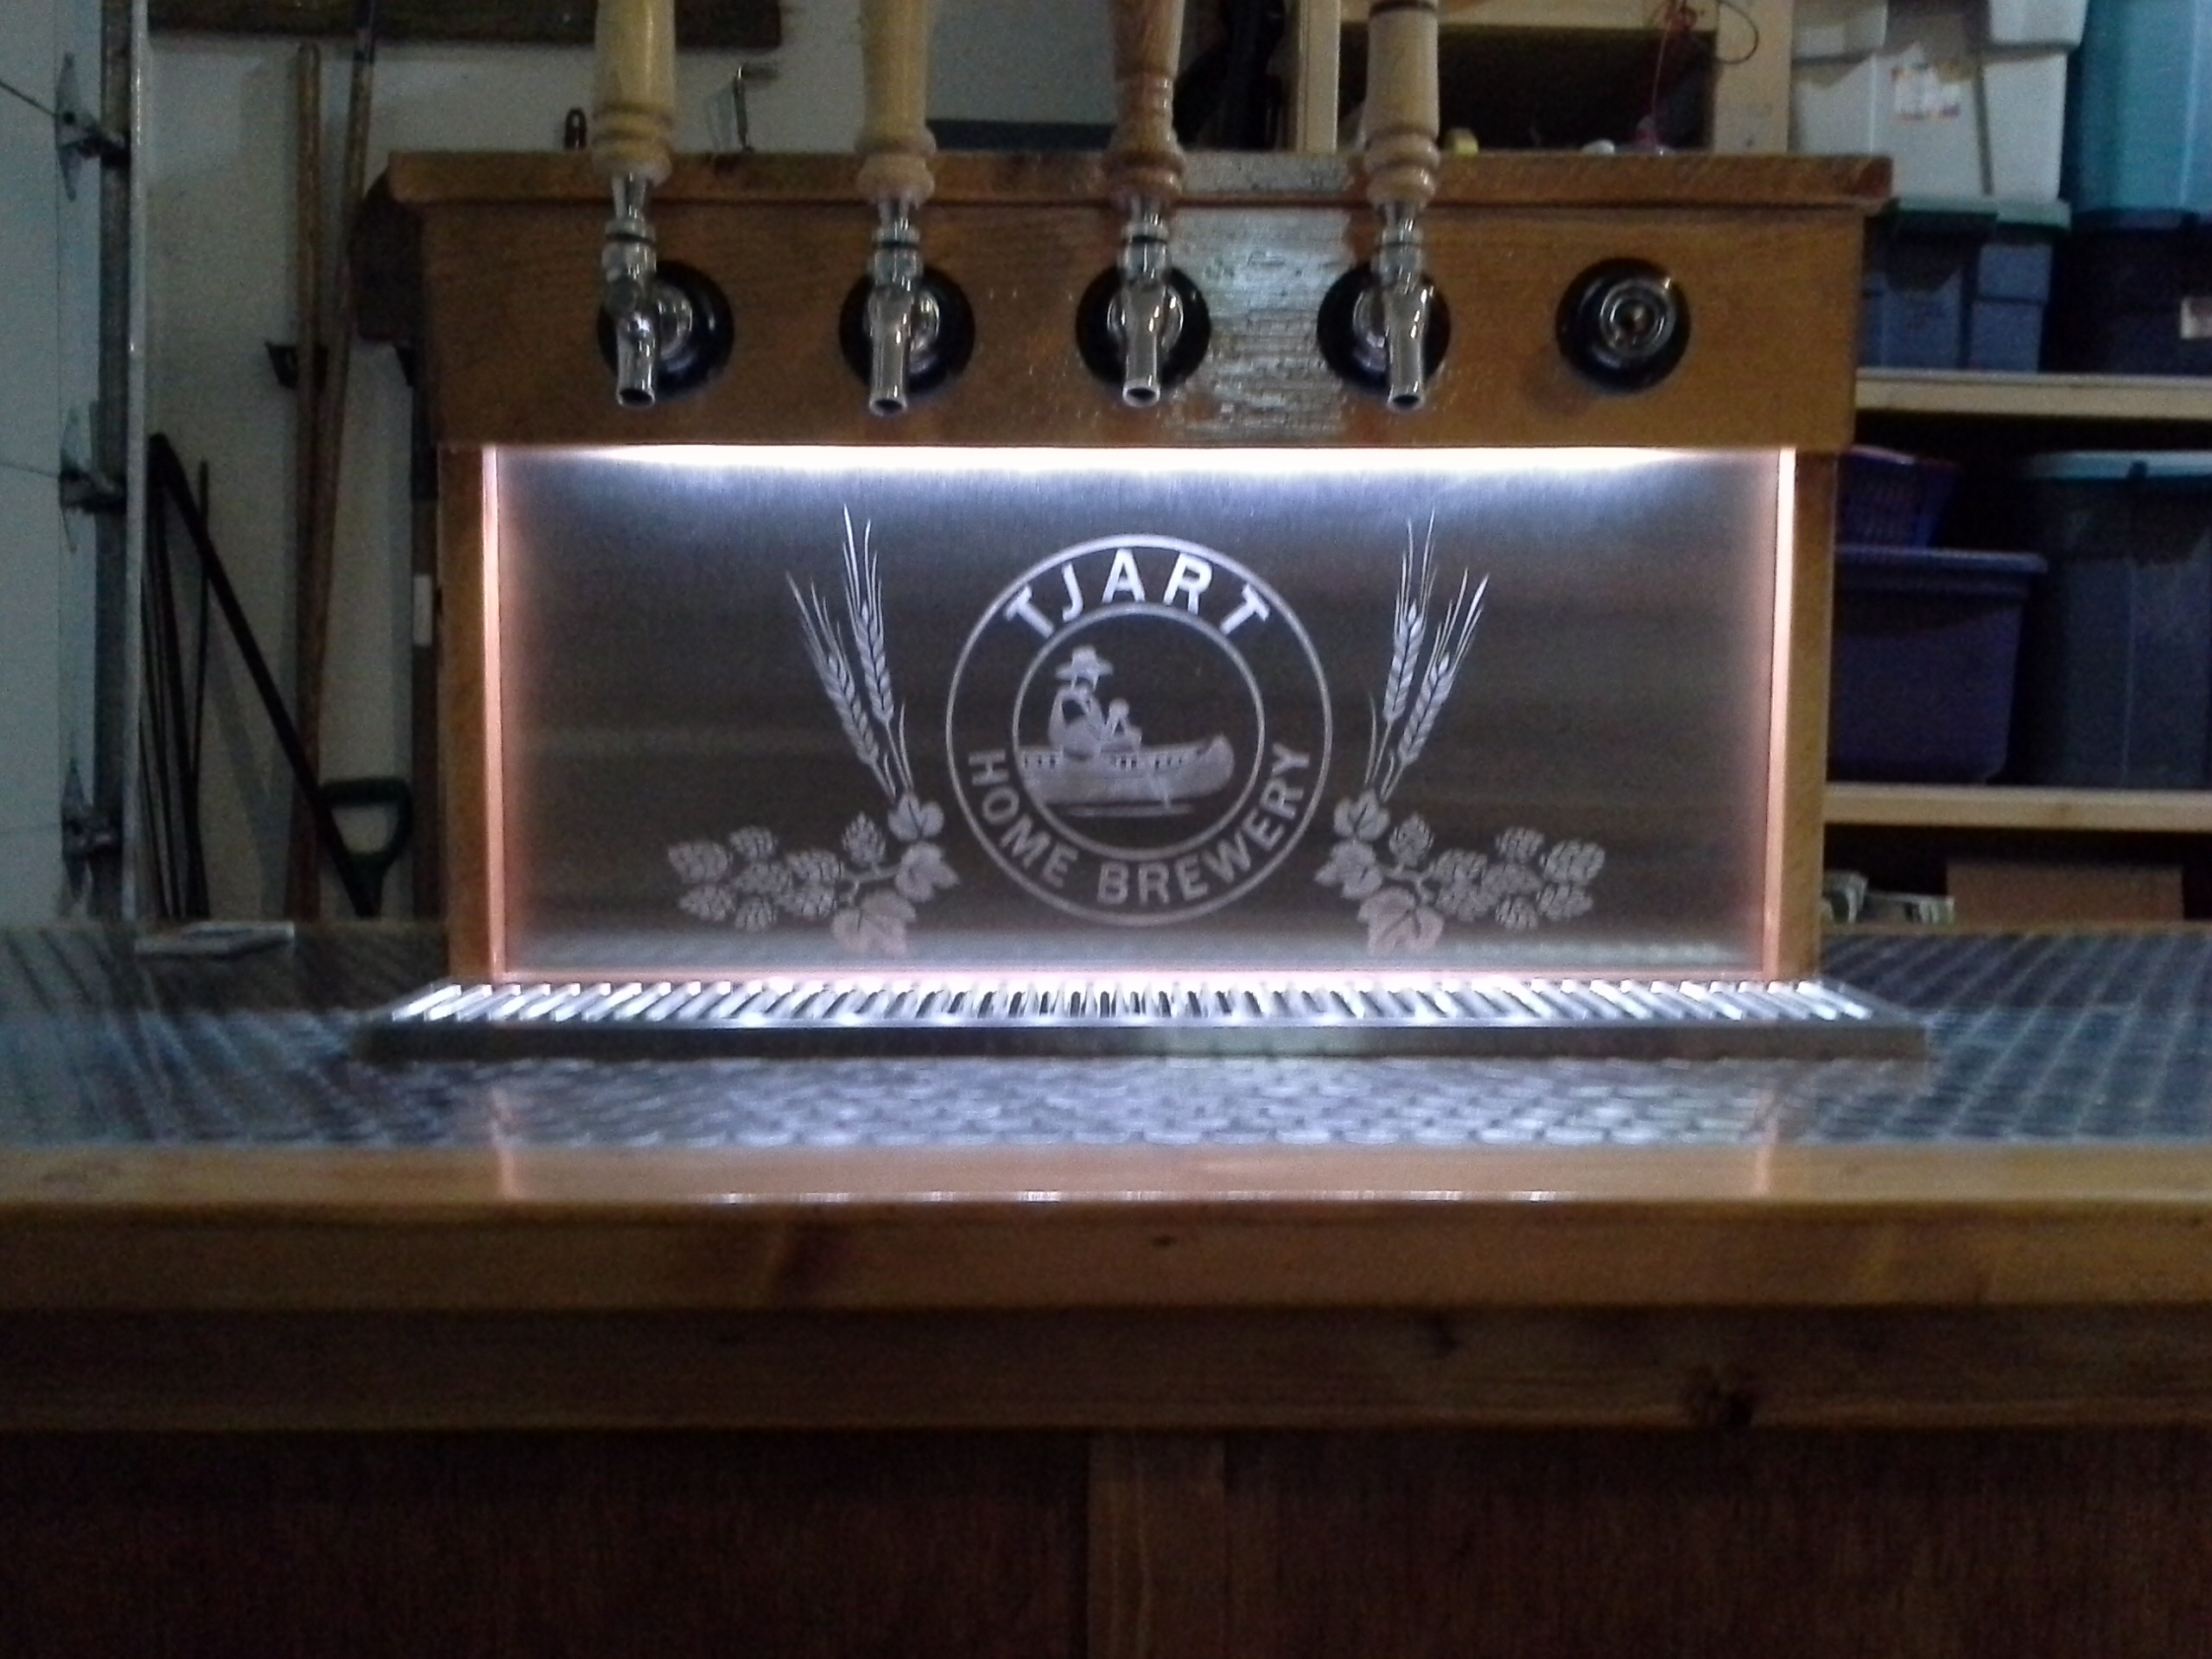
Oh well I'm going to try this on the outside of my kegs if I can find a stencil of some Hops or a cool logo of some sort.

Im curious, How are sight glasses that arent specifically maunufactured for your kettle calibrated? :confused:

I was thinking of buying a sight glass, assuming generic ones arent marked, and etching the kettle next to the glass on the outside.

--------------------------------------------------------------------------
SS Brewbucket: McMullen 85/-
Cornie #1: Auld Saxon D (lagering)
Cornie #2 Belgian Wit
Bottled: McMullen 85/-
The site glasses that I purchased from brewhardware.com come with the numbers and markings loose for you to calibrate yourself. You add a gallon and install the marking, add another gallon, etc.
 
Go with the included markings. They are simply stickers that have a number and arrow. Point the arrow at the exact fill location for each gallon and you're done. Mine have been in place for nearly 2 years and 30+ batches with no issues.
 
The site glasses that I purchased from brewhardware.com come with the numbers and markings loose for you to calibrate yourself. You add a gallon and install the marking, add another gallon, etc.

Yep I got the same ones from brewhardware. http://www.brewhardware.com/measurement-devices
Bobby makes some great stuff.
check out http://www.brewhardware.com/weldless-sight for info on how to install them also.

Im curious, How are sight glasses that arent specifically maunufactured for your kettle calibrated? :confused:

I was thinking of buying a sight glass, assuming generic ones arent marked, and etching the kettle next to the glass on the outside.

I was think of the same idea of etching next to the sight glass but there is no need, the stickers you put on the glass work just fine. But I have to admit the etching looks cool. Next project (when I get time ) is to try etching some kind of logo on the outside of my Keg.
 
This is fantastic, i will be sure to do this to my kettle later.
Just a little question, and it may sound dumb or obvious, but did u make sure to mark your first gallon after your deadspace?
for instance i will mark my first at 7.5 litres as i have a 3 litre deadspace on my kettle and as im in the UK my first gallon is after another 4.5 litres.

I think the dead space is just calculated. I know mine is. That way it didn't mess up my current setup configurations. I would mark the kettle with the correct amounts and compensate for your dead space and trub in your water and pre-boil amounts.
 
I wanted to share... I used this method to etch my brewery logo onto a stainless steel backsplash for my coffin keezer.

Here's the stainless sheet with a stencil, courtesy of my father-in-law who's a retired graphic artist / signmaker:
20141013_095409-63990.jpg

You can see the vinegar and wired battery ready to go.

Here's the etched piece:
20141013_1232361-63989.jpg


And here it is installed in my keezer with lighting:
20141013_134030-63991.jpg


I still have some finishing touches for the keezer, namely 2 new perlick taps and some moulding around the coffin and drip tray, but you get the gist.

I noticed with such a large design it was difficult to get a consistent degree of burn/etch. The design looks awesome from head on but you can definitely see the inconsistencies when viewed from an angle. I can't see how I would have done it perfectly without asking a professional to engrave it so Im happy with it as is.
 
Last edited:
I wanted to share... I used this method to etch my brewery logo onto a stainless steel backsplash for my coffin keezer.

Here's the stainless sheet with a stencil, courtesy of my father-in-law who's a retired graphic artist / signmaker:
20141013_095409-63990.jpg

You can see the vinegar and wired battery ready to go.

Here's the etched piece:
20141013_1232361-63989.jpg


And here it is installed in my keezer with lighting:
20141013_134030-63991.jpg


I still have some finishing touches for the keezer, namely 2 new perlick taps and some moulding around the coffin and drip tray, but you get the gist.

I noticed with such a large design it was difficult to get a consistent degree of burn/etch. The design looks awesome from head on but you can definitely see the inconsistencies when viewed from an angle. I can't see how I would have done it perfectly without asking a professional to engrave it so Im happy with it as is.

This is actually awesome! Inconsistent or not! I like the lighting. Those color changing LED strips would be cool with this! Then you could choose whatever color you feel like that day lol
 
....wow. Regardless of any flaws you may see, it is stunning and bad@ss. I've often wondered what possibilities having a decent stencil to start with would bring, but don't have access to making my own or having one done affordably. You sir have just raised the bar! (pun intended)
 
Those are color changing LEDs. I can set any custom color or just white. My favorite is the setting that fades through all colors softly. Thanks for the kind words.
 
Supergrump: That design and set-up is SPECTACULAR! I was just about to scroll through this whole thread again, but your recent post starts to answer the question I was about to ask.

I have a nice brewery logo that a friend designed for me, and I was thinking about printing it to etch it on my keggles. My question is would it be better to print it, glue it on with a glue stick and then carve out the logo with an exacto knife? I was also considering just free-hand drawing it on with pencil and then tracing around the edges with a wax pencil. Do you think that might create enough of a barrier for the etching process?

If your friend has the AI file or other type of graphic file that he could supply you with, take that to any sign shop and they should be able to cut you a stencil from vinyl to use for etching... It will be VERY nice and detailed. No matter how steady your hand is, unless you are a professional air-brusher or something, you will have jagged edges...
Just my 2 cents.

I agree with the above. My father in law is a retired sign maker so he was able to carve the stencil from an image onto a plastic film that's designed for this type of application. Maybe try one of those engraving shops in the mall... I hear they can run your image through a printer that will produce a perfect stencil.
also note that there is a technique to transferring the stencil to your material (kettle) as well. I had to listen to a lecture on the process from my father in law and it sounds involved. Might be best to get the sign maker to do that part for you.

Alternatively you could maybe try sticking drawer liner to your kettle and hand carve the image with an exacto. Be aware that the blade will scratch the surface of the metal but if you're careful to cut only the edges it shouldn't matter. Just don't let the blade stray.

No matter what you do, try some samples first. You can get stainless scraps for free at a metal supply shop to test your designs on.
 
Excellent suggestions! This is why I come here... I need to see what might be an option, but I think it sounds worth it.
Any guestimate on how much it would cost to take it to a sign shop? I would think the logo would probably print large enough to cover a 1' x 1 1/2' area on the front of a keggle. (Two keggles actually... unless I feel super froggy and want to do all my Cornelius kegs...)
 
Cool stuff. Did a test etch today on an old aluminum pot.

One mod I found handy was to use a small screw driver instead of a Q-tip. Wrap negative wire to upper part of screw driver shaft. Wrap tip in a bit of cloth secured with a cable tie. Dip in electrolite.

Used a 12VDC , 4AMP power supply.

Spliced a large alligator clip on the + lead...just clip it to the pot.

The acid solution will discolor aluminum a bit ever without electrolisys so protect the area around your etching too.
 
Did some really basic etching today on my small BK and HLT. Just simple stuff I could mask with tape.

Learned it is best to make a mask that covers the area well. If not, on stainless you may get a little electrolysis overlapping the edges where the mask is skinny. On aluminum even just a little electrolyte dribbling on to the surface will discolor it a slightly.

Also, from spending lots of time on boats, I know that sea water is a damn effective electrolyte (electrolysis is a common issue on boats). So I tried etching aluminum just using salt water...works just fine. My HLT is aluminum and was done this way. I suspect that an acidic electrolyte is more necessary for stainless (which I did use on the stainless BK).

Played around a bit with electroengraving using old beer cans...the aluminum is coated so you can just scratch thru the coating to make a mask. Learned that 12V @ 4A with a 316 stainless bolt as an anode eats thru thin beer can aluminium really fast! Sort of like photo etching a circuit board.

View attachment 1417653415731.jpg

View attachment 1417653384356.jpg
 
....wow. Regardless of any flaws you may see, it is stunning and bad@ss. I've often wondered what possibilities having a decent stencil to start with would bring, but don't have access to making my own or having one done affordably. You sir have just raised the bar! (pun intended)

+1. Wow, very nice work.
 
OK...I'm trying 2 different battery chargers and I don't know if it's working or not. I have an aluminum pot and all I'm getting on the swab is a little black...no burning or sizzling...I hate to pull the tape off just to see what I have as far as a contrast. I'm going to look for a 9V battery and try it.

EDIT- I used a wall art and finally got it to work...still didn't burn the q-tip brown like in the stainless pics, but I'm happy' Thanks OP!

An actual battery charger may not work because its expecting to have something attached that behaves like a battery. Any power supply that just delivers a set adequate voltage should work. I used an old laptop power supply (12V @ 4 A).
 
Ugh. Frustrated. Spent all afternoon/evening on this and didn't get great results. I used a fresh 9v battery and it burned off some metal but not enough to make a big difference. See picture below. Maybe if I try something that plugs into the wall it will work better. Unfortunately I don't have anything laying around the house. Is there an Amazon link to something that may work better? Or better, something I can grab from Lowes/Wal Mart?

View attachment ImageUploadedByHome Brew1418179558.632074.jpg
 
Mine wasn't working at first, so I kept adding salt to the vinegar until I got the sizzle on contact (you'll know it when you see it).

Also, make sure the wire on the q-tip is low enough so it is wet and completing the circuit.

I also kept the other wire close to where I was etching so it didn't have to travel as far.

I was definitely getting a sizzle, but I'm just not sure it was strong enough.
 
I picked these up from Michael's this weekend.

http://www.michaels.com/Typewriter-...ng-stencilsandaccessories-marthastewartcrafts


Sent from my iPad using Home Brew


I couldn't find the stick on stencils at either Michael's or Hobby Lobby that had Arabic numerals. The only alphabet stick ons carried in either craft store had graphic symbols in lieu of numbers :-(. I had to go with card board stencils instead and hold them in place.

I etched my 8 gallon SS kettle last night. It took me about 2 hours as the electro chemical etching process was very very slow using a fresh 9V battery and a pair of 24 wire gauge test leads with the positive clipped to the kettle lip and neg to wetted Q-tip. My etchings near bottom of kettle (furthest from positive lead) are not as prominent as I'd like. After reading through more of the post in this thread when I go back to add my half gallon marks tonight I'll use an old cellphone charger, heavier gauge wire and tape the positive wire to the inside of kettle closer to where I'm etching to decrease resistance between positive wire and Q-tip contact point. I may also increase the salt concentration for a stronger electrolyte solution. If this produces a stronger etch I'll go back over my previous work.
 
I used a 9V charger with a salt saturated 5% vinegar solution on my brand new shining aluminum kettle. After that I boiled some water in it to build the protective layer.
Now look, my etchings are almost invisible and the oxide layer is not just a slightly tanned finish, it is black. Is there something wrong with my pot or my process? Should I get a higher strength vinegar or increase the voltage and do it again?

black pot.jpg
 
Ok the thread search function sucks the big one. I plan to try this at some point and found a spare power supply I have which outputs 12V. Has anybody else had success with this power level? How do I tell which is the positive wire and negative wire, wire it up and if it doesn't work switch 'em? Thanks!
 
Ok the thread search function sucks the big one. I plan to try this at some point and found a spare power supply I have which outputs 12V. Has anybody else had success with this power level? How do I tell which is the positive wire and negative wire, wire it up and if it doesn't work switch 'em? Thanks!

Yes, 12V @ 4A from an old laptop power supply. Center pin/hole on a round connector is normally +. Simple multimeter test will confirm.
 
Yes, 12V @ 4A from an old laptop power supply. Center pin/hole on a round connector is normally +. Simple multimeter test will confirm.

Yes most of them have the positive on the center pin. A lot of the power supplies will have a diagram like below that shows the connections. The line with the dot us the center pin and the half circle is the outer pin.

View attachment 1418604913460.jpg
 
Thanks guys, the pin unit is a sealed unit so I can't get in there to check, I have cut it off and stripped the wires, I will get hold of a multimeter and check the polarity.
 
I used a 9V charger with a salt saturated 5% vinegar solution on my brand new shining aluminum kettle. After that I boiled some water in it to build the protective layer.
Now look, my etchings are almost invisible and the oxide layer is not just a slightly tanned finish, it is black. Is there something wrong with my pot or my process? Should I get a higher strength vinegar or increase the voltage and do it again?

So, since the first time I boiled water in my pot it was not full and the water turned black, I thought I'd give it a second boil of water before my beer goes in it.
I did that, and my oxide layer or whatever it was is gone as well as my etchings (traces left that you can't even see on the photo); my pot is shiny clean again like fresh from the shelf! The water became turbid both times as the oxide was forming and then dissolving back, I'm lucky I did not brew with it. Just in case, I measured the pH of my water with an aquarium kit and it turned out to be 7 to 7.5.
Another maybe important detail is that my pot came from the manufacturer with an 'etched' finish, whatever that's supposed to mean.
Any ideas? :confused: :confused: :confused:
I must add, for the 2nd time I boiled for about 6 hours and then left it there overnight to cool down.
Maybe once the oxygen was evaporated off, it got stripped from the oxide layer?
Pics: black after 1st boil, clean after 2nd boil.

black pot.jpg


Picture 52.jpg
 
I can't explain the clean look after boiling water a second time. The black layer is what you want though. My etched marks and numbers are deep enough to feel, but they're almost invisible with the oxide layer, and totally invisible when you add rising steam. I rely on a dipstick for volume checks anyway.
 
qmax.. is that an aluminum pot? It seems the aluminum folks aren't having much luck with this process.

Yes, it is! I bought my aluminum pot after reading this entire thread, but no one really said that after etching aluminum your markings will be as good as invisible.
I tried boiling water in my pot the 3rd time, no oxide layer in 3 hours. Then added vinegar to pH~5, boiled for 2 more hours and left overnight, still no layer. I'm at a loss here, I think I'll just brew as it is.
 
The OP said (on the first page) that in theory this should work in aluminum but may require a different electrolyte. You may need to do some research of-site.
 

Latest posts

Back
Top