• Please visit and share your knowledge at our sister communities:
  • If you have not, please join our official Homebrewing Facebook Group!

    Homebrewing Facebook Group

Go electric they said, It will be fun they said.

Homebrew Talk

Help Support Homebrew Talk:

This site may earn a commission from merchant affiliate links, including eBay, Amazon, and others.

sTiNkFiZzle

Well-Known Member
Joined
Aug 28, 2008
Messages
117
Reaction score
6
Location
Dallas, GA
Ok... I thought I would post some pictures of my current eHERMS build in progress. I figured if maybe I could help at least one person it would be worth sharing. Not much original from as I used ideas from several different systems on the forums. I got lots of ideas from Kal, Electric Brewing Supply, and countless others.

This has been almost a year going project. I have taken pics of different parts of the process except welding of the Brutus 10 frame. That has been documented several times and not sense in beating a dead horse. I chose to go with the Brutus frame because I was going to go gas. I then decided to switch to electric but liked the idea of the stand being portable with the lack of space in my garage.

My system:

Single Tier Brutus 10 Clone
3 Keggle (HLT, MLT, Kettle) All Bottom Drain.
50 amp, 2 element, 2 pumps, BCS-460 Controller. With potential for back to back brewing. I have TIG welded all the fitting/couplers myself. The project inspired me to relearn to TIG welding(I did it in HS).
Control Panel: 30x20x8 Stainless Steel Enclosure w/ 10" Touch Screen

Concept Control Panel:
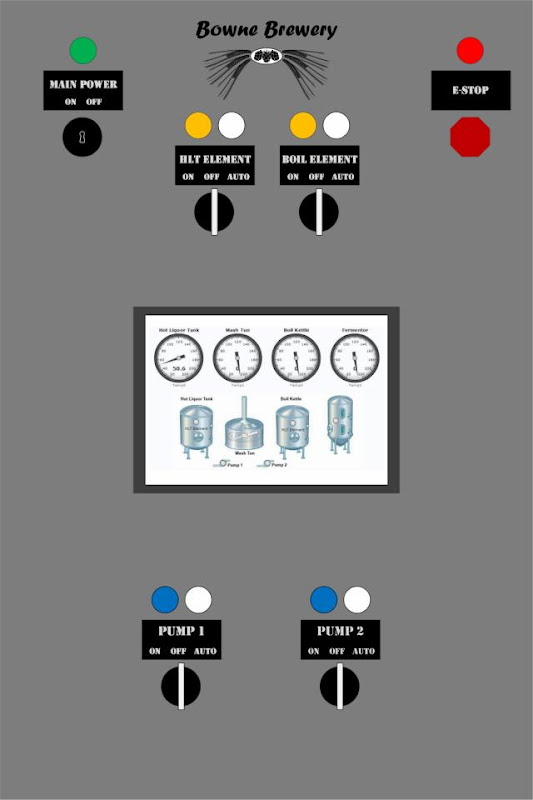
65248_10152538008635161_1767758504_n.jpg


Brutus 10 Plans(not mine, thanks for who shared them! And ignore pots, I am using Keggles):
Brutus-10-JW-V6%2520-%2520Copy.jpg


Wiring Schematic(Thank you Electric Brewing Supply):
scematic.png


BCS-460 Setup(not done yet):
controller.jpg


Also Building Fermentation Chamber
IMG to Follow
 
Where I am today 2/25/2012:

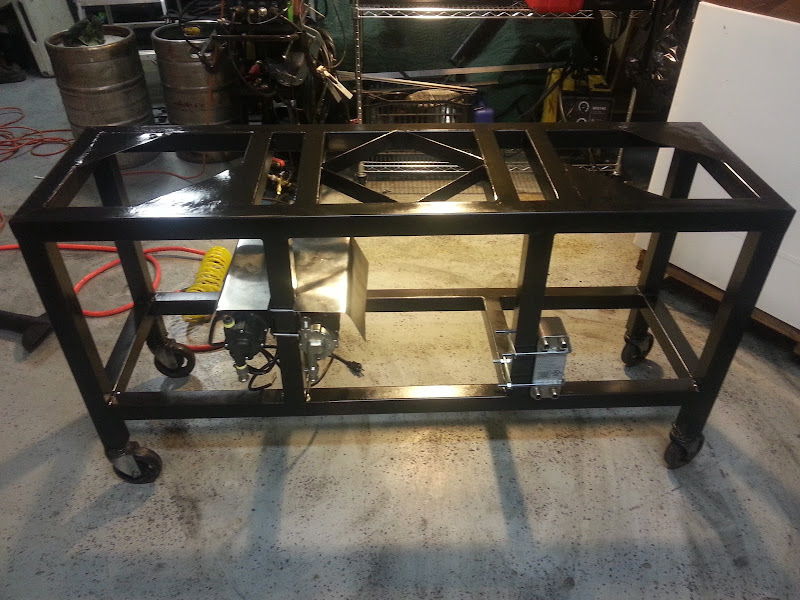
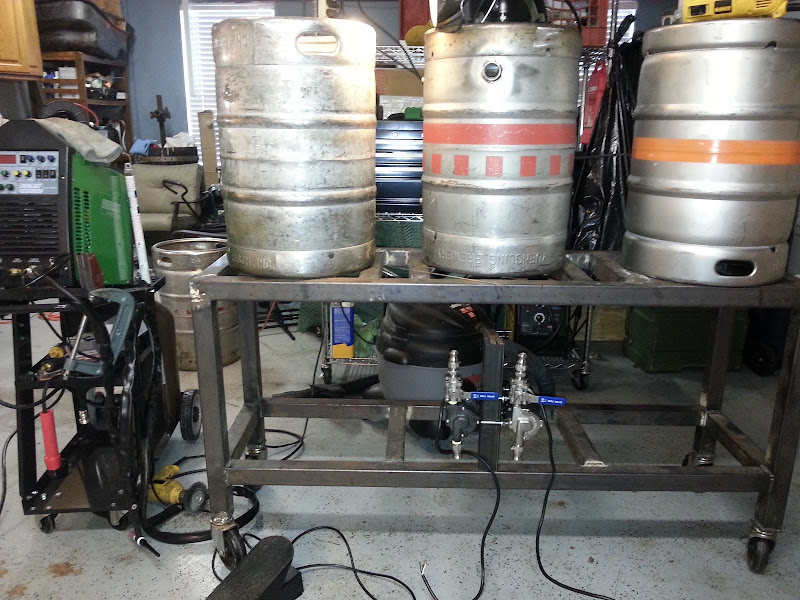
Brew Stand:
20130109_203552.jpg


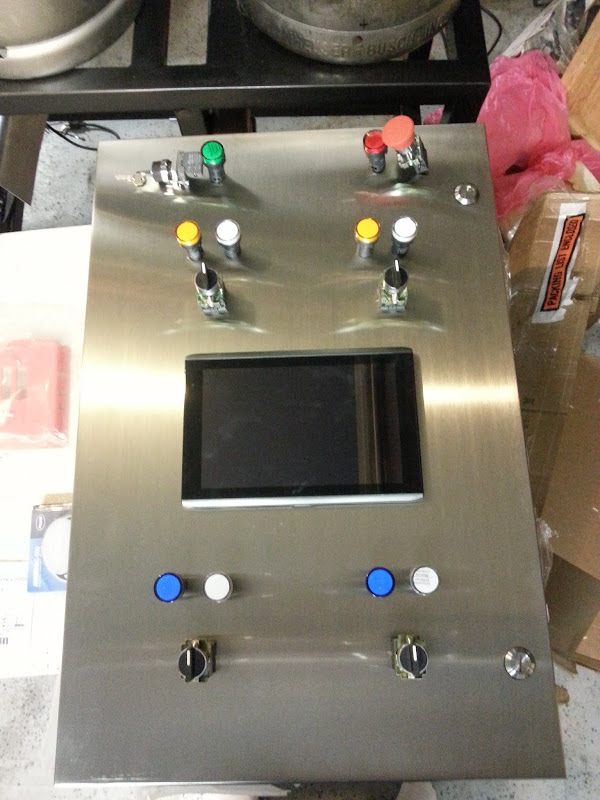
Early Panel:
20130213_214214.jpg


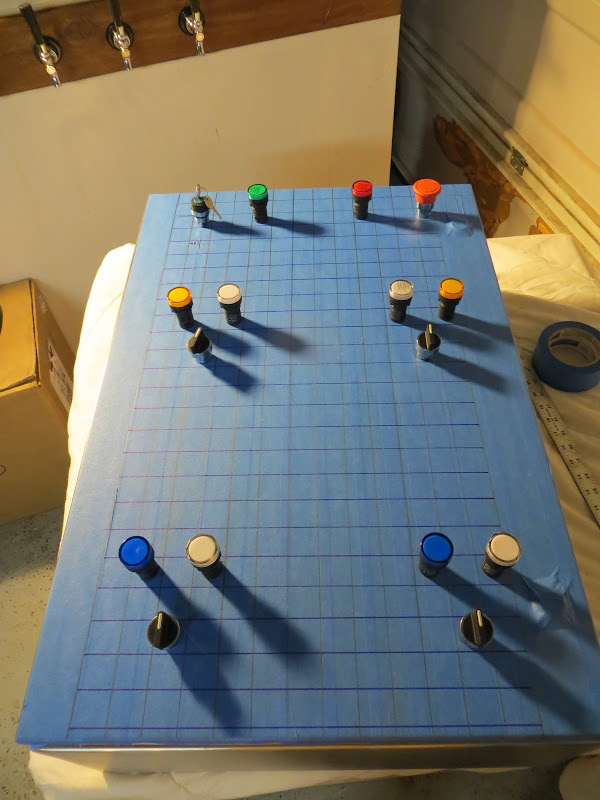
I used painters tape to layout switches and lights in a grid:
IMG_0166.JPG


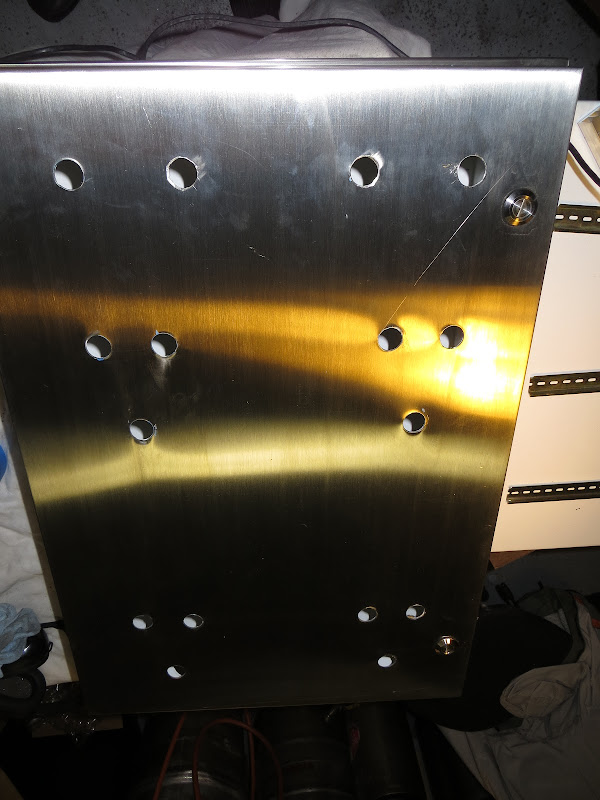
Post Knockout Punches:
IMG_0178.JPG


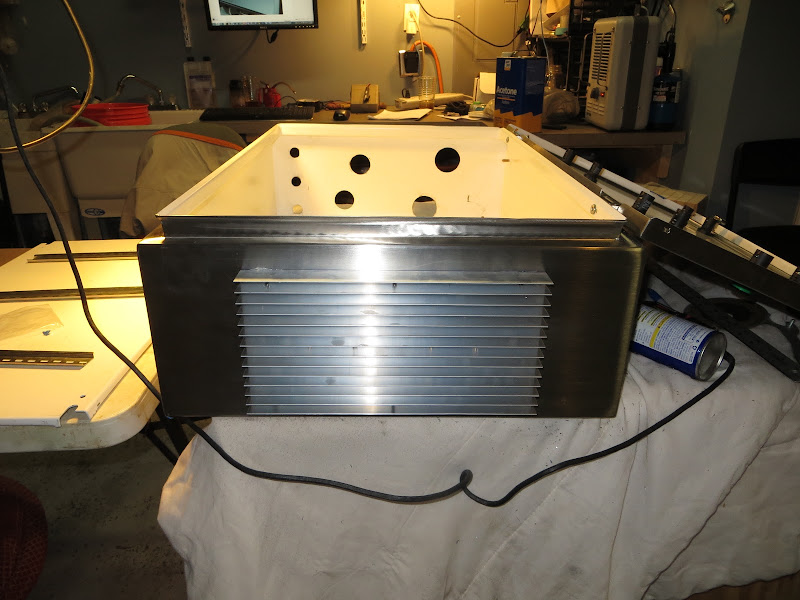
Mounted Heatsink:
IMG_0181.JPG


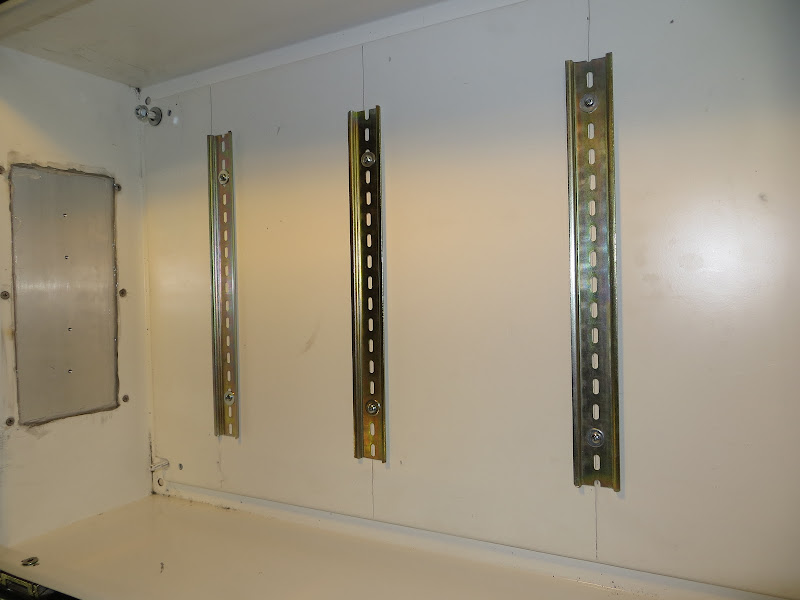
DIN Rails Down
IMG_0185.JPG


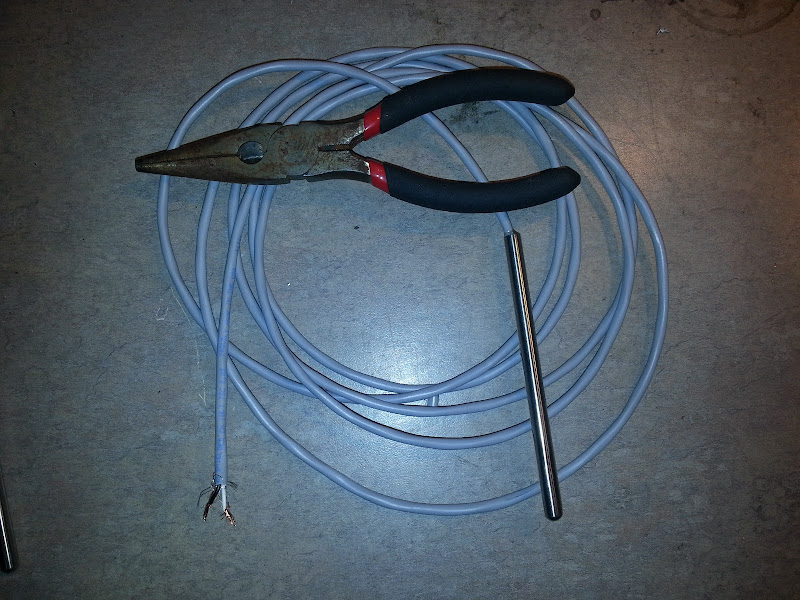
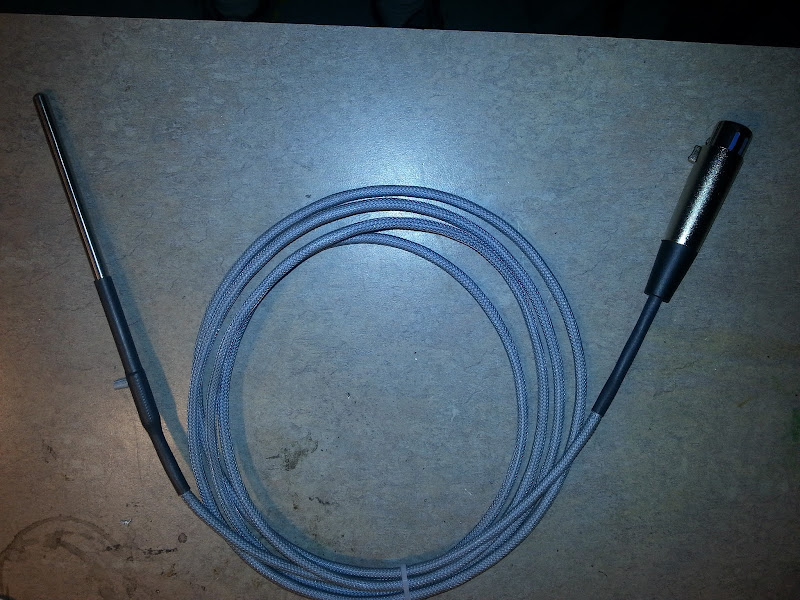
BCS Temp Probes: dded heat shrink, soldered XLR connector on one end, and added braided expandable sleeving.
Before:
20130221_211001.jpg


After:
20130221_211025.jpg
 
Keggles, Fittings, and Hoses oh my.

Brewstand just after welding and Keggles pre-polish.
20121231_144015.jpg


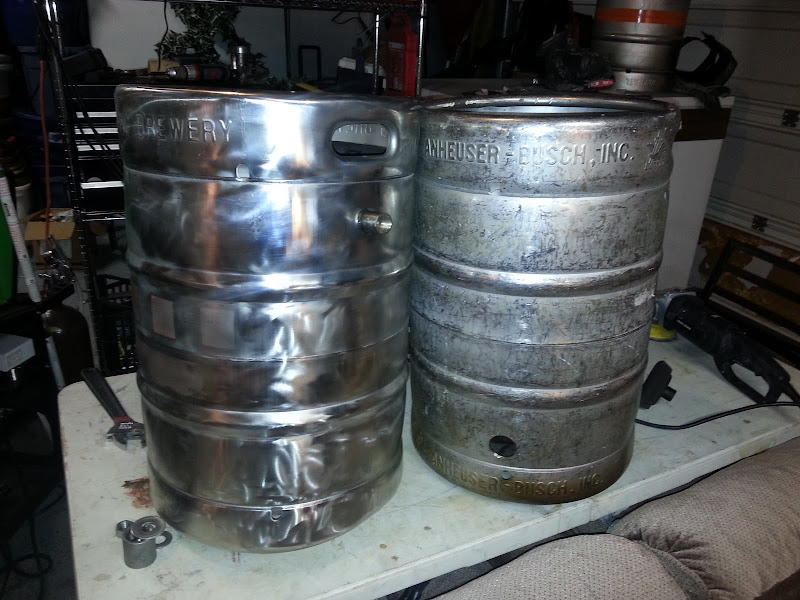
Before and After Polish
20130116_224723.jpg


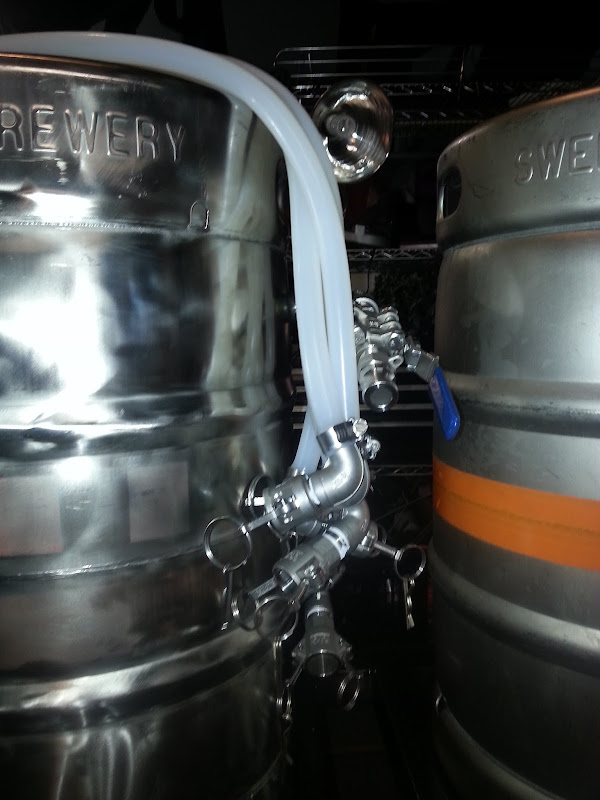
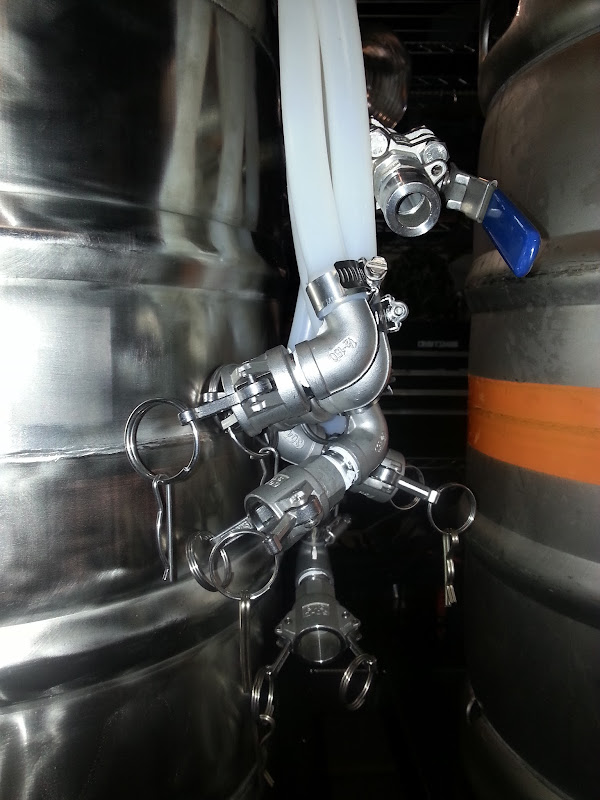
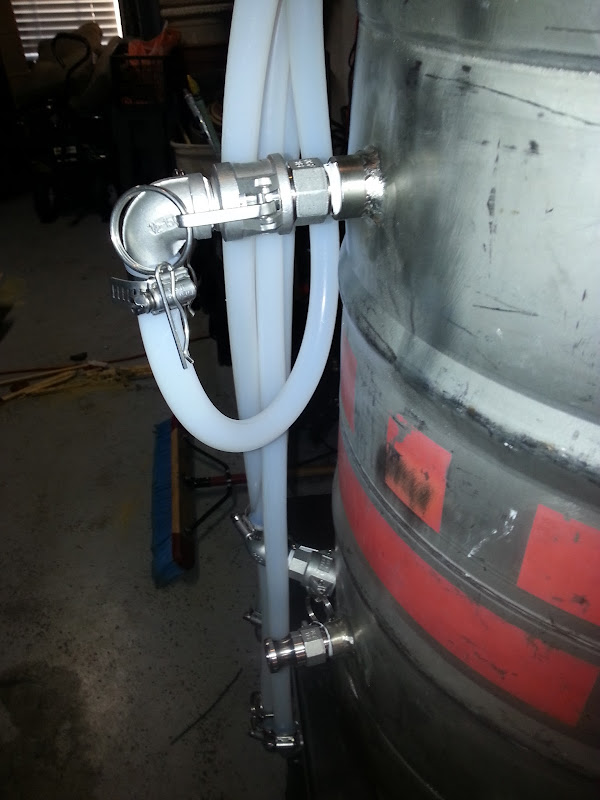
Camlock hoses:
20130209_173708.jpg

20130209_173812.jpg


HLT HERMS coil connectors
20130209_173802.jpg
 
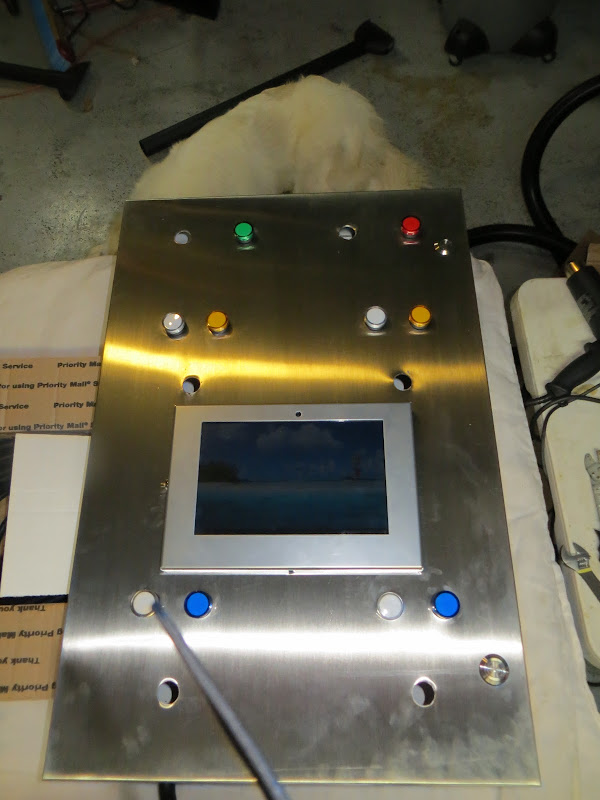
A small update. Got the stainless enclosure for the touch screen. Not the same color stainless as the enclosure but its still functional. I have not mounted it yet, going out of town this weekend so I wont have time to mess with it :(

Starting to think I like building the brewery better then vacation :)

IMG_0190.JPG
 
sTiNkFiZzle said:
Ok... I thought I would post some pictures of my current eHERMS build in progress. I figured if maybe I could help at least one person it would be worth sharing. Not much original from as I used ideas from several different systems on the forums. I got lots of ideas from Kal, Electric Brewing Supply, and countless others.

This has been almost a year going project. I have taken pics of different parts of the process except welding of the Brutus 10 frame. That has been documented several times and not sense in beating a dead horse. I chose to go with the Brutus frame because I was going to go gas. I then decided to switch to electric but liked the idea of the stand being portable with the lack of space in my garage.

My system:

Single Tier Brutus 10 Clone
3 Keggle (HLT, MLT, Kettle) All Bottom Drain.
50 amp, 2 element, 2 pumps, BCS-460 Controller. With potential for back to back brewing. I have TIG welded all the fitting/couplers myself. The project inspired me to relearn to TIG welding(I did it in HS).
Control Panel: 30x20x8 Stainless Steel Enclosure w/ 10" Touch Screen

Concept Control Panel:

Brutus 10 Plans(not mine, thanks for who shared them! And ignore pots, I am using Keggles):
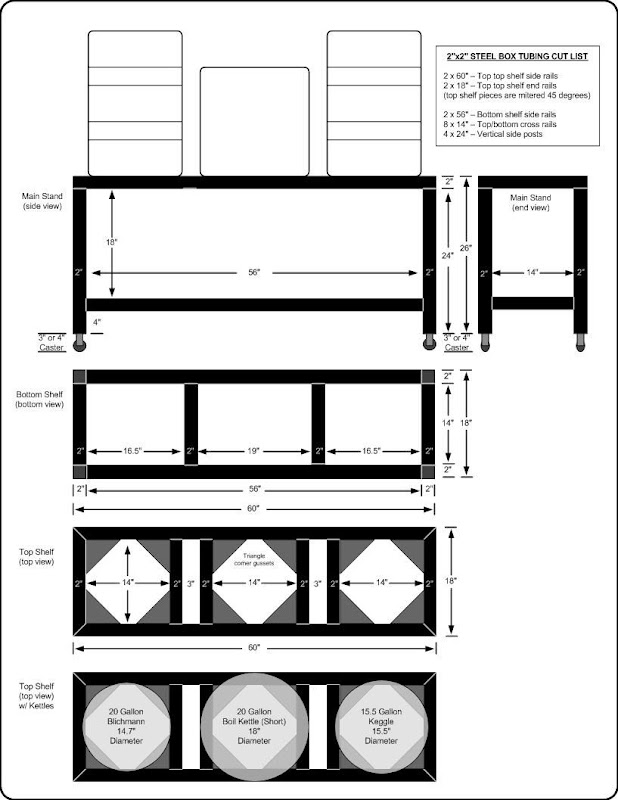
Wiring Schematic(Thank you Electric Brewing Supply):
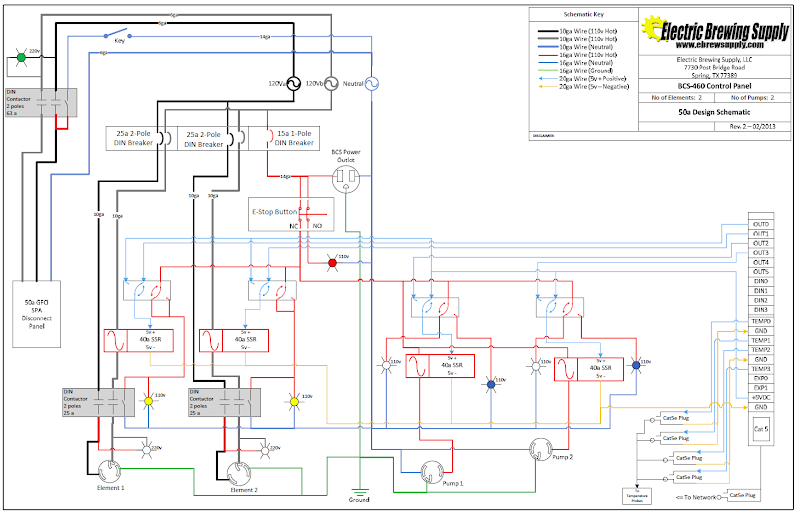
BCS-460 Setup(not done yet):
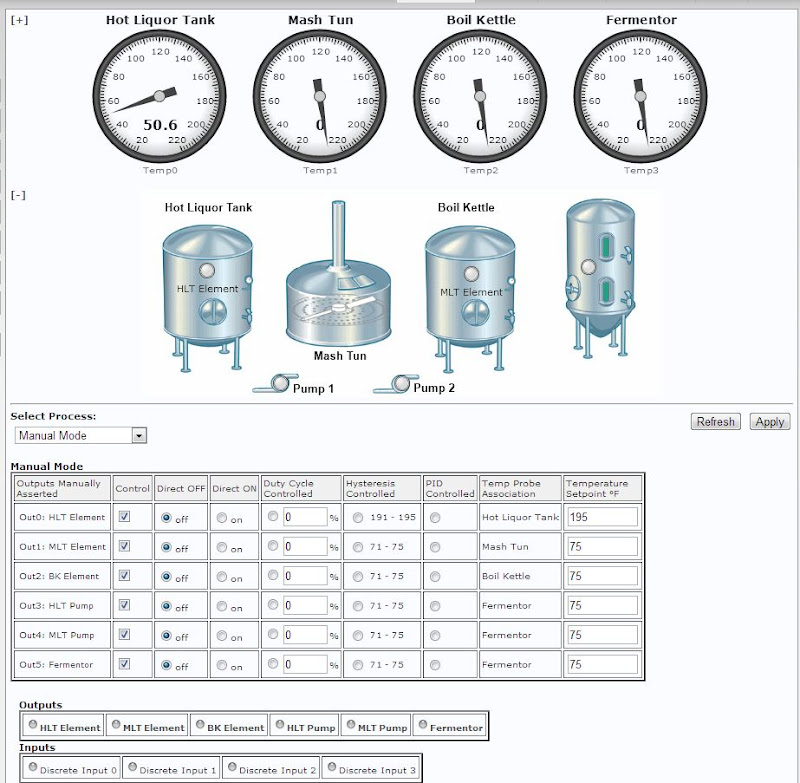
Also Building Fermentation Chamber
IMG to Follow

What program are you using for your touch screen?
 
What program are you using for your touch screen?

I actually decided to go with an old Galaxy Tab 10.1 tablet running chrome browser to control the web based BCS controller.

The original plan was to reuses an old 10" touchscreen I found at a flea market and Rasberry Pi...but the project has been so much work already that I didnt want to have to take time to program RP to work with the screen. I may still use it for a future project to control my fermentation chamber and kegerator.
 
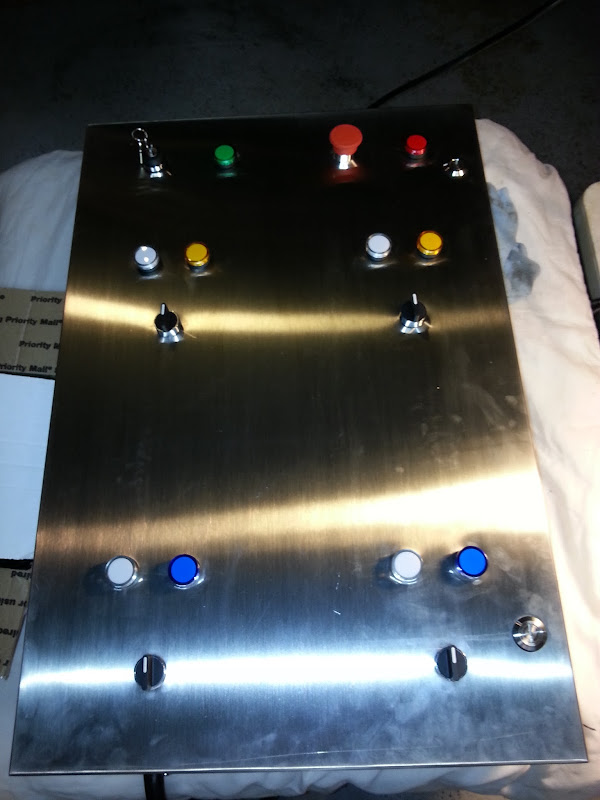
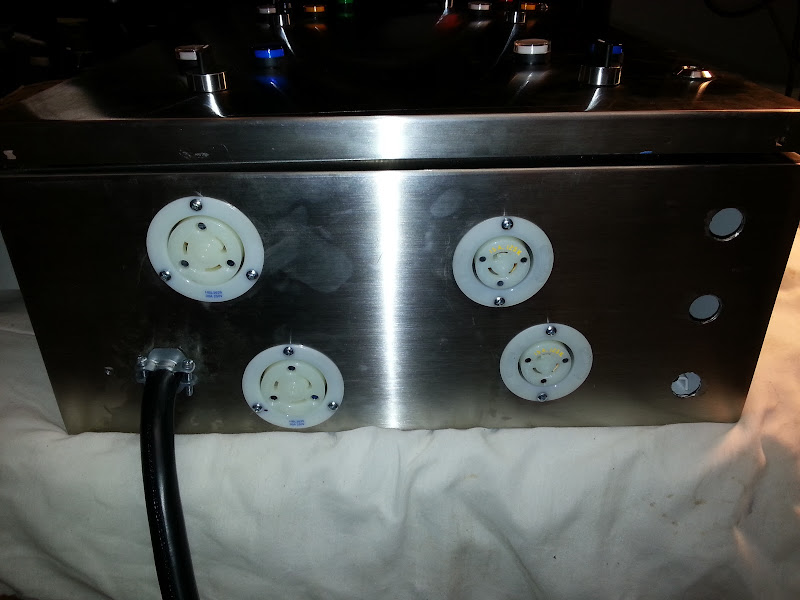
ok...last work I will be doing for 4-5 days and last update. I finally got all the buttons and lights mounted and the power receptacles.

The finger prints and smudges on the stainless are driving crazy, no sense in cleaning it until I am done I guess :p

20130226_215336.jpg


20130226_215347.jpg
 
A quick question for everyone out there. Is there a recommended length for the element cables. I am running 2 - Camco 02963 5500W elements and want to know if am limited to 10 feet or if I could get away with 15ft.
 
A quick question for everyone out there. Is there a recommended length for the element cables. I am running 2 - Camco 02963 5500W elements and want to know if am limited to 10 feet or if I could get away with 15ft.

What gauge wire are you using?
 
That sounds about right. I think 15 feet instead of 10 should be fine. If your wires are too thin and/or too long you'll get excessive voltage drop. I gather that 3% is considered a sensible maximum for the voltage drop you should allow from panel to appliance. You can plug in the numbers to a calculator like this one to check. http://www.electrician2.com/calculators/vd_calculator.html
 
A quick question for everyone out there. Is there a recommended length for the element cables. I am running 2 - Camco 02963 5500W elements and want to know if am limited to 10 feet or if I could get away with 15ft.

both are well within reason for length...but what i'd suggest is to try and not make them too long....they'll just get in the way
 
The only thing you did wrong was not upgrading to half bbl kettles.... :)

Well the keggles were free. I considered maybe going to 20 gallon pots and I still can pretty easy. The elements unscrew easily and I have a tig welder to add all couplings to the new pots. I would be scared to event mention the idea of upgrading those to the wifey... No more spending for a little while :)
 
looks great so far. I can't wait to see photos of the first brew day!
 
Nice work. I am going to be building a similar BCS based control panel in the next couple of months. Are you going to use a cabled Ethernet connection for the BCS or go wireless?

I'm also interested in seeing how much/if any free space you will have in the control panel. I would like to go with something smaller but still large enough to not have a cluttered mess inside.
 
Awesome work / build. But, I gotta know, was it Fun?

It has been really fun. It is nice to have a project to work on. I made a big mistake but not having my old system to brew while I built this. I am never been so ready to brew, tired of having to buy beer that in my opinion doesn't taste as good as my own.
 
Nice work. I am going to be building a similar BCS based control panel in the next couple of months. Are you going to use a cabled Ethernet connection for the BCS or go wireless?

I'm also interested in seeing how much/if any free space you will have in the control panel. I would like to go with something smaller but still large enough to not have a cluttered mess inside.

I am going to have a small 4 port hub mounted to the din rail and also a wireless range extender. This will make sure the tablet i used to a VERY close wireless connection to the BCS and my computer in the garage.

The 30x20x12 panel is an overkill but I will have plenty of room for the networking stuff and future growth. I also plan on maybe adding a 2nd BCS-460 down the road to control fermentation chambers and 2 kegerators. I will be sure to takes pictures of the space in the panel as I go.
 
Crazy how quick life can get busy and the fun stuff gets put aside. Between vacation, getting the flu, and planning the wife's birthday I have not touched the panel in almost 2 weeks. I will actually be home this weekend with no commitments...maybe I will gets something done.

What I hope to get done this weekend:
1) Weld on the last coupler for the BK element.
2) Weld the 1/4" couplers for the sight glass kits on HLT and BK.
3) Do some wiring on the panel...as much possible this weekend.
4) IF I need a break from the panel I may try to polish the remaining 2 kegs...
5) Build the remaining 2 Temp Probes.

Those are some big goals...we will see :)

Funny you mention that...

I spent 6 months designing my system and found my weekends getting booked with other activities (some were fun, though). I told my wife "I need the next 4 or 5 weekends free" when I had all my ducks in a row and knew what I had to do. Luckily, she loves beer, and fully supports my hobby, so she agreed to keep our (or at least MY) schedule free for over a month of weekends and I built the majority of my setup in about 4 weekends.

Sometimes, priorities shift to accommodate your hobb- no, obsession. Sometimes they just can't.

:mug:
TB
 
Back
Top