• Please visit and share your knowledge at our sister communities:
  • If you have not, please join our official Homebrewing Facebook Group!

    Homebrewing Facebook Group

Electric brewery build

Homebrew Talk

Help Support Homebrew Talk:

This site may earn a commission from merchant affiliate links, including eBay, Amazon, and others.
On all these "timed tests" has anyone metered the heating element voltage while under load?
Any and all VD due to house service wiring length to brewery socket lets not forget the cord to brewery length plus AWG, VD adds up resulting in a massive drop in BTU output.
Starting water plus ambient air temp variables, humidity, wind chill factor, not much of a constant to work with.
I'll shut up.
 
This calculator, while in metric units, also comes up with 50 minutes.

I'm still looking for others, but seems like I'm in the ballpark.

-Joe

That seems about right to me. I guess there isn't much of a difference between 50 minutes and 70 minutes in the grand scheme of things, but I know mine is under an hour starting with 45 degree water and 14 gallons.

That calculator you linked to didn't work for me- kept telling me "1" minute to reach the correct temperature!
 
Yeah, I'm sure there can be a wide fluctuation in actual BTU output. Which could well account for my lower efficiency.

That calculator you linked to didn't work for me- kept telling me "1" minute to reach the correct temperature!
Are you putting in 5500 watts? They're in KW, so you need to put 5.5 in.

-Joe
 
I timed how long it takes to heat my strike water today, for those who are curious.

To heat 15 gallons of 56F water to 180F on a 75F day in an uninsulated stainless vessel with a single, 5500 watt element took 1 hour 10 minutes.

-Joe

Are you actually using 15 gallons for strike water or is the extra needed to cover a HERMS coil? I used to try to heat up all my water (mash and sparge) at the beginning of the brew but I realized I could save a bunch of time on my brew day if I heated only what I needed to strike with at first and then the sparge while I was mashing. Just a though.
 
Yeah, I'm sure there can be a wide fluctuation in actual BTU output. Which could well account for my lower efficiency.


Are you putting in 5500 watts? They're in KW, so you need to put 5.5 in.

-Joe

Yes. The calculator just didn't like me.

I just got done brewing, and ended up doing a single infusion batch sparge.

What I like best about this electric system is the flexibility. I can do a 12 gallon fly sparge, or a 5 gallon batch sparge, with HERMS without HERMS, gravity drain the MLT, use the pump, change up the chilling procedure, etc. I love that flexibility. The only thing I can no longer do is decoctions. But step mashes are super easy, because I can ramp up fast.
 
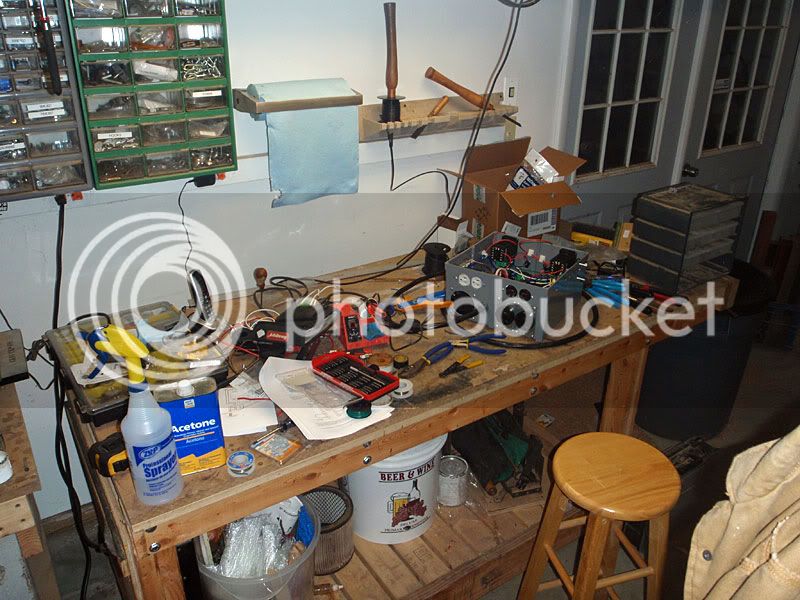
Ok kids, we're ready for power! First, I thought you might like a glimpse into the chaos that is my workbench...

workbench.jpg


Ummm....how is THAT workbench chaos?? One of the cleanest active workbenches I've ever seen! :mug:

(Where are all the posters and bumper stickers of questionable taste? the endless detritus of half-finished projects stacked on each other until they spill off the bench? piles of nearly empty paint and solvent cans filling the space under the tabletop? the jerry-rigged shelves and hooks for random tools? the #10 cans filled with mismatched nails, screws, and stereo components?) :drunk:
 
nostalgia - still monitoring this thread?

I see you soldered a triclover ferrule onto the boil kettle (for the dump valve?) How did that go? It looks like you dimpled it to the outside, and soldered on the inside, but must have fussed to get just the right fit to force the ferrule in from outside.

How useful do you find the bottom dump valves? Presumably used for cleanup. Someone I think suggested keeping the top fitting on the keg for an electric keggle, and using it for a dump valve for cleanout, inverting the keg and cutting out the bottom rather than the top. Sounds good to me.
 
Yeo, I'm still here :)

What I did was push it through from the inside, then pop it out and push it back in from the outside.

Since I use mostly pellet hops, I don't know if the larger valve makes a lot of difference. It's nice to rinse everything down the bottom drain, but I don't know if a 1/2" valve would be any worse.

But in general, having a bottom drain is the best thing EVAR.

As a quickie build update, I've been having some trouble with the heatstick leaking, so I'm probably going to drill a new hole and stick the element right in the kettle.

-Joe
 
I've got one of the 7gal conical fermenters from stout tanks and kettles, and have looked at the kettles and other stuff he sells. For electric kettles, he sells them with a 1 1/2 triclover on the side, and a 1 1/2 tricolver - 1" NPS fitting for mounting the heating element into the kettle.

That might be the way to go. As my kettles evolve, I'm thinking of doing that for the heating element myself.
 
Joe

You suck!!! LOL. Nice write up but an instruction manual or a "Build an E-Brewery for Dummies" Authored by Joe Fisher himself... I want the signed copy 1st edition. ;)

WW
 
Wanna say thanks for the ideas nostalgia. Finished my panel based off of your panel
 
So with this version of control panel are you able to have both elements firing at the same time? Wondering if you could run back to backs on this fairly easily?
 
Awesome, thank you... Wouldn't happen to know much about electrical theory would you? I'd like to build a panel like this one with a few subtle changes... Problem is, while I can follow a diagram, I draw a blank when it comes to making one... Looking for someone who can give me a good "road map"
 
Awesome, thank you! You wouldn't happen to know much about electrical theory would you? I am currently in the process of reworking my rig to get away from propane and move to e-brewing. I have tried a few different control panel configurations now and have failed miserably. I really like what Nostalgia has done here but would like to make a couple of subtle changes for my own. While I can follow an electrical diagram fairly well, I have no idea how to put one together. I'm kind of hoping that someone out there can help me with a sort of "panel diagram for dummies" if you will, lol.
 
Im a complete rookie i watched videos and jumped between this post and some others. However in my research i found a website that has different panels with schematics for a decent price. Ill try and find it today.
 
So basically this is what I'd like to build, I have a HERMS coil already plumbed into my HLT, but I'd still like to have the third PID in the center, just for closer monitoring of temps in my Mash tun.

On the backside of this one he has four outlets turned on and off by the four bottom switches on the front panel. I would have two outlets with front switches for my pumps, and then a single 110v/double usb outlet controlled by the third front switch, that way I could use my phone for timer and music while keeping it charged and also run my "El Cheapo" vent hood.

I wouldn't want that big honking red switch on top either, so the fourth front switch would be replaced with a keyed master on/off.

I'd also leave the lighted kill switches for the elements as they are. Does all that make sense? And can anyone help me make it happen?
 
Back
Top