Homebrew Talk - Beer, Wine, Mead, & Cider Brewing Discussion Forum

Help Support Homebrew Talk - Beer, Wine, Mead, & Cider Brewing Discussion Forum:

This site may earn a commission from merchant affiliate links, including eBay, Amazon, and others.

SouthPhillyBr3w3r

Well-Known Member
Joined
Dec 2, 2017
Messages
151
Reaction score
42
Location
Philadelphia, PA
I am working on a plan for a double coil immersion chiller to replace the janky, poorly made IC I currently have (25' x 3/8" Single). I was going to do two 3/8" x 25' coils, attached using T-fittings that are sweated together, so that there is cold water flowing from the input through each of the coils separately. I got lucky and found a deal at Lowes for 50' of 1/2" ACR tubing for only $13. I ended up getting it, so I will using 1/2" OD tubing and will be constructing the chiller this week. If anyone has a good design for a dual coil chiller, please feel free to post a link. Otherwise, I will go with the design I have in mind and will post a picture closer to the weekend.

I guess I will sell my old chiller as scrap metal, since no self respecting brewer will buy it (it is full of kinks and is pretty shite). I could probably use it as a pre-chiller but I am worried that going from kinked up 3/8" tubing into a wider diameter tubing will reduce the flow rate too much for my new chiller to work well.

This is what I hope to build, but with hose fittings at inlet/outlet:
F504NR3G8LWOQIW.LARGE.jpg
 
Last edited:
I am working on a plan for a double coil immersion chiller to replace the janky, poorly made IC I currently have (25' x 3/8" Single). I was going to do two 3/8" x 25' coils, attached using T-fittings that are sweated together, so that there is cold water flowing from the input through each of the coils separately. I got lucky and found a deal at Lowes for 50' of 1/2" ACR tubing for only $13. I ended up getting it, so I will using 1/2" OD tubing and will be constructing the chiller this week. If anyone has a good design for a dual coil chiller, please feel free to post a link. Otherwise, I will go with the design I have in mind and will post a picture closer to the weekend.

I guess I will sell my old chiller as scrap metal, since no self respecting brewer will buy it (it is full of kinks and is pretty poopye). I could probably use it as a pre-chiller but I am worried that going from kinked up 3/8" tubing into a wider diameter tubing will reduce the flow rate too much for my new chiller to work well.

This is what I hope to build, but with hose fittings at inlet/outlet:
View attachment 558818

Just got a call from Lowes this morning, and they do not have the 50' of tubing I ordered. They cancelled my order, so I am back at square one. Hopefully I can find 50' of 3/8" tubing for a good price. I have seen some ridiculous prices for soft copper tubing online. Does anyone have a suggestion as to a good place to get soft copper tubing on the cheap? I assume it is perfectly acceptable to use ACR copper tubing instead of soft copper plumbing tube. ACR seems to be cheaper, so maybe I could check out an HVAC supply shop?
 
Check out Home Depot. They might have it in stock, or can order it.

Otherwise, call around to some plumbing supply companies.

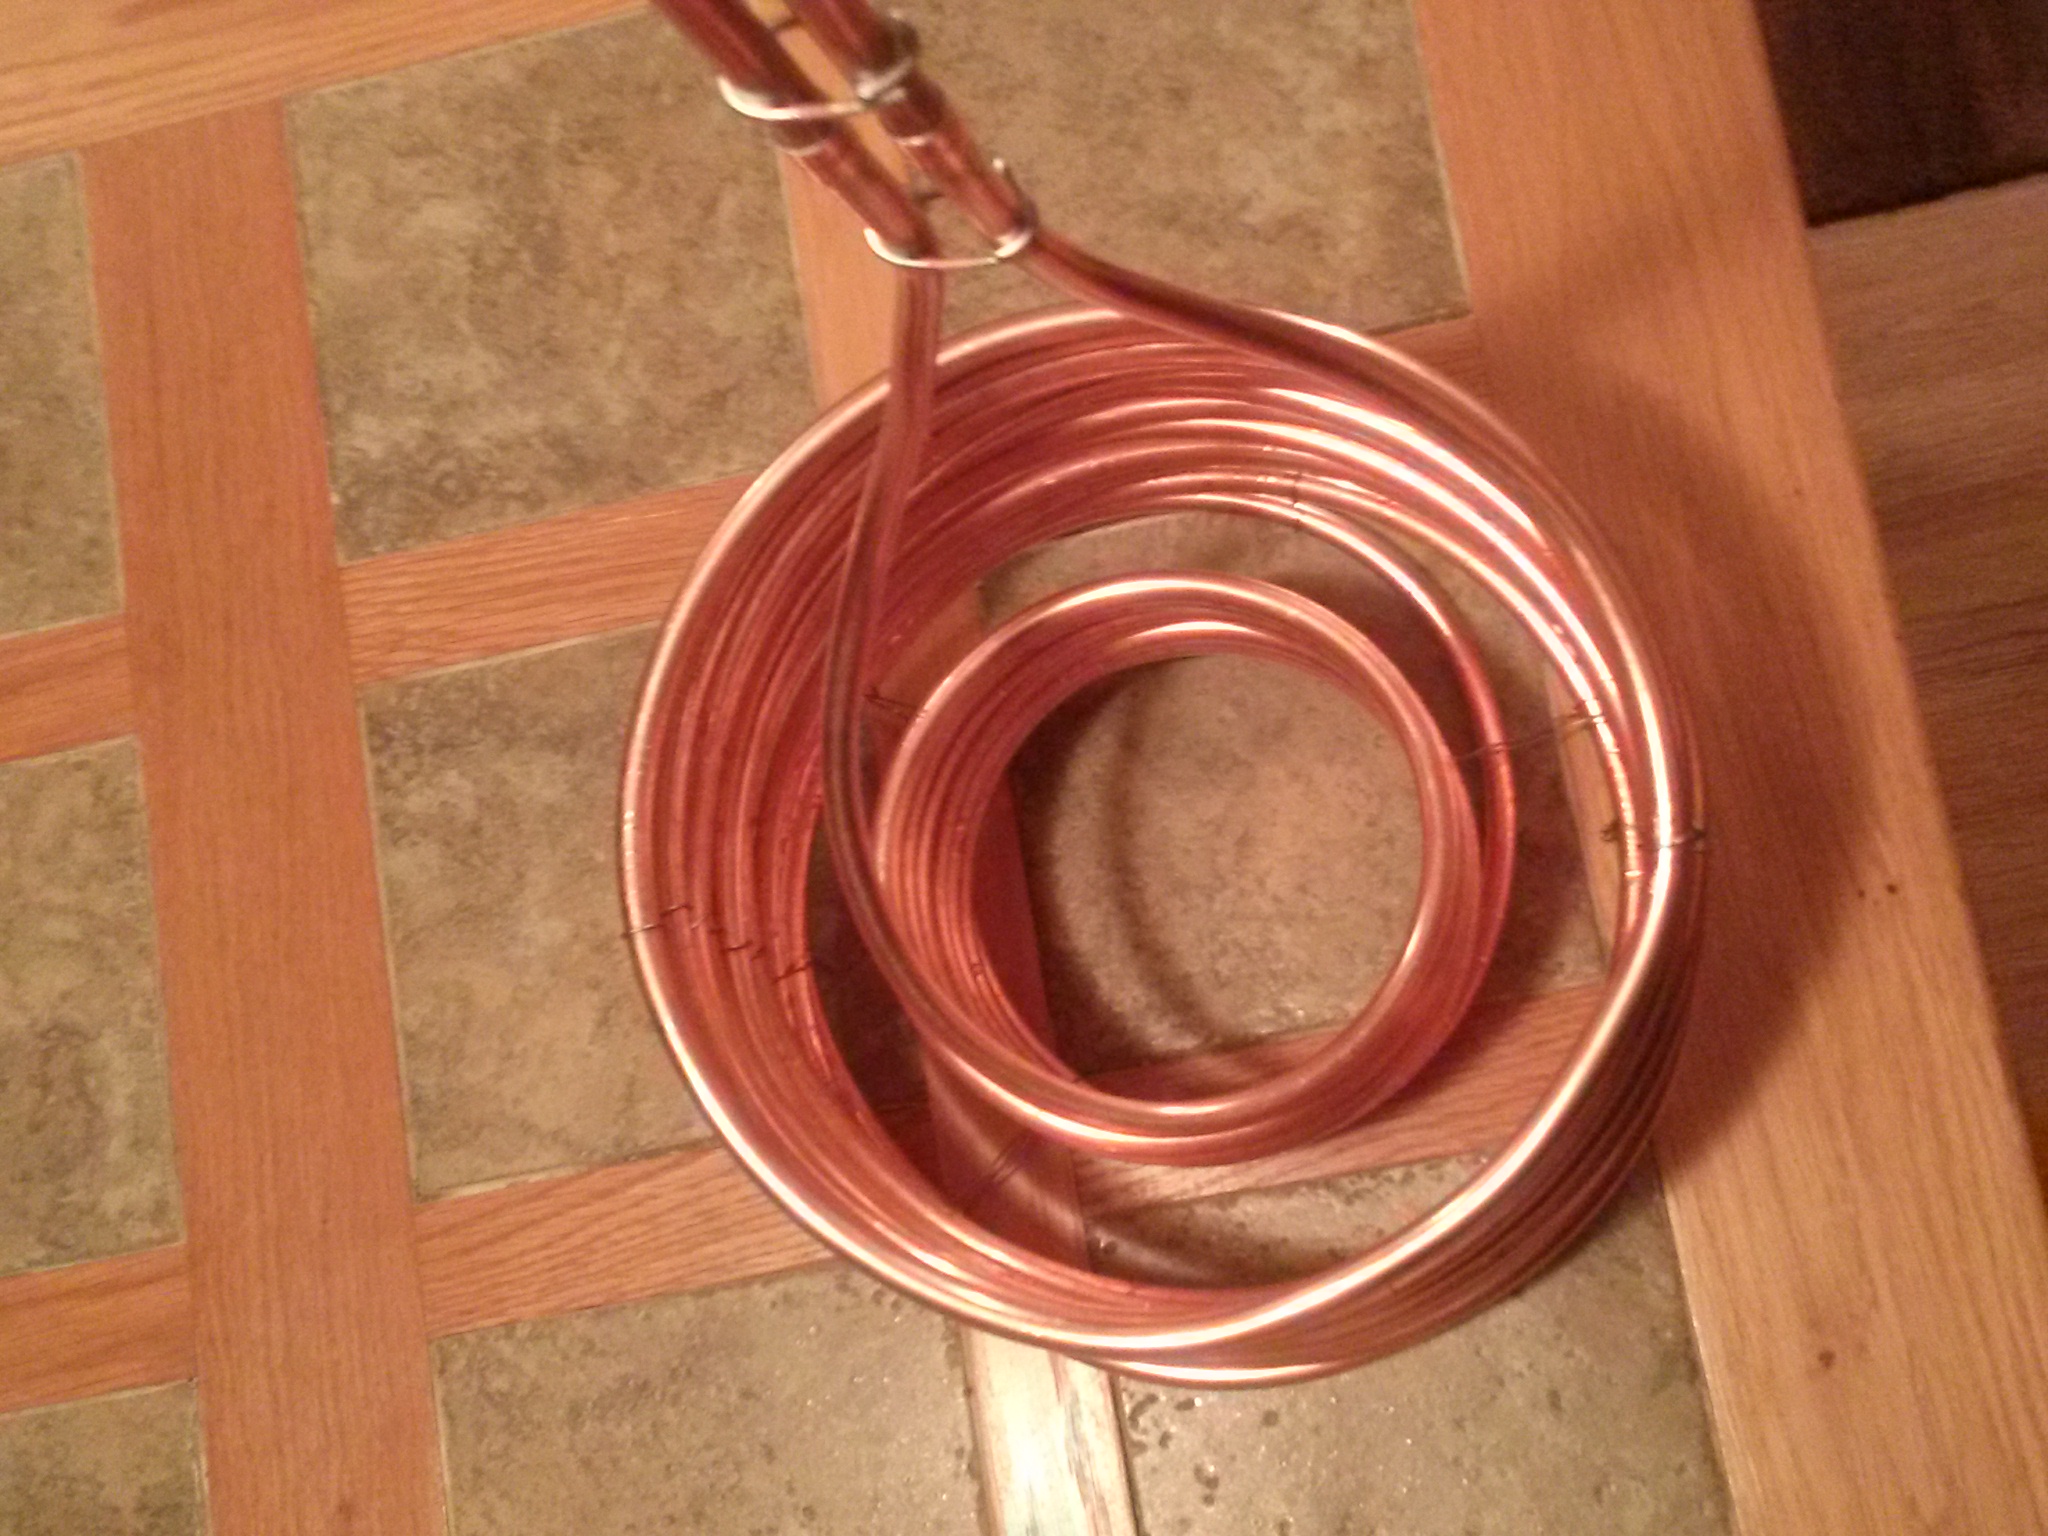
FWIW , this is the dual-coil DIY chiller I made from 50' of 3/8" tubing. I didn't branch off the coils like your design, just wound the outer coil downward, then the inner coil upward.


CAM00404.jpg
 
I think the flow will be restricted since the input is only one 3/8" pipe. This might not make it much better than a single 3/8" pipe.

I made one based on the jaded brewing hydra design (3 pipes, not 2). My input was a 1" copper tube and i used a cap on the other end with three holes drilled in to split it into the 3 pipes. After fitting the 3/8" pipes into the cap, the gaps were soldered to make it water tight. This way the flow isn't restricted.

It must have been a bear to make a hydra! I saw someone else had a DIY King Cobra and they said it took 7 hours! I am not sure what you mean when you say the input is a 3/8" pipe. Are you referring to the picture I posted or the one posted by MaxStout? I am planning on using 1/2" - 1" pipe for the inlet/outlet (depending on what fittings I can find), then splitting flow to the two separate 3/8" coils using t-fittings and reducers. I could be mistaken, but I thought the 1" reducers would actually increase the pressure/flow rate through the 3/8" pipe since the same volume from a 1" will be squeezed through 3/8" tubing. @MaxStout I like your setup, but I recently ordered a bernzomatic torch and solder kit, so I am pretty much locked into soldering. Plus, I like the idea of being able to attach a garden hose fitting to the inlet and maybe a barbed fitting to the outlet. Thoughts?
 
Here's the full view. Plenty of soldering.

Edit: I can get 10 gallons from boiling down to 70F in about 10 minutes with 55F tap water. It's better than a single coil as there is much greater surface area, and none of the wort is more than a few inches from any of the coils.

CAM00403.jpg
 
Ah I see, I was looking at the thumbnail of your pic so I couldn't see that the input was bigger. I thought it was all 3/8". Anyway, it was definitely a job. Total time spent was probably way more than 7 hours. I didn't do it all in one day. But I like building things so it was fun for me!

Your idea would work I think. The only reason I didn't do it that way is because they don't make (that I could find) splitters to go from 1 pipe to 3, so I had to make my own by drilling holes into a cap. It's ugly as hell but it works great!

Good luck!
 
For what it is worth, a restriction will increase velocity, but decrease flow rate and pressure. The energy needed to push through the smaller opening has to come from somewhere. It involves venturi effects, Bernoulli's principle, and some other fluid flow physics stuff.

1/2" feeding two 3/8" lines will flow well. 1/2" reduced to a single 3/8" will not work any better than 3/8" throughout.
 
...If anyone has a good design for a dual coil chiller, please feel free to post a link. ...

I went to a local plumbing/electrical supply store and got copper for about half of HD or Lowes prices. The small diameter copper wire I used to hold everything together came from some old fluorescent lighting fixtures. I stripped off the insulation and the bare wire was perfect for what I needed.

Here's some photos of the one I built. I got the general idea of the "ribcage" design from a discussion here on HBT, and modified it to suit my needs. It works really well, and was easier to build than I thought it would be.

The top tube makes a nice handle for getting it into and out of the kettle. The two T joints on the top tube are structural only, meaning I filed out the inside of the T's so the input/output pipes go straight through them. When it's all soldered and wired together it is a nice rigid structure.

IMG_20170630_192818_709.jpg IMG_20170630_192850_686.jpg IMG_20170701_105207_807.jpg
 
Giving up on this project. I can't solder and just ruined a bunch of copper pipe. I'm just going to return the coil I bought.
 
Last edited:
Soldering isn’t hard, it just takes patience. Make sure your joints are cleaned properly, fluxed, and that you let the joint heat properly before you add the solder. It should flow right into the joint.
 
Soldering isn’t hard, it just takes patience. Make sure your joints are cleaned properly, fluxed, and that you let the joint heat properly before you add the solder. It should flow right into the joint.
I did all of the above, but the solder either melted too quickly and dripped off or didnt melt enough. When i got it mostly done, I would try to do the final joint and the others would melt and the thing fell apart. It got to the point where everything was gloppy and I couldn't get anything to work. I am just gonna say f*** it and try to recoup as much of the money from this project as I can.
 
You can probably find some good youtube videos to help you learn to solder, or maybe you know someone who can show you. It's not hard once you know how to do it the first time.

Like Roland said, clean the joints (with sandpaper), and use soldering flux (required).

I heat one side of the joint with a torch, and when it is hot I touch the solder to the other side of the pipe. That way I know the whole joint has gotten hot enough. The solder will flow right into the fluxed area.
 
Giving up on this project. I can't solder and just ruined a bunch of copper pipe. I'm just going to return the coil I bought.
Whoa, there, SouthPhilly. This doesn't make any sense. Soldering copper is dead easy, you are somehow just missing some key factor, or it would work for you, too.

Maybe try this. Go to a plumber, offer to pay him or her to teach you how to solder copper. I'll bet you see where you are going wrong in 15 minutes or less. It's way easier than brewing beer. Good luck!
 
SouthPhilly-either you aren't getting the joints cleaned and fluxed properly, or you're applying too much heat.

The "cone" in the center of the flame is the hottest part of the flame. Hold the torch so that the cone is a half inch, or so, away from the joint. Hold the solder against the side of the joint opposite the flame. When the solder begins to flow into the joint, slowly pull the flame away. Keep some steel wool handy to wipe away the drips before they cool, for a nicer looking joint.

Soldering copper pipe requires about as much effort as breathing.
 
I hear you guys. I just talked to my stepdad who is a contractor and he explained to me what I was doing wrong. I was heating the pipe and fitting, as if I were trying to "weld" it. He explained that I should only be heating the fitting so that the solder will get sucked into the joint. I am going to shelve this plan for a couple weeks, then meet up with him and do it with his supervision. He said a similar thing to you all: this should be a lot easier than it was. I am gonna have him teach me how to do it, but will just use my single coil chiller until then. I was really frustrated this morning and wanted to wash my hands of the whole ordeal, but I am gonna give it another shot.
 
Get a few fittings and a bit of scrap tubing and practice. It isn't terribly hard to learn to sweat pipes. Clean the ends of the pipe and insides of fittings (where you want solder to bond) with some sandpaper. Just enough to roughen the surface and remove oxide. Brush on some plumber's soldering flux, and fit the parts together. Using a propane torch, heat the fitting, then touch the solder to the joint and let it melt in. Make sure you apply enough solder to fill the joint, but not so much that it drips all over.

Seriously, you can do this! Don't get discouraged. As someone else mentioned, check out some YouTube videos.
 
Thanks, guys. I will get this. After using nearly an entire roll of solder and destroying 15 dollars of 1/2" pipe and fittings, I was pretty discouraged. I didn't want to risk ruining the 50' of copper coil, so I panicked. I will definitely use the scrap from my experience today to get the practice I need to do this right the next time.
 
If you have multiple joints close together, like multiple adapters cascaded to reduce size, it can be frustrating. What I do is prep all the joints, slide them all together, and solder them all in quick succession. It does not take long at all to heat the 2nd and subsequent joints, because of the heat from the first joint.

Nothing is better than seeing it demonstrated first hand. My uncle taught me when I was a kid, and I still remember it.

Copper is great, because if you need to you can heat the joint, pull it apart, clean it up and try again. But once you get the hang of it, that will be a rare occurrence.

So you are saying I can reuse all the stuff I trashed today by reheating the joints and cleaning them up? I was under the impression that you really only get 1 or 2 tries before it is shot.
 
It's all about the prep, the underlying copper isn't going anywhere - you could literally use the same pieces in an "Intro To Soldering" course for years...

Cheers!
 
Sounds like you may be overheating the work and that’s why nothing sticks.
Are you using propane?
Mapp is too hot.
Get the propane flame to be about a 1” pencil tip.

  • Clean joints real good with sand paper (plumbers tape)
  • Flux
  • Dry fit the joint
  • Heat the fitting until you see the flame just barely turn green
  • Remove heat and touch with solder
  • If it’s good, push solder into joint all the way around the circumference.
  • If not, apply more heat
 
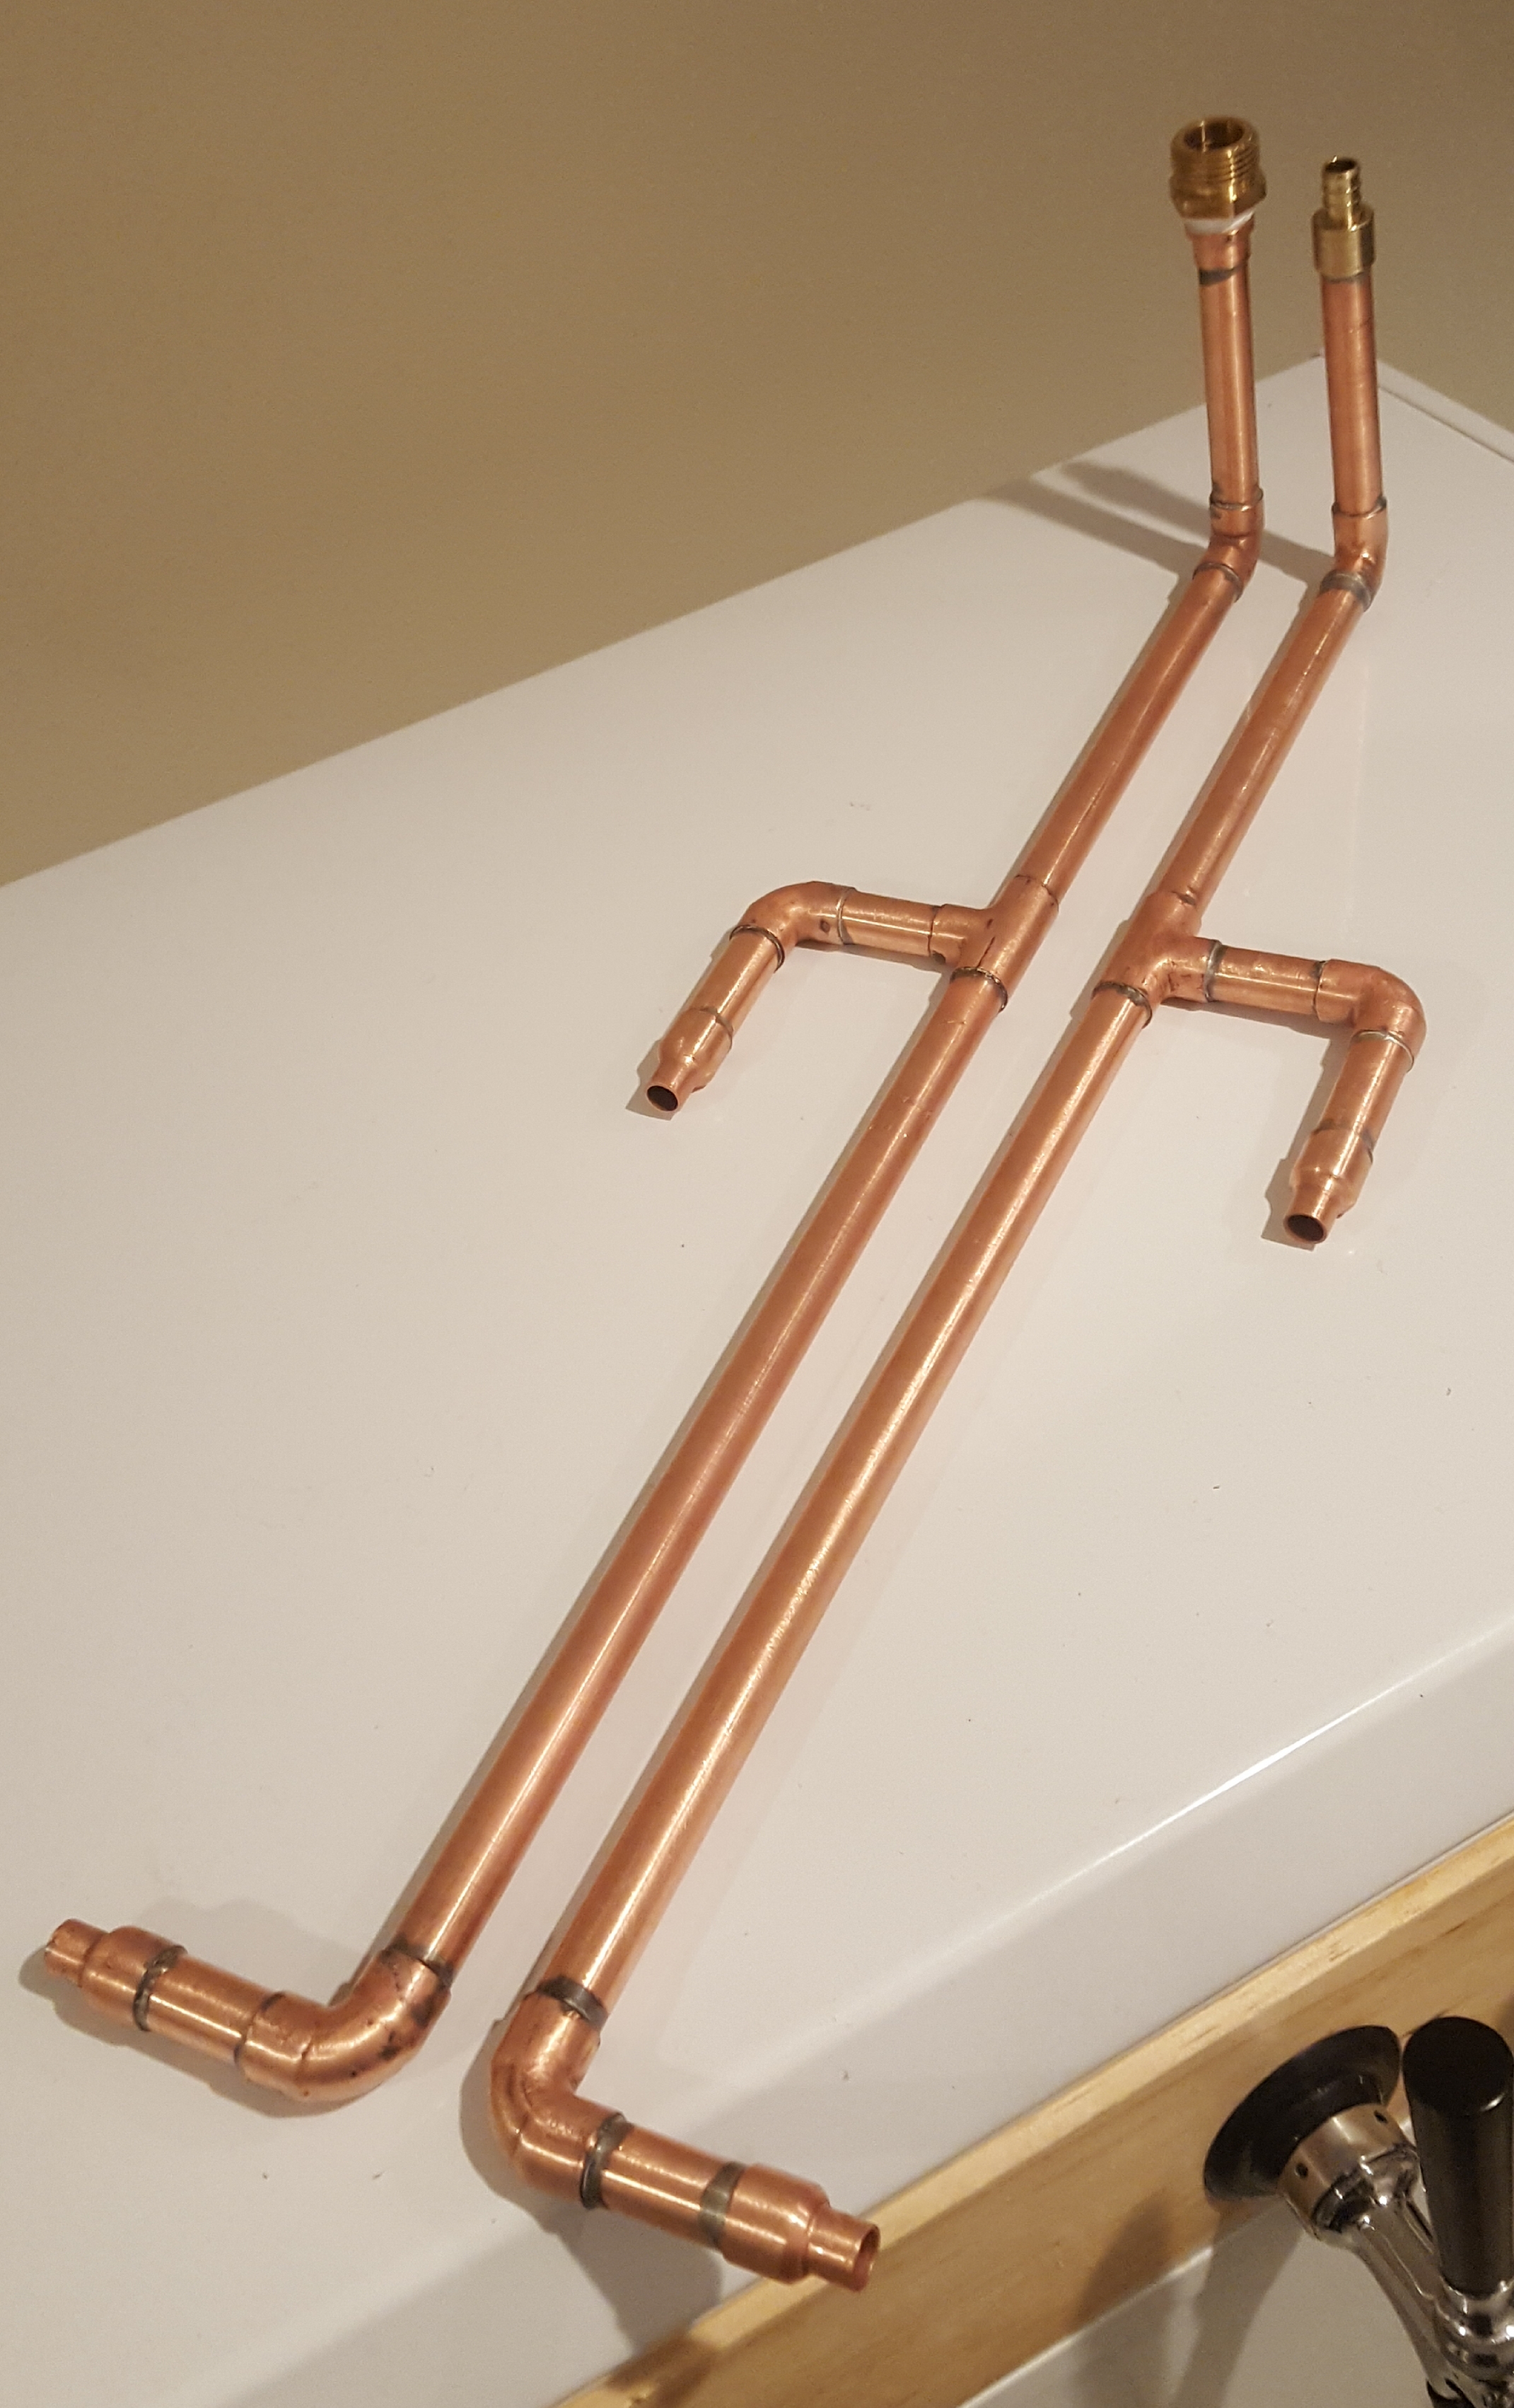
FINALLY got the backbone made. Now I need to find 50' of 3/8" ACR coil on the cheap. Y'all say a plumbing or HVAC supply shop would be a good bet? Does anyone have a good way to attach these together? Do they make copper straps with a wingnut to tighten them together? I want to attach the two backbone pipes at the top and bottom to give this some support. This was made with all the buggered up pipe from before. A little advice from my stepdad and the soldering was a breeze. I ended up using sandpaper and an acid soak to get it sparkly. The soldering could be a little neater, but it's not bad for my first successful try. The hose fitting is for water in, and the barbed fitting is for outflow. So i guess my questions to you are:
  1. Where to get cheap ACR tubing/ is $44 a good price for 50' of 3/8" tubing?
  2. How to bind the two pipes together to increase overall sturdiness and stability.
20180308_150134.jpg
 
You did a fine job, that's actually too neat for what passes for pro work around here :mug:

If you're handy with a round file you can cut a short piece of the tubing and file the ends to "cope" to the two risers, then solder it in place.
I did this in two places between the risers on my old Cu IC (given away) and it held for years....

Cheers!
 
...This was made with all the buggered up pipe from before...

There ya go, it looks good!

  1. Where to get cheap ACR tubing/ is $44 a good price for 50' of 3/8" tubing?
  2. How to bind the two pipes together to increase overall sturdiness and stability.

That seems like a decent price, certainly less than what the big box stores will try to charge you.

To brace the two pipes together, you can use a hacksaw to split two T's, then join them together with a short piece of pipe. This brace will give you a lot of surface area for your solder, and should be quite strong. Like this:
Copper H Brace.JPG
 
Before I saw these posts, I took two 4" pieces of scrap pipe and hammered them flat. I then bent the flat pieces to fit as a brace and soldered one above and below the T's. It works okay, but probably not as pretty as it could be.
 
I got a coil of 1/2 od and 5/8 od I would let go on the cheap.

Flying Monday night, was thinking beers in South Philly preflight, could meet up somewhere

Also got a copper chillzilla that I could give you a good price on.
 
I got a coil of 1/2 od and 5/8 od I would let go on the cheap.

Flying Monday night, was thinking beers in South Philly preflight, could meet up somewhere

Also got a copper chillzilla that I could give you a good price on.

Aw man! Wish I saw this earlier! I just ordered 50' of 3/8" coil.
 
You want the combined flow capacity of both of your coils to match (or be close to) the capacity of your main feed/drain pipes, so 3/8" is good for your coils.
 
I went to a local plumbing/electrical supply store and got copper for about half of HD or Lowes prices. The small diameter copper wire I used to hold everything together came from some old fluorescent lighting fixtures. I stripped off the insulation and the bare wire was perfect for what I needed.

Here's some photos of the one I built. I got the general idea of the "ribcage" design from a discussion here on HBT, and modified it to suit my needs. It works really well, and was easier to build than I thought it would be.

The top tube makes a nice handle for getting it into and out of the kettle. The two T joints on the top tube are structural only, meaning I filed out the inside of the T's so the input/output pipes go straight through them. When it's all soldered and wired together it is a nice rigid structure.

View attachment 558868 View attachment 558869 View attachment 558870

That's beautiful work right there...I like the extra structural components you added.
 
That's beautiful work right there...I like the extra structural components you added.

Yeah that's some clean work. I hope my finished product looks half as good. Does anyone have a good way to get tinning flux residue off? I wiped it down well with rubbing alcohol, but I really don't want any of that garbage in my next batch of beer.
 
Use some citrus cleaner and hot water. Rinse thoroughly.

Thanks for the compliments guys!
 
Finally finished the beast (that's what I am calling this monster). The one problem I am running into is how to get all of the water out of it after using it. It is heavy as H3LL when it is full of water. It's not as pretty as I had hoped, but it doesn't leak and gets quite cold with tap water flowing through it. I will be brewing probably this week, so I will get to try it out, so I want to find a way to properly clean the exterior before using it, so I don't end up with a beer full of flux. I can't use OxyClean/TSP to soak it because my brew kettle is aluminum. Any thoughts?
chillerbeast.jpg
 
Considering you were gonna bail not long ago that's a fantastic outcome. Nicely done :mug:

Assuming you used water soluble lead-free flux, some dishwashing detergent and a fresh Scotchbrite pad ought to work wonders...

Cheers!
 
Finally finished the beast (that's what I am calling this monster). The one problem I am running into is how to get all of the water out of it after using it. It is heavy as H3LL when it is full of water. It's not as pretty as I had hoped, but it doesn't leak and gets quite cold with tap water flowing through it. I will be brewing probably this week, so I will get to try it out, so I want to find a way to properly clean the exterior before using it, so I don't end up with a beer full of flux. I can't use OxyClean/TSP to soak it because my brew kettle is aluminum. Any thoughts?
View attachment 562468
That looks really nice! You can usually drain it using a siphon, if you keep the hose that flows the waste water below the chiller and disconnect the feed hose it should siphon most of tje water out. Thats how I drain my 50' IC.

As far as cleaning maybe just boil it with some dish soap the a rinse with hot water or reboil with just plain water.
 
Finally finished the beast (that's what I am calling this monster). The one problem I am running into is how to get all of the water out of it after using it. It is heavy as H3LL when it is full of water. It's not as pretty as I had hoped, but it doesn't leak and gets quite cold with tap water flowing through it. I will be brewing probably this week, so I will get to try it out, so I want to find a way to properly clean the exterior before using it, so I don't end up with a beer full of flux. I can't use OxyClean/TSP to soak it because my brew kettle is aluminum. Any thoughts?

Looks good man, way to overcome! As far as draining is concerned since you have inlets both top and bottom gravity won't work with you too well. If you have an air compressor, I would tip it over its side and feed it as much air as you can. As a tip, and may you already know this... be sure and have your inlet and outlet hoses connected before you drop it into your boiling wort. It will erupt and spew hot water and steam either onto you or into your wort...
 
Thanks guys! I really appreciate your encouragement early in the process. I cannot believe I was going to give up!!! Soldering really is as easy as you said it was. Threads like this are the reason I love this forum. You all saved my project when I was going to give it up and ditch it all as scrap metal! CHEERS! :mug:
 
Back
Top