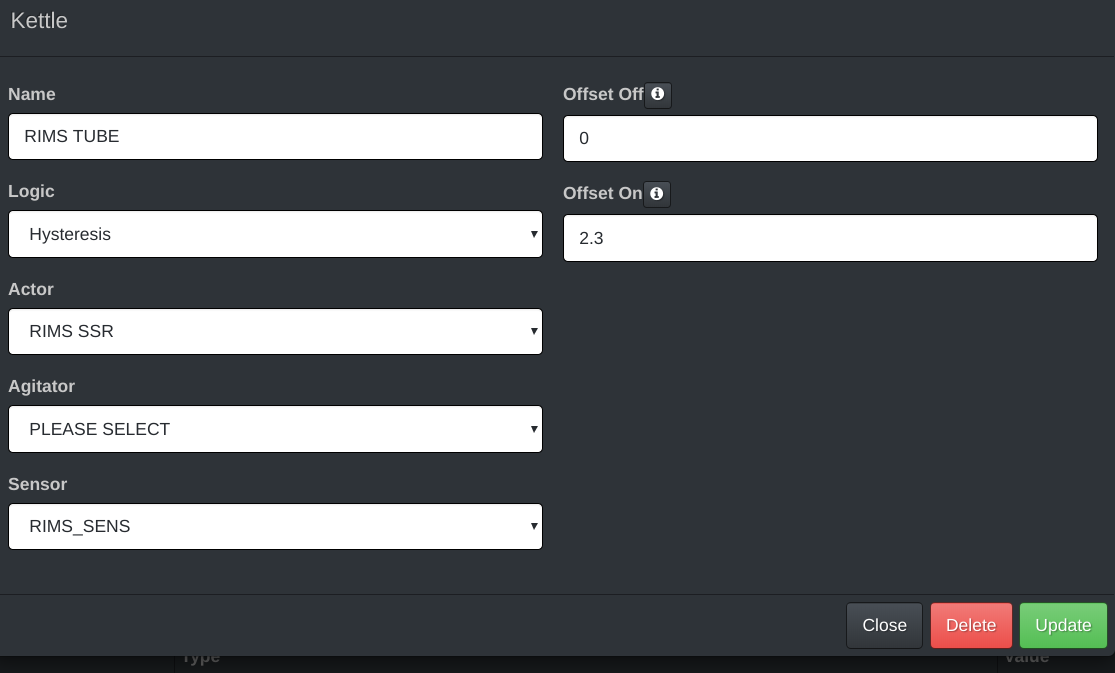
Hi,
I have 3 of these stainless temp probes from Amazon.
They are all 3 tied together via an expansion board with one 4.7K across them between 5v and ground. I assume that installation is OK from what I have read.
At first they all measured within .5 F of each other... now they jump all around and are not consitent. Even when one of them measures 2 degrees below the real temp and I adjust for it, the probe starts measuring 4 degrees below temp....
https://www.amazon.com/gp/product/B01MY8U394/ref=ppx_yo_dt_b_asin_image_o06_s00?ie=UTF8&psc=1
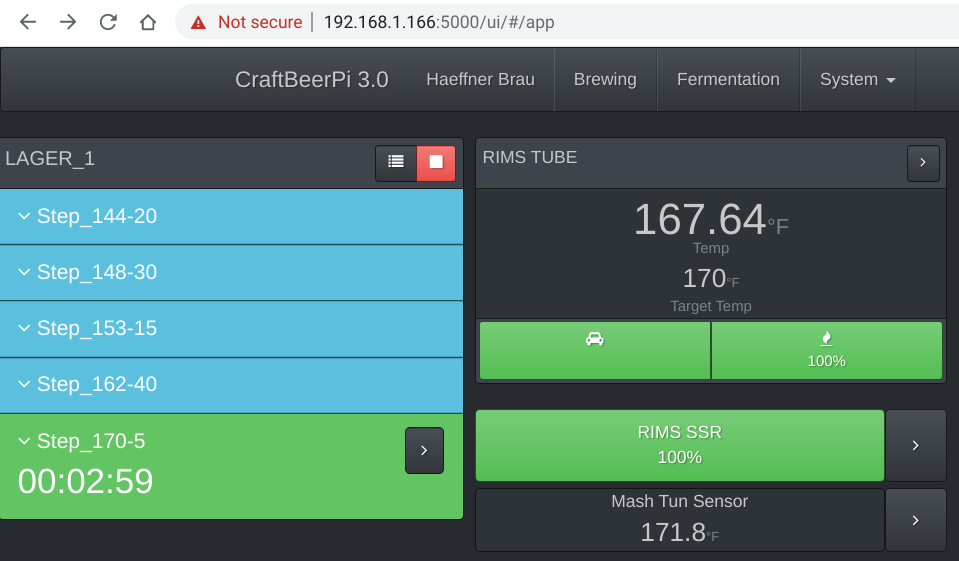
I am running a rims tube and need an accurate temp probe.
Any suggestions on probes?
thanks haeffnkr


![Craft A Brew - Safale S-04 Dry Yeast - Fermentis - English Ale Dry Yeast - For English and American Ales and Hard Apple Ciders - Ingredients for Home Brewing - Beer Making Supplies - [1 Pack]](https://m.media-amazon.com/images/I/41fVGNh6JfL._SL500_.jpg)