• Please visit and share your knowledge at our sister communities:
  • If you have not, please join our official Homebrewing Facebook Group!

    Homebrewing Facebook Group

Cooling in Apartment Homebrewing

Homebrew Talk

Help Support Homebrew Talk:

This site may earn a commission from merchant affiliate links, including eBay, Amazon, and others.

fusa

Senior Member
Joined
Feb 18, 2010
Messages
392
Reaction score
55
Location
Blacksburg
I recently moved to a new apartment. Previously I would remove the aerator from the faucet and connect a male quick disconnect. I would connect the immersion chiller to this to cool and also fill my brewing vessel. The faucet is much nicer, but does not have the regular aerator to replace with a disconnect.

What is another way to cool after a boil? I have been suggested using a pump, but not sure if that would be the best method. I have both an immersion chiller and also have a counter-flow chiller. I would brefer not to top up with cold water. This seems to increase the risk of contamination.
 
If you have to have the "best" method, then you might find yourself stymied at what to do for a long time or that the "best" method involves some really ridiculous amounts of cash and engineering.

I use a simple copper coil immersion chiller and during the summer when the water coming out of the tap is higher than the 68°F I'm trying to chill too, I just use a simple submersible aquarium water pump to pump ice water through it from a really big kettle. When the temp of the water coming out of the chiller gets cool enough I just let it recirculate back through the water bath.

Are there better ways? Perhaps and likely, but this is the easiest, simplest and least expensive for me since I already had the rolls of copper tubing to make my own chiller and the pump from a aquarium we use to have.
 
I'm in a similar situation, where my fancy faucet can't accept any kind of screw-on adaptor. I use a small fountain pump with a wort chiller, like hotbeer does. It generally works well for me.
 
Does the faucet have a pull-down sprayer? If so it is usually very easy to unscrew the head and you can attach at that point. (The head is effectively just a big aerator).
 
Does the faucet have a pull-down sprayer? If so it is usually very easy to unscrew the head and you can attach at that point. (The head is effectively just a big aerator).
Yes it does have a pull down sprayer. I'll check to see if I can unscrew it. Thanks.
 
Yes it does have a pull down sprayer. I'll check to see if I can unscrew it. Thanks.


be sure to turn off the shut off under the sink before you do that, which would make it redundant not just to hook up to them...you'd only have turn one off then!
 
Does the faucet have a pull-down sprayer? If so it is usually very easy to unscrew the head and you can attach at that point. (The head is effectively just a big aerator).
Do you have an idea what the connection to a pull down sprayer would be? I'm thinking of using a plastic connection to a typical metal disconnect. So I screw the two plastic pieces together for each use. I don't want to thread a metal disconnect to plastic every time I brew. Guaranteed to strip at some point.
 
Some spray heads are easy to connect to, some are notoriously difficult and brand specific. Just have to have a look. Ideally pull it out from the faucet and see what screws onto the back side. Next option is likely an adapter under the sink to where the lines go.
 
i've got a HC version of those little pump, i have to put my water bucket on the table 12" bellow the top to even get flow....

the other one, it needs to be primed, other then that? not sure, easier to clean then a sump i'd imagine....
 
Just depends on what your sprayer looks like and the hose leading up to it. Some connect at the spray head, some are a solid piece all the way back and under the sink. Well, not a solid piece of course, but an assembly made with parts you would not call user replaceable. Post up a picture if in doubt.
 
i know it's an apartement, but could you just take the sprayer off, and run a new hose with a permentant quick dissconet you could put the spray back on, if you move out?
 
Do you have a dishwasher? You possibly can get a t fitting and come off that line. Put in a t with a valve... disconnect line when you move, leave t in place shut off....
 
Do you have an idea what the connection to a pull down sprayer would be? I'm thinking of using a plastic connection to a typical metal disconnect. So I screw the two plastic pieces together for each use. I don't want to thread a metal disconnect to plastic every time I brew. Guaranteed to strip at some point.

First thing to try is see how easy/difficult it is to remove the head.

If it is a PITA or otherwise annoying you might want to come up with a different solution.
If it is easy, unscrew it and bring it and your metal disconnect fitting to a hardware store and look for a plastic piece that will join the two.

That way you will only be connecting plastic to plastic yet still be able to user your disconnect.
 
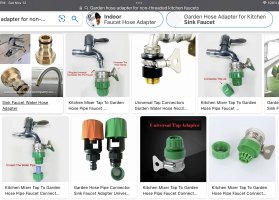
There are adapters out there for faucets without threads. I did some
looking when I was shopping for a new kitchen faucet but ended buying a threaded one.
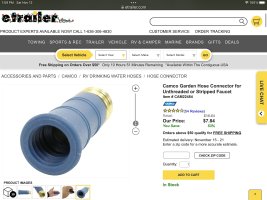
CE72C101-115E-4EFC-B2E9-5F4BBCF193FC.jpeg392BAB4D-DAAF-4AE1-97FD-9BE8A8B306C0.jpeg
 
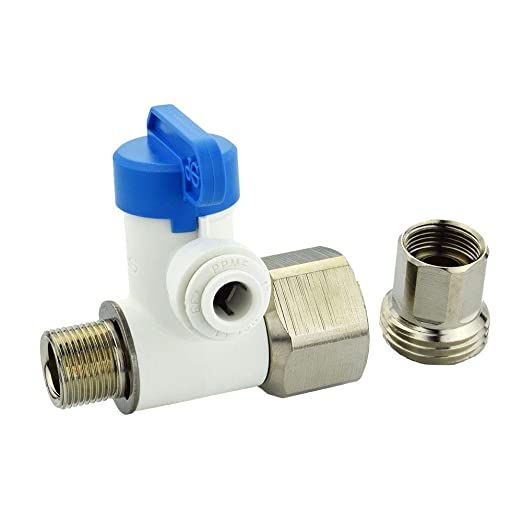
@fusa if the faucet thing doesnt work out this is what i did back when i had the same problem. you shut off the water line at the valve. unscrew the faucet supply hose, and then put this baby on. then your faucet supply hose goes on top of this guy and you're set to go. when its time to chill you just pop in some tubing and the blue handle controls the water for your chilling. you gotta assemble it once, and then you're done. easy peasy.

John Guest ASVPP5LF Angle Stop Adapter Valve, 1/2" x 3/8" x 1/4" OD: Amazon.com: Tools & Home Improvement
61BfftxMOKL._SX522_.jpg

they also make them with regular plumbing oriented outlets instead of the push connect. cheaper too. but then you gotta figure out total cost as you might need an adapter from 3/8 to 1/2 to GH or whatever. or you just just leave a 3/8npt x hose barb fitting on it, and you'd just have to pop your tube on and tighten a clamp.
 
I used to connect my immersion chiller by removing the aerator in my faucet...then I changed out the faucet for a model that does not have a removable aerator. I am sure there is some way to unscrew the spray and adapt that, but the connections vary by manufacturer.

I am using this $25 pump. I just hooked a small section of a garden hose to the barb on the pump, then connect my immersion chiller to that end.
https://a.co/gde7L37
A big benefit is that I can use tap water to cool my wort down to 90F to 100F, then switch over to circulating ice water to get fully down to pitching temps. In the summer my tap water is around 75F, so there was no way to get my wort down to 65F.

I have also used the pump to circulate cleaner through my tap lines and other transfer hoses. Overall it was one of the best inexpensive additions to my brewing equipment.
 
Yes it does have a pull down sprayer. I'll check to see if I can unscrew it. Thanks.
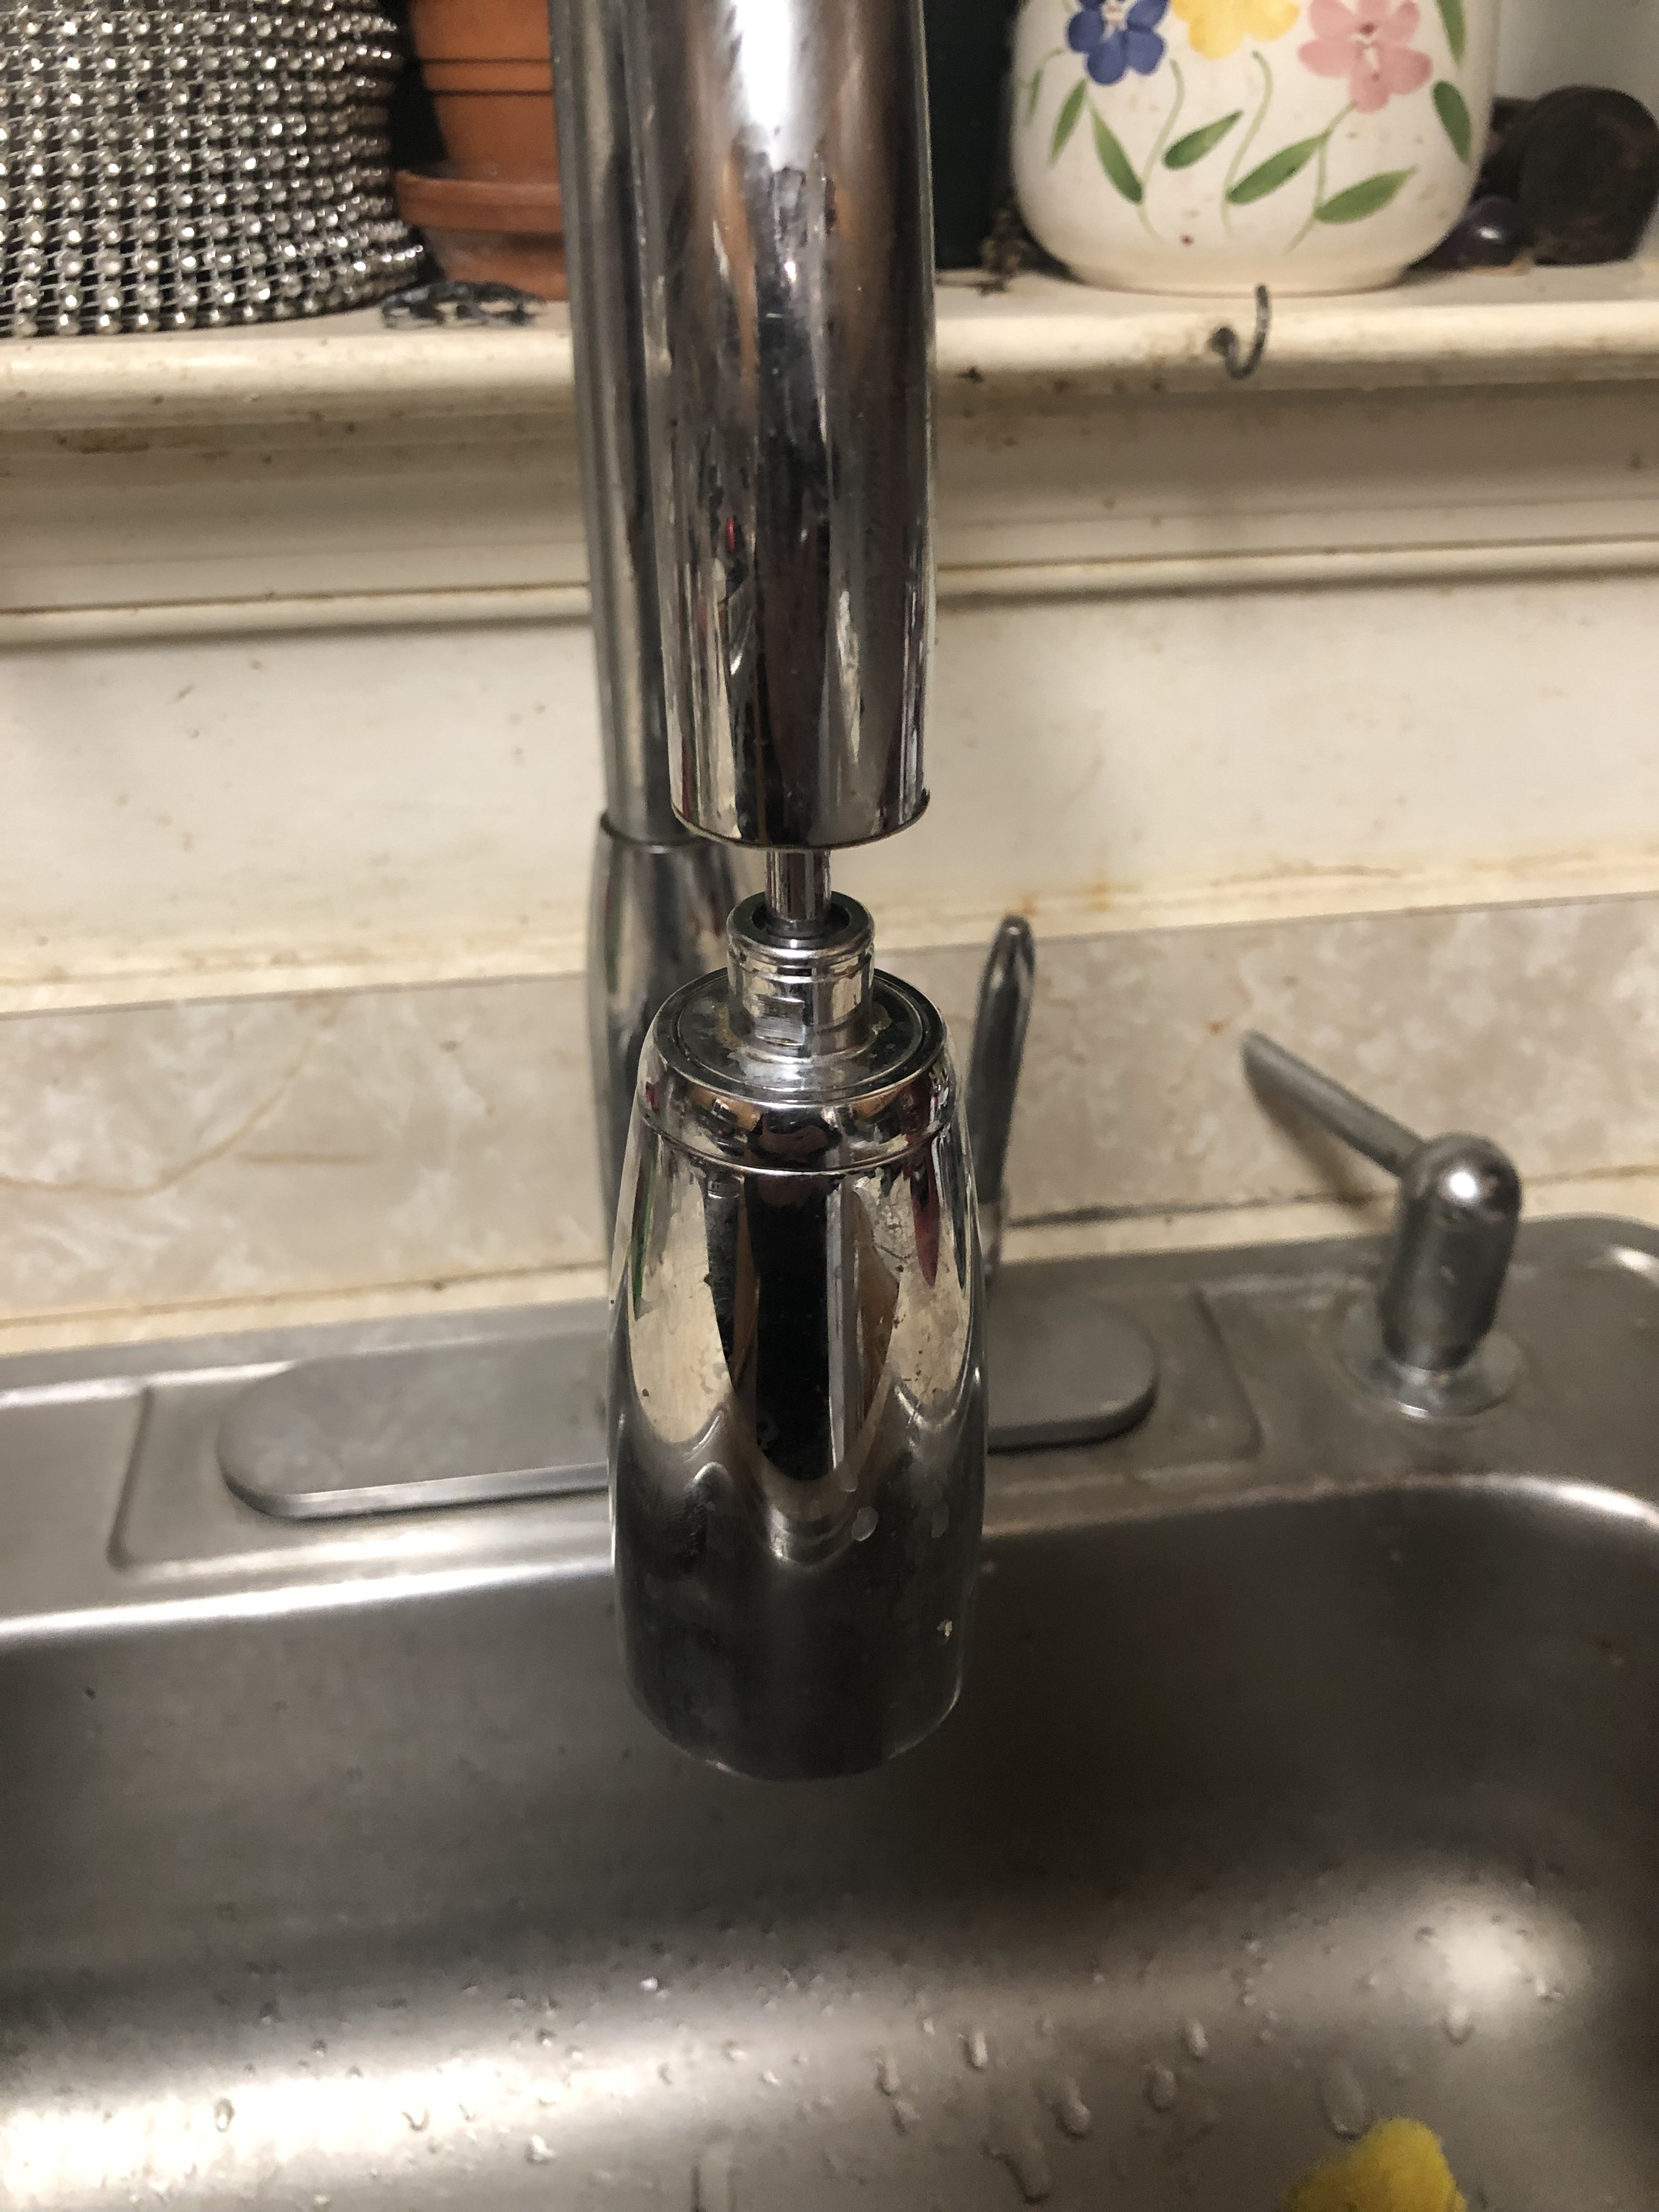
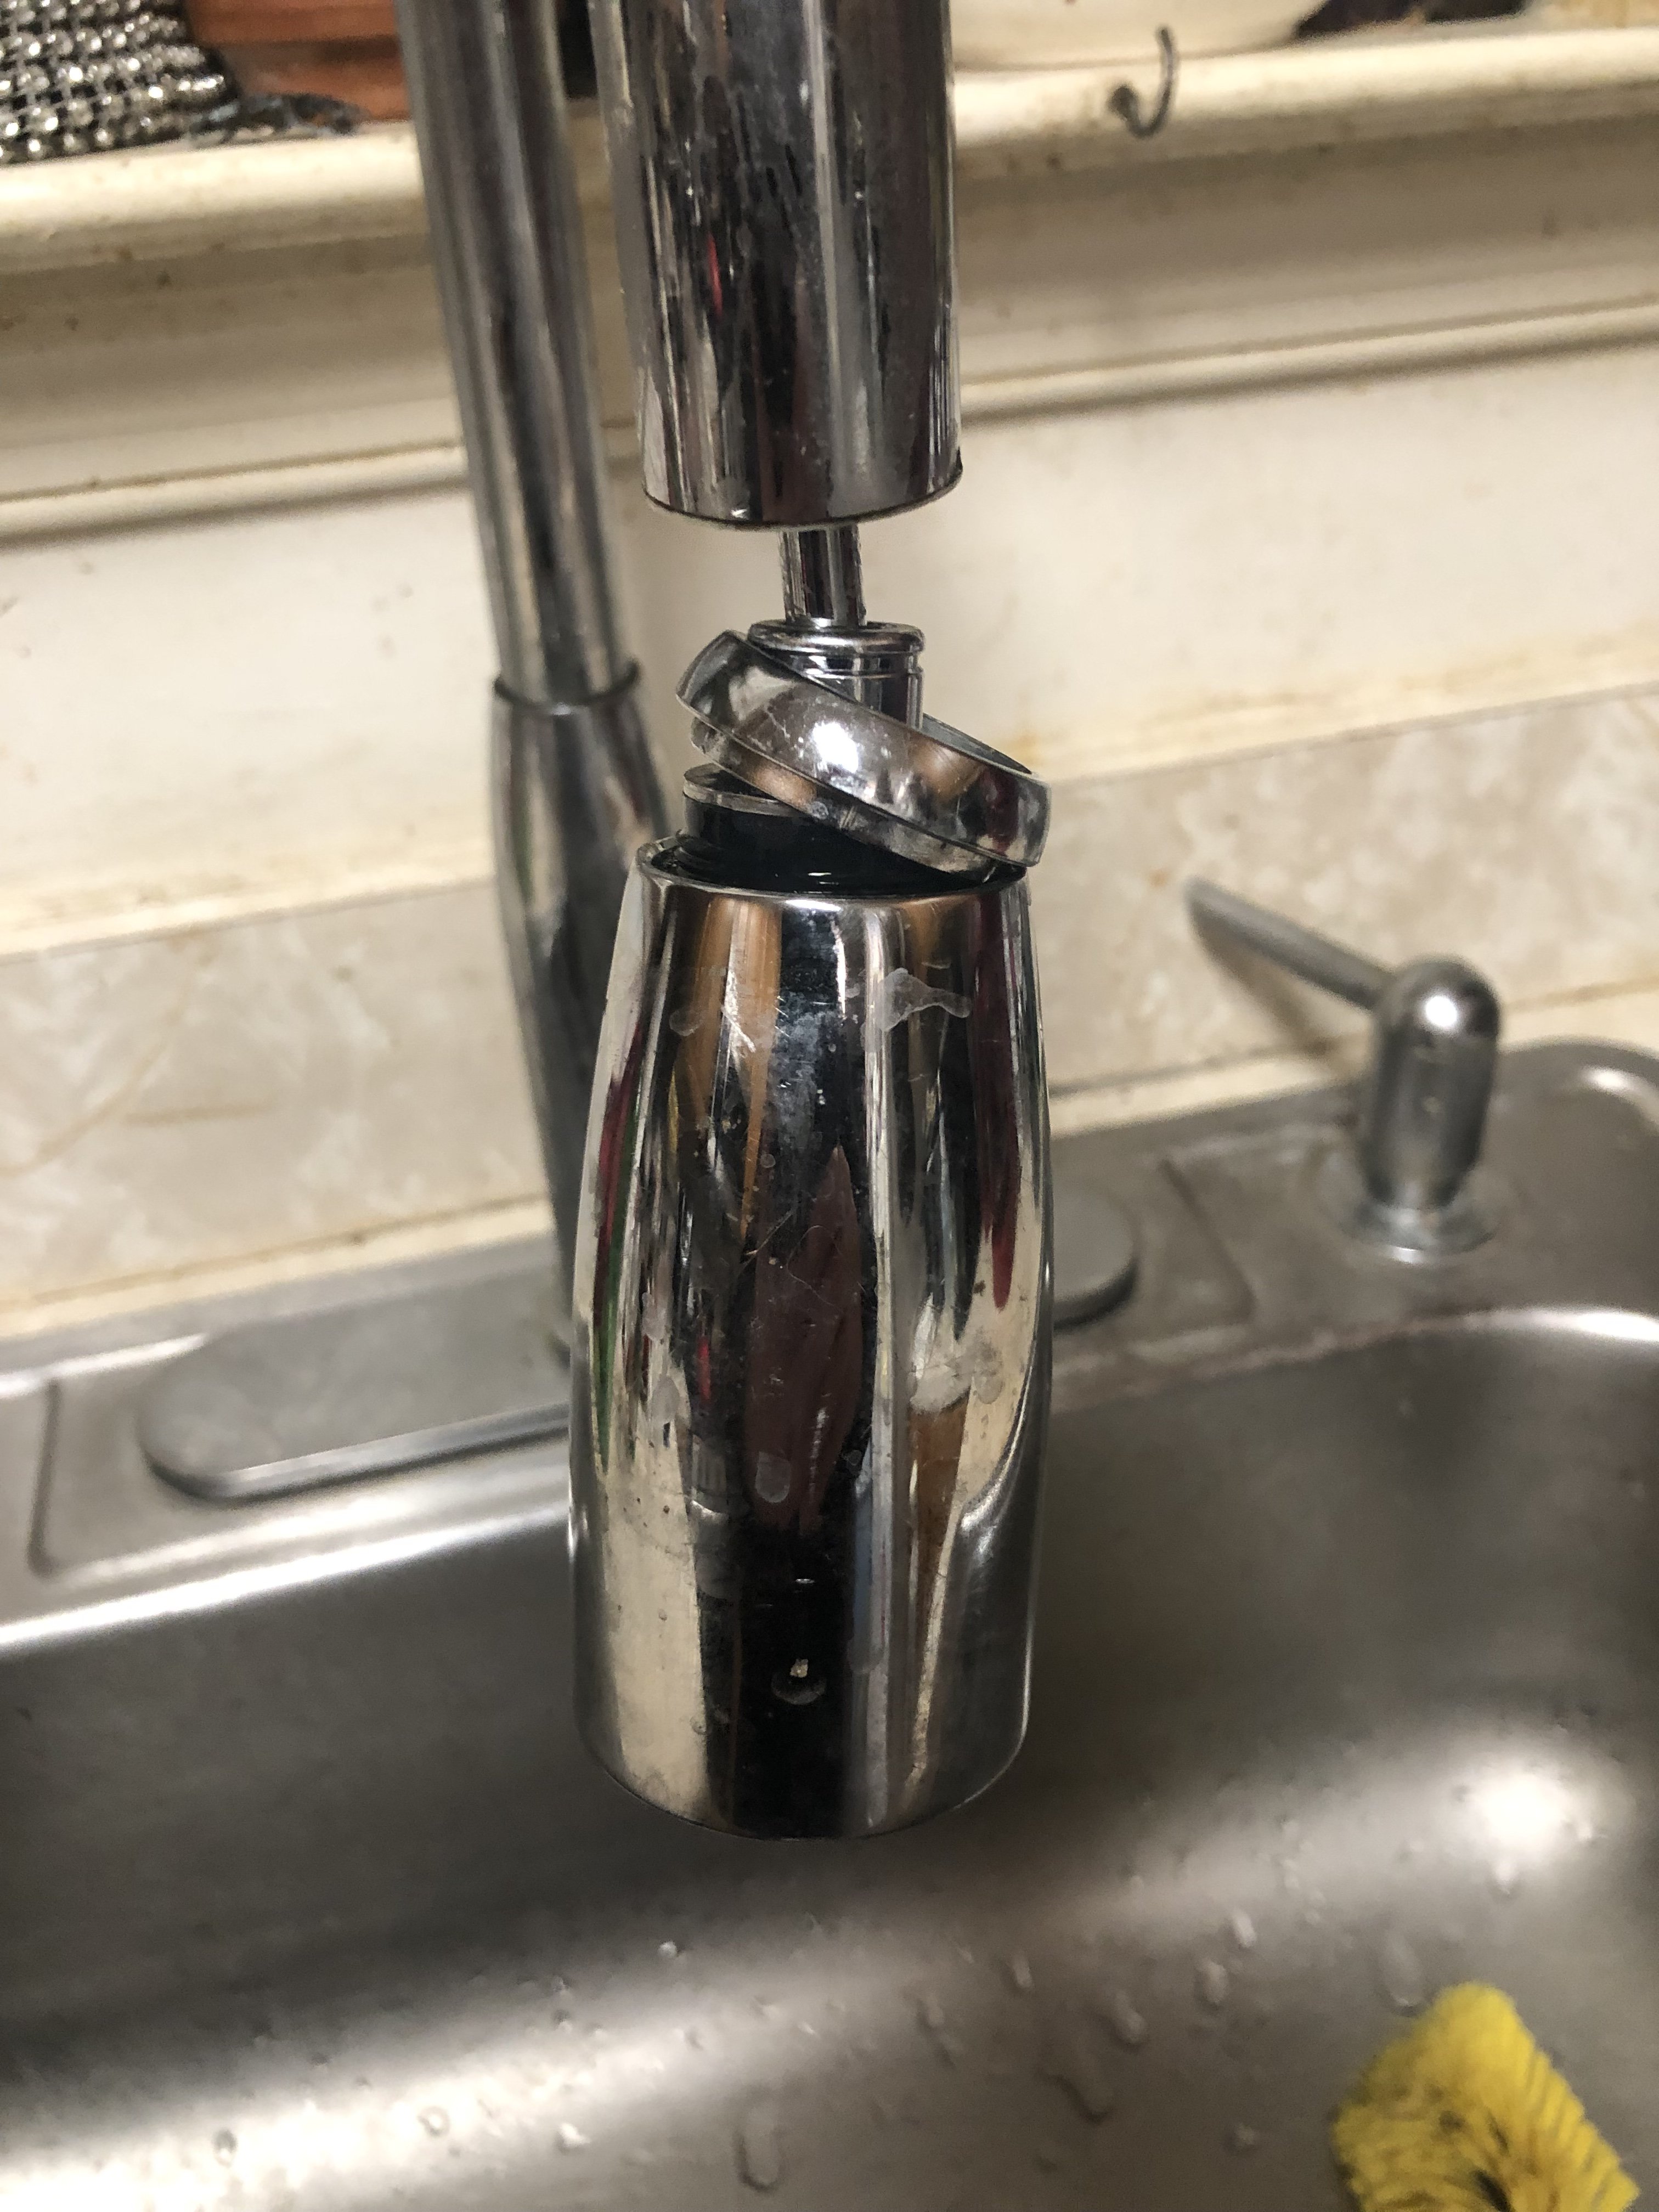
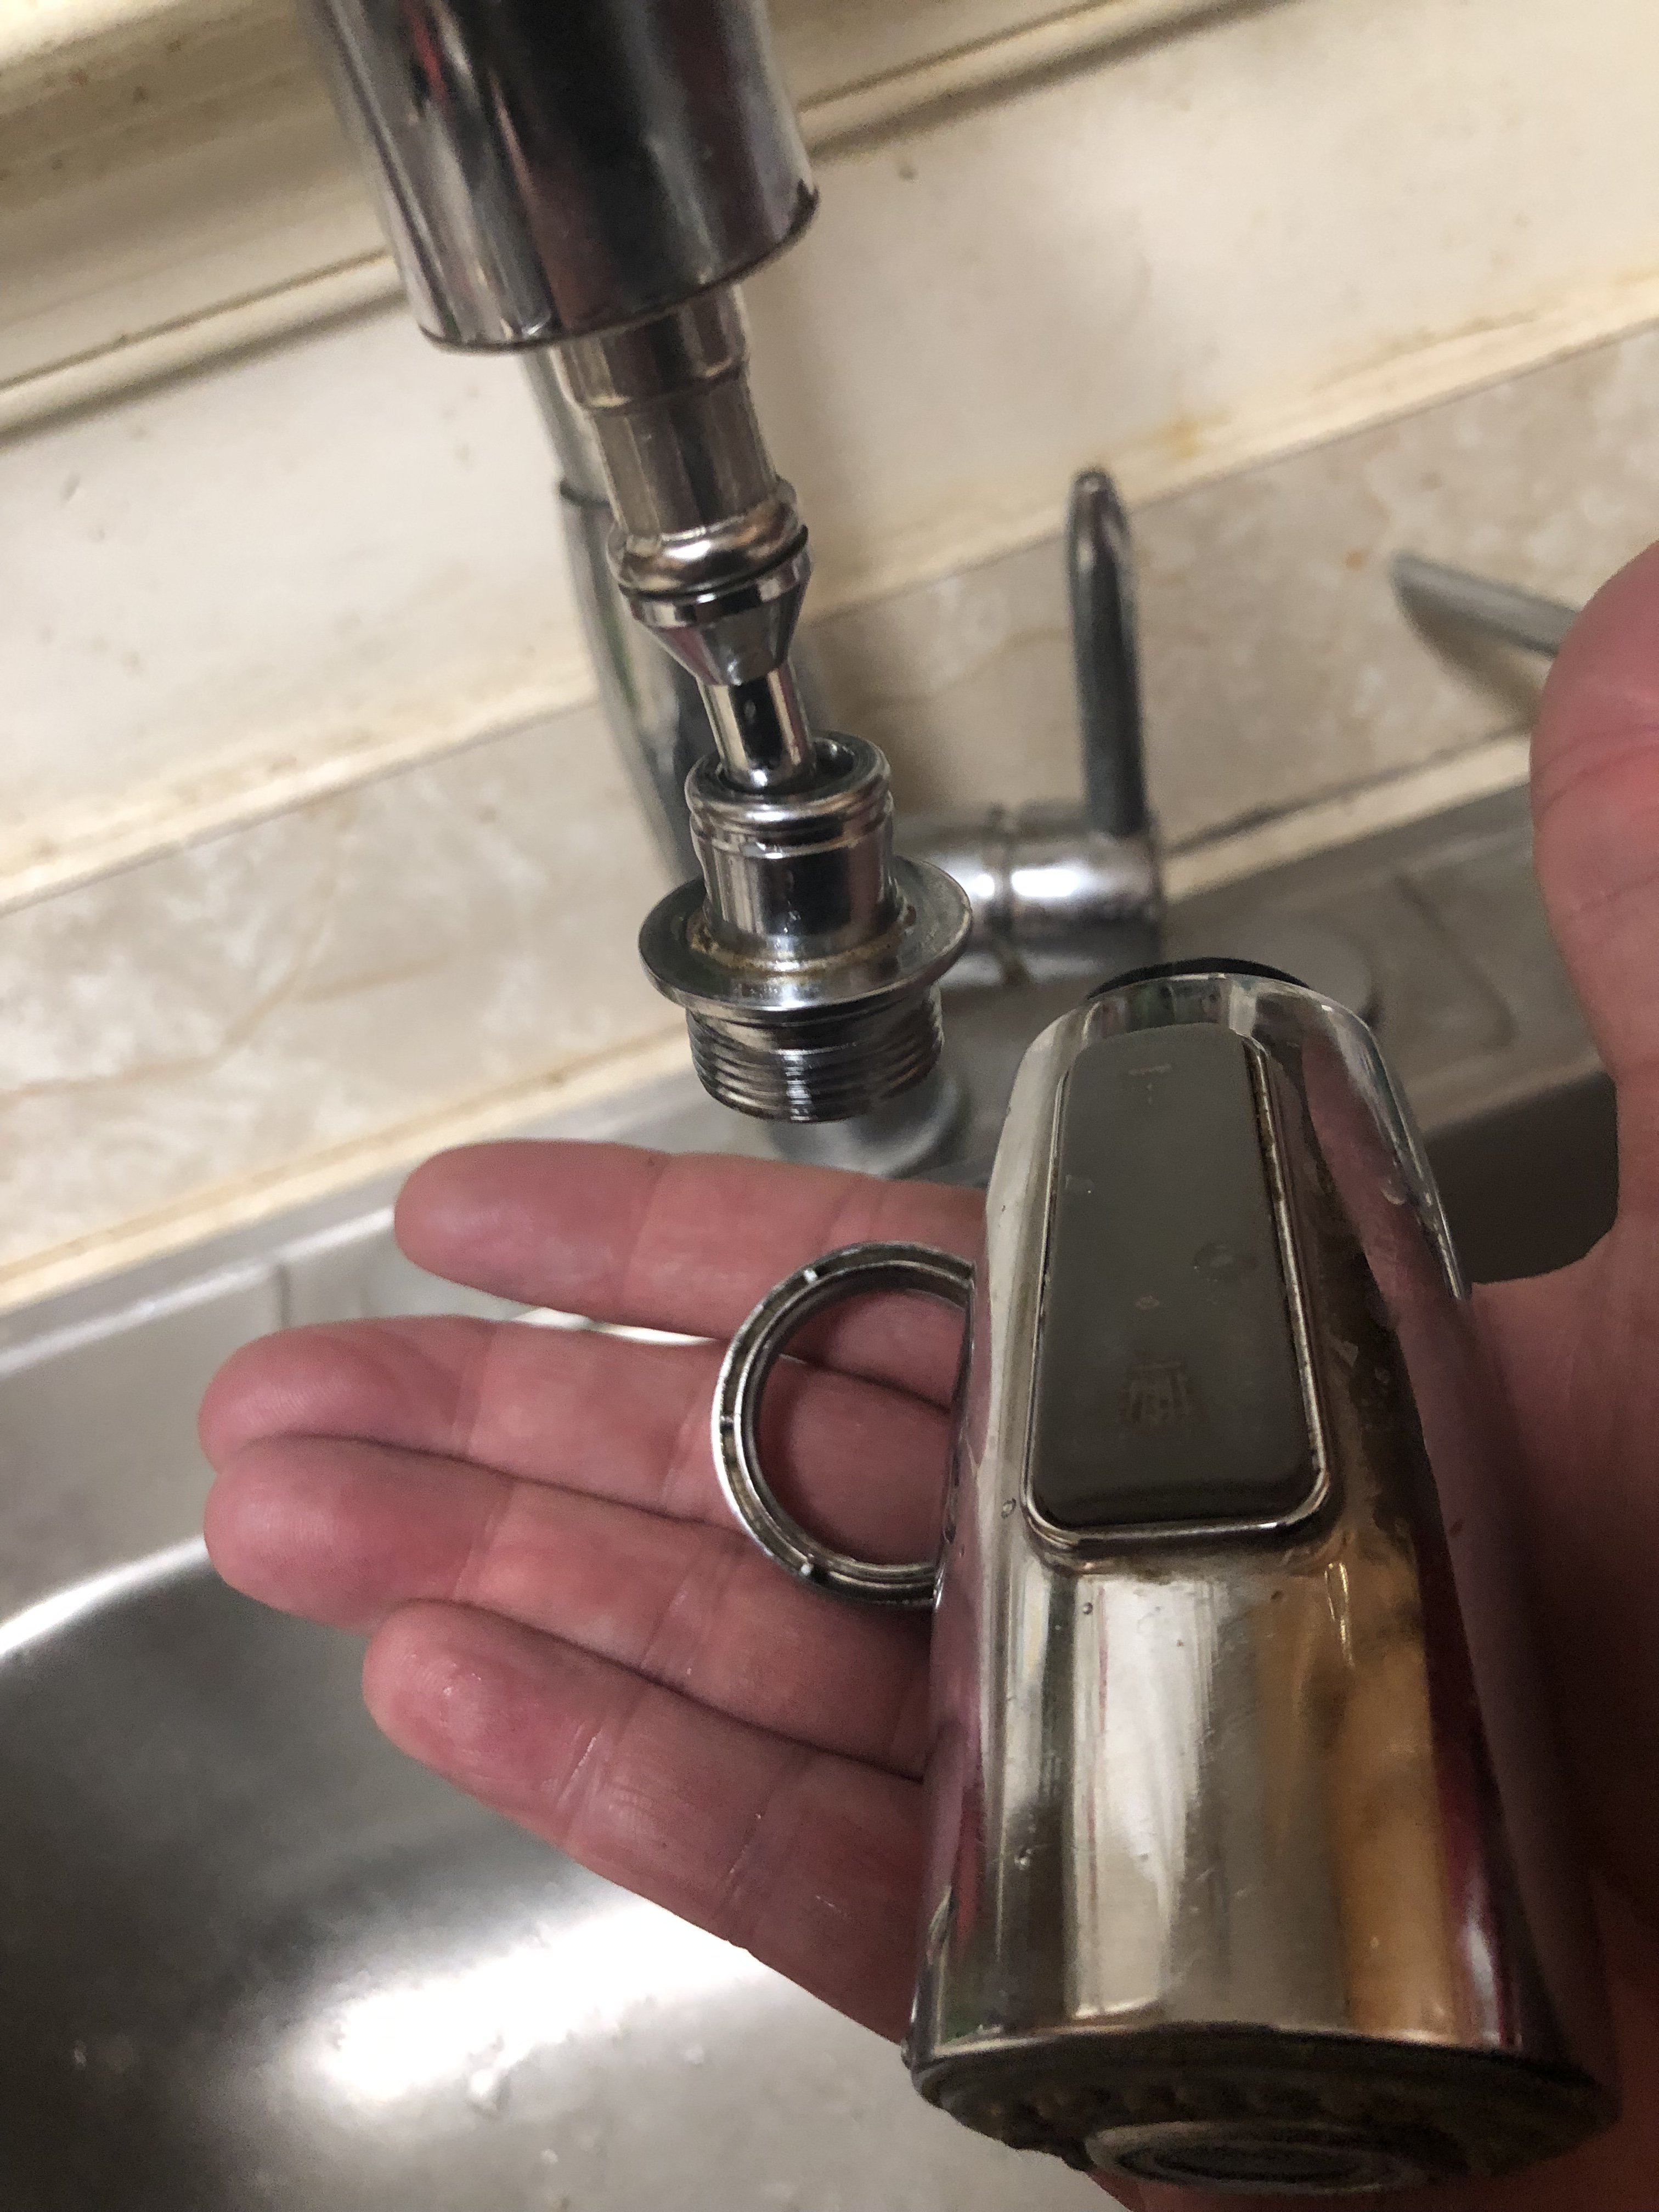
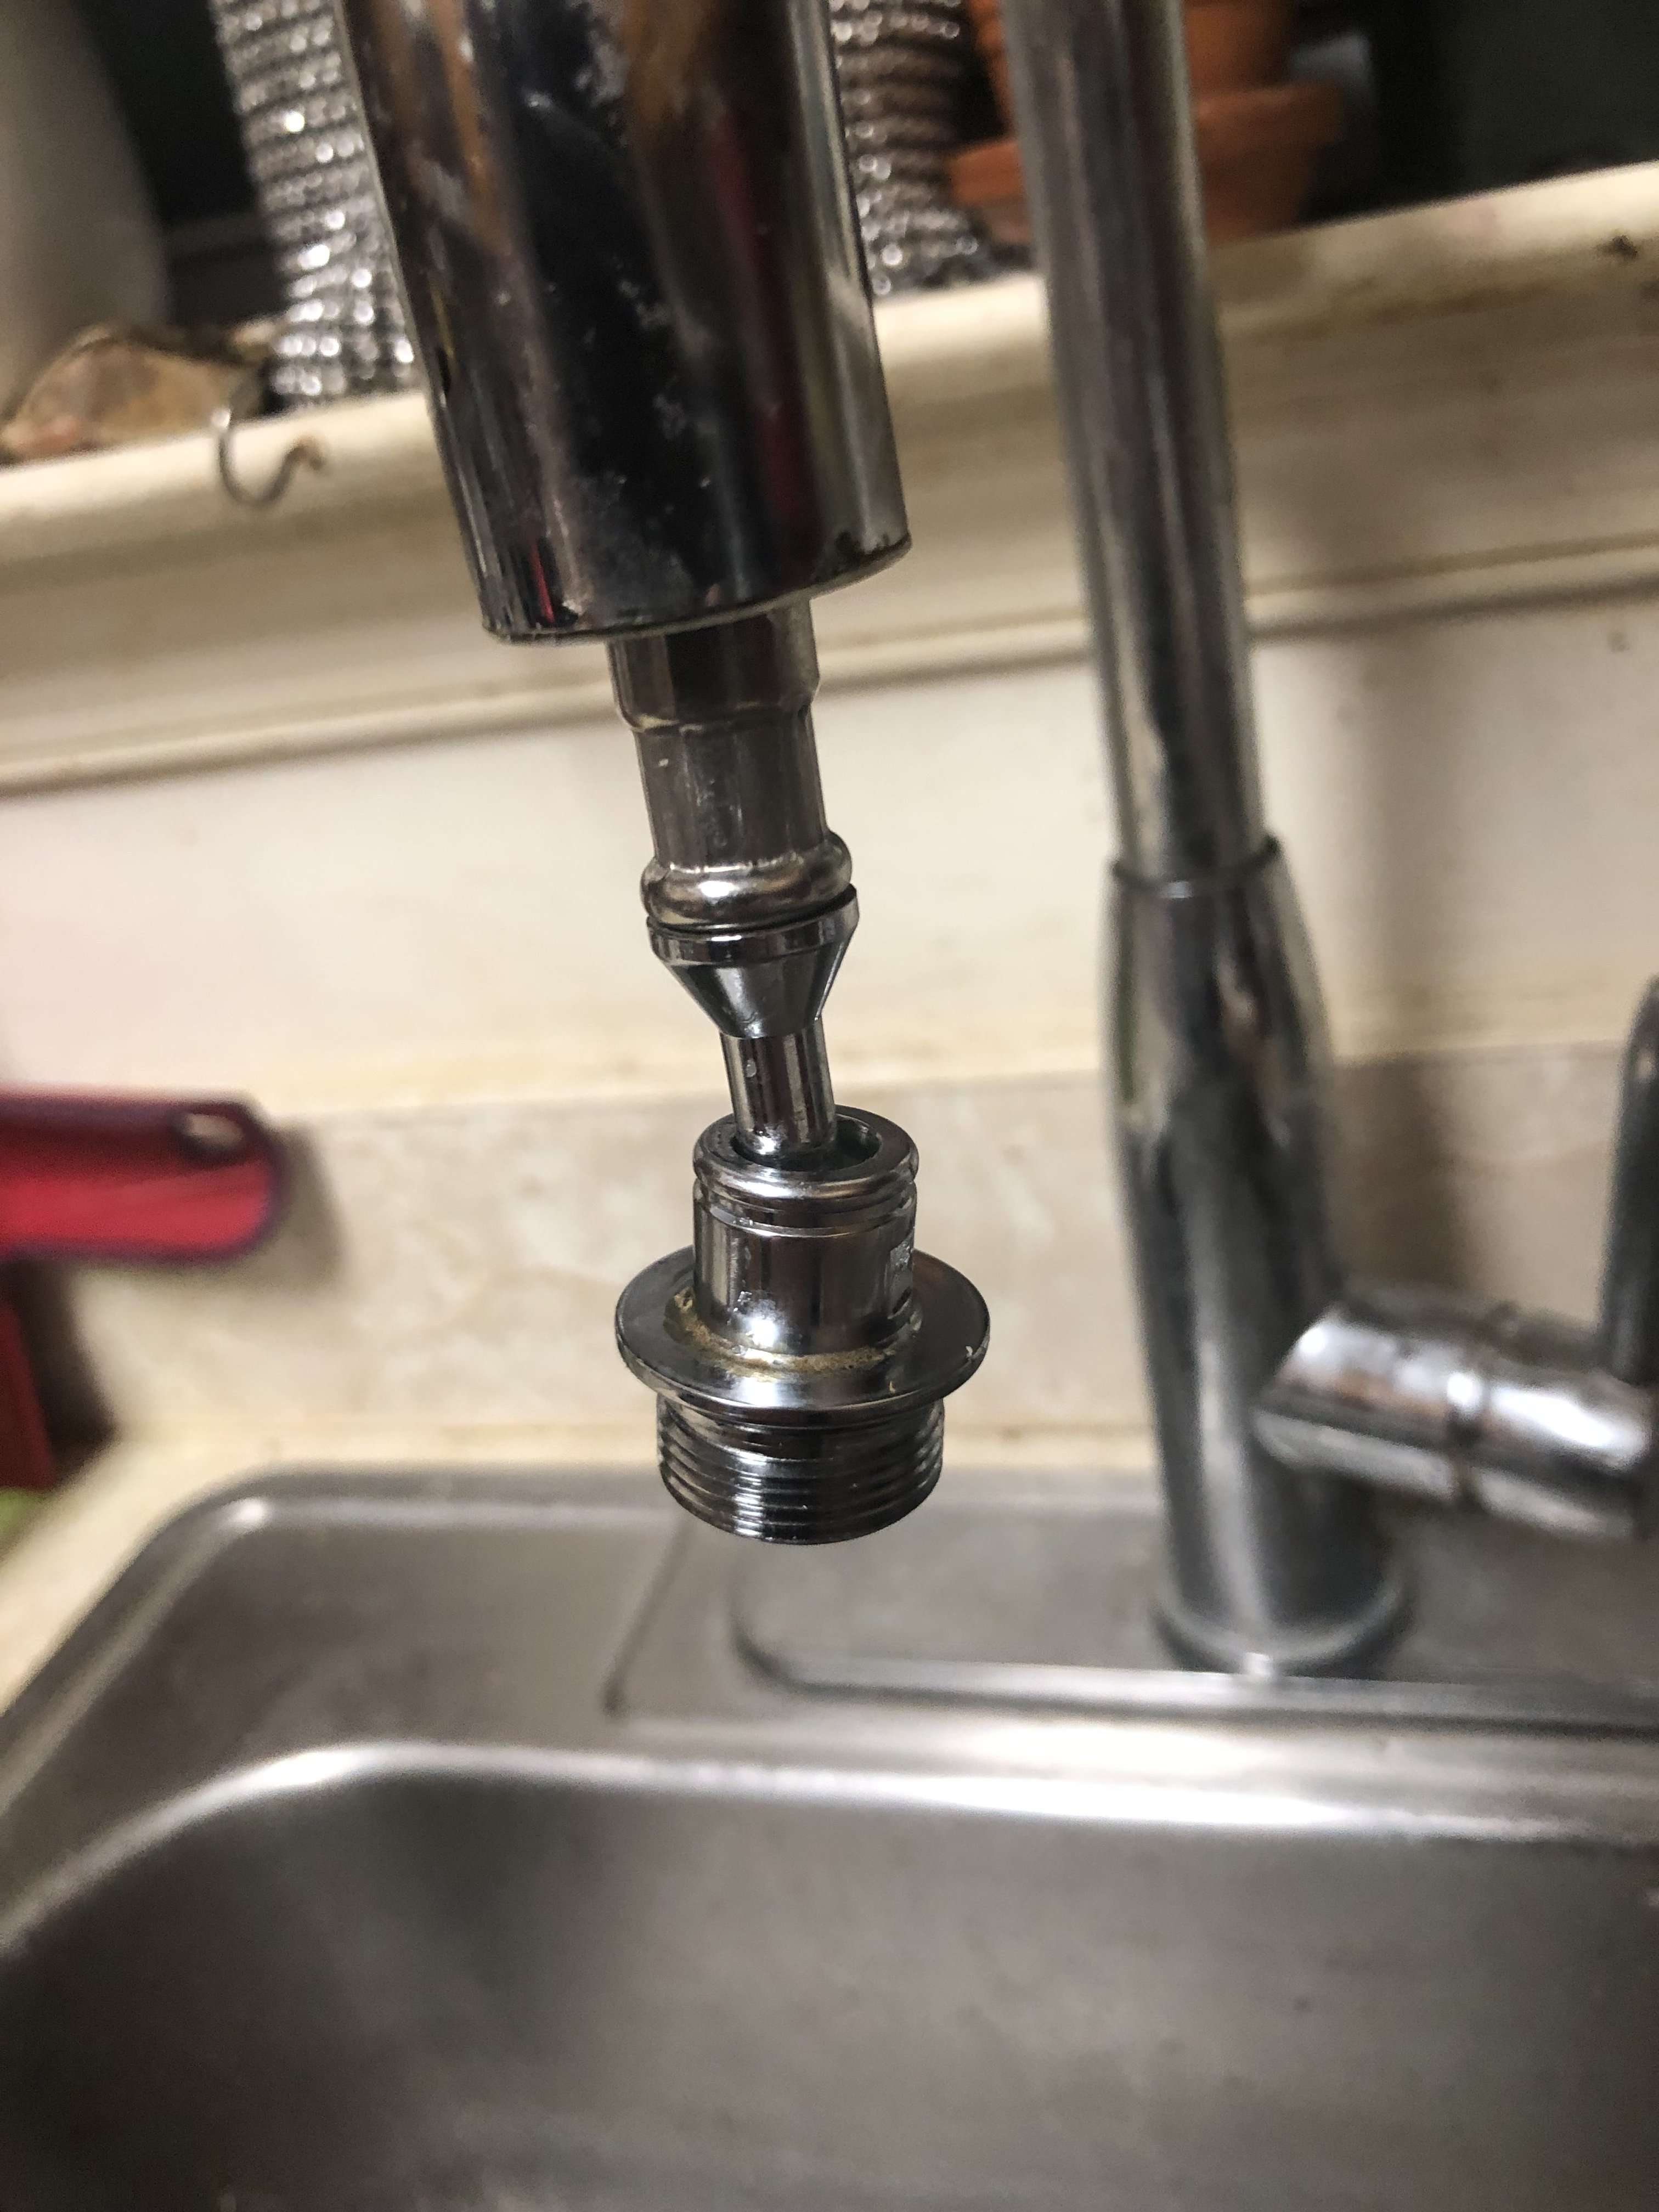
This is what I have and I hate it. I unscrew the sprayer head. It has a ring at the top that unscrews. Then the head itself can screw off. Theres a male thread under there that I haven’t been able to find anything thats a good fit. I’ve spent hours at Lowes and Home Depot and more hours searching online. The closest thing I found is actually a beer nut that would go on the end of a beer faucet. Its very loose and I can only get it to work with about 7-8 pieces of teflon tape. And even then I can’t run water through the chiller with any pressure or it comes off. What I really would like to do is get rid of this whole faucet and put on a new one that will accept the standard garden hose/chiller fitting. I’m not that handy so I’ve been just dealing with it. I brew 3 gallon batches and it can take 30-35 minutes to cool from boiling because I can’t run any pressure through the chiller. Its a slow flow.

5CCDB541-7BF3-4327-B711-BA70620A7D8F.jpeg


C00C32CC-3589-4898-B9C1-4EAA611E99C0.jpeg

1150F69F-B3A7-4D70-9A19-CCFA501125DD.jpeg
AE92E4D6-3BDF-447E-9448-D1160E176C97.jpeg
 

Attachments

  • 7F73FC13-4FC7-49A8-AA8E-8AFB4D1192E5.jpeg
    7F73FC13-4FC7-49A8-AA8E-8AFB4D1192E5.jpeg
    1.2 MB
Last edited:
Back
Top