Catalyst Fermentor Kickstarter

Homebrew Talk - Beer, Wine, Mead, & Cider Brewing Discussion Forum

Help Support Homebrew Talk - Beer, Wine, Mead, & Cider Brewing Discussion Forum:

This site may earn a commission from merchant affiliate links, including eBay, Amazon, and others.
Yes, in our experience the seal holds up to 2-3 PSI then very small leaks begin to occur in our water testing. Just keep in mind 2 PSI is way more pressure then will occur during a fermentation.

That's good! 2psi is enough that a low pressure regulator can put slight positive CO2 pressure to prevent air suck during cold crash and to transfer under pressure. Y'all should add this to the spec sheet
 
Couldn't you just purge the jar(s) with CO2 before connecting? Use one of those handheld cartridge things. I realize it would not be 100% effective but should drastically reduce the amount of oxygen.


I also kickstarted this thing and am excited to start brewing again after a few years hiatus.

Was hoping to hear from the manufacturer on an earlier comment - put your priming sugar solution in the bottling fixture. There will be little to no air. If the attachment is filled with a useful liquid, then there is no air to bubble up.
 
Was hoping to hear from the manufacturer on an earlier comment - put your priming sugar solution in the bottling fixture. There will be little to no air. If the attachment is filled with a useful liquid, then there is no air to bubble up.


I'd like to hear about that also. Do you think it would mix enough? Isn't the sugar water heavier and would just stay in the bottom in the jar?
 
I'd like to hear about that also. Do you think it would mix enough? Isn't the sugar water heavier and would just stay in the bottom in the jar?

The big bubble of air going up through the fermenter did occur to me the other day (haven't been keeping up with things).

You are absolutely right on the gravity part. The sugar water is heavier than alcohol.
 
The big bubble of air going up through the fermenter did occur to me the other day (haven't been keeping up with things).

You are absolutely right on the gravity part. The sugar water is heavier than alcohol.


Opening and closing the butterfly valve a few times(mixing) and allowing it to sit for half an hour would take care of that
 
Opening and closing the butterfly valve a few times(mixing) and allowing it to sit for half an hour would take care of that


You think? I know, fluid mechanics and all, but with the disparity between the two weights, I would be very concerned the sugar was evenly mixed. The manufacturer even suggests gently mixing the sugar in, but I'd much rather add it through the valve if possible.
 
You think? I know, fluid mechanics and all, but with the disparity between the two weights, I would be very concerned the sugar was evenly mixed. The manufacturer even suggests gently mixing the sugar in, but I'd much rather add it through the valve if possible.

'Granted it seems logical in my slightly twisted mind, but based on the size of the valve itself, the volume of liquid that would be moved by one complete cycle of the valve (open and close) would be pretty substantial. do that a couple times and the contents of the attachment should be moved out of the attachment entirely. Putting the sugar solution in at 100°F or slightly higher would also help the cause I would imagine.
 
'Granted it seems logical in my slightly twisted mind, but based on the size of the valve itself, the volume of liquid that would be moved by one complete cycle of the valve (open and close) would be pretty substantial. do that a couple times and the contents of the attachment should be moved out of the attachment entirely. Putting the sugar solution in at 100°F or slightly higher would also help the cause I would imagine.


Interesting idea. That would be great for minimizing oxygen.
 
Also easily tested by filling the fermenter with water and dying the water in the attachment with food coloring. Open close a couple times and see what happens.
 
Also easily tested by filling the fermenter with water and dying the water in the attachment with food coloring. Open close a couple times and see what happens.


Maybe if the upper portion was filled with ethanol and the jar filled with simple syrup and food coloring. Otherwise you aren't recreating the (perhaps exaggerated) conditions occurring with fermented wort and priming sugar solution. I'm more concerned with the much denser sugar water remaining on the bottom. Because denser.
 
Density should be ignorable. If you want to be rigorous calc the fg: priming ratio and recreate it


You think? It seems hard to believe the heavier fluid wouldn't have a tendency to remain on the bottom, with the lighter fluid on top?

Wonder if (after attaching the priming sugar) you could gently swirl the entire fermenter rather than opening the airlock and stirring with a spoon (thus adding some oxygen even if less than an actual transfer).
 
I have no doubt that the volume of the bottling device is minimal and the truth is that you are more likely to introduce significantly greater oxygen levels during the act of filling the bottle than attaching the bottling device - especially if you begin bottling immediately after the installation of the device.

My thoughts for the use of the valve as a stiring device stemmed from teh volume of displacement created by actuating the valve. One complete cycle of the valve would move the volume of liquid equal to a sphere with a diameter matching the diameter of the valve.

Open the valve, the valve 90° and close back 90°, assuming the valve rotates about a central axis, and you have moved each half of the circle 180° and essentially pushed the volume of a complete sphere with each complete cycle.

Formula being V=4/3πr^3

Volume = 4/3 * 3*3.14159*1.5^3

Seems that each opening and closing would move 14.1 cubic inches of liquid at the point where the priming sugar sits. Since water does not compress, all of the liquid in the fermenter would be set in motion. It seems that four or five quick, complete cycles moving up to 70 cubic inches of liquid at the site of the attachment and stirring the entire contents at the same time would sufficiently distribute the priming sugar throughout the fermenter. Just actuat ethe valve five times in rapid succession and allow the fermenter to sit for 20 minutes and teh sugar will be distributed.
 
Hmmm... interesting thought! Didn't really consider the stirring action of opening the valve.
 
I have no doubt that the volume of the bottling device is minimal and the truth is that you are more likely to introduce significantly greater oxygen levels during the act of filling the bottle than attaching the bottling device - especially if you begin bottling immediately after the installation of the device.

My thoughts for the use of the valve as a stiring device stemmed from teh volume of displacement created by actuating the valve. One complete cycle of the valve would move the volume of liquid equal to a sphere with a diameter matching the diameter of the valve.

Open the valve, the valve 90° and close back 90°, assuming the valve rotates about a central axis, and you have moved each half of the circle 180° and essentially pushed the volume of a complete sphere with each complete cycle.

Formula being V=4/3πr^3

Volume = 4/3 * 3*3.14159*1.5^3

Seems that each opening and closing would move 14.1 cubic inches of liquid at the point where the priming sugar sits. Since water does not compress, all of the liquid in the fermenter would be set in motion. It seems that four or five quick, complete cycles moving up to 70 cubic inches of liquid at the site of the attachment and stirring the entire contents at the same time would sufficiently distribute the priming sugar throughout the fermenter. Just actuat ethe valve five times in rapid succession and allow the fermenter to sit for 20 minutes and teh sugar will be distributed.

We tested this and will link to the video below. We had a solution of 1.011 liquid in the tank to simulate finished beer (clear) and a priming solution of 4oz corn sugar and 6 oz water (Purple) in the bottling attachment with the tube clamped as high as possible.

I opened the valve as quickly as possible and the small airbubble did allow the sugar to be brought to the top of the tank and distributed. We waited a few minutes then cranked the valve back and fourth. It does appear the priming solution mostley stayed and wanted to settle in the bottom.

I would say that if you are kegging this is a great way to reduce the bubble yet if you want a fully homogenious solution before bottling the priming sugar should be gently stired into the top of the tank. Even if it was added through the hole the solution would be much more evenly mixed.

We have many test batches under our belt without using any of these methods to avoid oxygenation and have yet to have any issues. The brewers I have spoken to are in agreement that avoiding the transfer to a bottling bucket will avoid much more oxygen then a single bubble going through your beer. I hope this helps!

[ame]https://vimeo.com/189173144[/ame]


And now you are buying it from Satan.....

Also available from CraftaBrew.com
 
extremely cool. Theories are nice, but nothing beats an actual test

I have no problem being wrong - in a case like this, I actually like seeing WHY it was wrong. The video will definitely help in developing best practices with the use of the product.
 
Wow, that big bubble of air going through the beer is, to me, a big concern. Is there a way to keep that from happening?

I am not in the market for this product, but if I were, that would lead me to stay with my PET carboys and my Autosiphon. I see very little air in the beer, the only air is the contact with the surface of the beer in the bottling bucket or an unpurged keg.

Yes, if the thumb clamp is unclamped and you slowly open the valve there is much less bubbling. When the beer begins to fill the bottling attachment it will push some of the air through the tubing rather then up into the tank.

Of course every user will have their own methods of using The Catalyst just like we all have our preferred methods of transferring, aerating, kegging etc so we are excited to see what our customers come up with.
 
I got mine in the mail last week and have my first batch in it. So far impressed with the construction of it, including the valve and stand. I'm not an expert brewer ny any means. I've got about 20 brews under my belt but so far I'm very happy with it. Although in hindsight with shipping and US/CAN exchange I don't know that I'd buy it again right now. But hey I spent that money months ago, so it's like it never even happened, right? For now, excited to have a cool new piece of gear.
 
Craftabrew,
Can you ship for 7.99? I'll buy one if you can. I will not buy from Northern Brewer.
 
Just assembled one of my two Catalysts, and it is EXACTLY 1/2" too long to fit into my fermentation chamber!!! :smack::smack::smack:

Just assembled my catalyst and put it in my FC. It fits, but does not leave enough room for an airlock. I confess I've been wanting to get rid of that old fridge, but still...
 
Just assembled my catalyst and put it in my FC. It fits, but does not leave enough room for an airlock. I confess I've been wanting to get rid of that old fridge, but still...

Cut off airlock, or get a 90deg stainless fitting of correct diameter and attach blow-off tube
 
Cut off airlock, or get a 90deg stainless fitting of correct diameter and attach blow-off tube

All I had to do was attach a blowoff tube to the plug and get a container of water. In the longer run, it looks like I can remove the "permanent" shelf that covers the produce drawer and make the whole open space about a foot taller.

I gotta say, this fermenter gives an amazing view of the early stages of fermentation. I've never been able to see the krausen bubble so clearly as with the Catalyst.
 
I brewed on Saturday and attached the quart sized jar for trub. Last night, I decided to swap the quart jar for the eight ounce "yeast jar" filled with three ounces of hop pellets to dry-hop my NE IPA. Four observations:
1) I don't think it matters what you do, there is going to be a small amount of spillage when the jar comes off. Either put something down to catch it or plan to clean up the mess.
2) I read a warning elsewhere not to overtighten the trub jar, as that makes it more difficult to remove when filled with trub. Even though I thought I was pretty careful, the black threaded piece between the jar and the fermenter began to unscrew as well. I lost only a few drops that way, but it was a very scary moment. Did I do something wrong in assembly? A little more sloppiness on my part and that whole piece could fall off and I'd lose the entire batch into my FC!
3) I wanted to try dry-hopping from the bottom rather than taking the top off because I'd introduce less oxygen into the mix. I also thought that all of the pellets would float to the top when I opened the valve and I could then remove the 8 oz jar and take a gravity reading with the contents. While a lot of hops floated to the surface, I found a pretty thick hop sludge in the bottom of the jar when I removed it.
4) While I doubt this last point will matter to many people, I've gotta say that the clarity of the Tritan plastic is just spectacular. Previously, I've fermented either in one gallon glass jugs or either amber or clear BrewDemons. It is far, far easier to see bubbles forming in the krausen with the Catalyst than with any of my prior FVs. Most people will rate watching bubbles form just slightly above watching grass grow, but it definitely works for me.
 
I made a video building a super cheap insulated box for the catalyst to control fermentation temp for those that do not have a fermentation fridge. It's a sheet of foam and a whole lotta tape. I'll update when the video is posted. Cheers!
 
I made a video building a super cheap insulated box for the catalyst to control fermentation temp for those that do not have a fermentation fridge. It's a sheet of foam and a whole lotta tape. I'll update when the video is posted. Cheers!


Nice! Excited for this!
 
Thanks for the insights whovous. Excited to use the catalyst this weekend, and now I know to be SUPER careful not to unscrew the valve. That would be awful.
 
Hey all! Thank you to all of you who have subscribed to my YouTube channel! If you haven't, stop on by and check it out! I just posted a new video on making a simple and cheap fermentation chamber for my catalyst conical. Cheers! https://youtu.be/IIX87_pJYnQ
 
Hello!

We have them available for pre-order in Canada, we'll probably be getting them in in late November.

$279.99 Canadian, with free shipping to most of Canada.

Catalyst Fermentation System


I'm in Canada and by the time this lands on my doorstep it will probably be over $300 CAD. But I'm still excited to see what it can do. I just hope you guys line up a Canadian distributor if I end up liking this thing! A buddy and myself backed for 2 fermenters and his arrived today, but I'm still waiting on my shipping notification. Thankfully he's going to let me break his in this weekend with an all grain 5 Gallon Dark "Winter warmer" holiday brew. I'm very excited to see this thing in action. I am going to try and remember to video and Youtube the entire process from brew day to pint glass with the Catalyst for the duration (hoping to keg around first week of December).

On a side note, I had never signed up for a profile on here until today, but this has been an invaluable resource for the past year or so as I got up and running with this obsession! So thank you all who are so helpful. I hope to chime in from time to time on the odd occasion I have some answers from now on.
 
Hey all! Thank you to all of you who have subscribed to my YouTube channel! If you haven't, stop on by and check it out! I just posted a new video on making a simple and cheap fermentation chamber for my catalyst conical. Cheers! https://youtu.be/IIX87_pJYnQ


Nice video! A little confused though, how do you lower the temperature in the chamber?

Can you show pictures with the catalyst IN the chamber?
Lastly can you post the dimensions of the panels we would need to make this? I know they're in the video, but would be easier to have them in front of me.

Thanks!
 
Has anyone looked at brewdemon. For $110 bucks if you join beerborg looks like a far better deal another $16 for the trub dump. I have the 3 gallon version and it works great.
 
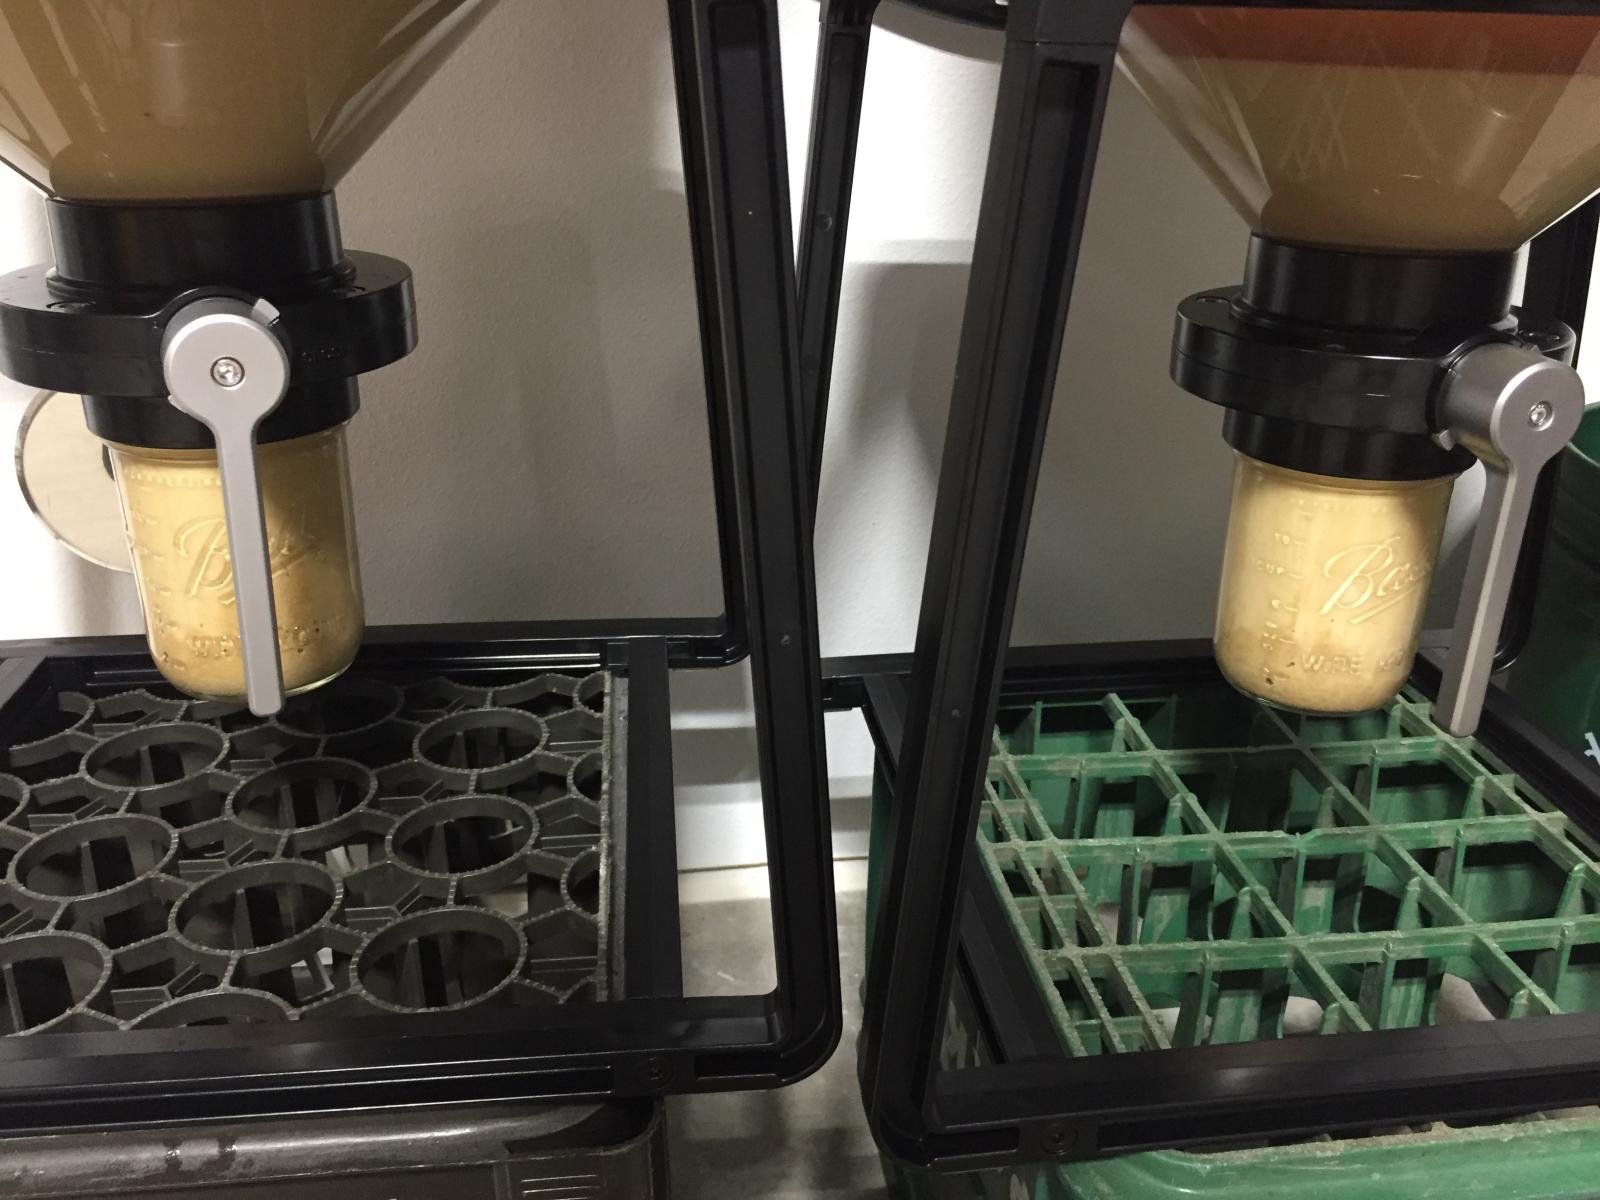
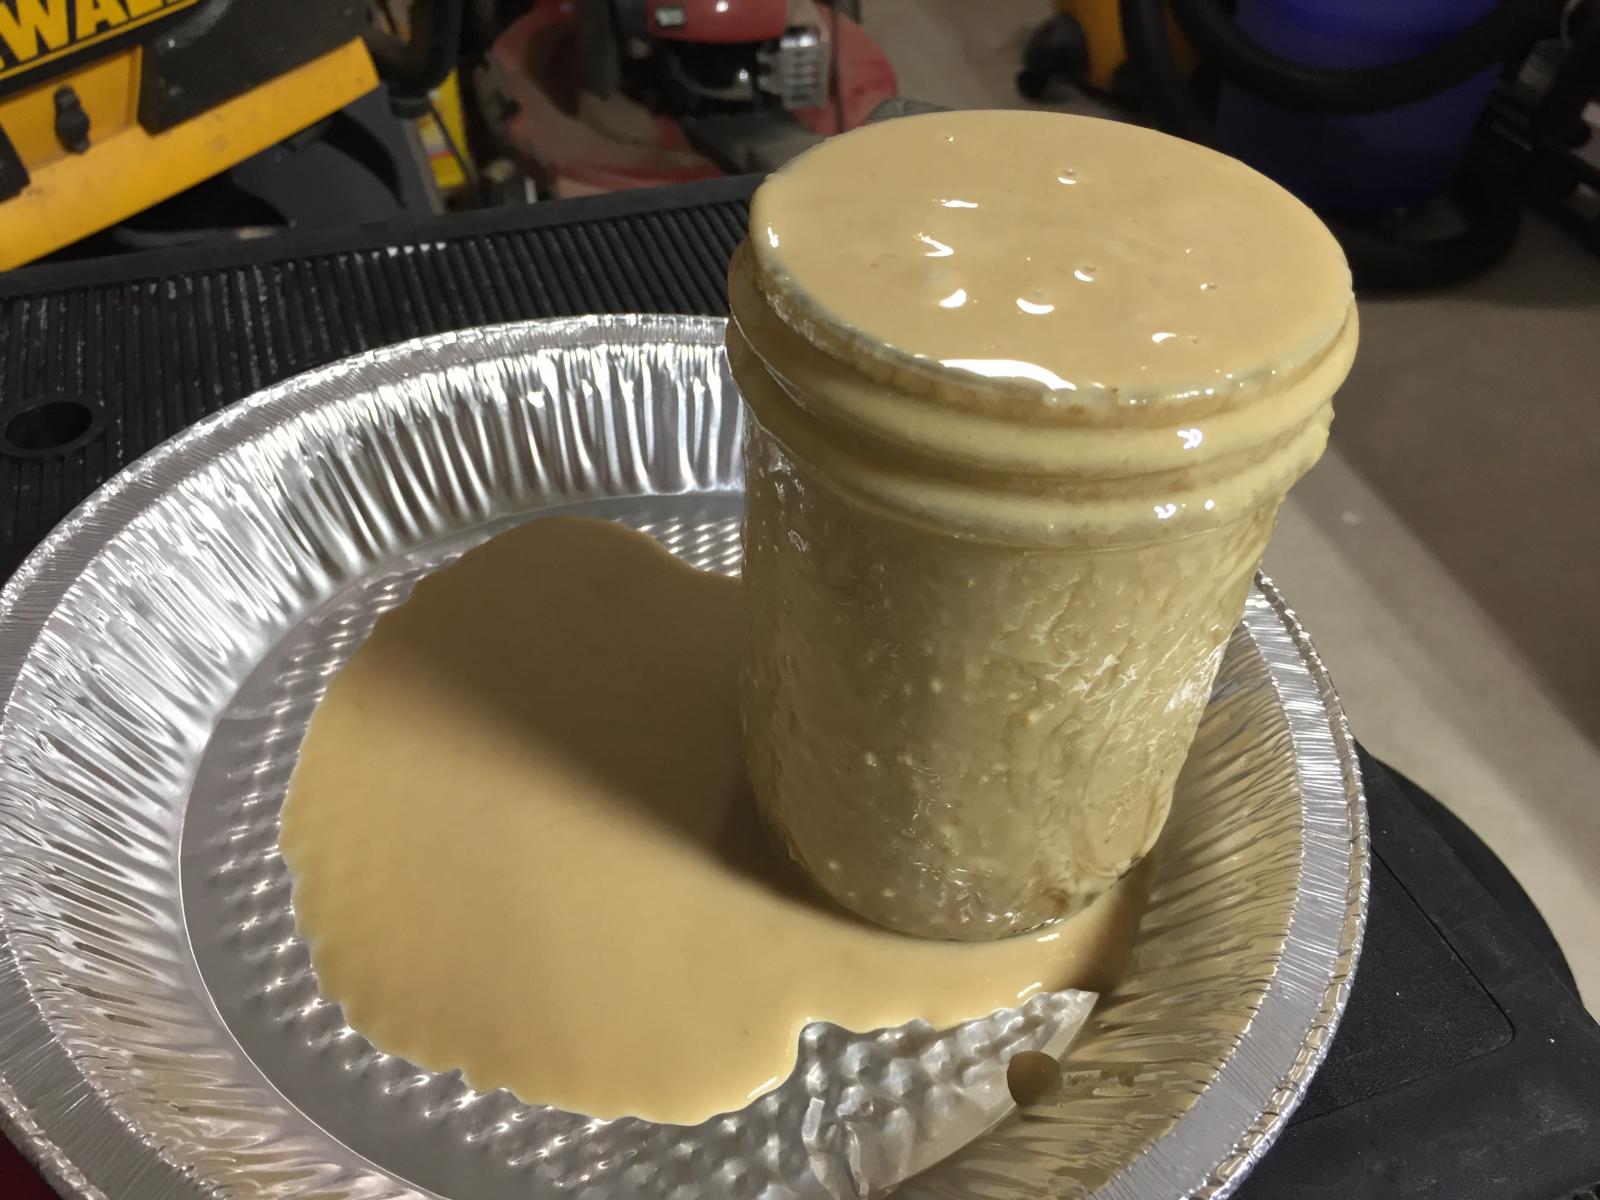
My son and I brewed a 10 gallon batch of blonde ale on Friday and got to christen my Catalyst fermentors. I just emptied the trub jars for the first time today. I'm impressed with the looks and design of the Catalyst. I put two aluminum pie plates under the Catalyst, removed the jar, carried the jar and one plate to the sink and left the other behind to catch drips. I emptied, rinsed, and sanitized the jar. I squirted some sanitizer into the valve area for good measure and reattached the jar. I'm sure I'll have to do this at least once more before kegging. Very slick system.

IMG_2633.jpg


IMG_2634.jpg
 
Has anyone looked at brewdemon. For $110 bucks if you join beerborg looks like a far better deal another $16 for the trub dump. I have the 3 gallon version and it works great.


It doesn't look like they have a 6 gallon version OR a trub dump. They have a sample/transfer valve. No way to dump trub. Am I looking at the wrong thing?
 
My son and I brewed a 10 gallon batch of blonde ale on Friday and got to christen my Catalyst fermentors. I just emptied the trub jars for the first time today. I'm impressed with the looks and design of the Catalyst. I put two aluminum pie plates under the Catalyst, removed the jar, carried the jar and one plate to the sink and left the other behind to catch drips. I emptied, rinsed, and sanitized the jar. I squirted some sanitizer into the valve area for good measure and reattached the jar. I'm sure I'll have to do this at least once more before kegging. Very slick system.


LOVE the idea of putting it on some milk crates to make accessing the valve easier. Now I just need to find some milk crates...
 
Back
Top