Cant find this KegLand part anywhere?!?!?!

Homebrew Talk - Beer, Wine, Mead, & Cider Brewing Discussion Forum

Help Support Homebrew Talk - Beer, Wine, Mead, & Cider Brewing Discussion Forum:

This site may earn a commission from merchant affiliate links, including eBay, Amazon, and others.
Update:

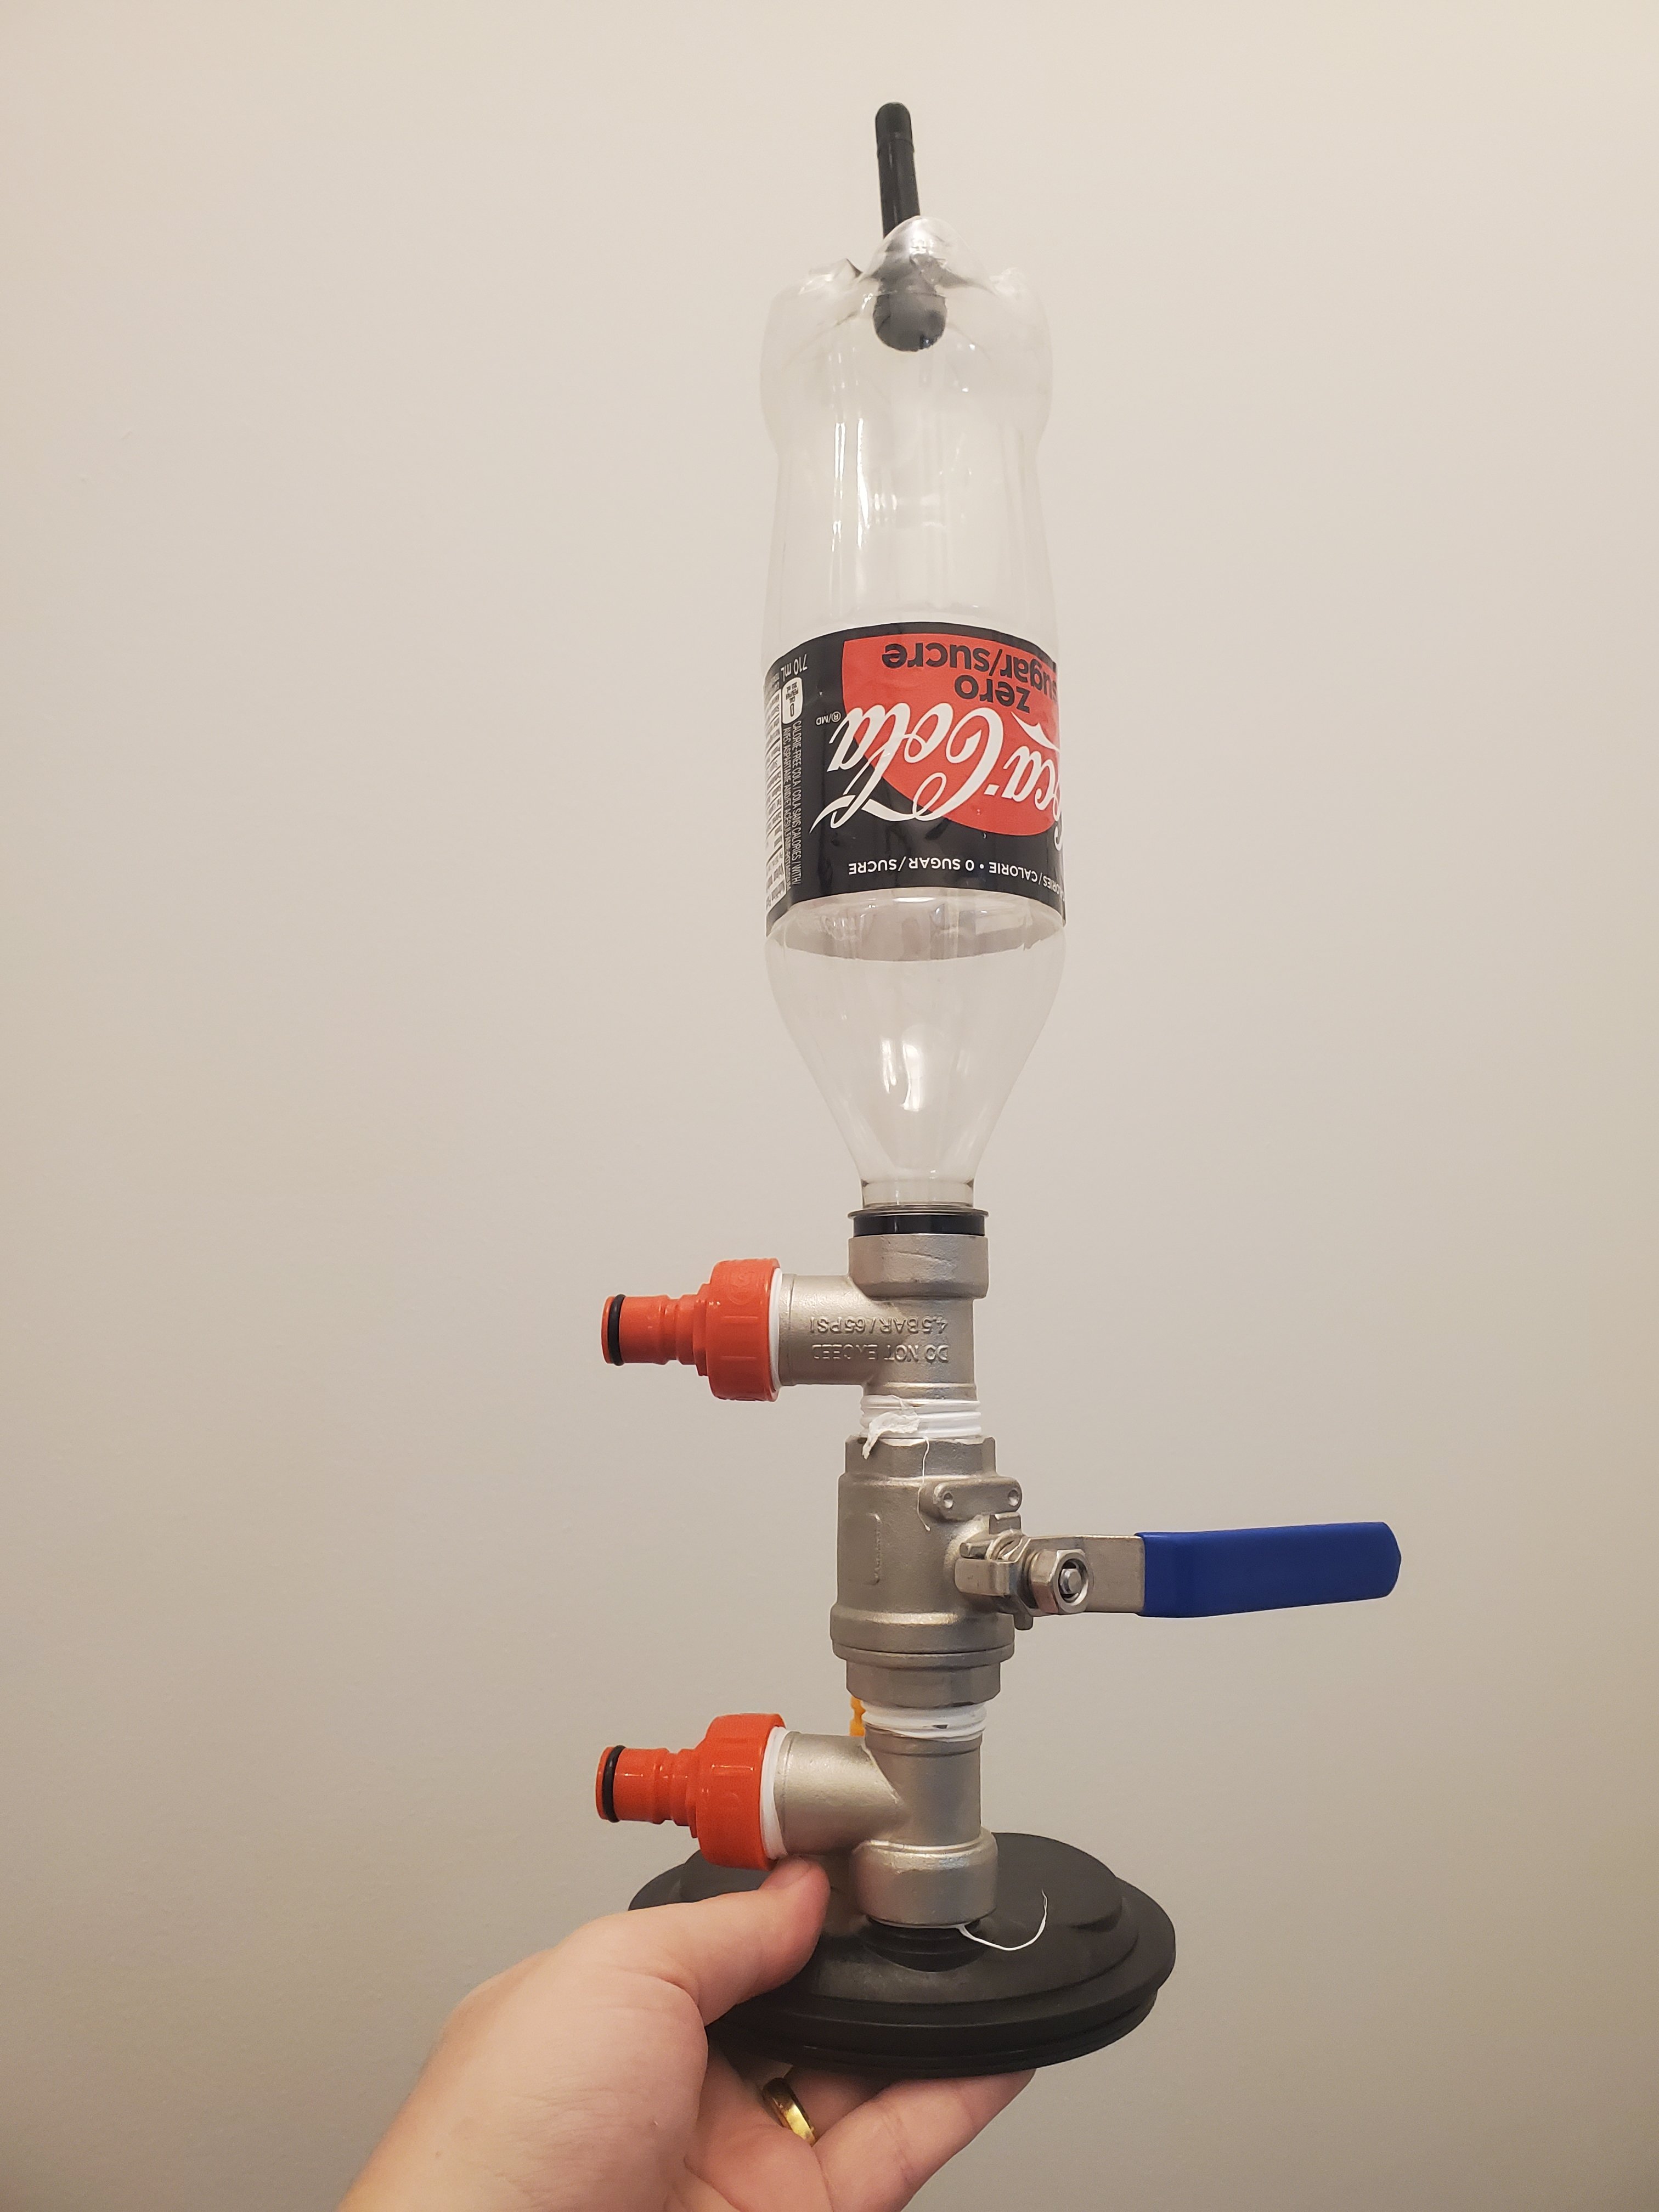
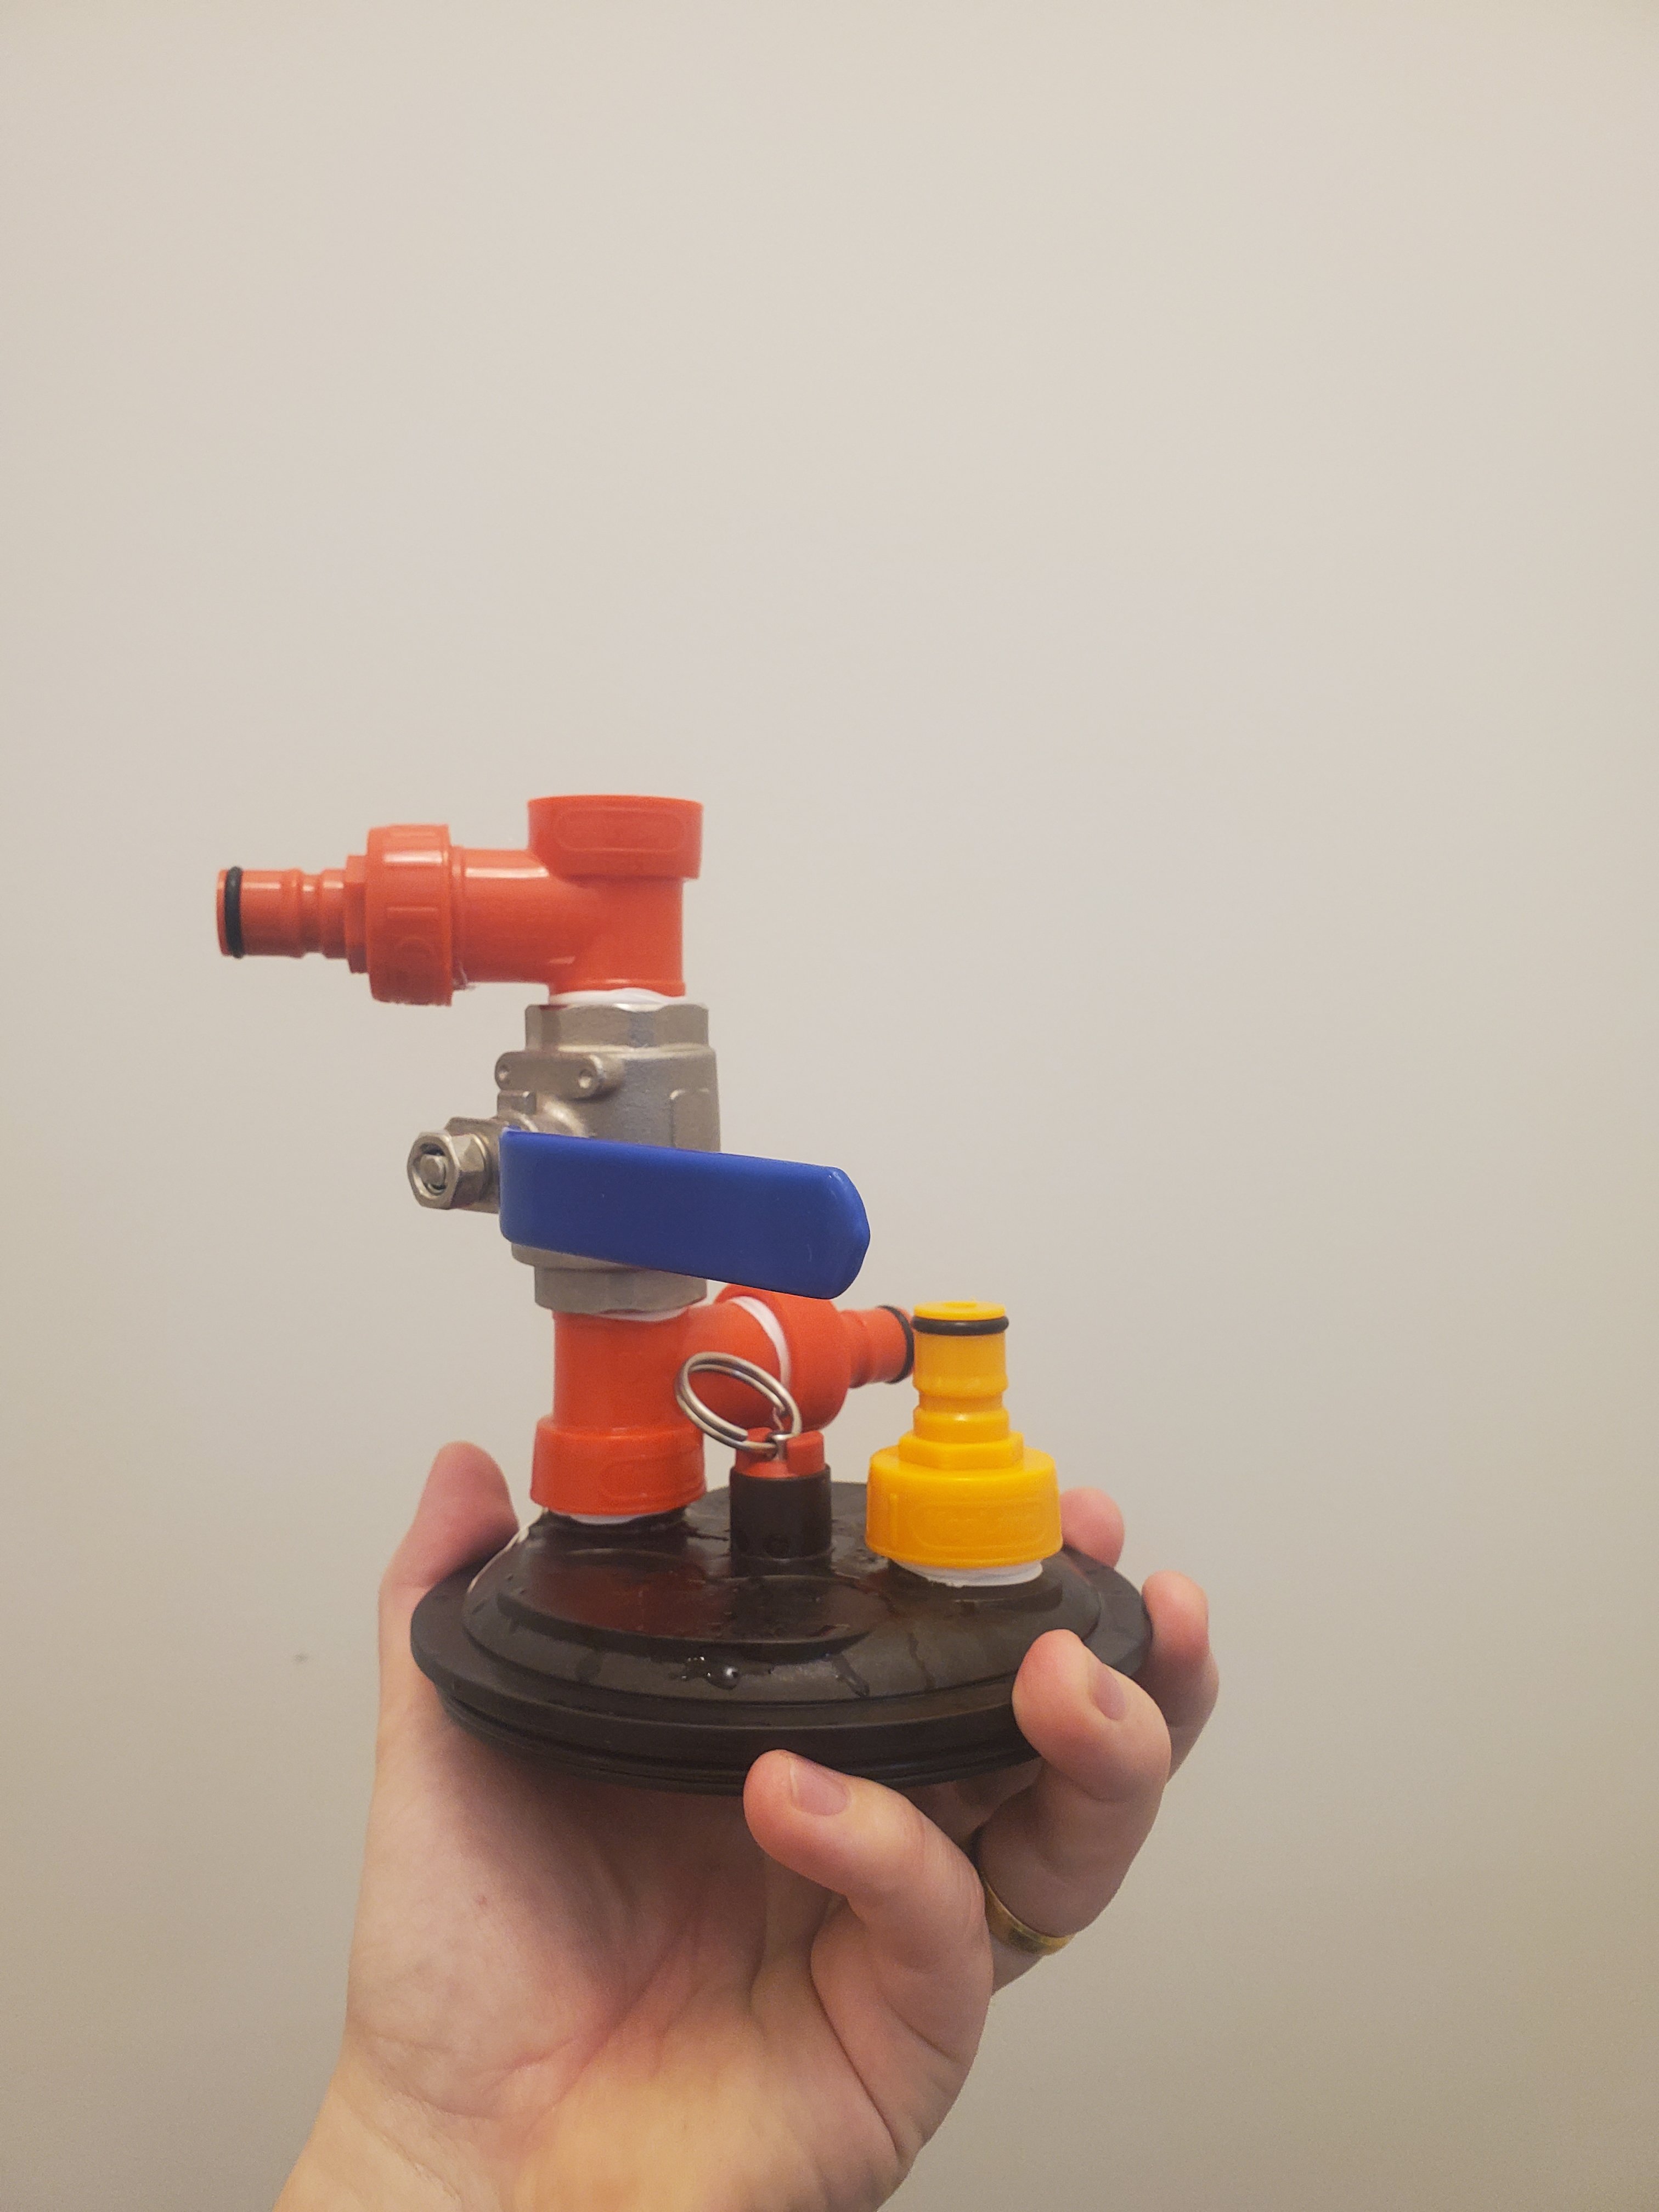
I tried out the fermzilla DH set-up today, and like schmurf's experience, it sucked. I thought if I smashed the hops a bit with a rubber mallet they'd go through just fine, but that wasn't the case. If you're doing more than an ounce you'd pretty much have to pulverize them in a food processor, which might defeat the purpose. Probably best to rock on with the magnet bag set up!
 
Love the follow up! Too many times threads die without any final opinions or actual results. Thanks for your post adn 100% agreed on the magnet dryhop approach. Im going to begin 10 gallon batches in the larger all rounder. We will see how it works with 6 oz per bag for a total of 12 oz per dry hop batch. TBD...
 
@Lurker
Have a little play with the magnet and bag with some dry ingredients, grain or something else. Check out how the bag dangles, you want your bag with enough space to allow the hops to expand when they get dunked. But that space does mean more dangle. Work out where your wort goes to. If necessary you might need more than two bags. Also good to practice getting the bags in and stuck on without wort in there, you don't want a pitched wort hopping.
 
Good info. Personally I don't ferment in a Fermzilla, so I don't have a need for a ball valve that connects to a soda bottle thread. The ball valve idea seems decent, and I could use a larger one. I would just need a bulkhead that I could use to attach whatever ball valve I used. In theory, being able to attach a soda bottle to use as a funnel sounds good, but it seems that it is too narrow.

I am thinking of tweaking the lid on my Fermonster to add a gas ball lock disconnect post. Then I would want another way to add dry hops without removing the lid. The massive sight glass setups seem like overkill for my style.

I could try the magnet solution, but I have never been much of a fan of dry hopping in bags. Honestly, I am pretty happy with just pouring in dry hops through the #10 stopper hole, but playing with gadgets is fun.
 
I know this kind of an older post, but for anyone who's interested, I've been buying some kegland parts from their Chinese store on aliexpress with great success. There are stuff that I can't find in Canada that I get from there.

https://kegland.aliexpress.com/store/5784799

They have both (at least they had until Yesterday) the PCO1881 plastic T as well as the PCO 1881XPCO 1881 ball valve. That valve isn't found anywhere, not even on kegland store.
 
@rlprafa
Should be available here soon

https://www.kegland.com.au/pco1881-x-3-4-bsp-female-ball-valve.html
Bear in mind it's a great idea that from the experience of users above doesn't execute as well as it suggests.
Yeah, that date is changing all the time. And they don't ship internationally, so for me, I gotta hope my local store gets it or buy from their Chinese counterpart.

And the suppliers I have available usually don't stock on these small things. When they do, it goes really quick.


In addition to that, I am gonna try pressurizing from the top (I've DIY'ed that bottle with an air valve thing) to see if it helps a little. That should help as well as keeping the Oxygen off. I don't mind having to do it multiple times for larger hop amounts, as long as I can keep it oxygen "free".

I wonder how much effect the lid has on the pressure rating of the fermzilla/all rounder, tho. I thoughtof drilling a larger hole in the lid to fit a triclamp valve with a larger diameter than the pco1881.
 
SOLUTION FOUND!!!

In order to connect the valve you can buy stateside to the T connector (I prefer this stainless steel one to the red plastic one), you need an 3/4" BSP to Soda Bottle adapter. This piece technically does not exist. However, I found schematics for it on a 3D printing forum. I took these specs and uploaded them to printathing.com. For about $25, they printed it for me and sent it to my house. This piece works perfectly to connect the valve and the T Connector. Instead of soda bottles to hold the hops, I bought soda bottle preforms. Their test-tube-like shape makes it much easier for the hops to flow through the narrow opening (I also pre-crush the pellets while they are in the sealed bag with a rubber mallet). In order to appropriately flush the oxygen out of the preform once I screw it onto the T connector, I drilled a small hole on the bottom (top once turned upside down?) of the preform. I purge the oxygen with CO2, then seal the hole with a kneaded eraser. After I dump the hops, I simply screw on a solid, un-drilled preform onto the T connector, which creates a seal that performs well under pressure (be sure to cover the preform with something so that light doesn't get into your beer, since obviously the preform is translucent). This system works well, especially for the second dry hop since I've had hit and miss luck getting the hops to rise to the top of the fermenter through the trub - it's much easier to be able to drop them on top of the fermenting beer. Hope this helps!


Welcome to HBT!
Can you post a picture (or pictures) of that setup, so we can see how this all fits together and works?

The classic paradigm: Picture <> 1000 words

Agreed - a picture of your setup would be great! I have recently purchased the All Rounder. I also got the stainless steel tee you mentioned and am very interested in seeing how you adapted the valve and Tee to allow for adding the dry hops. I'll be brewing my first batch with the All Rounder this weekend; a brown ale that does not call for any dry hops ;-)
 
The setup I am planning on using is similar to the one mentioned above. I still need to drill a hole for the thermo-well and do a pressure test, but so far it's not inspiring much confidence for a couple of reasons.

1- Due to the anatomy of the lid, the "T" piece hits the pressure relieve and seems kinda loose. I am pretty sure it will leak gas.
2 - The threads in the "T" are way too sharp and seems to be of low quality. The threads in the plastic connectors get "eaten" by the stainless steel threads.

I also tried the plastic "T" that kegland sells with the stainless valve. The threads got destroyed.

One other thing that will definitely make this a problem as others suggested is the small space. Chances are hops will clog it. I'll still try and report back when I get around using it.

I'll try to send an email to kegland suggesting a new lid design. Not sure it will ever be made but I'd definitely buy one. If the two threaded holes and the pressure relief valve are staggered in one side of the lid, like one right after the other, there would be enough space for a 1.5 to 2 inches hole that could fit a threaded nipple that could then be adapted to a triclamp setup with a valve and ball lock connectors to add and purge co2 for a closed dry hop. Even if they would release such lid, the price for the triclamp setup would be quite expensive.
 

Attachments

  • 20220203_133503.jpg
    20220203_133503.jpg
    772.2 KB · Views: 25
As I finished my last post I realized that there might be another option if that one doesn't work.

If I disassemble the valve (take off the handle) I'll probably be able to screw the valve all the way and use the top portion as is. I would still prefer to have that 2 step setup so that I could pressurize/purge it separately. But I guess that might be an overkill.

I'll keg a beer tomorrow and the fermenter will be free to test these scenarios.
 
Ok, I decided to spend some time fiddling around and doing a blow test. the stainless steel setup from my previous post is garbage (It could be the batch I got, but I am skeptical). I put as much force as I could as when blowing, air was leaking from every seal.

Then I tested with the plastic T. it seems to work better. The only thing I'd say, is to put an o'ring between the lower T and the lid thread. It has the same design problem where the side portion of the T hits the pressure relief valve (even if the valve is removed, the threaded portion in the lid don't allow the T to go all the way down). I used the seal from the SS T and it worked well. Still need to do a real pressure test, tho.

Bellow are the pictures of the setup with the plastic fittings, and another with the thread in the plastic T after threading it in and out a couple of times. Not sure it will last after disassembling it a few times for cleaning.
 

Attachments

  • 20220203_145634.jpg
    20220203_145634.jpg
    748.1 KB · Views: 16
  • 20220203_144826.jpg
    20220203_144826.jpg
    958.7 KB · Views: 13
Just did a dry run in the setup. It's quite clunky and tall, but seems to hold pressure well (the liquid I am spraying is starsan) as no bubbles was seen.

In this way I would theoretically be able to do a pressure fermentation, closed dry hopping and transfer. That is if the hops don't get stuck in between the bottle and the valve.

Besides that, all I need now it to learn how the hell to do a proper closed transfer as I am failing miserably on it. =/

I hope this gives you guys some ideas. Any suggestion/improvement would be appreciated.

In addition to that, I sent an email to kegland suggesting a couple of improvements in this lid. Namely putting the out posts and PRV all to one side so we can drill a 2in hole, or even better, they could add a 2 in camlock post on it as well. That would probably work well with KL14298, KL11365 and a triclamp valve.

Not sure they will ever do something, but one can hope.
 

Attachments

  • WhatsApp Video 2022-02-04 at 10.51.59 PM.mp4
    7.8 MB
UPDATE #2

Alright. So the 3/4 inch valve was a fail, and I didn't enjoy the magnet/hop bag method for o2 free dry hopping. I couldn't get the right mix of bag big enough for hop efficiency vs. Small enough bag that it doesn't droop down into the beer.
SO I build a tri-clover dry hop set up to fit onto my fermzilla lid.

Before you read further, THIS WAS A PAIN IN THE ASS.
I zipped off the pressure relief valve and one post, and drilled out a 2 inch hole in their place. Then I spent quite a bit of time grinding away the bottom of the lid until it was flat so the bulkhead could sit. Not a lot of wiggle room, so it has to be perfect, or you'll grind through the sloping side edge.
Went to put it on today and see if it holds pressure, and this was the worst part.
The way mine is set up, I have to screw off the post to get that bottom clamp on, then the disconnect has to be on to sit under the butterfly valve, or I can't get it on once the butterfly valve is connected. (I had to do this like 4 times trying to get it to hold pressure and almost gave up.) Maybe there is an extended bulkhead or extention spool I could use to alleviate that issue.
If you went with an 1.5 inch or even 1 inch tri-clover bulkhead there would be more room to maneuver, but I'm not sure if there would be a way to drill that size hole into the lid.
TLDR: Putting a TC dry-hop on a fermzilla is a major pain in the ass, but it worked.
20220205_173151.jpg
20220205_173119.jpg
20220205_143057.jpg
 
after getting mine on, I was thinking about the potential problems that started thinking about a solution like yours but the grinding of the bottom really put me off. I am hoping mine works so I don't have to think about it anymore.

Maybe they will create a different lid for that soon. who knows.
 
Ok, I decided to spend some time fiddling around and doing a blow test. the stainless steel setup from my previous post is garbage (It could be the batch I got, but I am skeptical). I put as much force as I could as when blowing, air was leaking from every seal.

Then I tested with the plastic T. it seems to work better. The only thing I'd say, is to put an o'ring between the lower T and the lid thread. It has the same design problem where the side portion of the T hits the pressure relief valve (even if the valve is removed, the threaded portion in the lid don't allow the T to go all the way down). I used the seal from the SS T and it worked well. Still need to do a real pressure test, tho.

Bellow are the pictures of the setup with the plastic fittings, and another with the thread in the plastic T after threading it in and out a couple of times. Not sure it will last after disassembling it a few times for cleaning.

How did this end up working out? Did the hops clog it up?
 
The setup I am planning on using is similar to the one mentioned above. I still need to drill a hole for the thermo-well and do a pressure test, but so far it's not inspiring much confidence for a couple of reasons.

1- Due to the anatomy of the lid, the "T" piece hits the pressure relieve and seems kinda loose. I am pretty sure it will leak gas.
2 - The threads in the "T" are way too sharp and seems to be of low quality. The threads in the plastic connectors get "eaten" by the stainless steel threads.

I also tried the plastic "T" that kegland sells with the stainless valve. The threads got destroyed.

One other thing that will definitely make this a problem as others suggested is the small space. Chances are hops will clog it. I'll still try and report back when I get around using it.

I'll try to send an email to kegland suggesting a new lid design. Not sure it will ever be made but I'd definitely buy one. If the two threaded holes and the pressure relief valve are staggered in one side of the lid, like one right after the other, there would be enough space for a 1.5 to 2 inches hole that could fit a threaded nipple that could then be adapted to a triclamp setup with a valve and ball lock connectors to add and purge co2 for a closed dry hop. Even if they would release such lid, the price for the triclamp setup would be quite expensive.
Where did you get the parts for prv that you attached at the bottom of the bottle?
 
Back
Top