BruControl: Brewery control & automation software

Homebrew Talk - Beer, Wine, Mead, & Cider Brewing Discussion Forum

Help Support Homebrew Talk - Beer, Wine, Mead, & Cider Brewing Discussion Forum:

This site may earn a commission from merchant affiliate links, including eBay, Amazon, and others.
The UniFlex output drivers are basically switches. You can let them switch the internal power (limited about available: 12V, 1A), or you can use an external supply as you noted, and then you are much less limited, as the drivers can switch 12 or 24V, at much higher currents too (say, 3A each).

The external PS does need to be ground-tied to the UF. See the little downward angle symbol... that is ground. The PS has one, as does pin 13 - so these are tied together, as are power consumers, like your valves.

Your second bullet is actually correct... kinda. You are powering the valves with your external PS, and the signal to switch them is coming from the UF... BUT, if your valve is 24V, then the 12V from the UF isn't going to work, as the valve will expect a 24V signal per the CR03 diagram. So, use your external PS, wire it per your diagram above - that is correct. The valve's motor will get its power from your external PS, and the valves switch signal will be also 24V from the PS, switched through the UF, to the valve. If your valves were 12V, then you could get away without tying the external PS to the UF's pins 2, 3, 14.

Note: Since you are providing a very low current signal, you can wire the PS to just one of the UF's pins 2, 3, or 14 - all three are only needed if switching a lot of current.

BIGGER NOTE: Per the Jumper Wire note.... MAKE SURE YOU DO NOT TIE UniFlex I/O Pin 1 and Pin 2 together while using an external PS... you will smoke the unit!
 
EDIT: I missed the SQL installation so I'm guessing that might be the reason
Graph question: Why when I change scale or time interval do I lose my historical data? The graph basically restarts form zero data points.
 
Last edited:
11:59:21.564: Loading configuration file 'C:\Users\vstar\OneDrive\Documents\BruControl\Brewery.brucfg'...
11:59:21.626: Opening database:
Data Source=(LocalDB)\MSSQLLocalDB;AttachDbFilename=C:\Users\vstar\OneDrive\Documents\BruControl\Data\Data.mdf;Integrated
Security=True

11:59:21.626: Exception while opening database: Keyword not supported: 'integrated
security'.
 
What string did you manually add? Try removing that. You should not have needed to add anything.
After installing SQL this was the line in settings.brusettings after a restart:
<DBConnection i:nil="true" />

I changed that to:
Data Source=(LocalDB)\MSSQLLocalDB;AttachDbFilename={0};Integrated Security=True
 
Once again requesting that a lock be put at the Element level for size and position. I was doing stuff again on my main hot side workspace and resized and move several elements in error. Even while I was positioning and resizing, the next element might move as I moved the mouse. Huge PITA. In addition one of my elements simply disappeared. Could I have deleted it? Prehaps, but I do not think I did. I recreated it with the same name so it was gone.

Edit, the name of the Element was duplicated. It was a global string type and any script manipulation worked on both. I had not deleted but had moved and resized and put under another element. I deleted the one I added and the scripts seem fine. It never threw an error with the dupicate names. This could be a "feature" except when you are tying to get the value.
 
Last edited:
I think only location and size characteristics would need to be locked, which could probably be handled by a switch in the appearance tab of each element.
 
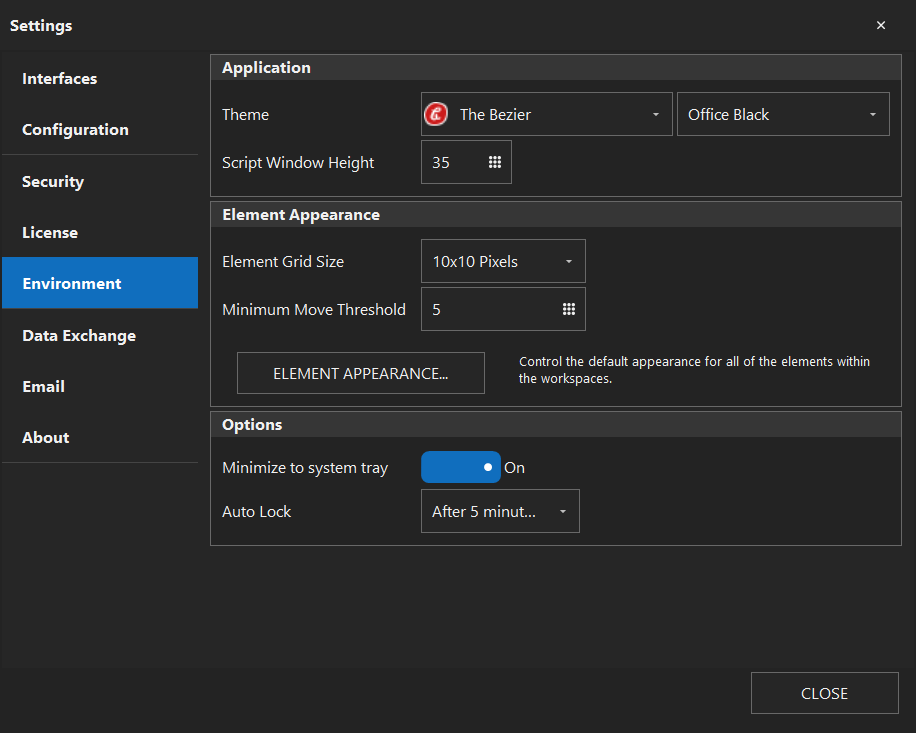
Also @oakbarn... did you see we added a setting "Minimum Move Threshold" that prevents elements from moving unless the i icon is moved more than the defined distance?

1638221963834.png
 
I did but I had it set too low. If I set it higher, I cannot place Elements where I want them, so I put it back to 1. The problem with that is at the Enviroment level and affects all Elements. When I am trying to place or move an Element, I use the 1 pixel grid. I still have issue as some of my Elements are 50 x 50 and it is easy to resize them when trying to click on it Circle I icon to bring up the properties. I have my kettle layout as the background of the workspace and want to put something like Vlave (digital Element) at the correct spot on my manifold (that is part of the background). I would want something property at the Element Level that has Lock Movement and Resizing that could be a Boolen Switch like the User Control property of an Element. I would want to lock them (and unlock) on the specific Element General Property Dialog. I believe that once Size and Movement Locked (because I have it exactly the size and position) I would not need to unlock the Element unless I added an addition Element and needed to reconfigure the space on the workspace. Something that was univeral, say at the Workspace Level would not solve the issues as it is when I am moving or resizing an Element that others are effected.

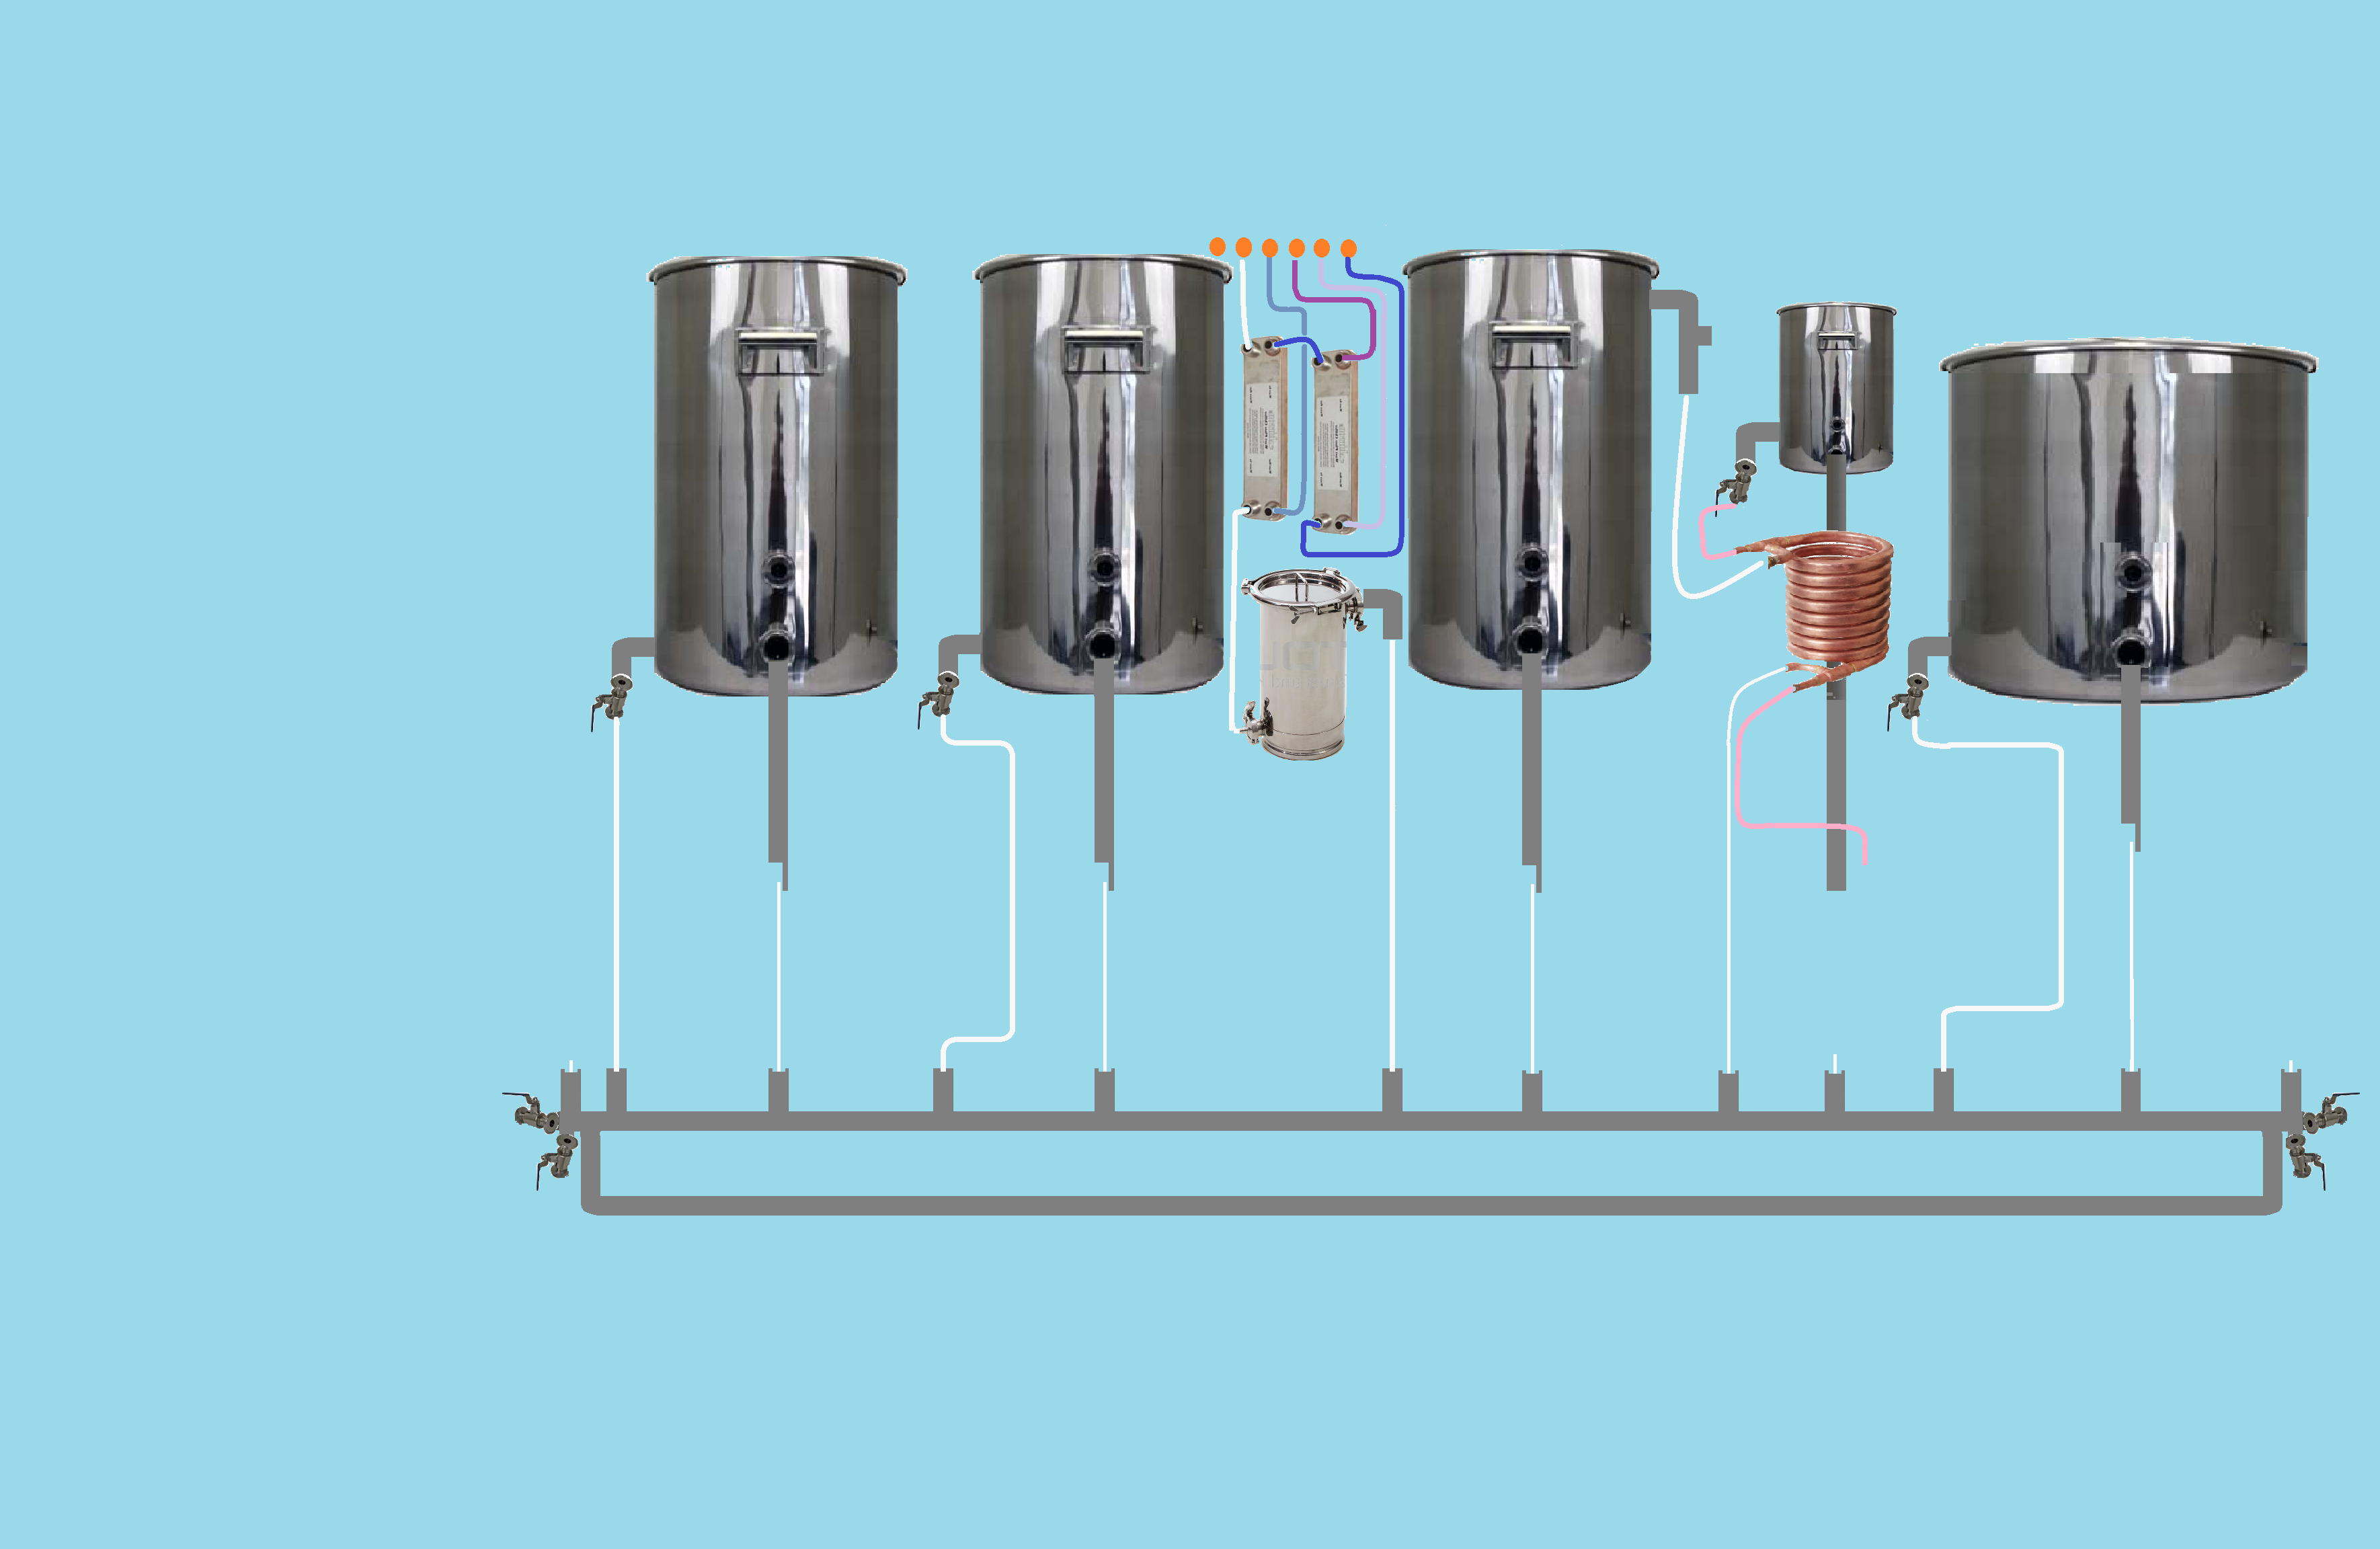
My background:
System_Back_new_2.png


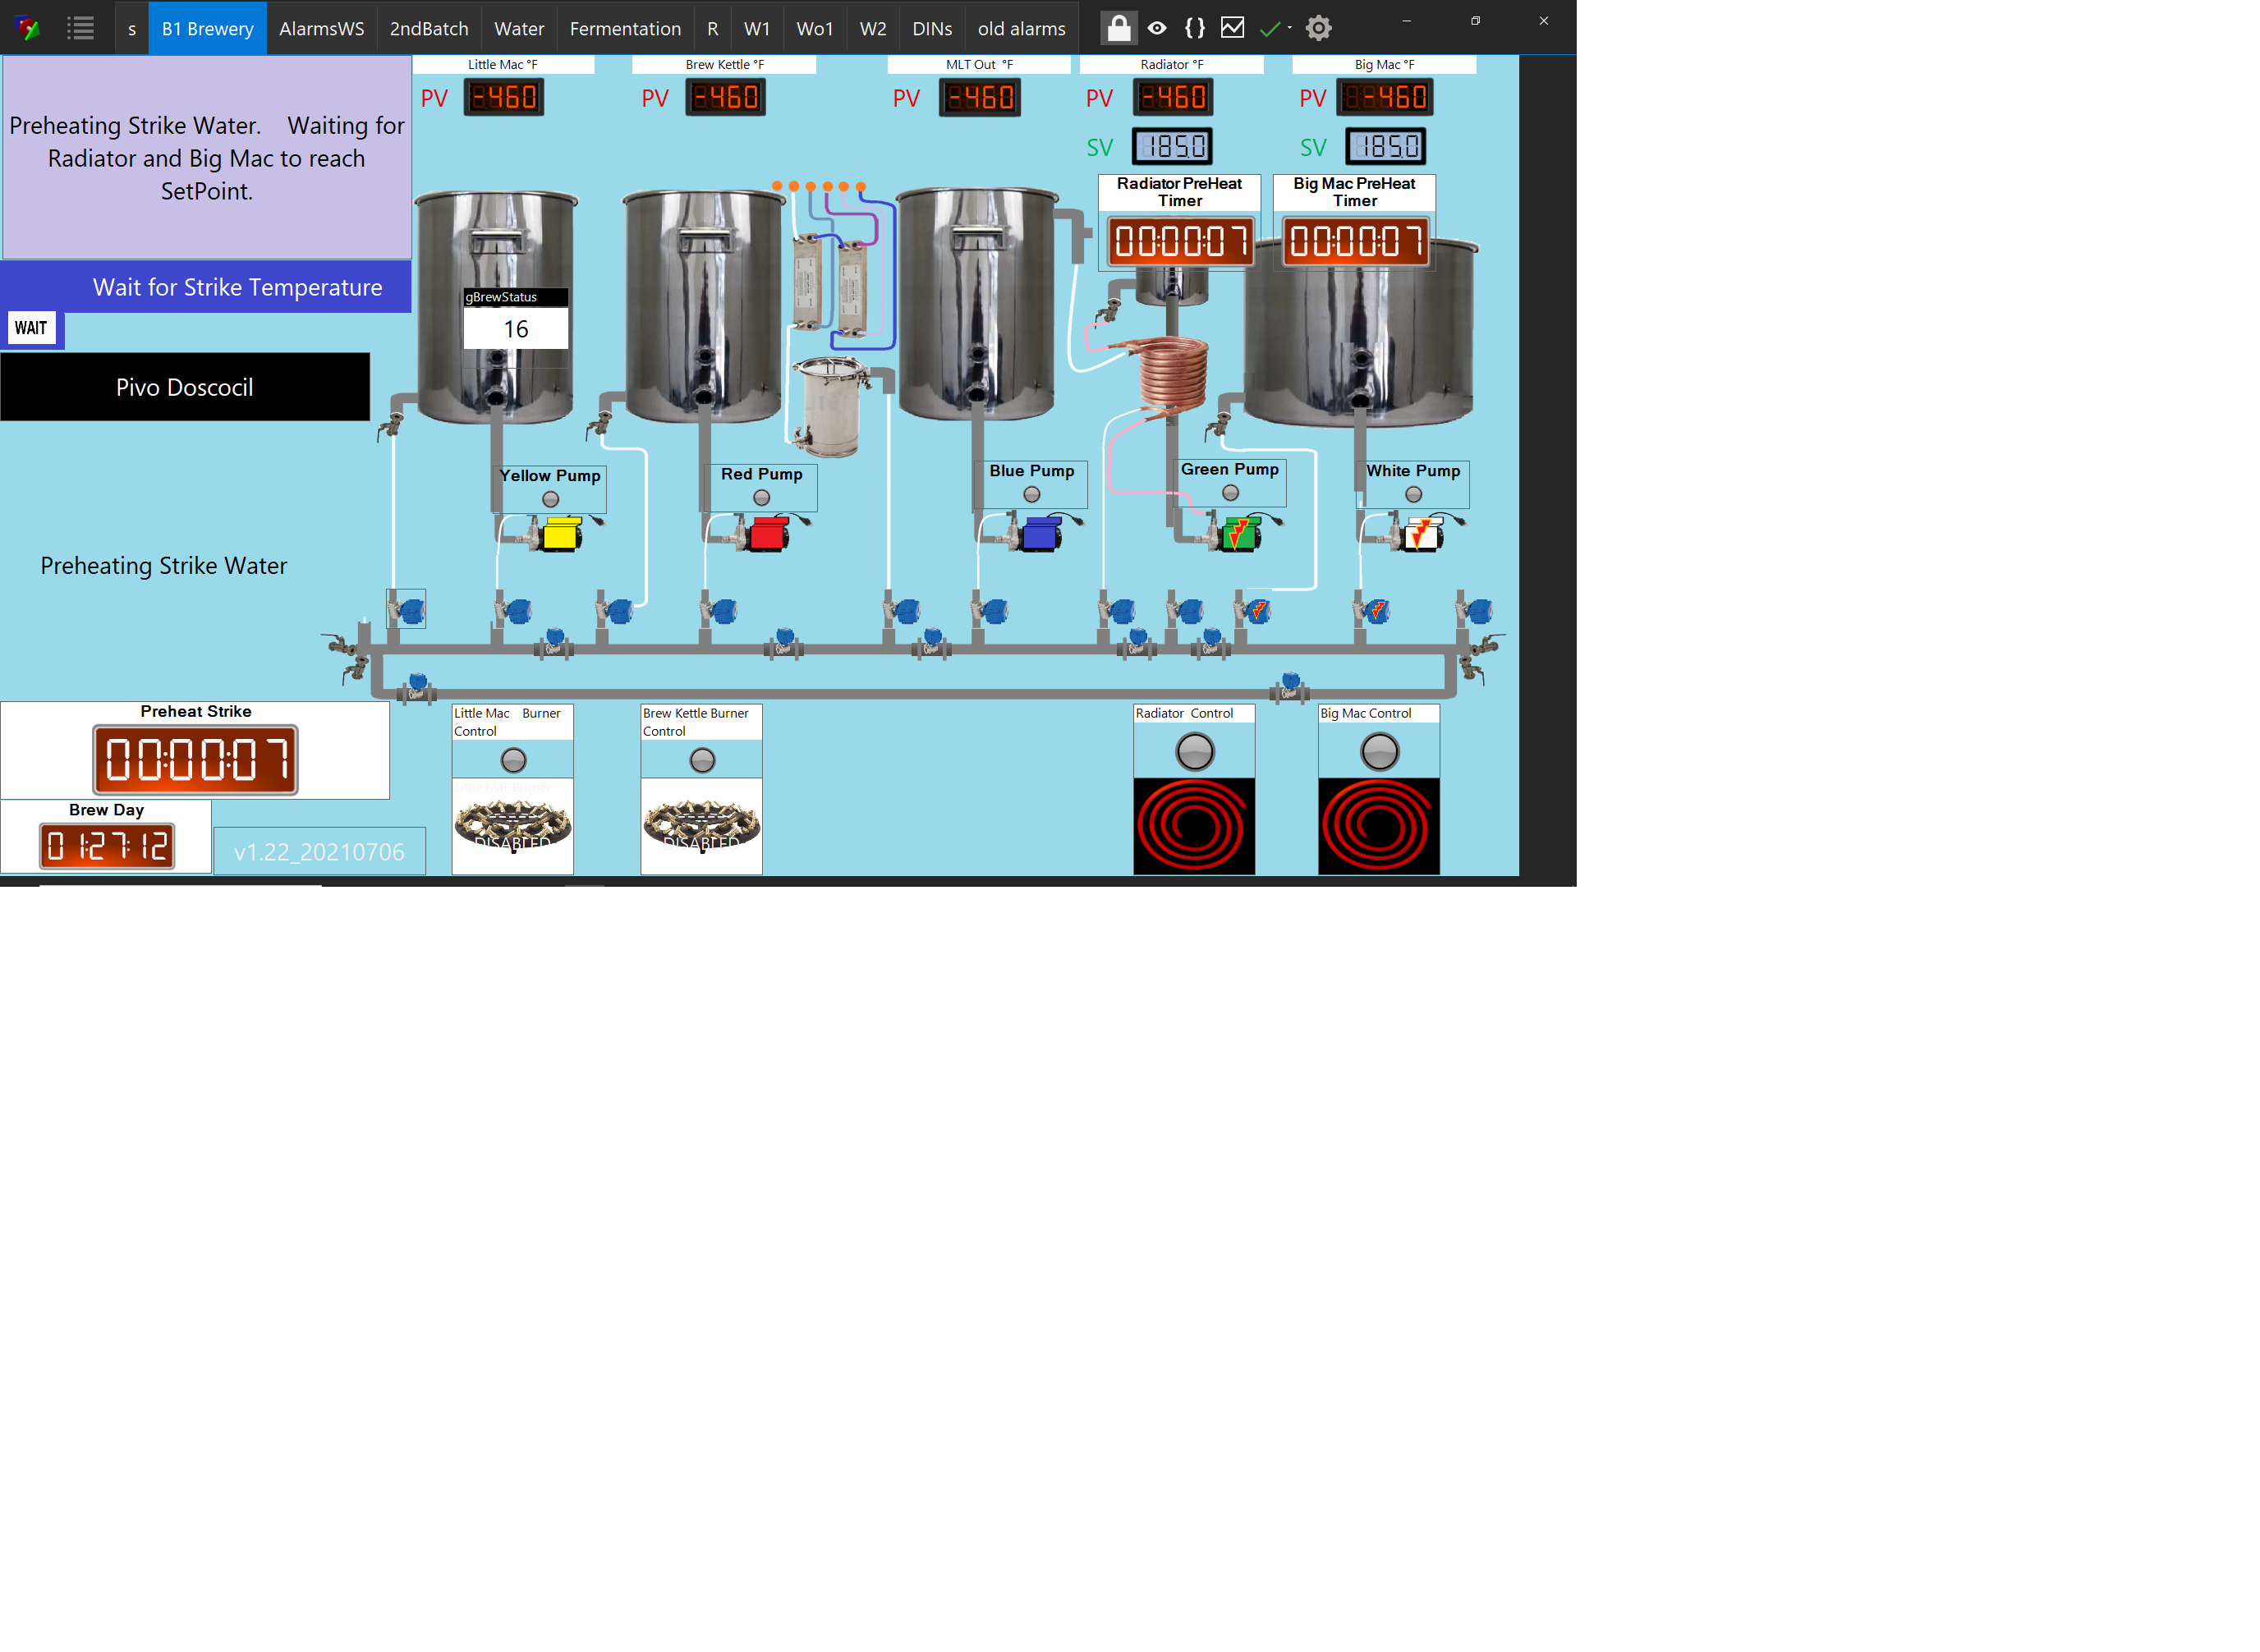
With Elements:
sample.png
 
"If I set it higher, I cannot place Elements where I want them..."

Sorry, I don't know what you mean by this. Once you move past the threshold, the grid should take over for the element's positioning. Can you describe what's happening?
 
I want to place an Element exactly at 0 and 446. It size os 400 x 350. I am moving other Elements at the 1 pixel level to get them exactly where I want them. If I am any where near my 0 and 446 Element, the mouse could grab it instead of the Element I want to move or resize. When Brewing, the screen is locked so it is not an issue when brewing, just when trying to setup the workspace, I am revamping and it happens constantly in my case. I also stack Elements because of the limited Backgrounds or wav files. When Ihave to drill down on the Workspace to one of the underlying Elements, the Element above does have to be moved, That is also a PITA because I have to reposition and likely resize to cover the underlying Elements. I there was a script way to change the path for Image 1 and wav File 1 (alarms), I would not have to stack Elements and I could get rid of basically duplicate Elements and use 1 Element to accomplish what I want.
 
What about using the X and Y, Width, and Height properties. You can edit these in the elements directly, no?

You could also change any of this stuff via script as well. Maybe I'm not thinking about it right... just want to make sure you see the options.
 
That is how I do it. In fact, I am an expert at it. I probably did that 50 times yesterday. Those are what I would like to lock at that level. What would happen is that because the mouse grabbed it, instead of being 0 and 446 and 400 x 350, it might have been 2 and 448 and 399 x 345. I would reset to the 0 and 446 and 400 x 350. Once again, 99.9% of my issue would disappear if I could just set the path for the background Image 1 on all Elements and File 1 on an Alarm via a Script property. I would not stack Elements in that case, but just change the background and in the case of Alarms, the wav File 1 via a Script property. I do believe that the locks at the Element level would still be useful as you could set it and forget it as it would never change unless you unlocked it.

You would need a Lock Toggle similar to the Lock at the top Right of the Workspace screen for the Position and Size.
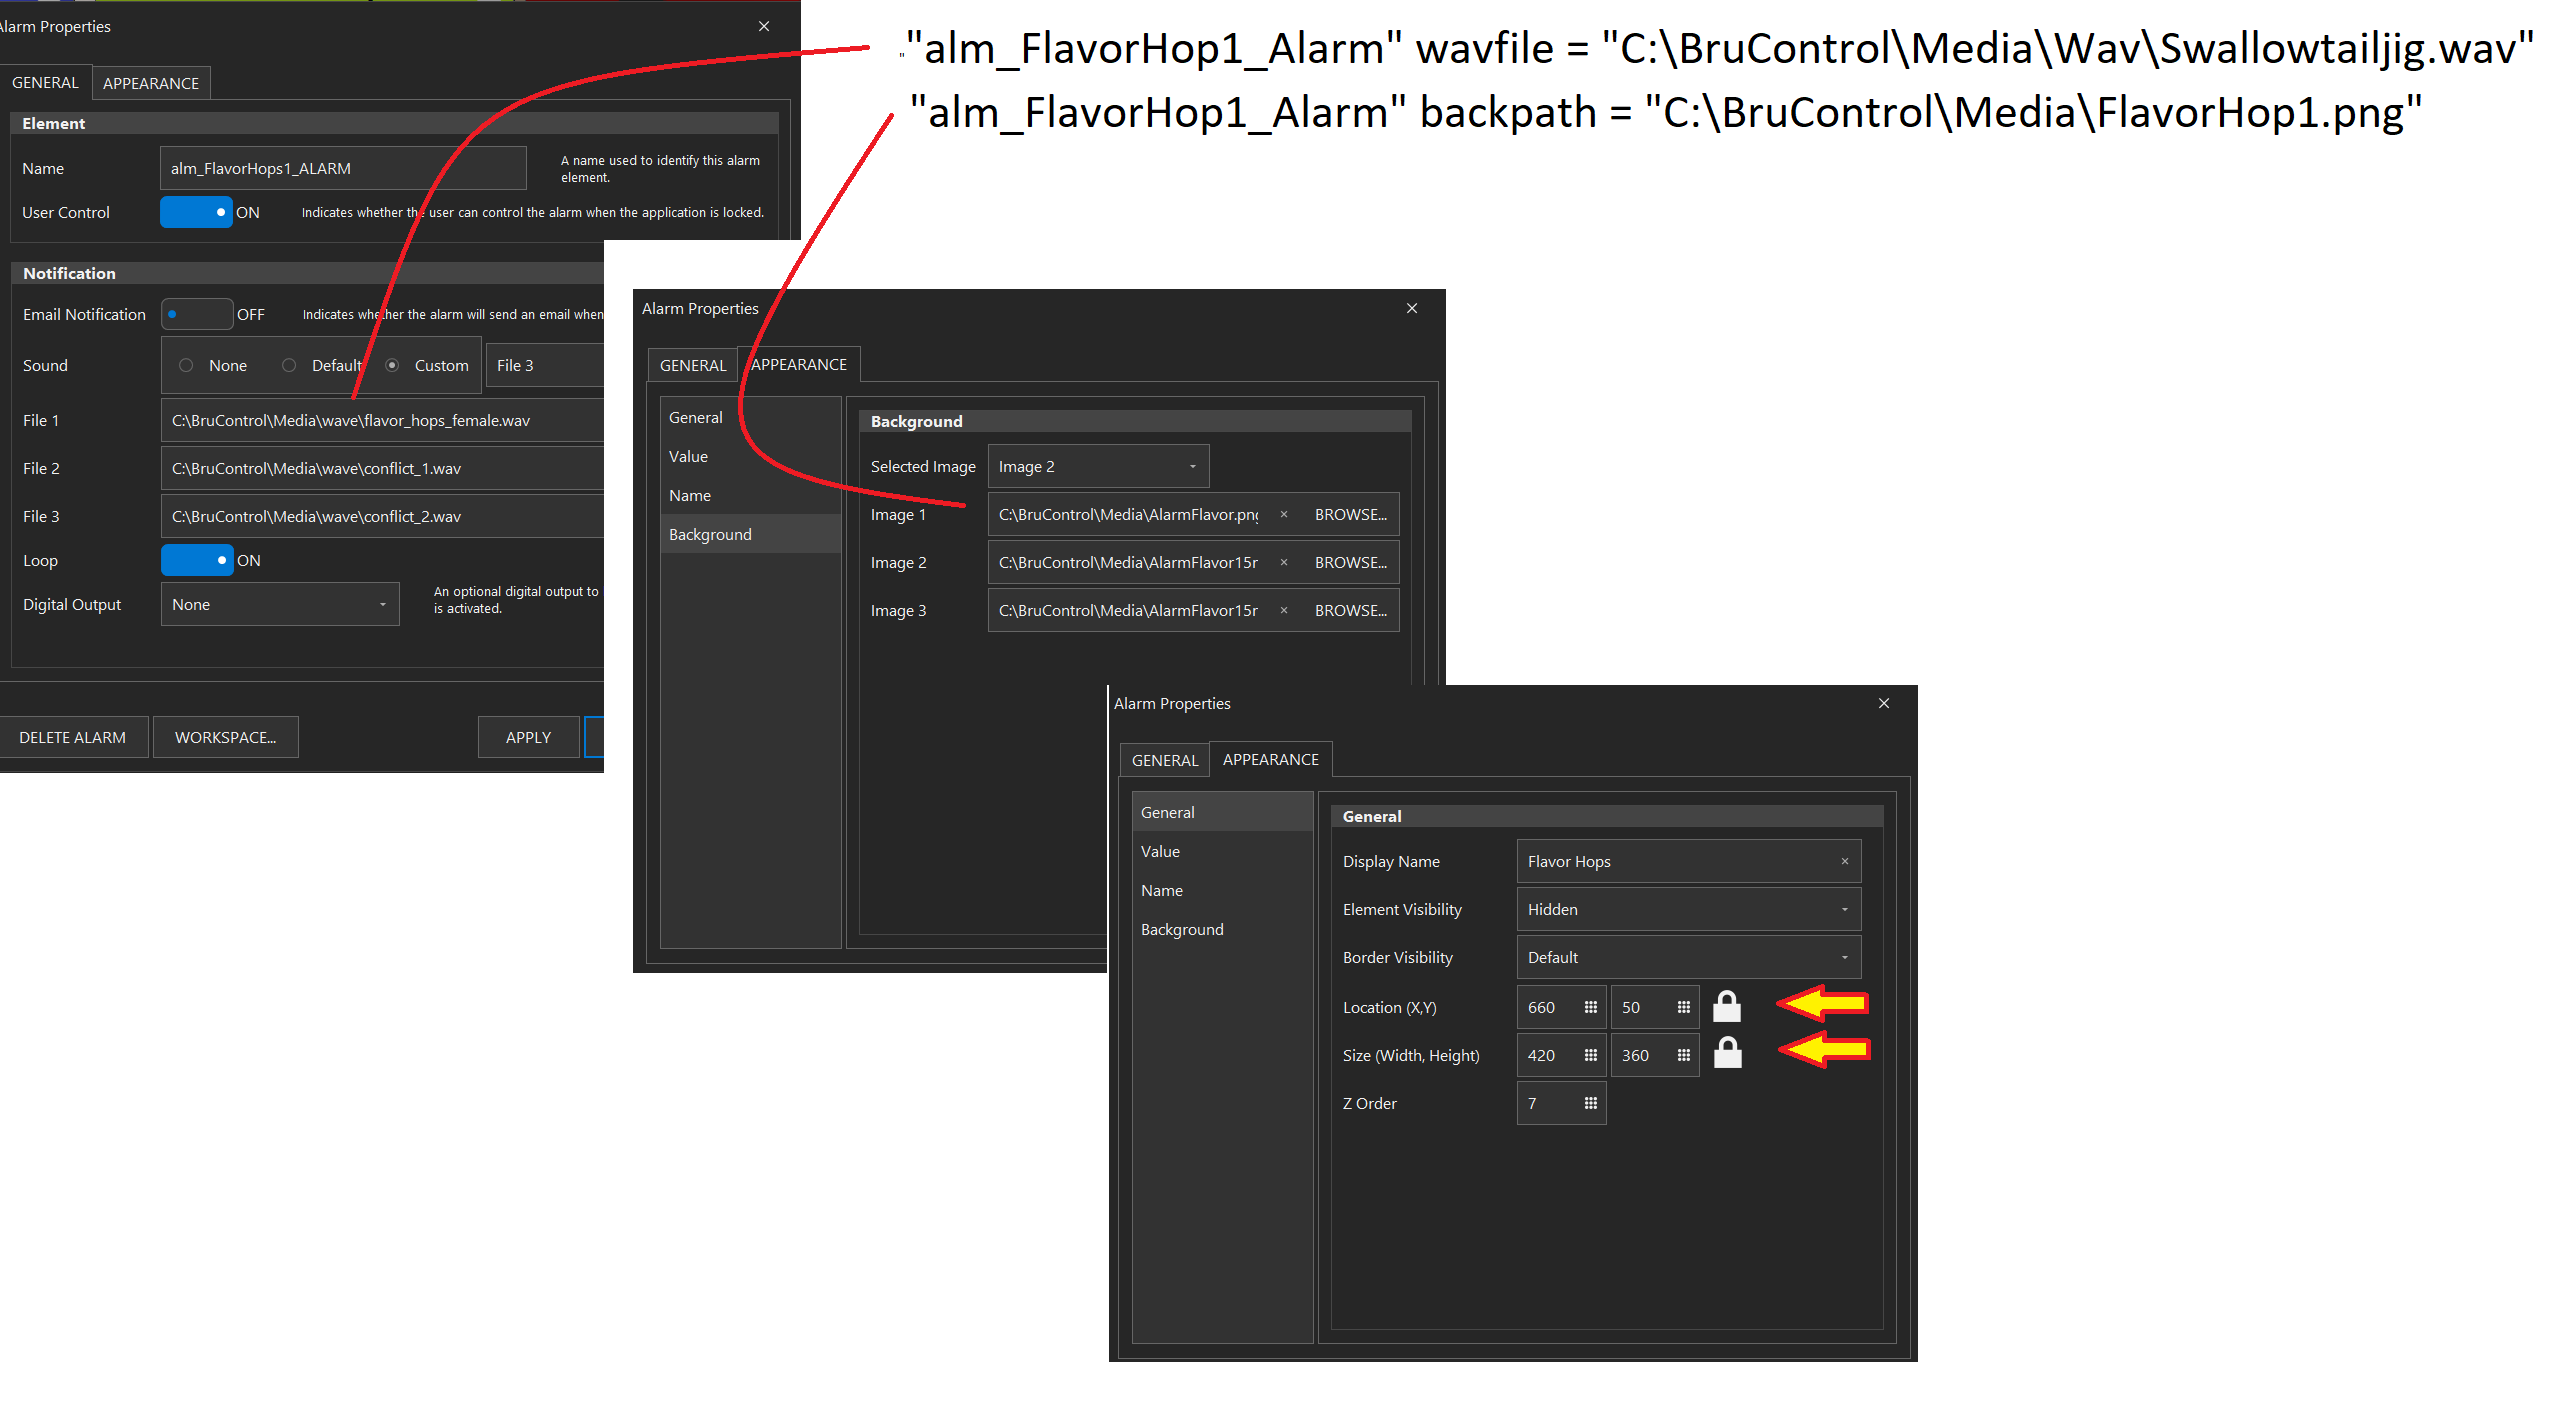
You would need two new Script property attributes.
backpath that would change the file path of Image 1 on any Element
wavfile that would change the path of File 1 on an Alarm.

You would not need to access any other paths and rather than changing the background, you woud leave it at Image 1 and just change the path.

alarm.png
 
For anyone interested in adding wireless bluetooth temperature sensors to their build, ive been messing around with node-red and have a flow working now. I used an Inkbird TH-1 sensor as it has a wired waterproof probe included , picked up for $15 and a Maxesla USB Bluetooth Adapter for similar price. I previously tried using onboard laptop bluetooth , but its very messy to get node red working with it. I've been using the TH1 sensor for 6 weeks and the battery is at 93% , so a year seems a reasonable estimate for battery life(single AAA battery!). I experimented with android app BLE Sniffer to figure out the conversions necessary to convert the bluetooth sensor data to a useable format, I'm sure a similar approach can be used on any cheap bluetooth sensor. This will greatly simplify adding new sensors in unwired parts of the brewery, as well as temporary checks on glycol chiller ports / calibrations etc where wireless is easier. No issues so far with distances up to 15meters from dongle with tanks and machinery in between.
 

Attachments

  • BluetoothSensorScanner.zip
    1.7 KB · Views: 9
For anyone interested in adding wireless bluetooth temperature sensors to their build, ive been messing around with node-red and have a flow working now. I used an Inkbird TH-1 sensor as it has a wired waterproof probe included , picked up for $15 and a Maxesla USB Bluetooth Adapter for similar price. I previously tried using onboard laptop bluetooth , but its very messy to get node red working with it. I've been using the TH1 sensor for 6 weeks and the battery is at 93% , so a year seems a reasonable estimate for battery life(single AAA battery!). I experimented with android app BLE Sniffer to figure out the conversions necessary to convert the bluetooth sensor data to a useable format, I'm sure a similar approach can be used on any cheap bluetooth sensor. This will greatly simplify adding new sensors in unwired parts of the brewery, as well as temporary checks on glycol chiller ports / calibrations etc where wireless is easier. No issues so far with distances up to 15meters from dongle with tanks and machinery in between.

NICE!

Another alternative would be to use @crane's Arduino code to import data via BC's DataExchange. Could use an ESP-32 to read the data and pass it along to BC.

Both are probably similar in terms of performance.
 
That is how I do it. In fact, I am an expert at it. I probably did that 50 times yesterday. Those are what I would like to lock at that level. What would happen is that because the mouse grabbed it, instead of being 0 and 446 and 400 x 350, it might have been 2 and 448 and 399 x 345. I would reset to the 0 and 446 and 400 x 350. Once again, 99.9% of my issue would disappear if I could just set the path for the background Image 1 on all Elements and File 1 on an Alarm via a Script property. I would not stack Elements in that case, but just change the background and in the case of Alarms, the wav File 1 via a Script property. I do believe that the locks at the Element level would still be useful as you could set it and forget it as it would never change unless you unlocked it.

You would need a Lock Toggle similar to the Lock at the top Right of the Workspace screen for the Position and Size.
You would need two new Script property attributes.
backpath that would change the file path of Image 1 on any Element
wavfile that would change the path of File 1 on an Alarm.

You would not need to access any other paths and rather than changing the background, you woud leave it at Image 1 and just change the path.

View attachment 750762

I hear you on the paths... but honestly I'm not seeing the benefit of the per-element lock. Why not just run it with the environment locked?
 
I hear you on the paths... but honestly I'm not seeing the benefit of the per-element lock. Why not just run it with the environment locked?
It is when I want the Workspace Unlocked that it is issue. It is when I am adjusting or adding Elements. I also open the property dialog and copy the name to the clipboard to use in Scripts . Once everything is set, I do keep the Lock On when Brewing. Like I said, the Script path would help a lot as it is when unstacking Elements (moving them to get to the lower layer). It would just make it very easy to "lock:" an Element in Position and Size when building the application Workspace. 99.9999% of the time, once I have the Element sized and in Place, I never want to change it. If I did , I could unlock it if there was a Lock at the Element Level. If you have it built and Set, it is not an issue unless you just happen to click your mouse on an unlocked Screen, It seems to snowball when I move one thing then I move or resize something Else I did not want to. Basically what the Element lock would do it set the size and position of the Element and you would never had to deal with the look ever again. I am sure that many of your users have either moved or resized an Element inadvertely when working on a Workspace. Maybe mine is overly complicated, but one of the fantastic features of BruControl is that you can make it your own. I like it to graphically represent my actual brewery. I have lots of "Additional" brewers and some are new, so the Screen and the Physical Brewery being graphically the same is a great help. When I say Blue Pump, it is easy to find on the Screen as well as the actual Brewery. Having the Screen lock at the Element Level would cut down on an irritaing issue when I am building the Workspaces, not when Brewing.
 
I may have also discovered an issue with the Script return command. I need to figure out why it is doing what it is, but I am getting an error. I suspect that I have two sub routines that have the return command running and it fails on the second executed return. I will research it some more.
 
I may have also discovered an issue with the Script return command. I need to figure out why it is doing what it is, but I am getting an error. I suspect that I have two sub routines that have the return command running and it fails on the second executed return. I will research it some more.
put all in one script rather than starting another and conflict issue disappeared.
 
I have an HLT that has two heating Elements. Any ideas on how to control them?

Both as Hysterisis?
One as a Hysterisis and the Other as Duty Cyle?
One as a PID and the Other as Duty Cyle?
One as a PID and the Other as Hysterisis?

I am thinking One as a PID and the Other as Hysterisis

Something Like

pidder.png


That way when I call for the elements to be "On" Both will be "On" until the HLT Temp probe is 5 degrees below the PID Target , the Hysterisis Element is then off. The 5 degrees may not be enough so I might need to increase that. Both of the Elements would have the same Input (probe).

I think I could use a standard conventional SSR for the Hysterisis Element as it is Hysterisis with an Axe versus a Scapel.
The HLT PID will be a Proportional Controller.
Any thoughts?

As an aside, I have a Quadzilla that I am putting on a small 15 gal Brew pot as the sole source of heat. Once I get my addition parts (Rims Tube), I am going to see how much a single pass of tap water (around 70F) will be raised. I want a decent flow so a static calc may not work.
 
Last edited:
You can experiment but I’d probably just set them both up together. One output to drive two SSRs (assuming your output can handle the current like via the UniShield output). Otherwise you can have two PID devices referencing the same input temp and set up the same way. They will run in parallel but identical.

That said, there is a lot of control wiggle room with these algorithms given the large quantity of water and energy required to heat it. Plus water stops increasing in temp the instant you stop heating, so there is no “momentum” to manage. We use PIDs to maintain temp, but the reality is a hysteresis will work well and hold very tight temps if it’s probe stays steady. Maybe a dynamic RIMs application needs PID, but not HLT or kettle heated mash. Might be blasphemous statements but pretty much true!
 
Yes! You want to eliminate as much dead space as possible. If you find that it’s hard to get it or seat it, in as one side is not dead-perpendicular to the tri-clamp end, then let us know.
It slides in fine. Just worried about the Elements touching the sides. Because of the way I am doing it, I will one have one of the RIMS tube ant a 1.5" TC 8" Extention tube for half of the assembly. At least currently planned that way. Depends on how I get it plumbed.
 
Is there any way to concatenate a string and a time? I'd like to do something like:

new string stepMessage
new time timerDuration
timerDuration = 00:45:00
stepMessage = "Boiling for " + timerDuration
"System Step" Value = stepMessage

Producing "Counting down from 00:45:00". It errors on adding the time value to the string.
 
Back
Top