Hello existing and future BruControl users.
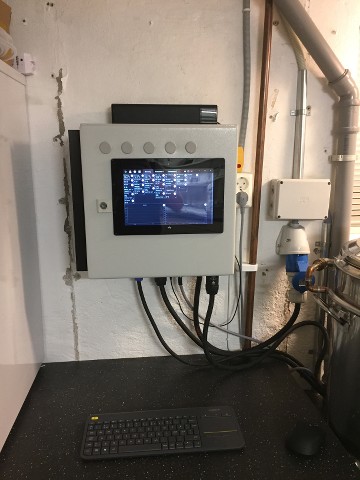
I thought I wanted to share how I am using BruControl in my brewery. First of all I must say I am very pleased with the system and concept. It goes far beyond other available brew control systems when it comes to flexibility, stability and expandability. So far I have not automated the brewing process but the possibility is definitely present. I am running BruControl on my desktop computer and use remote desktop from a LattePanda SBC computer in the control cabinet to control BruControl from the brewery. I guess a Rasperry Pi would do for this job as well if someone is looking at converting their craftbeerpi builds, but since I already had a LattePanda I am using it. So far it has been rock stable without any hickups and with an uptime of 3+ months so far.
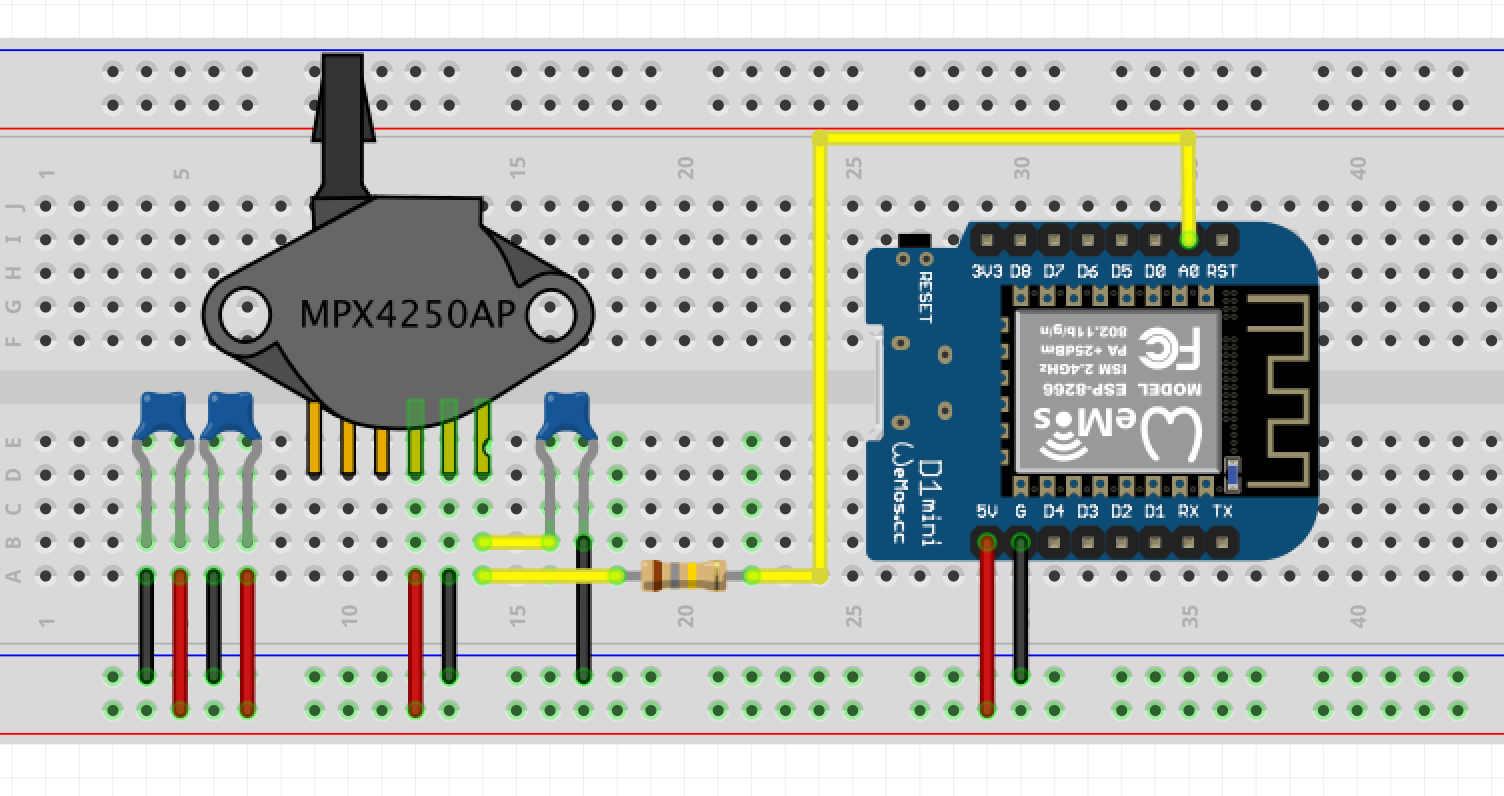
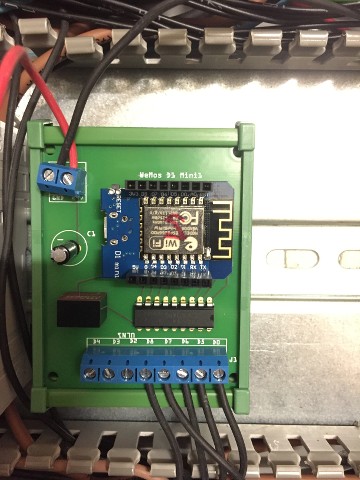
On the controller side I have chosen an untraditional decentralized solution where I use one interface per kettle and one interface to run the relays in the control cabinet. That way the only wiring between the kettles and the control cabinet is 24VDC power supply. Relay/SSR switching is handled by a $3
Wemos D1 mini and the signals between control cabinet and kettles is wireless and the connection between them is handled by the powerful scripting in BruControl. I stared with a plan of using one Mega to run it all but tossed the plan as I realised it would take $150+ in cables, connectors, shields and an additional control box. So I spent the money in extra interfaces and making each a custom PCB to ease the wiring and save space.
Control cabinet with 10" screen
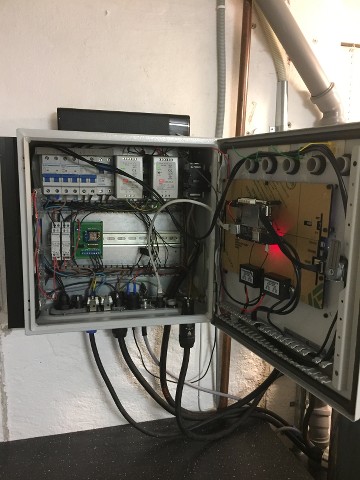
Inside control cabinet
Relay controller with onboard 24V to 5V power supply and 8 output ULN2803 darlington array to switch 24V to SSRs and contactors.
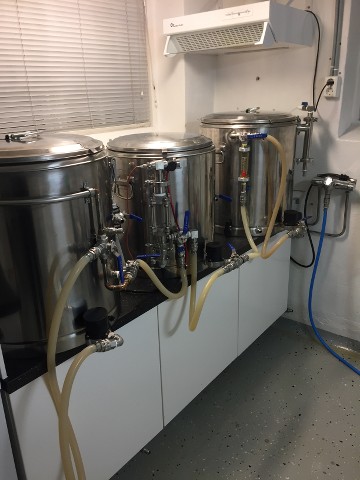
3 kettle setup, HLT at left and BKL to the right.
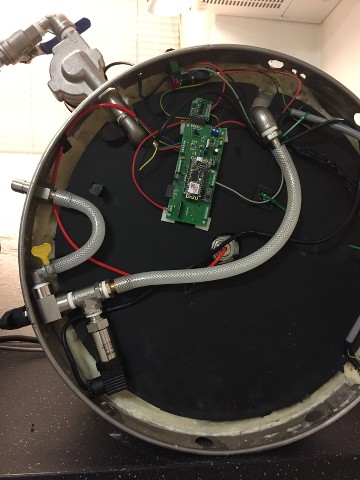
I use double wall insulated
"thermopots" with 1 inch+ foam insulation between the layers.
Similar to the SS brew tech insulated mash tun but cheaper. They have insulation in the bottom as well which I have cut out and insulated with 10mm armacell. That leaves a space of nearly 2 inches which I have used to place level sensor, bottom drain and wiring/control interface.
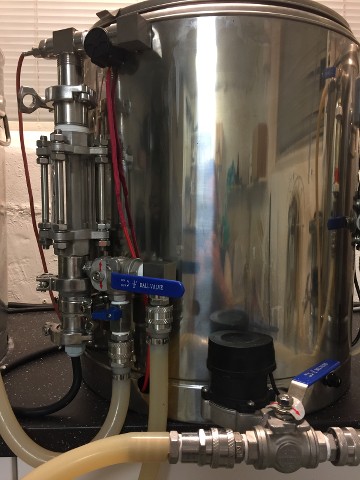
On the picture you see the custom control PCB which holds an
Adafruit Feather M0 Wifi, onboard 24V to 5V power supply, analog inputs (both 0-5V and 4-20ma), flow meter input, 0-10V output, 5V PWM output to the pump, slot for
PT100 amplifier board, thermistor input and 1-wire input. The PCB was approx €12 each + the components. I used
Fritzing to draw and fabricate the PCBs. Fritzing is not the best software out there to do this but for an amateur like me it was fairly easy to use.
The level sensor is a $31
YB-131 from Aliexpress. Its 0-5kpa 4-20ma but they sell it with 0-5V as well. Once properly set up it gives an accuracy of 0.1 liter. The key is to mount it far enough away from the hot liquid as its only temperature compensated up to 60 degree C. Thats why its mounted in the bottom with a silicone hose between the sensor and the kettle. I have also mounted a valve and a flushing port to flush debris that may sit in the hose after brewing.
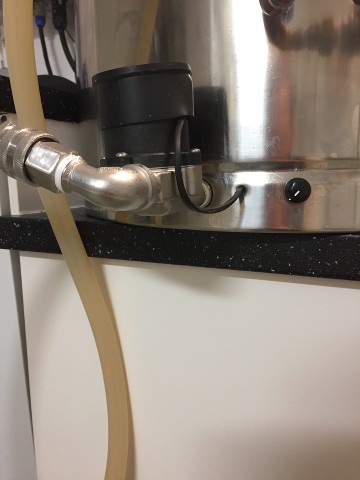
I have drilled vent holes in the skirt to keep the space under the kettle cool. Typically the temperature under the BKL while brewing is 30-35 degree C.
On the Feathers below the kettles I have set up a PID in BruControl and assigned the output from it to an unused pin. On the Wemos in the control cabinet I have set up duty cycle outputs to the respective SSR. Then I have made a script in BC which tells that PID output % from the Feather=duty cycle output % from the Wemos to the SSRs. It works very good, so far I have not experienced communication failures between the controllers.
Each kettle has a pump on the outlet. The pumps are 24VDC TD5 pumps bought from
brewpi.com. They come with a speed control board which accepts PWM signal from the feathers for speed control, or you can control the speed from the knob. The pump will use the signal which is highest. These pumps are more powerful than a Chugger and near completely silent while running.
Self design RIMS tube and sight glass combined mounted to the outer sheet of the mash tun. On the outlet I have a PT100 sensor and a
flowmeter. I use scripting to prevent the element from firing if there is low flow or high temperature over the element. The heating element is a
2400W 240V stainless cartridge heater from Aliexpress.
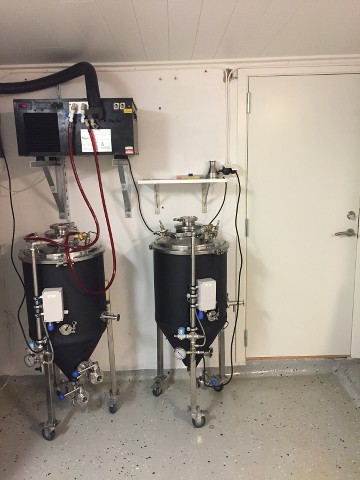
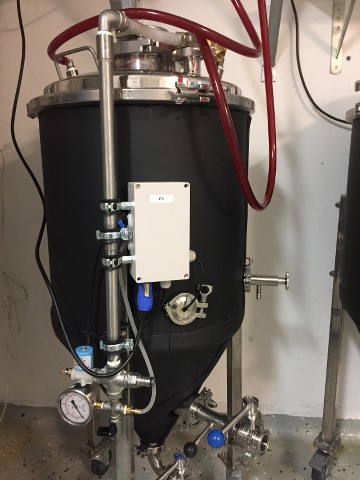
I also use BruControl to control my fermenters. I have made a box on each fermenter with a
Wemos D1 mini,
pressure sensor, and a relay board inside. The relays control the heating cable under the armacell insulation and the solenoid to bleed off pressure. The temperature probe sits in the thermowell and is wired to the Wemos. In the glycol chiller there are solenoids which are controlled with wireless $5
NodeMCU Electrodragon relay board flashed with BruControl firmware. If the Wemos in the fermenter control box demands cooling the NodeMCU will open the solenoid in the glycol chiller to let cooling water to the cooling coil in the fermenter. A neat and portable solution where the only wiring needed is 240V power to the fermenter.
I have written a script in BruControl which ramps the temperature and fermenting pressure if desired. Normally I ferment at 1 psi and ramp it up to 15 psi at the end of fermentation to carbonate. Its also set up to send email notification if temperature or pressure is out of defined limits. And off course, the vessels also has a pressure safety valve in case of BruControl failure but so far it has not failed. The Wemos in the fermenter control box will continue to control pressure and heating if it looses wifi signal and/or connection with the BruControl server.
Next step for me would be to add motorised valves. I consider using the
Electrodragon DC relay boards for valve control as they would fit well under each kettle and not require additional wiring to the control cabinet. Automation is not that important for me as I enjoy being around when brewing. BruControl has given me the possibility to add safety features like the RIMS tube not firing if low flow or the kettle and HLT elements not firing if low liquid level and when I am leaving the brewing room I can monitor it remote from the laptop or the remote desktop app on my Iphone.


![Craft A Brew - Safale S-04 Dry Yeast - Fermentis - English Ale Dry Yeast - For English and American Ales and Hard Apple Ciders - Ingredients for Home Brewing - Beer Making Supplies - [1 Pack]](https://m.media-amazon.com/images/I/41fVGNh6JfL._SL500_.jpg)


") )
)