You are using an out of date browser. It may not display this or other websites correctly.
You should upgrade or use an alternative browser.
You should upgrade or use an alternative browser.
Brewzilla Gen4 Discussion/Tips Talk
- Thread starter stealthfixr
- Start date

Help Support Homebrew Talk:
This site may earn a commission from merchant affiliate
links, including eBay, Amazon, and others.
Barão
Well-Known Member
- Joined
- Jun 18, 2020
- Messages
- 191
- Reaction score
- 50
the pump dries out after 30 minDid the pump initially stop flowing because it had run dry, or is it clogging before that?
Test might be to stop pump, and blow back through sparge pipe (valve full open). Hard to blow and hear bubbles =liquid left. Easy to blow (once any block cleared) =little or no liquid. If grain pipe was still draining, you'd have to be quick to be sure which.
Anyway blowing through can get the pump working again in two ways; clearing a blockage, or clearing an airlock. Sometimes, once air is in the pump, there's no flow because it can't pump air, and back pressure from any wort left in the sparge rise pipe prevents wort flowing in from the base. Once you've blown most of the wort out, wort can then fill the pump.
If air got to the pump, did it work again, after enough wort has eventually drained through, or had it become clogged with grain?
The overflow could be taking some grain down, but then that should be caught on the false bottom.
While an overflow is happening, wort is effectively bypassing the (stuck) mash, so the pump shouldn't run dry. But maybe with a low enough level, air could still be sucked down.
hungupdown
Well-Known Member
The manual, on page 2 says " Do not run the pump dry for extended periods. This can damage the pump".the pump dries out after 30 min
Would be good to know how fast damage can happen, and what is the likely outcome. Slow pumping or pump failure?
Barão
Well-Known Member
- Joined
- Jun 18, 2020
- Messages
- 191
- Reaction score
- 50
The wort level rises...the pump runs dry...wort stuckThe manual, on page 2 says " Do not run the pump dry for extended periods. This can damage the pump".
Would be good to know how fast damage can happen, and what is the likely outcome. Slow pumping or pump failure?
hungupdown
Well-Known Member
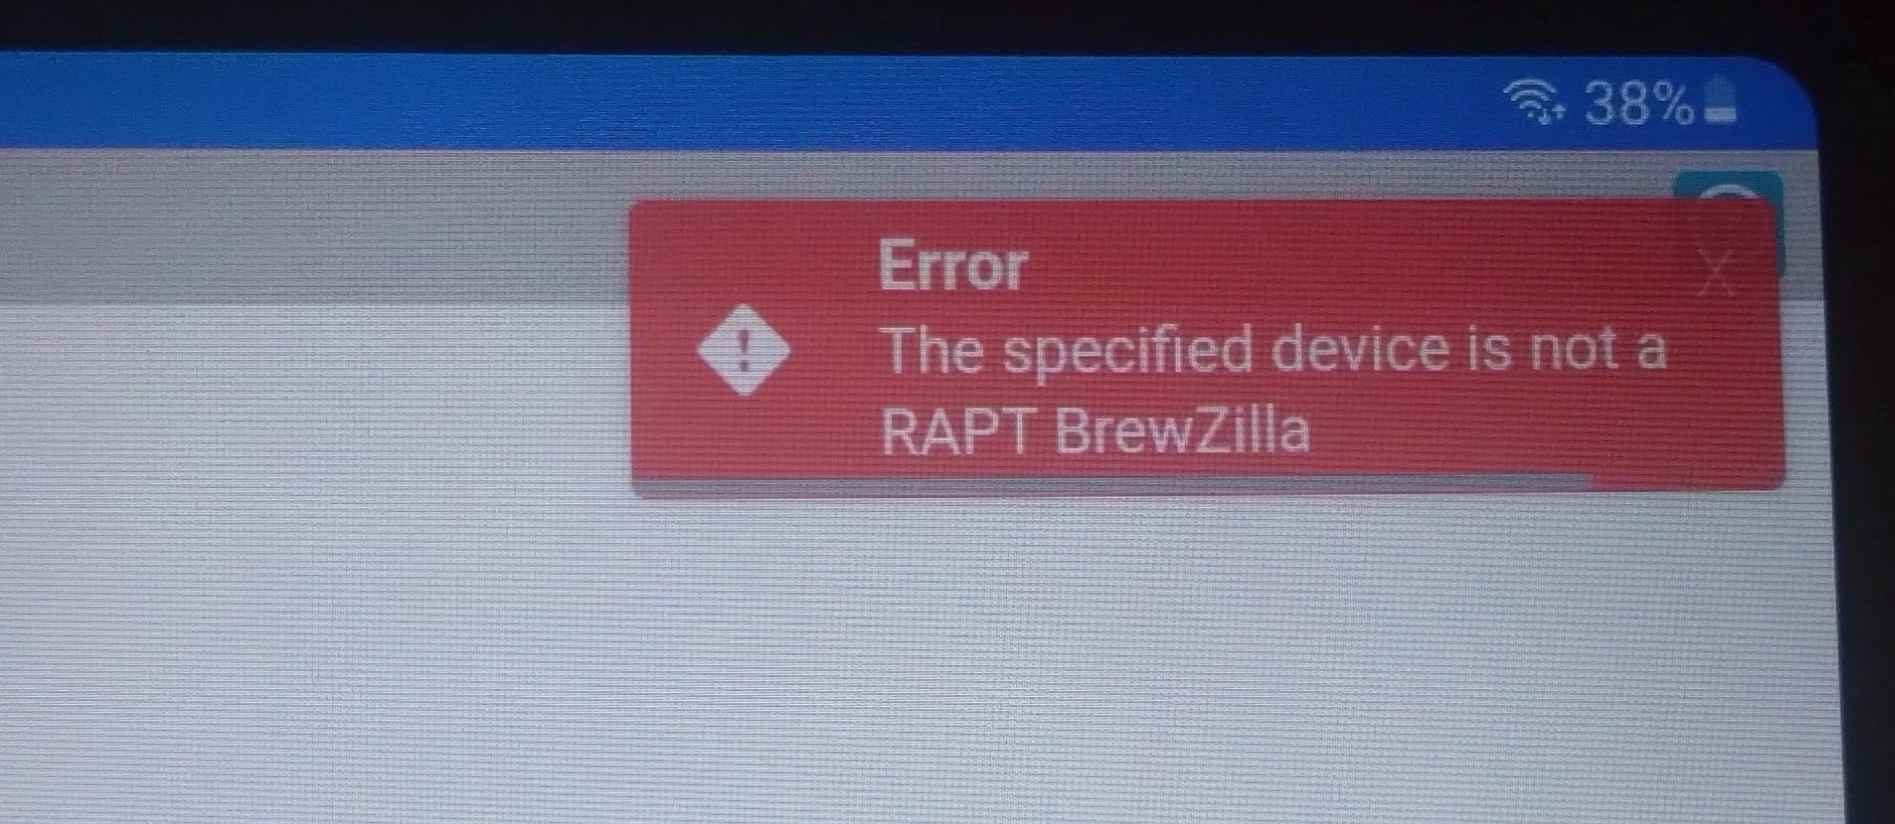
RAPT error message "The specified device is not a RAPT BrewZilla"
Get that when trying to register a BZ 35l gen 4 in the RAPT
After following all all the steps to register a new device, of type Brewzilla, inc deletion of any previous registration, the MAC and validation code are accepted (given warning if wrong code entered), then a while after confirming name entered, the wait message is replaced by an error message saying "The specified device is not a RAPT BrewZilla".
Same trying via RAPT web portal. Also tried powering BZ down a few times.
Any Ideas? - I'd like to do a brew, but prompt to register covers most of the display.
I'd ordered a BZ gen 4, it looks like a BZ gen4, and the diagnostics say "Brewzilla model P1". So what is it, other than hours of wasted time???
And that's just trying to turn it on, not all the unpacking & assembly.
Box says "RAPT connected", but then it also says "BREWING MADE EASY"!
If they made it hard, I dread to think how long things would take.
Surely the thing should default to permitting manual operation, and not be unusable without registration as a smart device. A thing that some people mightn't want anyway.
Attachments
hungupdown
Well-Known Member
Eventually somethings fixed the issue.RAPT error message "The specified device is not a RAPT BrewZilla"
Get that when trying to register a BZ 35l gen 4 in the RAPT
After following all all the steps to register a new device, of type Brewzilla, inc deletion of any previous registration, the MAC and validation code are accepted (given warning if wrong code entered), then a while after confirming name entered, the wait message is replaced by an error message saying "The specified device is not a RAPT BrewZilla".
Same trying via RAPT web portal. Also tried powering BZ down a few times.
Any Ideas? - I'd like to do a brew, but prompt to register covers most of the display.
I'd ordered a BZ gen 4, it looks like a BZ gen4, and the diagnostics say "Brewzilla model P1". So what is it, other than hours of wasted time???
And that's just trying to turn it on, not all the unpacking & assembly.
Box says "RAPT connected", but then it also says "BREWING MADE EASY"!
If they made it hard, I dread to think how long things would take.
Surely the thing should default to permitting manual operation, and not be unusable without registration as a smart device. A thing that some people mightn't want anyway.
During previous (10 or so) attempts, I'd been logged in both on Web portal and the app.
After logging out from Web portal, the registration worked in less than 2 seconds (while wait before getting error message, had been about 10 seconds).
So just an erroneous error message, and it was really a "RAPT BrewZilla", all the time!
I'm guessing registration via portal would also have worked, if I'd logged out of the app first.
Just hoping that running profiles, and direct monitoring / control, will work OK if I'm logged in from two devices.
As tablet easier for setting up profiles, but phone handier for brew day. And would be a pain having to keep logging the other out.

$58.16
HUIZHUGS Brewing Equipment Keg Ball Lock Faucet 30cm Reinforced Silicone Hose Secondary Fermentation Homebrew Kegging Brewing Equipment
xiangshuizhenzhanglingfengshop


$22.00 ($623.23 / Ounce)
AMZLMPKNTW Ball Lock Sample Faucet 30cm Reinforced Silicone Hose Secondary Fermentation Homebrew Kegging joyful
无为中南商贸有限公司


$44.99
$49.95
Craft A Brew - Mead Making Kit – Reusable Make Your Own Mead Kit – Yields 1 Gallon of Mead
Craft a Brew

$719.00
$799.00
EdgeStar KC2000TWIN Full Size Dual Tap Kegerator & Draft Beer Dispenser - Black
Amazon.com


$7.79 ($7.79 / Count)
Craft A Brew - LalBrew Voss™ - Kveik Ale Yeast - For Craft Lagers - Ingredients for Home Brewing - Beer Making Supplies - (1 Pack)
Craft a Brew

$28.98
Five Star - 6022b_ - Star San - 32 Ounce - High Foaming Sanitizer
Great Fermentations of Indiana

$479.00
$559.00
EdgeStar KC1000SS Craft Brew Kegerator for 1/6 Barrel and Cornelius Kegs
Amazon.com


$53.24
1pc Hose Barb/MFL 1.5" Tri Clamp to Ball Lock Post Liquid Gas Homebrew Kegging Fermentation Parts Brewer Hardware SUS304(Gas MFL)
Guangshui Weilu You Trading Co., Ltd


$176.97
1pc Commercial Keg Manifold 2" Tri Clamp,Ball Lock Tapping Head,Pressure Gauge/Adjustable PRV for Kegging,Fermentation Control
hanhanbaihuoxiaoshoudian


![Craft A Brew - Safale S-04 Dry Yeast - Fermentis - English Ale Dry Yeast - For English and American Ales and Hard Apple Ciders - Ingredients for Home Brewing - Beer Making Supplies - [1 Pack]](https://m.media-amazon.com/images/I/41fVGNh6JfL._SL500_.jpg)
$6.95 ($17.38 / Ounce)
$7.47 ($18.68 / Ounce)
Craft A Brew - Safale S-04 Dry Yeast - Fermentis - English Ale Dry Yeast - For English and American Ales and Hard Apple Ciders - Ingredients for Home Brewing - Beer Making Supplies - [1 Pack]
Hobby Homebrew

$159.99 ($26.66 / Count)
3M High Flow Series System BREW120-MS, 5616001, For Brewed Coffee and Hot Tea, Valve-in-Head Design
SpaceCityProviders


$76.92 ($2,179.04 / Ounce)
Brewing accessories 1.5" Tri Clamp to Ball Lock Post Liquid Gas Homebrew Kegging Fermentation Parts Brewer Hardware SUS304 Brewing accessories(Gas Hose Barb)
chuhanhandianzishangwu


$10.99 ($31.16 / Ounce)
Hornindal Kveik Yeast for Homebrewing - Mead, Cider, Wine, Beer - 10g Packet - Saccharomyces Cerevisiae - Sold by Shadowhive.com
Shadowhive

$53.24
1pc Hose Barb/MFL 1.5" Tri Clamp to Ball Lock Post Liquid Gas Homebrew Kegging Fermentation Parts Brewer Hardware SUS304(Liquid Hose Barb)
yunchengshiyanhuqucuichendianzishangwuyouxiangongsi


$33.99 ($17.00 / Count)
$41.99 ($21.00 / Count)
2 Pack 1 Gallon Large Fermentation Jars with 3 Airlocks and 2 SCREW Lids(100% Airtight Heavy Duty Lid w Silicone) - Wide Mouth Glass Jars w Scale Mark - Pickle Jars for Sauerkraut, Sourdough Starter
Qianfenie Direct


hungupdown
Well-Known Member
Eventually somethings fixed the issue.RAPT error message "The specified device is not a RAPT BrewZilla"
Get that when trying to register a BZ 35l gen 4 in the RAPT
After following all all the steps to register a new device, of type Brewzilla, inc deletion of any previous registration, the MAC and validation code are accepted (given warning if wrong code entered), then a while after confirming name entered, the wait message is replaced by an error message saying "The specified device is not a RAPT BrewZilla".
Same trying via RAPT web portal. Also tried powering BZ down a few times.
Any Ideas? - I'd like to do a brew, but prompt to register covers most of the display.
I'd ordered a BZ gen 4, it looks like a BZ gen4, and the diagnostics say "Brewzilla model P1". So what is it, other than hours of wasted time???
And that's just trying to turn it on, not all the unpacking & assembly.
Box says "RAPT connected", but then it also says "BREWING MADE EASY"!
If they made it hard, I dread to think how long things would take.
Surely the thing should default to permitting manual operation, and not be unusable without registration as a smart device. A thing that some people mightn't want anyway.
During previous (10 or so) attempts, I'd been logged in both on Web portal and the app.
After logging out from Web portal, the registration worked in less than 2 seconds (while wait before getting error message, had been about 10 seconds).
So just an erroneous error message, and it was really a "RAPT BrewZilla", all the time!
I'm guessing registration via portal would also have worked if I'd logged out of app.
Just hoping that running profiles, and direct monitoring / control, will work OK if I'm logged in from two devices.
As tablet easier for setting up profiles, but phone handier for brew day. And would be a pain having to keep logging the other out.
hungupdown
Well-Known Member
Gap between false bottom and wall, due to oval shape.
The single eye false bottom, new BZ35 gen4, seems a very loose fit along two sides.
I'm hoping others could post what sort of gaps they see, on later gen4 systems - after false bottom size was reduced (single lifting eye).
I remember seeing an earlier post listing very small gaps, but I think that was an earlier gen4 (bigger / two eye).
I heard kegland saying they'd now reduced the false bottom diameter a touch, due to complaints it was too tight. Don’t know when this happened, but false bottom now has just a single, central lifting eye.
The supplier is saying a >2mm gap, could be within tolerance. But I suspect gap will make pump blockages much more likely, and think I need a replacement.
Knowing the range of size tolerance on working systems, might give others who get frequent blockages, something to check.
The loose fit on mine, means the gap left can be over 2mm wide along one side, between the false bottom and the wall. A 2mm drill bit can be dropped through this slot.
That is when cold, around 16°C. Kegland say that at the warmer, operating temperatures, the fit becomes looser so any gap would increase, (which is why they, originally, chose the fit to be tight while cold).
The false bottom seems to be an accurate circular shape, but at the base (of the tun) the wall forms an oval shape.
Across the shorter axis of the oval, the base is a close fit. The other axis, being around 2 mm longer, is too big for the diameter of the false bottom.
The false bottom perforation holes are only around 1.6mm diameter. So it seems daft having a 2mm or wider slot, that any sized pieces under 2mm thick could pass.
I'm thinking rolled flakes (1.2 - 1.3mm); flattened stalk fragments (often find a few of these per kilo of bought crushed grain); or whole leaf hop fragments. None of those would pass through a 1.6mm hole, or even a 2mm one.
A good fitting false bottom is more likely to prevent blockages, from any debris escaping the malt pipe or from leaf hops. Especially if it lifts, and moves about, during the boil.
{edit} Just checked on a BZ3.1.1. The false bottom, which was never a tight fit, has a maximum gap of 1mm.
Last edited:
My 35L false bottom is extremely tight, requiring flexing the bottom to extract. Some complained about this, but the friction is the only thing holding it down, so in my eyes it's a feature.Gap between false bottom and wall, due to oval shape.
The false bottom, new BZ35 gen4, seems a very loose fit along two sides.
I'm hoping others could post what sort of gaps they see, on later gen4 systems - after false bottom size was reduced (single lifting eye).
I remember seeing an earlier post listing very small gaps, but I think that was an earlier gen4 (bigger / two eye).
edit: I haven't noticed anything out of round.
Last edited:
hungupdown
Well-Known Member
I'd heard about the tight fit, and also thought it seemed a good feature. So was disappointed to find the feature had been dropped by the time I got mine.My 35L false bottom is extremely tight, requiring flexing the bottom to extract. Some complained about this, but the friction is the only thing holding it down, so in my eyes it's a feature.
edit: I haven't noticed anything out of round.
Supplier, BKT, has now to send a checked replacement main body and false bottom. With any luck, they may have some old stock of the larger bottom.
londonslaughter
New Member
I was also running into the "The specified device is not a RAPT BrewZilla" error.
In case this helps anybody else - I ended up deleting my device, logging out of any portals. Then on the brewzilla itself, went to settings, cleared registration, then back into settings to the last option which is to check for update. I moved my brewzilla closer to my router (still pretty far away), and ran the update. It downloaded the new firmware, restarted. Then I re-registered the device in the app.rapt.io portal and everything worked.
In case this helps anybody else - I ended up deleting my device, logging out of any portals. Then on the brewzilla itself, went to settings, cleared registration, then back into settings to the last option which is to check for update. I moved my brewzilla closer to my router (still pretty far away), and ran the update. It downloaded the new firmware, restarted. Then I re-registered the device in the app.rapt.io portal and everything worked.
Last edited:
I finally got around to setting up my RAPT Bluetooth temp probe last night and was trying to experiment with it plus some PID settings. Has anyone successfully used both together? My research seems to suggest people either use one or the other, but I’m trying to both get a more realistic, stable mash temp as well as prevent massive overshooting (which I had before, though admittedly based on just the default hysteresis settings).
For reference, I had my PID settings at 0.418, 0.0025, 0.0, respectively. The Allowed sensor Differential was 2F. My Target temp was 152.0. The Probe temp hit 154.2 with the built in reading 148, and then the differential temp override kicked in and turned the heater off. The Probe temp eventually came down to 153.5 after about 5 min but the probe temp was 145.7, almost 6.5 degrees less than target of 152.
Do I need to allow more overshooting my increasing the Proportional factor or something else?
PID settings depend on the system properties (e.g. lag in detectable response). You'd need to dial in the parameters for the remote probe, and consistent probe placement would be key.
I was thinking about starting to use the top plate since it has a hole in the center that the probe is designed to sit in, so I think that solves the consistent placement issue, but the gap between the two temps seemed pretty wide. Should I allow a bigger temperature differential so the heaters don’t turn off too early? It would result in, I think, a higher temp towards the top of the mash but then allow the top temp to drop to meet the built in probe, resulting in a more consistent temp throughout. Maybe?
Clickeral
Member
Anyone have issues with cloudy wort and the screens not catching all the grain bits? I always have grain bits in my boil 
My crush is pretty course as its the same that I run on my 3V (which has no issues with clear wort)
Currently on my 4th batch with the 35L gen 4 so currently waiting on the 1st batch to cold chill/carb before I can check its clarity in the glass
My crush is pretty course as its the same that I run on my 3V (which has no issues with clear wort)
Currently on my 4th batch with the 35L gen 4 so currently waiting on the 1st batch to cold chill/carb before I can check its clarity in the glass
I do; not enough to affect flavor but definitely appearance..I’ve seen some folks recommend recirculating into a hop spider for a bit after the mash in order to catch anything that made it through the malt pipe screen plus the false bottom.
from what I understand, newer builds of the Gen4 have a slightly looser false bottom because people were commenting early on that it was too tight to take out. The trade off there is sometimes stuff slips through.
one thing I started doing and actually saw recommended somewhere else is to put some of the malt into the pipe before you lower it into the kettle to prevent the bottom screen from slipping, which I’ve had happen when lowering it into the strike water without anything on top to keep it from floating out of place.
Clickeral
Member
Yeah I wish the false bottom was tighter I seem to get particulates stuck to the HED as well and while nothing has burned yet on the bottom I do have to give it a scrub after brew to remove buildupI do; not enough to affect flavor but definitely appearance..I’ve seen some folks recommend recirculating into a hop spider for a bit after the mash in order to catch anything that made it through the malt pipe screen plus the false bottom.
from what I understand, newer builds of the Gen4 have a slightly looser false bottom because people were commenting early on that it was too tight to take out. The trade off there is sometimes stuff slips through.
one thing I started doing and actually saw recommended somewhere else is to put some of the malt into the pipe before you lower it into the kettle to prevent the bottom screen from slipping, which I’ve had happen when lowering it into the strike water without anything on top to keep it from floating out of place.
I haven't noticed the plate in the pipe slipping but will give it ago, I tend to fill with mash water then add the pipe then heat up
Never got PID to work properly (but that's also because my inbuilt probe is not calibrated (I see it is off by something by 8c). I have switched to using only the BT thermometer. I put it in the middle of the top screen as well and it works perfectly fine. Just increase the differential and you should be fine. Alternatively, calibrate your inbuilt probe. (link to the manual). Since you have the BT probe, you don't need to use freezing and boiling. You can use any two temp points to calibrate (though I have been lazy and have not yet done it). This should be enough.I finally got around to setting up my RAPT Bluetooth temp probe last night and was trying to experiment with it plus some PID settings. Has anyone successfully used both together? My research seems to suggest people either use one or the other, but I’m trying to both get a more realistic, stable mash temp as well as prevent massive overshooting (which I had before, though admittedly based on just the default hysteresis settings).
For reference, I had my PID settings at 0.418, 0.0025, 0.0, respectively. The Allowed sensor Differential was 2F. My Target temp was 152.0. The Probe temp hit 154.2 with the built in reading 148, and then the differential temp override kicked in and turned the heater off. The Probe temp eventually came down to 153.5 after about 5 min but the probe temp was 145.7, almost 6.5 degrees less than target of 152.
Do I need to allow more overshooting my increasing the Proportional factor or something else?
Let me know if that helps!
I use a bag outside the malt pipe as insurance. Works like a charm. Also, some little bits of grain should not really have too much of an effect on anything.Anyone have issues with cloudy wort and the screens not catching all the grain bits? I always have grain bits in my boil
My crush is pretty course as its the same that I run on my 3V (which has no issues with clear wort)
Currently on my 4th batch with the 35L gen 4 so currently waiting on the 1st batch to cold chill/carb before I can check its clarity in the glass
I've only ever managed to get PID to work when using the bottom in built probe and have had great results with this. When using the Blue tooth probe I've pretty much only manged to use it once with a stable temp, the rest of the time I've had wild overshoots so have given up using it. Now maybe the PID settings need to be completely different when using the Bluetooth probe? But I'll let someone else figure it out!I finally got around to setting up my RAPT Bluetooth temp probe last night and was trying to experiment with it plus some PID settings. Has anyone successfully used both together? My research seems to suggest people either use one or the other, but I’m trying to both get a more realistic, stable mash temp as well as prevent massive overshooting (which I had before, though admittedly based on just the default hysteresis settings).
For reference, I had my PID settings at 0.418, 0.0025, 0.0, respectively. The Allowed sensor Differential was 2F. My Target temp was 152.0. The Probe temp hit 154.2 with the built in reading 148, and then the differential temp override kicked in and turned the heater off. The Probe temp eventually came down to 153.5 after about 5 min but the probe temp was 145.7, almost 6.5 degrees less than target of 152.
Do I need to allow more overshooting my increasing the Proportional factor or something else?
I remember seeing on the kegland video that there is no need for the PID when using the BT thermometer. So, I just switched to using the thermometer and I've done 4-5 brews now, all of which have been alright. What I would also advocate is that once you get a stable-ish temp during the mash, reduce the heating to 30-40% (or perhaps lesser) that will further stabilize temps.I've only ever managed to get PID to work when using the bottom in built probe and have had great results with this. When using the Blue tooth probe I've pretty much only manged to use it once with a stable temp, the rest of the time I've had wild overshoots so have given up using it. Now maybe the PID settings need to be completely different when using the Bluetooth probe? But I'll let someone else figure it out!
I remember seeing on the kegland video that there is no need for the PID when using the BT thermometer. So, I just switched to using the thermometer and I've done 4-5 brews now, all of which have been alright. What I would also advocate is that once you get a stable-ish temp during the mash, reduce the heating to 30-40% (or perhaps lesser) that will further stabilize temps.
I use the the element power percentage now and find anywhere from 25-35% enough to maintain a stable mash temp, providing your strike temp is right then this works very well. I'll also set the heating hysteresis to 0.5c and the temp differential to 2c during the mash. Of adjusting the temp, i.e. for mash out I'll often change to controlling using the in built in probe and then switch back to the Bluetooth probe once at the correct temp. All a bit of a flaf!I remember seeing on the kegland video that there is no need for the PID when using the BT thermometer. So, I just switched to using the thermometer and I've done 4-5 brews now, all of which have been alright. What I would also advocate is that once you get a stable-ish temp during the mash, reduce the heating to 30-40% (or perhaps lesser) that will further stabilize temps.
Yea, when I watched the video (I think the same one you are referencing) they talked about the HED, BT probe, and PID as separate things, not so much as three things to use in concert. So I guess I'll turn off PID now that I have the BT probe and update the hysteresis and temp differential settings and see if I can get to some stable temps. Lowering the heat power during the mash is a good tip, too. I usually leave it at 100% during the mash and turn it down once I get to boil to prevent any boil overs but trying it during the mash itself is something I will do on my next brew. Thanks everyone!I remember seeing on the kegland video that there is no need for the PID when using the BT thermometer. So, I just switched to using the thermometer and I've done 4-5 brews now, all of which have been alright. What I would also advocate is that once you get a stable-ish temp during the mash, reduce the heating to 30-40% (or perhaps lesser) that will further stabilize temps.
I use the HED with the BT probe and it works absolutely fine. I've also found that a degree here and there does not really matter too much. Also, in general even in the heating up to mash, perhaps consider reducing the heating power when approaching close to mash temp since once it is overshot, reducing the temp - especially if it is a large mash takes far longer. One more tip, all through the heating and mash, keep the recirc on. Definitely gets a far more even temp all through the malt pipe. Good luck!Yea, when I watched the video (I think the same one you are referencing) they talked about the HED, BT probe, and PID as separate things, not so much as three things to use in concert. So I guess I'll turn off PID now that I have the BT probe and update the hysteresis and temp differential settings and see if I can get to some stable temps. Lowering the heat power during the mash is a good tip, too. I usually leave it at 100% during the mash and turn it down once I get to boil to prevent any boil overs but trying it during the mash itself is something I will do on my next brew. Thanks everyone!
I put the pipe in, add my mash water, then heat the whole system. I've never had the pump clog. That's consistent with the idea that an empty pipe lowered into water displaces the bottom screen.One process step that has maybe shown differences in this thread is how you add your grains. Myself, and at least one other have not had grain clogs and report the following process:
- Basket in while heating strike water.
- Lift empty basket and rest on the stops.
- Add grain.
- Lower into strike water.
One difference that popped out between cloggers and non-cloggers, was the basket was lowered into water empty. This may have been unseating bottom screen.
Are you measuring the water before you fill the Gen4? How do you know how much water you’ve got if you have the malt pipe in there already?
Yep, I add water until the malt pipe bottom is just at the water's surface (filling the dead space) then I add my 1.7 quarts/lb using a marked pitcher.Are you measuring the water before you fill the Gen4? How do you know how much water you’ve got if you have the malt pipe in there already?
Does anyone use the top plate while mashing, if so how soon do you put it in place after doughing in? I.e. do you let the grain bed set at all before adding it?
I didn't use it last brew which seemed to create quite a bit of channeling on one side.
Cheers
I didn't use it last brew which seemed to create quite a bit of channeling on one side.
Cheers
I put it on after mashing in. I have the grain in malt pipe, lower it into the water, then stir with a long spoon until ask the dry spots seem mixed out. Then the top plate goes on, recirc hose lays on top, and pump goes on .Does anyone use the top plate while mashing, if so how soon do you put it in place after doughing in? I.e. do you let the grain bed set at all before adding it?
I didn't use it last brew which seemed to create quite a bit of channeling on one side.
Cheers
I don't stir grains or touch anything until I'm pulling malt pipe out.
I've only ever brewed with it. The logic of it as explained in Kegland YouTube video made sense to me, so I've had it since I got the unit.Is the heat exchanger plate necessary really?......Also does it help retain the hot trub hops ...mash / whirpool ?
Whether it can be attributed to the HED or not, this system has worked great for me. I get mash efficiency 80+%, the system heats up well and has good temperature stability, and I haven't had any of these stuck mashes some have posted on here about.
Barão
Well-Known Member
- Joined
- Jun 18, 2020
- Messages
- 191
- Reaction score
- 50
OK....Thanks...but what I would like to know is if the hob helps to retain the hops from the hot part and whirpoolI've only ever brewed with it. The logic of it as explained in Kegland YouTube video made sense to me, so I've had it since I got the unit.
Whether it can be attributed to the HED or not, this system has worked great for me. I get mash efficiency 80+%, the system heats up well and has good temperature stability, and I haven't had any of these stuck mashes some have posted on here about.
For me, the filter plate typically is covered in hop dust.OK....Thanks...but what I would like to know is if the hob helps to retain the hops from the hot part and whirpool
Just got the HED and attached it to the false bottom. Unless I’m missing something, the false bottom’s feet don’t sit flat anymore — the screw of the eye hook now sits lower and so the whole thing sort of tilts on the center axis.
That seems like a problem, as the false bottom can sit at an angle, not fully covering the bottom and letting some grains/hops through. Has anyone else experience this?
That seems like a problem, as the false bottom can sit at an angle, not fully covering the bottom and letting some grains/hops through. Has anyone else experience this?
JoepH
Active Member
No, everything fits and is nice in place with my 65Lgen4. Contact your supplyer.Just got the HED and attached it to the false bottom. Unless I’m missing something, the false bottom’s feet don’t sit flat anymore — the screw of the eye hook now sits lower and so the whole thing sort of tilts on the center axis.
That seems like a problem, as the false bottom can sit at an angle, not fully covering the bottom and letting some grains/hops through. Has anyone else experience this?
Odd. Even the KegLand video where they introduce the HED after he assembles it and places it down you can see it doesn’t sit flat.
agentbud
Well-Known Member
be sure you have the connections in the right order. From top to bottom, it should be Eye bolt, washer, false bottom, washer, nut, HED, then wing nut. The wing nut should be the only item below the HED
I threw another washer between the wing nut and the HED just to disperse the tension a bit BUT at around 5:30 this morning I had the realization that once inside the unit, the longer screw sits in the center drain and so the off-balance I mentioned when placing it on the table after assembly doesn't actually affect anything 
JoepH
Active Member
Odd. Even the KegLand video where they introduce the HED after he assembles it and places it down you can see it doesn’t sit flat.
Shorten the screw by adding a few extra washers at the top.I threw another washer between the wing nut and the HED just to disperse the tension a bit BUT at around 5:30 this morning I had the realization that once inside the unit, the longer screw sits in the center drain and so the off-balance I mentioned when placing it on the table after assembly doesn't actually affect anything

Similar threads
- Replies
- 6
- Views
- 436
- Replies
- 46
- Views
- 13K
- Replies
- 46
- Views
- 16K
