• Please visit and share your knowledge at our sister communities:
  • If you have not, please join our official Homebrewing Facebook Group!

    Homebrewing Facebook Group

brewing over a wood fire.

Homebrew Talk

Help Support Homebrew Talk:

This site may earn a commission from merchant affiliate links, including eBay, Amazon, and others.
http://gcvmblog.blogspot.com/2010/05/1803-walter-grieves-brewery.html

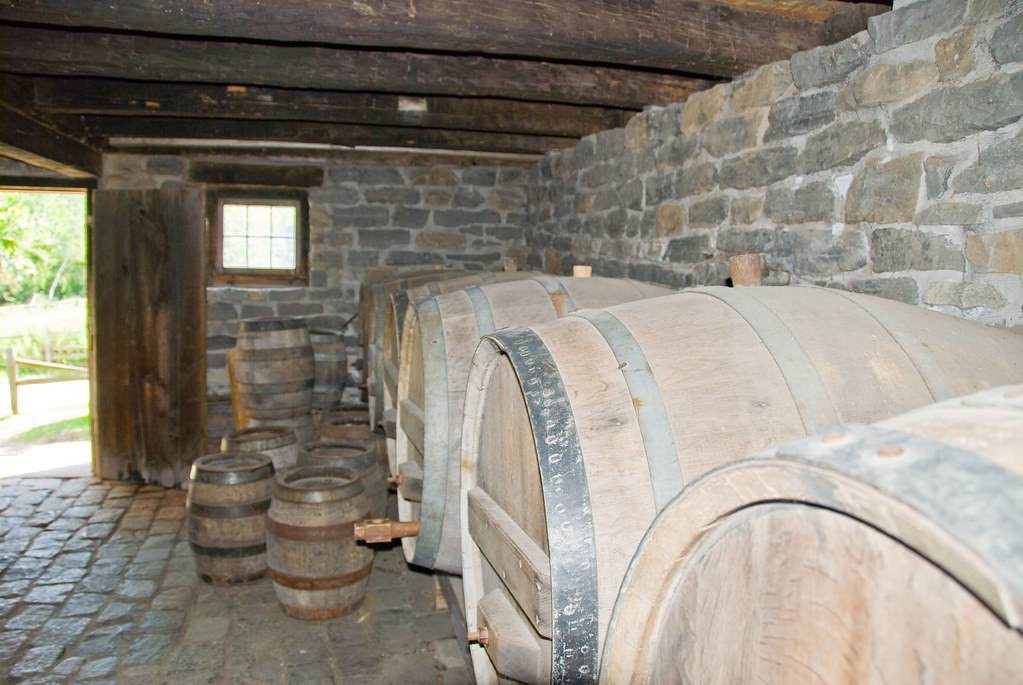
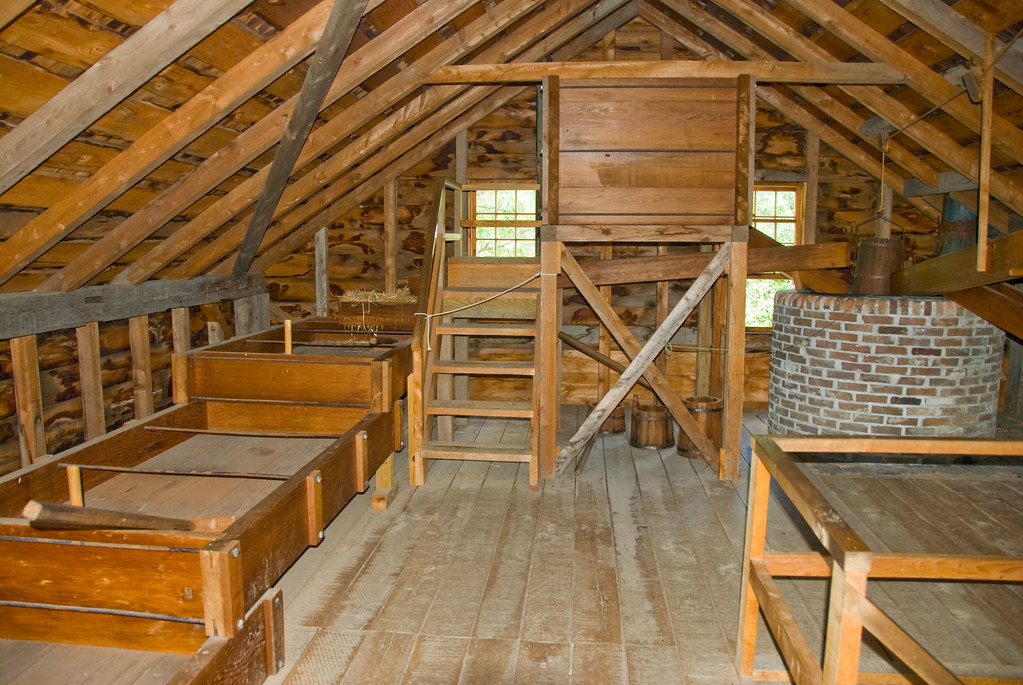
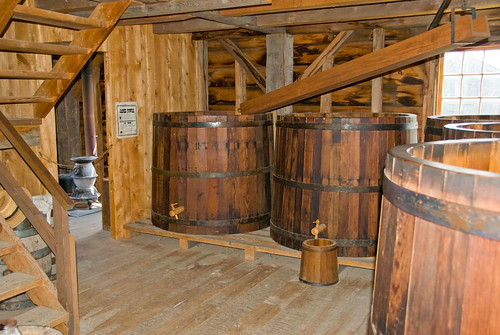
At the museum they are brewing al la 1800's style with wood fired kettle and mash tun. The cooling is done by putting the wort in 3 or 4 big 4'x8-10' copper pans with open tops then draining it to the basement into big casks.
2765732909_37197e26df_b.jpg


BREW6960cfc7-3adf-42d3-af80-cb7d422ca6f3.jpg


2765731069_8679a84b23.jpg


2766579830_7734e1caef_b.jpg


Note: Not my picts, but check out his other photos for more of the brewery too.
Not quite open fire brewing, but still lots of flavor in the air!
 
This seems like it would be pretty "easy" to do Brew-in-a-Bag style. You could sit your kettle up on a few cinder blocks leaving a space to add/remove hot coals. I'm picturing a semi-circle of cinder blocks with the kettle on top. I don't know if you could build a big enough fire under there to boil a 5 gallon batch, but I think a 2.5 gallon batch would be do-able.

1. Get your kettle up to strike temp and add the grain.
2. Remove the coals from under the kettle.
3. Sacc rest...
4. During the sacc rest, build up a lot of coals off to the side to prepare for the boil.
5. Remove the grains and add enough coals to boil.

Seems pretty simple on the surface. Hmm....
 
I was thinking about doing the very same thing. I was toying with the idea of doing a decoction mash and then boiling on the fire. It would probably be a dawn to dusk at the peak of summer kind of thing, but it sounds like a good time to me! If you try it first, be sure to post pics and a review of your process.
 
I've brewed a DME Nut Brown on the firepit in the backyard. Controlled temperatures by moving the pot on the grill grate toward/away from the flame much like cooking on the grill with indirect heat.

You can expect some smoky flavor in the beer, but it worked great with the Nut Brown recipe.
 
I'm new here; and I apologize if I'm repeating something some one else has already posted. But in case I'm not, check out "rocket stoves" (Google it) and you brewers will find what you're looking for.

I happened across it and checked it out. So when my cheap-ass Korean propane burner crapped out on me out in northern BC this summer, I grabbed my jigsaw, cut into a 30 gallon barrel and, flattening a short length of rain gutter for a wood shelf, made a remarkably efficient and responsive brewing stove in less than ten minutes.

I should emphasize that I was frustrated, had the barrel and tools handy, and the "rocket stove principles" firmly in mind.

Again, let me apologize if this is old news.

And I should say that the rocket stove was designed to help desperately poor people more efficiently cook for their families. I salute the work of these men.

That said, the "Rocket Stove." so good at reducing the amount of hours and miles that Somali women have to endure gathering sticks for a cook fire, is equally efficient for suburban beer geeks who want to ease the reliance on foreign oil, and enrich the time they spend twiddling with the heat, and stirring the mash.

I made an intensely hoppy barleywine, and my wife followed up with a delightful pale ale on her own. The stove is remarkably responsive.

Sorry if you've heard all this before. Happy brewing!
Timbo

Great post, and as a newb myself, welcome to HBT! The rocket stove is quite neat. I think I want one!
 
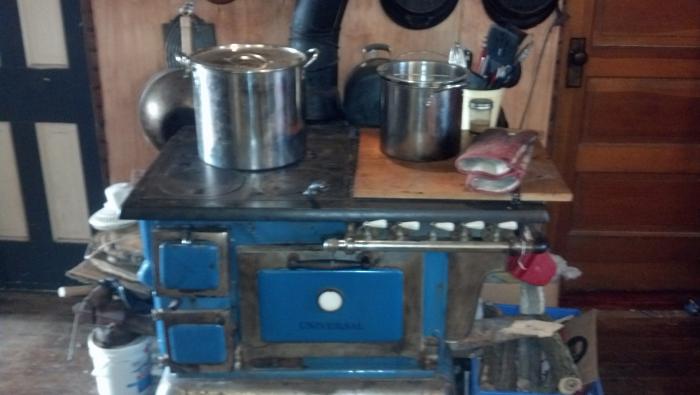
I have brewed my last seven batches on wood heat. Two extract, one partial mash and the rest all grain. I am using an old wood burning Cook stove like this:
Antique_Wood_Cook_Stove.jpg


I picked it up on Craigslist for $30. Works Great. It has been really nice this winter, always toasty in here on brewday. Now with summer coming I am looking to pick up another for a planned outdoor brew house, but thats a whole new topic.
 
"Like" that, or is that the actual stove you're using? Very cool (warm) concept! How long does it take to get a full boil, and how do you control it enough to prevent boil over?


Sent from my iPad using Home Brew
 
Since this thread has been resurrected, I'll share my wood fire brewing experience.

A couple of years ago, a buddy of mine and I decided that there was no reason we couldn't mix brewing and camping. We brought along a brew kettle, muslin bag, hops & pre-crushed malt, yeast, sanitizer, and a corny, and set about to do BIAB over a campfire in a national park.

Well, it turns out that it takes a *lot* of wood to boil 5 gallons of water on a fire pit grate. Fortunately, (OK not really, but it was fortunate for us at the time) the forests here in Colorado had just been plagued with pine beetles, and so there were nearly unlimited amounts of firewood, free for the taking. Nice, green, smoky, cool-burning firewood.

It took us a couple of hours, but we finally got a mash going. We didn't bring a thermometer--we just estimated that the strike water was at about hot-but-not-scalding coffee temperature, and mashed in. After an hour, we pulled the grains, stoked the fire again, and went for a boil. Three very smoky hours later, we finally got a rolling boil, added hops, and boiled for another hour. Throughout the whole process, we were generating enough smoke that lots of campers and several rangers came by to make sure that we weren't burning the forest down! But in the end, we finished up, transferred the still-scalding wort into a sanitized corny, and sealed it up. Even though it was starting to get dark, we made sure to clean everything up the best we could, and disposed of the grains in the campsite's locking dumpsters.

Good thing, too! The next morning, the ranger came by & asked us if we'd had to share any of our beer. With who? The bear that had been rummaging through the campsite the night before! I guess he couldn't smell wort through the keg though, because he didn't bother us a bit. We added the yeast the now-chilled wort that morning, sealed it up, and hauled everything back down the mountain.

Two weeks (and a number of corny CO2-blowoffs) later, we ended up with a nice, smoky brown ale. I wouldn't necessarily *recommend* a campfire over a modern burner, but it can make some pretty good beer!
 
Since this thread has been resurrected, I'll share my wood fire brewing experience.


A couple of years ago, a buddy of mine and I decided that there was no reason we couldn't mix brewing and camping. We brought along a brew kettle, muslin bag, hops & pre-crushed malt, yeast, sanitizer, and a corny, and set about to do BIAB over a campfire in a national park.


Well, it turns out that it takes a *lot* of wood to boil 5 gallons of water on a fire pit grate. Fortunately, (OK not really, but it was fortunate for us at the time) the forests here in Colorado had just been plagued with pine beetles, and so there were nearly unlimited amounts of firewood, free for the taking. Nice, green, smoky, cool-burning firewood.


It took us a couple of hours, but we finally got a mash going. We didn't bring a thermometer--we just estimated that the strike water was at about hot-but-not-scalding coffee temperature, and mashed in. After an hour, we pulled the grains, stoked the fire again, and went for a boil. Three very smoky hours later, we finally got a rolling boil, added hops, and boiled for another hour. Throughout the whole process, we were generating enough smoke that lots of campers and several rangers came by to make sure that we weren't burning the forest down! But in the end, we finished up, transferred the still-scalding wort into a sanitized corny, and sealed it up. Even though it was starting to get dark, we made sure to clean everything up the best we could, and disposed of the grains in the campsite's locking dumpsters.


Good thing, too! The next morning, the ranger came by & asked us if we'd had to share any of our beer. With who? The bear that had been rummaging through the campsite the night before! I guess he couldn't smell wort through the keg though, because he didn't bother us a bit. We added the yeast the now-chilled wort that morning, sealed it up, and hauled everything back down the mountain.


Two weeks (and a number of corny CO2-blowoffs) later, we ended up with a nice, smoky brown ale. I wouldn't necessarily *recommend* a campfire over a modern burner, but it can make some pretty good beer!


Sounds like a true beer drinking sport!! If you gotta have a 14 hour brew day, I can't think of a better way to do it than camping/Bon fires/friends/beer/bears......!


Sent from my iPad using Home Brew
 
"Like" that, or is that the actual stove you're using? Very cool (warm) concept! How long does it take to get a full boil, and how do you control it enough to prevent boil over?


Sent from my iPad using Home Brew

Attached is a picture of my stove. the right side is propane, which is not hooked up yet

Control is easy when you get used to the stove. it has two control dampers under the fire and one in the chimney so you can shut the fire down or really get it going. You also get used to where the "hot spots" are and move the kettle around as needed. As for the full boil....It "took" anywhere from 30 minutes to an hour to really get going, I say "took" because last weekend I discovered a flaw in the system. It seems that when it is really cold outside the chimney can handle any fire I put in it, But.......now that its not winter.......Well last sunday we had an exciting brew day. Just as the boil started, the chimney started on fire! YIKES! Up on the roof I go to check it out. sure enough. Blazing away 6 ft from the top. I watched it for a bit, and decided, it was not really dangerous so, back to the brew. It took quite a bit longer to bring it to a boil because I had to be careful of the heat I sent up the chimney. in the end the Pale ale was fine and is in a secondary now.

The golden lining here(I say golden because this is way better than silver) is that my wife, who loves to brew with me, has decide that we should build an addition and make it a dedicated brew space! she even laid out an area to do it. It will connect our house with our root cellar, where we can lager year round. Its our new summer project. yippee!!! Can't wait to get started.

IMG_20140305_170310_043.jpg
 
For me, wood burning stove has been so far absolutely best option for mashing. Tried both gas & electricity before but wood is cheap and stove in our kitchen has more than enough power to boil 30-40 litres of wort.

olut1-1.jpg
 
My two brew pals and I brew exclusively over a wood fire. In the beginning there was a bit of a learning curve we had to work thru, (think BIG hot break!!) but it didn't take long and we got it figured out.

We built a rudimentary wood stove out of 8 cinder blocks. the stove is open on top, the bottom brick on the front is turned sideways to allow air to enter the firebox, the top rear brick is also sideways and acts as an exhaust. We can block the exhaust or open it to make minor temp adjustments. This system works great!

We decided to start brewing this way because we live in the mountains of Western Montana and wood fuel costs us only a bit of sweat.

We brew 10 gallon batches of sweet all-grain joy 2-3 times a month like this, and I can't think of a reason I would ever change. The biggest thing to learn is "burn timing". You want your fire to start hot and heavy when you first put your wort kettle over the flame. If you used the right amount of wood to start your fire it should start petering out just before hot-break.

After you've successfully navigated around any type of catastrophic hot-break a tiny fire will maintain the boil. You'll want to let it die out a bit before hop-additions, but it only takes a few batches to figure it out.

We've never noticed any smokey flavors at all and the process is really not too different than a propane burner.
 
Very cool NineMile! Welcome aboard!
I recently experimented boiling several gallons of water over a charcoal flame in my Akorn Grill. It took a while, next time I would use more charcoal. Meanwhile, I'm still brewing on propane.
 
Very cool NineMile! Welcome aboard!
I recently experimented boiling several gallons of water over a charcoal flame in my Akorn Grill. It took a while, next time I would use more charcoal. Meanwhile, I'm still brewing on propane.

Yeah...try it out. My heat-to-boil time is pretty much the same as with propane, even better when its sub-zero outside! haha
 
Back
Top