You are using an out of date browser. It may not display this or other websites correctly.
You should upgrade or use an alternative browser.
You should upgrade or use an alternative browser.
Brewie
- Thread starter aangel
- Start date

Help Support Homebrew Talk:
This site may earn a commission from merchant affiliate
links, including eBay, Amazon, and others.
Still Brewn
Well-Known Member
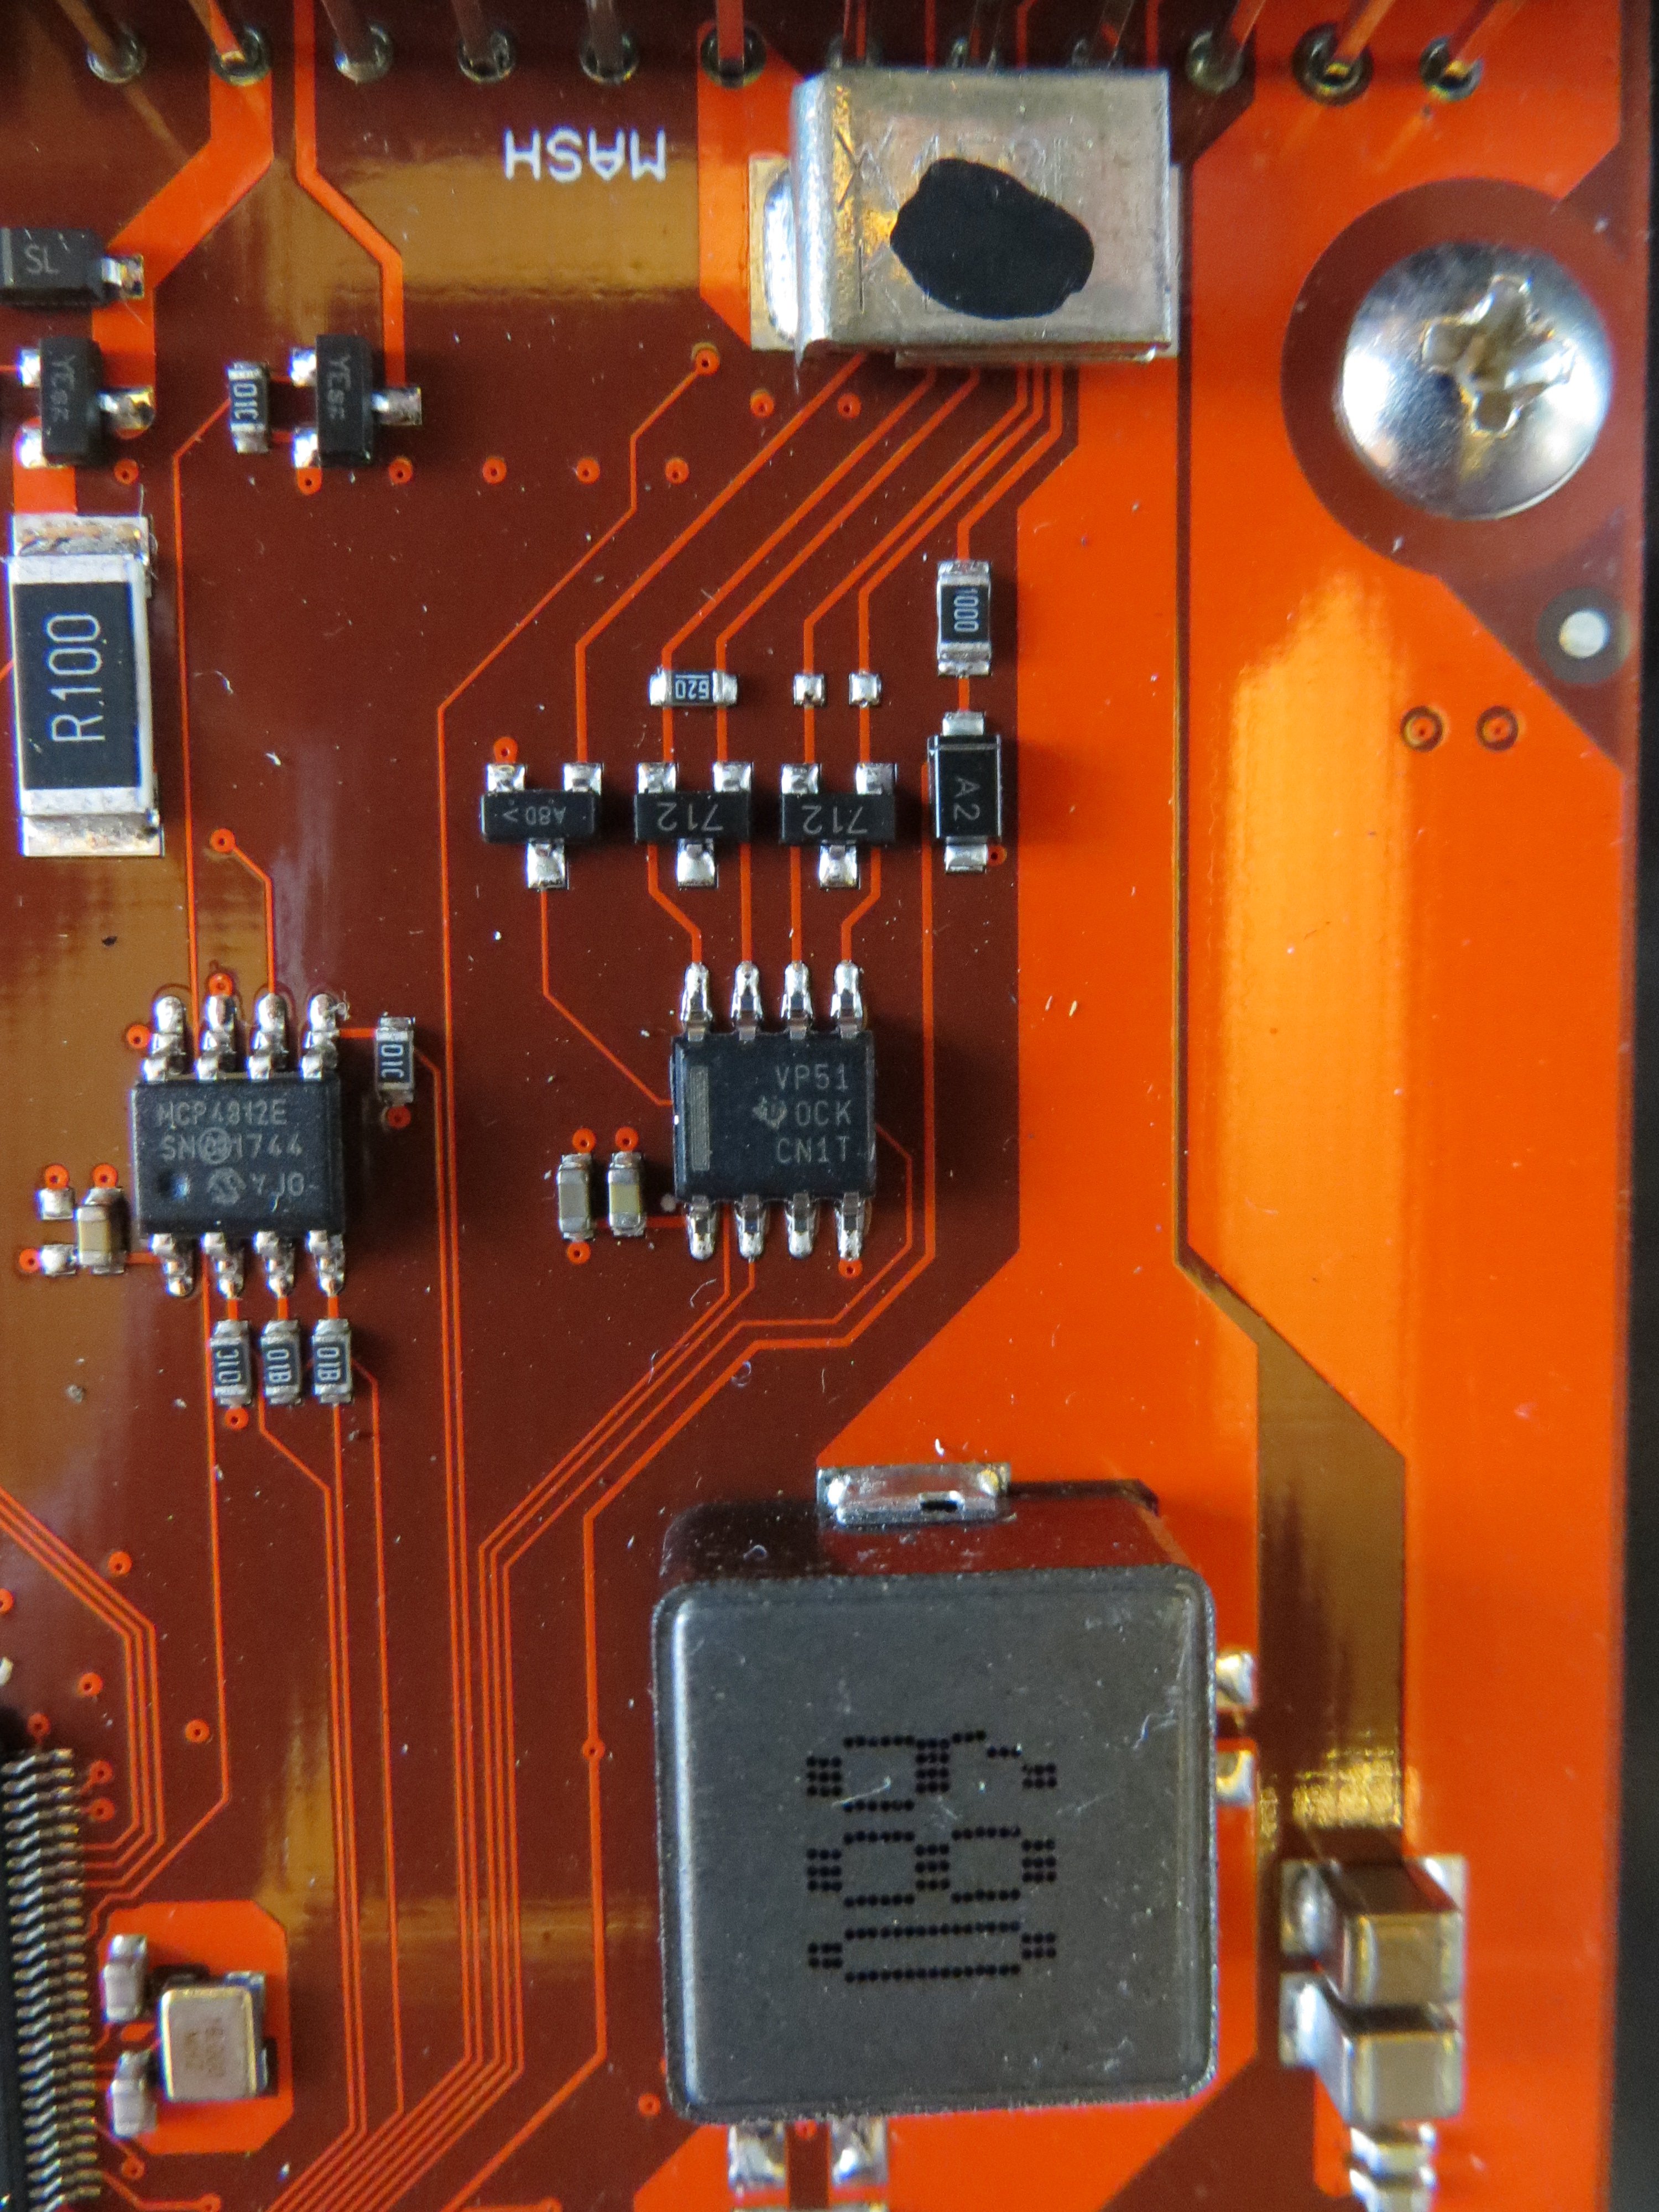
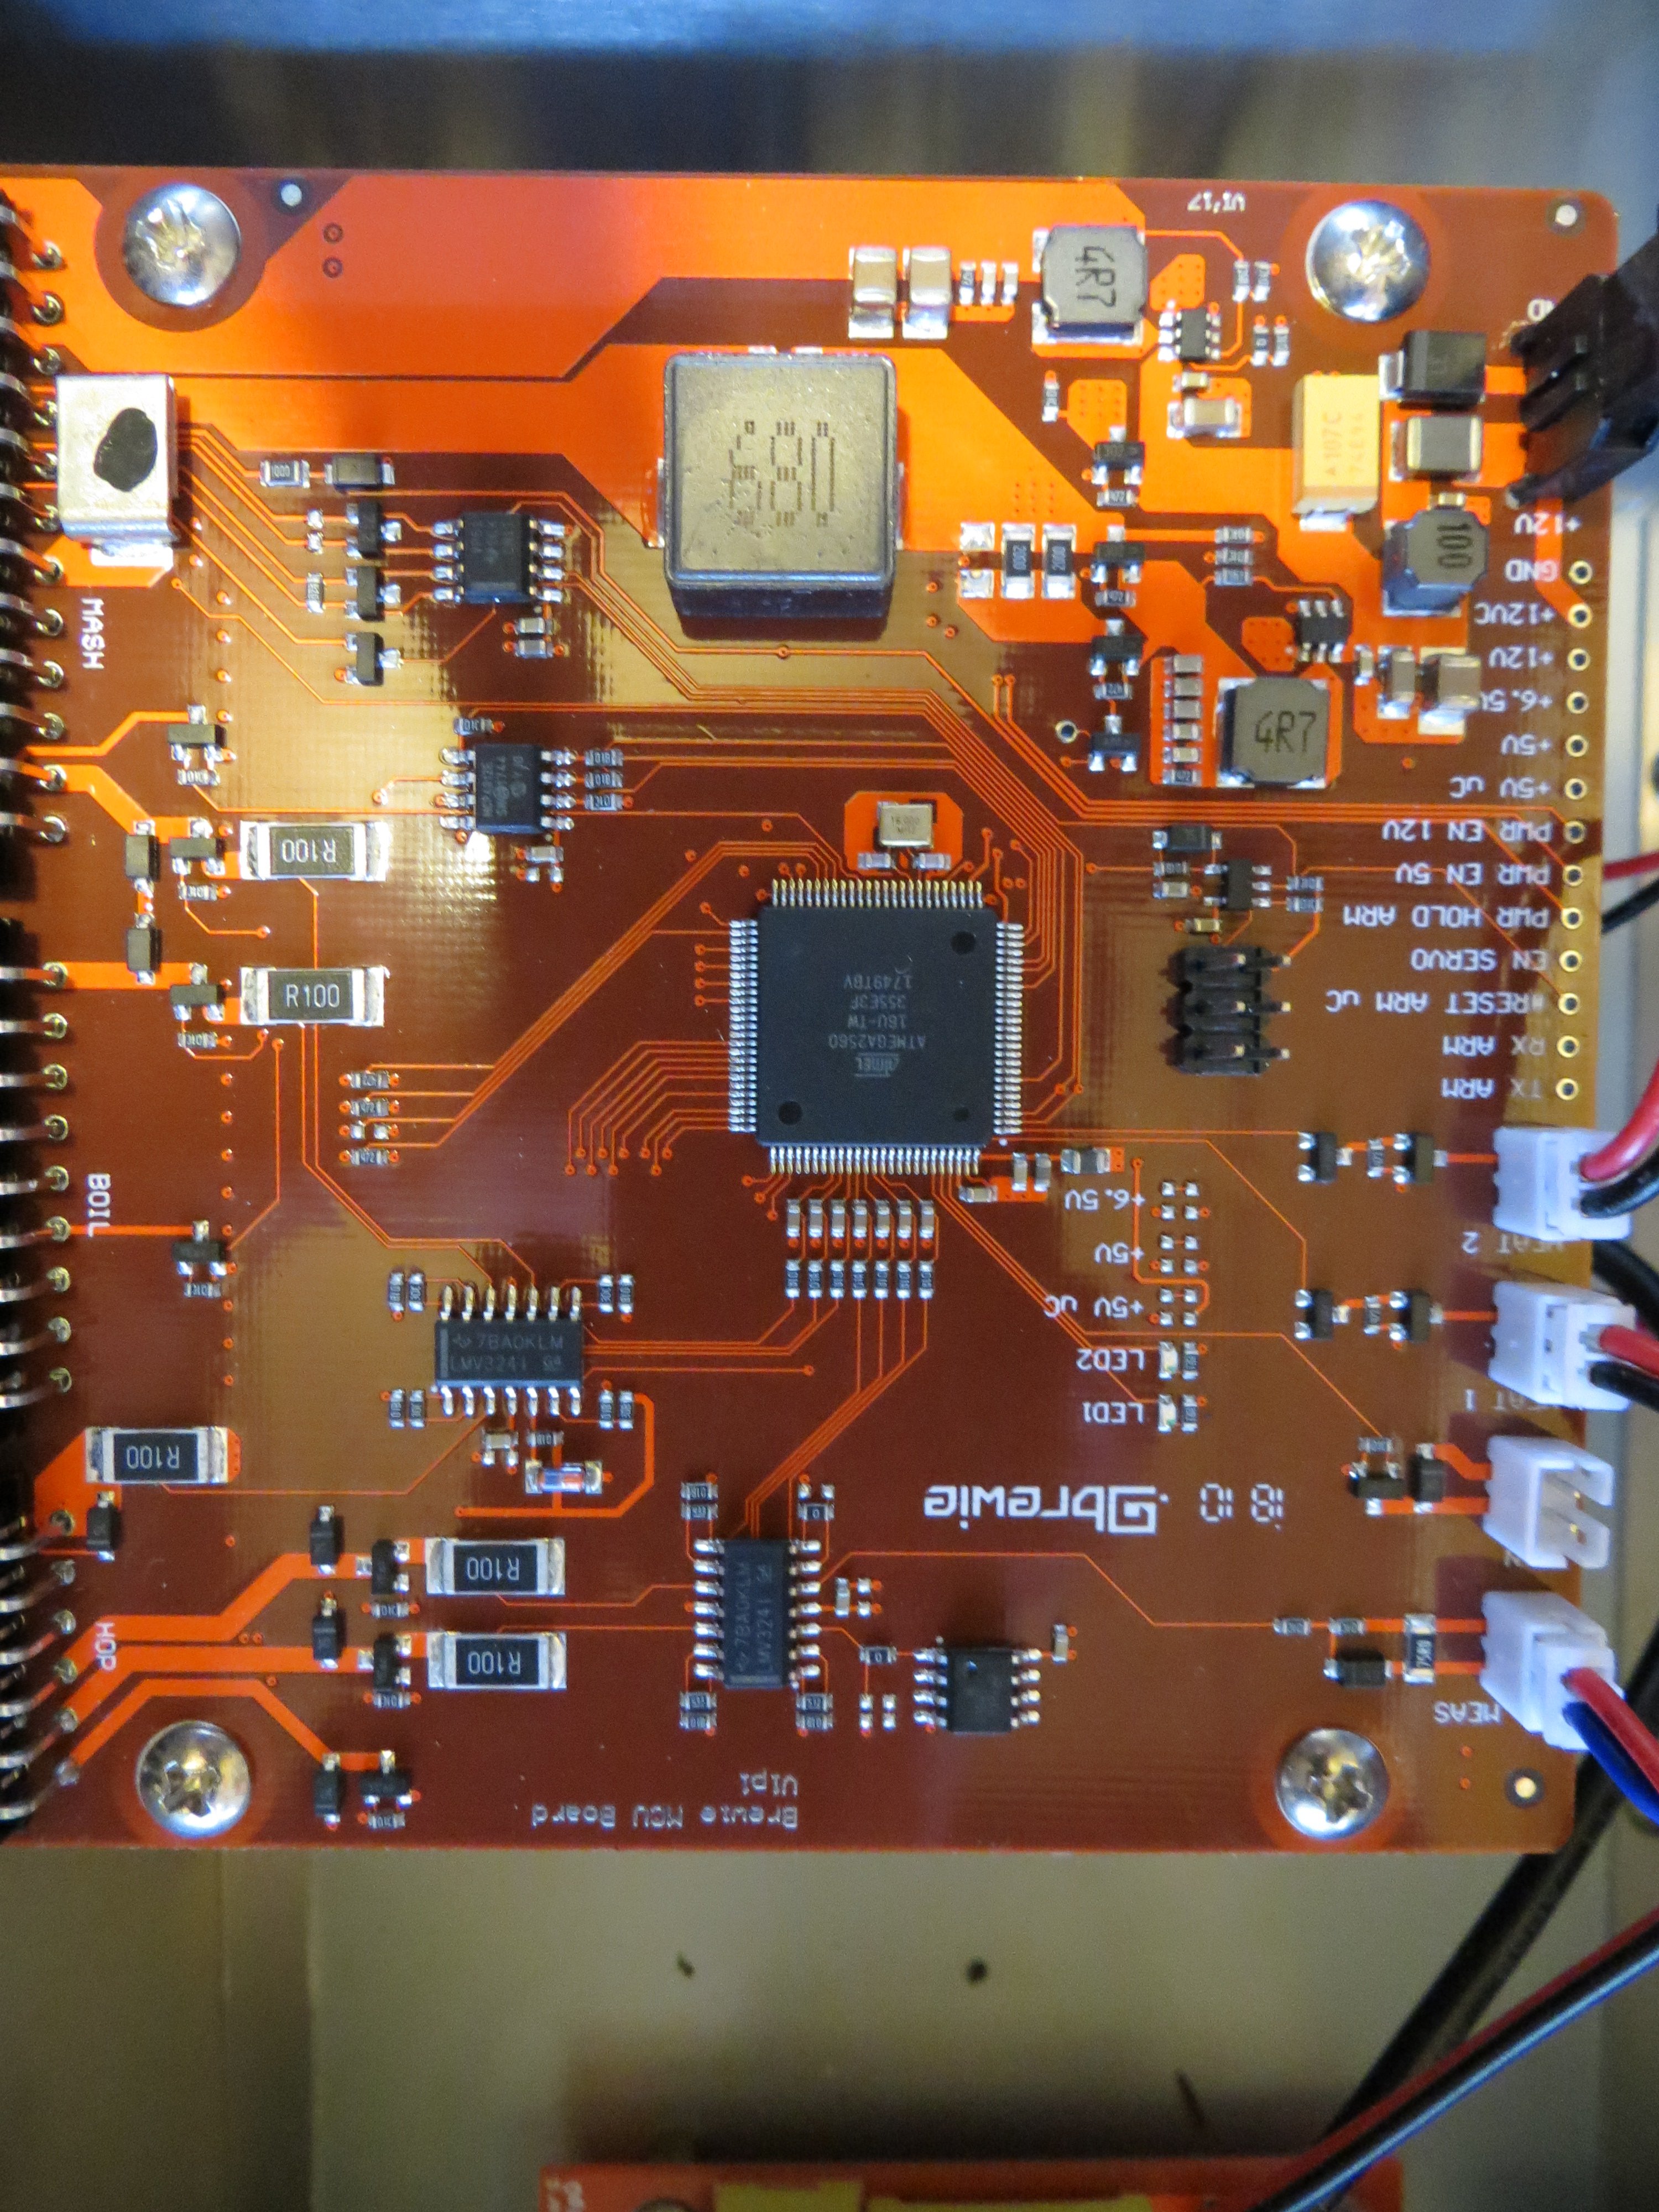
Thanks guys! That was the problem ! I soldered it up and it works now. I figured out how to use my phone as a microscope so I could see what I was doing. It is now fixed and of course asking me to do the first clean... lol. At least I can brew tonight, after I put it all back together.
Thanks again.
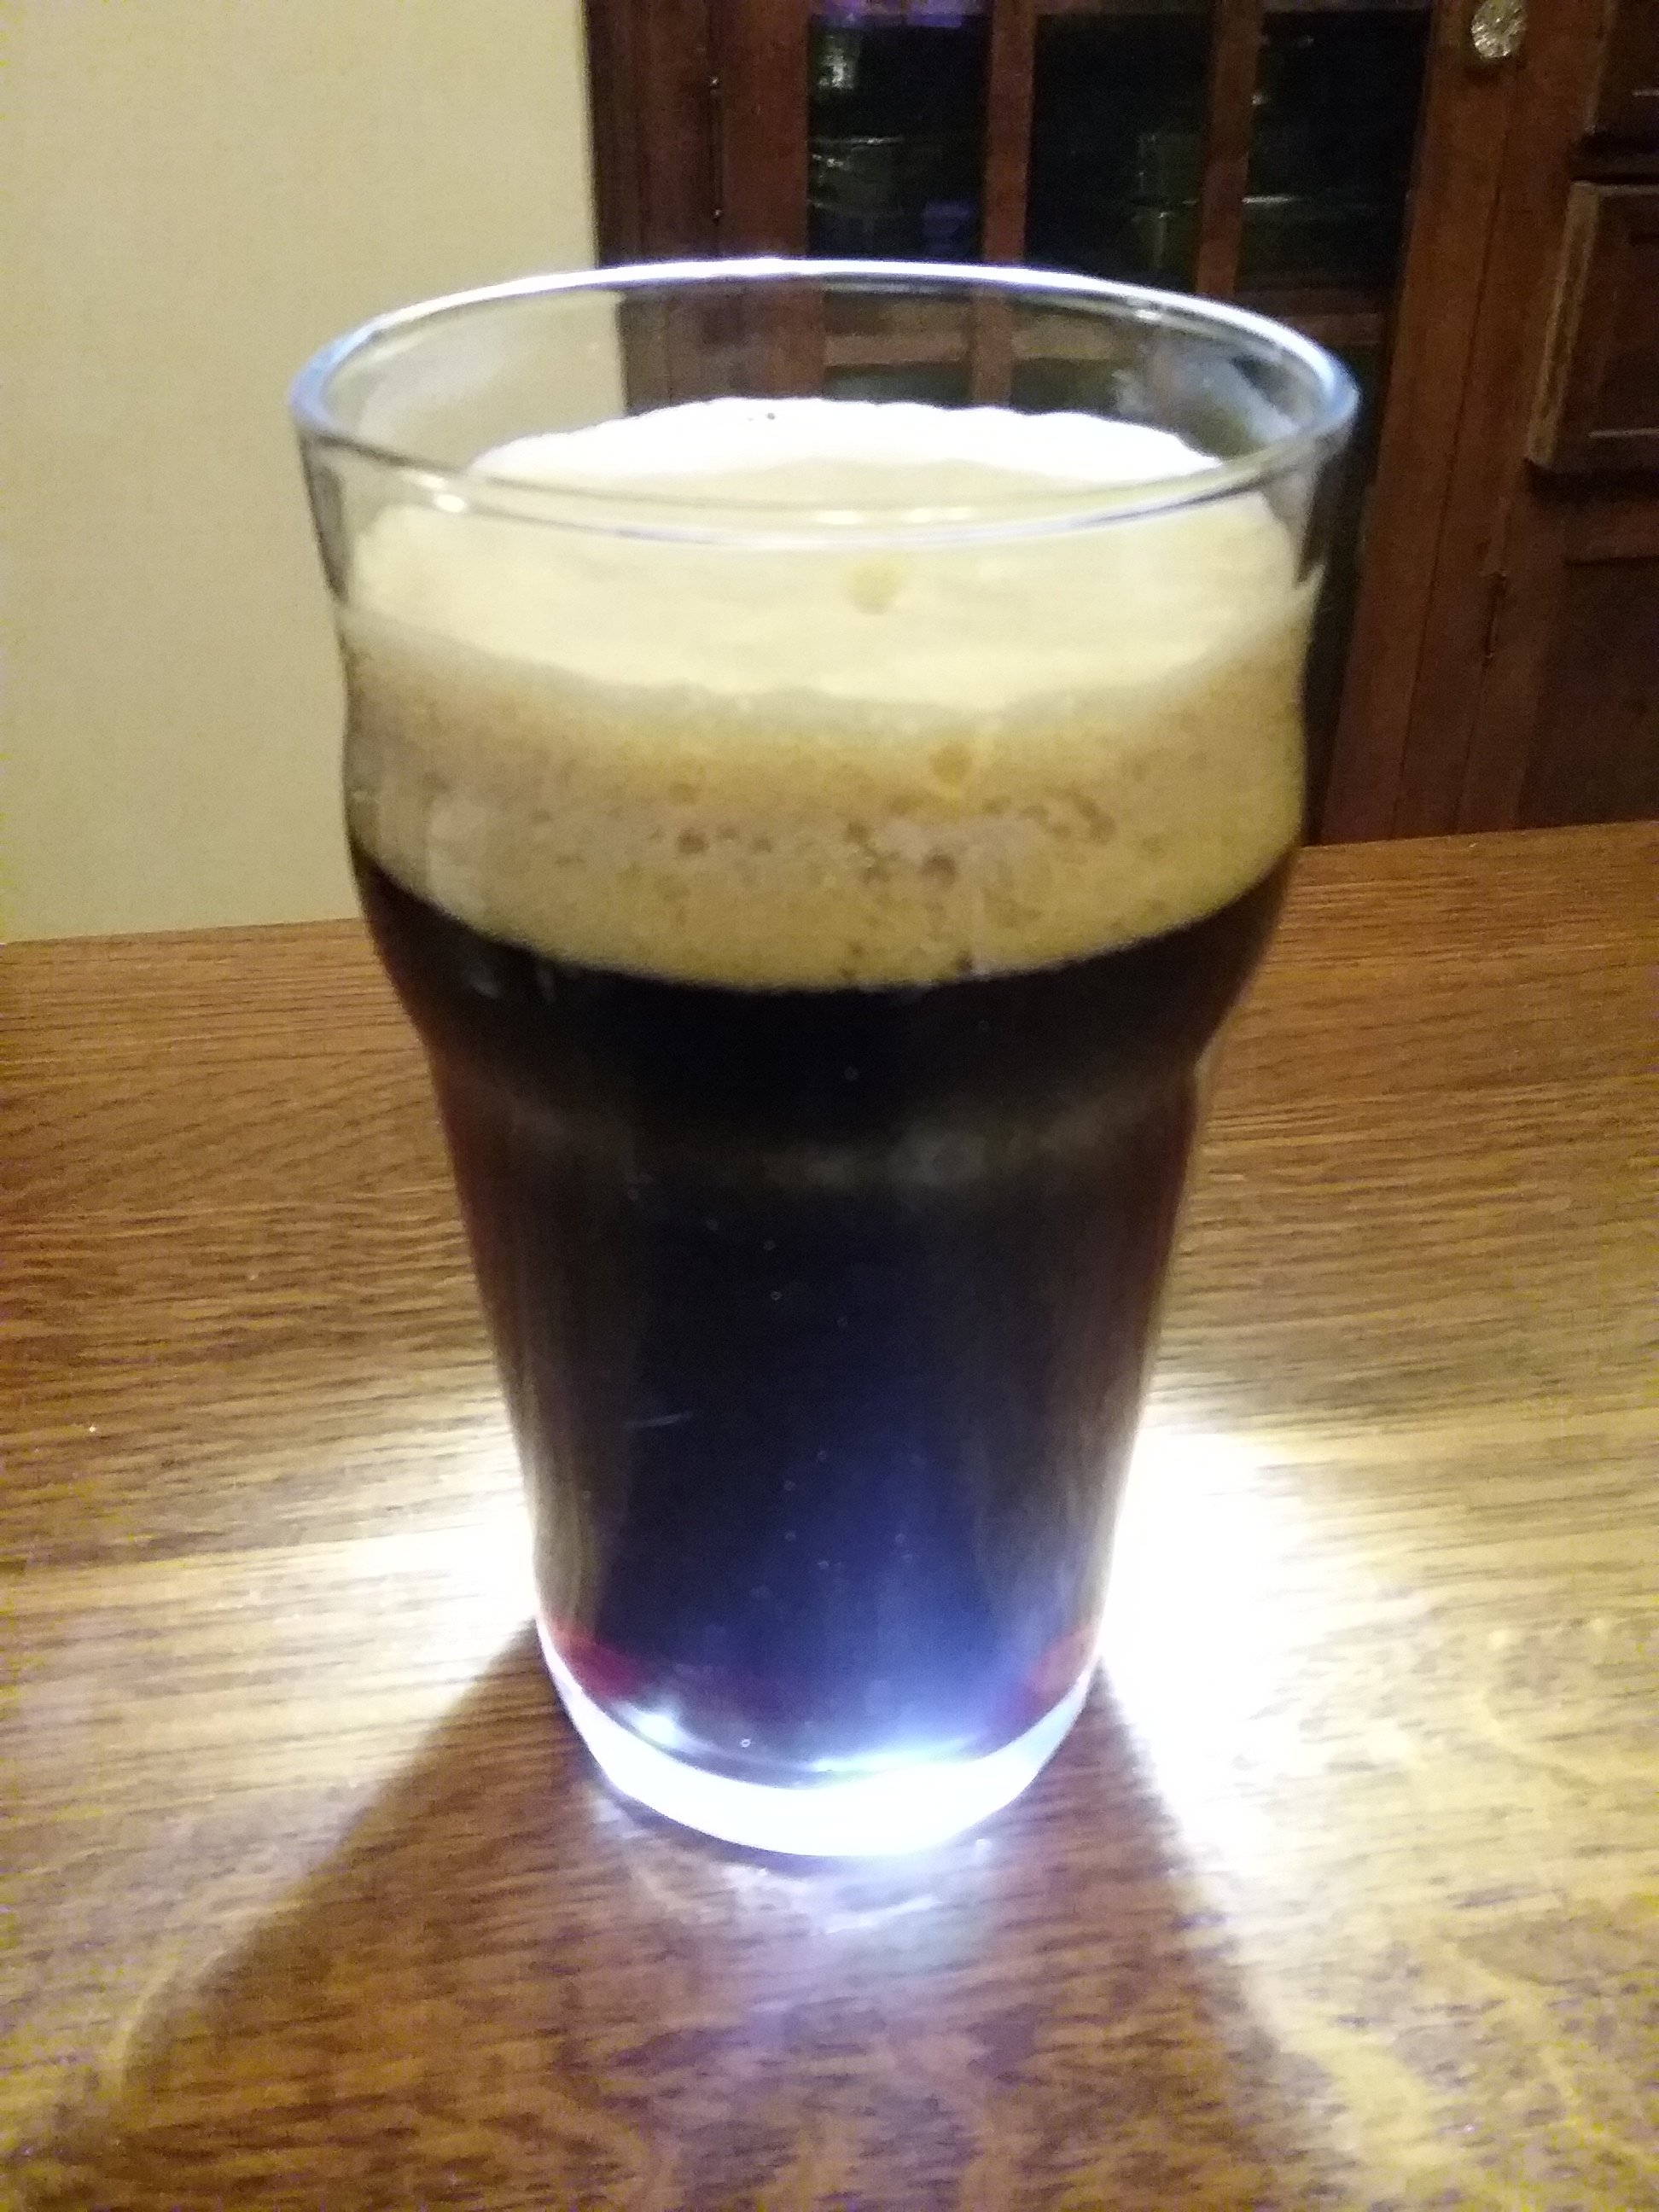
Time for one of these! The whole purpose of all of this!
Thanks again.

Time for one of these! The whole purpose of all of this!
HarkinBanks
Well-Known Member
Thank you all for all the help! I am trying myself on the fan solution. In addition to the silver insulation, do I cut a hole in the silicone sheet underneath as well? Thanks!
Yes. Trace it with a pen while the mounting plate is down and then use an exacto knife to cut the piece out.
HarkinBanks
Well-Known Member
Thanks guys! That was the problem ! I soldered it up and it works now. I figured out how to use my phone as a microscope so I could see what I was doing. It is now fixed and of course asking me to do the first clean... lol. At least I can brew tonight, after I put it all back together.
Thanks again.View attachment 611492
Time for one of these! The whole purpose of all of this!
Dude super impressive. I never would have thought to trace a connection on the board, let alone try to re-solder something! Awesome job man.
Last edited:
Still Brewn
Well-Known Member
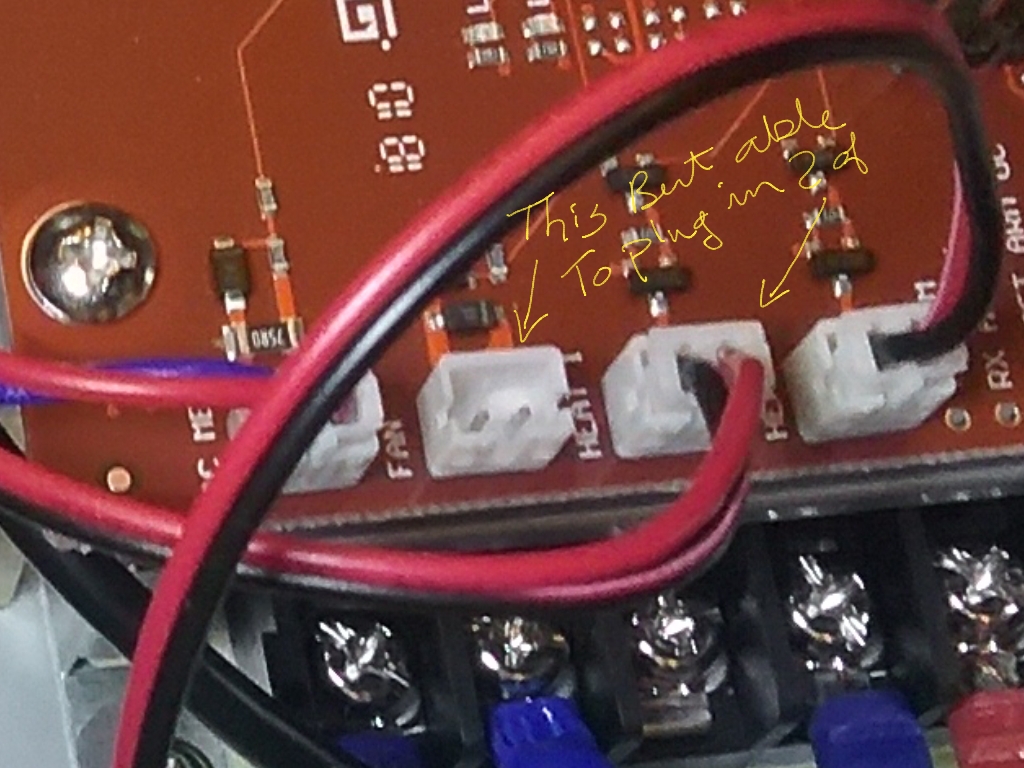
Now if anyone knows where to get a splitter or stacking plug used on the fan connections I would be golden so I can disconnect my new fans from the 12v power supply and connect them to the switched fan supply...


$22.00 ($623.23 / Ounce)
AMZLMPKNTW Ball Lock Sample Faucet 30cm Reinforced Silicone Hose Secondary Fermentation Homebrew Kegging joyful
无为中南商贸有限公司

$172.35
2 Inch Tri Clamp Keg Manifold With Ball Lock Posts, Pressure Gauge, PRV (0-30 PSI) – Homebrew, Fermentation, Kegging System
wuhanshijiayangzhiyimaoyiyouxiangongsi

$10.99 ($31.16 / Ounce)
Hornindal Kveik Yeast for Homebrewing - Mead, Cider, Wine, Beer - 10g Packet - Saccharomyces Cerevisiae - Sold by Shadowhive.com
Shadowhive

$7.79 ($7.79 / Count)
Craft A Brew - LalBrew Voss™ - Kveik Ale Yeast - For Craft Lagers - Ingredients for Home Brewing - Beer Making Supplies - (1 Pack)
Craft a Brew

$44.99
$49.95
Craft A Brew - Mead Making Kit – Reusable Make Your Own Mead Kit – Yields 1 Gallon of Mead
Craft a Brew

$28.98
Five Star - 6022b_ - Star San - 32 Ounce - High Foaming Sanitizer
Great Fermentations of Indiana

$20.94
$29.99
The Brew Your Own Big Book of Clone Recipes: Featuring 300 Homebrew Recipes from Your Favorite Breweries
Amazon.com

$76.92 ($2,179.04 / Ounce)
Brewing accessories 1.5" Tri Clamp to Ball Lock Post Liquid Gas Homebrew Kegging Fermentation Parts Brewer Hardware SUS304 Brewing accessories(Gas Hose Barb)
chuhanhandianzishangwu

$58.16
HUIZHUGS Brewing Equipment Keg Ball Lock Faucet 30cm Reinforced Silicone Hose Secondary Fermentation Homebrew Kegging Brewing Equipment
xiangshuizhenzhanglingfengshop

$719.00
$799.00
EdgeStar KC2000TWIN Full Size Dual Tap Kegerator & Draft Beer Dispenser - Black
Amazon.com

$53.24
1pc Hose Barb/MFL 1.5" Tri Clamp to Ball Lock Post Liquid Gas Homebrew Kegging Fermentation Parts Brewer Hardware SUS304(Liquid Hose Barb)
yunchengshiyanhuqucuichendianzishangwuyouxiangongsi

$33.99 ($17.00 / Count)
$41.99 ($21.00 / Count)
2 Pack 1 Gallon Large Fermentation Jars with 3 Airlocks and 2 SCREW Lids(100% Airtight Heavy Duty Lid w Silicone) - Wide Mouth Glass Jars w Scale Mark - Pickle Jars for Sauerkraut, Sourdough Starter
Qianfenie Direct

$33.98
DYKWSWYX Heavy Duty Brewing Gloves (1 Pair) - 55CM Long Chemical Resistant Plastic Gloves for Beer & Wine Making, Cleaning, Homebrew Equipment Protection
wuhanshijiayangzhiyimaoyiyouxiangongsi

$53.24
1pc Hose Barb/MFL 1.5" Tri Clamp to Ball Lock Post Liquid Gas Homebrew Kegging Fermentation Parts Brewer Hardware SUS304(Gas MFL)
Guangshui Weilu You Trading Co., Ltd

$159.99 ($26.66 / Count)
3M High Flow Series System BREW120-MS, 5616001, For Brewed Coffee and Hot Tea, Valve-in-Head Design
SpaceCityProviders

$176.97
1pc Commercial Keg Manifold 2" Tri Clamp,Ball Lock Tapping Head,Pressure Gauge/Adjustable PRV for Kegging,Fermentation Control
hanhanbaihuoxiaoshoudian

$479.00
$559.00
EdgeStar KC1000SS Craft Brew Kegerator for 1/6 Barrel and Cornelius Kegs
Amazon.com
Still Brewn
Well-Known Member
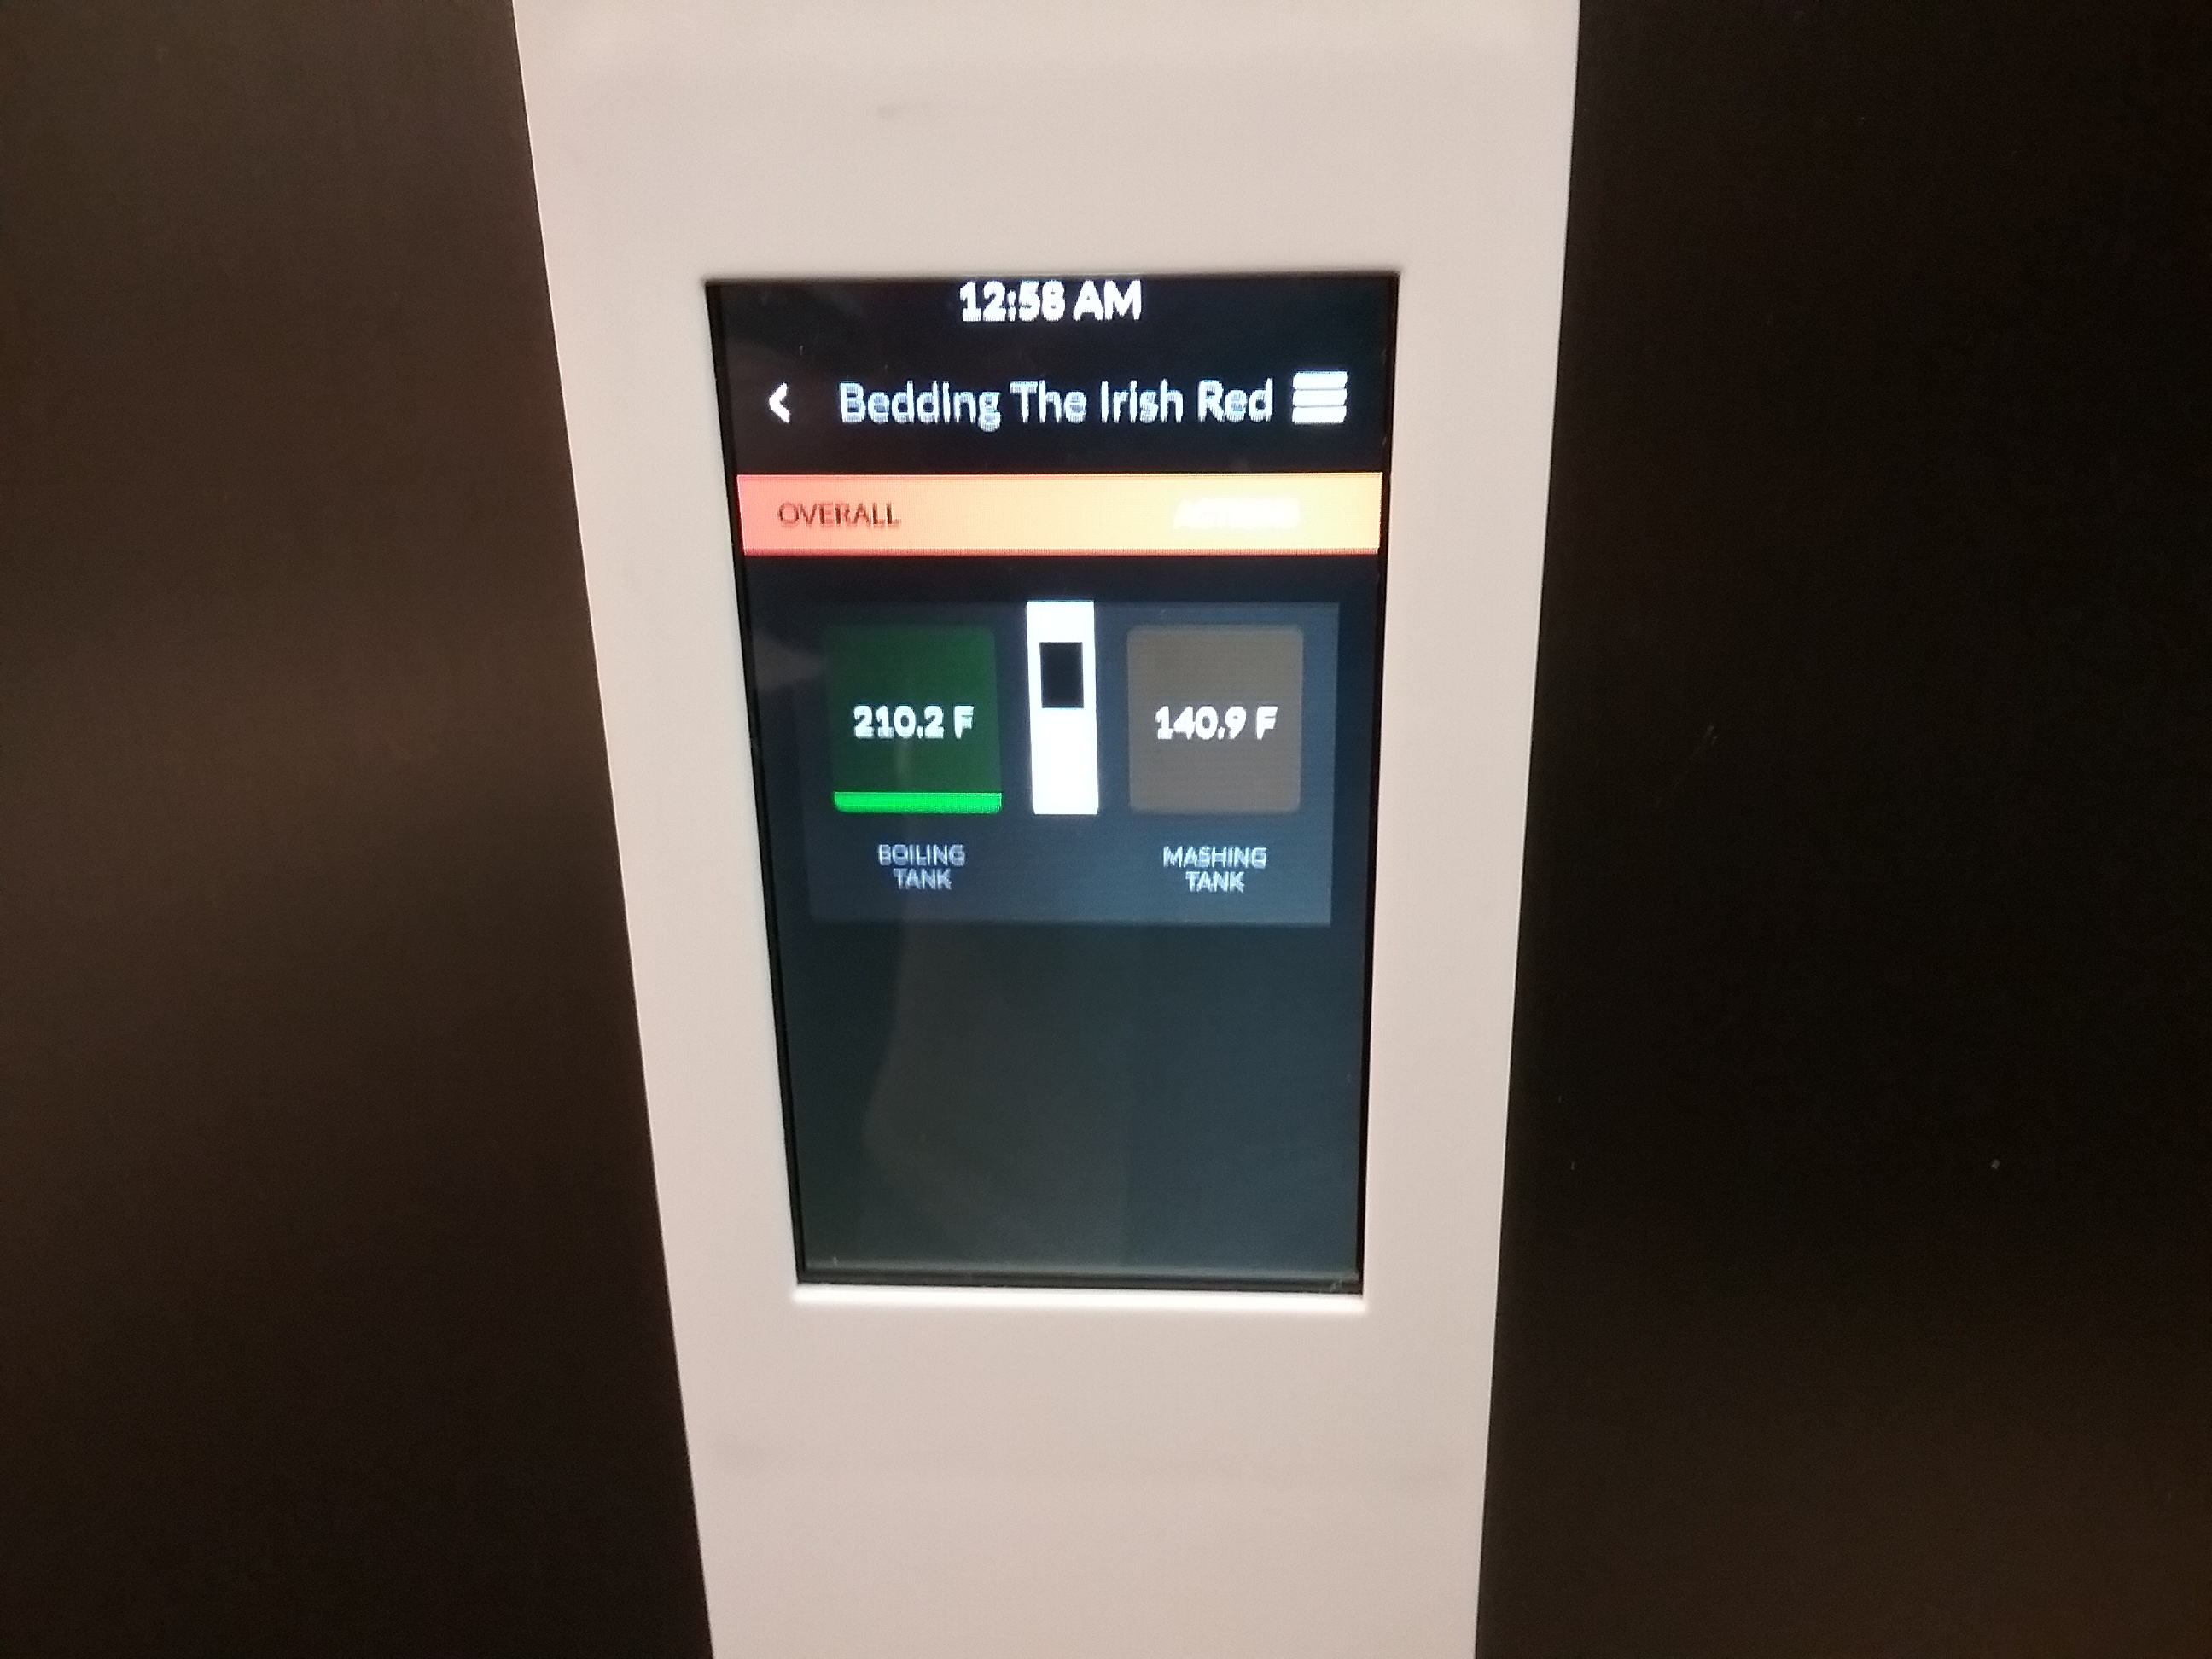
Definitely an improvement somewhere! Best boil ive had so far

Still Brewn
Well-Known Member
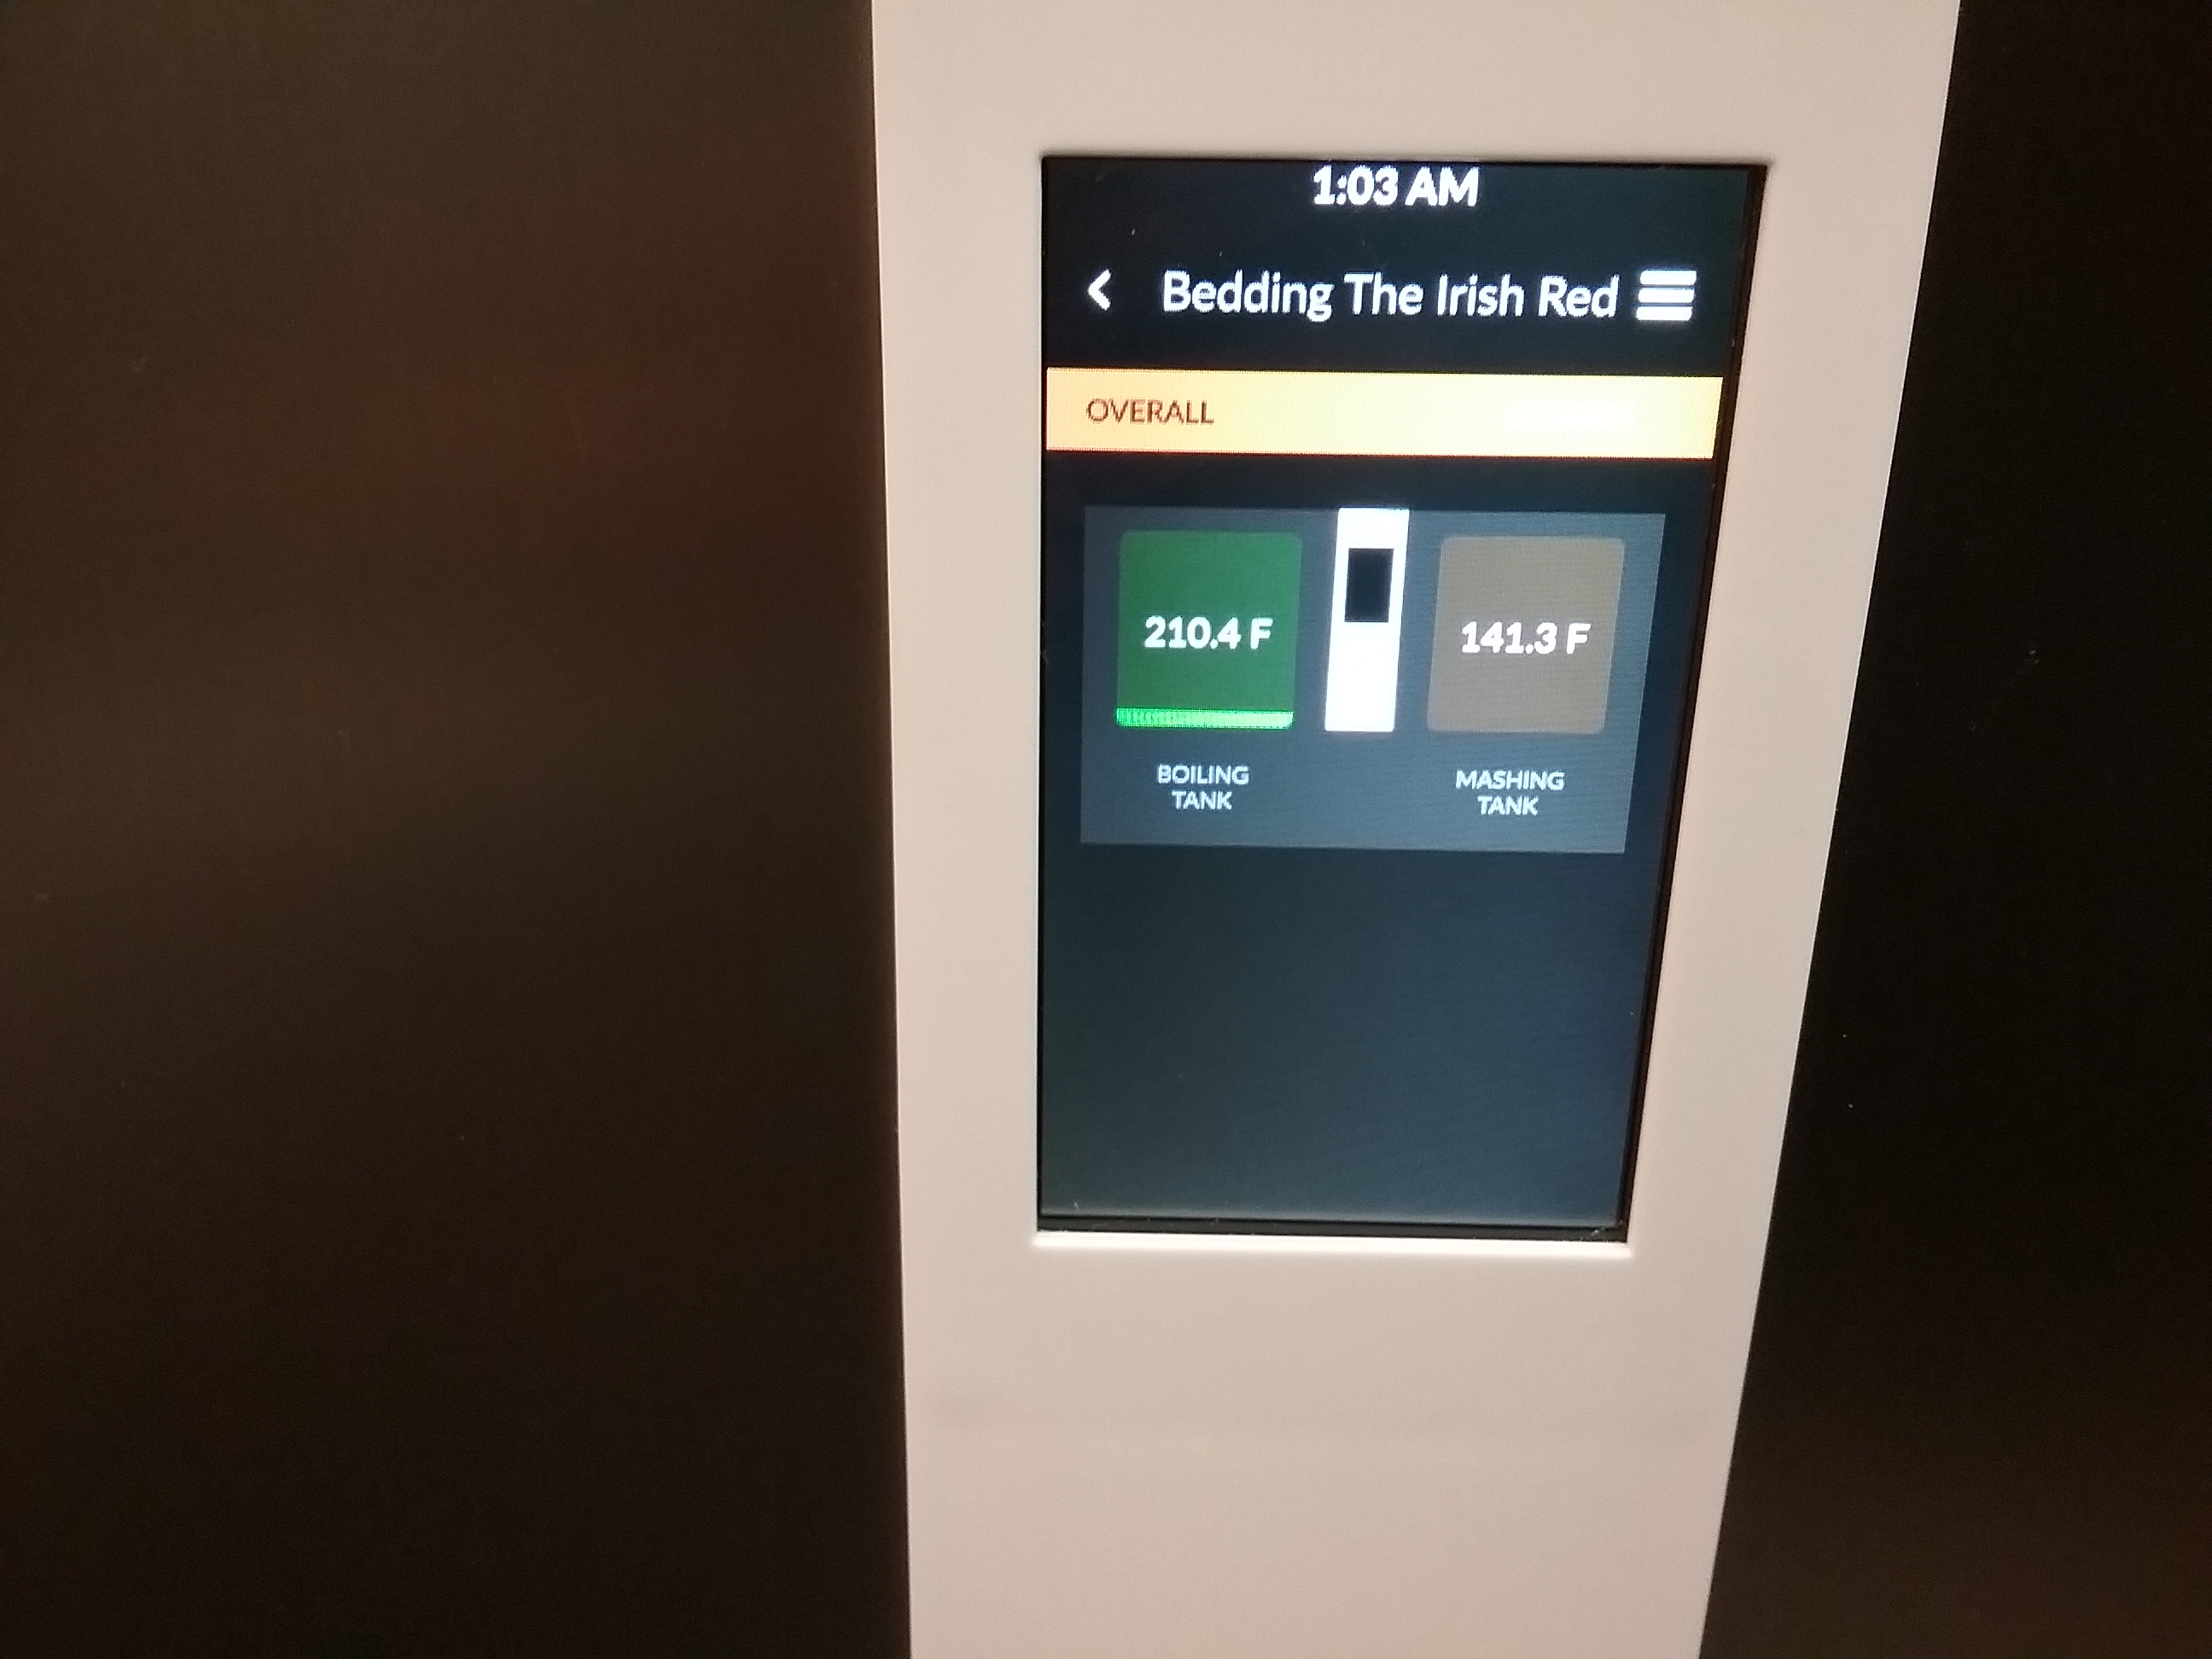
And now....

Still Brewn
Well-Known Member
Finished! Brewed my "Bedding The Irish Red". Didn't hit my numbers but I think I may have screwed up. I got everything ready 2 weeks ago and may have forgot something tonight. The machine got up to 210.6° during the boil so it is working great. Time for one last beer before SWMBO gets home.
Looks like these could work, although the reviews are rather discouraging:Now if anyone knows where to get a splitter or stacking plug used on the fan connections I would be golden so I can disconnect my new fans from the 12v power supply and connect them to the switched fan supply... View attachment 611526
https://www.amazon.com/gp/product/B00TXDWIJ6/?tag=skimlinks_replacement-20
Ironcyberia
Active Member
Finished! Brewed my "Bedding The Irish Red". Didn't hit my numbers but I think I may have screwed up. I got everything ready 2 weeks ago and may have forgot something tonight. The machine got up to 210.6° during the boil so it is working great. Time for one last beer before SWMBO gets home.
good job fixing the issue!!
For folks who want to drive more fans out of the 12V output from the board, I took a look at the specs of the small mosfet driving this output fiew weeks ago, I posted info on previous pages, around 31-32. the max current output for those is around 200mA, if i can remenber, maybe 250mA, so not much, I prefered connecting my fan directly to the 12V, anyway I always unplug the brewie after use (supply always on) it will probably hold other fans, but since there is no gain to connect it there, I tool no risk of doing it.
chillandbrew
Member
Hello everyone,
I've created a thread about Brewie recipes (i didn't find a topic about this, so that's why i made it), i welcome everyone who is keen to share a recipe:
https://www.homebrewtalk.com/forum/threads/brewie-recipes-tips-tricks.662419/
I've created a thread about Brewie recipes (i didn't find a topic about this, so that's why i made it), i welcome everyone who is keen to share a recipe:
https://www.homebrewtalk.com/forum/threads/brewie-recipes-tips-tricks.662419/
Still Brewn
Well-Known Member
Finally order my parts to upgrade the fan connections to the internally switched fan connections. Now they won't be running all the time when I'm just entering or tweeking recipes.
https://www.amazon.com/gp/product/B00N1Y50QQ/?tag=skimlinks_replacement-20
### part that was listed here was wrong so don't order###
The fans are correct. For the wires/plugs search for "jst xh connector"
The fans use half the power while only moving 3 cfpm less air and should be more than adequate, they still move something like 43 cfpm. Changing the fans reduced the power use enough that there will be no issue with overloading the fan circuit with the additional 2 fans. The wires /plugs hopefully are the correct ones, I will know in a couple of days. If they are wrong or right I will update to let everyone know. It was far cheaper to just buy an unmade set and make them myself. It also gives me the option to make them the correct length. The splitter listed above in an earlier post is not the correct item, at least by the pictures anyway.
On another note, Máté is sending out a new MCU board. The board should be here at the beginning of next week.
Now I just want to brew again... of course I'm having a lot of fun tinkering with this machine.
Last edited:
Still Brewn
Well-Known Member
I just updated my previous post. Don't order the plugs I had listed there before, they are wrong. Search for "2 pin JST XH 2.5 MM pitch". I will update again when I have the proper plugs.
JST stands for Japan Solderless Terminal
Pitch is the distance between terminals
The plugs you order should be white if the ones you are thinking about ordering are black or red they are not the right part.
Being in the US can be a pain sometimes since the rest of the world uses the metric system, I have something to measure centimeters but not millimeters so I was guessing on the size and picked the most common one, I picked wrong. I should have RAHAHB and spent a little more time researching.
I'm pretty sure the new ones are correct, I will update when they come in.
Last edited:
Brewed on the Brewie again over the weekend. No issues, easy brew day. I do wish they would build in whirlpool options into the hop scheduler soon so I don’t have to be around to manually drop in my hops.
Last edited:
Fredrik Lerigon
Member
- Joined
- Jan 13, 2019
- Messages
- 12
- Reaction score
- 7
Hi,
Found a lot of info in this thread on why not to buy the Brewie+ but did it anyway. My wife wanted me to stop brewing because of the sweet lovely malt “smell” that woke her up every Sunday (I know, she is crazy) and that I had to spend more time with my family. Since I have been married for over 20 years I know that happy wife=more time for beer so I developed a strategy. I convinced my wife it was about time we gave our guests their own kitchen in the small guesthouse….and then slowly gave hints about automated brewing machines and how much more time it would give with the family if I had one. So, with some “doggy sad eyes” I got go ahead on the project (but of course without telling the budget for the new brewery).
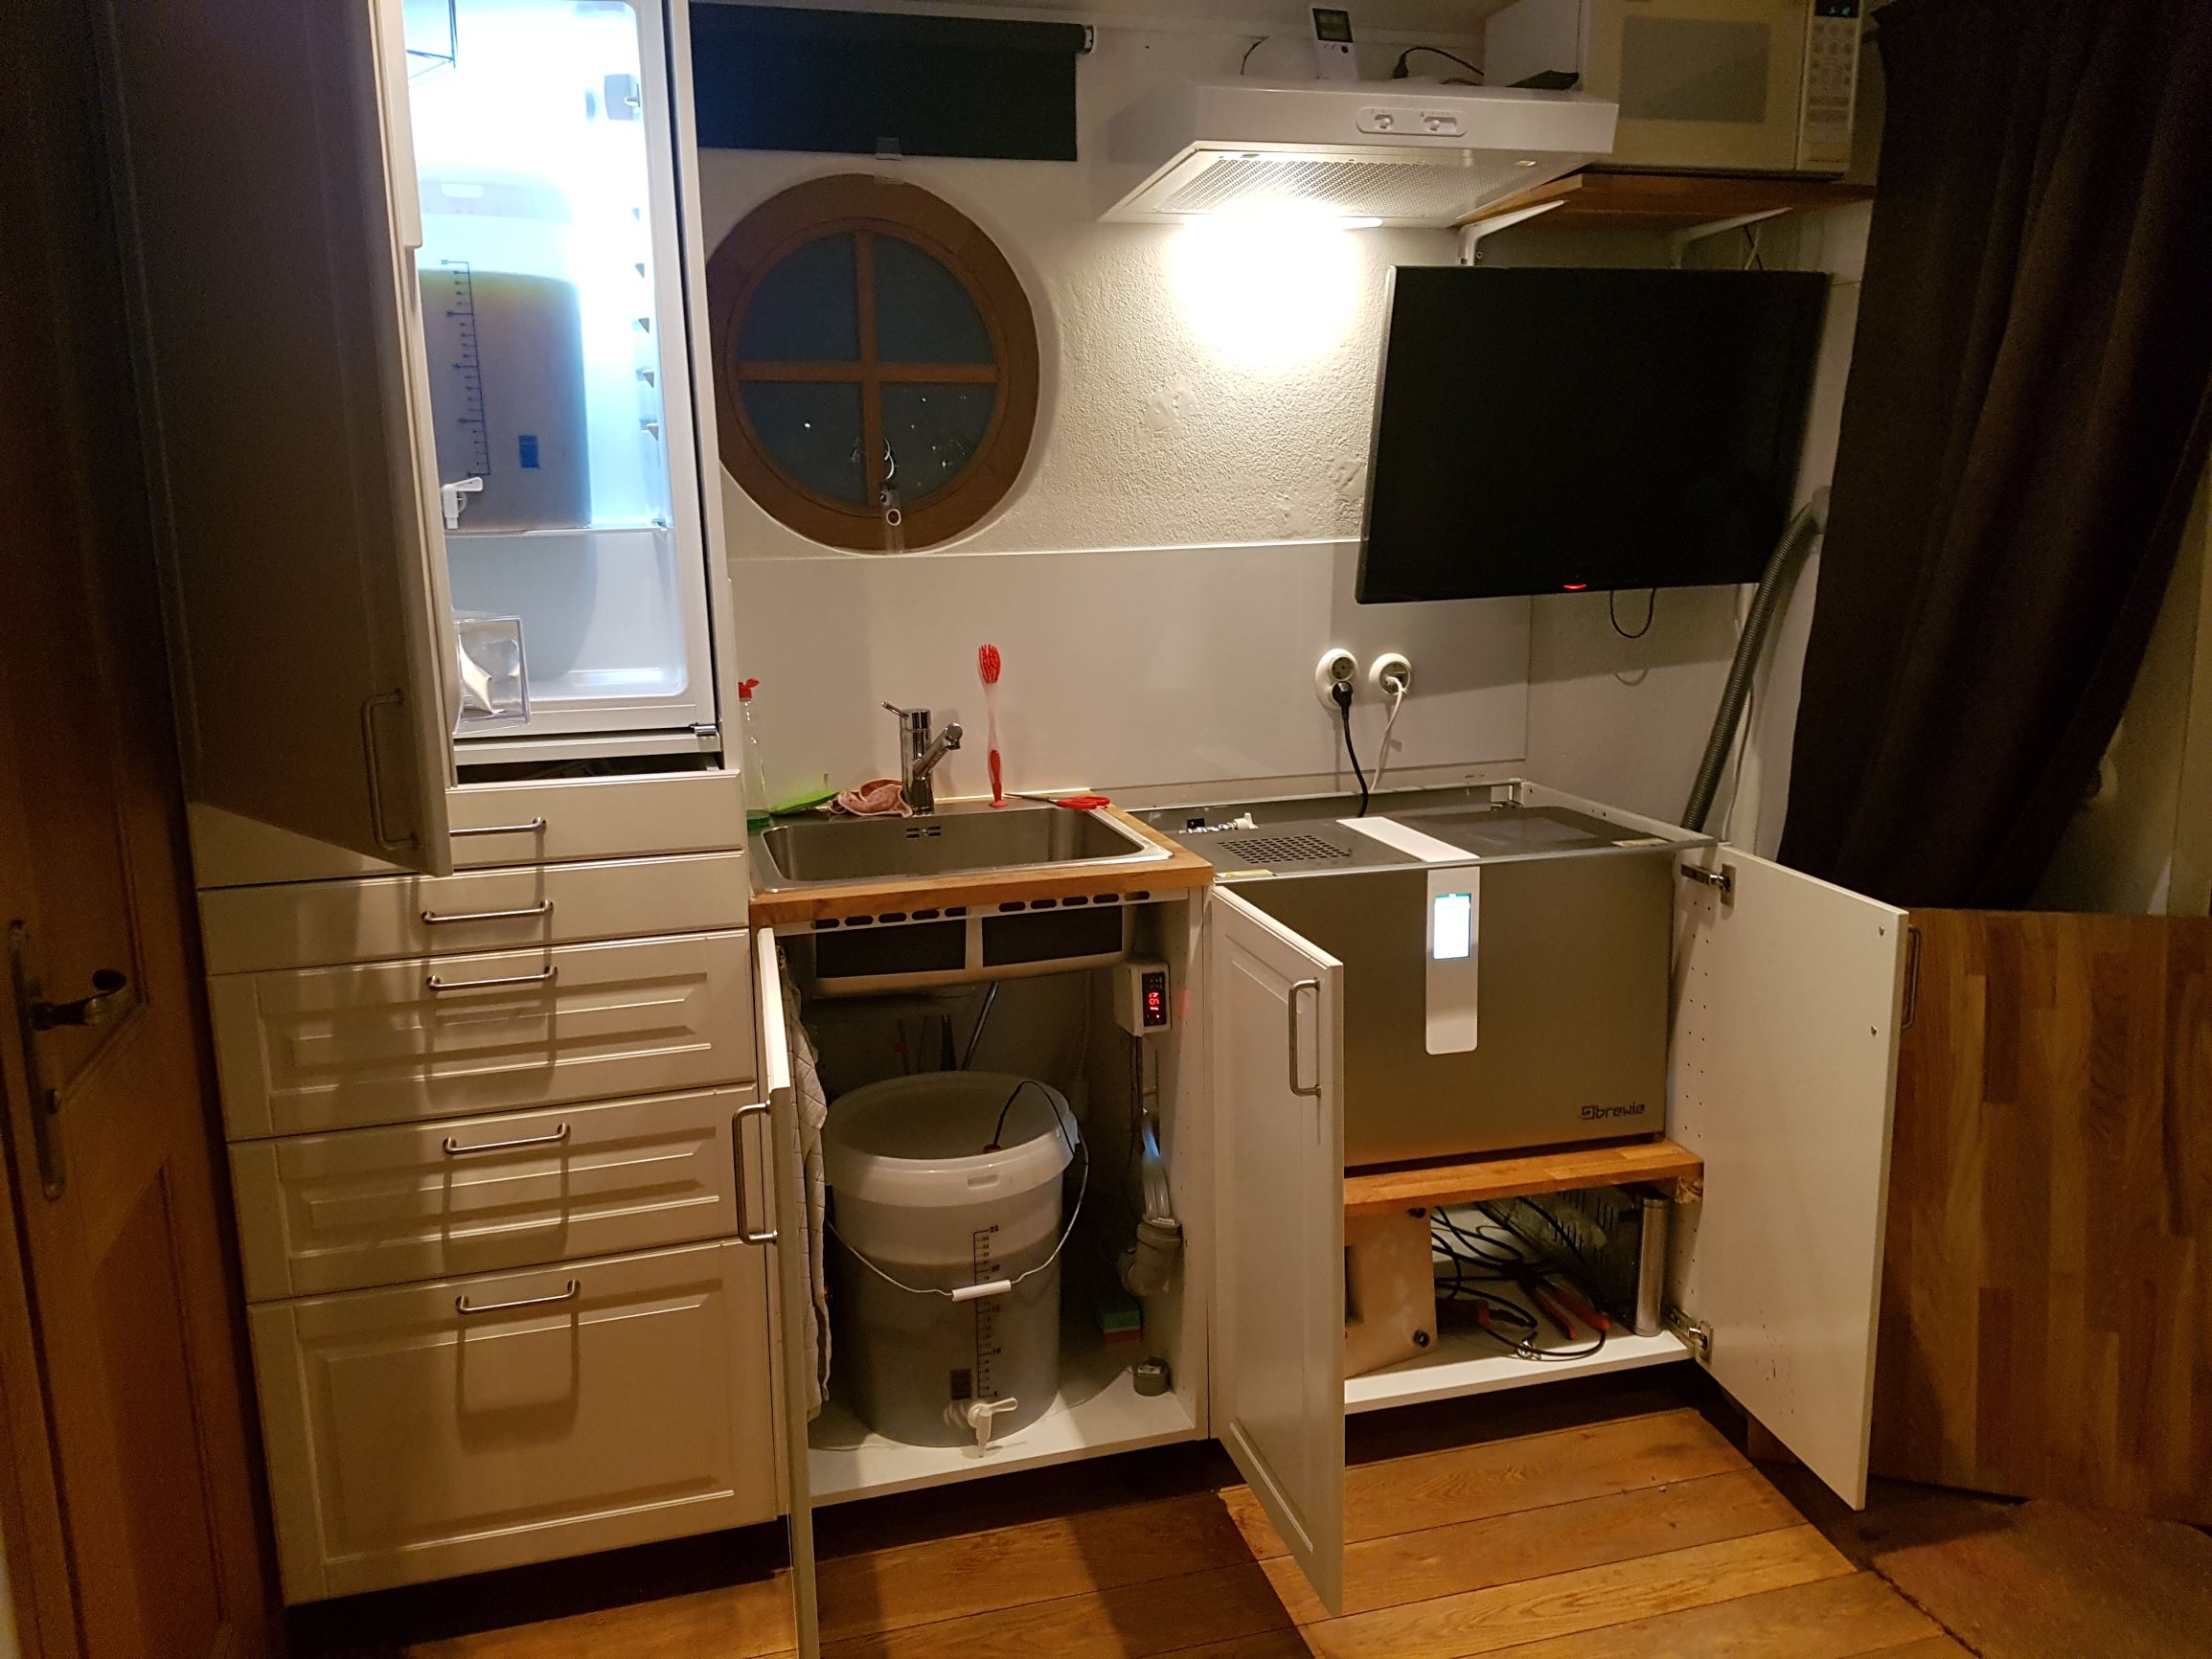
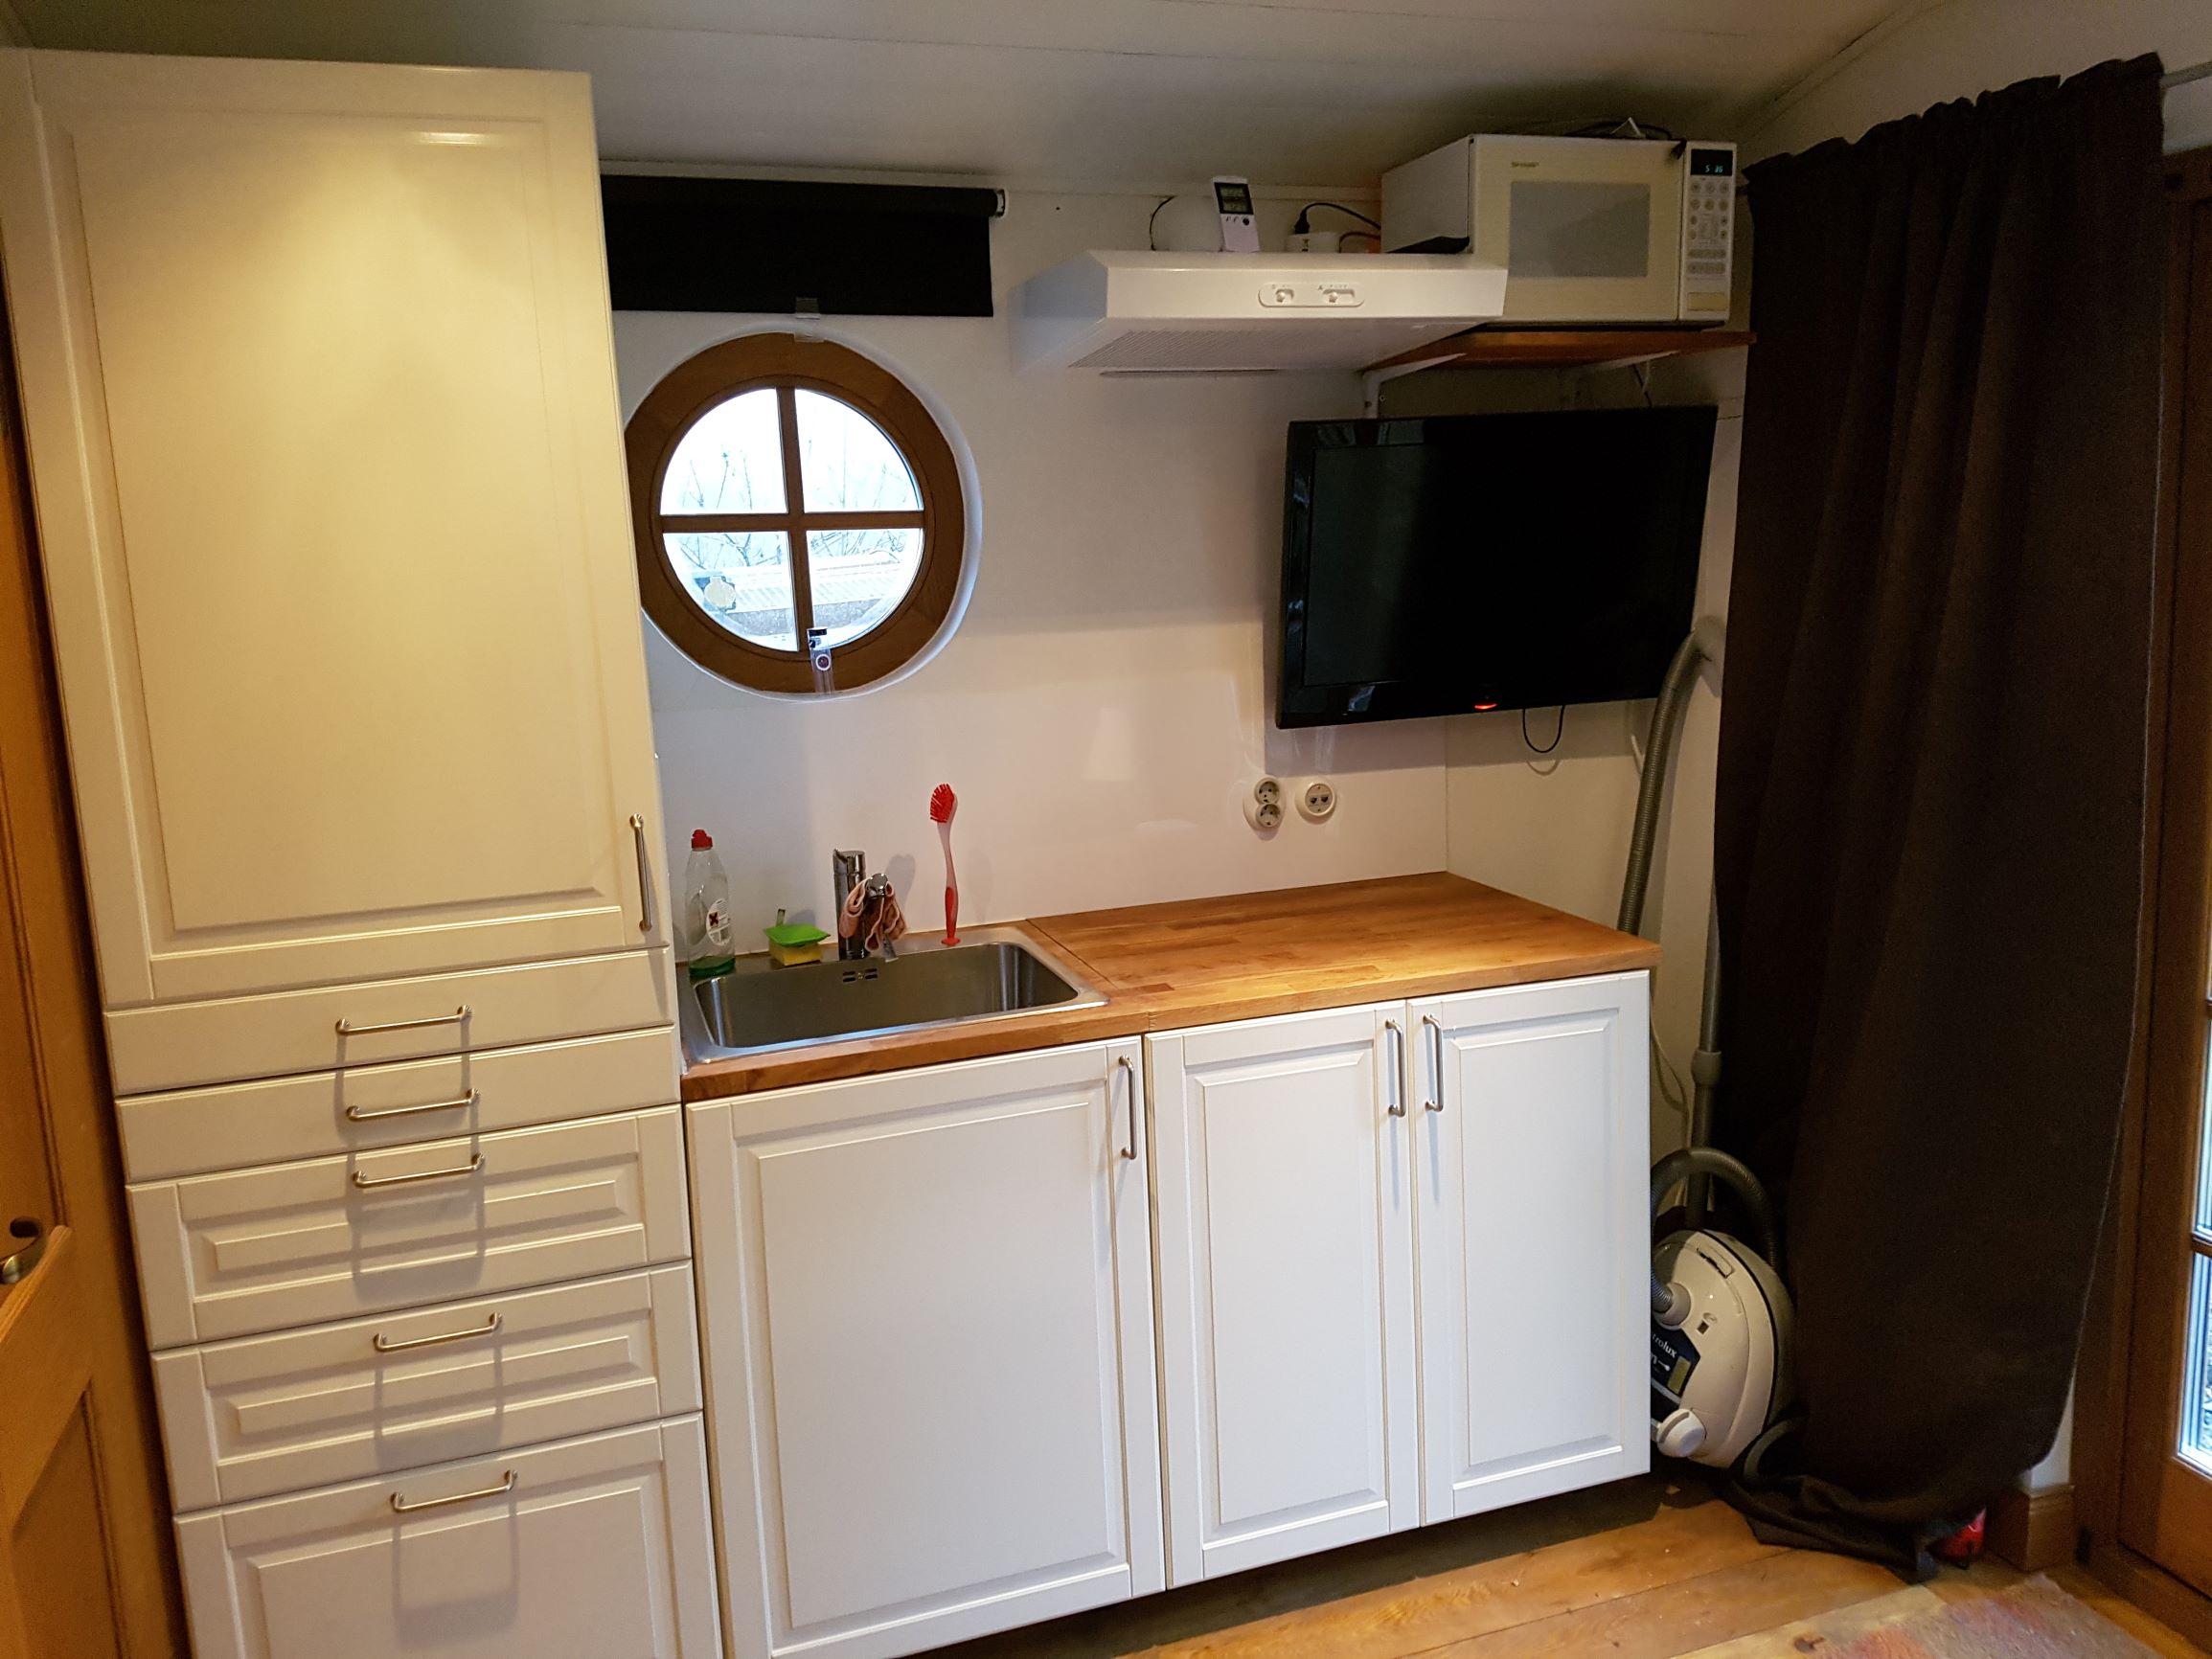
Under the sink there is a temperature-controlled area since the guesthouse often is around 8-15 C during the winter part of the year and I want my IPAs and Pale Ales to stay around 19 C. There are holes on both sides (and under it) so that all fans have free access. There is a separate inlet for water to the machine.
After now 3 brews in the new Brewie+ station I am very pleased (even though the calibration took 4 tries until it hit the mark and stayed there…) with the result. The working height to put in grains is perfect and the tap is extendable so I can use that when I clean the topside of the tanks which makes that very easy and fast….and I actually do spend a lot less hours in the brewery when I brew (but on the other hand now can brew more times.. . Highly recommend the setup.
Thanks for all the info in this thread.
Fredrik
Found a lot of info in this thread on why not to buy the Brewie+ but did it anyway. My wife wanted me to stop brewing because of the sweet lovely malt “smell” that woke her up every Sunday (I know, she is crazy) and that I had to spend more time with my family. Since I have been married for over 20 years I know that happy wife=more time for beer so I developed a strategy. I convinced my wife it was about time we gave our guests their own kitchen in the small guesthouse….and then slowly gave hints about automated brewing machines and how much more time it would give with the family if I had one. So, with some “doggy sad eyes” I got go ahead on the project (but of course without telling the budget for the new brewery).


Under the sink there is a temperature-controlled area since the guesthouse often is around 8-15 C during the winter part of the year and I want my IPAs and Pale Ales to stay around 19 C. There are holes on both sides (and under it) so that all fans have free access. There is a separate inlet for water to the machine.
After now 3 brews in the new Brewie+ station I am very pleased (even though the calibration took 4 tries until it hit the mark and stayed there…) with the result. The working height to put in grains is perfect and the tap is extendable so I can use that when I clean the topside of the tanks which makes that very easy and fast….and I actually do spend a lot less hours in the brewery when I brew (but on the other hand now can brew more times..
Thanks for all the info in this thread.
Fredrik
Still Brewn
Well-Known Member
It doesn't say where you are at, do you have 120v version or the 240v version? If you have the 120v version did you do the fan installation modification? It sounds like the company is going to go ahead and start adding fans where we did.
Glad you like the machine, really makes a brew day so much easier don't you think.....
My wife also commented on the machine and how much less smell in the house there is when I'm brewing. Personally I haven noticed a difference but then I'm the one in the house during the brewing while she is at work or something else.
Still Brewn
Well-Known Member
The calibration issue was probably occurring before your machine software was fully updated. At least for me that was the only time I had issues. After updated the Brewie+ sailed right through it.
Fredrik Lerigon
Member
- Joined
- Jan 13, 2019
- Messages
- 12
- Reaction score
- 7
I have the 240 version (Lives in Sweden) and havent done the modification. To free up space under the machine probably helps for heat transportation as well but we will see down the line if I have to start modding.
Fredrik
Fredrik
Awesome setup Fredrik!!
Site says batch size 2.6-5.2gal....you have a couple draining options with each batch where you can either recover all the wort and trub (drain all) or leave around 3l / .79gal leaving the hot break/trub behind which will affect your total volume yield. I brewed a 3 gal galaxy hopped saison over the weekend which was the volume I pushed my Zymatic to fill my 3gal keg....but could also do 2.5 gallons if you chose.
Last cleanup went really quick for me...I added hot water from the tap instead of the auto water supply (I'm adding a quick hose disconnect to my facet to be able for the machine to pull hot water during cleaning cycles) then sprinkled some pbw in both tanks and hop cages and used a sponge brush to scrub while it was running the quick cleaning (12min). I did run a extra rinse by just adding more water and draining after I was done to ensure everything got rinsed well.
I heard the 240v version has not had the same heat/wiring issues since it has a lower amp draw than the 120v version.
Fredrik Lerigon
Member
- Joined
- Jan 13, 2019
- Messages
- 12
- Reaction score
- 7
Cleanuptime vary but if I do a 5,5 kilo, 22liter Helles it takes less than 7 minutes up to 20 min with a heavy 7kg 20liter hoppy IPA that hav boiled over a bit. You start a full clean (program) and in my setup I start to scrubb the "lids" and the upper side of the machine. I help the "Pre clean" (part of the program) by using the scrub in the bottom. Then I clean the Hop cages and false bottom and put them back into the machine (together with the dishwashing tablets). Then I clean the outside, put things in place and leave. The day after (or some days later) I spray some Starsan on the bits with contacts of worth. When I start brewing (while i crush the malt) I do a small clean (program 6 min, says 12 min above so I might be wrong) to get the star sun out and then just Brew.
I spend at least 30 min less on cleaning compared to my traditional system and 3-4 hours less per brew in front of the machine...more time to try your brews..
Fredrik
I spend at least 30 min less on cleaning compared to my traditional system and 3-4 hours less per brew in front of the machine...more time to try your brews..
Fredrik
Last edited:
I asked Chad @ Arbor Fab if the Brewie basket that they have for sale fit the Brewie+ and they didn't know for certain. Chad mentioned to me that a number of people have asked the same question but to date, no one has confirmed to them that their basket does, in fact, fit the new Brewie.
Does anyone on this forum have this particular mesh basket/know if it fits?
http://arborfab.com/Brewie_p_139.html
Does anyone on this forum have this particular mesh basket/know if it fits?
http://arborfab.com/Brewie_p_139.html
HarkinBanks
Well-Known Member
I asked Chad @ Arbor Fab if the Brewie basket that they have for sale fit the Brewie+ and they didn't know for certain. Chad mentioned to me that a number of people have asked the same question but to date, no one has confirmed to them that their basket does, in fact, fit the new Brewie.
Does anyone on this forum have this particular mesh basket/know if it fits?
http://arborfab.com/Brewie_p_139.html
I designed it with Chad for my B+, so yes it does fit. It also fits the original b20 machine.
Mine fit perfectly and has worked flawlessly on my first 2 brews. They offer it in a 400 and 600 mesh. I went with the 600 mesh as recommended earlier in the thread by HarkinBanks and it has worked very well...no drainage issues.
Still Brewn
Well-Known Member
I designed it with Chad for my B+, so yes it does fit. It also fits the original b20 machine.
Do you know if your efficiency changed at all over the Brewie bags?
And
Does this block the recirculating pump outlet hole and how does that effect your results?
And
Is the Brewie lid the mesh lid I see in a couple of the pictures and do you think it is needed?
Mine fit perfectly and has worked flawlessly on my first 2 brews. They offer it in a 400 and 600 mesh. I went with the 600 mesh as recommended earlier in the thread by HarkinBanks and it has worked very well...no drainage issues.
@cubsfan16 or @HarkinBanks : I'm curious why you went with the 600 mesh rather than the 400? Are you you double-crushing your malt and concerned about bits getting through the mesh and causing problems with the pump?
@cubsfan16 or @HarkinBanks : I'm curious why you went with the 600 mesh rather than the 400? Are you you double-crushing your malt and concerned about bits getting through the mesh and causing problems with the pump?
600 is going be be larger holes than the 400 so it should improve flow over the 400. If you look back at previous posts Harkin had used both and had better luck with the 600.
The basket does set in front of the mash recirculation hole but the stream penetrates through fine (just deforms the stream) and doesn’t seem to be much of a factor in my limited experience.
HarkinBanks
Well-Known Member
I recommend 600 vs 400. I tried both and had better results with 600. 400 is a bit finer and there is a chance with a finer crush that the bottom could cake up. I saw some caking with the one brew that I did. The 600 did not cake and is easier to clean up. 400 doesn't drain as quickly so there was more volume in the mash tun, much less with the 600, so no fears of an overflow.
I have seen better efficiency. I stir at mash in and at the beginning of the sparge step.
As noted above the basket deflects the recirculation port slightly, but it still circulates well. It "fluffs" the top of the mash slightly.
I don't use a mesh lid to my basket. It's not a bad idea, but I don't think it is necessary.
Edit: I just checked arborfab and see Chad is offering a mesh lid. I can't guarantee that the Brewie lid will close with the basket with the mesh lid on. I would want Chad to reduce the height of the basket by about 1/4" to ensure the Brewie lid will close.
Fredrik Lerigon
Member
- Joined
- Jan 13, 2019
- Messages
- 12
- Reaction score
- 7
Since the international transport cost was so high I ordered mine from China (Alibaba) instead. I ordered 2 of them for $46 each (+VAT). Transport cost (for both) was $108 (+VAT) so mostly for international users of the forum. The one abov is probably best choice if you live in US.
HarkinBanks
Well-Known Member
Since the international transport cost was so high I ordered mine from China (Alibaba) instead. I ordered 2 of them for $46 each (+VAT). Transport cost (for both) was $108 (+VAT) so mostly for international users of the forum. The one abov is probably best choice if you live in US.
I understand cost issues but the welds on the alibaba stuff are typically terrible. I had a long discussion with Chad about Chinese welding. Ultimately you get what you pay for.
Fredrik Lerigon
Member
- Joined
- Jan 13, 2019
- Messages
- 12
- Reaction score
- 7
I understand cost issues but the welds on the alibaba stuff are typically terrible. I had a long discussion with Chad about Chinese welding. Ultimately you get what you pay for.
..Amen to that but have been lucky so far on the things I have ordered so I cross my fingers..;-)
Still Brewn
Well-Known Member
Not to get off thread topic but..... how many of you have ordered from alibaba? What has been your luck with doing so? Did you get what you ordered or did you credit card later get ripped off?
The few times I have looked at it, it always seemed like some sort of scam going on so I never made the leap to try it.
The few times I have looked at it, it always seemed like some sort of scam going on so I never made the leap to try it.
HarkinBanks
Well-Known Member
Not to get off thread topic but..... how many of you have ordered from alibaba? What has been your luck with doing so? Did you get what you ordered or did you credit card later get ripped off?
The few times I have looked at it, it always seemed like some sort of scam going on so I never made the leap to try it.
AliExpress is totally legit. Ordered tons of stuff there for cars and other accessory stuff. Carbon fiber stuff. Never had a problem. Alibaba is more of the commercial bulk side. I’ve had an ok experience there but not perfect. I had to dispute a rather large purchase when the seller tried to ship me a different product when mine was out of stock.
Is anyone else getting extreme burn in on the mash tun side with the grain basket? I was stirring a lot today and it still burnt in like crazy. I can even taste it a bit in the wort right now but it has not boiled yet. I am not 100% sure it is related to the basket, I have to do a brew with the bags again. And yes, I am using the false bottom also.
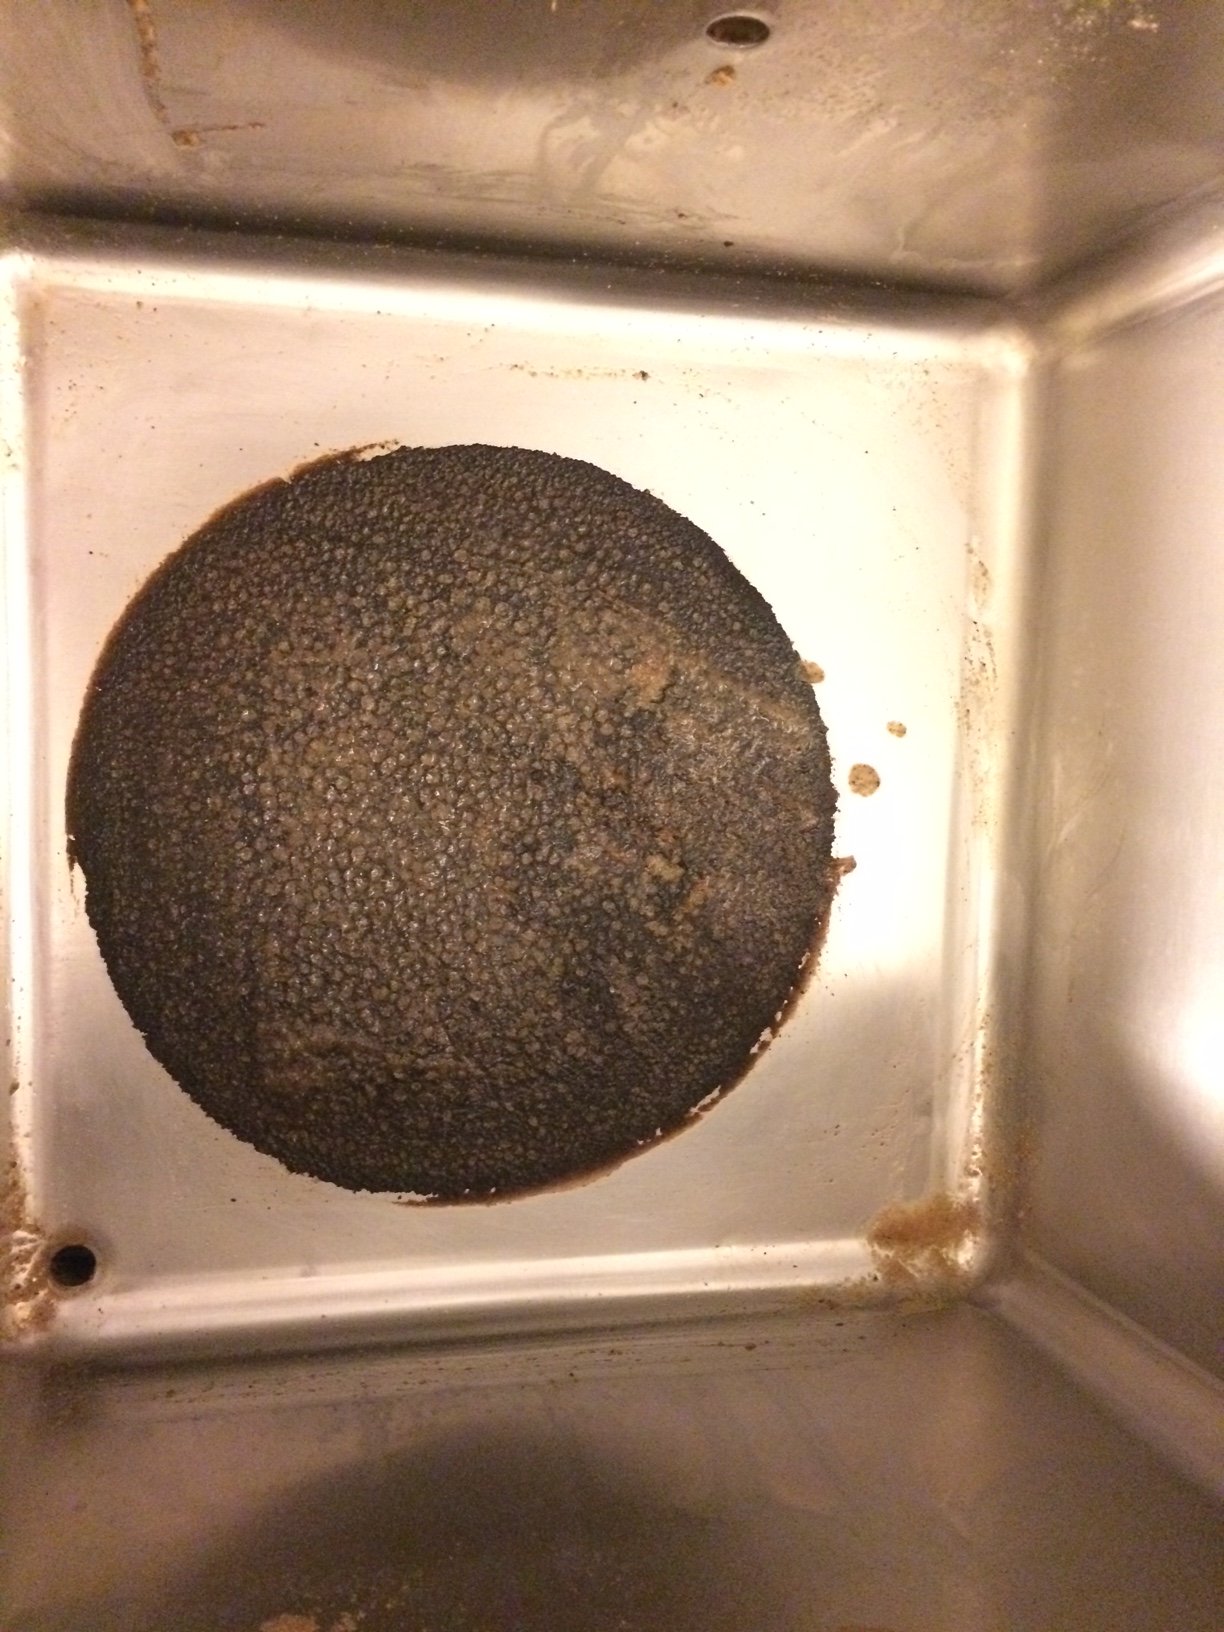

AliExpress is totally legit. Ordered tons of stuff there for cars and other accessory stuff. Carbon fiber stuff. Never had a problem. Alibaba is more of the commercial bulk side. I’ve had an ok experience there but not perfect. I had to dispute a rather large purchase when the seller tried to ship me a different product when mine was out of stock.
I ordered from Alibaba as well. Actually the company was not completely hooked up at that time but now is, I believe. This made me a bit nervous. However for 250$ -steal I got a 50L (10G) stainless steel conical fermenter with butterfly fittings, custom -sized dry hop opening, on wheels, etc. On the other hand dealing with customs (in Japan) and delivery was tough and expensive. But all in all, the best home fermenter I could have expected.
HarkinBanks
Well-Known Member
Is anyone else getting extreme burn in on the mash tun side with the grain basket? I was stirring a lot today and it still burnt in like crazy. I can even taste it a bit in the wort right now but it has not boiled yet. I am not 100% sure it is related to the basket, I have to do a brew with the bags again. And yes, I am using the false bottom also.
View attachment 614768
Don’t think that is basket related. I had a mash tun burn issue on one of my original units. Brewie never told me what it was. They sent me the B+ instead.
Still Brewn
Well-Known Member
Is anyone else getting extreme burn in on the mash tun side with the grain basket? I was stirring a lot today and it still burnt in like crazy. I can even taste it a bit in the wort right now but it has not boiled yet. I am not 100% sure it is related to the basket, I have to do a brew with the bags again. And yes, I am using the false bottom also.
View attachment 614768
Are you using the grate/false bottom?
I believe you should still have the grate in there it will allow more water/wort between the high heat and the grains. Also what are you setting temp for strike water? Even if you are doing a step mash set your strike water/mash in temperature above your mashing/resting temp. For example: for a rest at 122° set your mash in temp to 132° or there about for your temperature drop. It will get you close to the 122° you are looking for. I don't have this temperature drop perfected but somewhere between 8° and 12° F for my Brews so far. I have not brewed the same recipe twice in 12 years of brewing yet but now that I have the Brewie this is more likely to happen.
***************** NOTE *************
Do not set the temperature above your next step or it will skip it according to Brewie.
For example: if you are doing a multi step mash 124° and 134° do not set your strike water/mash in temperature above 133° or 132° because it will skip the 134° step. Personally I would go with the 132° because I have seen a 1 and 2 degree temperature up swing after the heater shuts off.
Basically what all this comes down to is that this will reduce the time your mash tank heater is energized thus reducing the scorching you are getting and be sure to keep your lid closed as much as possible to reduce heat loss.
Similar threads
- Replies
- 45
- Views
- 3K
- Replies
- 30
- Views
- 6K
- Replies
- 3
- Views
- 2K
- Replies
- 2
- Views
- 2K



![Craft A Brew - Safale BE-256 Yeast - Fermentis - Belgian Ale Dry Yeast - For Belgian & Strong Ales - Ingredients for Home Brewing - Beer Making Supplies - [3 Pack]](https://m.media-amazon.com/images/I/51bcKEwQmWL._SL500_.jpg)


