BrewCommander - Impressive offering from John

Homebrew Talk - Beer, Wine, Mead, & Cider Brewing Discussion Forum

Help Support Homebrew Talk - Beer, Wine, Mead, & Cider Brewing Discussion Forum:

This site may earn a commission from merchant affiliate links, including eBay, Amazon, and others.
Assuming they really wanted you to use a pair for 3 vessel systems, the big oversight is the ability to interlock and not run both elements at the same time. To be honest, unless you have a pair of 30 amp circuits or a 50 amp circuit broken out into dual 30 amp outlets, you might as well just integrate a switch over step. Get an extra probe and just juggle the connectors.

The other option is to put a relay module onto the side, run the hots to both SSRs and then use a selector switch that just interrupts the "fire" signal to one of the SSRs at a time. If you get fancy about it, that selector switch can be double pole so that you can switch the probe signal as well as the SSR fire signal.

Yeah I have been thinking of something like that as well. I never have seen the need to do back to back batches so I would be ok with only running one heating element at a time. I did however install 6GA wire in the wall. All I would need to do is replace my GFCI breaker and add another plug..
 
The pigtails off of the Brew commander are pretty short. It comes with a 10 foot long extension cable, and I think the probe cable is near equal length. If you are using boil coils, they come with a 10 foot power cable as well. The Riptide pumps had adequate length of cable as well 6 or 7 feet if I remember. I will share measurements in my review.
I'm likely to use a ripple element that comes with no cable but probably need at least four feet to plug in, my pump has a long cable so I'm good there. thanks
 
The pigtails off of the Brew commander are pretty short. It comes with a 10 foot long extension cable, and I think the probe cable is near equal length. If you are using boil coils, they come with a 10 foot power cable as well. The Riptide pumps had adequate length of cable as well 6 or 7 feet if I remember. I will share measurements in my review.
Yes, I'm counting on my boil coil and the BC extension cable to be plenty long enough so my kettle will be under my pulley at one end of my workbenches and the BC at the other. My riptide could then be in the center, so that once whirlpooling and chilling are done, I can pump from the kettle into my fermenter in the mini fridge.
Lol, I'm all about lessening my lifting and letting the pump save my back for golfing.
 
20191101_170024.jpg
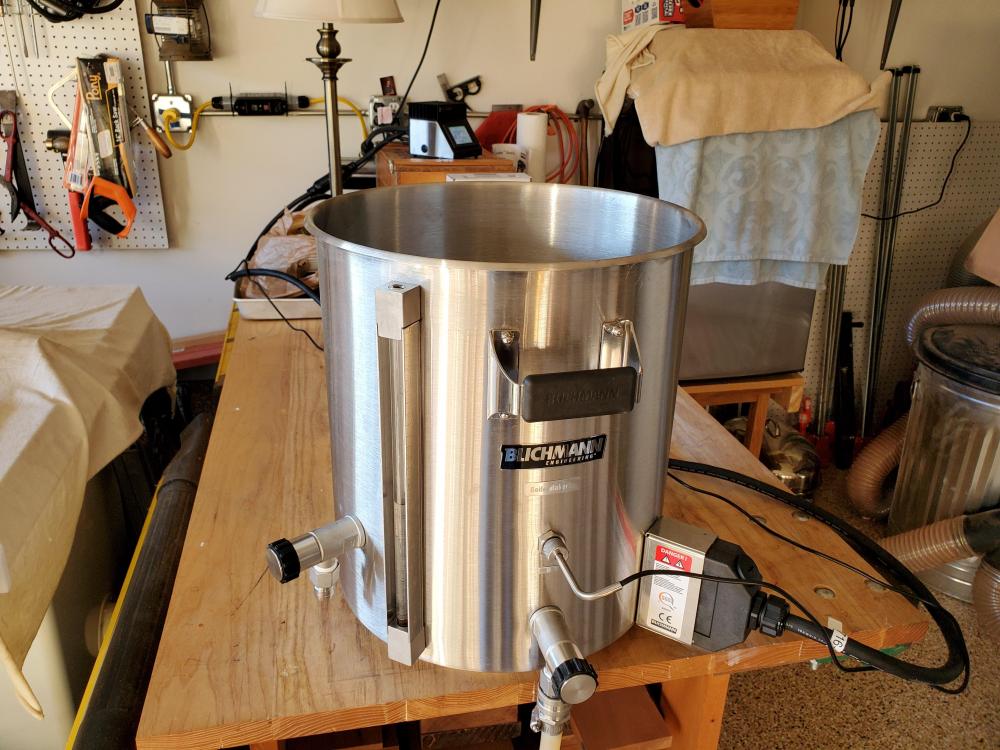
This week I received my 10 gal 240v G2 kettle and the 240v Brew Commander.
Assembly and leak test went well. I'll be using it for BIAB, and first batch should be Thusday or Friday this week.

Controller seems very nice and very user friendly.
20191101_165927.thumb.jpg.93128ba31390e20d060381d1783bba5b.jpg
20191101_165938.thumb.jpg.4b686335ba3cf46e0705f00cf08bc134.jpg
 
View attachment 651133 This week I received my 10 gal 240v G2 kettle and the 240v Brew Commander.
Assembly and leak test went well. I'll be using it for BIAB, and first batch should be Thusday or Friday this week.

Controller seems very nice and very user friendly.View attachment 651129 View attachment 651130


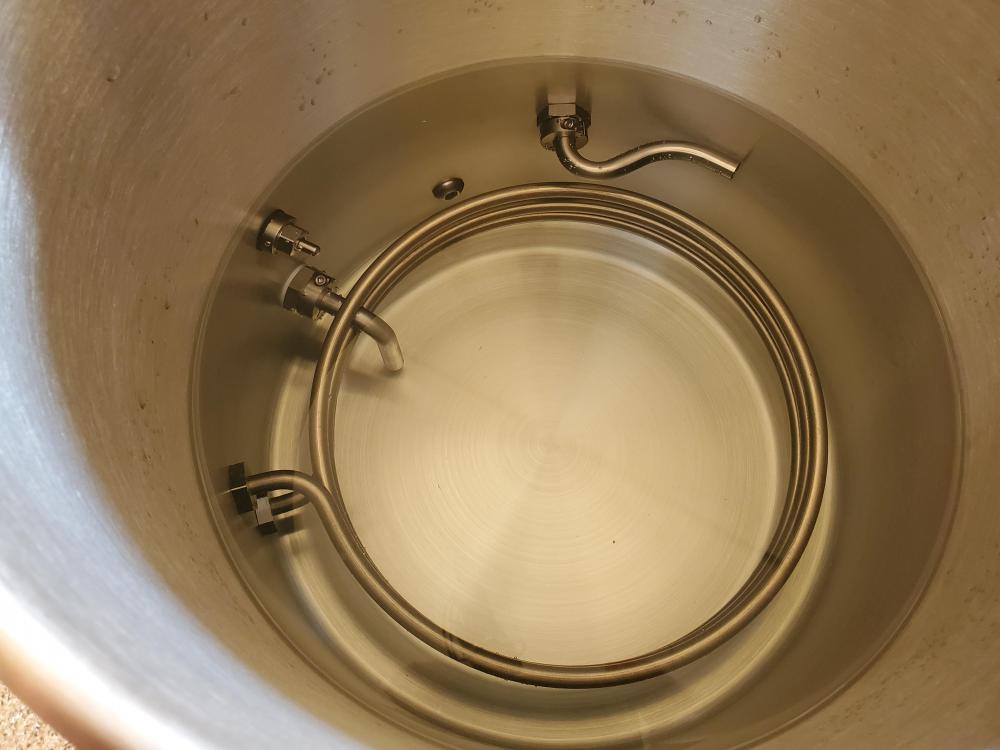
Just out of curiosity, what are you going to do to keep the BIAB bag from touching the BoilCoil? The main reason I went with a ripple element instead of the BoilCoil was the fact that the former can rest pretty low in the kettle, below a steamer tray or steamer basket, maximizing the amount of grain volume that can be in contact with the strike water.
 
Just out of curiosity, what are you going to do to keep the BIAB bag from touching the BoilCoil? The main reason I went with a ripple element instead of the BoilCoil was the fact that the former can rest pretty low in the kettle, below a steamer tray or steamer basket, maximizing the amount of grain volume that can be in contact with the strike water.

Nothing! Dave Knott at High Gravity had told me that the Boil Coil was ultra low watt density, and that used with the Brew Bag, would not scorch or burn the bag or grains as long as the coils were submerged. So yeah the bag touches the coils all around the circumference of the kettle with no issues.

Dave was right. I run my Brew Commander at 90% power during mash program and run my whirlpool pump and it keeps the grains stirred up. I couldn't be more pleased with this set up.
From watching the Brew Commander it seems to pulse the heat to keep it constant.

It's the reason I went with the boil coil so I wouldn't have to use a basket and through the lid RIMS. So much easier for me anyway to just bring to strike temp, cut off heat, add bag , grains, dough in, and then start the whirlpool and mash program and go get coffee, lunch, or weigh out hops, etc.
 

Attachments

  • 20191108_122426.jpg
    20191108_122426.jpg
    2.1 MB · Views: 104
Nothing! Dave Knott at High Gravity had told me that the Boil Coil was ultra low watt density, and that used with the Brew Bag, would not scorch or burn the bag or grains as long as the coils were submerged. So yeah the bag touches the coils all around the circumference of the kettle with no issues.

Dave was right. I run my Brew Commander at 90% power during mash program and run my whirlpool pump and it keeps the grains stirred up. I couldn't be more pleased with this set up.
From watching the Brew Commander it seems to pulse the heat to keep it constant.

It's the reason I went with the boil coil so I wouldn't have to use a basket and through the lid RIMS. So much easier for me anyway to just bring to strike temp, cut off heat, add bag , grains, dough in, and then start the whirlpool and mash program and go get coffee, lunch, or weigh out hops, etc.

Ah, interesting to know! I didn't realize that could be done. Nevertheless, I like to use a stainless steam basket to hold my bag, esp. for 10+ gallon batches, so that would still be a problem in my setup.
 
Ah, interesting to know! I didn't realize that could be done. Nevertheless, I like to use a stainless steam basket to hold my bag, esp. for 10+ gallon batches, so that would still be a problem in my setup.
Ah, yeah I'm doing half the size batches you are, mostly 4-5 gal.
Whether there would be issues with larger batch sizes IDK.
 
Ah, yeah I'm doing half the size batches you are, mostly 4-5 gal.
Whether there would be issues with larger batch sizes IDK.

In my case, i find the basket helps to hold the bag over the mash while I do a "hanging basket sparge." With my new setup, the basket will be quite a bit higher up off the bottom, so I probably could have gotten away with a Boil Coil, but I like the idea of using TC ports, so Brewer's Hardware is adding a TC port to my BrewBuilt kettle as we speak. I also built a panel using Auber components. I was close to pulling the trigger on the Brew Commander, but the new panel has a couple of features not available on the Brew Commander and I thought it would be fun to build it myself. Got a chance to dry test it yesterday. No sparks, so it seems like it should work! I'll probably post an entry to describe the build process and upgrade to eBIAB.
 
In my case, i find the basket helps to hold the bag over the mash while I do a "hanging basket sparge." With my new setup, the basket will be quite a bit higher up off the bottom, so I probably could have gotten away with a Boil Coil, but I like the idea of using TC ports, so Brewer's Hardware is adding a TC port to my BrewBuilt kettle as we speak. I also built a panel using Auber components. I was close to pulling the trigger on the Brew Commander, but the new panel has a couple of features not available on the Brew Commander and I thought it would be fun to build it myself. Got a chance to dry test it yesterday. No sparks, so it seems like it should work! I'll probably post an entry to describe the build process and upgrade to eBIAB.
Nice! I went with the plug and play BC because it handles a range of amps, where most everything else in the 240v was 30 amps.
I have a 240v 20 amp tablesaw circuit, so I went with the easiest solution. The 3750w boil coil in my size batches is ideal.
Also, I'm retired so the few extra minutes it takes to get to strike or boil is not an issue.
Look forward to your post when you get your hardware set up and how you went about building the Auber controller.
I do like the touch screen and keypad entry on the BC. It seems to have a lot of features, likely more than I'll need.
 
That is a really nice setup! I was close to getting the BrewCommander given the nice touch screen. I also love how your Blichmann eKettle looks. How hard is it to clean the kettle behind the BoilCoil after your brew days? With my TC setup, I can just remove the element when it's time to scrub down the sides, but I do like the way the BoilCoil looks and I imaging it probably works better for whirlpooling than a ripple element.
 
That is a really nice setup! I was close to getting the BrewCommander given the nice touch screen. I also love how your Blichmann eKettle looks. How hard is it to clean the kettle behind the BoilCoil after your brew days? With my TC setup, I can just remove the element when it's time to scrub down the sides, but I do like the way the BoilCoil looks and I imaging it probably works better for whirlpooling than a ripple element.

@craigmw , for cleaning the kettle and boil coil I just heat some pbw to 140F and recirculate, then when i've drained down to the coils I use a kitchen bristle brush to run over the coils. So far no build up but a bristle bottle brush easily fits between the coils and sidewalls.

I might have gone for a ripple element but I couldn't find any that were ulwd to fit my 20amp circuitry.
 
For users of the Commander, are there multiple "boil" steps like the mash steps? I don't mean for hop additions. Can you set a boil step at 100%pwr to 200d for a couple minutes, then set a step 2 to boil to 212 at 50% pwr for an hour to avoid the boil over? Or is it a single boil step/pwr setting and steps are just for boil additions?
 
Last edited:
@phillip_h I got it off Amazon. Northshore Safety makes them in different configurations and for me was much cheaper, $88, than calling electrician etc.

Ah - this is for 20A. The 30A version is twice the price, and then you have to buy the plugs. I just ordered a breaker for $90 and I'll probably install it myself.
 
For users of the Commander, are there multiple "boil" steps like the mash steps? I don't mean for hop additions. Can you set a boil step at 100%pwr to 200d for a couple minutes, then set a step 2 to boil to 212 at 50% pwr for an hour to avoid the boil over? Or is it a single boil step/pwr setting and steps are just for boil additions?

Steps are for hop additions in the boil program. I guess you could use the mash program for what you have in mind.

However once you play with the linear boil setting working slightly back from 100% it's super easy to find that just less than boil over setting. With hop additions I always find myself right there at the kettle anyway, so boil over is not a concern.
You might be right here; prob don't need 100% to ramp from mash-out and I'll be there for first hops. maybe one could stop/pause then add an extra mash step to get closer. as you said that might not be necessary.
 
For users of the Commander, are there multiple "boil" steps like the mash steps? I don't mean for hop additions. Can you set a boil step at 100%pwr to 200d for a couple minutes, then set a step 2 to boil to 212 at 50% pwr for an hour to avoid the boil over? Or is it a single boil step/pwr setting and steps are just for boil additions?

No, I talk about this extensively earlier in the thread. You will have to run up to boil in the auto/mash mode. Set the target to 210F at 100% output. When it reaches that temp, switch to ON/boil mode and regulate power.

If you initially set it to boil at 50% power, it will take twice as long to ramp.
 
Nice! I went with the plug and play BC because it handles a range of amps, where most everything else in the 240v was 30 amps.
I have a 240v 20 amp tablesaw circuit, so I went with the easiest solution. The 3750w boil coil in my size batches is ideal.
Also, I'm retired so the few extra minutes it takes to get to strike or boil is not an issue.
Look forward to your post when you get your hardware set up and how you went about building the Auber controller.
I do like the touch screen and keypad entry on the BC. It seems to have a lot of features, likely more than I'll need.
You can use any 30A controller at 20A if you change the input plug, and stick with an element less than 4300W (if you want to be able to also run a pump.) You could use a 4500W element as long as you don't run a pump from the controller. The current that flows is determined by the voltage and the element resistance. Lower wattage elements have higher resistances, so draw lower max current.

Brew on :mug:
@doug293cz, yes I figured that would probably work but it was finding the right ULWD element that I felt would work for my BIAB that was an issue. Just not much of a selection out there that I could find that was under 5500w.

That and I was new to the electric controller choices. Definitely felt more at ease going with a matched controller and element that would work on my table saw circuit.
 
No, it doesn't have a positive disconnect on the hots leading to the element. Both the hard toggle switch and the soft on/off button do not activate any relays or contactors. It simply disrupts the signal to the SSR. That means an SSR fail open will keep the element running.
Has anyone come up with a convenient safeguard to protect against this; some kind of visual aid? I was thinking a lighted plug like this:
https://www.mcmaster.com/lighted-plugs
But they're pricey.
Eric
 
Ok guys!! finally got a video done on all the features and how to set it up for RIMS and HERMS. Long video with lot to cover but I did add time stamps in the description to jump to whatever part your interested in!
Cheers!


Brian:

As usual, this is a wonderfully informative video. It was great to hear your thorough description about how to set it up and your honest overall assessment of this controller. A friend of mine who has been brewing over 30 years is looking to build a small eBIAB system and I recommended he take a look at the Brew Commander because he really doesn't want to build his own panel. I will also send him to your video.

Thanks so much!
Thanks for the feedback! Hope it helps him out!
 
Great video. I'm definitely buying one of these and already have the order into @Bobby_M at BrewHardware.com. Blichmann have done a great job with the 'Human Factors' on this and have produced a powerful unit with an easy to use, and tweak, interface.

The few shortcomings you note in the video are valid but this is by far the best value solution on the market today. Thanks Brian.

Paul
Definitely.. Best bang for the buck! Thanks for the comments!
 
Nice video, do you know what the diameter of the temperature probe is and the length of it before the elbow?
With the compression fitting you can insert as much or as little of the probe into your kettle. For my BIAB, I just insert a little so that it won't bother my Brew Bag.
Works great!
 

Attachments

  • 20191101_165938.thumb.jpg.4b686335ba3cf46e0705f00cf08bc134.jpg
    20191101_165938.thumb.jpg.4b686335ba3cf46e0705f00cf08bc134.jpg
    60.2 KB · Views: 94
  • 20191101_165927.thumb.jpg.93128ba31390e20d060381d1783bba5b.jpg
    20191101_165927.thumb.jpg.93128ba31390e20d060381d1783bba5b.jpg
    118.1 KB · Views: 89
Ok guys!! finally got a video done on all the features and how to set it up for RIMS and HERMS. Long video with lot to cover but I did add time stamps in the description to jump to whatever part your interested in!
Cheers!

Great video, thanks!
so for the 240v version I only need to run 3 wires, not a neutral for this ? I was originally thinking 4 due to the 120v pump plugging into the back of the controller but you mention having to also plug the controller into 120v power. 30A Probably all I need but Electrician friend asked if I wanted to do 40A & weather or not we need a neutral for anything running on 120v.
 
Last edited:
Great video, thanks!
so for the 240v version I only need to run 3 wires, not a neutral for this ? I was originally thinking 4 due to the 120v pump plugging into the back of the controller but you mention having to also plug the controller into 120v power. 30A Probably all I need but Electrician friend asked if I wanted to do 40A & weather or not we need a neutral for anything running on 120v.

Yes you will need a 30 amp circuit (Brewcommander and element power) AND a 15 amp 120v circuit (Pump power)

(In actuality you could run a 4 wire, replace the main plug with a 4 wire 240V plug for the neutral needed, and not need the 120v plug with some rewiring inside the BrewCommander.)

If you are not savvy on electrical wiring you probably would want to tackle this.
thanks,
I’m definitely not. Electrician is moving in a couple doors down. I’m making friends
 
Ok guys!! finally got a video done on all the features and how to set it up for RIMS and HERMS. Long video with lot to cover but I did add time stamps in the description to jump to whatever part your interested in!
Cheers!

Nice video! The BC certainly made my brew day a lot easier and more enjoyable.
It's like having an assistant watching over things in the garage, while I duck inside during mash to weigh out hops, check mash ph, get lunch, a cup of coffee, etc.
 
Bringing back this thread. Just watched the video. Thanks for doing that.

One thing I liked about this when I was at the NHC was the mash ramp. The way it was described to me was you set the mash ramp to x degree(s) per minute and the control ramps each step based on that setting. So if it was set to 1°F per minute, it would go from 135°F to 145°F in 10 minutes. The controller would control the power to make sure it was ramping at the set parameter. But from the video, it seems like it is just a timer based on your system and the ramp from each step is at 100% power all the time. Is that right? That seems like a dumb option to put in if it really doesnt control anything.

Edit: just read the manual. Sounds like the step timer would start as soon as the wort was heated instead of starting when the next temp is reached. The mash ramp is a manual timer so the next step timer isnt started right away...if I'm reading it correctly. This seems like a backwards way of doing that. Why not program it so the timer doesnt start until the set temp is reached. I was excited for this controller but if that's how it really works, I'm passing on it.
 
Last edited:
Bringing back this thread. Just watched the video. Thanks for doing that.

One thing I liked about this when I was at the NHC was the mash ramp. The way it was described to me was you set the mash ramp to x degree(s) per minute and the control ramps each step based on that setting. So if it was set to 1°F per minute, it would go from 135°F to 145°F in 10 minutes. The controller would control the power to make sure it was ramping at the set parameter. But from the video, it seems like it is just a timer based on your system and the ramp from each step is at 100% power all the time. Is that right? That seems like a dumb option to put in if it really doesnt control anything.

Edit: just read the manual. Sounds like the step timer would start as soon as the wort was heated instead of starting when the next temp is reached. The mash ramp is a manual timer so the next step timer isnt started right away...if I'm reading it correctly. This seems like a backwards way of doing that. Why not program it so the timer doesnt start until the set temp is reached. I was excited for this controller but if that's how it really works, I'm passing on it.

It is not a "reach the temp and start the timer" It is a predictive setting. You can adjust the percentage of power that is applied to get to the temp but you would have to adjust the ramp time as well.
 
Bringing back this thread. Just watched the video. Thanks for doing that.

One thing I liked about this when I was at the NHC was the mash ramp. The way it was described to me was you set the mash ramp to x degree(s) per minute and the control ramps each step based on that setting. So if it was set to 1°F per minute, it would go from 135°F to 145°F in 10 minutes. The controller would control the power to make sure it was ramping at the set parameter. But from the video, it seems like it is just a timer based on your system and the ramp from each step is at 100% power all the time. Is that right? That seems like a dumb option to put in if it really doesnt control anything.

Edit: just read the manual. Sounds like the step timer would start as soon as the wort was heated instead of starting when the next temp is reached. The mash ramp is a manual timer so the next step timer isnt started right away...if I'm reading it correctly. This seems like a backwards way of doing that. Why not program it so the timer doesnt start until the set temp is reached. I was excited for this controller but if that's how it really works, I'm passing on it.


I understand your disappointment, however in a HERMS system the HLT usually reaches temp long before the MT actually reaches the same point. Other systems may be more "responsive" but in a HERMS system I think you might want to delay the timer a little to allow the mash to reach the step temp.
 
It is not a "reach the temp and start the timer" It is a predictive setting. You can adjust the percentage of power that is applied to get to the temp but you would have to adjust the ramp time as well.

Right, that what my understanding was after reading the manual. Wouldnt it be better to just program the controller to start the timer as soon as the temp is hit? Doesnt matter if it takes 5 minutes or 30 minutes. The element keeps the mash at 135°F for 20 minutes. Ramps up to 145°F after 20 minutes. Timer starts once mash reaches 145°F. Seems odd to have to tell the program the ramp will take x amount of time so dont start the actual mash timer until after the ramp timer. What happens if for some reason it takes longer one day to reach a certain step? Will you have to manually adjust the controller so the mash timer doesnt start yet?
 
Back
Top