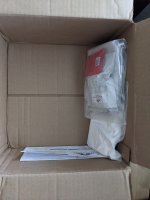
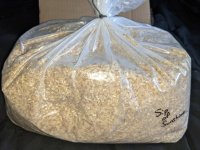
Bought an extract kit by accident

Homebrew Talk - Beer, Wine, Mead, & Cider Brewing Discussion Forum

Help Support Homebrew Talk - Beer, Wine, Mead, & Cider Brewing Discussion Forum:

This site may earn a commission from merchant affiliate links, including eBay, Amazon, and others.
For mashing out, is there any risk in using water that is too hot, like 200F, regarding the tannins issue?

For sparge I will use room temp.

Regarding hop types, I guess they want to keep the recipe top secret.

I am impressed with the packaging and shipping speed. I'll likely use them again. It shipped same day and was at my door 3 days later.
 
After 60 minutes, add hot water to bring mash in the mash tun to 170F, let rest for 10 minutes.
  1. Does it matter how much water I add when mashing out, can there be too much or too little?
There's really no need for a mashout.

At the end of the mash time, stir the mash well, let sit for a few (2-4) minutes and start your Vorlauf. When running are clear (enough) start your Lauter. Start heating the wort in your kettle as soon as you have a gallon of wort in there and keep adding your runnings to it.
 
What does '20 min whirlpool' refer to for the hop addition? Is this after the boil, whirlpool those hops for 20 minutes? Or at T-20, add the whirlpool hops and whirlpool the boil with them?
 
What does '20 min whirlpool' refer to for the hop addition? Is this after the boil, whirlpool those hops for 20 minutes? Or at T-20, add the whirlpool hops and whirlpool the boil with them?

After the boil, turn the heat off and add the hops. Let them sit for 20 minutes, stirring occasionally, if desired. You could actually do a whirlpool, where you stir the kettle vigorously in a circular motion to make a cone of trub in the middle.

People do whirlpool hops at different temps - some right at flame out (so just under 212), others will cool down more to reduce isomerization and allow different hop flavors/aromas to survive.
 
The whirlpool is always at some point after flameout.
So add whirlpool hops at flameout (or later)* and recirculate for 10', 20', or 30', etc. or stir periodically. Then chill down to ferm temps.

* Many brewers will chill somewhat, down to somewhere around 170F-140F, and then add the whirlpool hops. That to restrain bitterness in favor of more flavor and aroma. NEIPAs use huge whirlpool additions at lower temps.
 
I wouldn't, they've put Munich in there, that malt cannot be steeped. It needs to be mashed.

I would exclude the Munich and also the carapils (that one is also not fully converted and it is better to mash it) and just brew it with the dme only.

FWIW, I looked at the process instructions that the kit supplier has online. For me the instructions where "good enough" to suggest "trusting the recipe".

Given the variety of brands of carapils and munich malts, it can be hard to have a useful discussion about these malts without mentioning specific brands. For example: Briess Carapils can be steeped [link].
 
I think I'll skip the steeping step for my extract kit.

I know this is off topic, but for my Sip of Sunshine AG kit I am doing today:

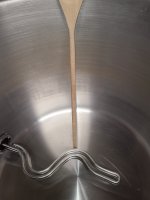
I have my gear mostly ready to go. The one missing piece is determining the volume in my kettle. I made gallon marks on my carboy but with a kettle it's a little harder since you obviously can't see through it. How do you guys mark your kettles where 5, 6 ,7 gallons is?
 
Last edited:
I think I'll skip the steeping step for my extract kit.

I know this is off topic, but for my Sip of Sunshine AG kit I am doing today:

I have my gear mostly ready to go. The one missing piece is determining the volume in my kettle. I made gallon marks on my carboy but with a kettle it's a little harder since you obviously can't see through it. How do you guys mark your kettles where 5, 6 ,7 gallons is?

I calibrated a large wooden spoon with cut in marks for every gallon 20210919_115504.jpg
 
Last edited:
Last edited:
I think I'll skip the steeping step for my extract kit.
There is (always) a 3rd option. In this case, you could do a "partial mash" (e.g. Easy Partial Mash Brewing (with pics)).

In place of one of the three pound packages of DME, mash 4 lb of base malts with the munich/carapils malts. There well be more than enough DP in the base malts to convert the other malts.
 
My AG brew day just came to screeching halt. I just realized that my brew kettle holds only 5 gallons, and the recipe calls for a 6.5-7 gallon boil. I may just do that extract kit today.

This one looks good, and has gallon markings on the inside. Thoughts?
https://www.homedepot.com/pep/Gas-O...R9cHSZOiDZegQHxS19oaAv_cEALw_wcB&gclsrc=aw.ds

That will work but to help with avoiding boil overs I would go with a 40 quart pot.

Edit: Also make sure you have a plan for cooling down the wort after the boil. You can do an ice bath or use a wort chiller.
 
Last edited:
Quick question, why does the AG kit need such a larger boil? I thought once the wort comes out of the mash tun it's pretty much the same as extract. The extract kit gets by with a smaller boil with water added later.
 
Quick question, why does the AG kit need such a larger boil? I thought once the wort comes out of the mash tun it's pretty much the same as extract. The extract kit gets by with a smaller boil with water added later.

Because you are converting the starches to sugars during the mash and rinsing the sugars out of the grains to get the proper amount of sugars for your recipe. You then boil down to concentrate the sugars for your batch Size to hit the anticipated gravity of the recipe.

With extract this has already been done for you and you already have all of the sugars you need for your brew. This is why smaller kettles and other techniques are possible with extract.

Here's a good link covering all grain brewing just fyi.
 
That will work but to help with avoiding boil overs I would go with a 40 quart pot.

Edit: Also make sure you have a plan for cooling down the wort after the boil. You can do an ice bath or use a wort chiller.
Thanks, yeah I am going to hunt one down and hopefully brew next weekend.

Yes, I have an immersion chiller and just bought an submersible pump so I can pump ice water through it. In my prior extract brews, I ran tap water through it, and it took longer than I wanted.
 
Thanks, yeah I am going to hunt one down and hopefully brew next weekend.

Yes, I have an immersion chiller and just bought an submersible pump so I can pump ice water through it. In my prior extract brews, I ran tap water through it, and it took longer than I wanted.

Stirring the wort while the immersion chiller is running helps it work much faster.
 
I think I'm going to buy this kettle. I just found that they also have one that includes a false bottom and bazooka filter, this could have saved me the $80 and time I spent on building a mash tun out of a cooler :(. The only thing I think I wouldn't like about that is having to clean out all of the grains when I am ready to boil. Having 2 separate vessels I think makes it easier.

https://www.amazon.com/GasOne-Gallo...rds=gas+one+40+qt&qid=1632071588&sr=8-10&th=1
Mash tun / boil kettle combo
https://www.amazon.com/GasOne-40QT-...9Y2xpY2tSZWRpcmVjdCZkb05vdExvZ0NsaWNrPXRydWU=

A BIAB bag and a hoist makes the false bottom/filter unnecessary. Mash in the pot, sparge in the cooler?
 
I do not plan to BIAB at this point. I personally think mashing in the cooler and then collecting wort in a clean kettle seems like the easiest.

Down the road I thought about maybe one of those clawhammer systems, but we'll see.
 
I do not plan to BIAB at this point. I personally think mashing in the cooler and then collecting wort in a clean kettle seems like the easiest.

Down the road I thought about maybe one of those clawhammer systems, but we'll see.

This is what I do. I have a 5 gallon pot for my strike/sparge water. I have a 12 gallon rectangular cooler with a bazooka screen for mashing/sparging and a 10 gallon boil kettle.

I do think biab is a solid method as well it's more of a personal preference thing with how you want to go about setting up your system.

There many ways to skin this cat though. Down the road I wouldn't be opposed to getting an all in one electric system.
 
Yeah, I think it will be nice to have both a 5 and 10 gallon kettle. I'm thinking I can use both the 5 and 10 gallon to get to a boil faster (have both on a burner) and when the 5 gallon gets close to boil, pour it into the 10. On second thought, I bought a propane burner back when I started extract brewing but never used it, it's literally new and still in the box. This will likely be much better for getting a 10 gallon kettle to a boil, and I can avoid using the 5 and 10 boil idea, and it'll allow me to brew outside.

Maybe I will try BIAB at some point, since it can be done without needing additional equipment, except the bag.

Since I am just jumping into the AG world, I want to make sure I enjoy it enough. Maybe after a few years of successful brews, I'll splurge for the $1k clawhammer. I watched a few videos on it and it and it looks awesome, and easy.

This first AG brew went way over my planned budget. I went into it thinking all of my equipment was enough, except the need for a mash tun.

Planned expenses: $80
  • $80 mash tun
Actual expenses: $303
  • $80 mash tun
  • $110 kettle
  • $20 starsan and PBW (the stuff I already had was old/expired from 2017)
  • $50 extract kit impulse/accidental buy
  • $8 ($16) Floating thermometer (which I broke last night, 1 day old never used). Buying another with the kettle
  • $35 submersible pump and fitting for wort chiller
 
Also, with this new kettle I bought, is it ok to drain to my carboy through the ball valve, or am I better off using a auto siphon to avoid sucking up the stuff at the bottom of the kettle? I'm hoping to use the ball valve. Should I use bags when I hop?
 
You should be able to use the ball valve. I would recommend getting a 1/2" MPT x 3/8" barb to screw in to the ball valve that way you can attach tubing and make it easier to drain in to you carboy. If you give the wort a good stir and get a little whirlpool going and then cool the wort you should be able to almost completely drain the kettle and watch for the wort color to change then stop the flow.

Also a pickup tube on the inside will also help you to get most of the wort out also.

The hop bag is up to you I just throw them in and don't worry about it.
 
Cool, thanks! I went with a 1/2" barb since I already have 1/2" ID tubing, and this matches the barb on my mash tun
 
Last edited:
  • $20 starsan and PBW (the stuff I already had was old/expired from 2017)
  • $8 ($16) Floating thermometer (which I broke last night, 1 day old never used). Buying another with the kettle
PBW and Starsan (concentrate) don't really expire.
You can always add some Oxiclean Free (or a generic) to your old PBW to boost the oxygen action, but may not be necessary. The Metasilicate (TSP/90) component remains as potent as always.

Make your homemade PBW at $2-3 a pound.
4 lb bag of TSP/90 and a tub of Oxiclean Free (or a generic, as long as it's fragrance free).
30% TSP/90
70% Oxiclean
Mix a pound at a time. Voilà!

This $14 digital thermometer works wonderful!
There are others, such as the $80 Thermapen (that's the price when they go on sale from time to time).
 
The PBW was hardly powder anymore, it was all clumpy and it just did not look good. And the StarStan was discolored, and online it says its only good for 2 years or so. I'd rather be safe than sorry regarding cleanliness/sanitization. I am primarily the only one drinking my beer, and I do not drink a lot in a day, so one batch of home brew lasts a long time. With that said, I do not need a whole lot of PBW, or StarSan, I think spending $10 on a replacement tub of PBW is easier than buying all of the stuff to make it.

I tried to cancel my glass floating thermometer order but Amazon is already prepping to ship so I may just keep it in my equipment closet, unless they let me return it for free.

But thank you for the ingredients, I will take that into consideration the next time around if I begin brewing more often.

I know this thread has gone off topic a bit but it's really helped me get started. One more question for you, what are your thoughts on side pickups in the kettle? My new kettle has a ball valve that will drain from a straight-line across from where my whirlpool cone will be (dead center). I am thinking a side pickup could prevent some of the crap from ending up in my carboy.
 
what are your thoughts on side pickups in the kettle?
I think a side pickup is useful, yes.

In a pinch, I've used a "street elbow" (1/2" NPT) that screws right into the inside of my kettle's bottom exit port, with a spare 1/2" NPT barb screwed into that. Use stainless wherever you can, not brass.
Put it on your shopping list that will undoubtedly grow over time. It's silly to buy one thing at a time, as shipping often exceeds the price of small items.
 
Thanks, I will put this in my cart for the future as I'm trying to not spend anymore for my first brew.

For my first batch I think I'll try to just not fully open the ball valve in hopes I do not disturb the pile in the middle of the kettle.
 
Thanks, I will put this in my cart for the future as I'm trying to not spend anymore for my first brew.

For my first batch I think I'll try to just not fully open the ball valve in hopes I do not disturb the pile in the middle of the kettle.
Cone formation by whirlpooling (pump or good stirring) is usually far less perfect of what most people expect. You need to remove your immersion chiller for it to even work at all.

Although an exit port is definitely useful, if you really want super clear wort in your fermenter, nothing beats letting your chilled wort sit in the kettle with a lid on it for an hour (or longer) then siphon from the top. Tilt the kettle toward the end of the transfer to keep the siphoning well deep. When you see trub being sucked up stop the transfer. Make sure to put that inverter tippy on the bottom of your cane/siphon. ;)

Also add a kettle fining agent (Irish Moss or so) 10' before flameout. It works better by pre-soaking it in some scooped out hot wort, 10-20 minutes before adding the (now gelatinous) suspension to the kettle.

For the frugal brewers among us, as a final step, you can reclaim much of the wort trapped in the leftover kettle trub. Strain it through a fine-mesh nylon bag, re-pasteurize, chill, and add to your fermenter. I usually reclaim 1-2 quarts of wort that way in a 5 gallon batch.
Or just dump it all in and call it a day :)
 
I ended up brewing this extract kit yesterday using distilled, looking forward to trying it to compare to my 1st AG batch.

PXL_20211115_203832842.jpg
 
I ended up brewing this extract kit yesterday using distilled, looking forward to trying it to compare to my 1st AG batch.

View attachment 749124

If that carboy is glass be careful with the handle that you don't use it to lift while it's full. The neck can't always support the weight of the beer and has a small chance of snapping off, which would be catastrophic for your health and beer.
Milk crates work great for carrying them.
 
If that carboy is glass be careful with the handle that you don't use it to lift while it's full. The neck can't always support the weight of the beer and has a small chance of snapping off, which would be catastrophic for your health and beer.
Milk crates work great for carrying them.
Yeah, I don't carry it with the handle when full, and rarely even when empty, if you look towards the floor you'll see an unbuckled carboy carrier. I don't even fully trust that, so I hardly take it off the ground and nudge it along to it's final fermentation place.
 
Back
Top