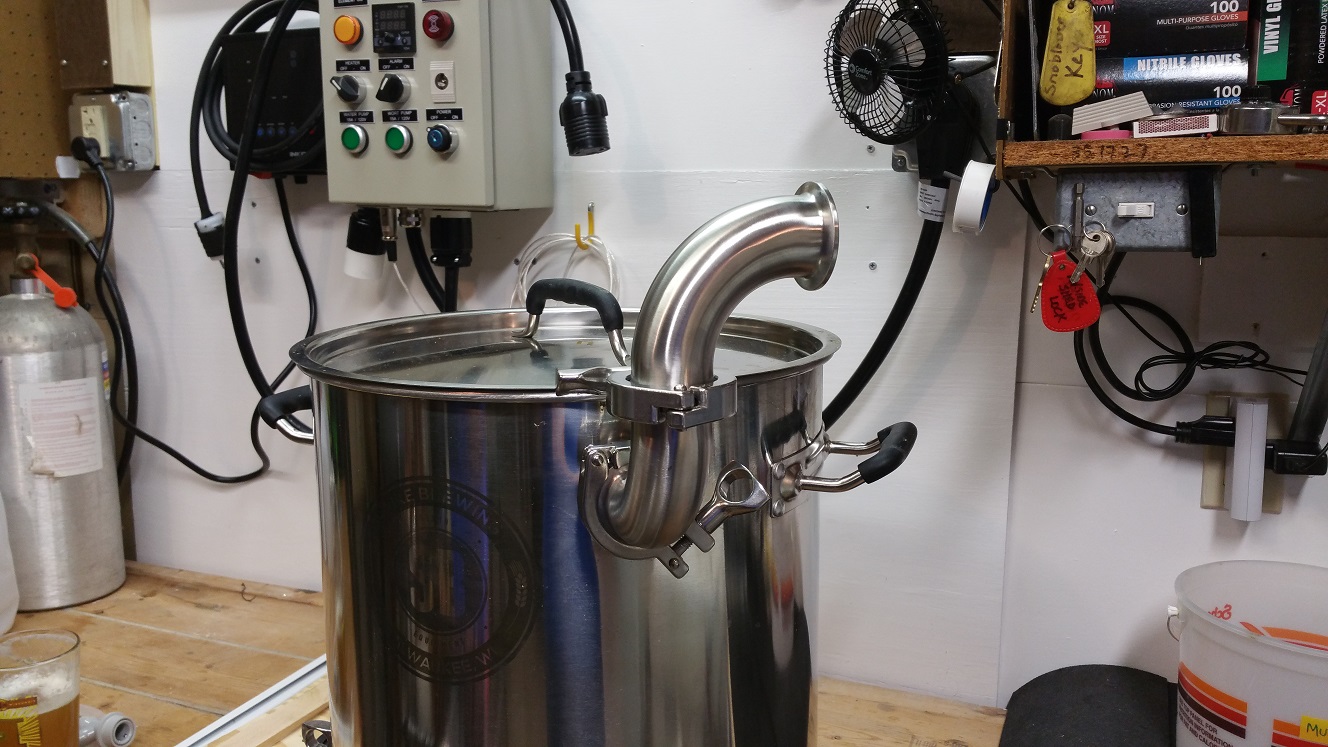
Boil kettle condenser - no overhead ventilation needed

Homebrew Talk - Beer, Wine, Mead, & Cider Brewing Discussion Forum

Help Support Homebrew Talk - Beer, Wine, Mead, & Cider Brewing Discussion Forum:

This site may earn a commission from merchant affiliate links, including eBay, Amazon, and others.
Brundog, thank you for the inspiration. I have made it to page 10 of the discussion, but have to get to bed and want to ask my question before I get too groggy and lost my thoughts.
I hate wasting water. I was thinking I could use the waste water line from my RO water filter as the supply for the spray nozzle. I usually make water for my next brew while I am brewing anyways.
My question is, does anyone have an idea what the pressure on the waste side of an RO filter is? I have asked the googles, but must not be wording my searches right, because, I haven't found an answer.
I could always collect the waste water in a bucket and use a pump to boost pressure to feed the assembly, but I like the idea of having everything hard plumbed.
My questions are A: is the pressure on the waste line high enough to be effective and B: will the nozzle put too much back pressure on the RO membrane rendering it useless. I am worrried that B is true, but I was an Econ major so I will defer to the engineers on this one. Thank you in advance.

I don't know the answer, but it's a really, really good question. I have an RO system, same deal.
 
I guess I may not be understanding correctly. I thought the RO system makes and wastes water when filling up the typical 2-3 gallon holding tank. So, if the holding tank is full, there is no waste water since no water is being forced through the RO membrane.

If you are either using the 6gph or 9gph nozzle, you would have to be able to hold that much water. Plus, you would need a pump to get the water pressure above 40 psi.

How about using your hose bib or water faucet like normal and use that waste water created on plants or something else?
 
I’m not an expert on RO but there are people on this forum who are.

That said, I think the higher the waste back pressure, the less effective the membrane. You would need a steady pressure and adequate volume. So given those variables, you would probably ensure success by using a boost pump, and I don’t think that would cost you much in terms or dollars nor hardware - just drain to a bucket then pump out of it.

Given a 4:1 waste:RO, you would need a system that can make ~2.5 gph of RO water in order to get the ~9 gph for the sprayer. Also keep in mind that water will have an increased concentration of minerals, so long term performance of the nozzle should be monitored.
 
I guess I may not be understanding correctly. I thought the RO system makes and wastes water when filling up the typical 2-3 gallon holding tank. So, if the holding tank is full, there is no waste water since no water is being forced through the RO membrane.

If you are either using the 6gph or 9gph nozzle, you would have to be able to hold that much water. Plus, you would need a pump to get the water pressure above 40 psi.

How about using your hose bib or water faucet like normal and use that waste water created on plants or something else?

Both TripleD and I use our RO systems to make water for our next brew while we're brewing the current one.

I bought an RO system from Buckeye Hydro but it's not hooked to a holding tank like a standard indoor installation would be. Instead I simply drop the output line into an Aquatainer. When I brew, I empty the aquatainer into the boil kettle then set the RO system to start refilling the Aquatainer. Meanwhile, there's all this wastewater going down the drain. It would be nice to use it though, based on Brundog's thoughts above, it may not be viable.

rosystem2.jpg
 
Than
I’m not an expert on RO but there are people on this forum who are.

That said, I think the higher the waste back pressure, the less effective the membrane. You would need a steady pressure and adequate volume. So given those variables, you would probably ensure success by using a boost pump, and I don’t think that would cost you much in terms or dollars nor hardware - just drain to a bucket then pump out of it.

Given a 4:1 waste:RO, you would need a system that can make ~2.5 gph of RO water in order to get the ~9 gph for the sprayer. Also keep in mind that water will have an increased concentration of minerals, so long term performance of the nozzle should be monitored.

Thanks for the response. I found an inline John Guest pressure meter. I ordered two. Once they show up, I will be able to measure pressure on the waste line. However your comment jogged my memory. I have a 100 gpd membrane. I dont recall my waste ratio, but 4:1 sounds about right. If that is true, flow through waste line would be 400 gpd or 16 gph unrestricted. Restricting that flow to 9 gph would put back pressure on the membrane.
Luckily, I live in an area with pretty soft water and have a whole house water softener. Total dissolved solids into my filter is 20 ppm. Econ math results is 25 ppm TDS on the waste side. That is still lower than most cities levels so not super concerned about clogging the mister.

I will report back on my progress. Unfortunately everyone seems to be sold out of the 2" TC 1/2" NPT full coupler. Looks like I will have to go 1.5" TC unless someone can point me to a vendor that has it in stock.
 
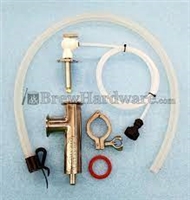
Good eye! The picture is pretty close to the finished design but I'll post some pics of the final one very soon. The tee is more like an instrument tee, but the side port is closer to the top to leave more space for the condensing. The bottom skips the TC flange, clamp and gasket and just has a 5/8" hose barb welded. Instead of a compression fitting as shown on the top, there will be a 90 degree shutoff valve with a push to connect fitting for the water supply. I'm planning to include some length of PE tubing and a female garden hose fitting on the far end. The sprayer tip is threaded in to a tube that is welded to the TC cap/adapter. The whole plan was to make it as compact and inexpensive as possible. I had great success running the 6gpm @ 40psi and reducing my normal power input of 60% down to 30%.

View attachment 577652

Bobby,
Any update on when these will be rolled out? Just checked your site and couldn't find them. Since I can't find the 2" TC 1/2" NPT full coupling anywhere, I might as well give your solution a shot.
 
Bobby,
Any update on when these will be rolled out? Just checked your site and couldn't find them. Since I can't find the 2" TC 1/2" NPT full coupling anywhere, I might as well give your solution a shot.

Supposed to be this coming week, according to what I read elsewhere. I'm chompin' at the bit for this, had a TC port added to my kettle to accommodate this.

You're at best second in line, btw. :)
 
Curious to see all the parts included with yours. This is still on my list to make/buy so I can move fully indoors, and my initial list of parts has it cheaper to buy the piece parts separate.
 
For sure each configuration is different. I will be doing a lid mount as well, so I have that other cost. But on the flip side, I have access to a machine shop, and own a TIG welder, so I can make the top section from a blank TC cap, a section of stainless 1/8"NPT pipe, and the spray nozzle for a lot cheaper than trying to link together a bunch of adapters and reducers.

Not knocking Bobby and that price at all. If I go the full DIY route I'll still buy most of the parts from him anyway. I was just stating I"m curious how it will work out.


I'm also going to play with pumps. I don't always want to tie up my sink, and I think I have a pump that can generate the pressure needed to run the 6GPH nozzle. I have a scheme in my head that involves building another window AC based chiller that could be used to maintain cool temps in a set volume of water and essentially turn the condensor into a closed loop system. Start with say 5-8 gallons of water and just use that volume for the whole boil. The appeal here is mostly due to not having a convent place to brew near a sink, not wanting to run a long water line somewhere, and not being able to modify the apartment to add another water tap.
 
Just keep in mind with a sprayer the condensate gets loaded into the spray water. If you want to do a closed loop which doesn’t contaminate internally, you would need to mount up a heat exchanger like an air:water or air:water:air radiator. I had thought of testing this as a next generation system for those who are really concerned about wasting water, but haven’t yet started to do the math and source appropriate parts.
 
Curious to see all the parts included with yours. This is still on my list to make/buy so I can move fully indoors, and my initial list of parts has it cheaper to buy the piece parts separate.
It's not made from off the shelf parts so it would be a hard comparison to make to other vendors or even a pile of parts that I sell.

Garden hose to 1/4" tube adapter, 6ft of water supply tubing, tube adapter to water valve.
Custom TC flange with long tube into which the included 6GPH sprayer threads into.
Tc clamp and gasket for top.
Custom main body tee with an integrated bottom hose barb for condensate drain.
3ft of silicone tubing and a clip to hold it to the catch bucket.
Detailed instructions for use.

The good news is that I've been using it on every brew since the first prototype and 2 of the beers took gold medals. I'm convinced enough that the boil is driving off things like DMS.
 
Just keep in mind with a sprayer the condensate gets loaded into the spray water. If you want to do a closed loop which doesn’t contaminate internally, you would need to mount up a heat exchanger like an air:water or air:water:air radiator. I had thought of testing this as a next generation system for those who are really concerned about wasting water, but haven’t yet started to do the math and source appropriate parts.

Neat idea Brundog, although I really think the "wasted" water is trivial in the grand scheme of things. How much water goes down the drain when using a chiller compared to your condenser? I'd wager a lot more for the chiller such that the 6-9 gallons from the condenser is insignificant.

That being said, to explore this idea further: You could get a heat exchanger that could function as a wort chiller so you only need one heat exchanger. The steam condensing should sanitize it during the boil and then switch over to wort chilling. Just need a way to rinse it out prior to chilling...hmm...sounds like another set of automatic valves!
 
It's not made from off the shelf parts so it would be a hard comparison to make to other vendors or even a pile of parts that I sell.

Garden hose to 1/4" tube adapter, 6ft of water supply tubing, tube adapter to water valve.
Custom TC flange with long tube into which the included 6GPH sprayer threads into.
Tc clamp and gasket for top.
Custom main body tee with an integrated bottom hose barb for condensate drain.
3ft of silicone tubing and a clip to hold it to the catch bucket.
Detailed instructions for use.

The good news is that I've been using it on every brew since the first prototype and 2 of the beers took gold medals. I'm convinced enough that the boil is driving off things like DMS.

Bobby - Thanks for building this! Looking forward to putting it in my cart as soon as it shows up in your store.

Will there be an option for a different size sprayer? My summer water temps are in the mid-70's, which will require the 9 GPH sprayer.
 
Just keep in mind with a sprayer the condensate gets loaded into the spray water. If you want to do a closed loop which doesn’t contaminate internally, you would need to mount up a heat exchanger like an air:water or air:water:air radiator. I had thought of testing this as a next generation system for those who are really concerned about wasting water, but haven’t yet started to do the math and source appropriate parts.

What is there honestly that would contaminate? I know all the steam and everything you're boiling off gets pulled into the spray water, but it's not like you're pulling out large particles that could clog something. I'd be draining the water from the system after every brew, and a quick rinse of the system should be ok. Going this route wouldn't be for water conservation as much as it's driven by not having a place near a sink that's convenient to brew. I'm probably a long way off from even trying a closed loop system, just thinking out loud about it. I do want to run a few quick calculations to see if a window AC could keep up with the heat coming from the condenser setup.

First version will likely be a pump driven setup that pulls from a bucket of water that I'd need to refill over the course of the boil. If I can prove that the pump I have can drive the spray nozzle appropriately I'll share the info here for those that might be interested.

It's not made from off the shelf parts so it would be a hard comparison to make to other vendors or even a pile of parts that I sell.

Garden hose to 1/4" tube adapter, 6ft of water supply tubing, tube adapter to water valve.
Custom TC flange with long tube into which the included 6GPH sprayer threads into.
Tc clamp and gasket for top.
Custom main body tee with an integrated bottom hose barb for condensate drain.
3ft of silicone tubing and a clip to hold it to the catch bucket.
Detailed instructions for use.

The good news is that I've been using it on every brew since the first prototype and 2 of the beers took gold medals. I'm convinced enough that the boil is driving off things like DMS.

Thanks for the list Bobby. I have no doubt that your version works great, everything else I've purchased from you has been flawless. I love the RIMS tube I got from you. Mostly I just need to compare a full DIY setup to your setup + the extra parts I'd need to make it 100% what I want.
 
Contamination is the boiled off volatiles. May not matter if you dump it after every brew.

Consider the bucket route... 5 gal bucket means it needs to be emptied twice per hour boil time. It’s fairly easy to manage unless carrying it far or up steps.
 
Contamination is the boiled off volatiles. May not matter if you dump it after every brew.

Consider the bucket route... 5 gal bucket means it needs to be emptied twice per hour boil time. It’s fairly easy to manage unless carrying it far or up steps.

For sure I wasn't advocating trying to use the same volume of water for multiple brews. I'd be swapping it out every brew day. It was just a thought that with a chiller setup I could likely get away with using a small amount of water for the whole boil cycle. Would be convenient for my overly constrained conditions to only need to move say 5 gallons total instead of dealing with a bunch of buckets. But yes, buckets as a first step, overly complex solutions later.
 
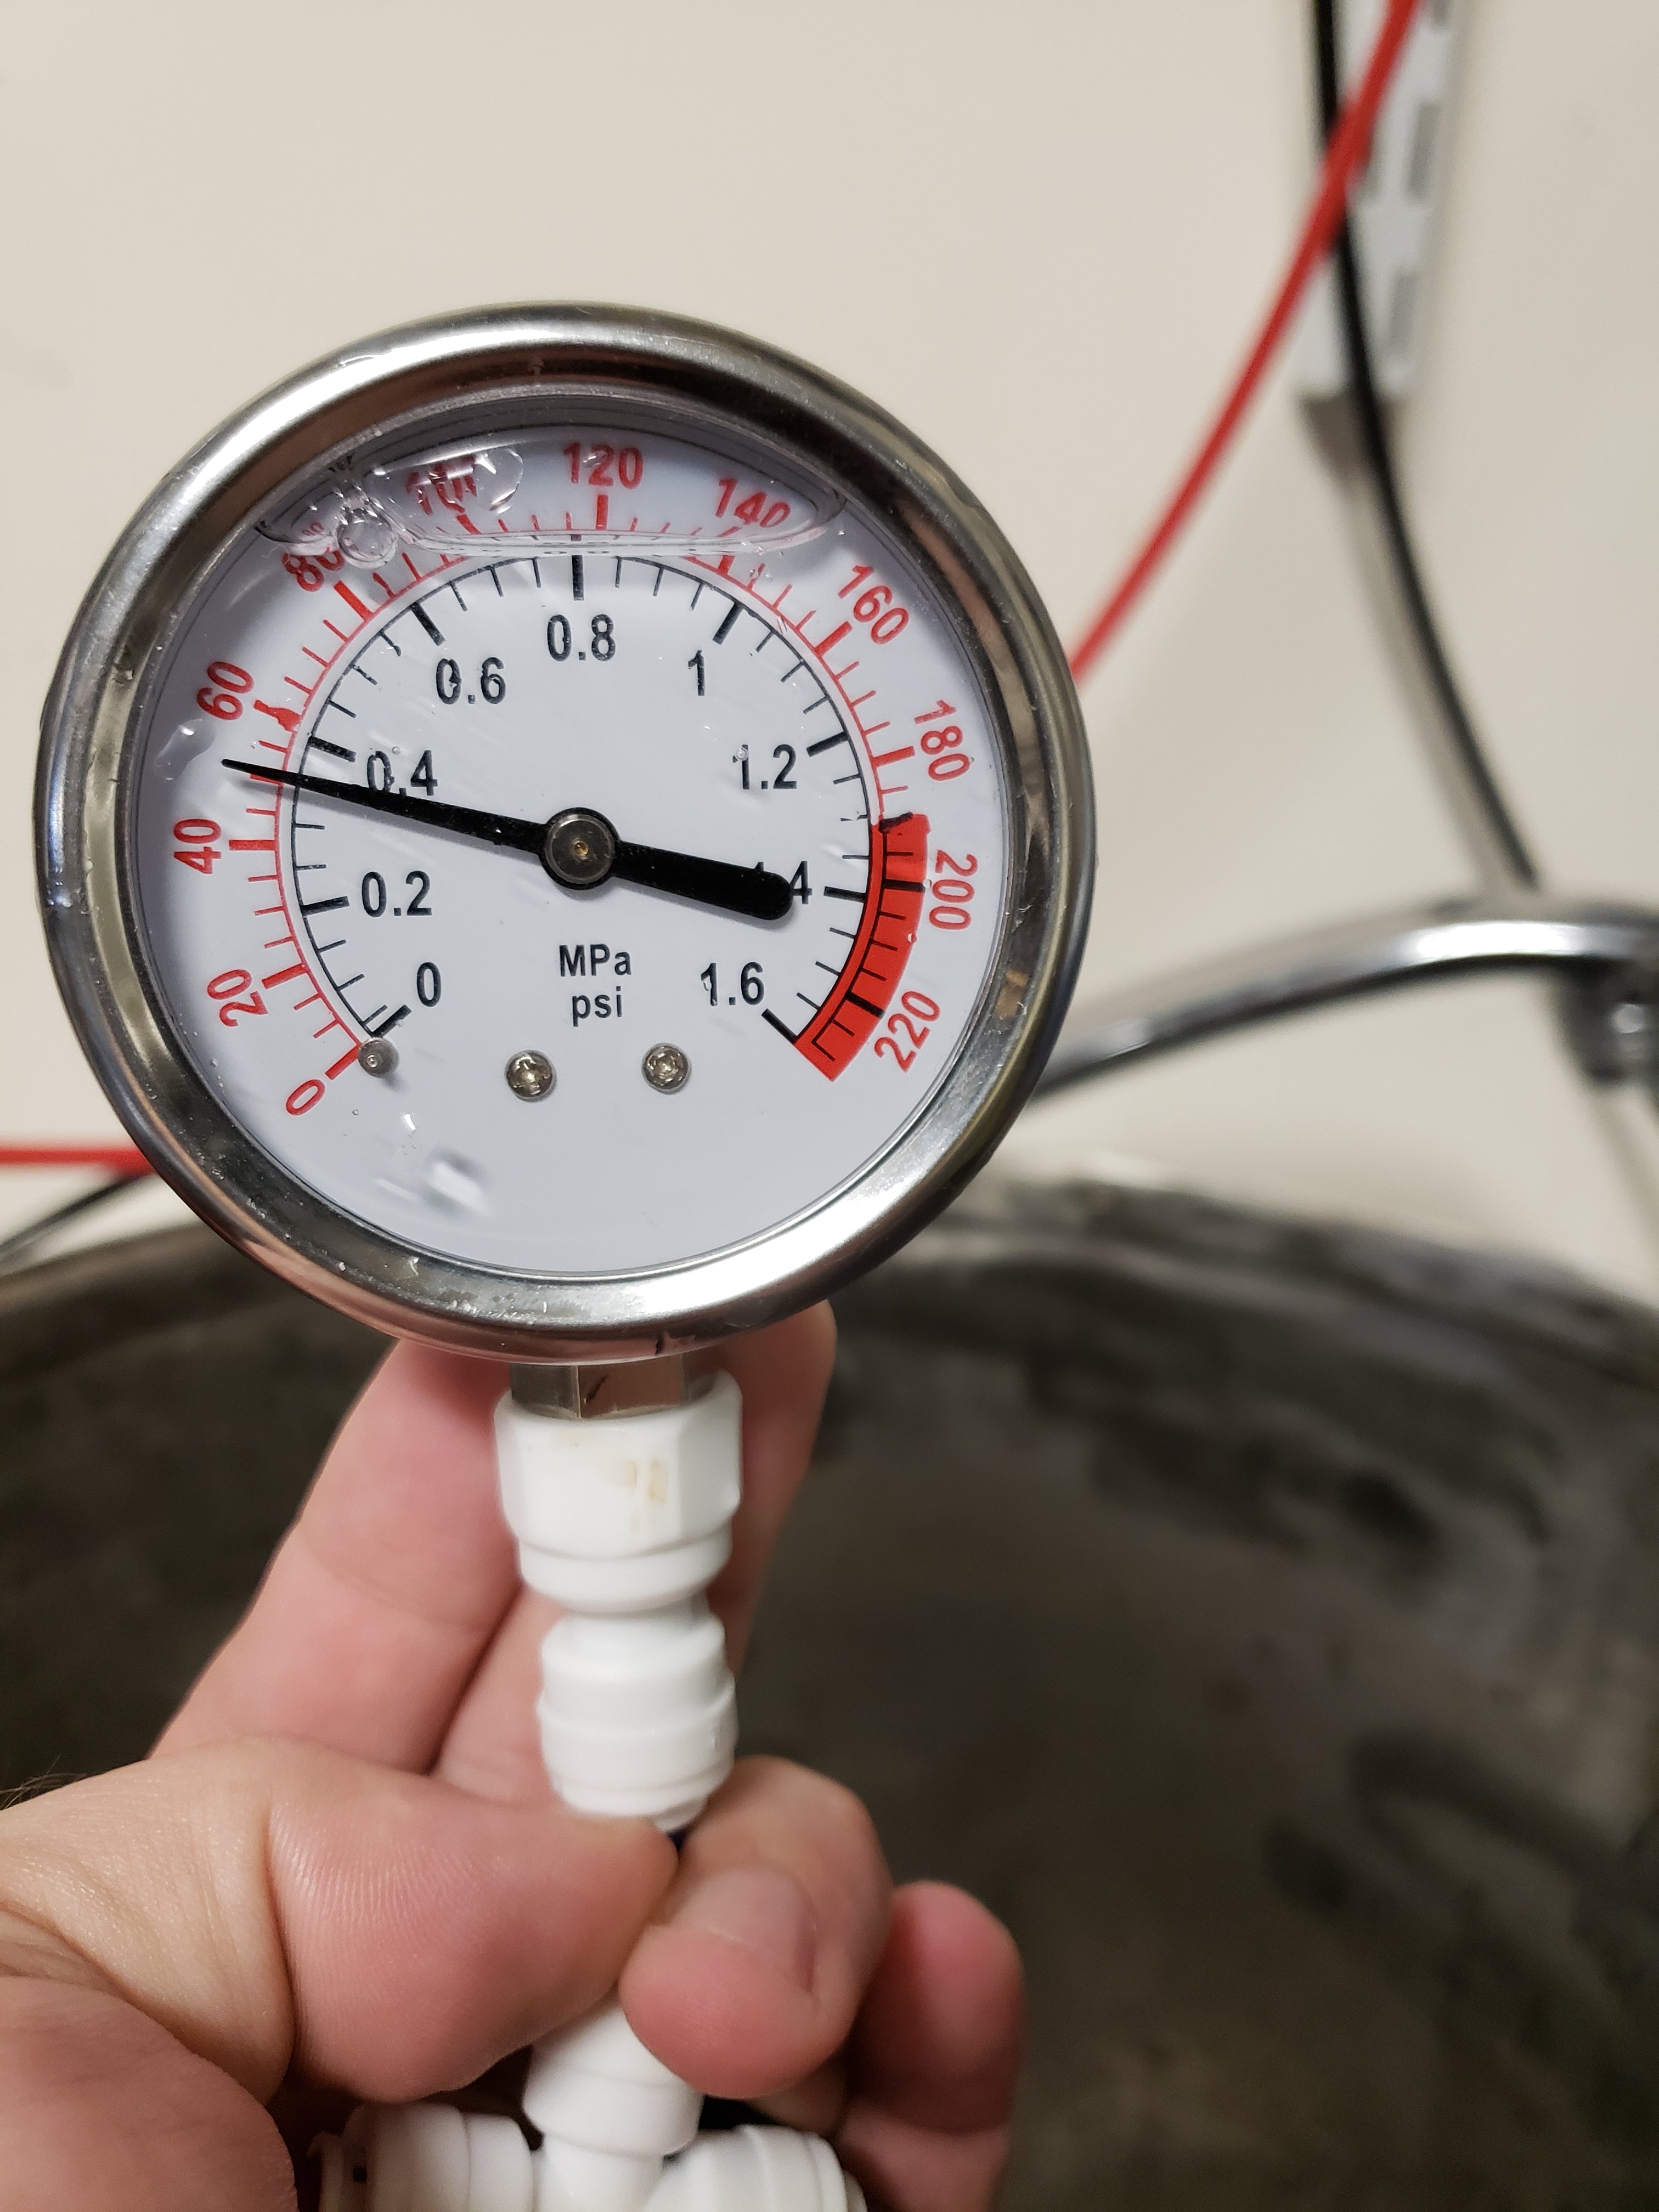
So.... proof of concept worked flawlessly. For those interested in using the waste line of your RO filter, I was able to get 50 psi by adjusting the flow through the membrane slightly. Flowing freely, the pressure was only 20 psi. The small adjustment on the waste line more than doubled the pressure on the waste line and only resulted in a 5 psi drop across the membrane (60 psi to 55). Since i am going to be sending that water down the drain anyway, now I can redirect it to condense steam!!!
20180910_190208.jpg
 
Did this impact your RO performance? Flow rate, TDS?
So.... proof of concept worked flawlessly. For those interested in using the waste line of your RO filter, I was able to get 50 psi by adjusting the flow through the membrane slightly. Flowing freely, the pressure was only 20 psi. The small adjustment on the waste line more than doubled the pressure on the waste line and only resulted in a 5 psi drop across the membrane (60 psi to 55). Since i am going to be sending that water down the drain anyway, now I can redirect it to condense steam!!! View attachment 587649
 
Devil's advocate. You may plug up the sprayer more often with calcium and/or lime by doing this.

I have pretty hard water. I soften it, but that doesn't do a lot to reduce total dissolved solids. We get a lot of lime deposit on our kitchen sink sprayer.

I wonder how much worst the reject water is than normal water.

BTW, Bobby: will you be selling spare spray nozzles for your condenser kit? I can see needing to have a spare in case I decide to try this and I clog up that nozzle.
 
Devil's advocate. You may plug up the sprayer more often with calcium and/or lime by doing this.
I have very soft water (20 ppm TDS) as input into my RO filter. Even while making water with a 4:1 membrane, my TDS in the waste line should be 25. This is softer than most filtered spring water so I am not super worried about clogging it up. If I notice any change in performance, I will hit it with some CLR.
 
I have pretty hard water. I soften it, but that doesn't do a lot to reduce total dissolved solids. We get a lot of lime deposit on our kitchen sink sprayer.

I wonder how much worst the reject water is than normal water.
It depends on your RO membrane's permeate flow percentage. It has been a few months since I changed my filter, but I believe it is printed on the side.
 
Great, thank you.

Edit: Just placed my Order (with a lot of other stuff). Showed as 20 available when I started. Down to 14 now. I think you got a hit on your hands. I’m excited to try it out. Got a nice long staycation coming up.
 
Last edited:
So.... proof of concept worked flawlessly. For those interested in using the waste line of your RO filter, I was able to get 50 psi by adjusting the flow through the membrane slightly. Flowing freely, the pressure was only 20 psi. The small adjustment on the waste line more than doubled the pressure on the waste line and only resulted in a 5 psi drop across the membrane (60 psi to 55). Since i am going to be sending that water down the drain anyway, now I can redirect it to condense steam!!! View attachment 587649

I've been intrigued by this idea, but I think we may have run into a snag--depending on the rate at which waste water will flow. I have a 50 gpd membrane, but on a good day it might do 1.5 gallons per hour--depends on how warm the water is. If I have a 4-1 rejection rate, in an hour I'm only producing maybe 6 gallons of reject water. I ordered the 9 gph sprayer, but I'm hoping I can turn that down a bit with the valve. If not, I may not be able to produce enough reject water.

Just a thought such that anyone planning this make sure their system has the waste necessary to do this.
 

Latest posts

Back
Top