I haven't been on here much lately but I'm still kickin'!
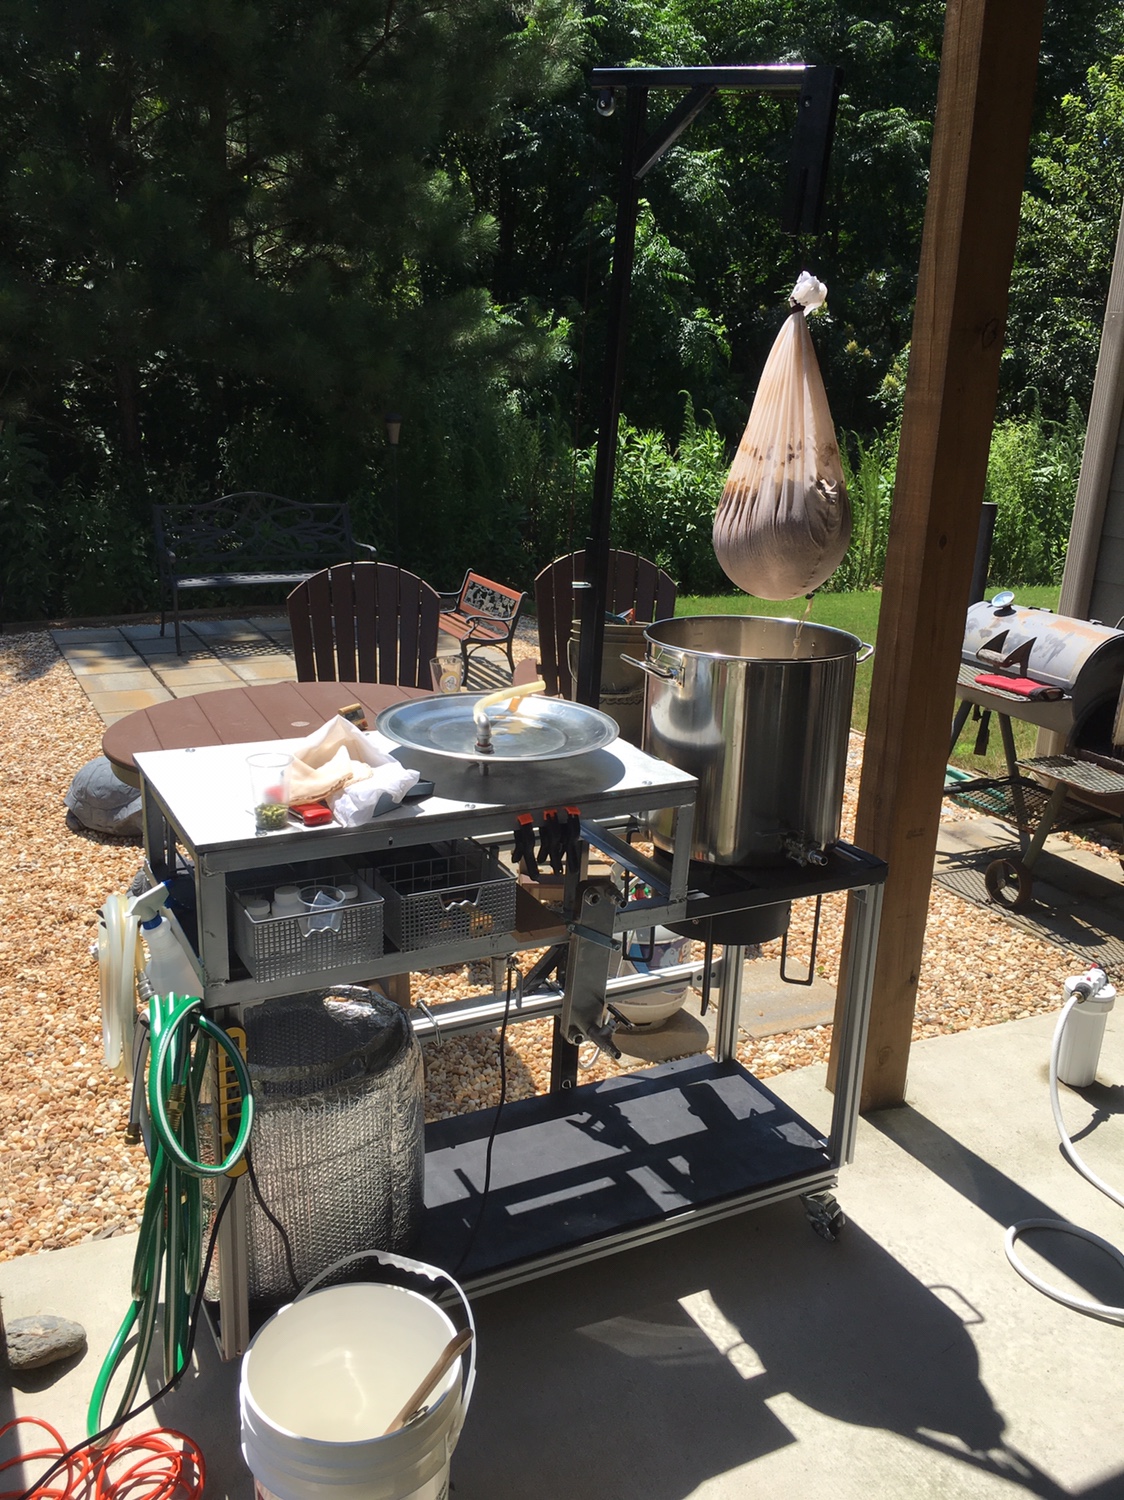
So after a lot of thought and waffling on design I finally built my brew stand.
Its completely built but I'm just waiting on some fittings before I can use it for the first time... So here goes:
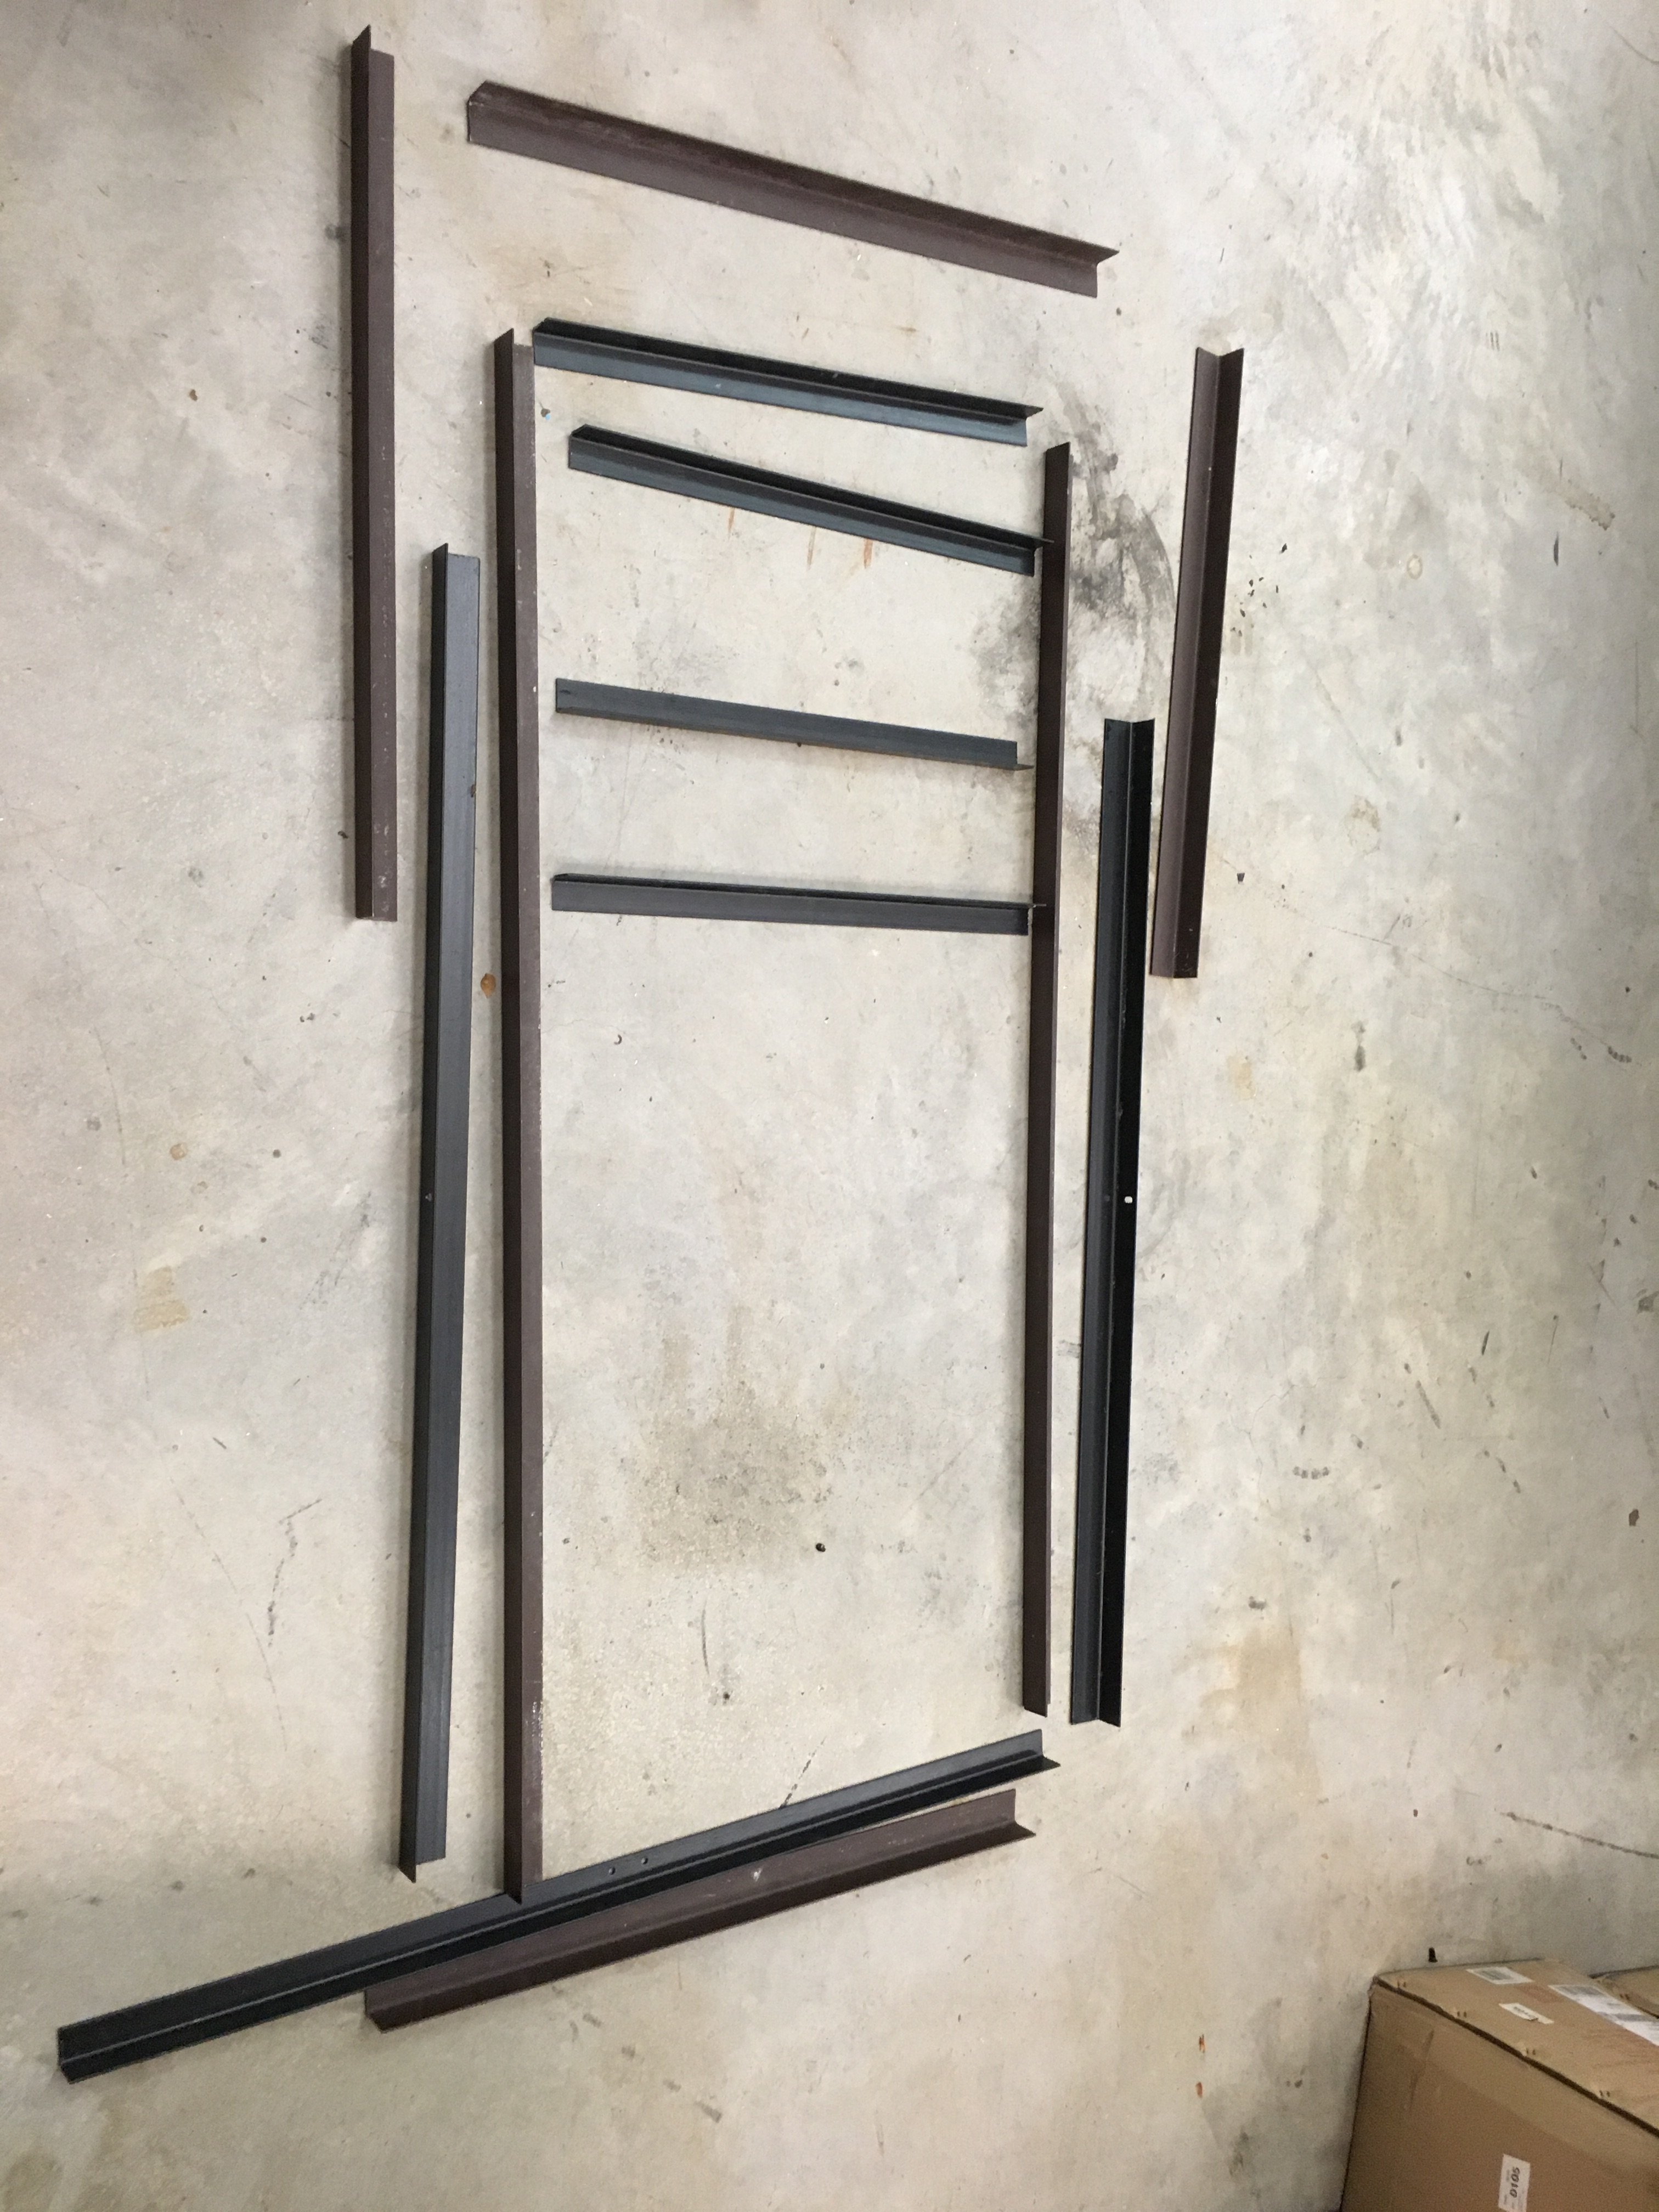 I decided on a 2-part construction for a couple reasons. First I had several old bed frames lying around, but not enough to make the whole stand; and second I want it to be easy to disassemble into smaller pieces. So this upper part (which is the business end) is made from angle steel harvested from bed frames.
I drew the whole thing up in AutoCAD and then cut all my pieces to length.

I welded them all together... please excuse the ugle-a** welds...
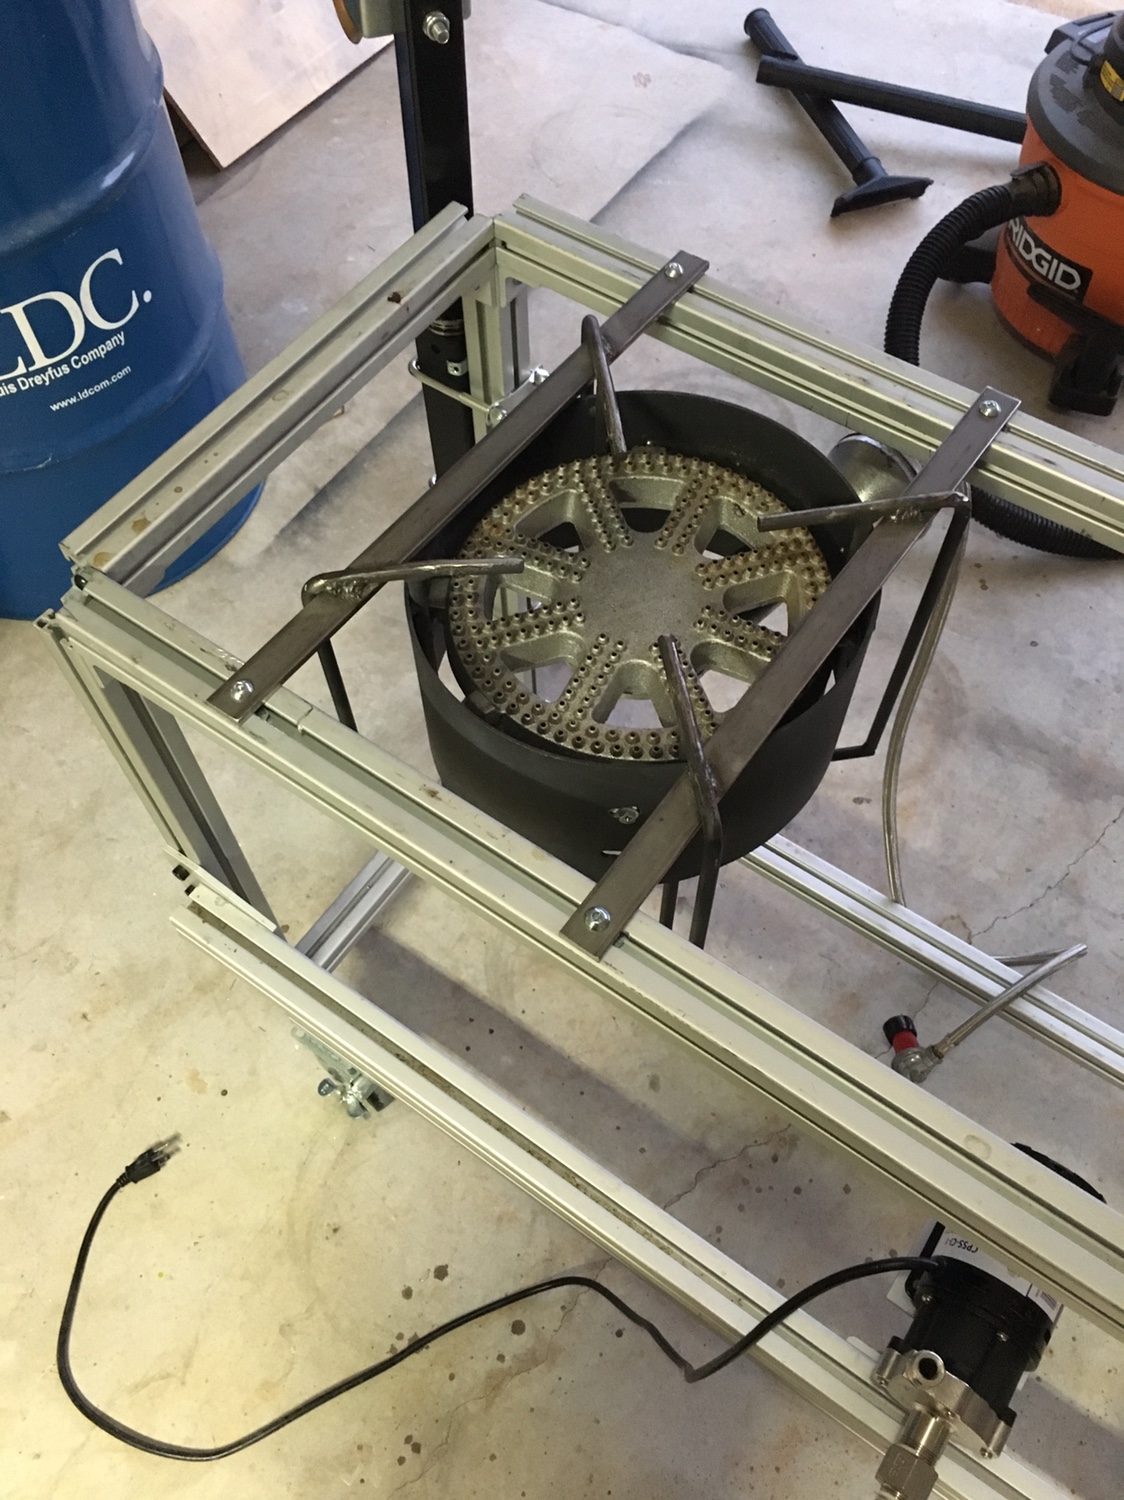
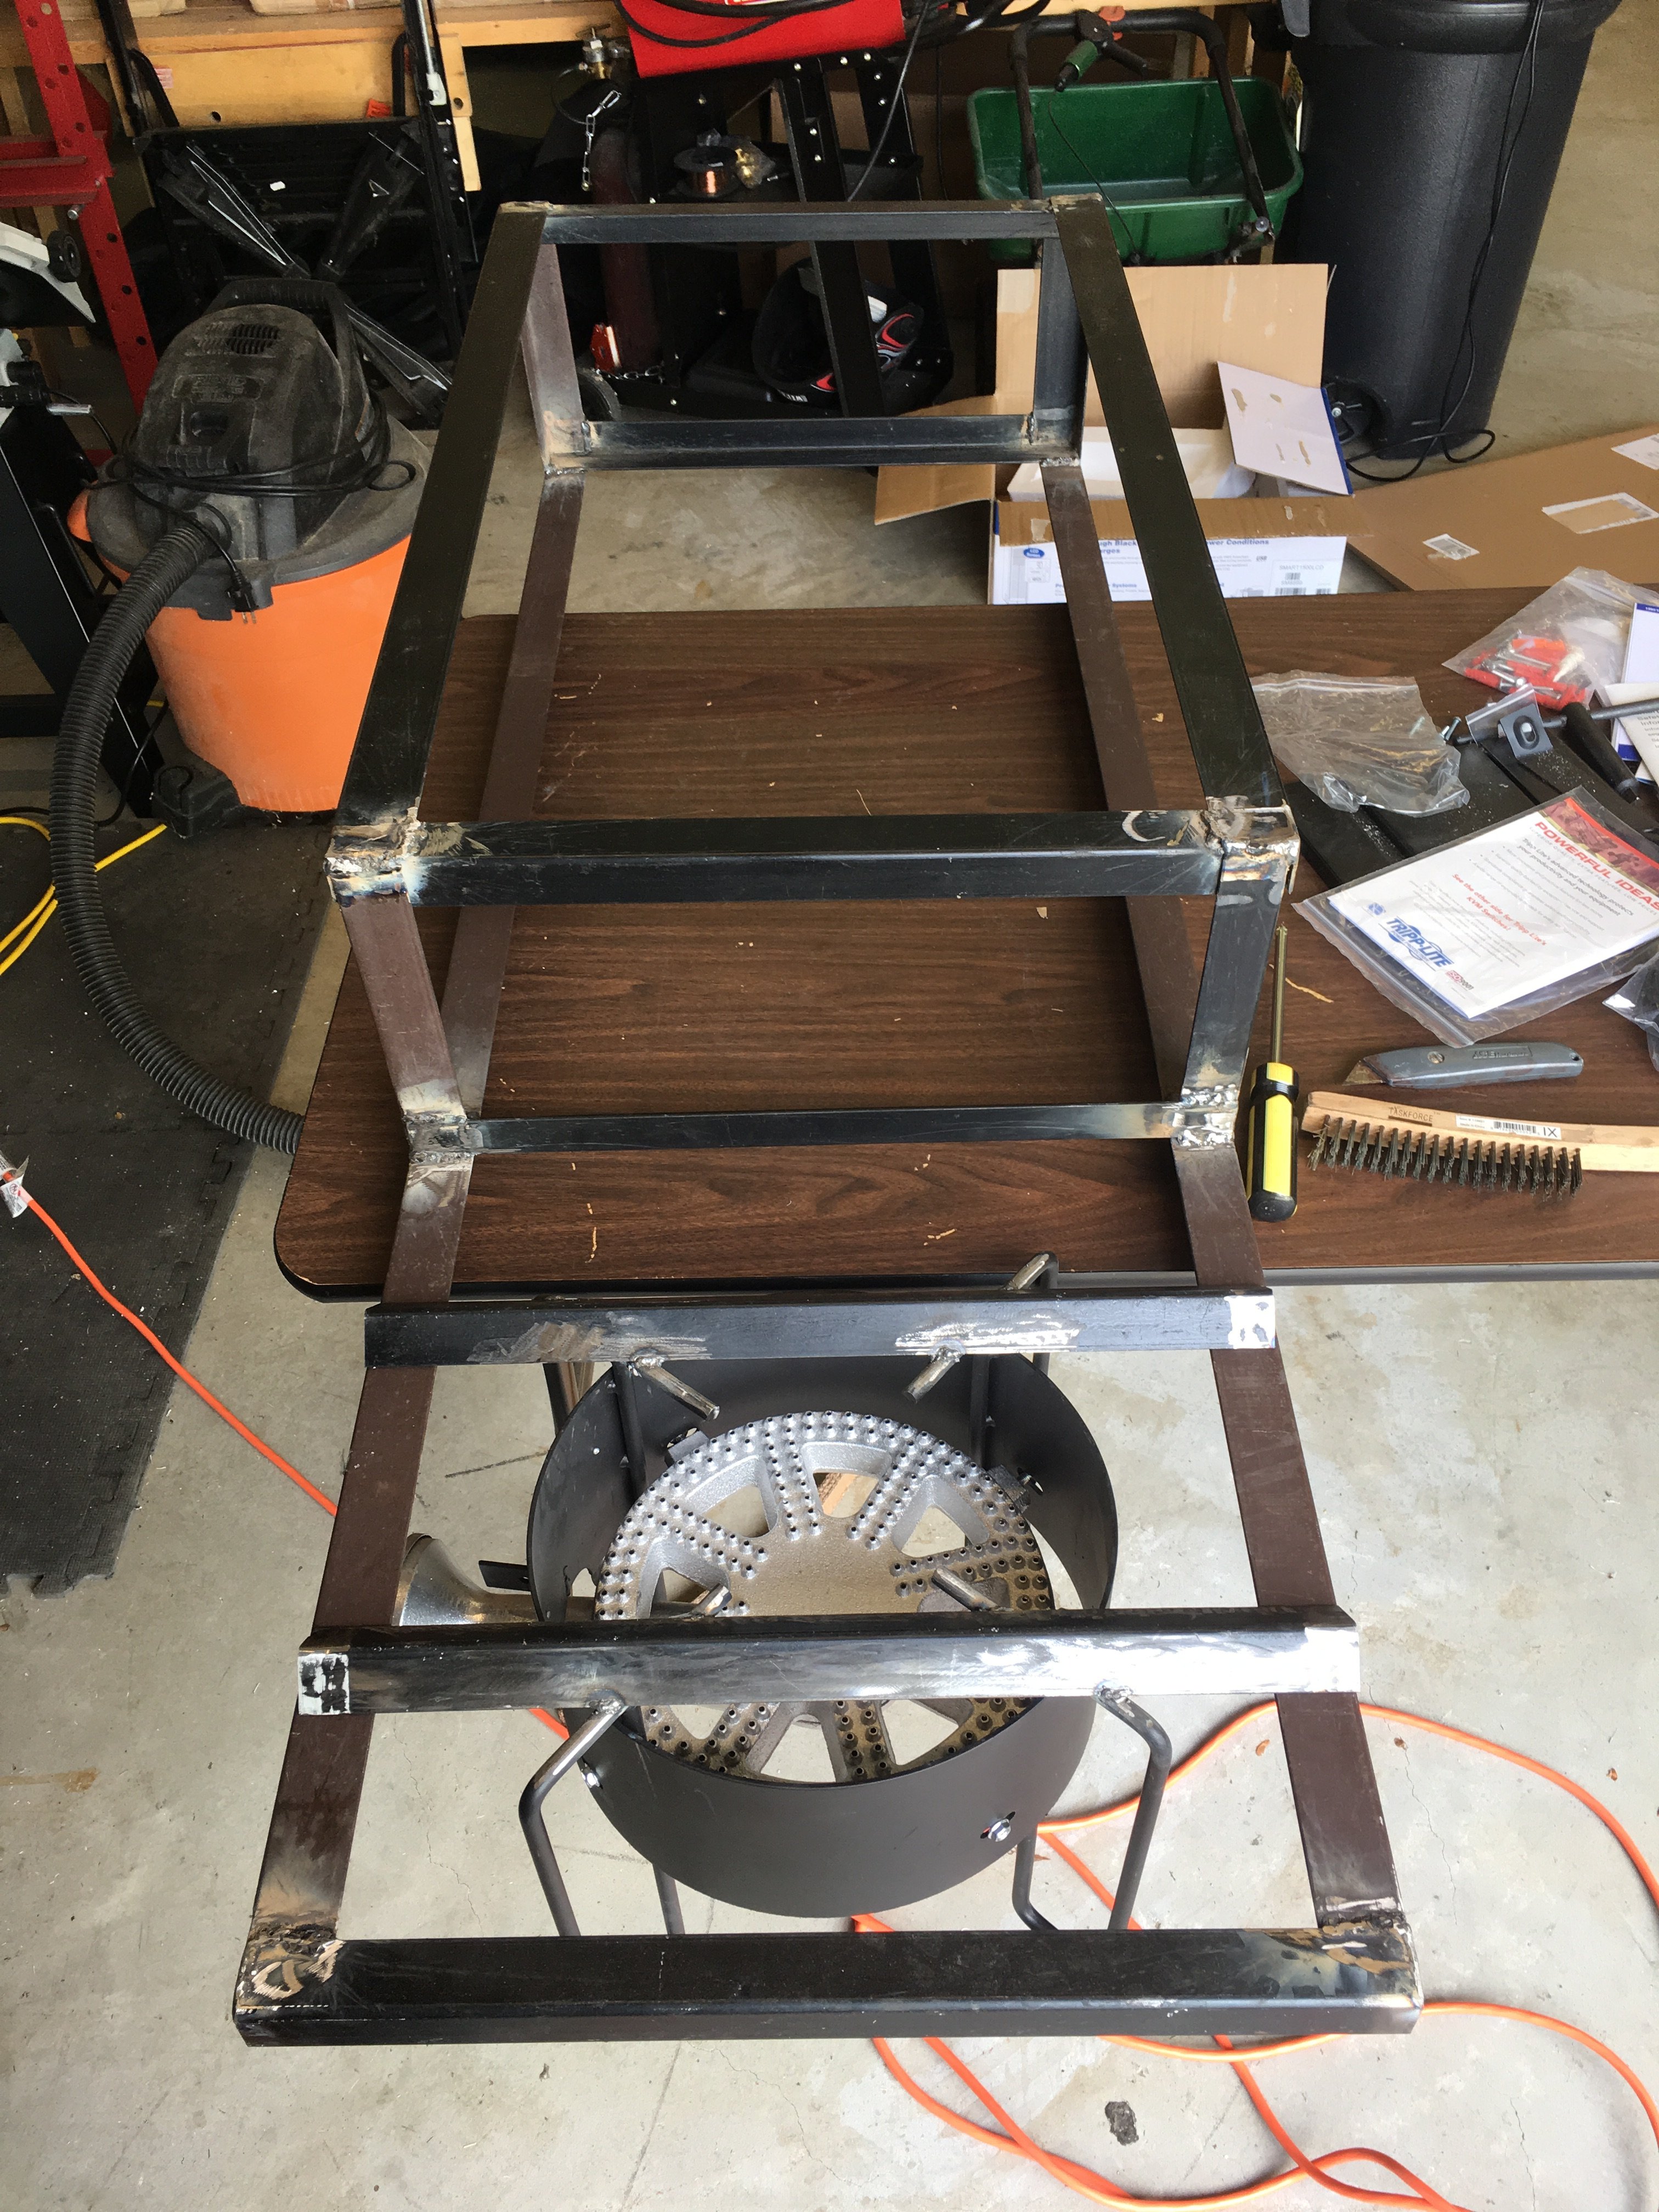 Then I welded on my burner. It hangs from those cross pieces.
I'm slightly concerned about those welds holding over the long term just because of the massive amount of thermal cycling that's going to occur. But if they break I'll just build a bracket to capture the burner from the bottom.... after I put out the ensuing
fire that is
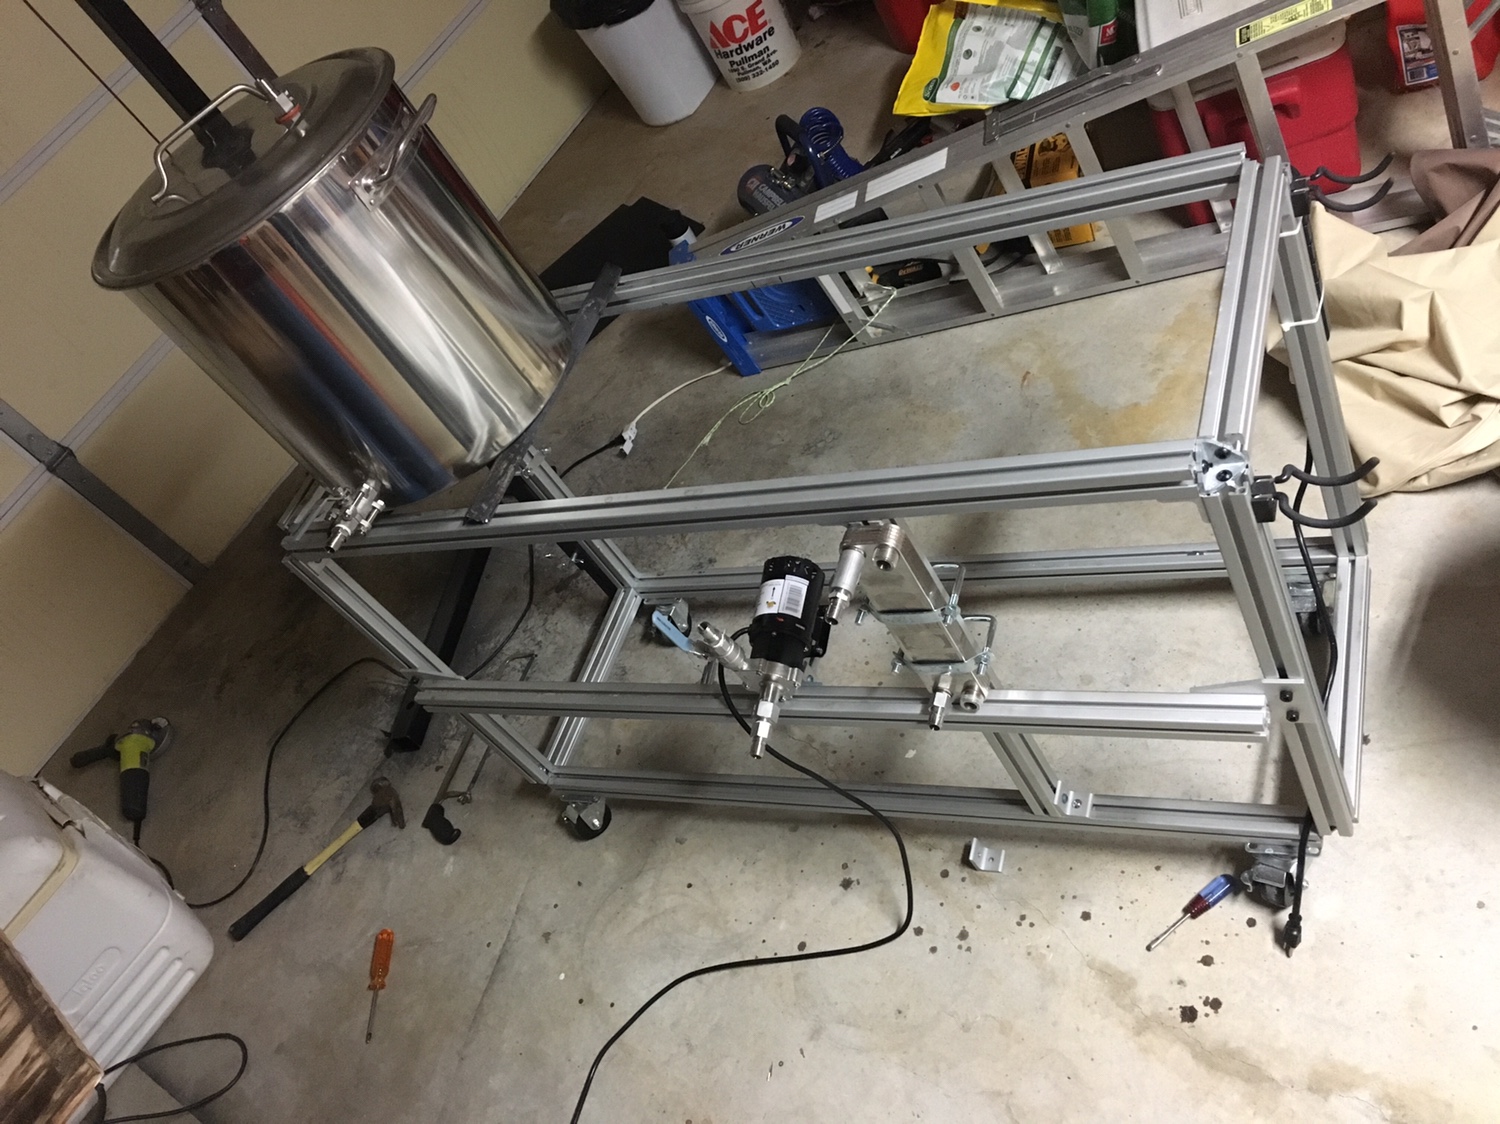
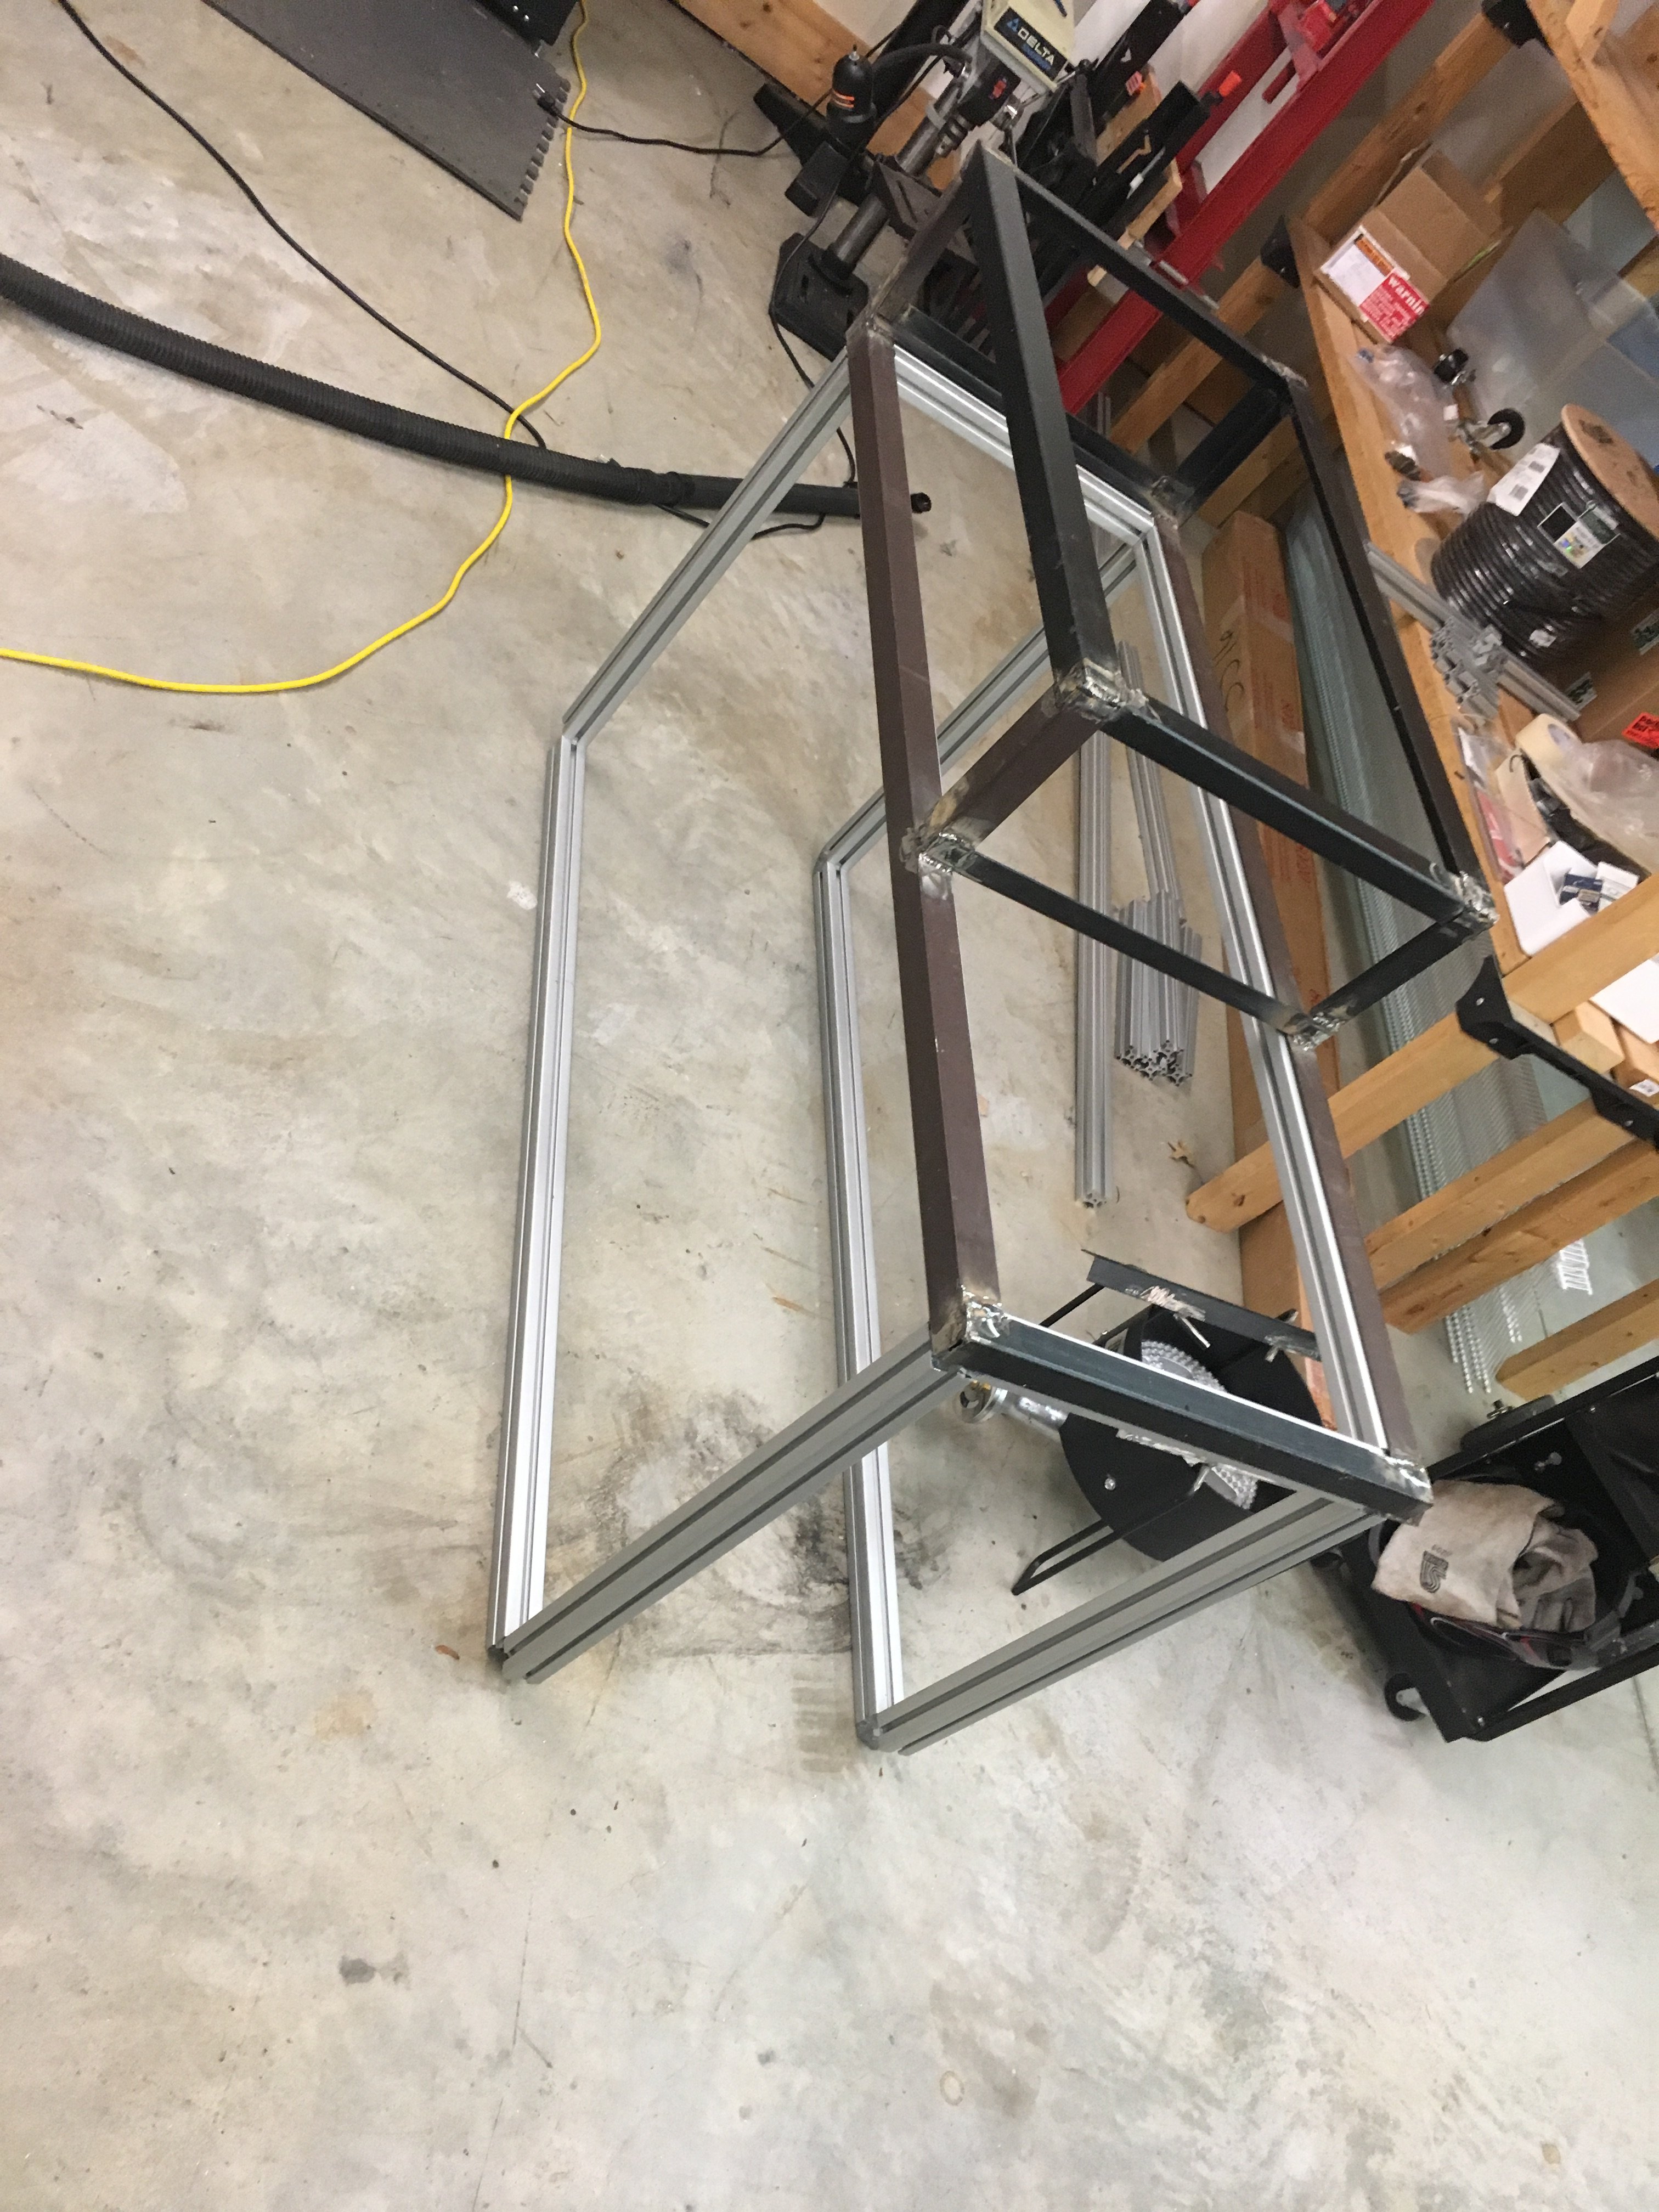 The lower part of the stand is a cart built from 80/20 T-slotted aluminum. I chose this because it's easy to work with and I can modify and add to it later as needed.
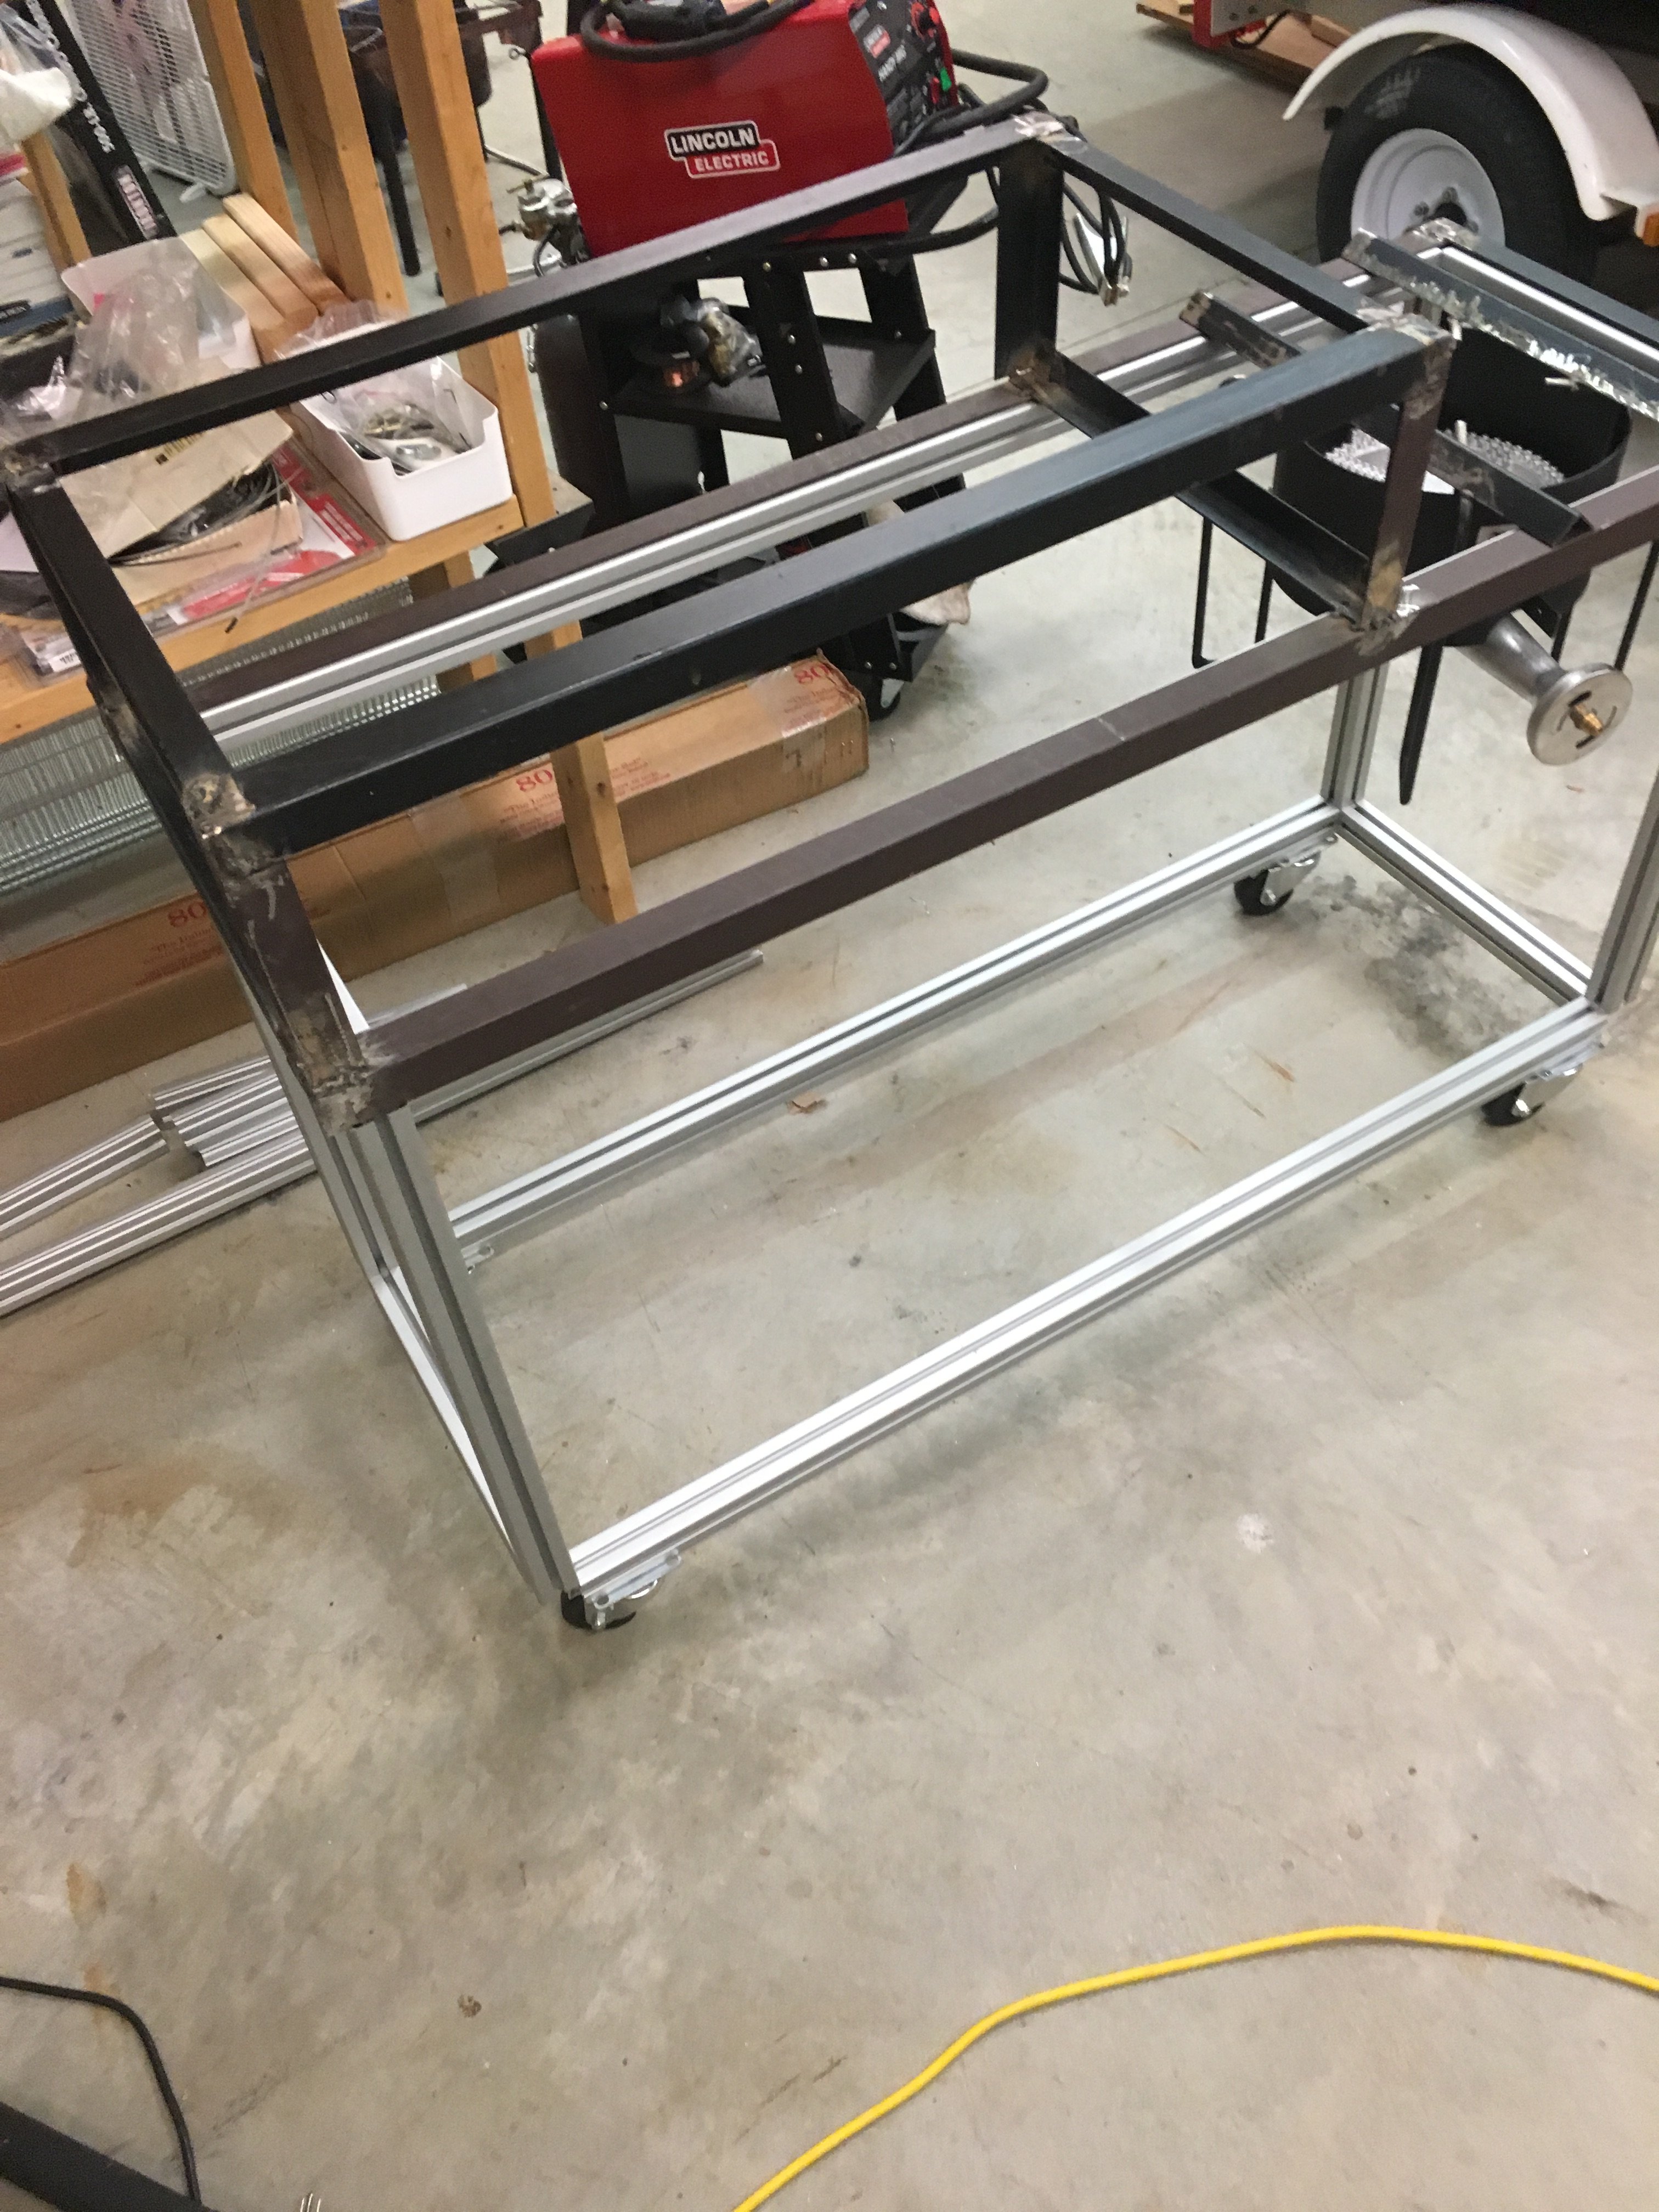
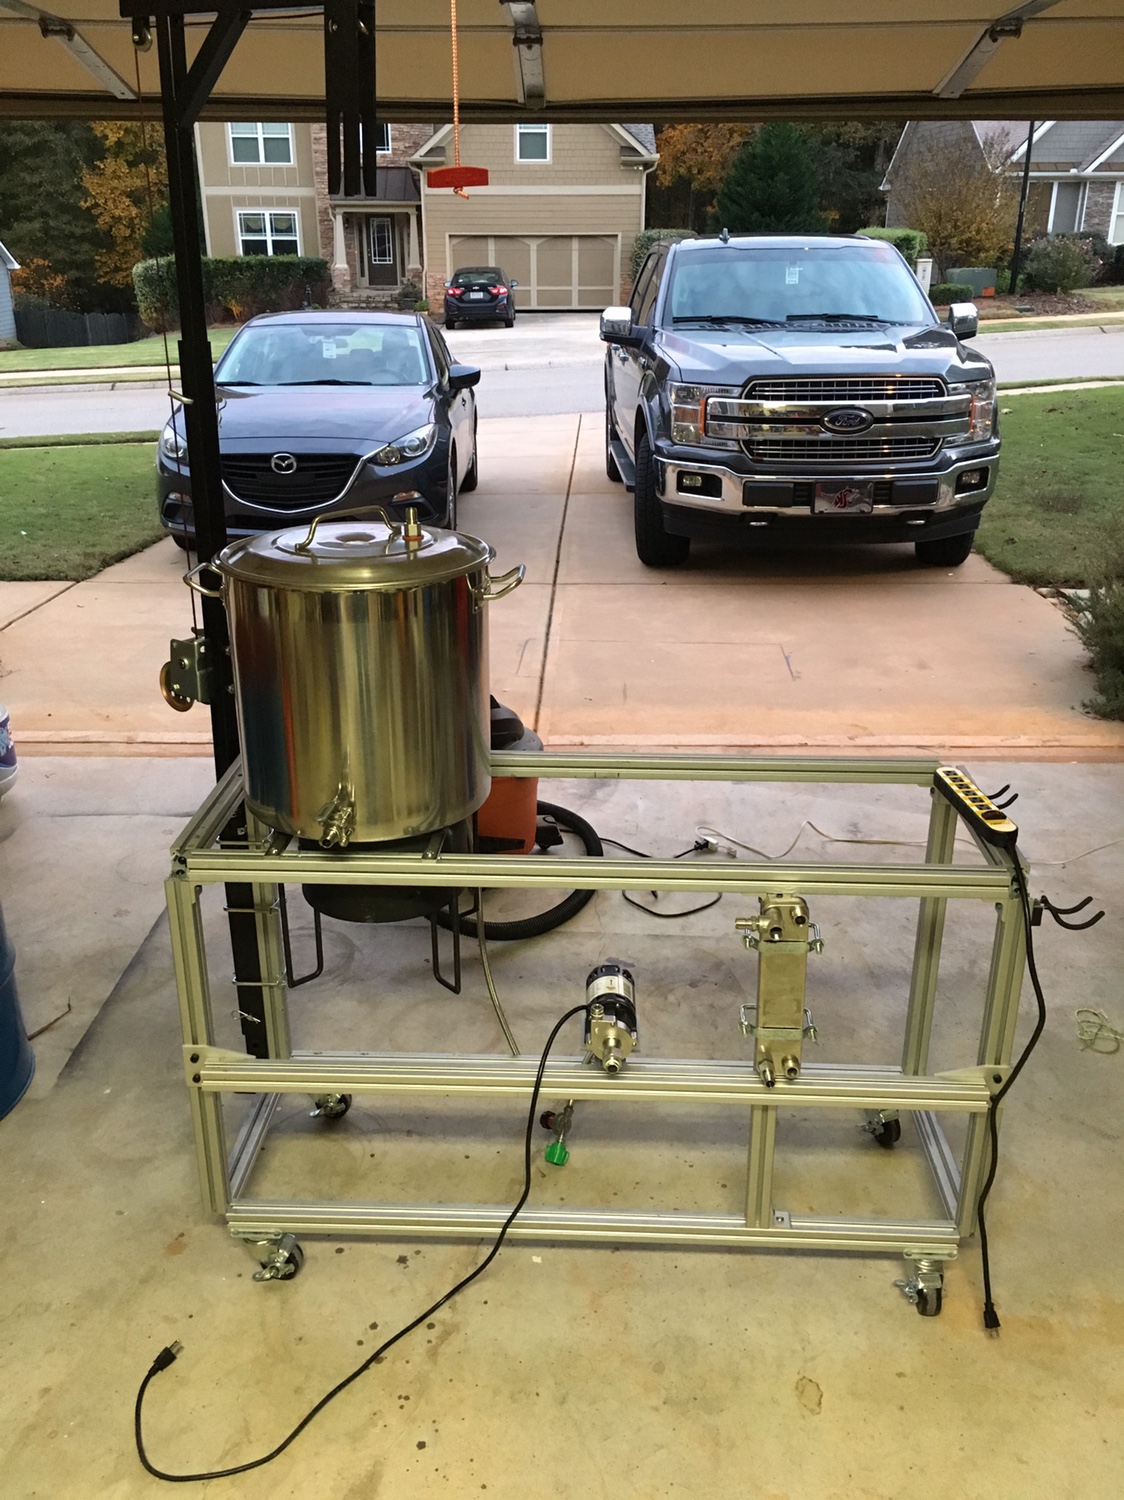
The upper part sits captive on top of the lower part, with the angle steel holding it in place by gravity. I was initially going to bolt it down, but after feeling how snug the fit is, and how solid it feels I decided to just leave it held on by gravity. It's not going anywhere.

I didn't weld those cross-pieces on until later because I wanted to mess with my pot on there and play with the placement a little. I ended up putting it a little off-center (as shown) just because I wanted to leave some extra room on the side to get my brew jacket on and off.
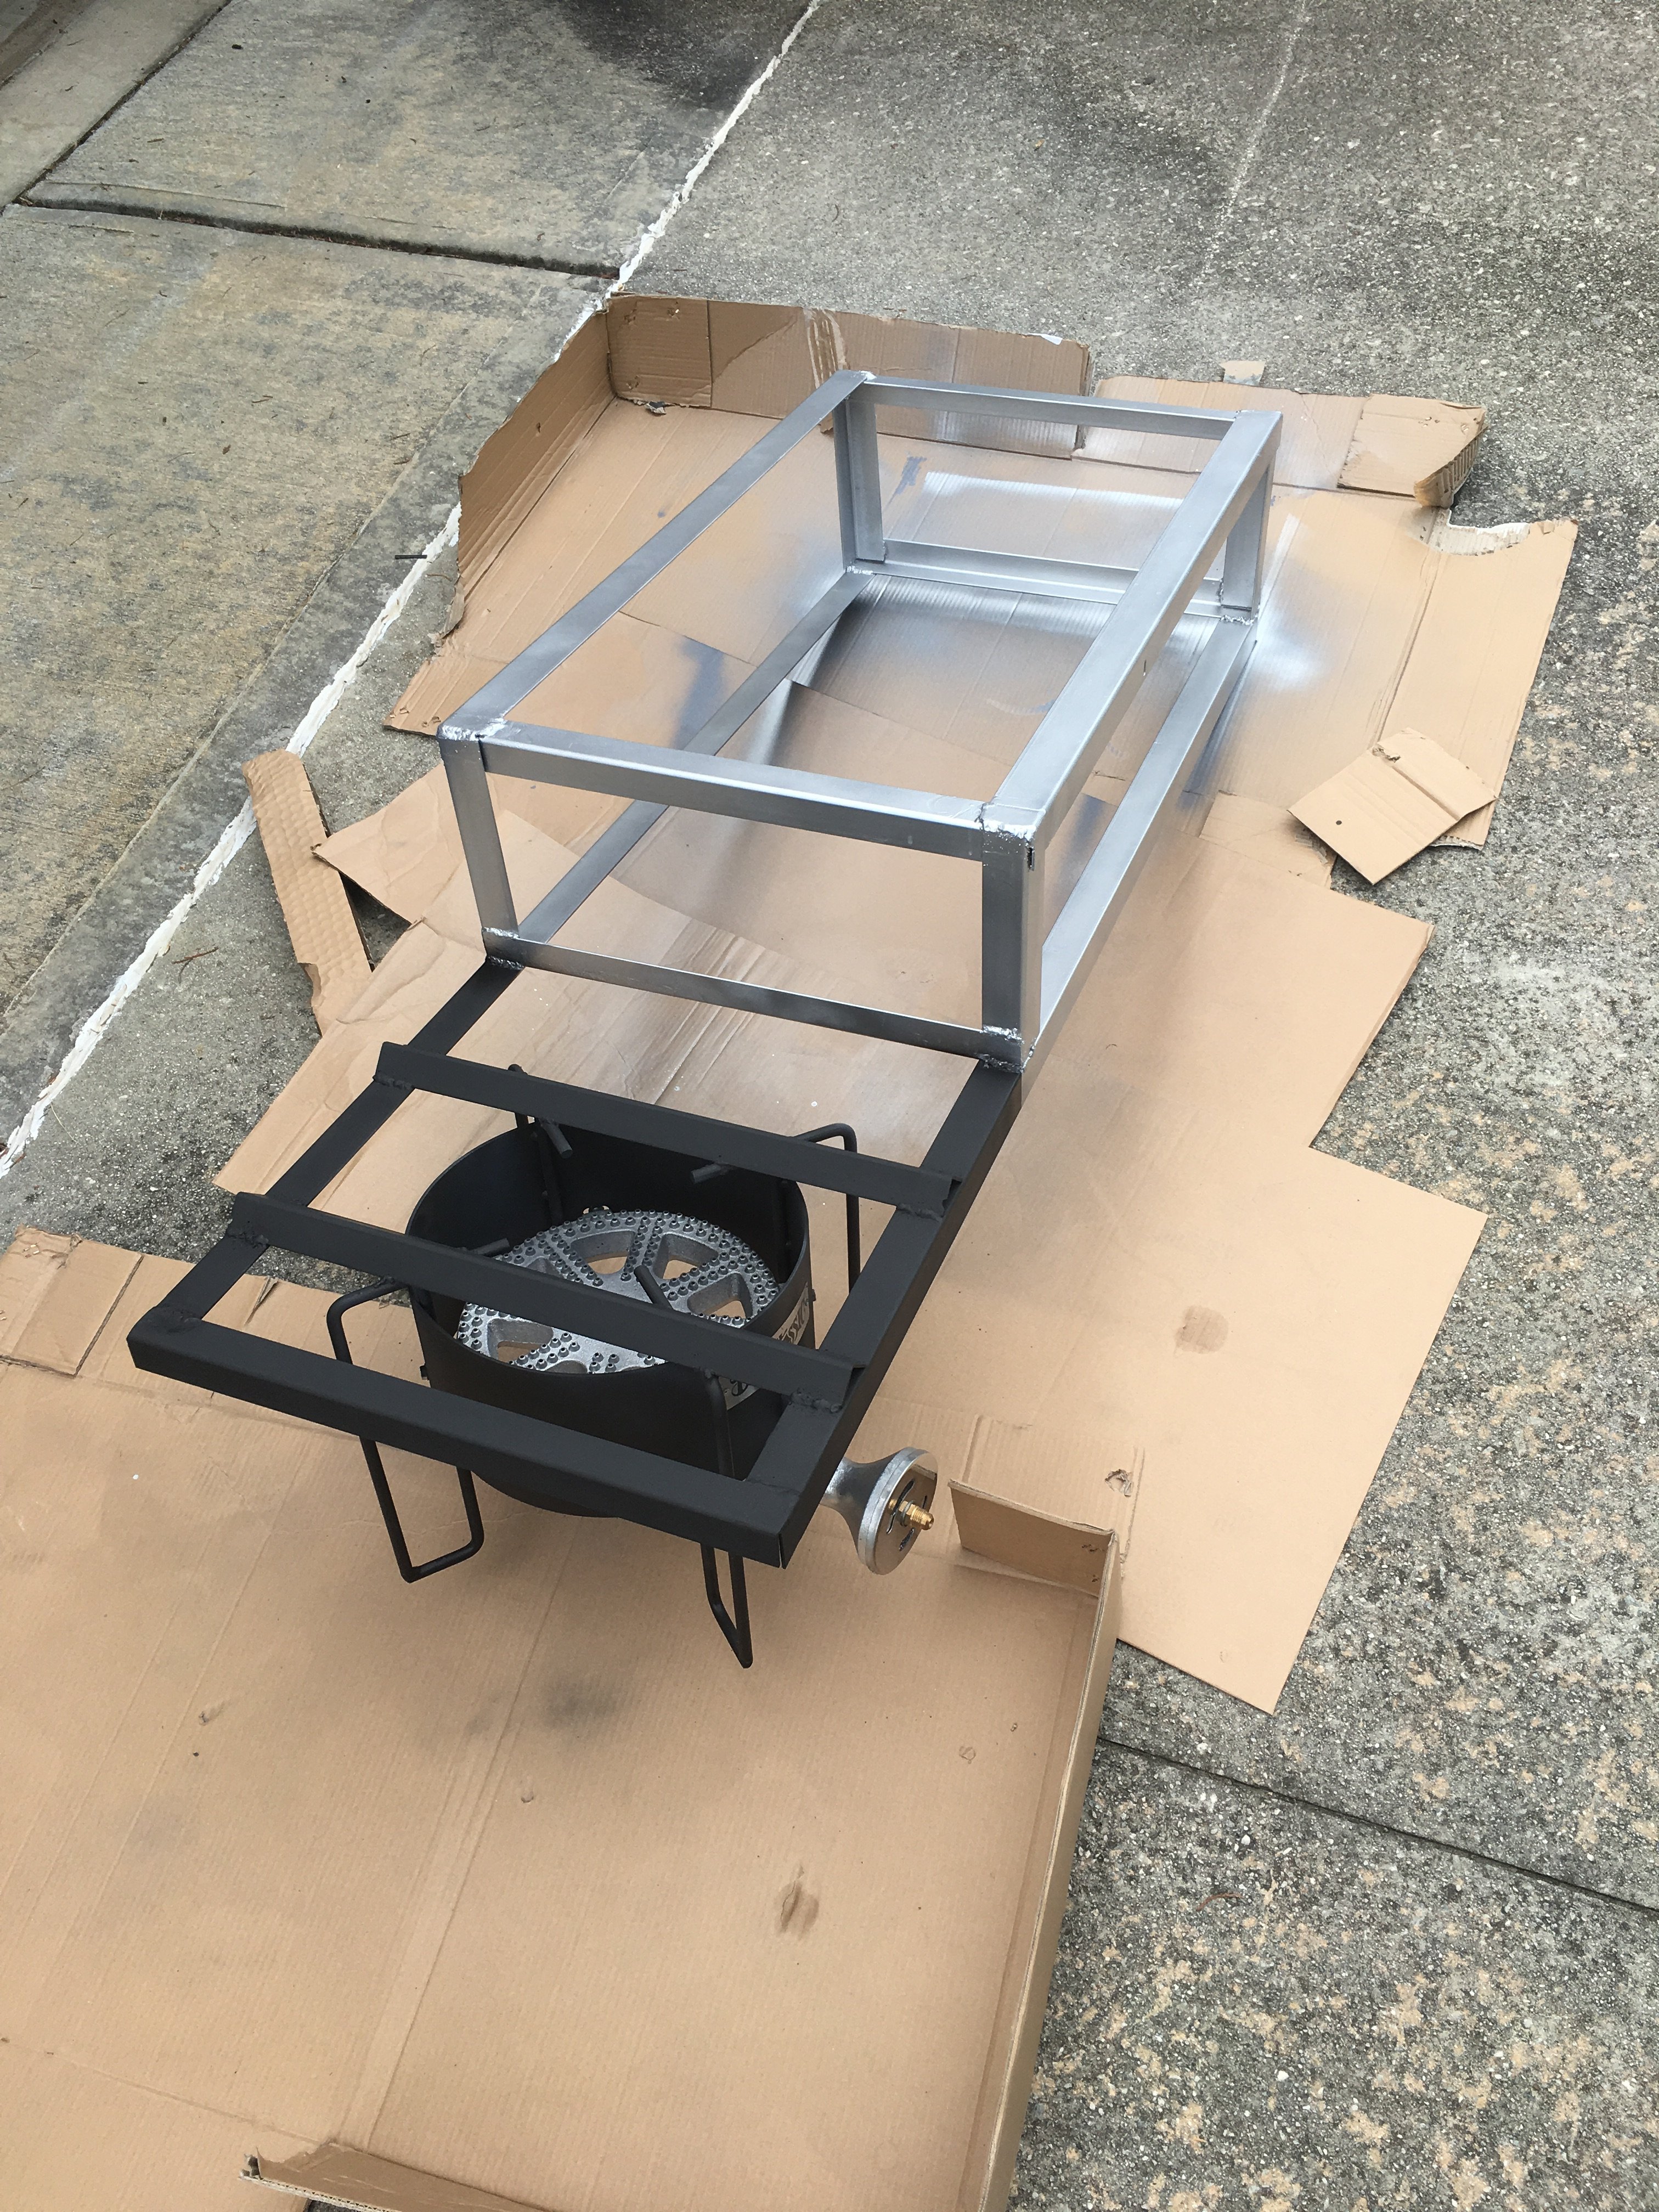
Time for some high temp enamel paint

I bought a trailer-hitch mounted game hoist for field-dressing game. It was $90 on Amazon and easier than building something that could swivel under load out of 80/20.
I just attached it to the cart with U-bolts, and it has a foot that goes down and presses into the ground for added support. I may replace the cable with something a little lighter since that thing is designed to lift 400+lbs.
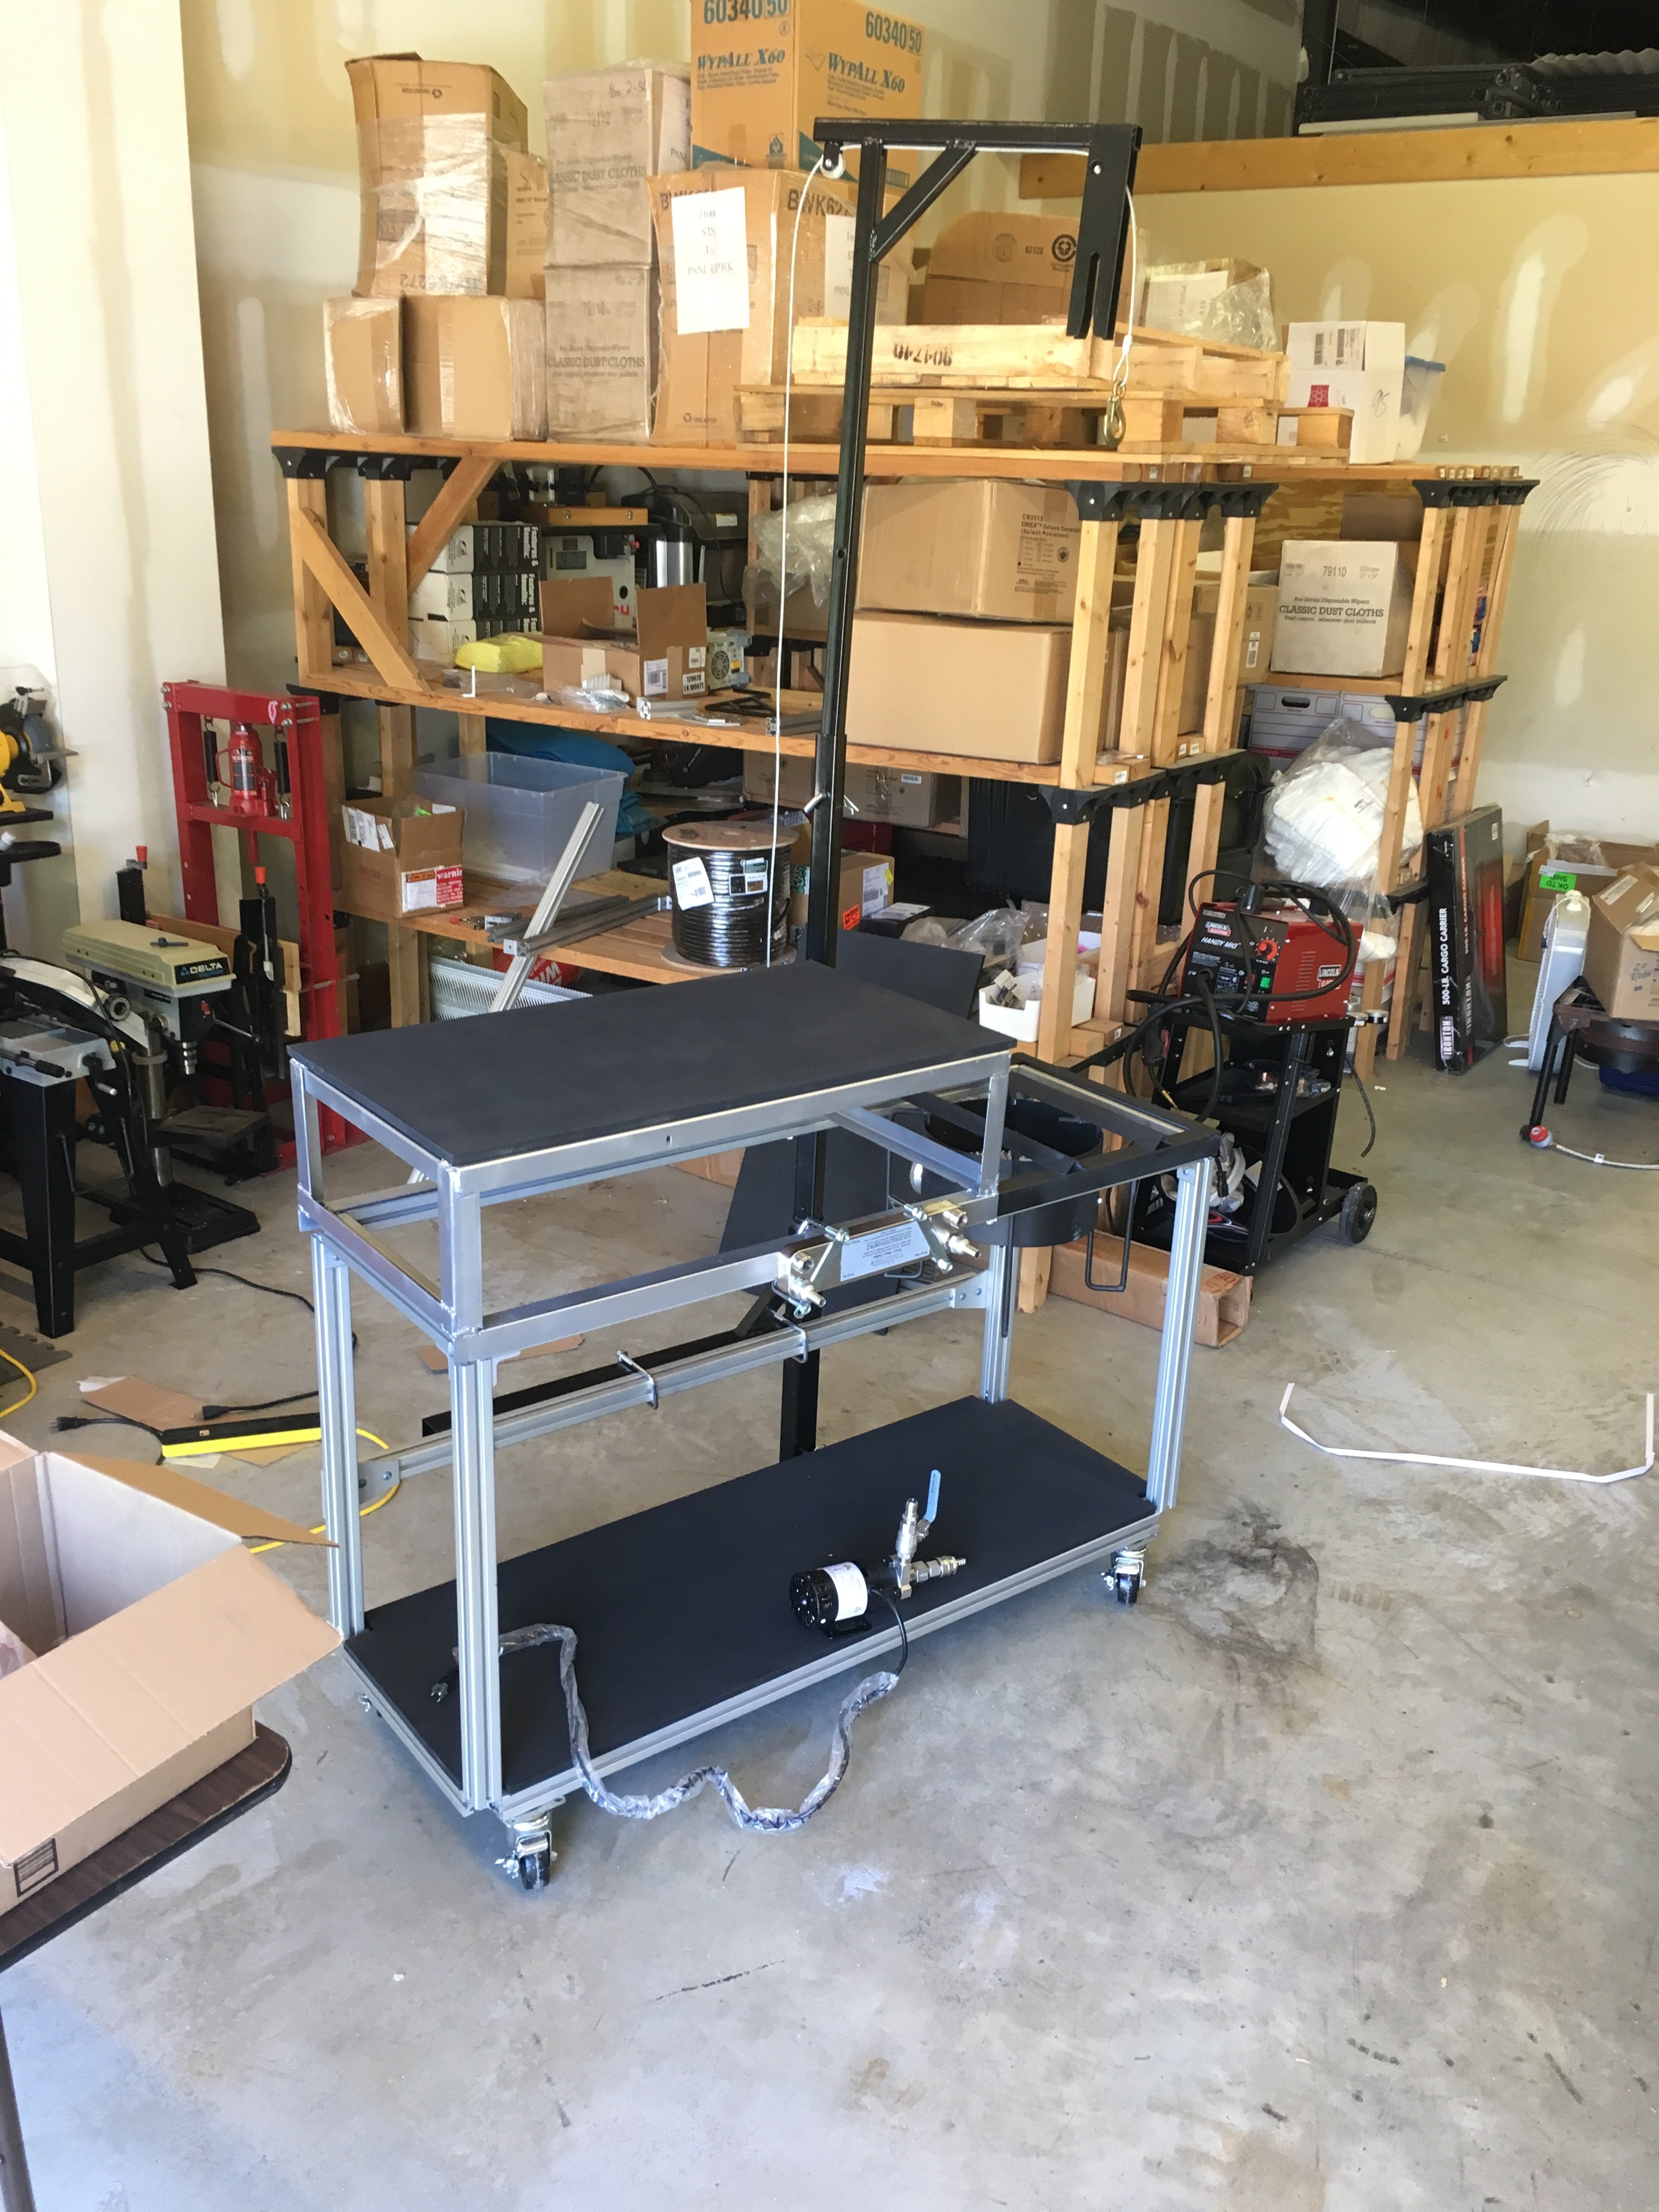
Installed my plate chiller and chugger pump.
I have 2 wire mesh slide-out drawers that I'm going to mount in that middle area under the counter top.
I used MDF coated in high-temp enamel for the shelving. If it ends up scorching I may upgrade that to aluminum plate or something.
I'd appreciate any thoughts and feedback from improvements!
So after a lot of thought and waffling on design I finally built my brew stand.
Its completely built but I'm just waiting on some fittings before I can use it for the first time... So here goes:

I drew the whole thing up in AutoCAD and then cut all my pieces to length.

I welded them all together... please excuse the ugle-a** welds...

I'm slightly concerned about those welds holding over the long term just because of the massive amount of thermal cycling that's going to occur. But if they break I'll just build a bracket to capture the burner from the bottom.... after I put out the ensuing
fire that is


The upper part sits captive on top of the lower part, with the angle steel holding it in place by gravity. I was initially going to bolt it down, but after feeling how snug the fit is, and how solid it feels I decided to just leave it held on by gravity. It's not going anywhere.

I didn't weld those cross-pieces on until later because I wanted to mess with my pot on there and play with the placement a little. I ended up putting it a little off-center (as shown) just because I wanted to leave some extra room on the side to get my brew jacket on and off.

Time for some high temp enamel paint

I bought a trailer-hitch mounted game hoist for field-dressing game. It was $90 on Amazon and easier than building something that could swivel under load out of 80/20.
I just attached it to the cart with U-bolts, and it has a foot that goes down and presses into the ground for added support. I may replace the cable with something a little lighter since that thing is designed to lift 400+lbs.

Installed my plate chiller and chugger pump.
I have 2 wire mesh slide-out drawers that I'm going to mount in that middle area under the counter top.
I used MDF coated in high-temp enamel for the shelving. If it ends up scorching I may upgrade that to aluminum plate or something.
I'd appreciate any thoughts and feedback from improvements!


![Craft A Brew - Safale BE-256 Yeast - Fermentis - Belgian Ale Dry Yeast - For Belgian & Strong Ales - Ingredients for Home Brewing - Beer Making Supplies - [3 Pack]](https://m.media-amazon.com/images/I/51bcKEwQmWL._SL500_.jpg)

