• Please visit and share your knowledge at our sister communities:
  • If you have not, please join our official Homebrewing Facebook Group!

    Homebrewing Facebook Group

ANVIL FOUNDRY ALL-GRAIN BREWING SYSTEM

Homebrew Talk

Help Support Homebrew Talk:

This site may earn a commission from merchant affiliate links, including eBay, Amazon, and others.
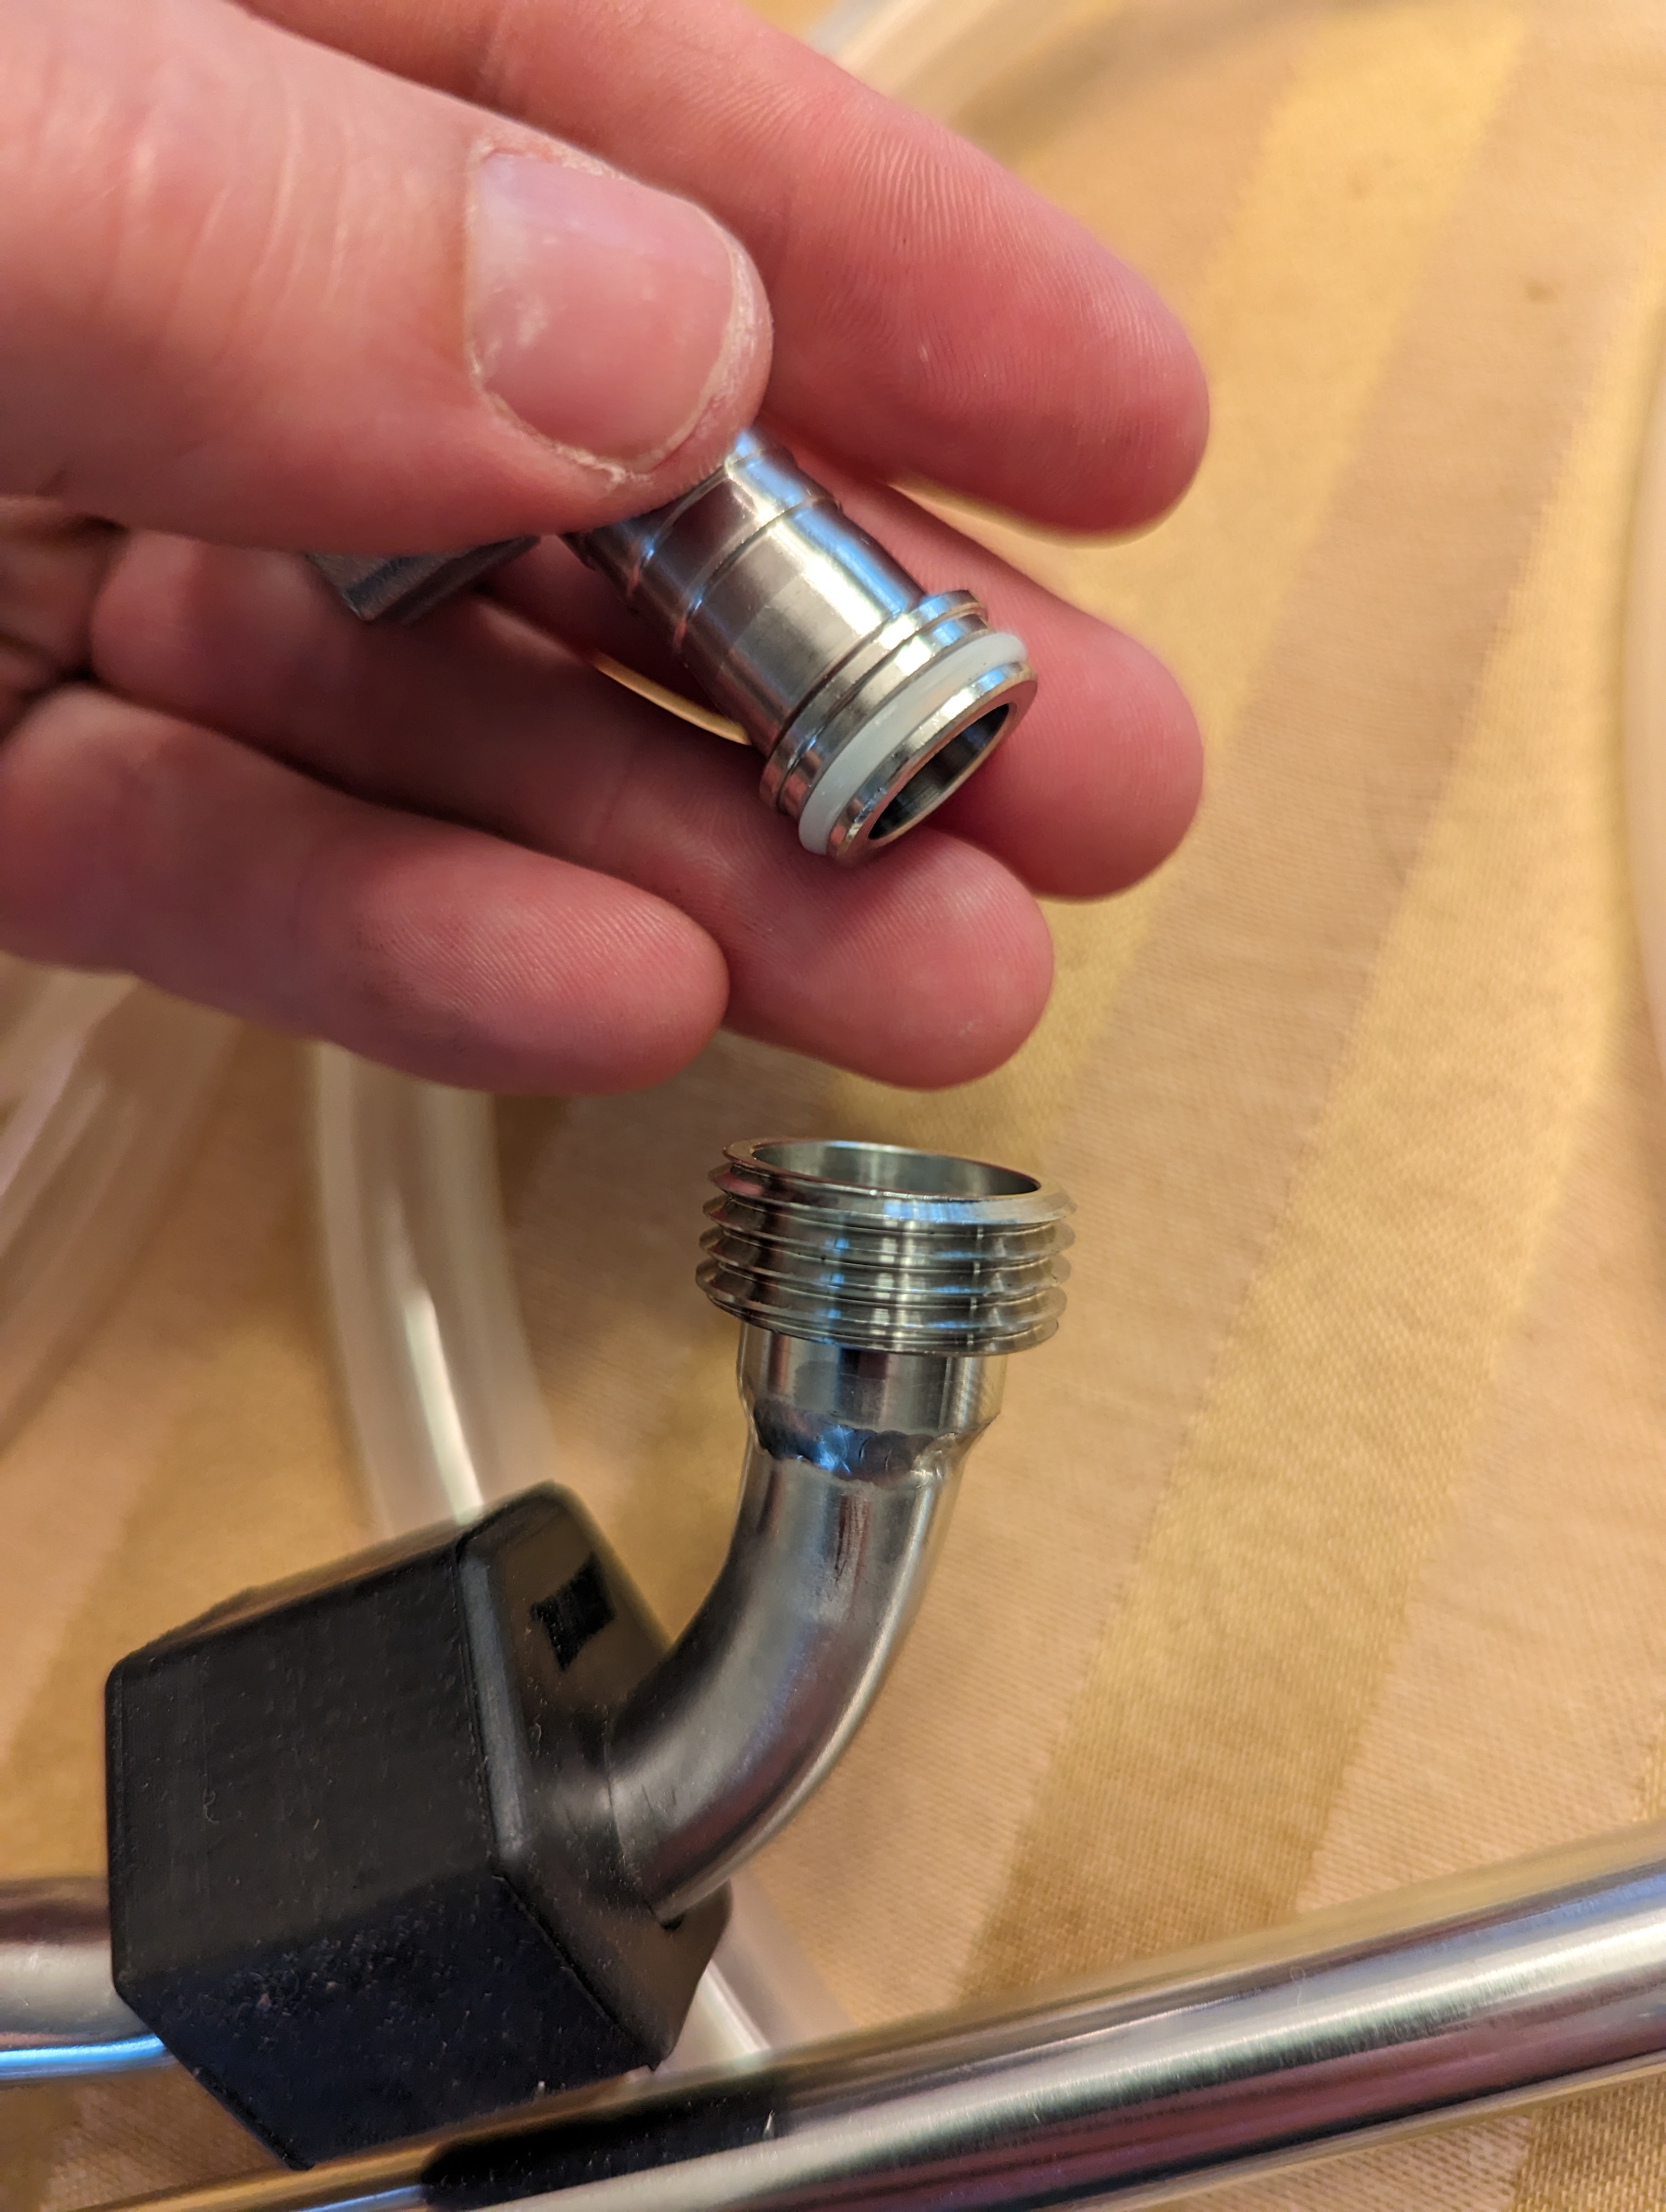
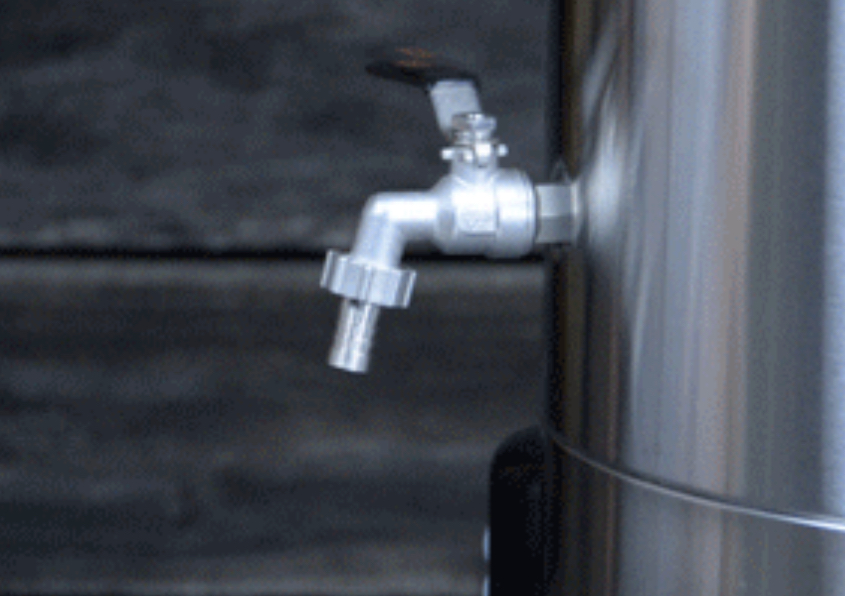
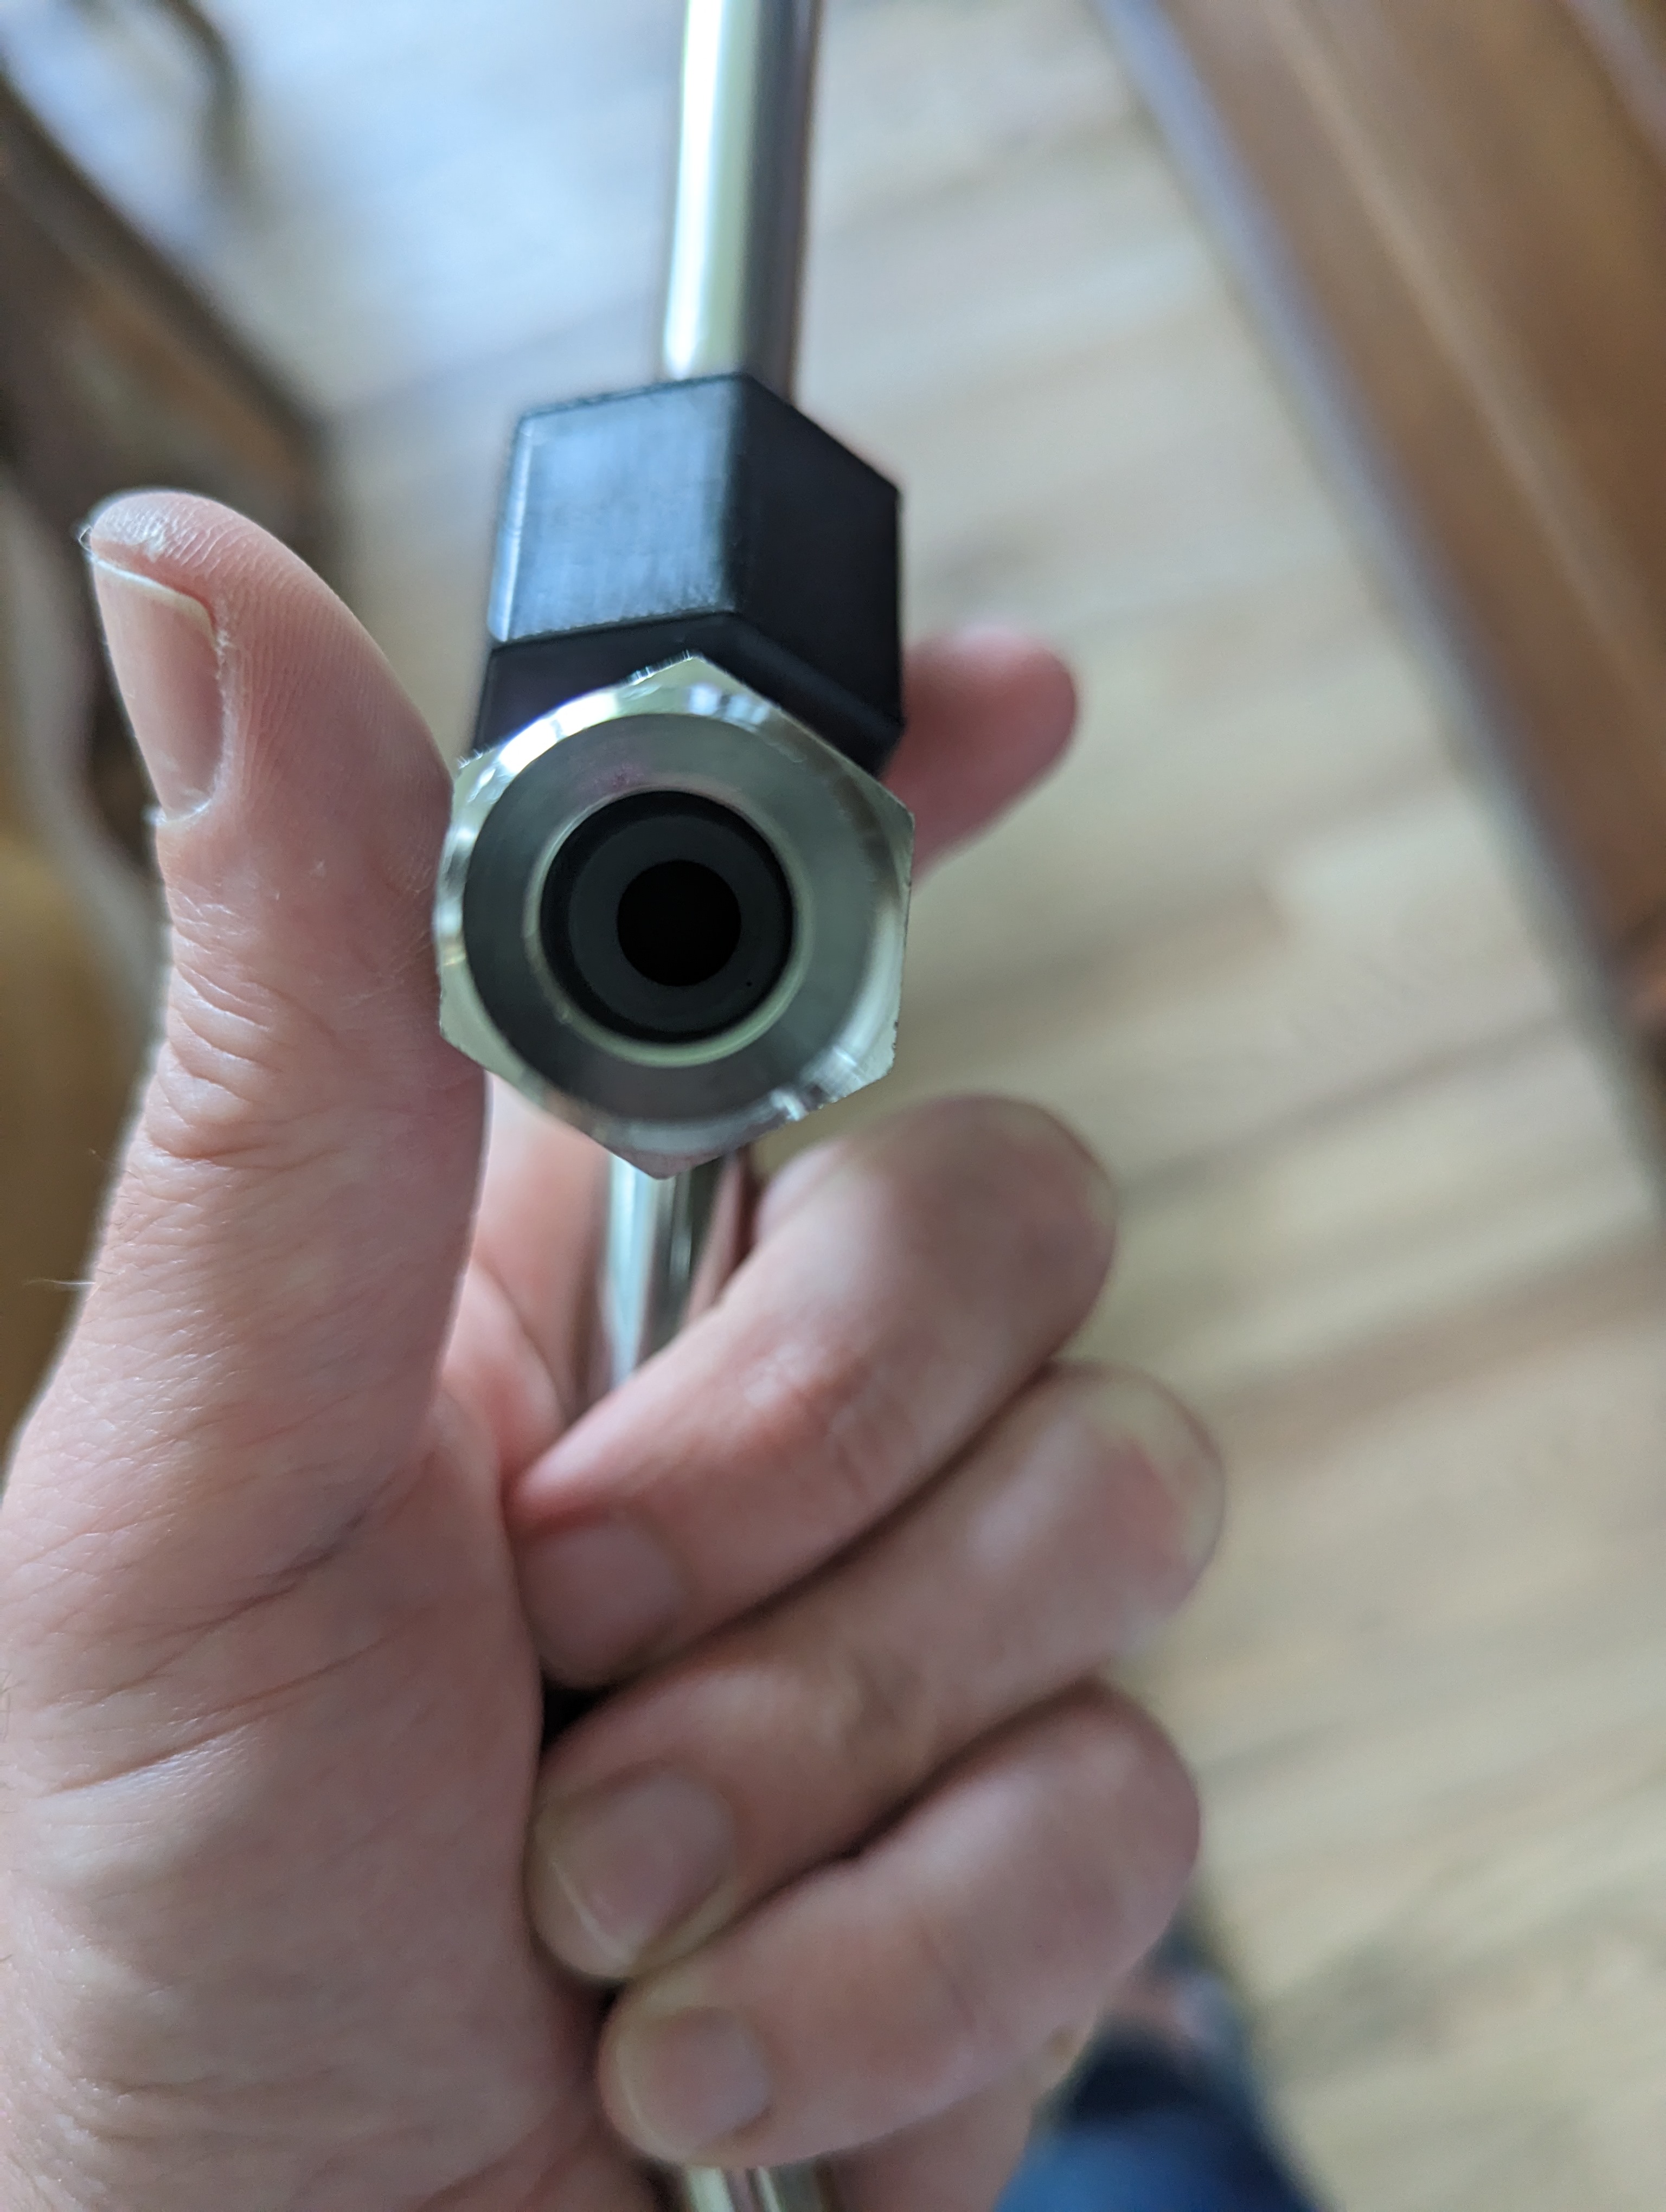
Thanks...is it in the correct config as well, regarding male/female with the appropriate threads?

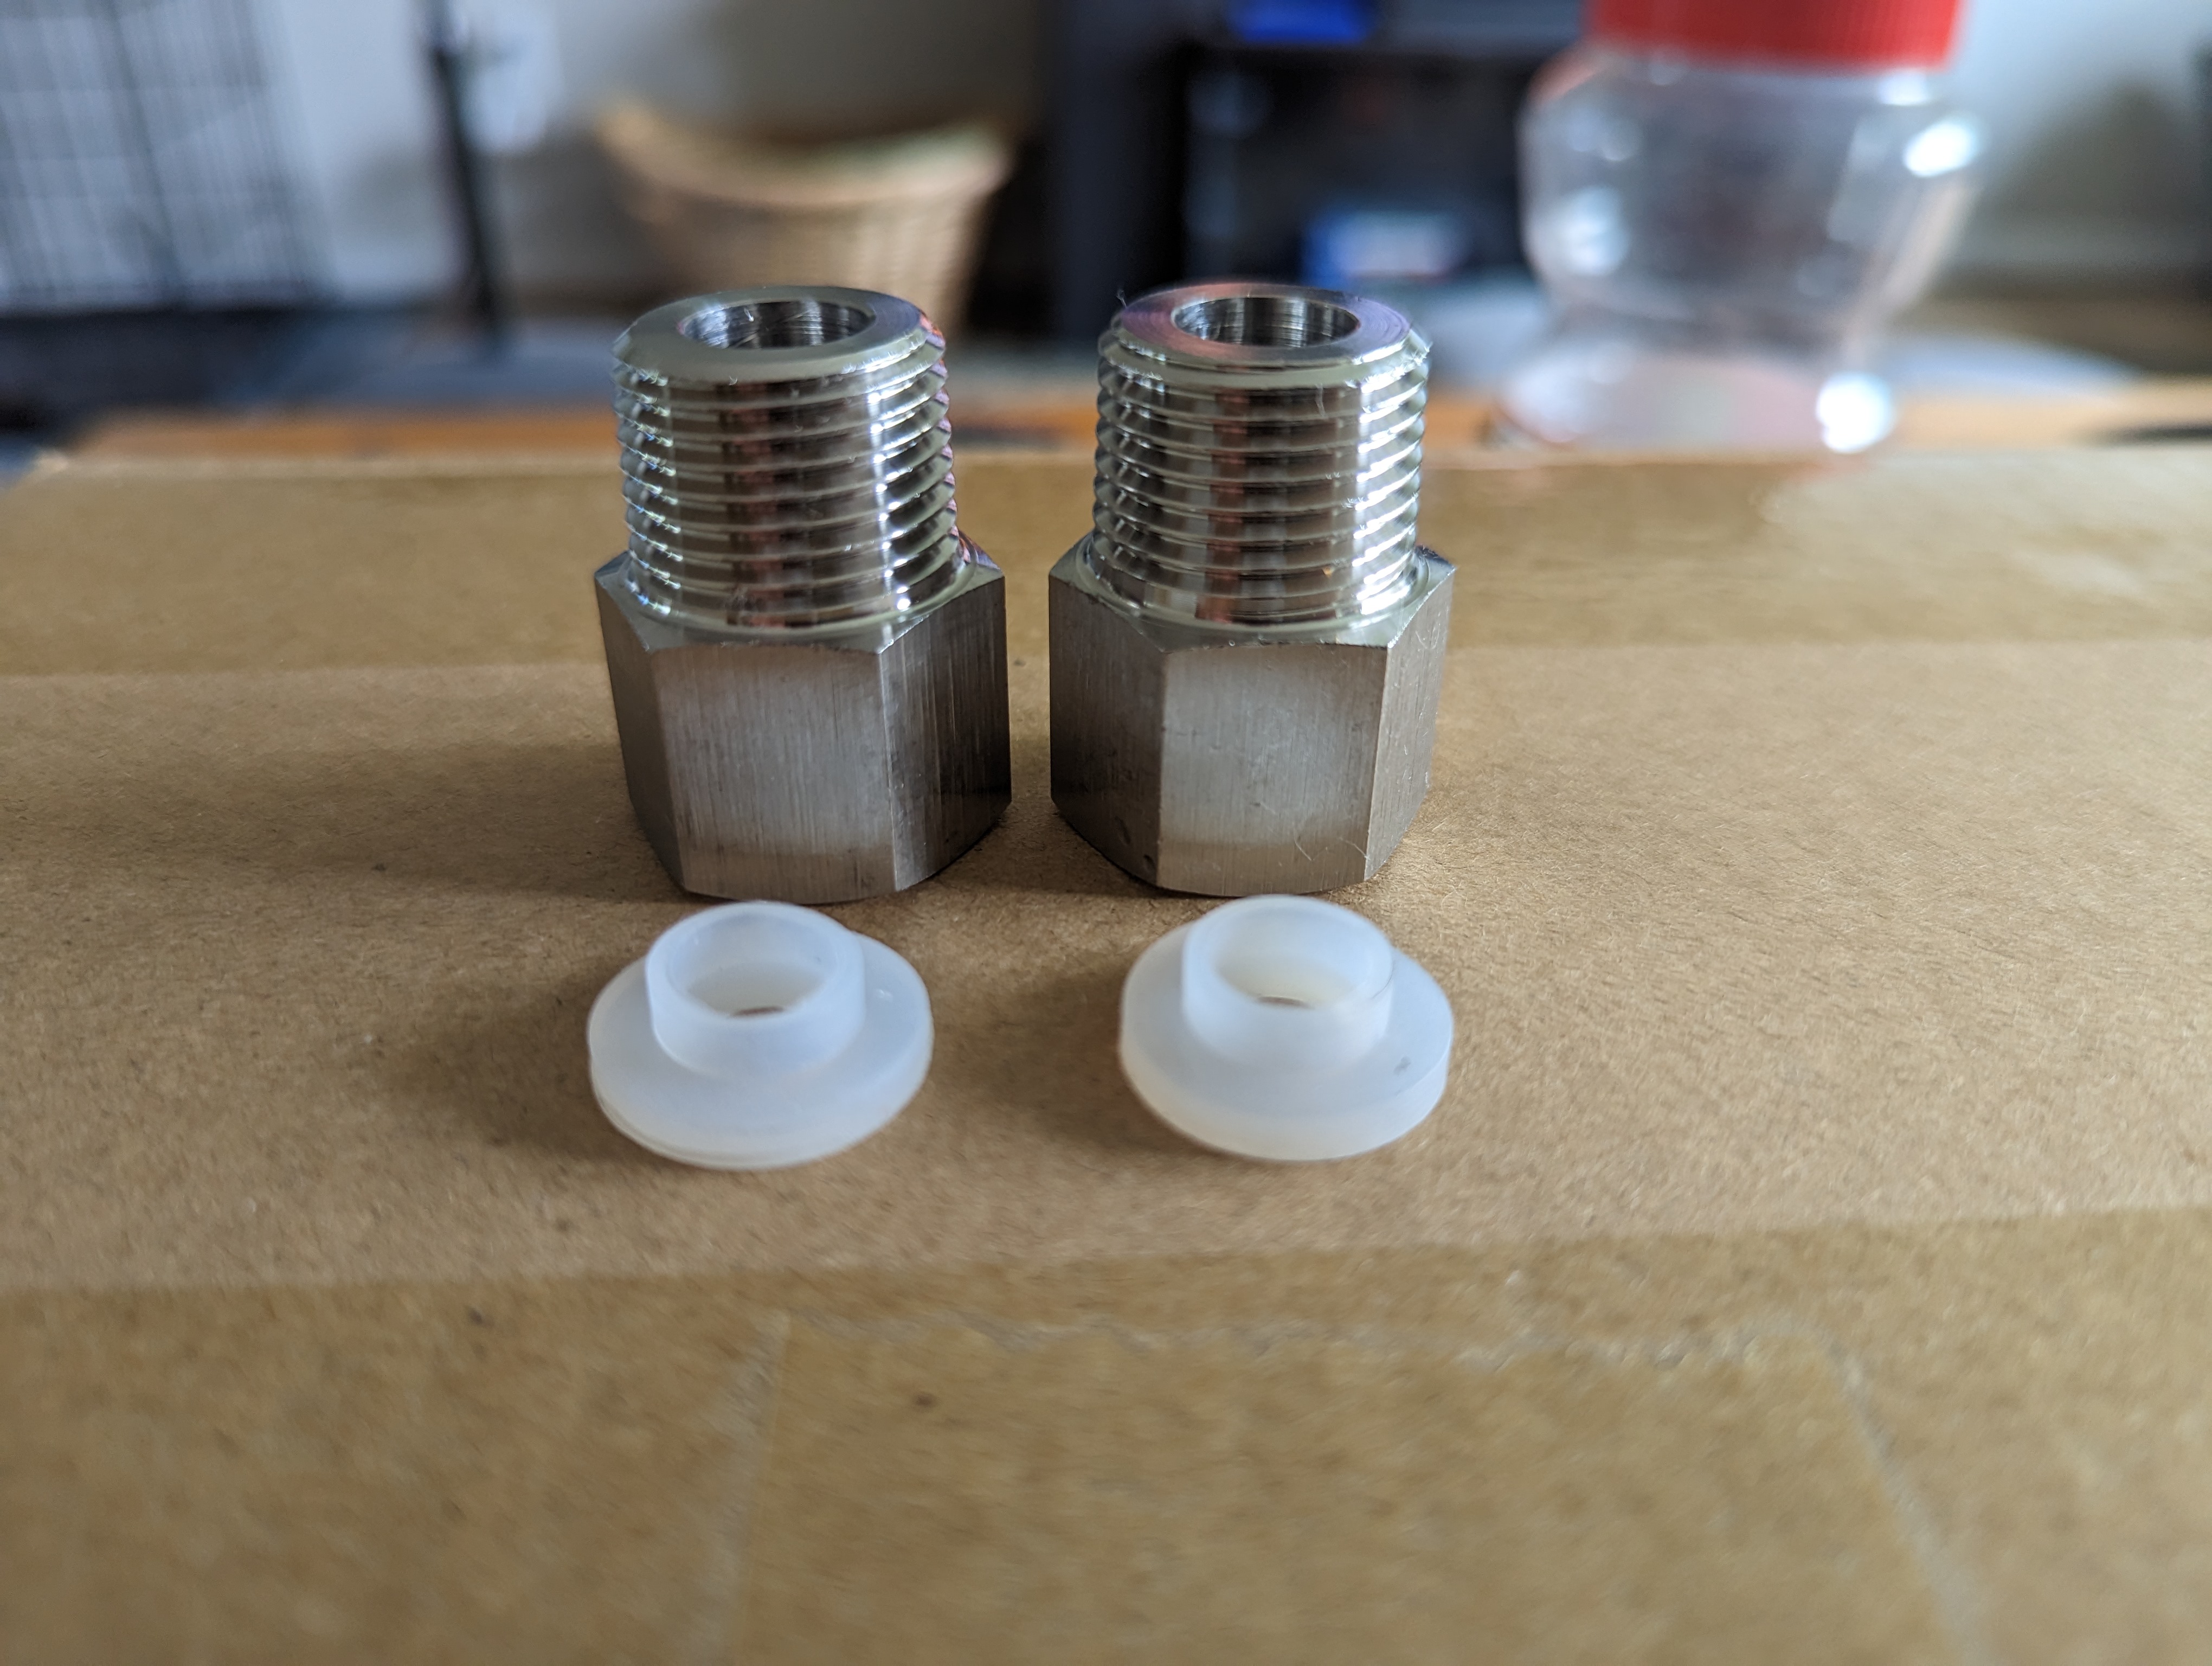
Edit: I don't think this is correct, I think I need 1/2" G male to 1/2" NPT female. Can anyone link me to what you have used & is confirmed working?

I also emailed brewhardware.. I have around $100 worth of stuff in my cart, I'm hoping they have something I can use and get it all in one order
 
Last edited:
no--you have an Anvil, correct? The Anvil spigot has a 1/2 G male end, so you need a G female to NPT male adapter. I posted in your other thread a link to a provider, but the one from tracer_bullet works too.

I see that it's RyPA who found the right fitting, VERIFIED by tracer_bullet. Then questioned by RyPA and then reverified by Grizwold1, then . . . . 😁
My Foundry arrives today and I was trying to get everything ordered in advance without buying the wrong parts. Thanks for confirming, chief.
 
It showed up today and I got it assembled. I'm glad I waited to order parts, I realized I need two adapters, one for the ball valve and one for the swirly/whirlpool arm as they both use the same thread. Also need an additional camlock fitting.
 
I don't know how to verify but it looks like this, same on ball valve and swirly arm

NPT threads do fit on Anvils threads, seems a little looser than NPT, is that expected? How else do you tell the difference?

Edit: With the existence of the o-ring, the anvil connections are straight threaded.
 

Attachments

  • PXL_20230429_194628854.jpg
    PXL_20230429_194628854.jpg
    2.2 MB
Last edited:
Ugh, every thing always seems to have to be different. That could be straight thread, I don't mean that it can't be, just not usually. For ball valves anyhow. Anvil may have kept the straight thread on all its stuff for consistency.

When you said ball valve, this came to mind, it's NPT: Brew Kettle Drain Valve and Mounting Hardware
Yeah the swirly arm and ball valve have the same exact connections and nipple -- both with the nipple having the rubber gasket attached. I ordered all of my camlock fittings from brewhardware, I should have this fully up and running by next weekend
 
Yeah the swirly arm and ball valve have the same exact connections and nipple -- both with the nipple having the rubber gasket attached. I ordered all of my camlock fittings from brewhardware, I should have this fully up and running by next weekend
Excited for ya man! Let us know how the virgin brewday goes on this system!
 
When you said ball valve, this came to mind, it's NPT: Brew Kettle Drain Valve and Mounting Hardware
Note the line stating that it does not fit the Foundry. Why the different threading was used, who knows? I could not even get an NPT fitting to start, let alone thread all the way on. Thinking a little bit more on this, my guess is that the Foundry line is sourced differently than the rest of the Anvil products?
 
You need to join the Anvil Foundry group on Facebook. They have specs and links to all the parts you need for all the modifications that have been discussed here recently.
 
It showed up today and I got it assembled. I'm glad I waited to order parts, I realized I need two adapters, one for the ball valve and one for the swirly/whirlpool arm as they both use the same thread. Also need an additional camlock fitting.
The photos they show on their site show the nipples and connectors, it appears you should have gotten them, I’d contact them. Worst case maybe you can buy them from them.
 

Attachments

  • IMG_2553.jpeg
    IMG_2553.jpeg
    96.5 KB
  • IMG_2556.jpeg
    IMG_2556.jpeg
    406.2 KB
The photos they show on their site show the nipples and connectors, it appears you should have gotten them, I’d contact them. Worst case maybe you can buy them from them.
I got the nipples & connectors with the Foundry, but I want to attach 1/2" NPT to the threads, so I bought adapters.
 
I will post my set up later. I chose a hybrid set up, using NPT quick connects and a ball valve on the pump sides but kept the simple plastic compression ring for the foundry ball valve and the swirly/recirculating arms.
 
Removable = yes
NPT = no, straight thread (aka G thread), it's like shower hose to shower head thread, it relies on a gasket to make the seal, not the threads mushing into each other

There are adapters for straight to NPT if needed. Some folks put a ton of PTFE tape on and cross their fingers.

This is what I did on the ball valve. So far so good after 2 years.
 
This is what I did on the ball valve. So far so good after 2 years.
I did screw on NPT threads with no issue, I'm pretty confident that with some Teflon tape, you'd be good. Since I'm building this setup now and getting a ton of fittings, I figured Id just do it 'proper', even though it may be overkill.
 
NPT / straight combos can work. It's just luck if it does or doesn't. They aren't designed for it, but it can work depending on the fittings. Like exactly on the fittings, their exact sizing, how deep the threads are cut, and so on.
 
Do you guys think it's worthwhile to widen the hole in the G to NPT adapter silicone gasket? It looks like it's introducing restriction.

Or is the pump flow usually more than enough where the restriction will be helpful?
 

Attachments

  • PXL_20230501_224319818.jpg
    PXL_20230501_224319818.jpg
    2 MB
  • PXL_20230501_222003485.jpg
    PXL_20230501_222003485.jpg
    2.1 MB
Last edited:
Strange. I guess the shape is to keep it located? I've actually never seen that. You can see where the sealing happens, and what part needs to be left and what part can be removed.

Worthwhile... I kind of bet you wouldn't notice the difference without a way to measure it. But if you're like me you'll end up removing it just to be sure :)
That's where my head is at. It really only needs a flat gasket, not sure why they bothered with the groove. In the inside of the fitting leading towards the NPT end, there is a slight indent that looks to be an intended area for that extra gasket material, but it's tapered and is causing more of a flow restriction. I'm going to try to find flat silicone gaskets. Not sure I can cleanly increase the diameter of these by cutting/drilling.
 
Makes sense. That gasket should be a dime a dozen at any hardware store. Probably be Buna-N or similar as well and slightly softer, and seal better. Especially for our applications. Harder plastic is good for crushing into empty spaces, like sealing a gauge to a CO2 tank.
 
Do you guys think it's worthwhile to widen the hole in the G to NPT adapter silicone gasket? It looks like it's introducing restriction.

Or is the pump flow usually more than enough where the restriction will be helpful?
Trying to figure out what I'm looking at here. Are you trying to see if you will modify the ball valve outlet or is this picture of the swirly arm? FWIW, I never modified the ball valve in any way and no issues. I still use white clips to fixate the hose to the ball valve. My whirlpool is brewhardware's over the top whirlpool attachment and I did not put any fittings on it. I just put the hose on it with white clips to fixate. Done over 70 brews on this system this way with no issues. But, if you are enjoying yourself, tinker and modify away! Thats what the hobby is all about lol
 
Trying to figure out what I'm looking at here. Are you trying to see if you will modify the ball valve outlet or is this picture of the swirly arm? FWIW, I never modified the ball valve in any way and no issues. I still use white clips to fixate the hose to the ball valve. My whirlpool is brewhardware's over the top whirlpool attachment and I did not put any fittings on it. I just put the hose on it with white clips to fixate. Done over 70 brews on this system this way with no issues. But, if you are enjoying yourself, tinker and modify away! Thats what the hobby is all about lol
I bought 2 G-to-NPT adapters to allow me to use 1/2" NPT parts on Anvils ball valve and swirly arm, which use G threads.

Images are of the 2 adapters, their included gaskets, and one adapter installed on the swirly arm.
 
I agree that you should be able to remove the restrictive portion or as you say just replace it with an oring.. The adapter I got has a red oring seal and doesn't appear to restrict flow significantly.
 
I trimmed it down with a pair of really small scissors, it came out pretty good and the hole looks less blocked now.
 
Old hat by now, but this is all the stuff I've done w/mine. Not anything out of the ordinary, but maybe helpful for somebody.

I decided to go the cam lock route for one reason or another. Pretty happy w/that decision tho.

Camlock w/lots of teflon tape on the spout, whirlybird with cam lock fitting and 240 waterproof plug. I plug this into a GFCI protected extension cord.

All stuff purchased from Brewhardware.com w/exception of 240 plug & extension cord.
tempImageucVlfJ.jpg


Riptide pump head. Longer hose is drying out. Used it the other night to put water into a keg for cleaning. Have a cam lock fitting on the garage sink, best thing EVER! Those screws are from me installing the v2 brackets into the mash basket. Definitely worth the purchase.

tempImageSqXS8U.jpg


No weld fitting..so outstanding.
tempImage0B5po8.jpg
 
Not sure if this is old news, but my Foundry came with a 240v plug with a 240 to 120 adapter plug. It's going to make the switch to 240 much easier
 

Attachments

  • PXL_20230503_015220355.jpg
    PXL_20230503_015220355.jpg
    2.8 MB
Last edited:
Not sure if this is old news, but my Foundry came with a 240v plug with a 240 to 120 adapter plug. It's going to make the switch to 240 much easier
That’s actually pretty awesome they are doing this now! I’ve got the first generation foundry and just cut the 120 plug off and had to rewire a 240 plug on it. Wondering if too many peeps burned down their house doing that and decided to make a standard choice on newer units. Risk mitigation strategy vs altruism lol
 
That’s actually pretty awesome they are doing this now! I’ve got the first generation foundry and just cut the 120 plug off and had to rewire a 240 plug on it. Wondering if too many peeps burned down their house doing that and decided to make a standard choice on newer units. Risk mitigation strategy vs altruism lol
Agreed, I was surprised & happy when I saw it. Overall I'm happy with this generation, having the new electrical plug and no ring to hold the grain basket. The only thing I wish it had was 1/2" NPT threads on the ball valve and swirly arm, but this is minor.
 
Back
Top