• Please visit and share your knowledge at our sister communities:
  • If you have not, please join our official Homebrewing Facebook Group!

    Homebrewing Facebook Group

3-in-1 "Boil Kettle, Jacketed Chiller, Conical Fermenter" by Brewha

Homebrew Talk

Help Support Homebrew Talk:

This site may earn a commission from merchant affiliate links, including eBay, Amazon, and others.
I think that would work but for just a little more, you can buy a brand new glycol chiller from Rapids Wholesale. An aquarium chiller or a bucket heater controlled by an STC-1000 would control the heat when needed.
 
I think that would work but for just a little more, you can buy a brand new glycol chiller from Rapids Wholesale. An aquarium chiller or a bucket heater controlled by an STC-1000 would control the heat when needed.


Sorry for the rookie question but with those wouldn't you need a separate cooler for the reservoir? This multitemp solution looks like the reservoir is built in so all contained with just one device vs. pumps and coolers etc.
 
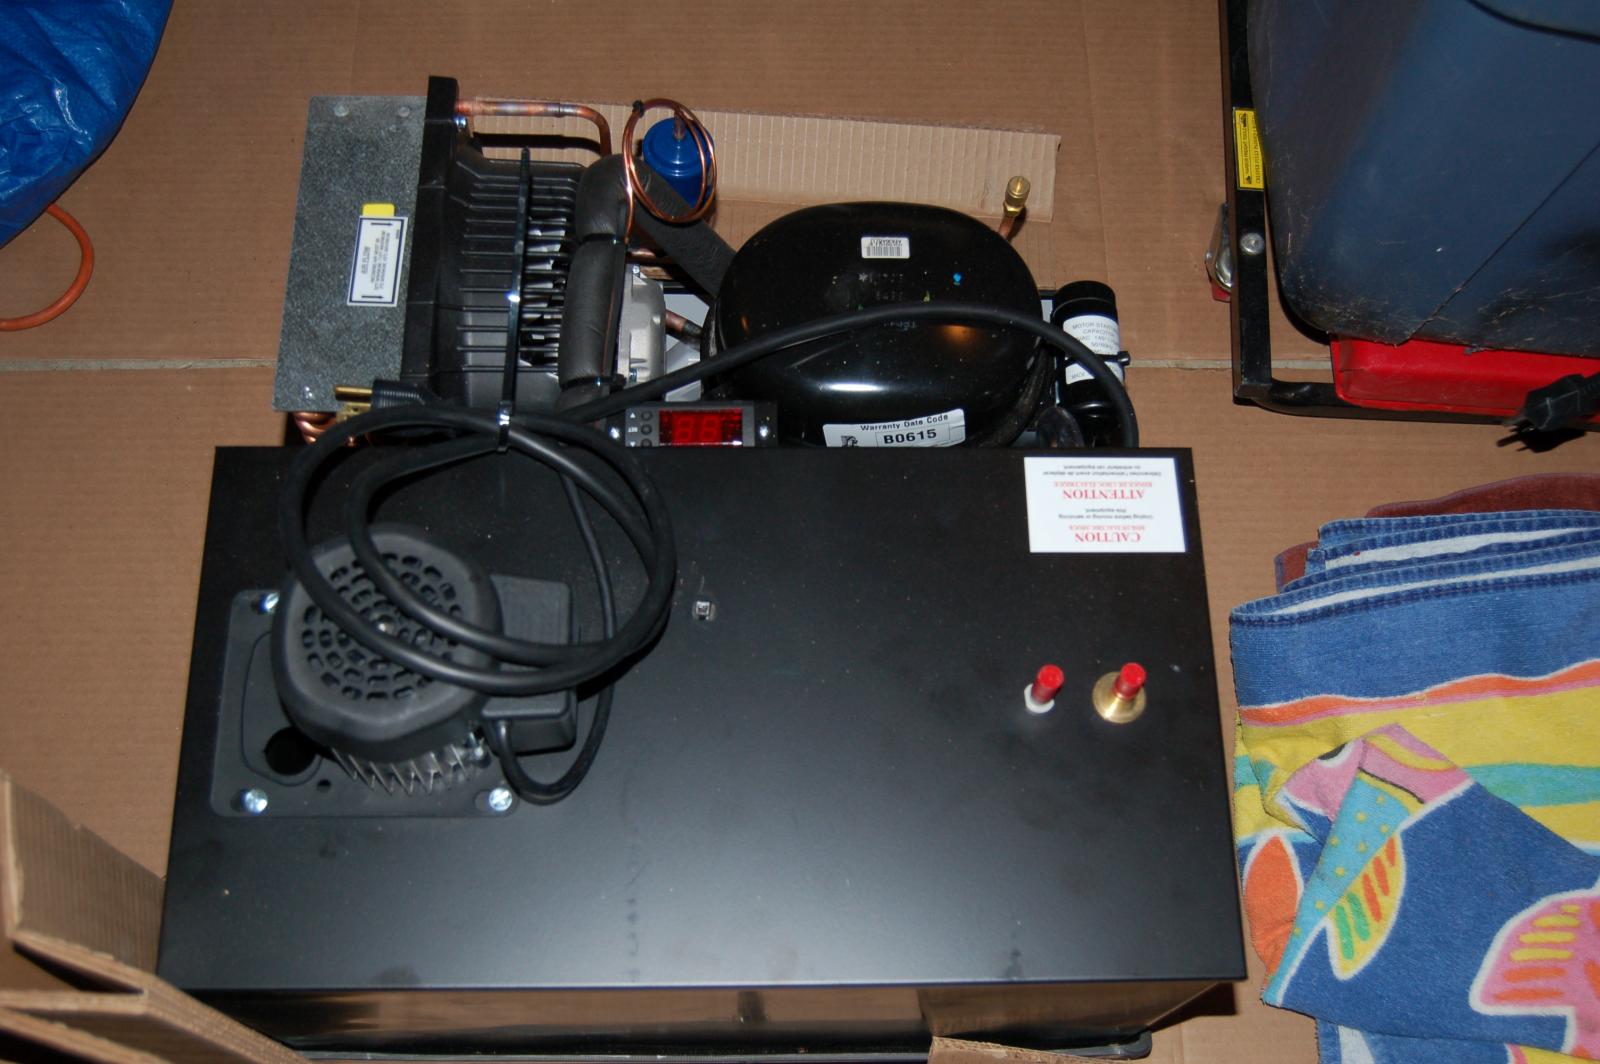
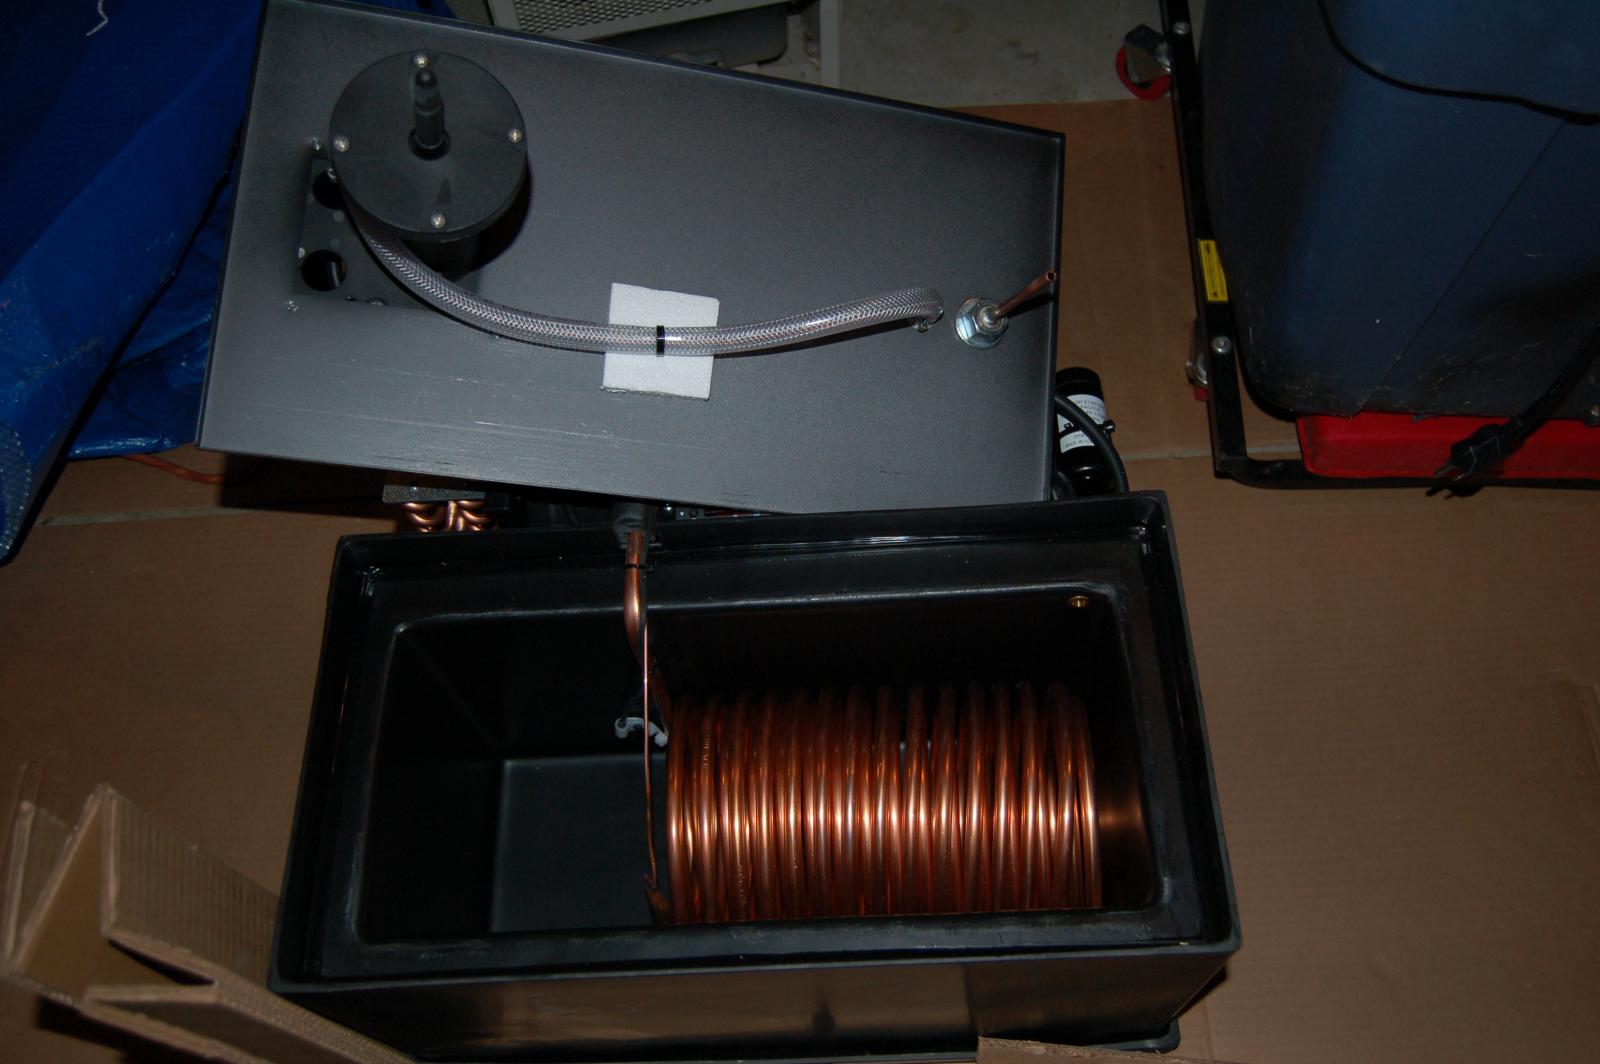
I took some photos of mine as I was unboxing it. You can see it with the top on and then the top off. This one holds 3-gallons. The copper coil is a closed loop and that cools the mixture in the reservoir. The pump circulates the mixture in the reservoir through the jacket and back to the reservoir. The return inlet is right over the copper coil. At first, I was also going to use a separate reservoir and my old copper immersible chiller connected to the pump, but I'm going to just circulate constant 68F glycol mix directly from the main reservoir. If I need to heat next winter, I'll use an aquarium pump placed inside the reservoir. When it is time to crash cool, I'll just lower the temp on the chiller.

I took a brewing course last year at a brewery and I learned how to make a loop with multiple fermenters. It would also work with these if anyone decides to buy extra 3-in-1s.

In the first photo, you are looking at the chiller with the top on. The pump is on the left and you can see the inlet and outlet on the right side. The return inlet is far right.

The second photo is with the lid off and you can see the bottom of the pump on the left. It has a dip tube which inserts into the reservoir. On the far right you can see the return inlet which is a copper tube.

DSC_0283.jpg


DSC_0285.jpg
 
Has anyone purchased or used the wort aeration stone?

I have a Williams Oxygenation kit sitting around that I just need a Oxygen tank for that I'll probably use. But so far every batch I've done has been using dry yeast.
 
I purchased the aeration stone from other than Brewha and all the items Nathan noted in his instructions. Haven't used it yet though.
 
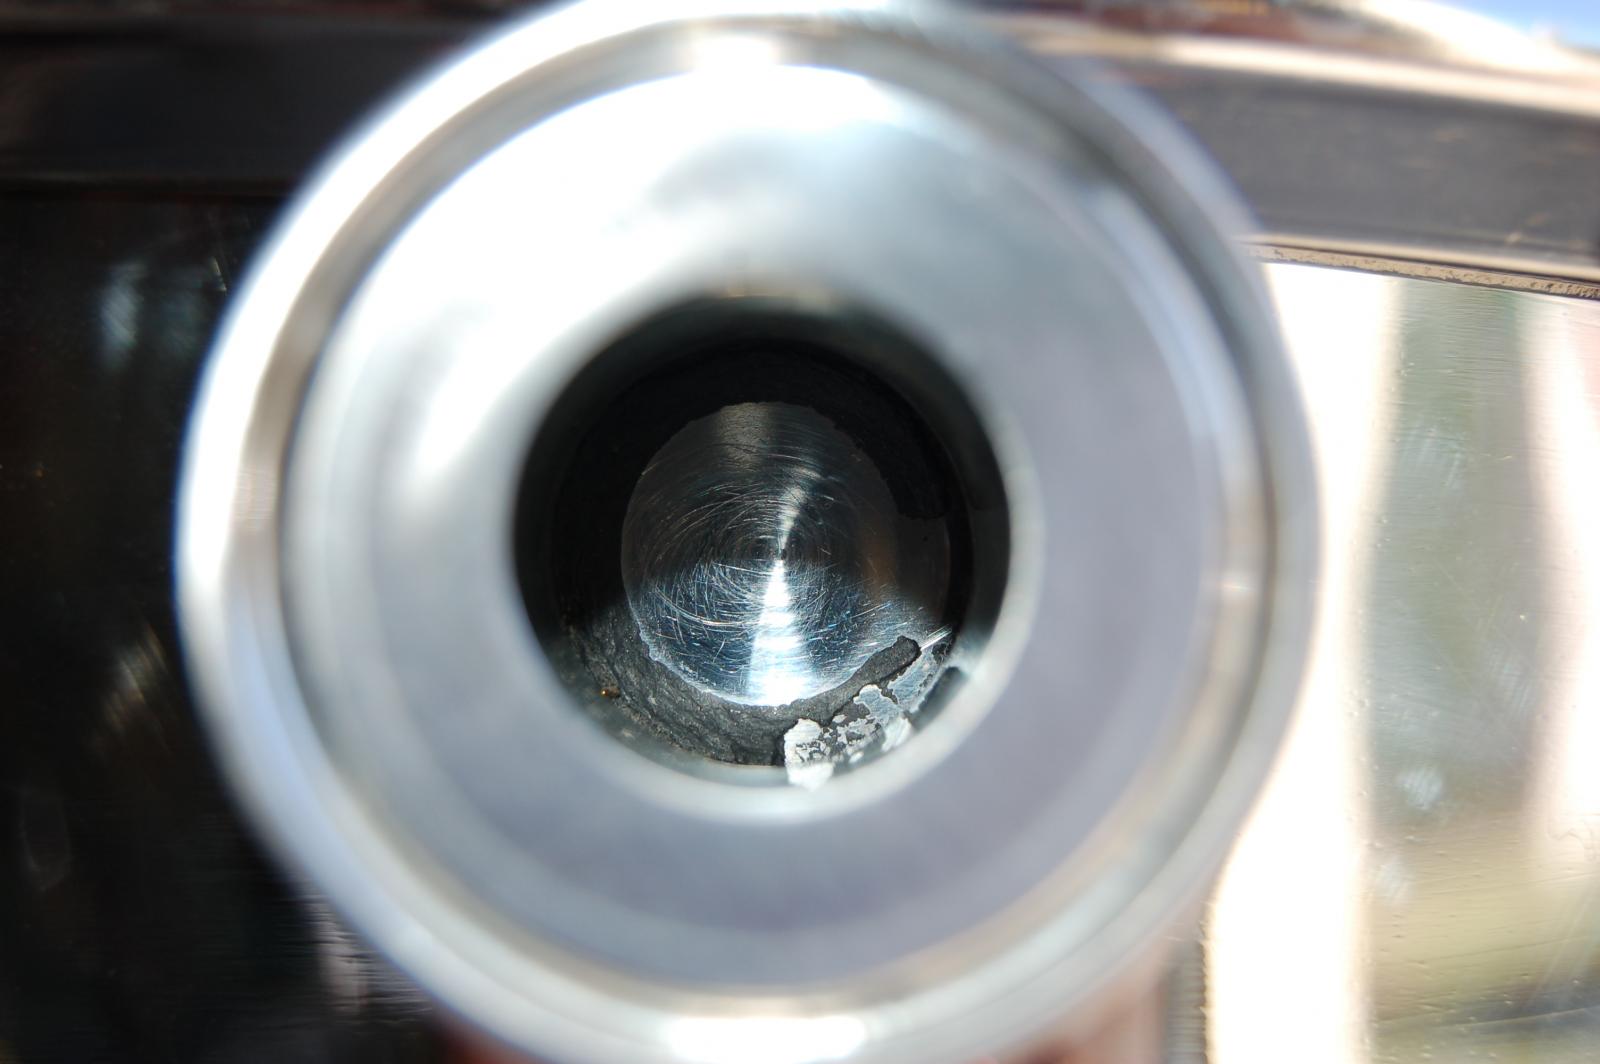
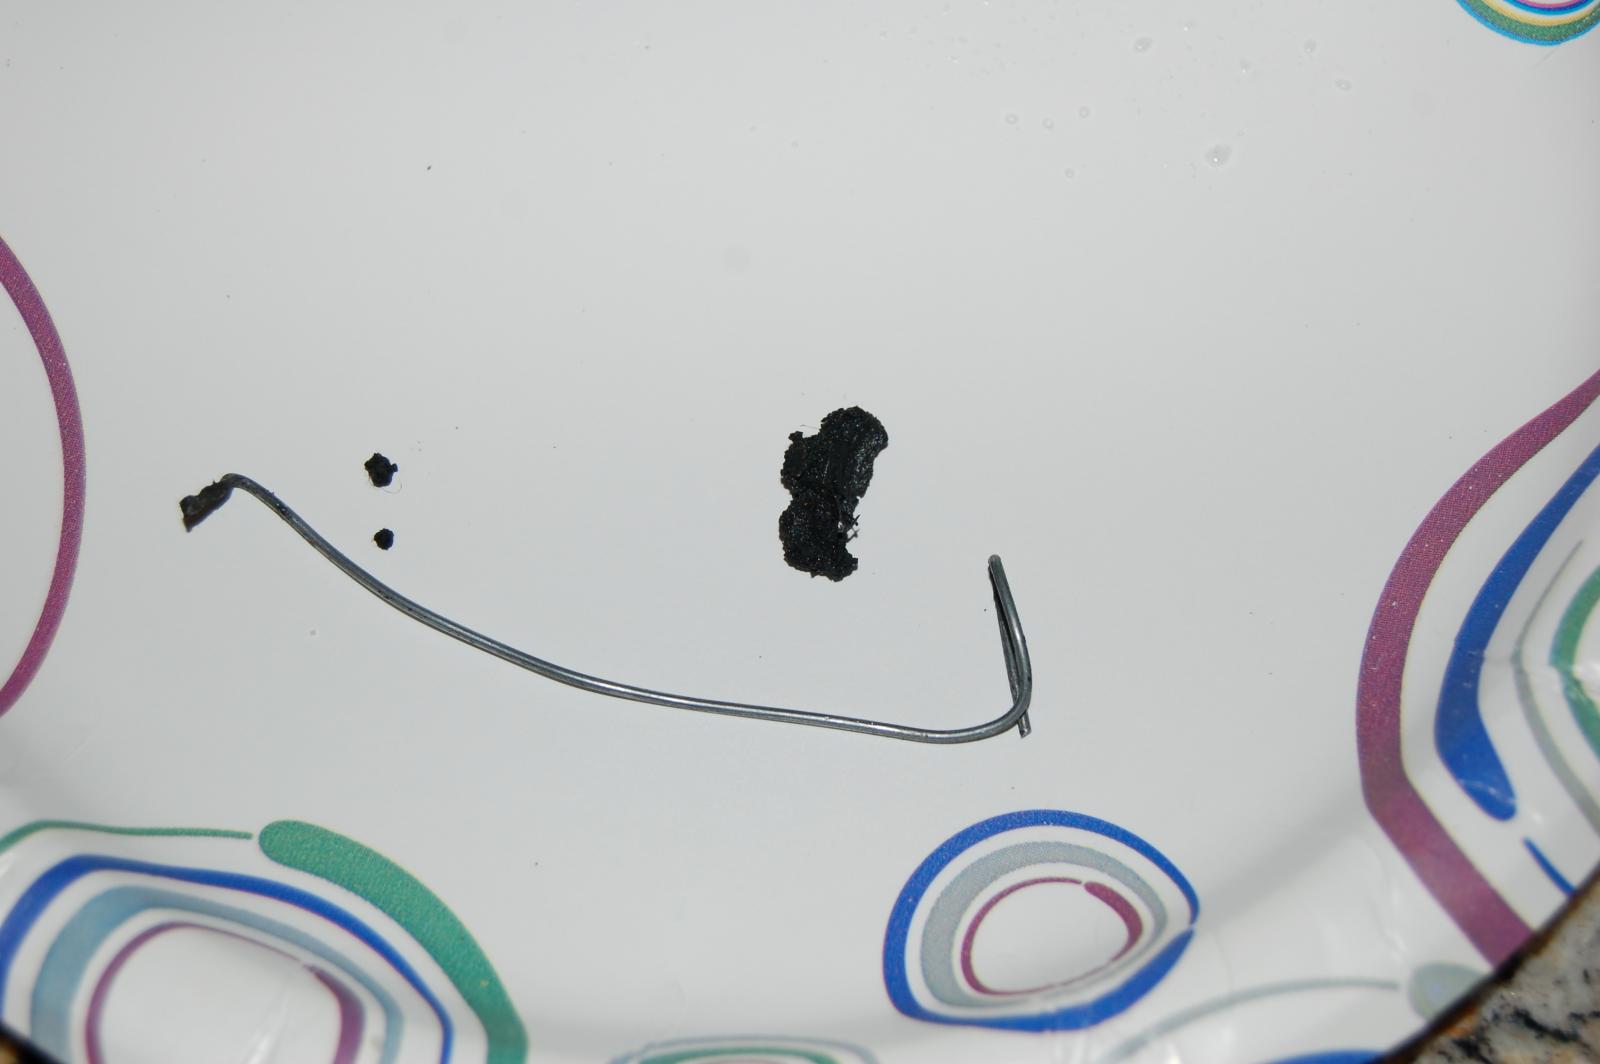
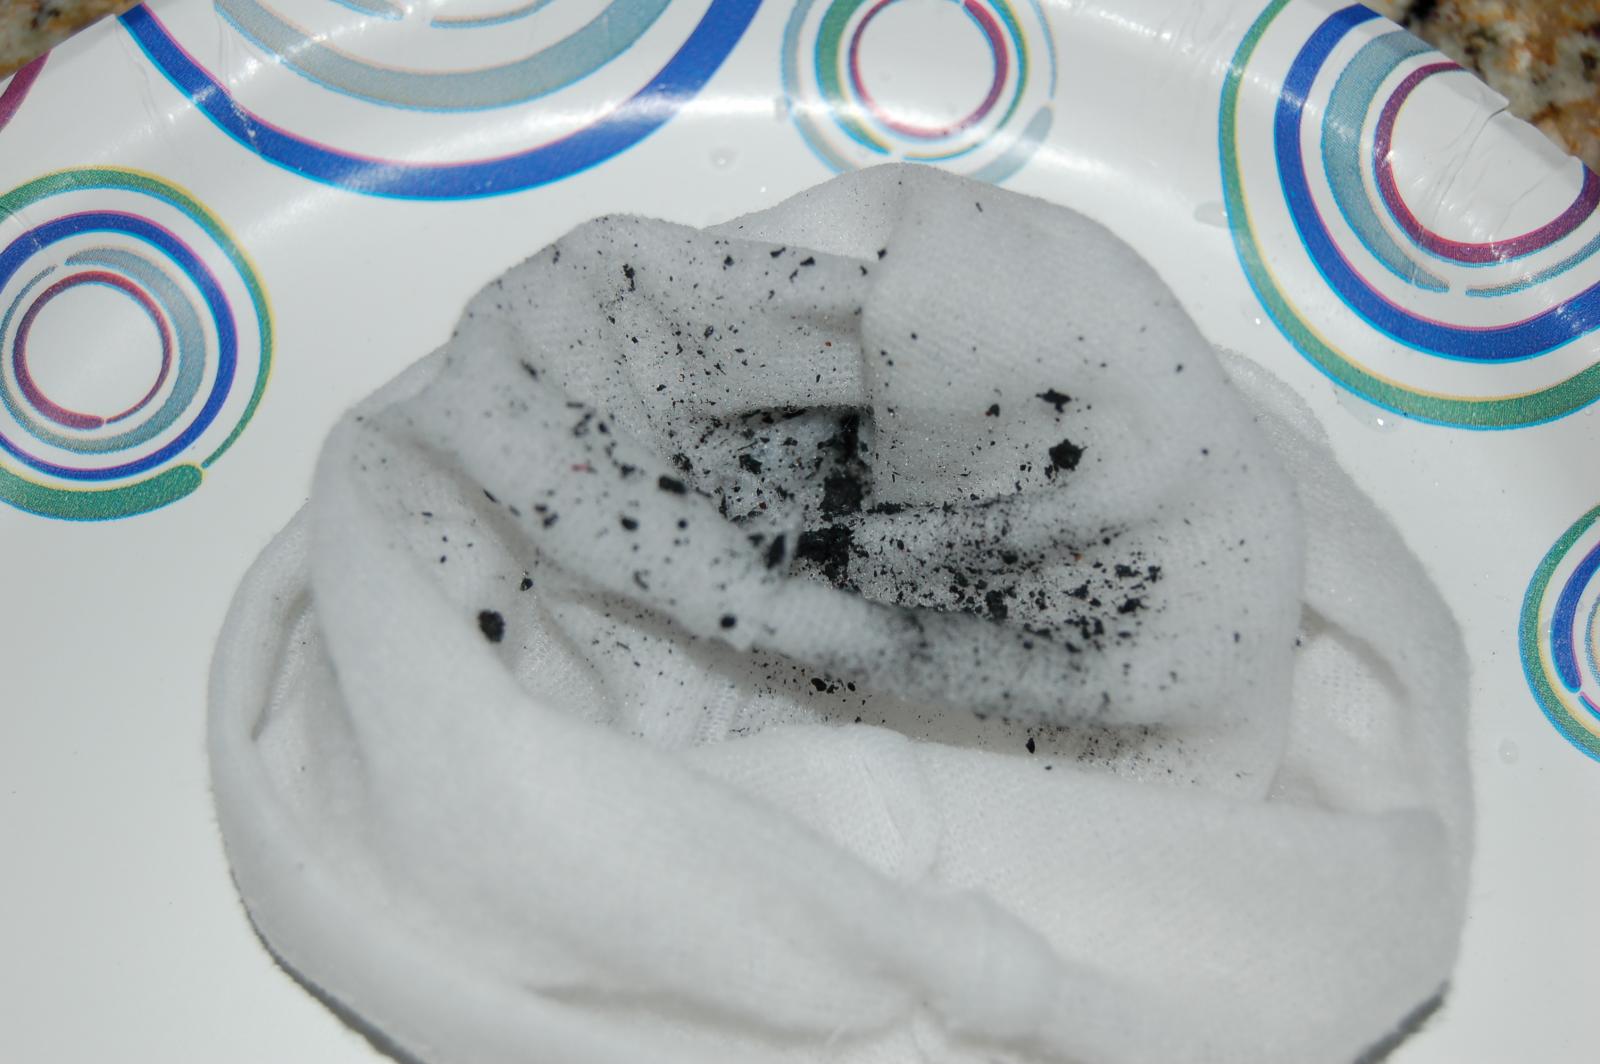
Hello Lads, last night I was gearing up to run my glycol system for the first time. As some know I have not used the jacket on my system yet. Last night, I removed the tri-clamp and the hose barb that I had on the jacket exit. For some reason, I stuck my finger inside and I felt what I thought was a weld all the way around. I got a light and could see that it was black flux or whatever the stuff is called. It formed a bead all the way around. There was just a small spot where water could actually pass. I took photos and sent them to Nathan at about 1:30 am ET. This morning at 9:30 am ET (6:30 in Vancouver), I received a call from Nathan. He was a little surprised that I had not used it to it's full extent after 4 months. But I wanted to get it bought before a price increase went into effect. He suggested that I connect it to my faucet and let water fill it from the top (exit) port. I did that for about 5 minutes. I placed a mesh bag over the end of the exit hose to catch anything that came out. Then I switched the hoses to the normal way. I even turned it up eventually to full force without any pressure regulator with zero damage (but still pay attention to your water pressure!). More of the black stuff broke free after about 15-minutes but there was obviously at least 50% still there. So, I cut a piece of fairly stiff gauge wire and bent the ends into hooks. I was able to get most of the stuff clear. BTW, Nathan told me he would replace it if I could not clear the port. Even with mine 90% blocked, I was able to run water through it with no damage. But don't restrict the flow! It is not recommended. I don't think this has happened to anyone else, but just for an extra precaution, check your top jacket exit ports. If you see something that concerns you, document it and contact Nathan. Just as he always has, he contacted me in a very reasonable time. As a matter of fact, he called me again at 11:25am ET to make sure I had his phone number. I'm probably more satisfied with my purchase now.

First photo:
top exit port
Second Photo:
wire I used and the last big chunk
Third photo:
the mesh bag and debris

DSC_0297.jpg


DSC_0298.jpg


DSC_0299.jpg
 
That is crazy. I didn't even think to do that upon my first go around with the jacket and I got lucky. When I drained my glycol mix the first time, ( I drain about 2 gallons into a 5 gallon bucket because my reservoir is only 7 gallons and the jacket takes about 2-3 ) I noticed a ton of that black stuff in the mix. I strained it out so I could use the mix again. I consider myself lucky that it didn't clog to bad a cause a pressure build up. Now that I have used the jacket with glycol 6 times, when I drain after use it is nice and clean. Thanks for the info limulous you saved someone some headache and disappointment for sure!!
 
What the biggest beer anyone has brewed in a BIAC? How much grain and how much water went into the BIAC?
 
How has everyone connected with regards to power?
With the new digital power box, does anyone have a GFIC spa box or portable GFIC in the system? If so where do you have the GFIC, between the heating element and the power box, or between the power box and the wall plug (assuming a dryer plug is the power source)?
 
I just brewed a hop venom clone. 40 lbs of grain and 75 liters Of water due to 90 minute mash 90 minute boil. When I finished adding all grain I had an overflow of probably 2 liters of water out of the top of the BIAC. Arrrgggg pain in the ass to clean. So my opinion is it maxes out at 36 pounds and 72 liters.
 
It depends on a few factors but according to Nathan the medium BIAC mash tun can hold approximately 45lbs of grain.
 
How has everyone connected with regards to power?
With the new digital power box, does anyone have a GFIC spa box or portable GFIC in the system? If so where do you have the GFIC, between the heating element and the power box, or between the power box and the wall plug (assuming a dryer plug is the power source)?


I have the old-style power box and I had a dryer outlet installed in my garage. I also bought a GFCI plug that someone else posted early in the thread that goes between the element and the box. I had a spa panel on my deck and I should have just had that moved into my garage.
http://www.amazon.com/dp/B00OZY2Y4C/?tag=skimlinks_replacement-20
 
Last edited by a moderator:
Hello Lads, last night I was gearing up to run my glycol system for the first time. As some know I have not used the jacket on my system yet. Last night, I removed the tri-clamp and the hose barb that I had on the jacket exit. For some reason, I stuck my finger inside and I felt what I thought was a weld all the way around. I got a light and could see that it was black flux or whatever the stuff is called. It formed a bead all the way around. There was just a small spot where water could actually pass. I took photos and sent them to Nathan at about 1:30 am ET. This morning at 9:30 am ET (6:30 in Vancouver), I received a call from Nathan. He was a little surprised that I had not used it to it's full extent after 4 months. But I wanted to get it bought before a price increase went into effect. He suggested that I connect it to my faucet and let water fill it from the top (exit) port. I did that for about 5 minutes. I placed a mesh bag over the end of the exit hose to catch anything that came out. Then I switched the hoses to the normal way. I even turned it up eventually to full force without any pressure regulator with zero damage (but still pay attention to your water pressure!). More of the black stuff broke free after about 15-minutes but there was obviously at least 50% still there. So, I cut a piece of fairly stiff gauge wire and bent the ends into hooks. I was able to get most of the stuff clear. BTW, Nathan told me he would replace it if I could not clear the port. Even with mine 90% blocked, I was able to run water through it with no damage. But don't restrict the flow! It is not recommended. I don't think this has happened to anyone else, but just for an extra precaution, check your top jacket exit ports. If you see something that concerns you, document it and contact Nathan. Just as he always has, he contacted me in a very reasonable time. As a matter of fact, he called me again at 11:25am ET to make sure I had his phone number. I'm probably more satisfied with my purchase now.

I am glad you learned from my experience and took the necessary pre-cautions. I hope others read this and do the same.

As for Nathan saying this: "BTW, Nathan told me he would replace it if I could not clear the port", I would say this wins the award for the most empty promise on the planet. He excels at talking the talk, but the walking the walk escapes him entirely.
 
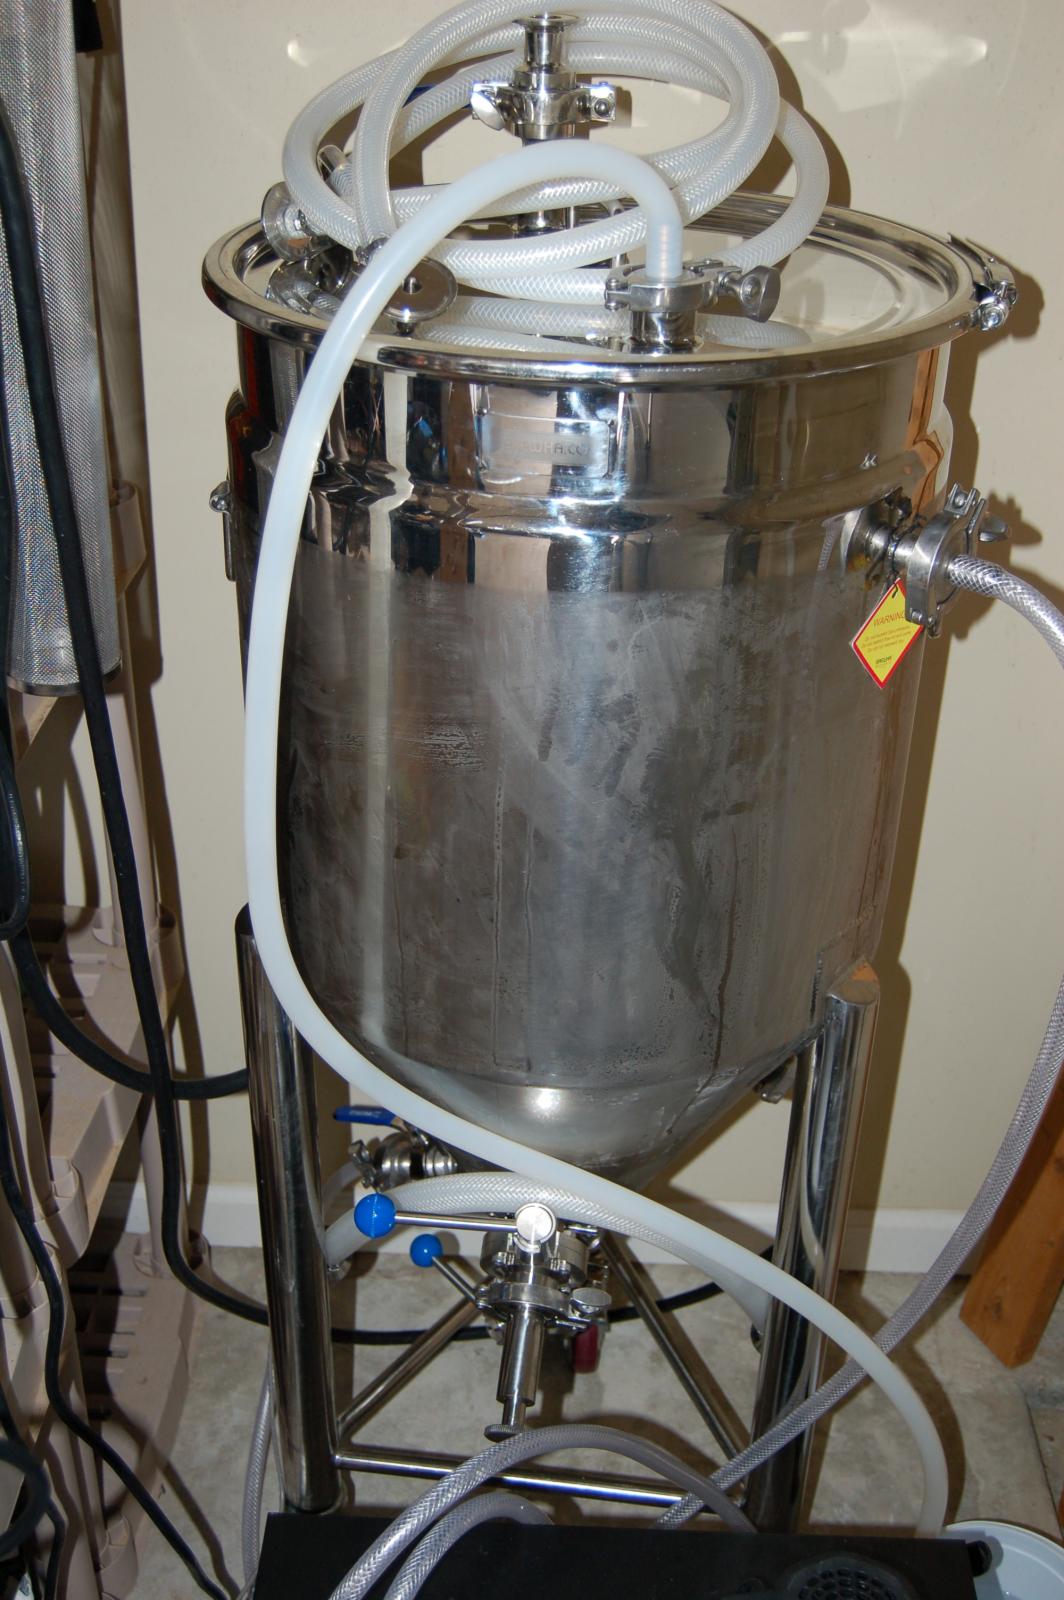
Hello Everyone, I thought I'd post a photo of my BIAC with the glycol chiller running. I brewed this batch on Saturday and it is still bubbling just a little five days later. The BIAC maintains the temperature very well and the glycol is not needed as often as I thought. I chilled it as far as I could with city water and I did not use the pressure regulator I bought. I'm not using it for the glycol either. Right now, I just have the Ranco turning the glycol chiller on when needed. Next time, I will use a T fitting and the electric valve that came with the BIAC. The chiller will just run all the time and the valve will divert it to the jacket when needed.

I will be crashing this down to the 30s soon. Do any of you with glycol chillers have any advice?

In this photo, you can see some condensation but so far, I have not had any puddling on the floor of my garage. I know that as summer progresses and it gets humid, I'll have some on the floor. I may buy the neoprene jacket if I don't come up with my own way to control condensation.

I am really like this!

DSC_0357.jpg
 
Just finished up brewing with the new 316SS butterfly valves from Glacier on the dump port and racking port. Brewed "Hop Fu" with about 13oz of hops before the boil and forgot to put whirfloc in. Unfortunately I still managed to plug the dump valve up and even with jamming a knife and keg dip tube cleaner through the bottom of the valve I still couldn't get it to unplug. Im in the middle of changing my CO2 setup around so I wasn't able to hit it with CO2 to try and release it, so now its fermenting away with all those hops and crud still sitting at the bottom. Hoping the strong amount of hops in it doesn't screw up any of the flavor while sitting in it all through fermentation. I may try to hit it with CO2 in a few days when I get my gas post fitting in. And otherwise extremely frustrating end to a pretty good brew day...was hoping these valves would eliminate this issue.
 
Just finished up brewing with the new 316SS butterfly valves from Glacier on the dump port and racking port. Brewed "Hop Fu" with about 13oz of hops before the boil and forgot to put whirfloc in. Unfortunately I still managed to plug the dump valve up and even with jamming a knife and keg dip tube cleaner through the bottom of the valve I still couldn't get it to unplug. Im in the middle of changing my CO2 setup around so I wasn't able to hit it with CO2 to try and release it, so now its fermenting away with all those hops and crud still sitting at the bottom. Hoping the strong amount of hops in it doesn't screw up any of the flavor while sitting in it all through fermentation. I may try to hit it with CO2 in a few days when I get my gas post fitting in. And otherwise extremely frustrating end to a pretty good brew day...was hoping these valves would eliminate this issue.

Sorry to hear it. Regarding the beer though, I wouldn't worry about fermenting with the hop and break debris in the fermentor. I speak from personal experience. :)
 
Sorry to hear it. Regarding the beer though, I wouldn't worry about fermenting with the hop and break debris in the fermentor. I speak from personal experience. :)

LOL, I hope you are right. I brewed an IPA last Saturday. I used the hop basket, so I should not have as much debris in my cone. But I'm sure there is some there and I did not dump any of it even after I let it settle for about 45min after the boil. I think I'll dump some of it today and start my secondary.

I always seem to do something dumb when I brew and last week was no different. I was finished with my mash and was about to roll the unit over to the electric winch. I had the "brilliant" idea to remove the temp probe just to get rid of some wires/cables when I was rolling it over. Being the genius I am, I unscrewed the tri-clamp and pulled out the probe. There is nothing like a blast of 150 sugar water on your leg. The only way to fix this was hold my hand over that hole and quickly get the fitting reattached. That will NEVER happen to me again.

I wouldn't worry about the trub. This podcast discusses split batches, half with trub and half without, and it basically came back that it didn't make a difference.

http://traffic.libsyn.com/basicbrewing/bbr02-23-12trubres.mp3
 
I guess I was mostly worried about the effects of such a heavily hopped beer creating some off-flavors while sitting on the hops all through fermentation.
 
I had the "brilliant" idea .....Being the genius I am, I unscrewed the tri-clamp and pulled out the probe. There is nothing like a blast of 150 sugar water on your leg. The only way to fix this was hold my hand over that hole and quickly get the fitting reattached. That will NEVER happen to me again.


Wow, that's funny. I wouldn't worry over kettle trub and hops. I have been fermenting in my kettle for a couple years.
 
In leiu of the Neoprene jacket not being available until late summer I'm going to attempt to (crudely) make my own from a sheet of neoprene and some plastic zippers. I'll post up when it's complete. I also plan to get some pipe insulation for all of the silicon hoses reciruclating the water. Hopefully with this I'll be able to cold crash down to 35* without much of an issue and less condensation to deal with.
 
In order to lift my colander from the medium BIAC, I decided to install a hoist to aid in that effort. Looking at just a pure vertical lift seemed like it would create the additional headache of getting the colander to the sink to drain completely. I decided to install a small trolley so I would have both X and Y axes capable of travel. I purchased the $99 Harbor Freight electric hoist with remote control and capable of handling 400 lbs. then purchased roller track and roller track cars from Master-Carr. The HF hoist came with U brackets for mounting to a pipe or bar. I just drilled a hole in each to accept the threaded bolts of the track rollers. Total cost was about $230 for everything. Installing the track this weekend.

 
JB, very nice. Using the track will make life even easier! I have that same hoist, but mine is not mounted to a track. I've been lowering the MT into a tote to drain and then I tilt/dump the grain into a contractor garbage bag. I have to seal the bags very tightly or by trash pickup day, the smell is pretty bad. The one thing I have been envious of for years is a large sink in my garage.
 
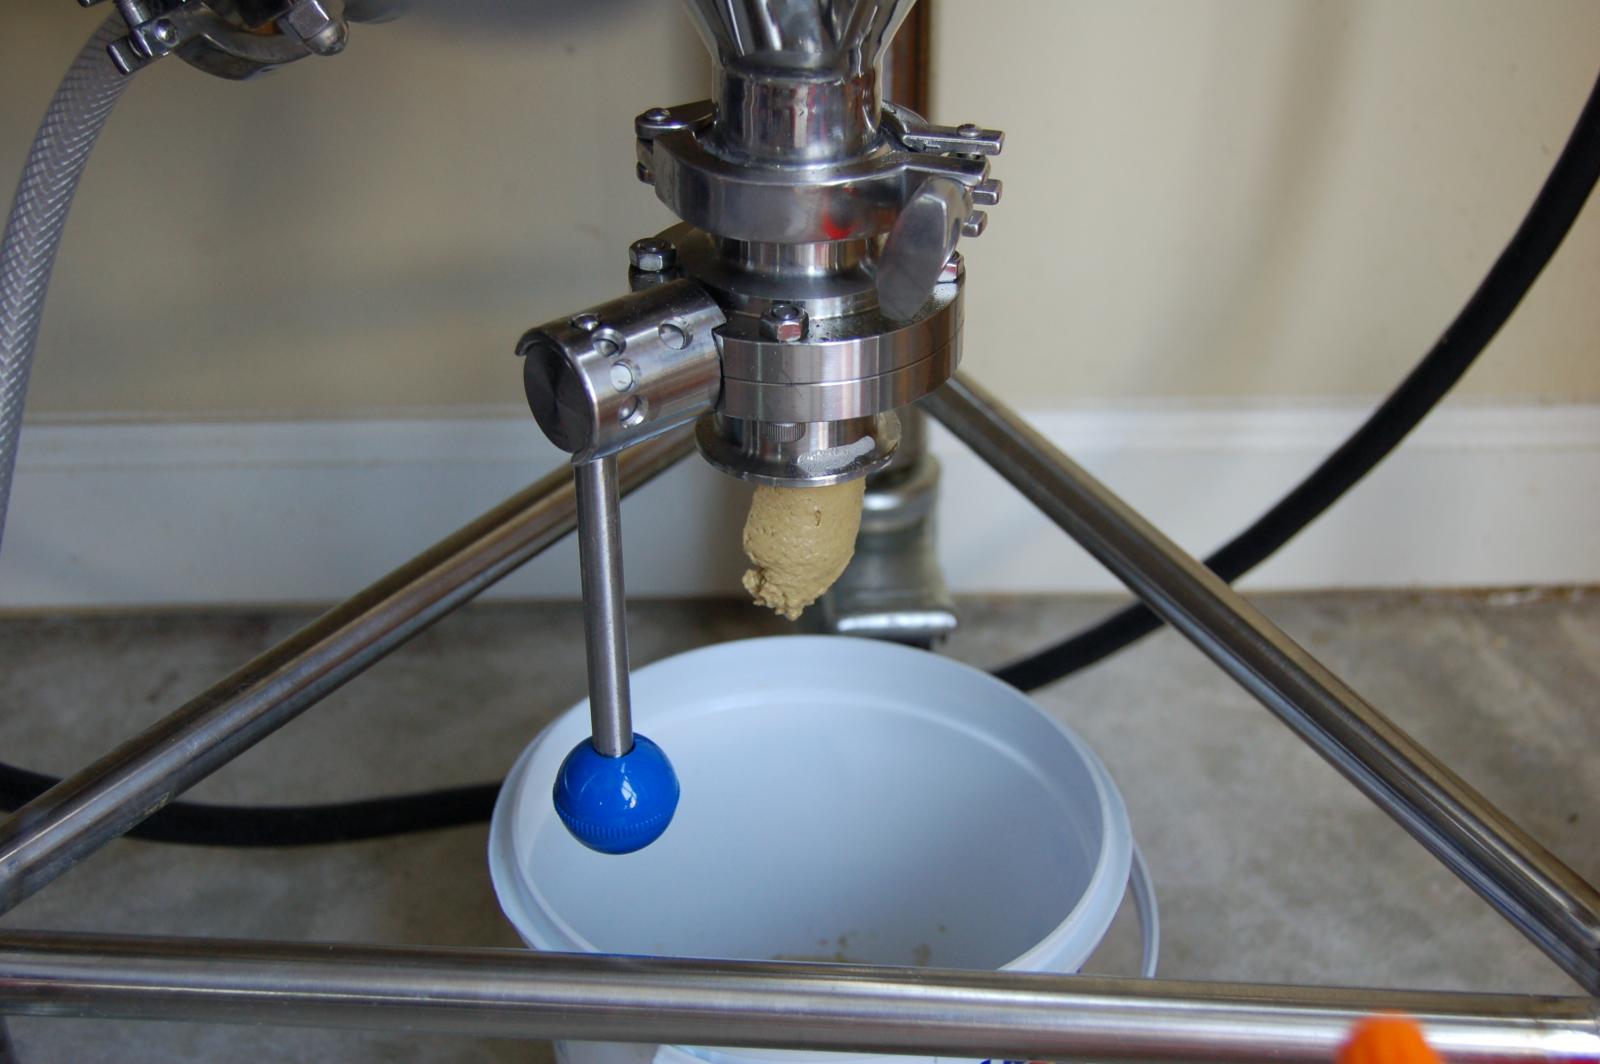
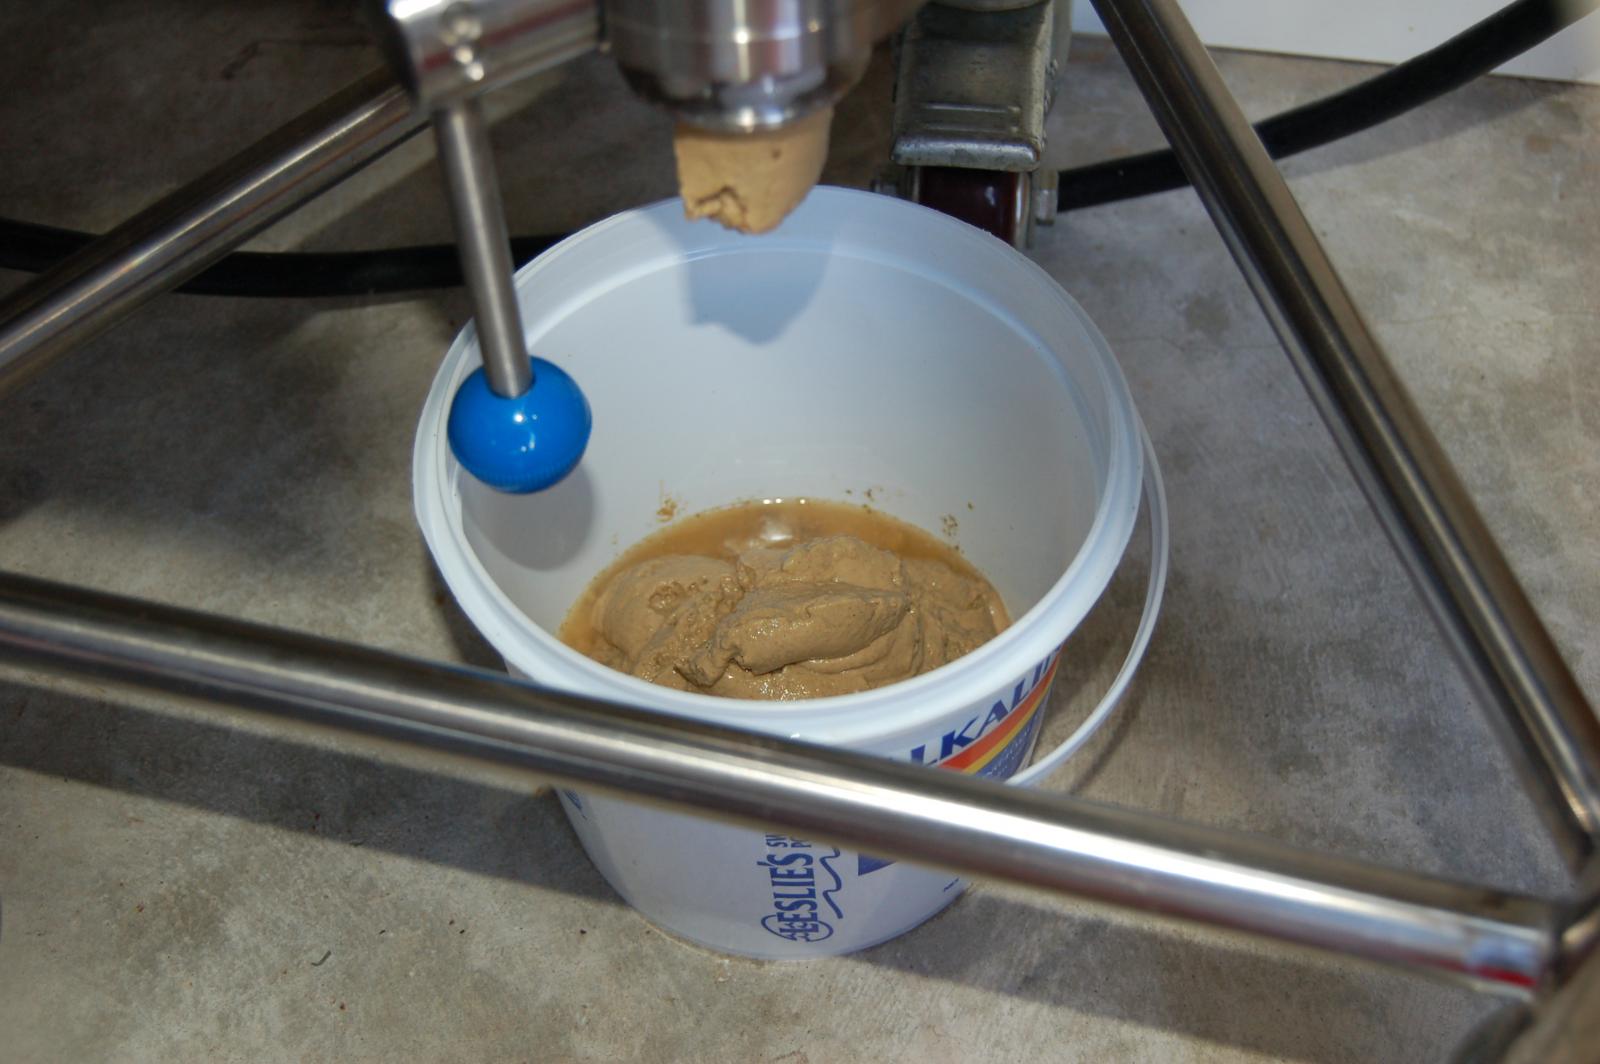
This afternoon after work, I drained off some trub and took a gravity sample. It took about 15 min for the trub to all fall out of the valve. I honestly don't know how you would drain through a ball valve. The main thing you have to do after it all "falls" out, is to get the valve clean. There will be some trub stuck after you close it. I used a paper towel and then gave it a good spray with Starsan. I used two packages of dry yeast so it got a good dose of yeast.

I hope this beer is not "crappy" if you get my drift.

DSC_0360.jpg


DSC_0362.jpg
 
Wel, I am at the HBC in Sad Diego and Nathan is here, so I will be ordering the medium with one tweak, I am going to go with the Brew Boss DIY controller instead of the normal power box. The Brew Boss will automate the tempature contol process, and since they are here at the convention to I can make sure I cover compatibility issues with plug types, ecetera.
 
Congratulations. It is really amazing how many options we have for brewing equipment now. I started this hobby back in the mid 1990s and you could not even find a decent 10gal pot. Corny kegs were a lot more plentiful back then but now, you can buy a brand new one for $79 when they are on sale. Automation was definitely not available unless you were some kind of mad scientist with mad diy skills. I stopped brewing for a few years and in 2009 when I started back there were a lot more options and now there are automated table top machines that do everything.

That Brew-Boss controller will really look cool with the BIAC. Other than a glycol chiller that is the only other way you can add additional bling to this thing. Please post photos when you get it all set up. I am still happy with my standard Brewha controls, but I may have done the same as you if I had really thought about that option. Also, their Infusion filters look a lot like my old hop filter... only larger diameter. I'm now wondering if one would fit inside my mash colander (I could just use a large mesh bag too). During my recent brew, I had a lot of grain stuck in the holes and it took a long time to drain.

My BIAC is in my garage connected to the glycol at 40F making a nice little condensation puddle on the floor and I"m still not using a pressure regulator :)
 
Back
Top