10 gallon aluminum kettle from ebay

Homebrew Talk - Beer, Wine, Mead, & Cider Brewing Discussion Forum

Help Support Homebrew Talk - Beer, Wine, Mead, & Cider Brewing Discussion Forum:

This site may earn a commission from merchant affiliate links, including eBay, Amazon, and others.

mattyb85

Well-Known Member
Joined
Jan 9, 2012
Messages
252
Reaction score
4
Location
Wakefield
Does anyone have any experience with this product?

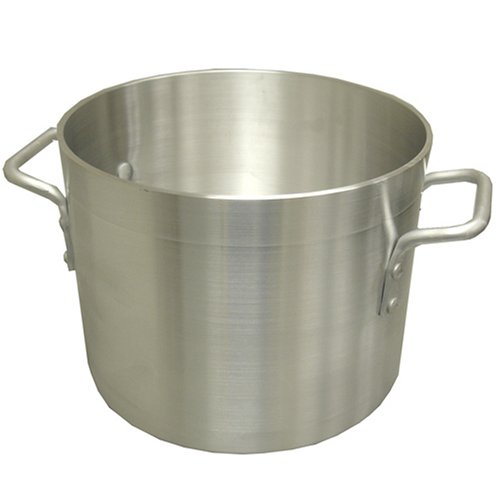
10 Gallon Hot Liquor Tank Mash Tun Brew Kettle New

http://bit.ly/LSj10N

It seems like a decent pot. I'm going to start all grain brewing and currently I only have 5 gallon aluminum pots. I eventually will save up for a 20 gallon blichmann but this seems like it will be a good option until that happens.

Any opinions will be greatly appreciated!
 
Personally I think that kettle is cheap. The thermometer and valve are cheap. You could get that same kettle (40qt Al Kettle) for around $60. A cheap step drill bit ($15) would eat through Al no problem and then install some quality weldless fittings and you'll have a better kettle for cheaper.
 
I know the make weld-less valve options as you noted and also weld-less thermometer fittings too. Do they make weld-less sight glass options?
 
So I went with that pot from amazon and it's a solid pot! It's almost 1/4" thick and put together nicely. Can't wait to cut some holes in it and turn it into a brew kettle!
 
Building Tuns and Kettles is 1/2 the fun. Once you start doing your own kettles you will be amazed at what you can do. It's just really a matter of what you want and then making it happen. Sight glasses, temp wells, dip tubes, fill and drain ports chiller installs and more are all pretty easy to do and the utility of your equipment just gets better and better. Hope this helps get ya going again.
Wheelchair Bob
 
Just a note about something I found when I used a similar pot. The thickness claimed was around the top. You can see a step a couple inches down the side. Below that the wall is much thinner, as is the base. The pot never gave me any problems and worked great. It's just that I was surprised to find the discrepancy.

The average consumer who doesn't drill holes in their cookware would never know. :cross:

4137YLp%2B0xL.jpg
 
Just a note about something I found when I used a similar pot. The thickness claimed was around the top. You can see a step a couple inches down the side. Below that the wall is much thinner, as is the base. The pot never gave me any problems and worked great. It's just that I was surprised to find the discrepancy.

The average consumer who doesn't drill holes in their cookware would never know. :cross:

Found this out as well when we welded on them

Yeah I've got my sight glass, thermometer & weld less bulkhead with dip tube waiting at home for me to cut the holes and install which I might have to do tonight! I even bought greenlee chassis punch kits to make sure all the holes are clean and neat!

http://www.amazon.com/gp/product/B002NQWZWU/?tag=skimlinks_replacement-20

A cheap step drill would have worked fine on Al (for others that may view this thread in the future) but the knockout punch will make some really pretty holes! :rockin:
 
Last edited by a moderator:
Just a note about something I found when I used a similar pot. The thickness claimed was around the top. You can see a step a couple inches down the side. Below that the wall is much thinner, as is the base.

I have one of these and have used it for a couple years - originally as a boil kettle and now as my HLT. "Much thinner" would be an exaggeration. It's a great pot - much thicker than most budget aluminum pot out there.

I've got mine all outfitted with Bobby M gear - sight glass, thermometer, ball valve. A step bit goes through the aluminum like a hot knife through butter, so it's easy to add on components.
 
Just finished putting it together!!! The chassis punch worked even better than I imagined!!!

Starter hole drilled

image-4255177320.jpg


Chassis punch attached

image-4139735487.jpg


image-3983913031.jpg

Thank you to whoever invented adjustable wrenches!

image-517431673.jpg


Look how clean that is!

image-281651217.jpg


Ball Valve & thermometer attached

image-3850743901.jpg


Dip tube installed

image-2066372054.jpg


Sight glass attached

image-3048287596.jpg
 
How much did this whole project cost? Kettle + all the hardware (thermometer, sight gauge, valve, punch, etc.)
 
Thanks! Very nice project.

$171 total for the brewing stuff seems like a pretty good deal. Those punches are expensive though - if I do this I might have to try to borrow those from somewhere or use step drill bits.
 
Thanks! Very nice project.

$171 total for the brewing stuff seems like a pretty good deal. Those punches are expensive though - if I do this I might have to try to borrow those from somewhere or use step drill bits.

If you use aluminum a knockout punch is over kill. A cheap step drill will cut through it like a hot knife through butter.
 
SpikeBrewing said:
If you use aluminum a knockout punch is over kill. A cheap step drill will cut through it like a hot knife through butter.

I agree however I plan on buying blichmann pots down the road and converting them to an electric setup so these will get future use. That was my justification in spending $90 on the two punches
 
Back
Top