conpewter
Well-Known Member
I tried to solder copper to stainless before and was not able to do so. I need to get the proper flux it looks like, thanks for the info!

Jeffmeh,
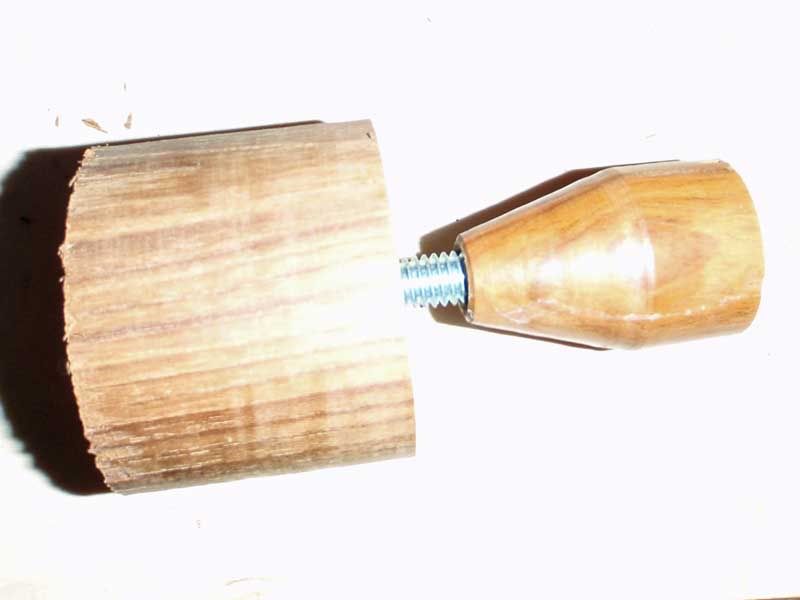
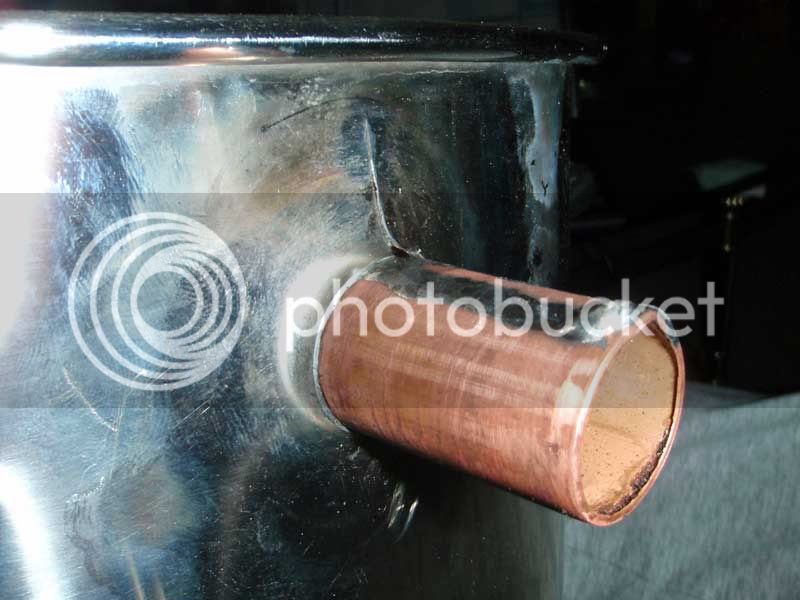
I am building an electric element heated HLT out of a keg. I have soldered a blocky brass 1/2" NPT elbow directly over a hole in the keg bottom. I plan to run a piece of soft copper water pipe to the keg rim and out a hole in the rim to a valve. The rim will support the pipe and prevent it from being torqued about when opening and closing the valve. I'll post a pic tomorrow of my progress so far, when I get my lazy butt out to the barn with a camera and take some pictures.
Are you planning a gas fired keggle or electric? The heat of the flame on the solder joint might be an issue if it's exposed and boils the wort or water out of the fittings and then overheats them.
")
Thanks for the suggestion. I am planning to go with electric, and want to be able to fully drain to accomplish clean-in-place. I could probably do something similar to what you described, and perhaps attach the horizontal copper pipe to the stand to take the force of opening and closing the valve.
This is all in concept phase at this point, so mistakes now are pretty cheap.


Why not flip the keg over and cut a large hole in the bottom to make the keggle opening and use the kegs "original" opening as your central drain. It fits a 2" tri-clover sanitary fitting. I am currently doing this to my MT and HLT.


Why not flip the keg over and cut a large hole in the bottom to make the keggle opening and use the kegs "original" opening as your central drain. It fits a 2" tri-clover sanitary fitting. I am currently doing this to my MT and HLT.


Hey guys,
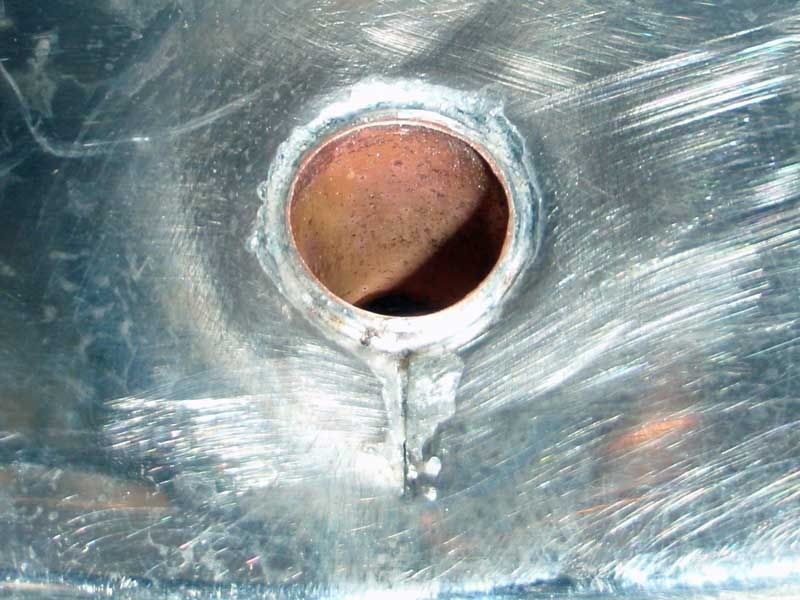
I just tried brazing SS for the first time. Like many of you I'm pretty anal about what touches my wort so I researched Brewmoor's suggestion of Saft-Silv 56% silver solder. This stuff is NSF meaning it is safe to use on food product and it works great. I used a plain Bernzomatic torch with MAPP gas (yellow tank). One thing that I found is that you can't heat your parts up too much or the solder will just flow everywhere, and you wont get a good seal, especially if you have a larger gap on your kettle, like I did. You have to balance between the melting point and the "freezing" point of the solder so you can move the solder around to fill the gaps correctly. Also, making sure your surfaces are shiny clean before applying your flux onto the surface (I used Harris Stay-Silv White Brazing Flux ($6). Please be aware, I worked outside with fan blowing the toxic fumes away from me. Here is all the stuff I used to create this joint. Good Luck!!
Not to be a d!c@ or anything but, your using a mix of Propylene and Propane.
I believe the doing away with MAAP, has finally happened. They have wanted to get rid of MAAP gas for a while now.
Edit; When I say mix.........the propane content is only like .5%.
I believe they are still labeling it MAAP. At least the bottles I have say MAAP on the outside. The yellow bottles from Lowes. At least the last ones I bought probably in December of 2009. Is this something new as of recently? Why are they trying to get rid of MAAP? Also is there something wrong with using Propylene and propane? Is there something chemically bad that it should not be used, or are you just pointing it out so he is not mis-labeling what he is using.
You kind of left your statement up in the Air. This is a very helpful thread so we should continue explaining why we do and say the things we do.


![Craft A Brew - Safale S-04 Dry Yeast - Fermentis - English Ale Dry Yeast - For English and American Ales and Hard Apple Ciders - Ingredients for Home Brewing - Beer Making Supplies - [1 Pack]](https://m.media-amazon.com/images/I/41fVGNh6JfL._SL500_.jpg)
