You are using an out of date browser. It may not display this or other websites correctly.
You should upgrade or use an alternative browser.
You should upgrade or use an alternative browser.
Ready or Not E-BIAB Here I Come....
- Thread starter aubiecat
- Start date

Help Support Homebrew Talk:
This site may earn a commission from merchant affiliate
links, including eBay, Amazon, and others.
OP
OP
aubiecat
Well-Known Member
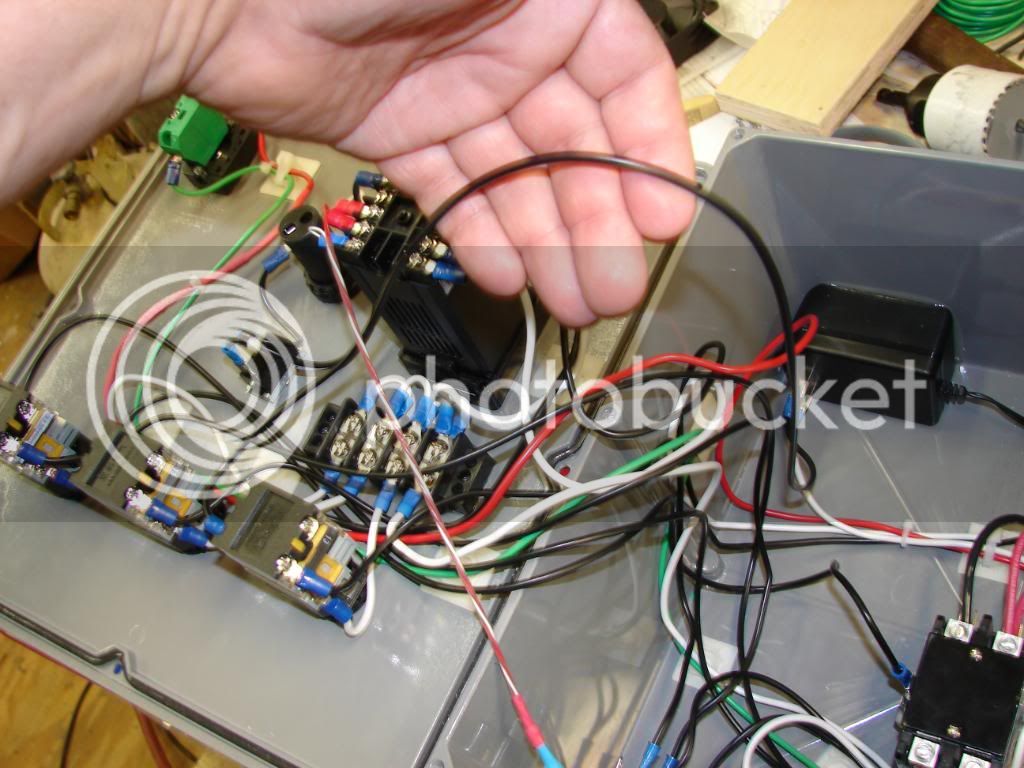
Good shot of the neutral buss being fed from the main buss.
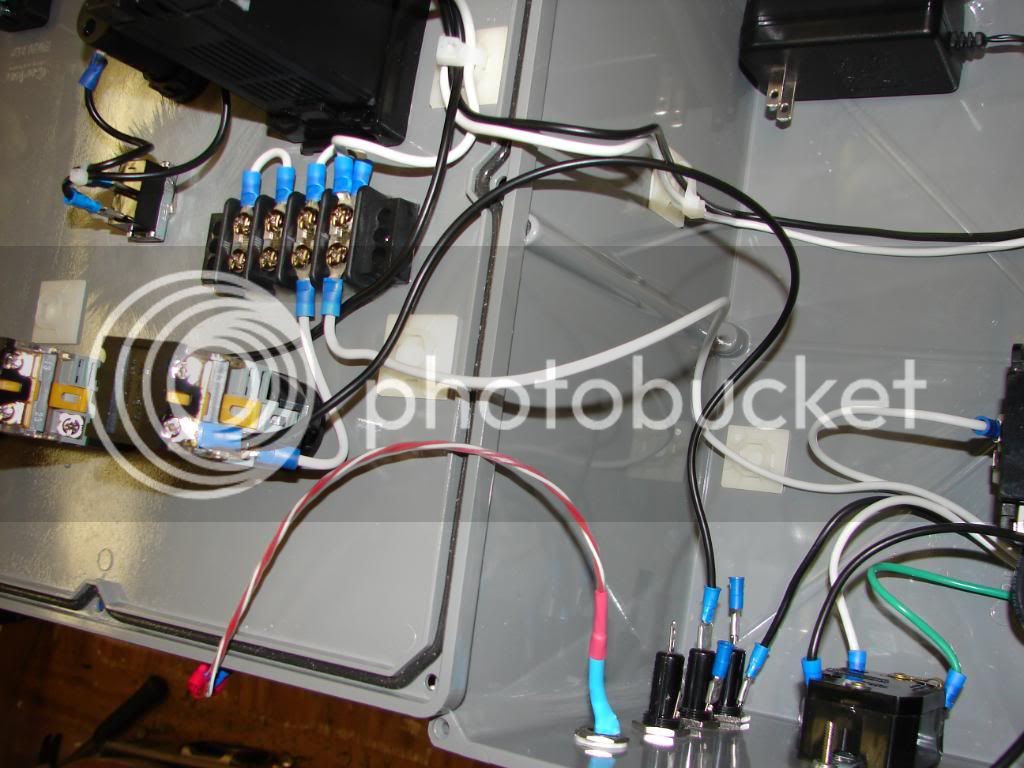
Wiring the SSR signal wires to and from the PID.
PID now connected to SSR, neutral buss and switch.

PID finished wiring.
Wiring the SSR signal wires to and from the PID.
PID now connected to SSR, neutral buss and switch.
PID finished wiring.
OP
OP
aubiecat
Well-Known Member
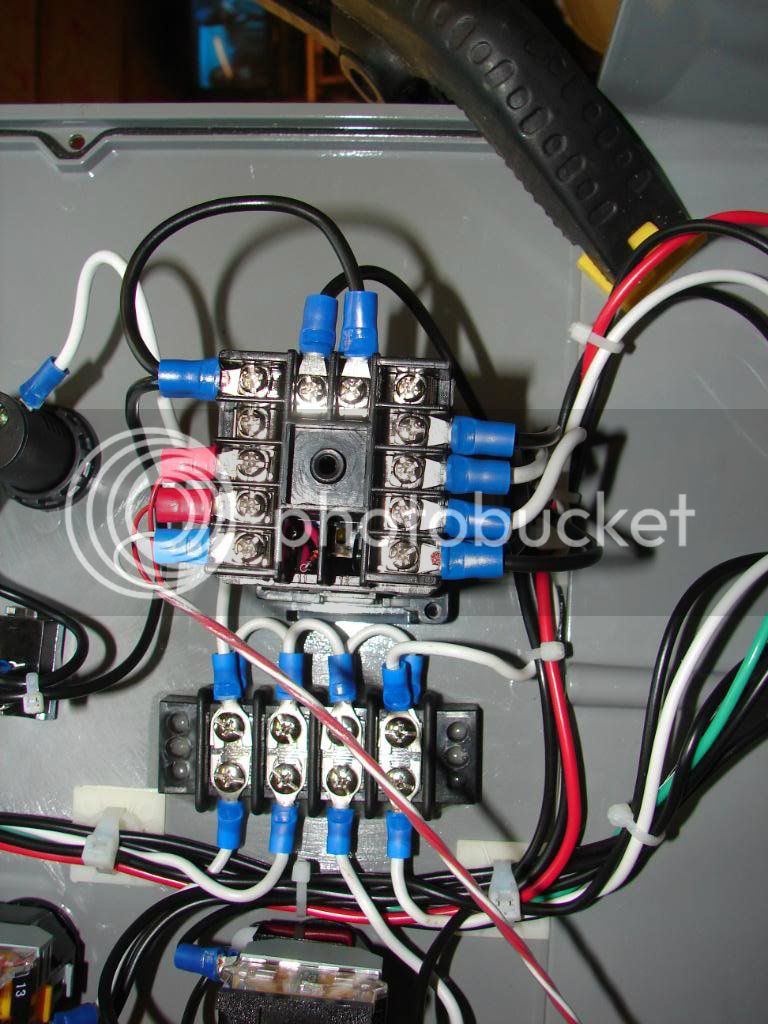
Ready to wire the E-Stop
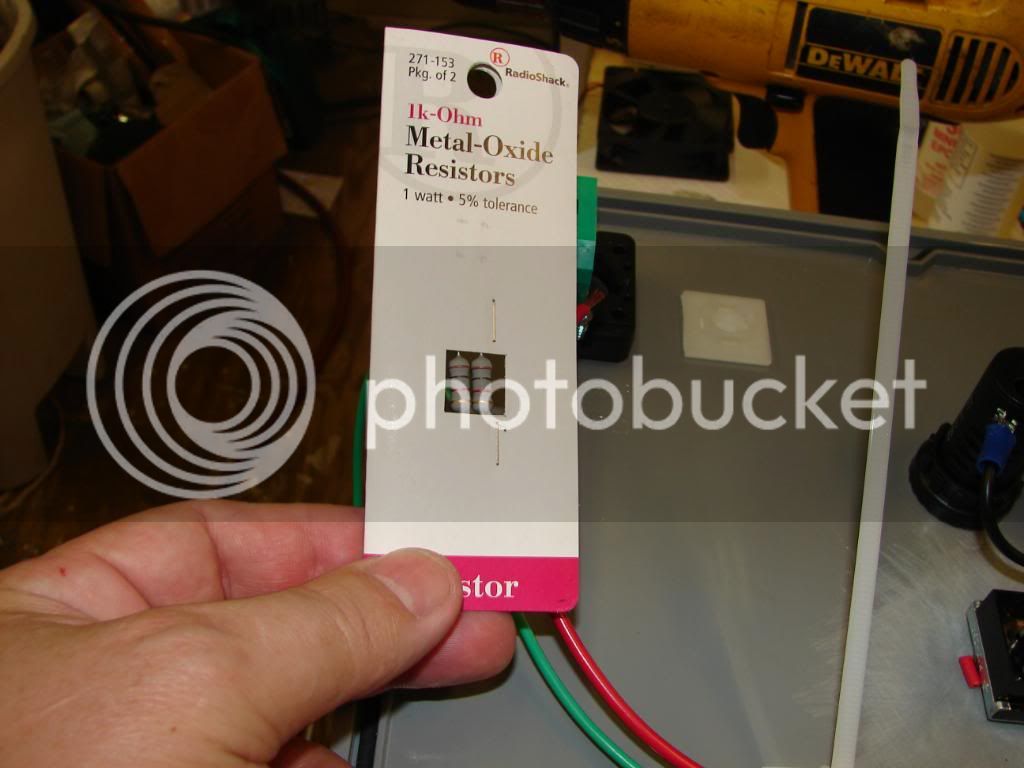
Resistors twisted together.
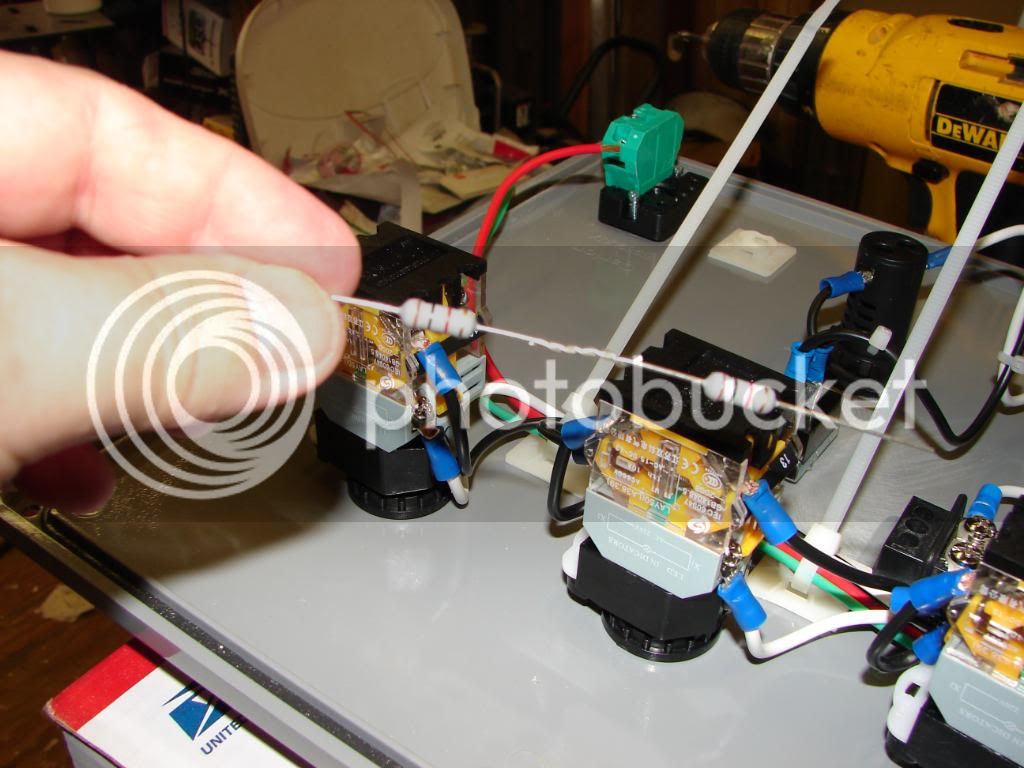
Now Soldered.
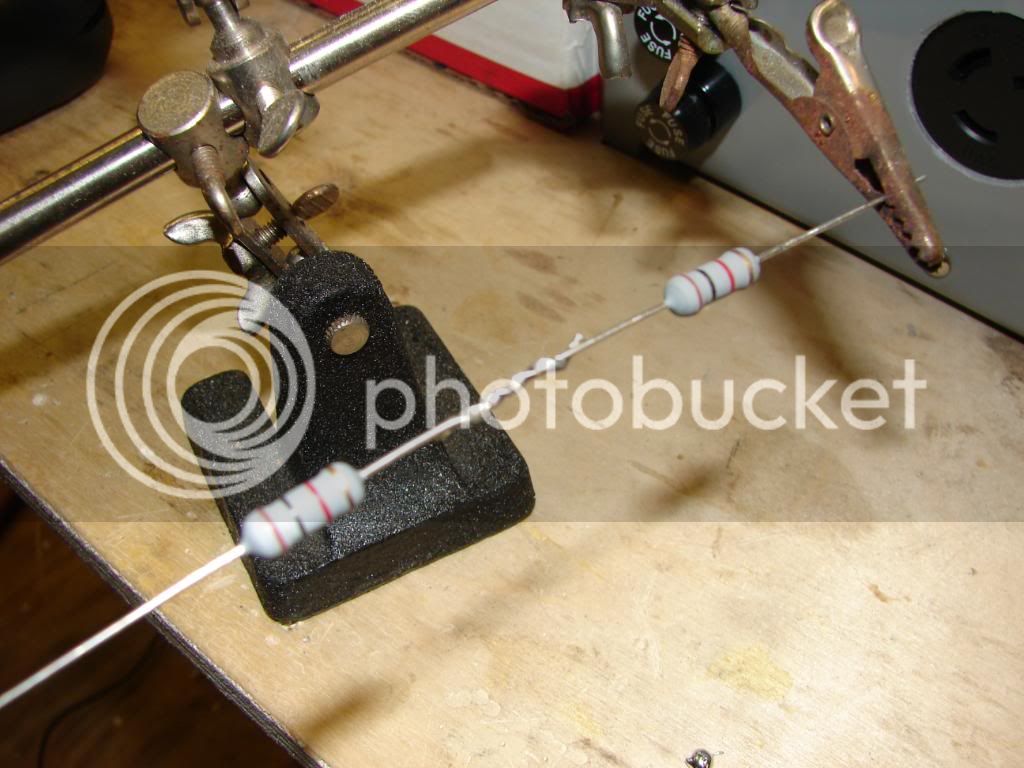
Tinning the end of the wire.
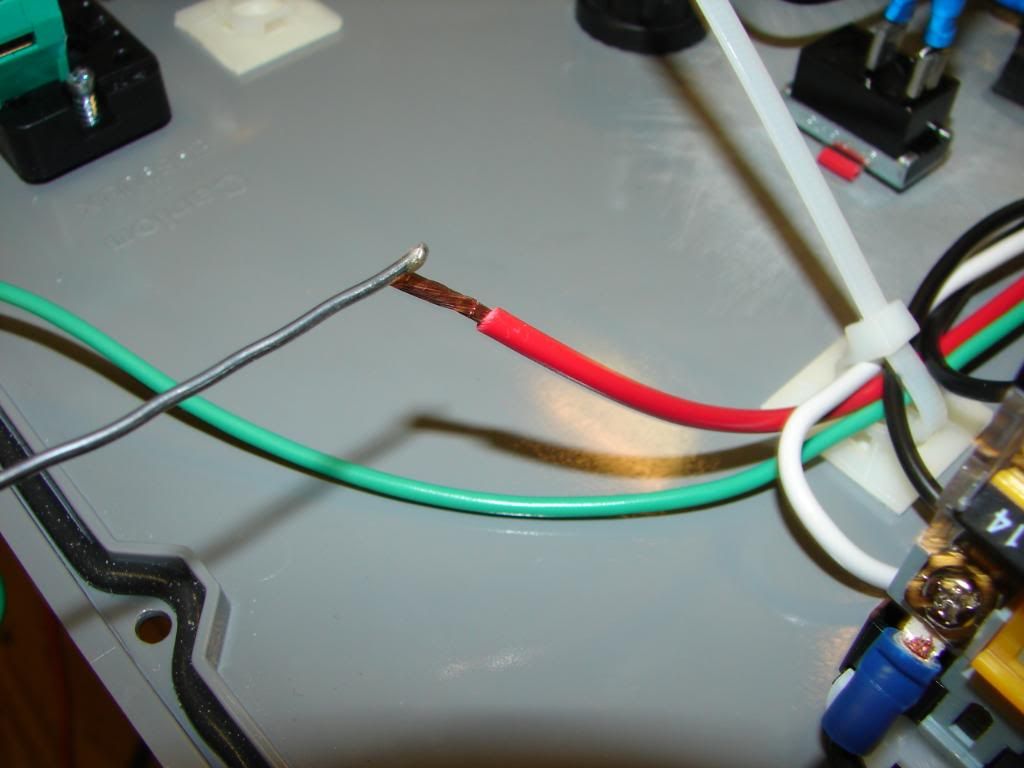
Resistors soldered to the wire.
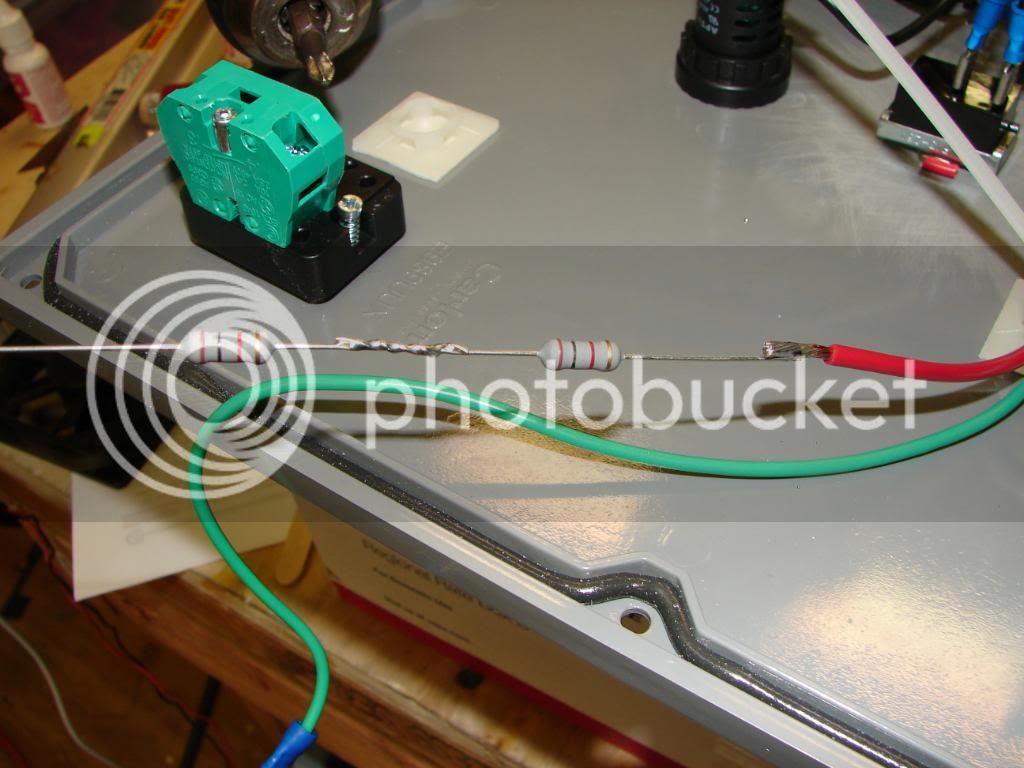
And the other end, you'll notice I slid on and extra long piece of heat shrink tubing.
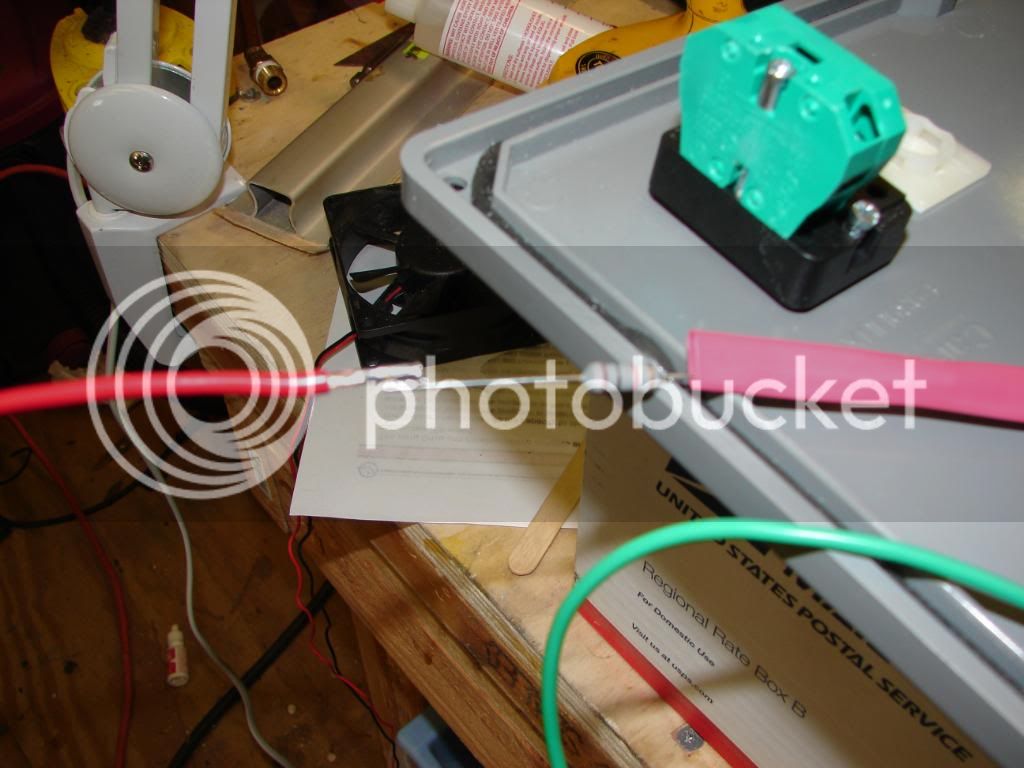
Finished.
Resistors twisted together.
Now Soldered.
Tinning the end of the wire.
Resistors soldered to the wire.
And the other end, you'll notice I slid on and extra long piece of heat shrink tubing.
Finished.
OP
OP
aubiecat
Well-Known Member
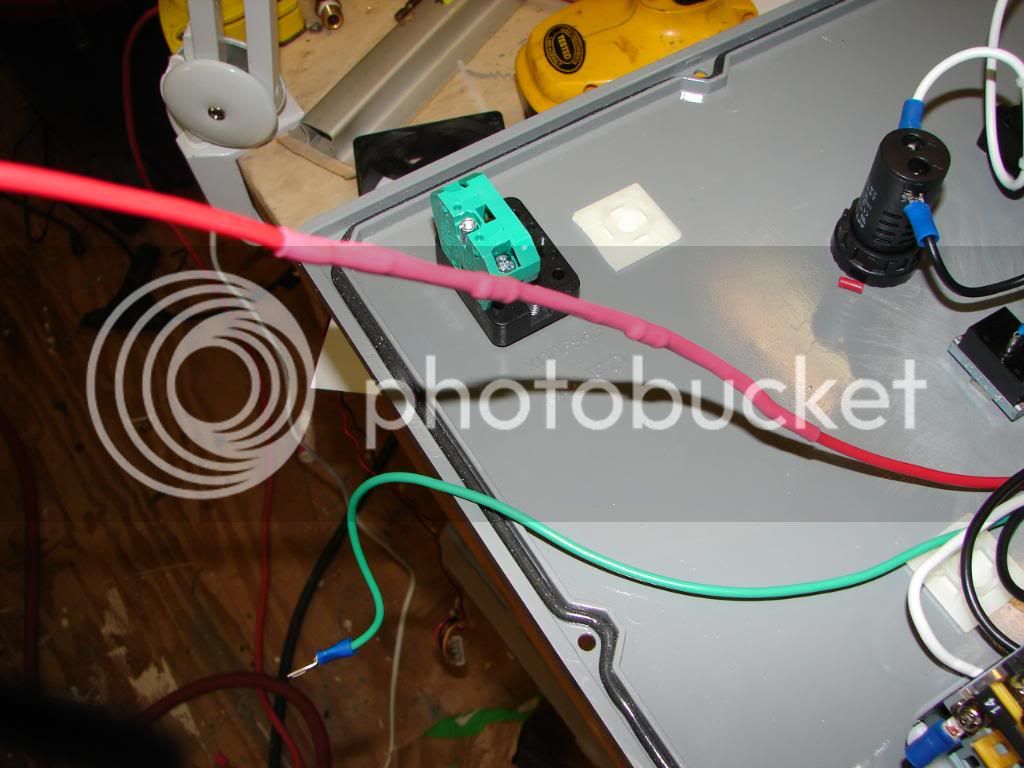
Great thing about these switches is you can pop them off any time if the wiring is getting to tight or crowded.
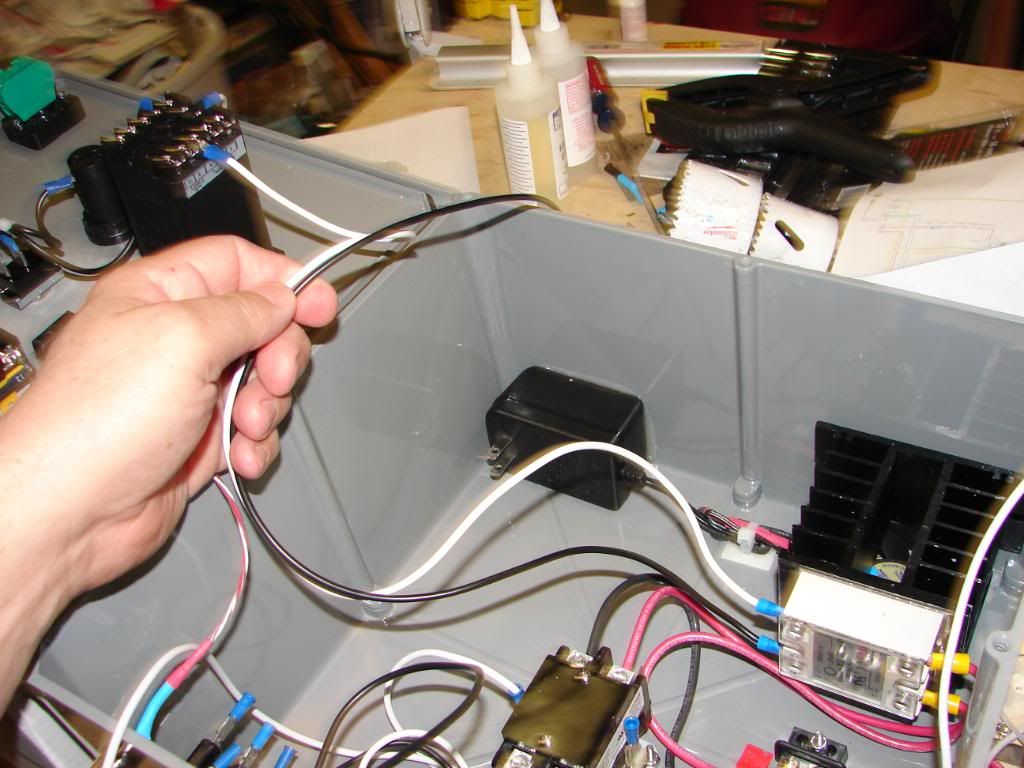
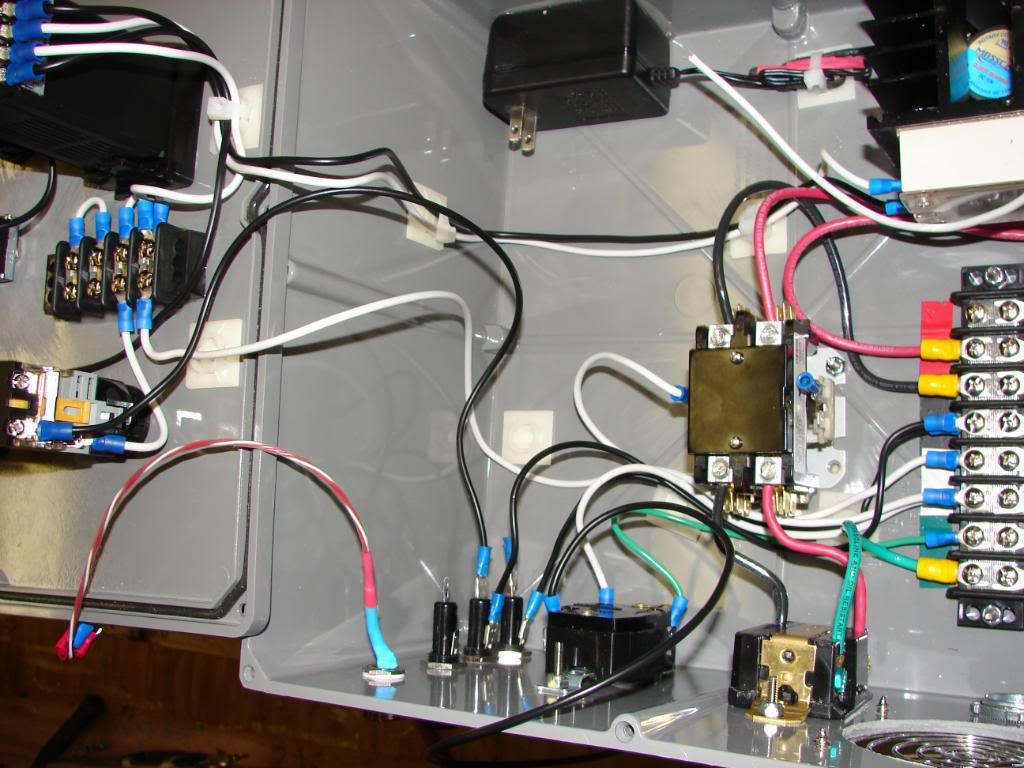
Wire to feed the cooling fan transformer is connected to the PID switch so it will always be on when the PID is on.
Getting hard to tell what is what. Wiring to the pump switch done.
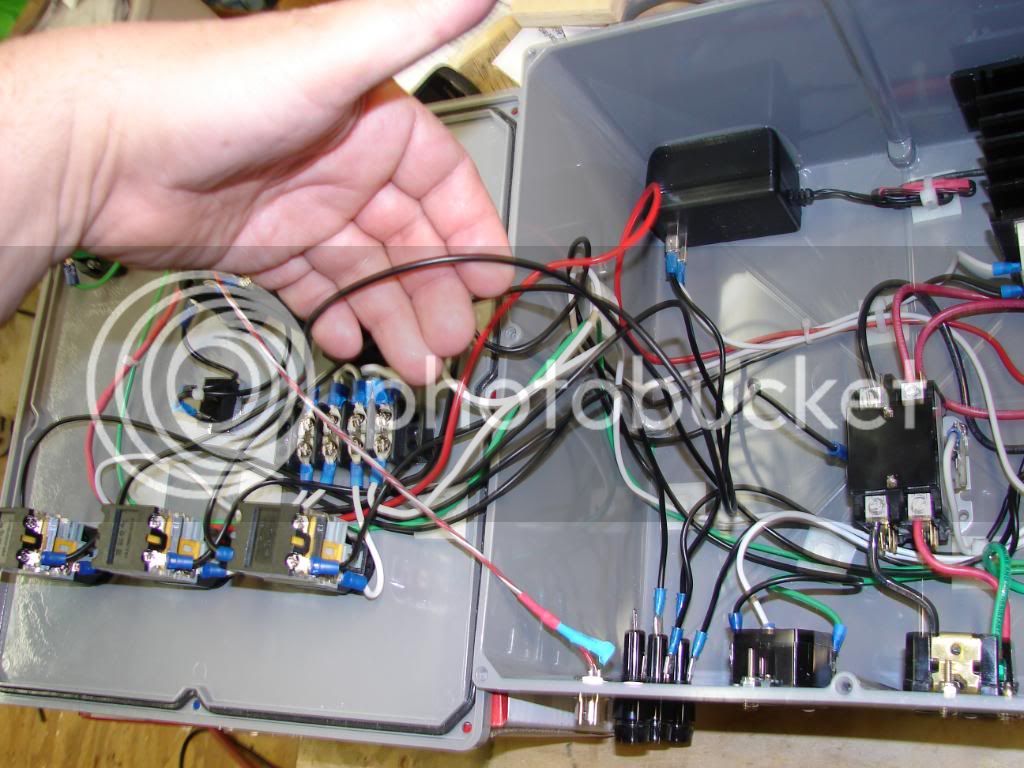
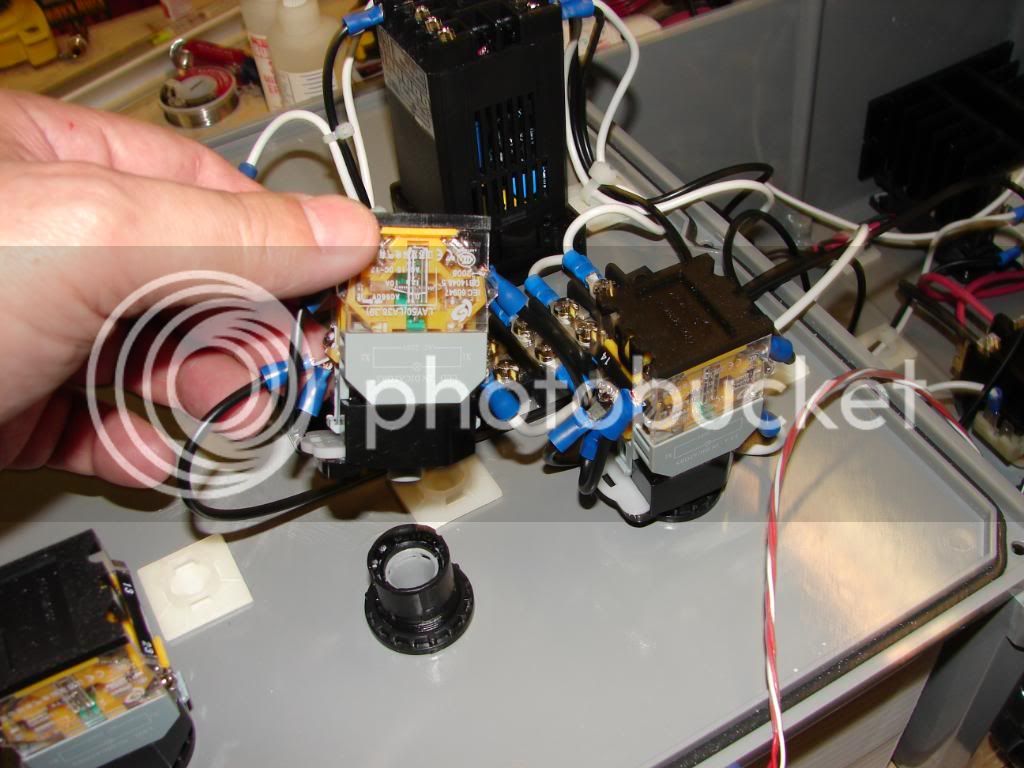
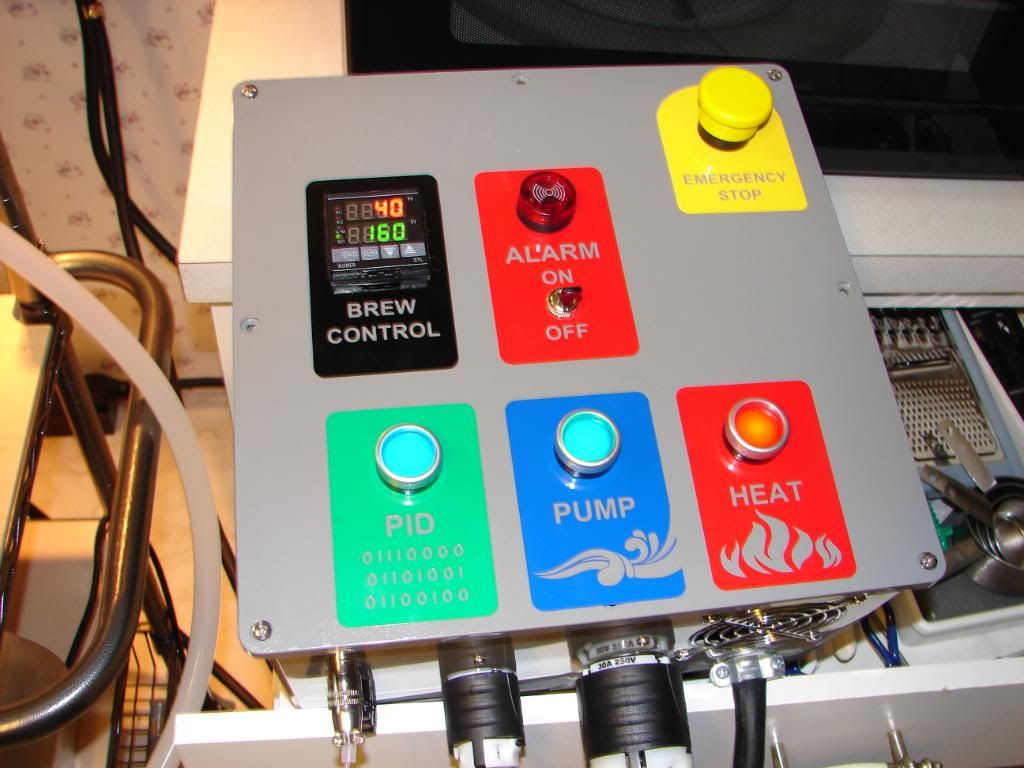
The PID wired up like I want. The alarm has a hot jumper going from #10 to #13. A jumper from #14 to #1 will make sure I can use the one alarm on the high and low perimeters.
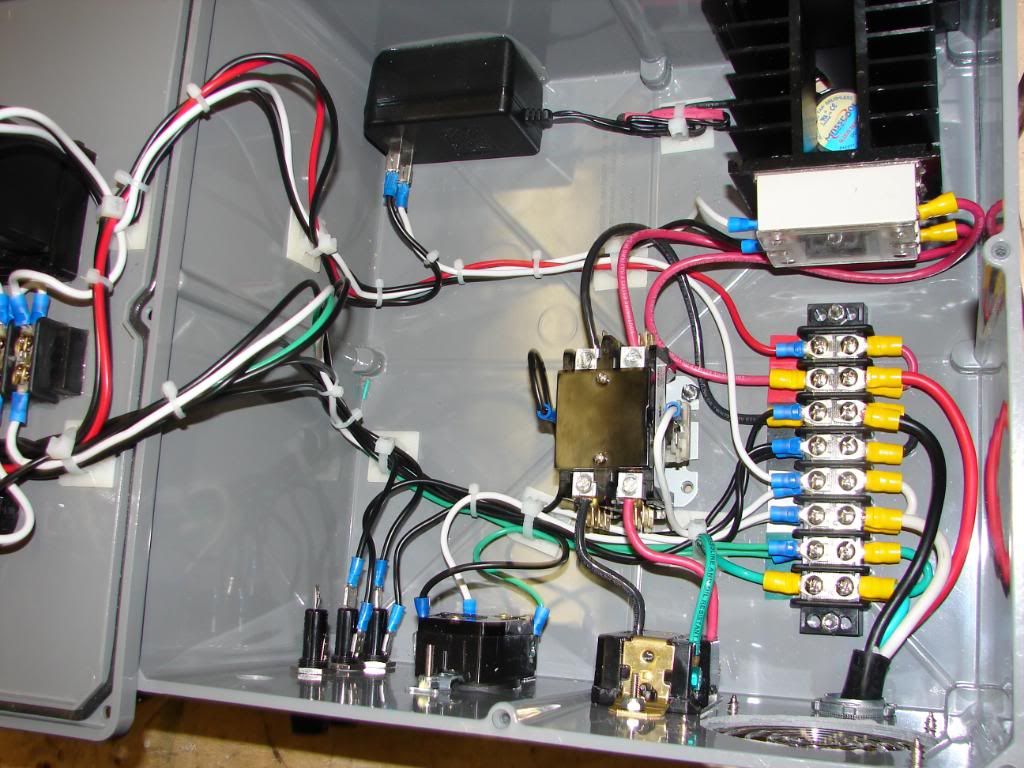
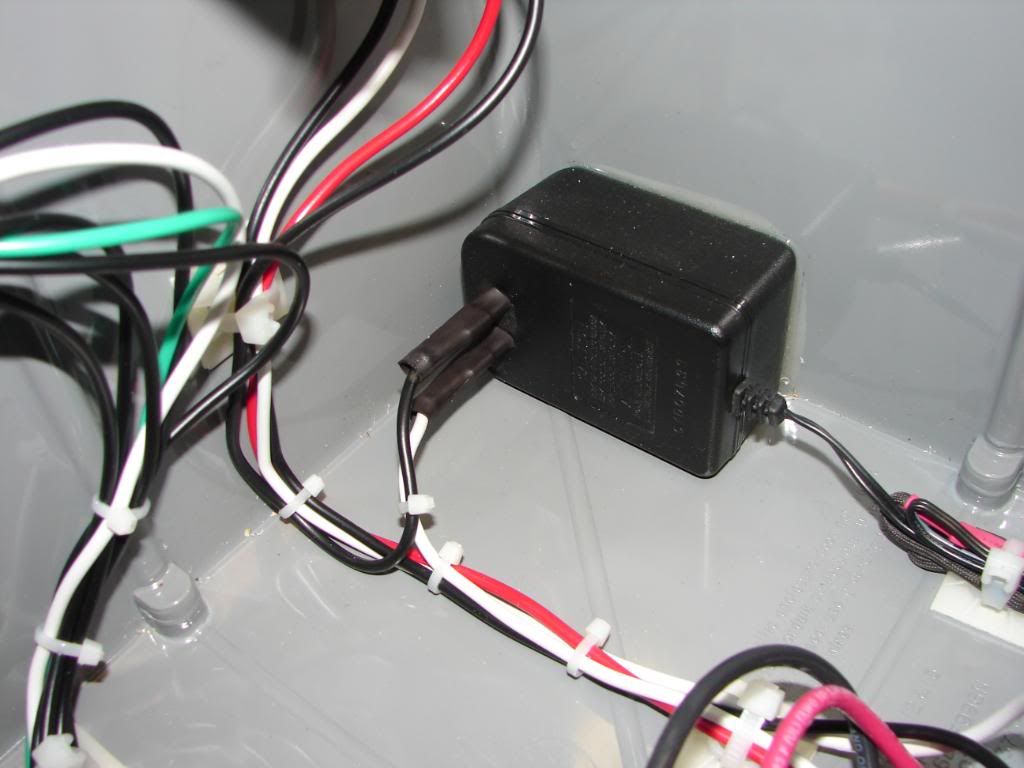
Inside the case done.
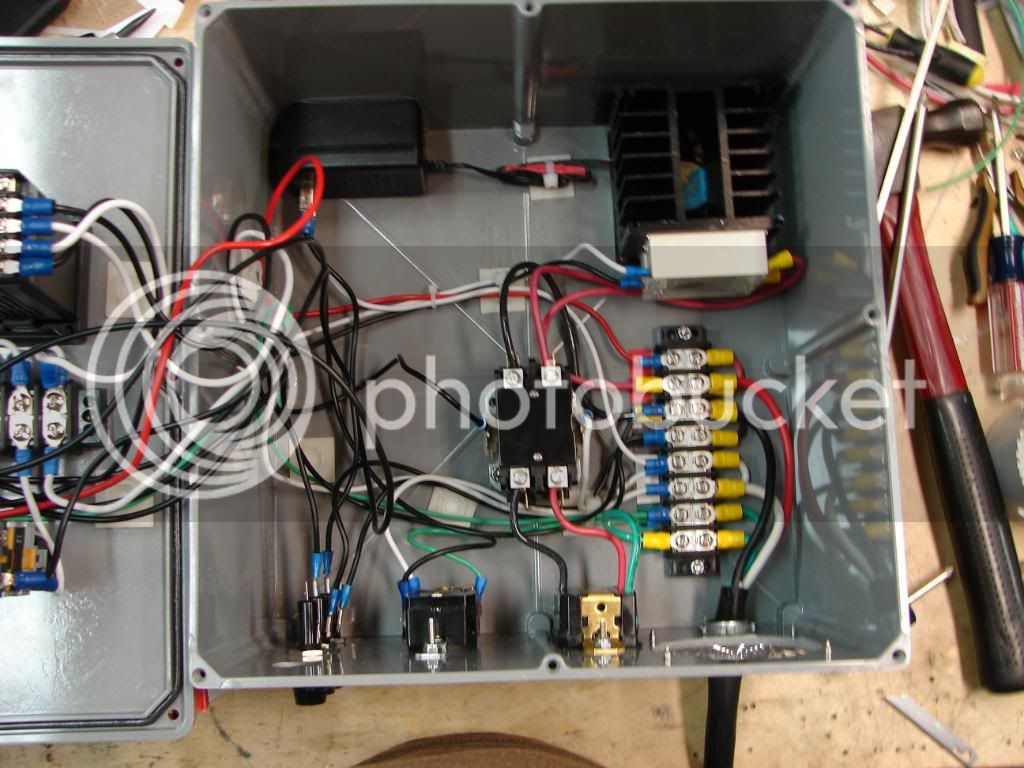
Case cleaned up and zip tied.
Wire to feed the cooling fan transformer is connected to the PID switch so it will always be on when the PID is on.
Getting hard to tell what is what. Wiring to the pump switch done.
The PID wired up like I want. The alarm has a hot jumper going from #10 to #13. A jumper from #14 to #1 will make sure I can use the one alarm on the high and low perimeters.
Inside the case done.
Case cleaned up and zip tied.
OP
OP
aubiecat
Well-Known Member
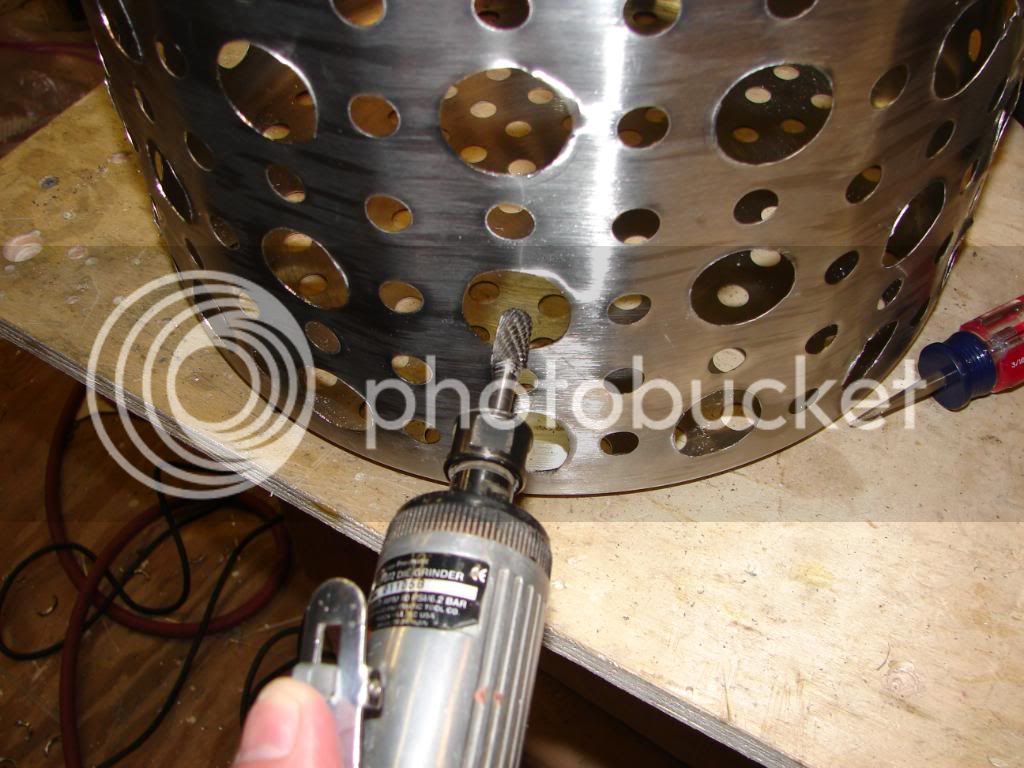
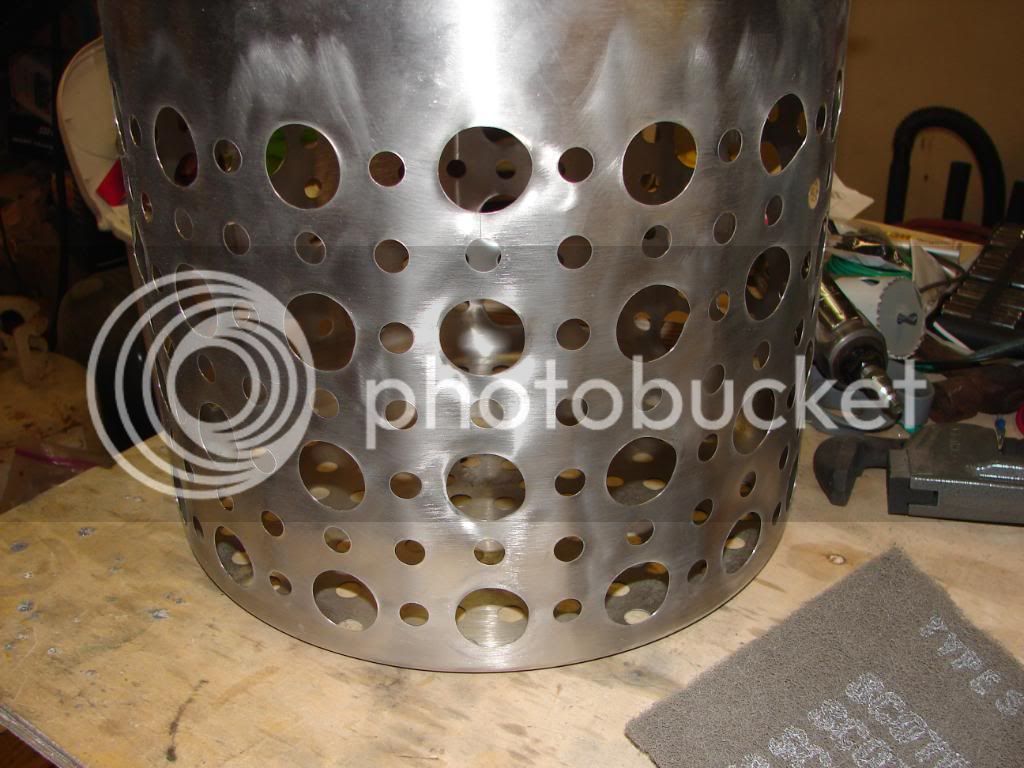
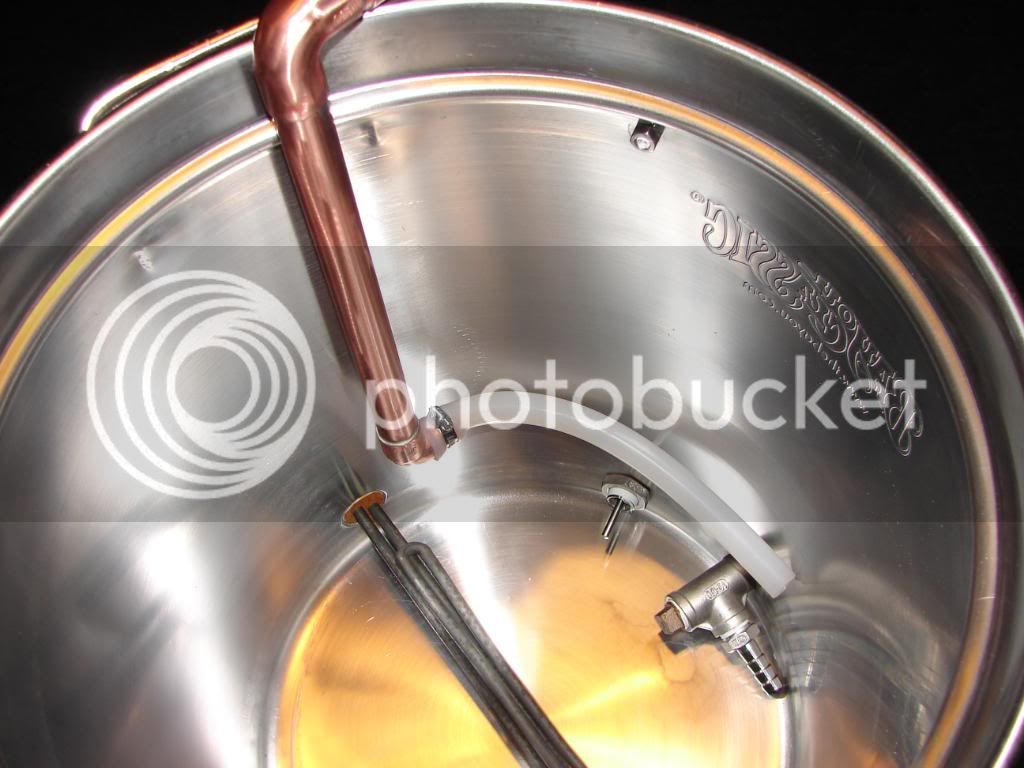
Going to open up the holes in the steamer basket so I get good flow when recirculating.
Marked the holes I intend to enlarge.
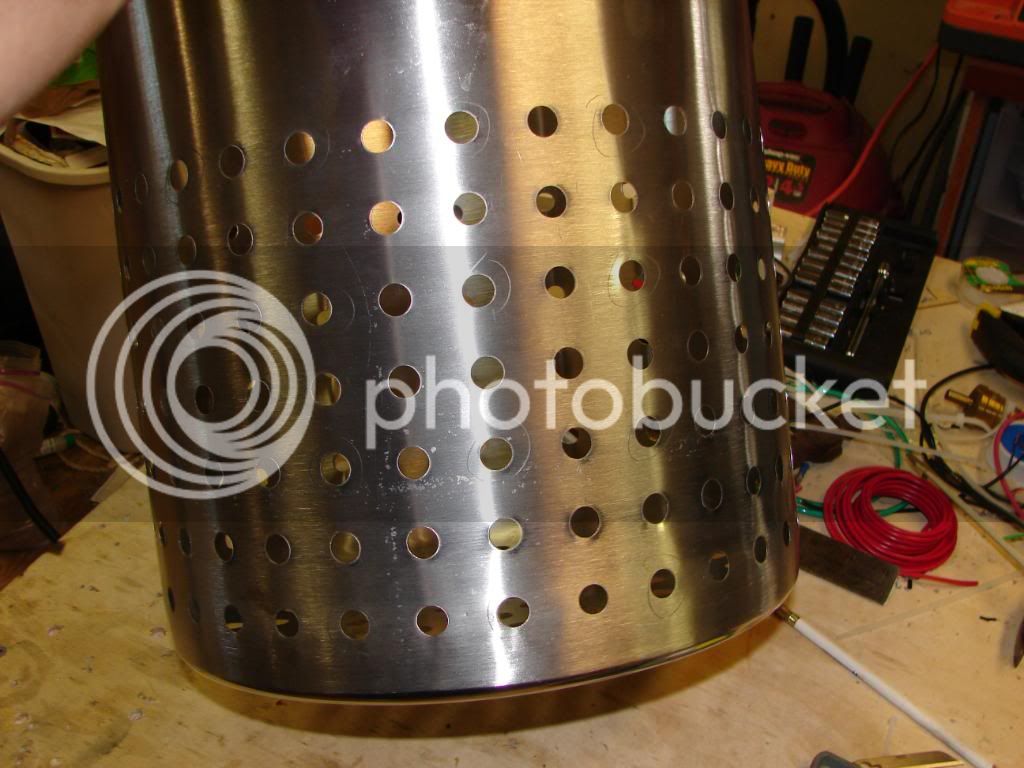
Used the step drill to make the holes large enough for the punch bolt.
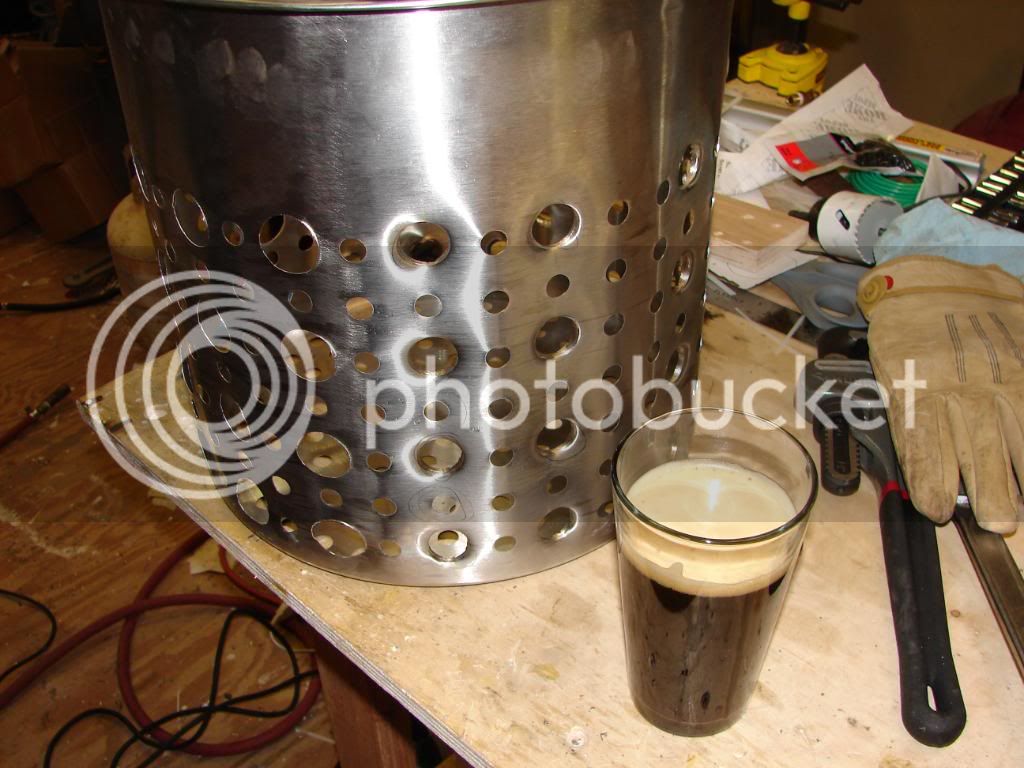
Whew, that calls for a home brew.
OK, I broke down and got a Greenlee punch for this. Guilty as charged.
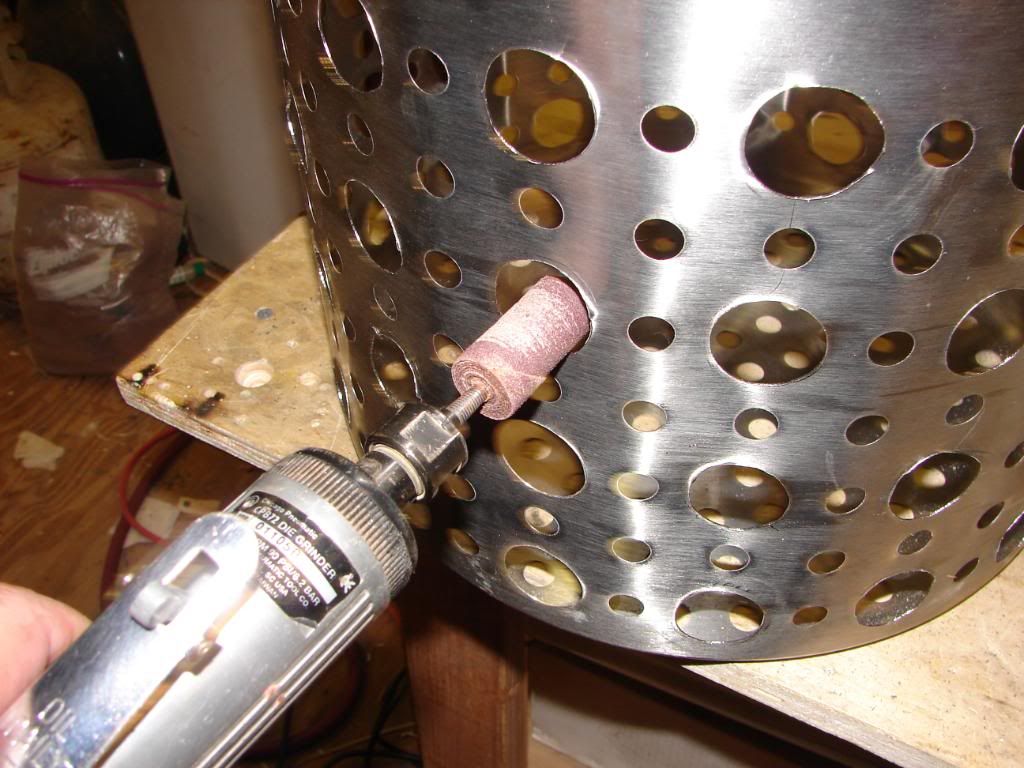
Smoothing up the rough edge with a die grinder and a carbide bit.
Removing the burs with a cartridge role.
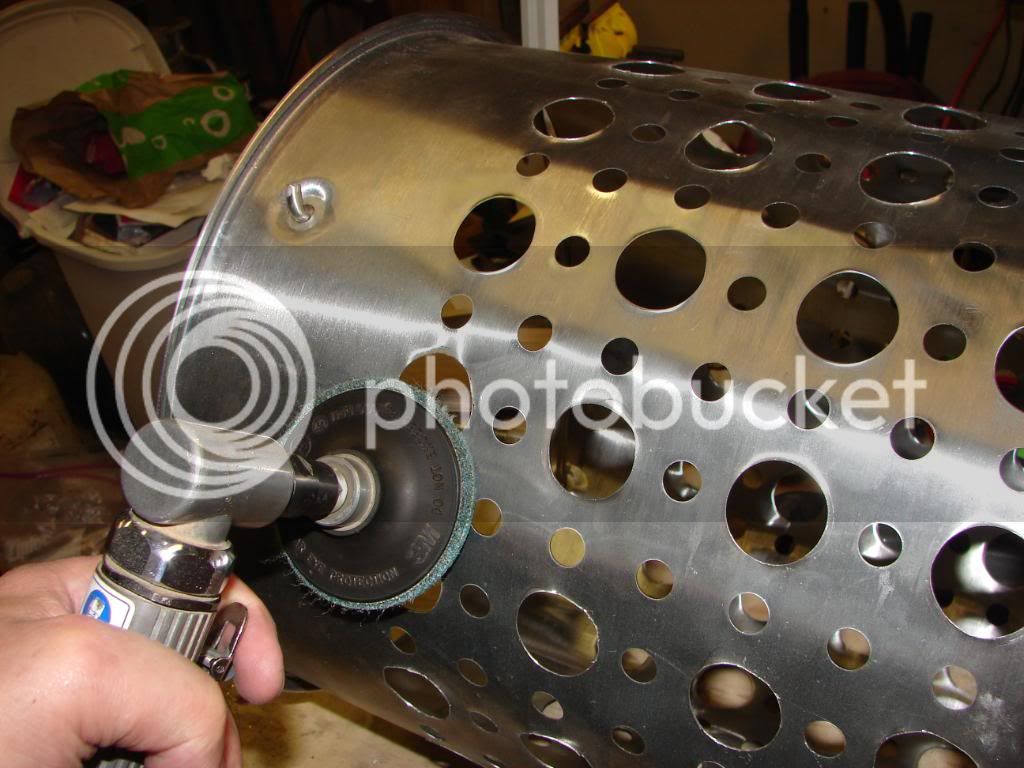
Once more with the Roloc disks.
One final search for burs with a Scotch Brite pad inside and out.
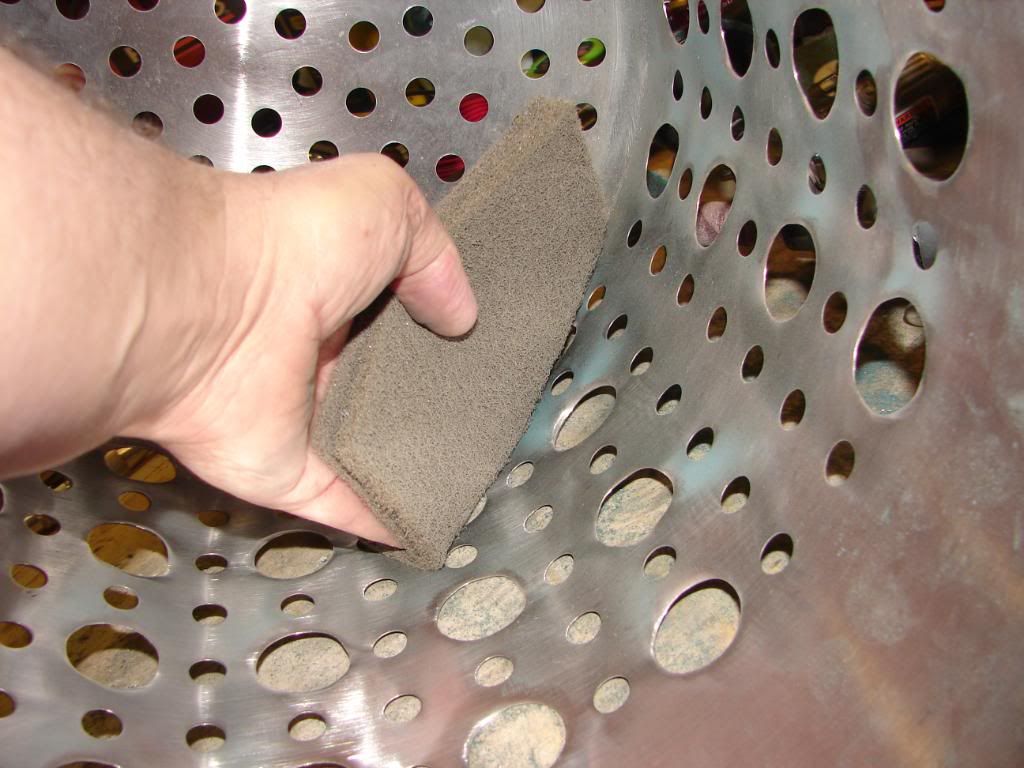
All ready for the first BIAB run.
Marked the holes I intend to enlarge.
Used the step drill to make the holes large enough for the punch bolt.
Whew, that calls for a home brew.
OK, I broke down and got a Greenlee punch for this. Guilty as charged.
Smoothing up the rough edge with a die grinder and a carbide bit.
Removing the burs with a cartridge role.
Once more with the Roloc disks.
One final search for burs with a Scotch Brite pad inside and out.
All ready for the first BIAB run.
OP
OP
aubiecat
Well-Known Member
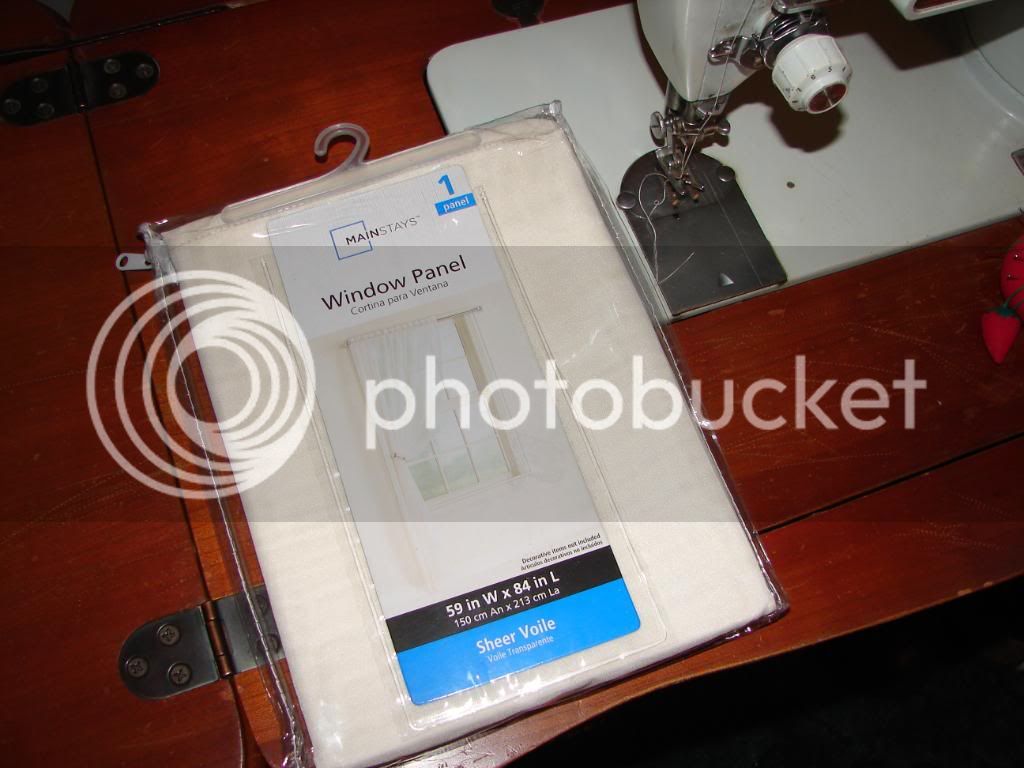
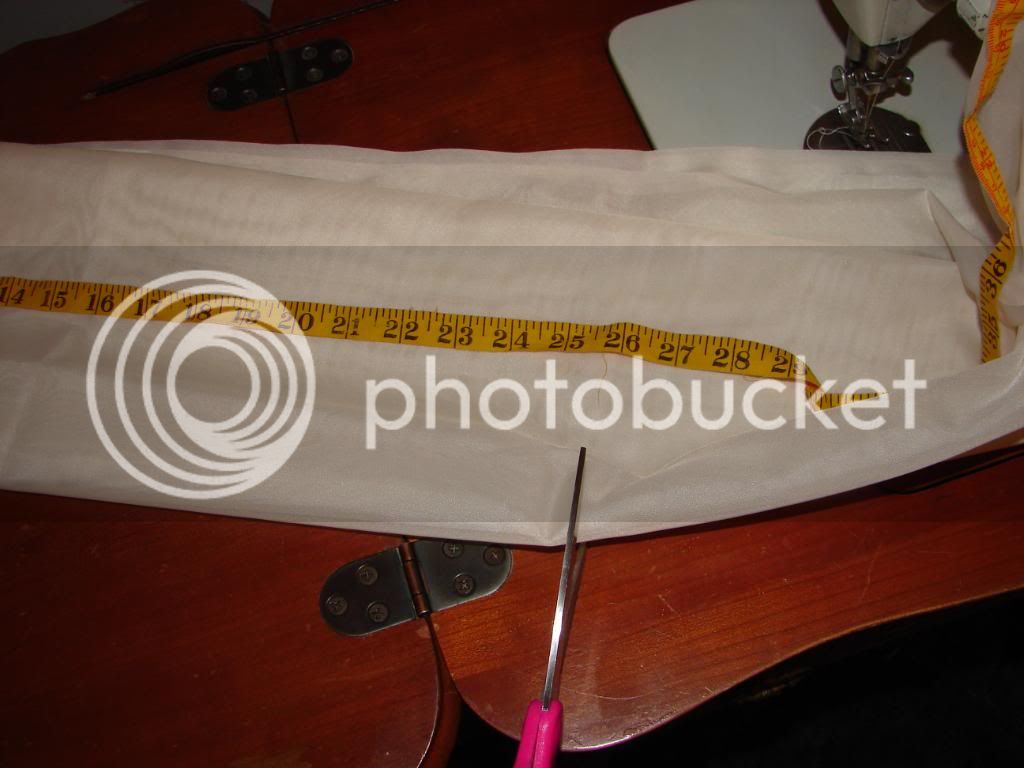
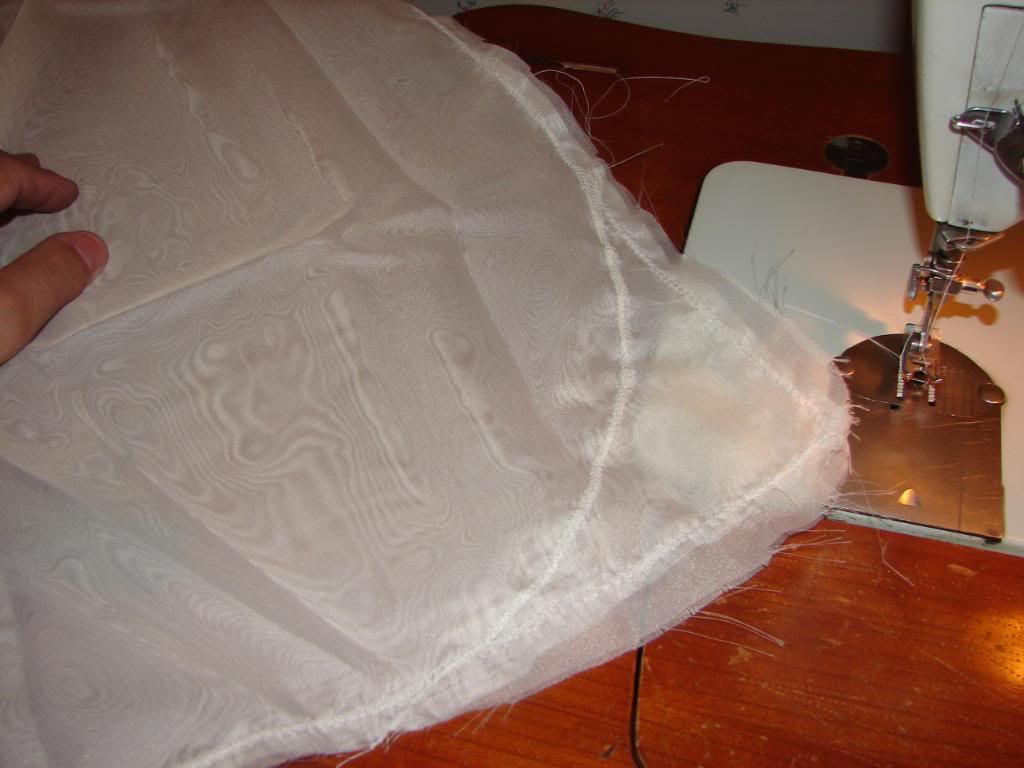
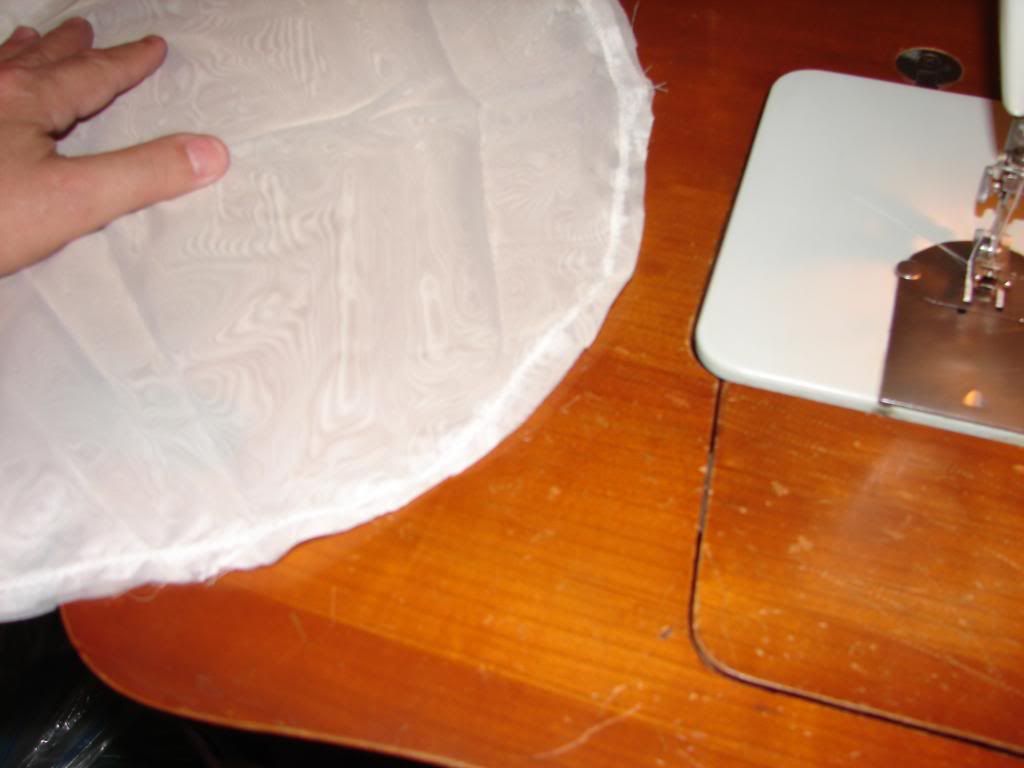
I set out to make a custom BIAB bag for my kettle so gathered up the material and got at it. I did this so there would only be a seam on one side. Using this tutorial site as a guide it was pretty easy. I used a straight stitch then back over that with a zig zag stitch.
Small town, no fabric store not even at Walmart so this sheer will do.
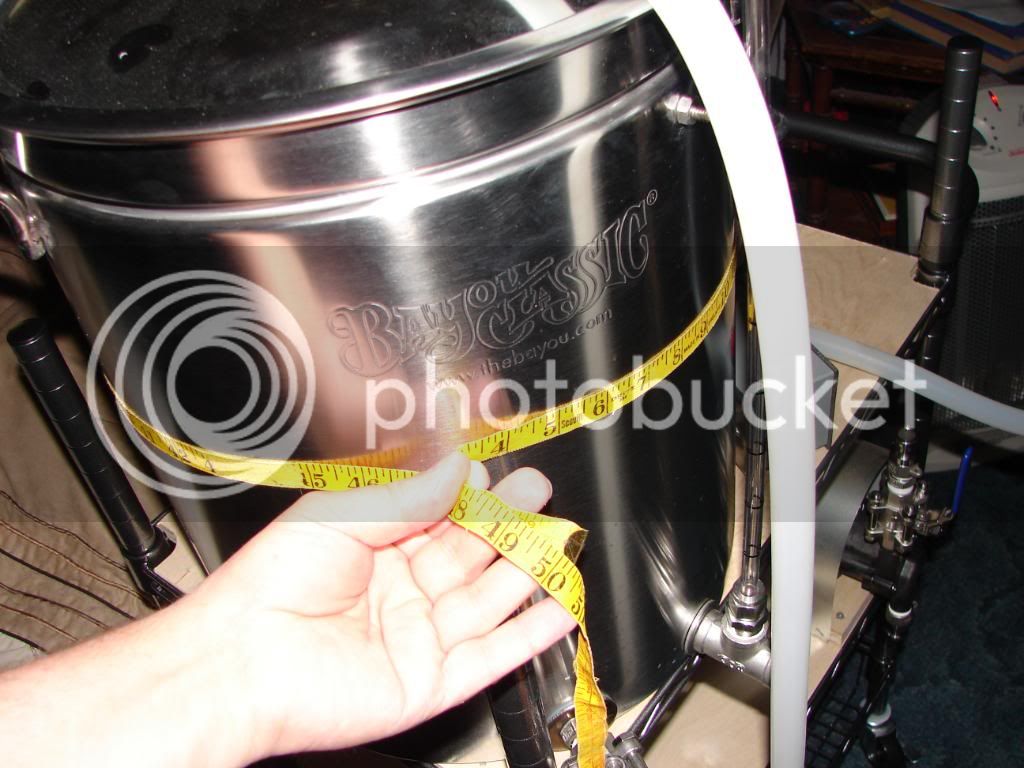
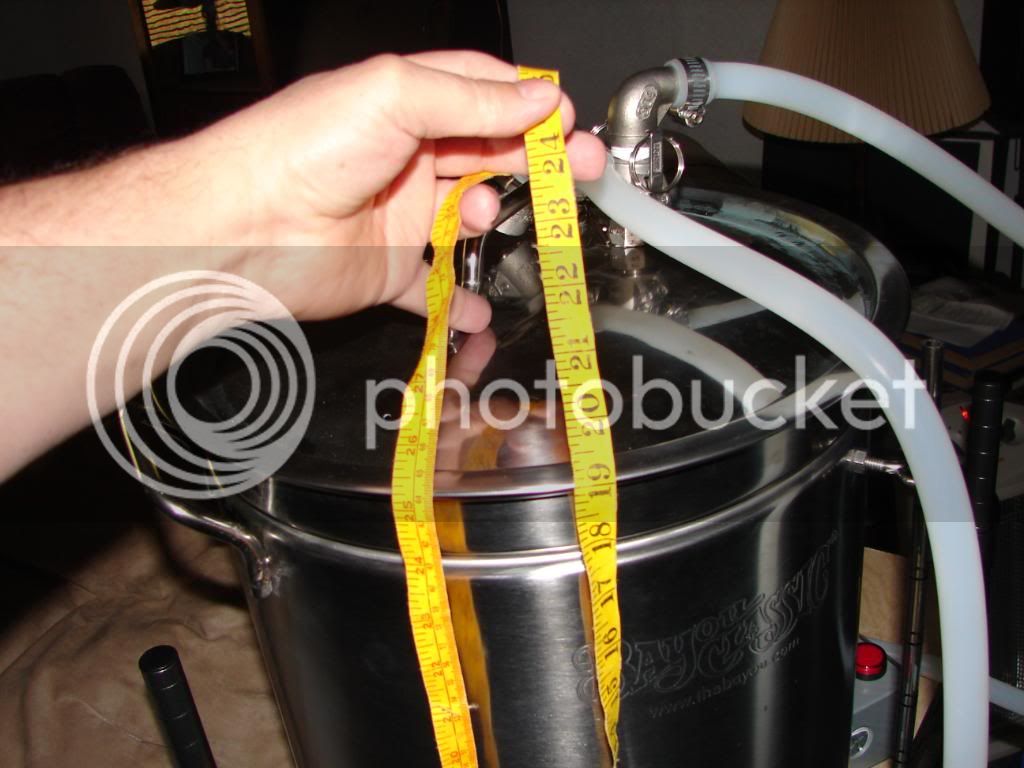
A few preparatory measurements on circumference and height.
Cutting a bit long to allow extra for the seams.
Sewing the draw string openings.
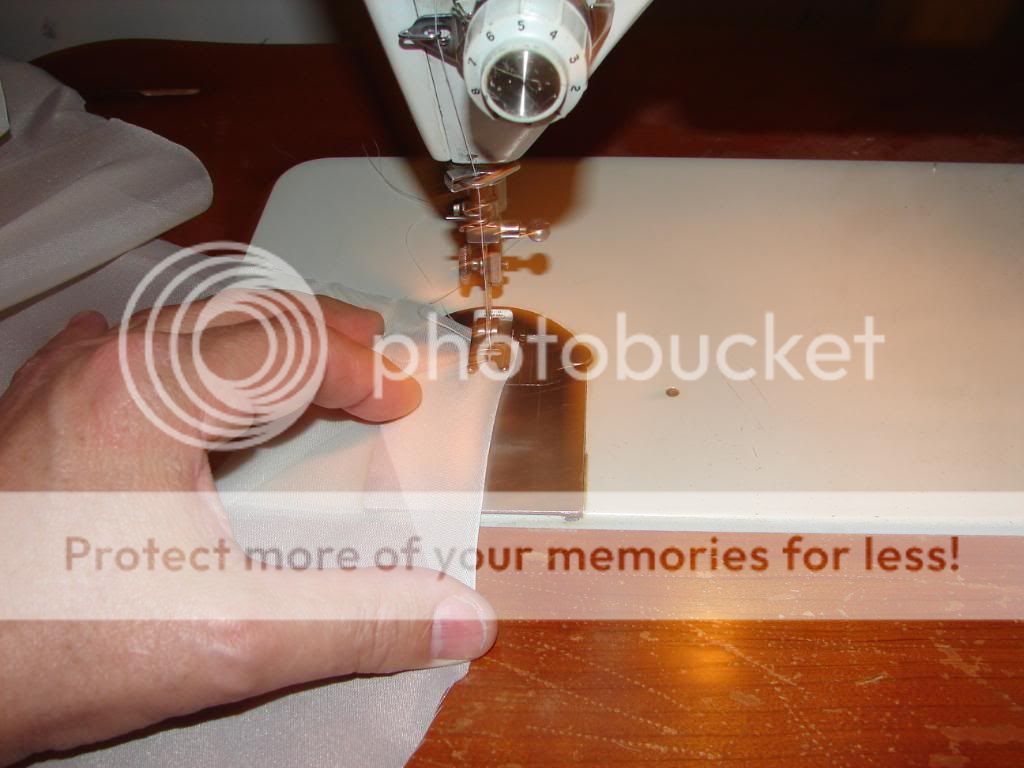
Went ahead and hemmed the pocket for the draw string.
I put the little gusset in there to give it some strength around the draw string openings.
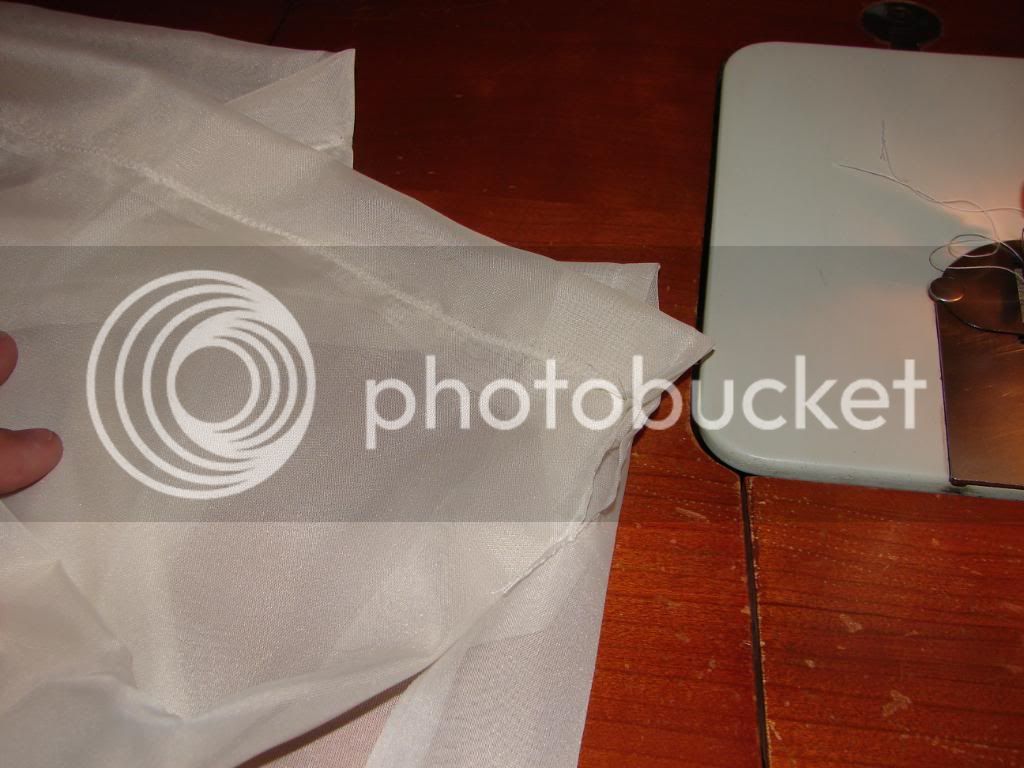
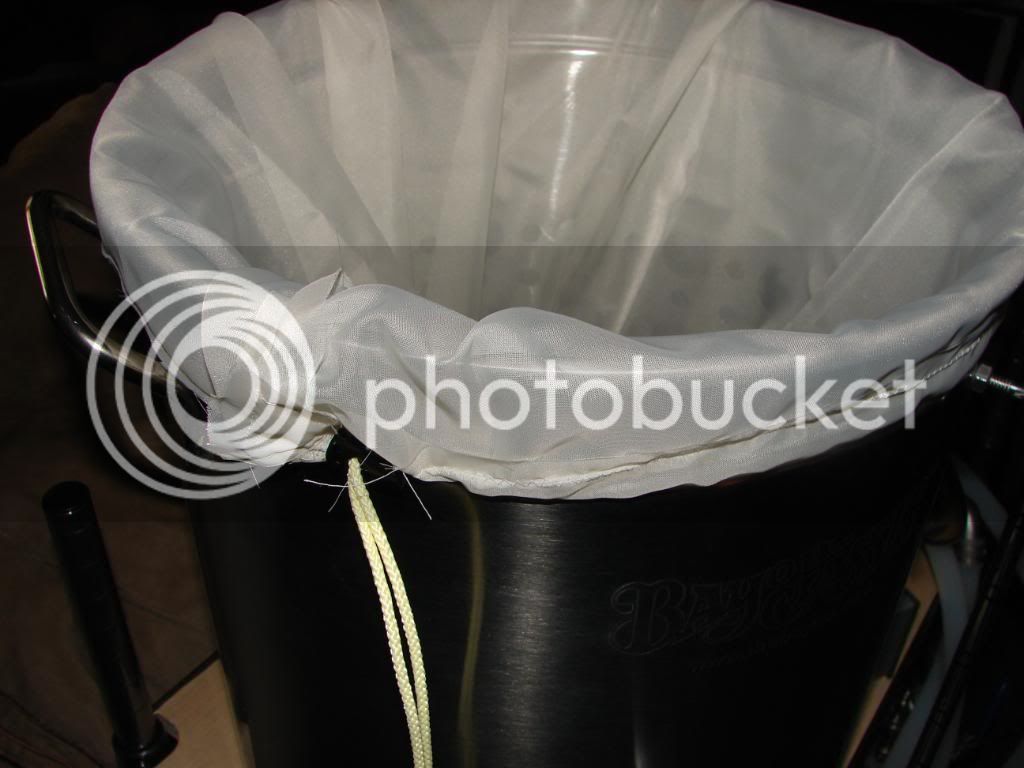
After looking at it I decided I didn't like the straight corners. I used the steamer basket to mark a nice radius.
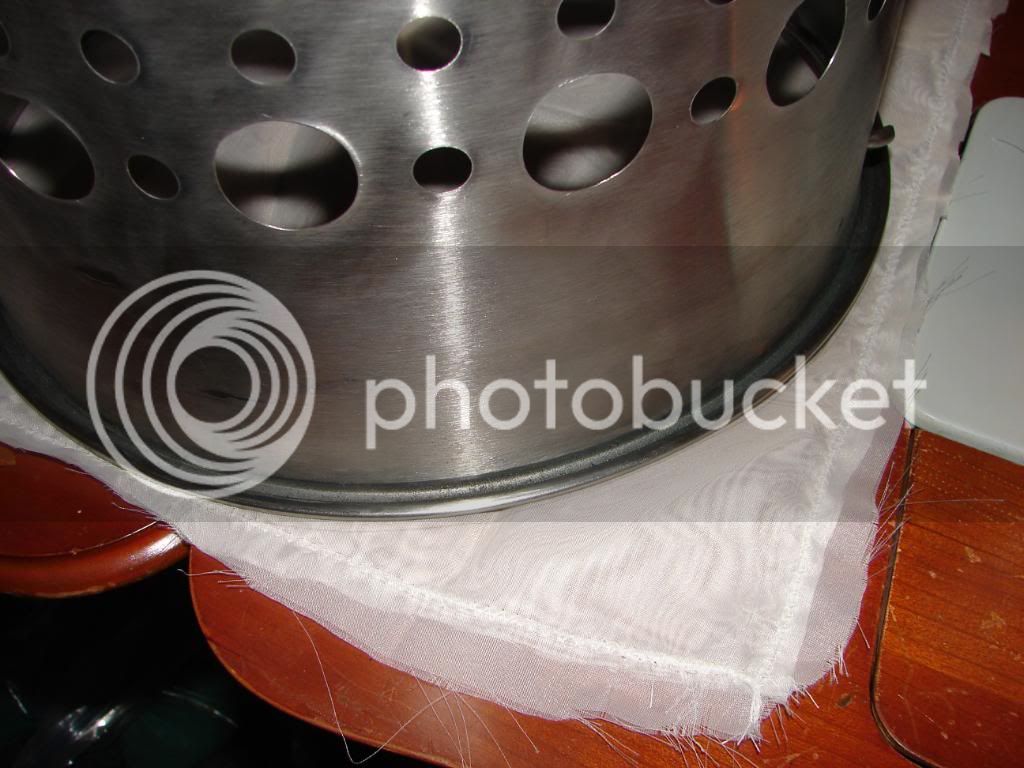
That worked well.
Then just trimmed it off.
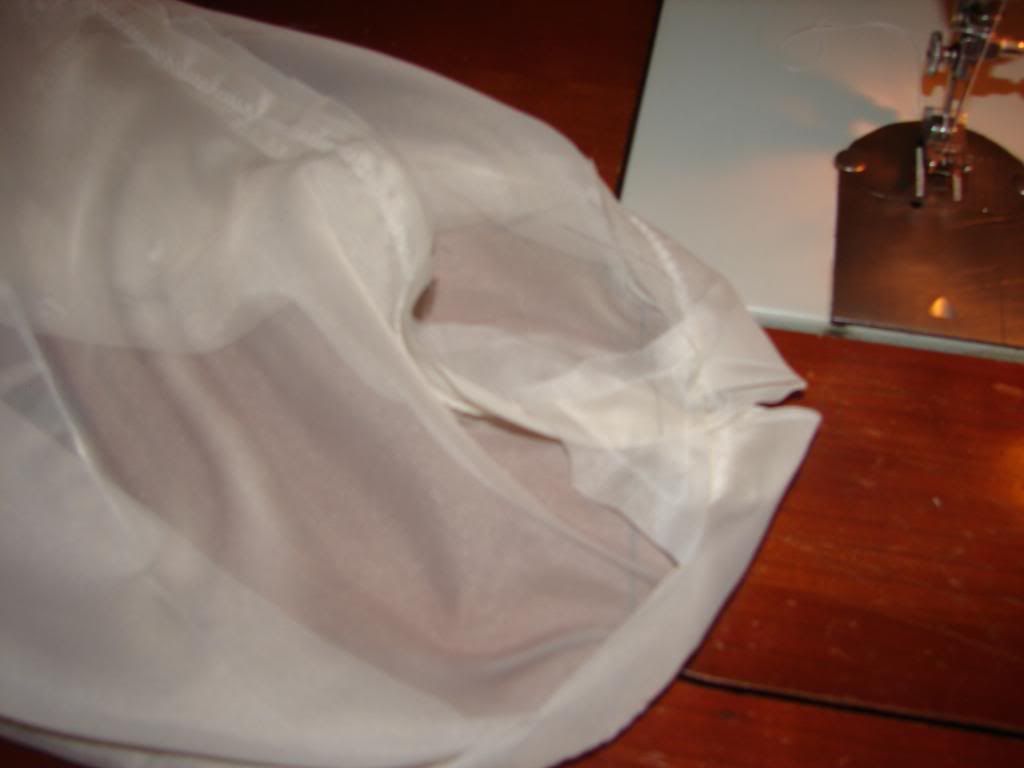
Found some Colman cord out in the shop so that is what I used, it is 100% polypropylene too. These cord stops from Walmart are great for holding the bag on the kettle.
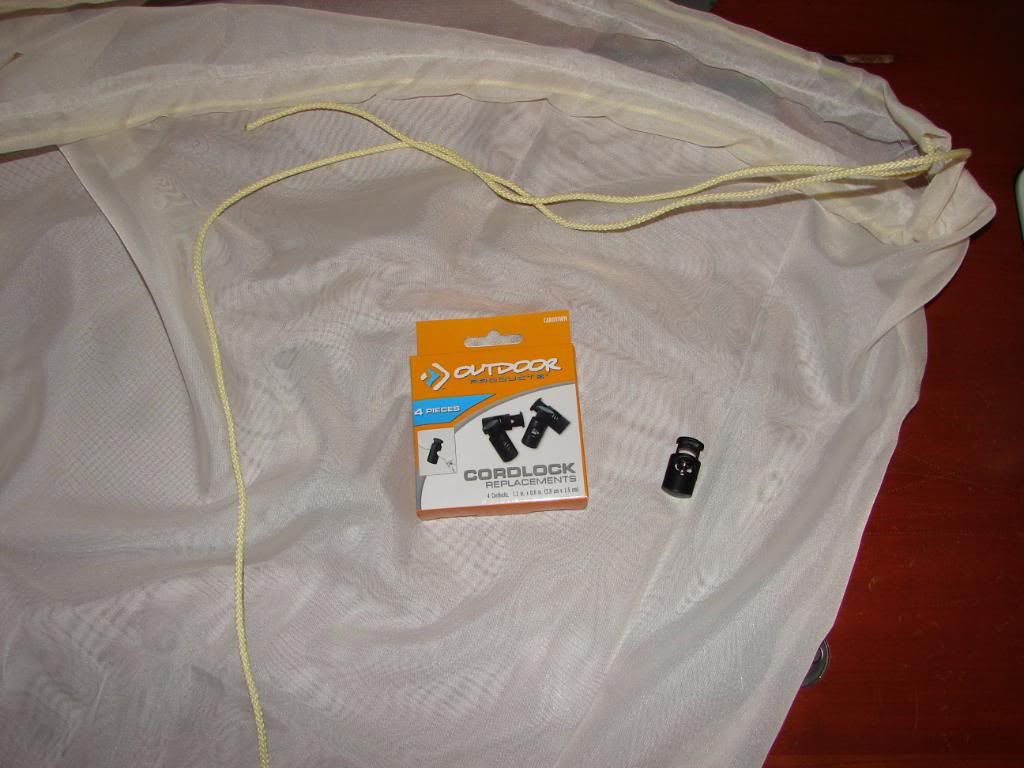
Looks good.
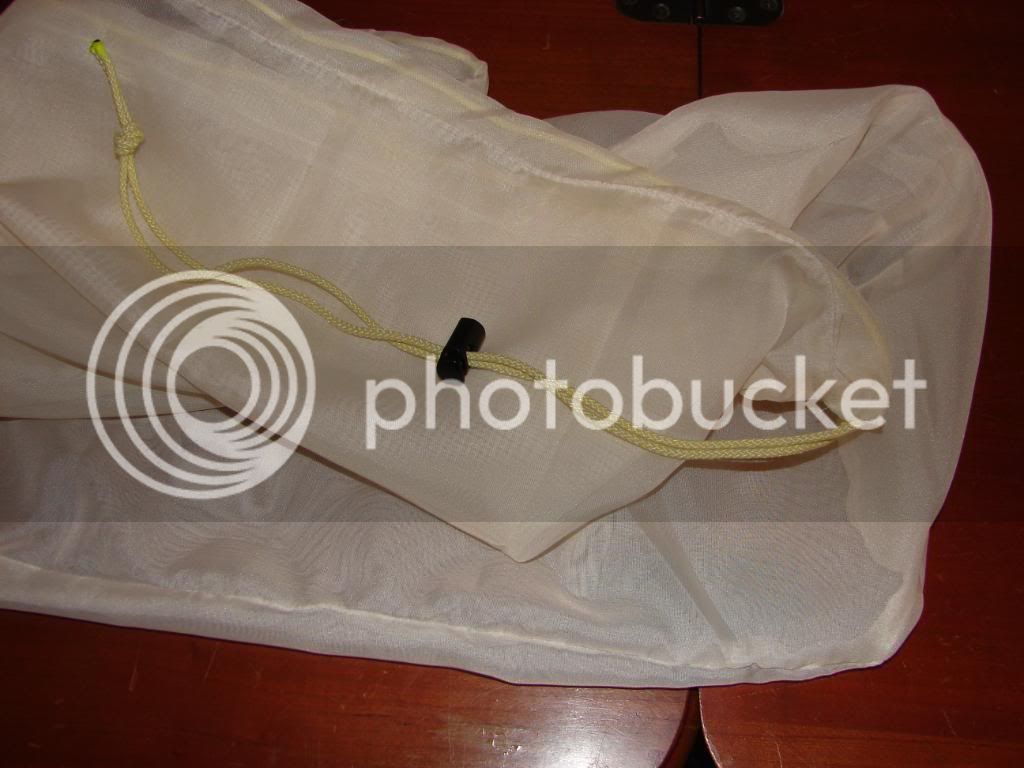
The good thing about the Bayou Classic steamer pot is they all have a rim to hold the steamer basket off the bottom of the pot. That makes a nice indention on the outside and works great for a draw string.
Small town, no fabric store not even at Walmart so this sheer will do.
A few preparatory measurements on circumference and height.
Cutting a bit long to allow extra for the seams.
Sewing the draw string openings.
Went ahead and hemmed the pocket for the draw string.
I put the little gusset in there to give it some strength around the draw string openings.
After looking at it I decided I didn't like the straight corners. I used the steamer basket to mark a nice radius.
That worked well.
Then just trimmed it off.
Found some Colman cord out in the shop so that is what I used, it is 100% polypropylene too. These cord stops from Walmart are great for holding the bag on the kettle.
Looks good.
The good thing about the Bayou Classic steamer pot is they all have a rim to hold the steamer basket off the bottom of the pot. That makes a nice indention on the outside and works great for a draw string.
![Craft A Brew - Safale BE-256 Yeast - Fermentis - Belgian Ale Dry Yeast - For Belgian & Strong Ales - Ingredients for Home Brewing - Beer Making Supplies - [3 Pack]](https://m.media-amazon.com/images/I/51bcKEwQmWL._SL500_.jpg)

$27.29 ($13.64 / Count)
$41.99 ($21.00 / Count)
2 Pack 1 Gallon Large Fermentation Jars with 3 Airlocks and 2 SCREW Lids(100% Airtight Heavy Duty Lid w Silicone) - Wide Mouth Glass Jars w Scale Mark - Pickle Jars for Sauerkraut, Sourdough Starter
Qianfenie Direct

$53.24
1pc Hose Barb/MFL 1.5" Tri Clamp to Ball Lock Post Liquid Gas Homebrew Kegging Fermentation Parts Brewer Hardware SUS304(Liquid MFL)
yunchengshiyanhuqucuichendianzishangwuyouxiangongsi


$39.22 ($39.22 / Count)
Brewer's Best Home Brew Beer Ingredient Kit - 5 Gallon (Mexican Cerveza)
Amazon.com

$22.00 ($623.23 / Ounce)
AMZLMPKNTW Ball Lock Sample Faucet 30cm Reinforced Silicone Hose Secondary Fermentation Homebrew Kegging joyful
无为中南商贸有限公司

$58.16
HUIZHUGS Brewing Equipment Keg Ball Lock Faucet 30cm Reinforced Silicone Hose Secondary Fermentation Homebrew Kegging Brewing Equipment
xiangshuizhenzhanglingfengshop


$10.99 ($31.16 / Ounce)
Hornindal Kveik Yeast for Homebrewing - Mead, Cider, Wine, Beer - 10g Packet - Saccharomyces Cerevisiae - Sold by Shadowhive.com
Shadowhive


$7.79 ($7.79 / Count)
Craft A Brew - LalBrew Voss™ - Kveik Ale Yeast - For Craft Lagers - Ingredients for Home Brewing - Beer Making Supplies - (1 Pack)
Craft a Brew


$176.97
1pc Commercial Keg Manifold 2" Tri Clamp,Ball Lock Tapping Head,Pressure Gauge/Adjustable PRV for Kegging,Fermentation Control
hanhanbaihuoxiaoshoudian

$172.35
2 Inch Tri Clamp Keg Manifold With Ball Lock Posts, Pressure Gauge, PRV (0-30 PSI) – Homebrew, Fermentation, Kegging System
wuhanshijiayangzhiyimaoyiyouxiangongsi


$53.24
1pc Hose Barb/MFL 1.5" Tri Clamp to Ball Lock Post Liquid Gas Homebrew Kegging Fermentation Parts Brewer Hardware SUS304(Liquid Hose Barb)
Guangshui Weilu You Trading Co., Ltd


$20.94
$29.99
The Brew Your Own Big Book of Clone Recipes: Featuring 300 Homebrew Recipes from Your Favorite Breweries
Amazon.com
OP
OP
aubiecat
Well-Known Member
The temperature sensor was dead on when I tested it in a cup of ice water. Auto tune done. Running a test brew, water, right now. Hit 153° in 20 minutes and a rolling boil in another 20 minutes. Once I got it to a boil I dialed it back to 80% then 75% and finally 60%. Looks like I will lose about 1.25 gallons an hour.
Just need to mount the control panel and put together a whirlpool fixture.
Gonna brew this weekend!
Just need to mount the control panel and put together a whirlpool fixture.
Gonna brew this weekend!
Awesome post, I'm in the process of building up a very similar e-BIAB system. Quick question for you regarding the harbor freight conduit punches. Which punch did you use for the weldless fittings, and which punch did you use for the element? Do you think you could use a weldless setup for the element using that same punch, or is the hole too large?
Regarding the basket did you try the harbor freight punches and they just didn't have the muscle? Finally is there any reason you punched the sides of the basket and not the bottom?
Regarding the basket did you try the harbor freight punches and they just didn't have the muscle? Finally is there any reason you punched the sides of the basket and not the bottom?
OP
OP
aubiecat
Well-Known Member
Awesome post, I'm in the process of building up a very similar e-BIAB system. Quick question for you regarding the harbor freight conduit punches. Which punch did you use for the weldless fittings, and which punch did you use for the element? Do you think you could use a weldless setup for the element using that same punch, or is the hole too large?
Regarding the basket did you try the harbor freight punches and they just didn't have the muscle? Finally is there any reason you punched the sides of the basket and not the bottom?
I used two different size punches for the weldless fittings and the element. I used the smallest one, 13/16", for the weldless fittings and I used the 1 1/8" for the element. I'd have to check the sizes of them again when I get home to remember the precise sizes. You can't use the same size punch for the element and 1/2" fittings. Using one size would create either holes too large for one or holes too small for the other.
The Harbor Freight punches are great for the few holes you will punch in the kettle. They are just made with inferior materials and manufacturing processes. The small punch especially won't hold up to much repeated use.
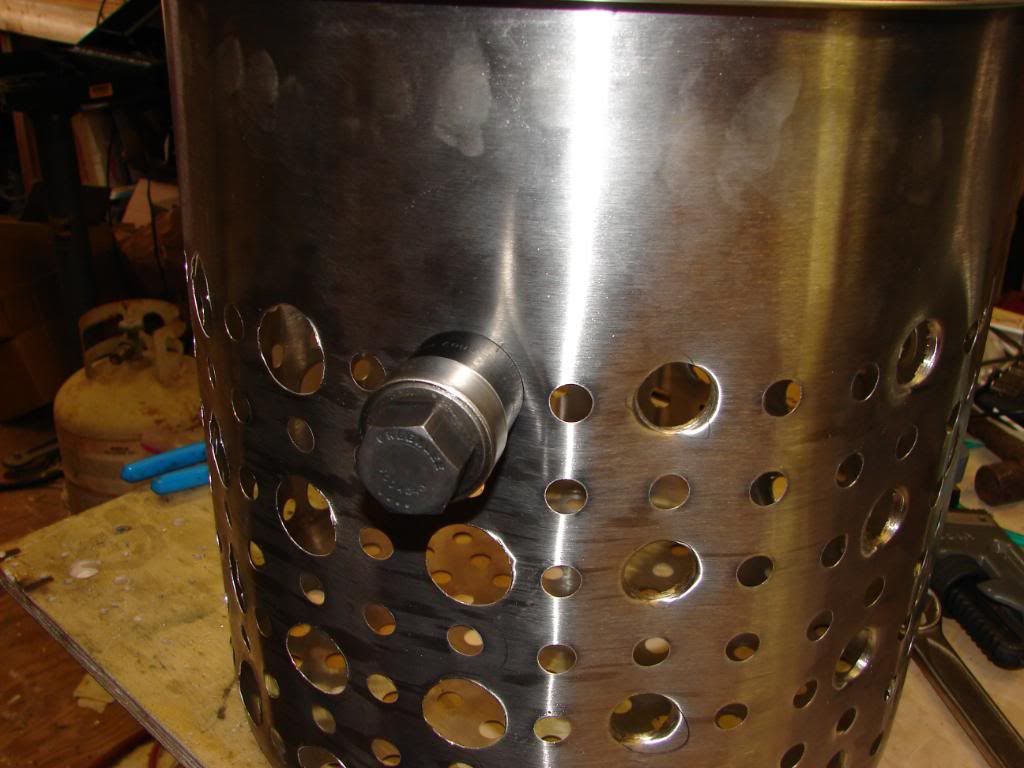
I knew the steamer basket would give the HF punches more than they could handle. The Greenlee punch laughed at the basket and asked for more. The only real draw back was the thin metal of the basket itself. Most of the holes popped through very clean but if I didn't get the punch exactly in the center of the pre-drilled hole it would leave a little tag on one side. If the basket was a bit thicker I am sure all the holes would have been perfectly clean with very little finish work needed.
As for the bottom, there are so many holes in it and they are close together I decided to go with what I have done so far. The Greenlee punch I have is 1 1/8" and is too big to use on the bottom anyway. I may purchase a 13/16" Greenlee if I need to open some holes on the bottom. There is still room on the sides to put more holes if I don't get good enough flow.
At the time I was putting everything together$80.00-$100.00 for two punches was more than I wanted to spend but in retrospect it is what I should have done. Now that I am on the other side of the build buying the Greenlee punches one at a time doesn't give me indigestion.

I used two different size punches for the weldless fittings and the element. I used the smallest one, 13/16", for the weldless fittings and I used the 1 1/8" for the element. I'd have to check the sizes of them again when I get home to remember the precise sizes. You can't use the same size punch for the element and 1/2" fittings. Using one size would create either holes too large for one or holes too small for the other.
The Harbor Freight punches are great for the few holes you will punch in the kettle. They are just made with inferior materials and manufacturing processes. The small punch especially won't hold up to much repeated use.
I knew the steamer basket would give the HF punches more than they could handle. The Greenlee punch laughed at the basket and asked for more. The only real draw back was the thin metal of the basket itself. Most of the holes popped through very clean but if I didn't get the punch exactly in the center of the pre-drilled hole it would leave a little tag on one side. If the basket was a bit thicker I am sure all the holes would have been perfectly clean with very little finish work needed.
As for the bottom, there are so many holes in it and they are close together I decided to go with what I have done so far. The Greenlee punch I have is 1 1/8" and is too big to use on the bottom anyway. I may purchase a 13/16" Greenlee if I need to open some holes on the bottom. There is still room on the sides to put more holes if I don't get good enough flow.
At the time I was putting everything together$80.00-$100.00 for two punches was more than I wanted to spend but in retrospect it is what I should have done. Now that I am on the other side of the build buying the Greenlee punches one at a time doesn't give me indigestion.
Thanks for the info. My question about the punches was more regarding the fact that the harbor freight punches are conduit punches not chassis or radio punches. Therefore the actual cut whole will be larger than the 13/16" or 1 1/4" size. Did you find this to be the case? Obviously it worked for you I'm just curious because Kal specifically mentions not to use conduit punches on his electricbrewery website.
OP
OP
aubiecat
Well-Known Member
Thanks for the info. My question about the punches was more regarding the fact that the harbor freight punches are conduit punches not chassis or radio punches. Therefore the actual cut whole will be larger than the 13/16" or 1 1/4" size. Did you find this to be the case? Obviously it worked for you I'm just curious because Kal specifically mentions not to use conduit punches on his electricbrewery website.
Ah, I got you. The punches do make holes that are slightly bigger than you want but in the case of the soldered lock nut for the element it didn't matter.
It really it doesn't matter that the holes for the 1/2" fittings were a bit bigger than needed because of the silicone gaskets. If you use a silicone gasket it will spread out way over any difference in the size of access hole. I was surprised to see, on the value fitting, that the washer spread out almost to the size of the washer and I used a large washer.
Right after I installed the fittings I did a 24 hour leak test without so much as a drop. I did several hours of run tests last night and still no leaks.

Kal used the punches he did because he wanted no extra space between the holes and the fittings. He did a superlative build and spared no expense with professional results.
My build was just trying to show how I did it and that it can be done without breaking the bank, even though I ended up buying a Greenlee punch. If you are willing to pay the price for the Greenlee punches then you should get the ones he recommends. Absolutely nothing wrong with that.

OP
OP
aubiecat
Well-Known Member
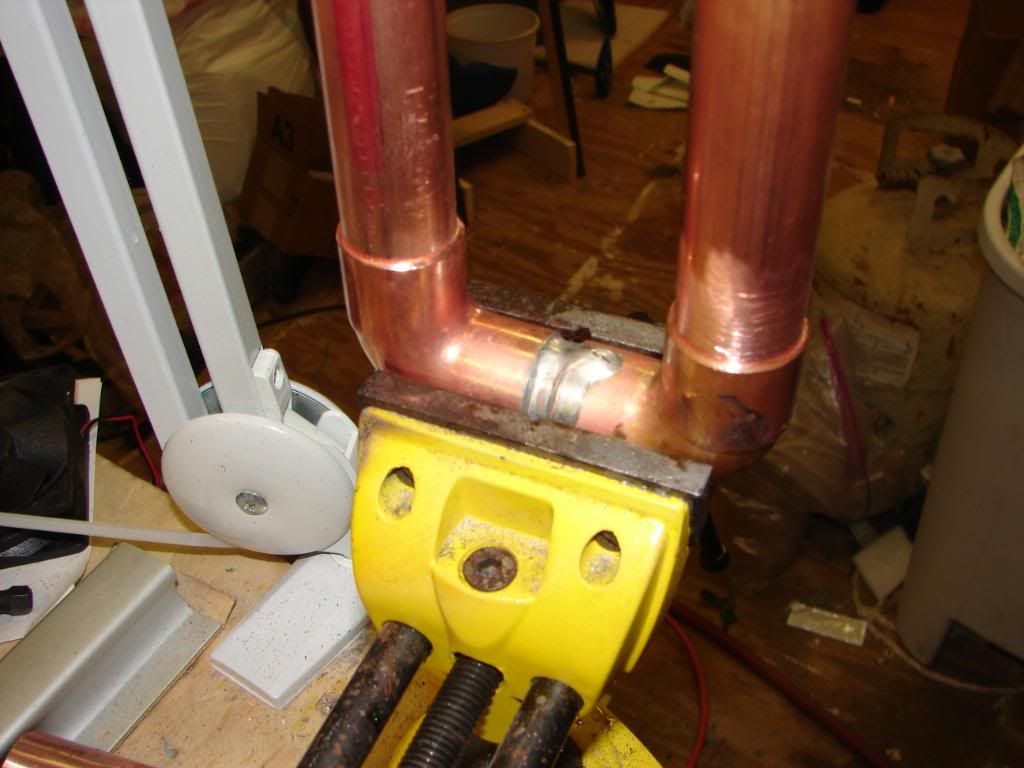
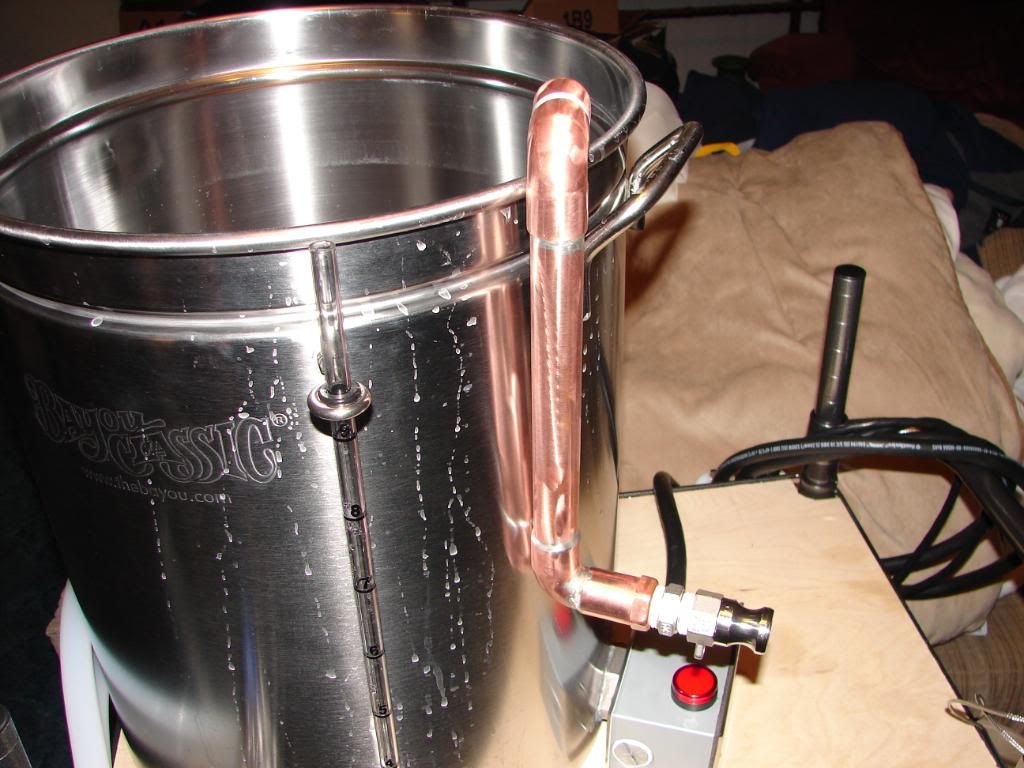
I can't put a whirl pool fitting on the kettle because of the steamer basket so I need to make a portable whirl pool fixture. Another run to HD produces these.
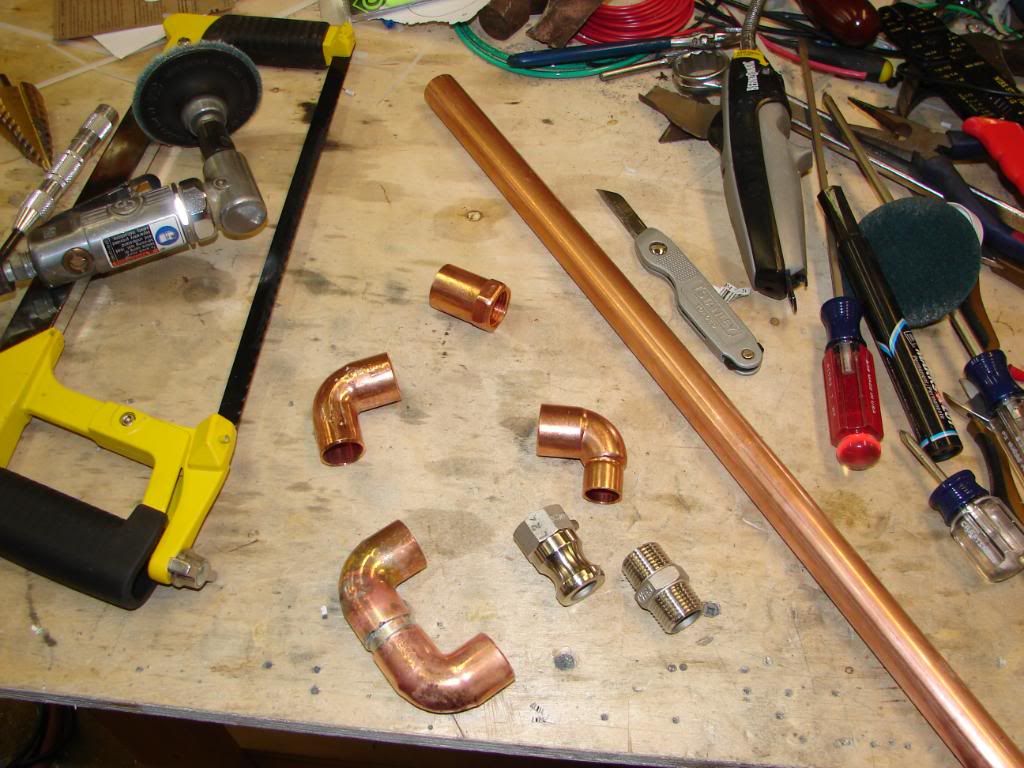
1 - Mueller Streamline 3/4 in. x 2 ft. Copper Type M Pipe
1 - NIBCO 3/4 in. x 1/2 in. Copper Pressure Cup x FIPT Female Adapter
1 - NIBCO 3/4 in. Copper Pressure 90-Degree FTG x C Street Elbow
2 - NIBCO 3/4 in. x 3/4 in. Copper 90-Degree Cup x Cup Pressure Elbow
1 - NIBCO 3/4 in. x 1/2 in. Copper Pressure 90-Degree C x C Reducing Elbow
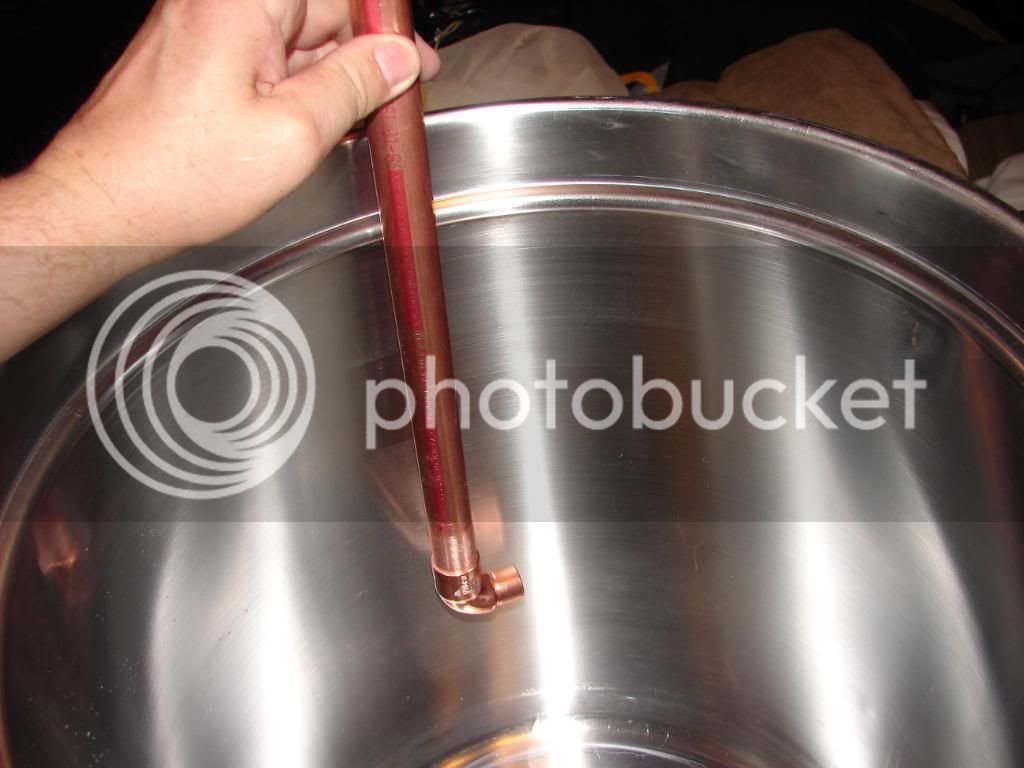
Getting an idea where I want the whirl pool tube to exit.
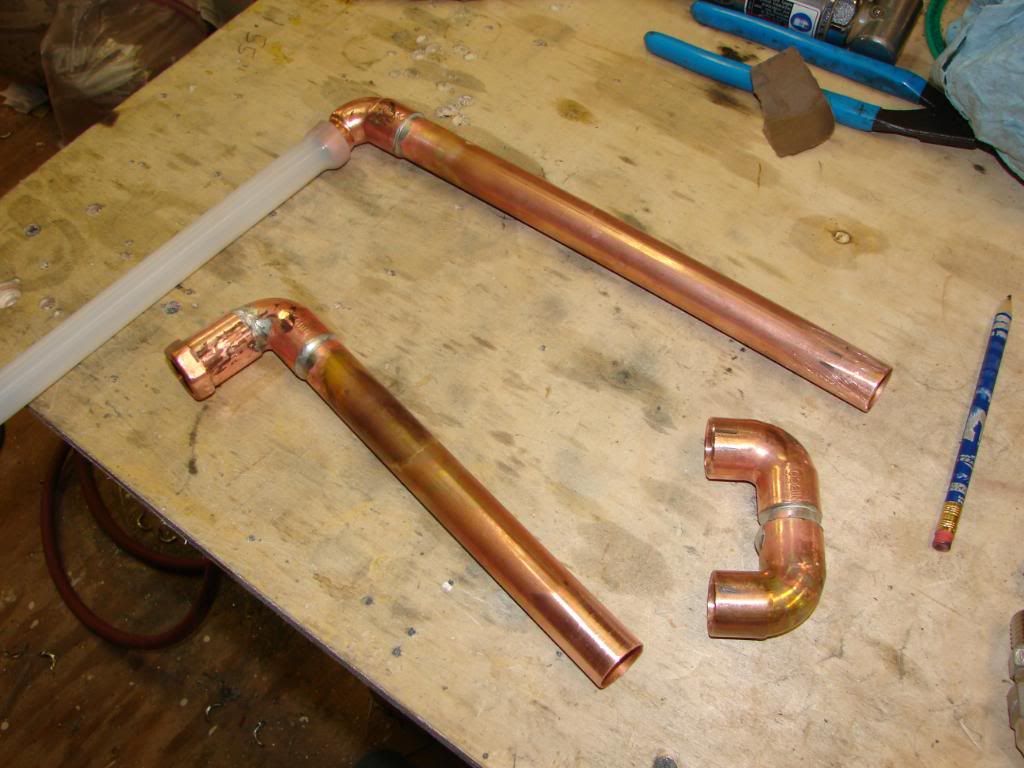
Went ahead and soldered the main sections together.
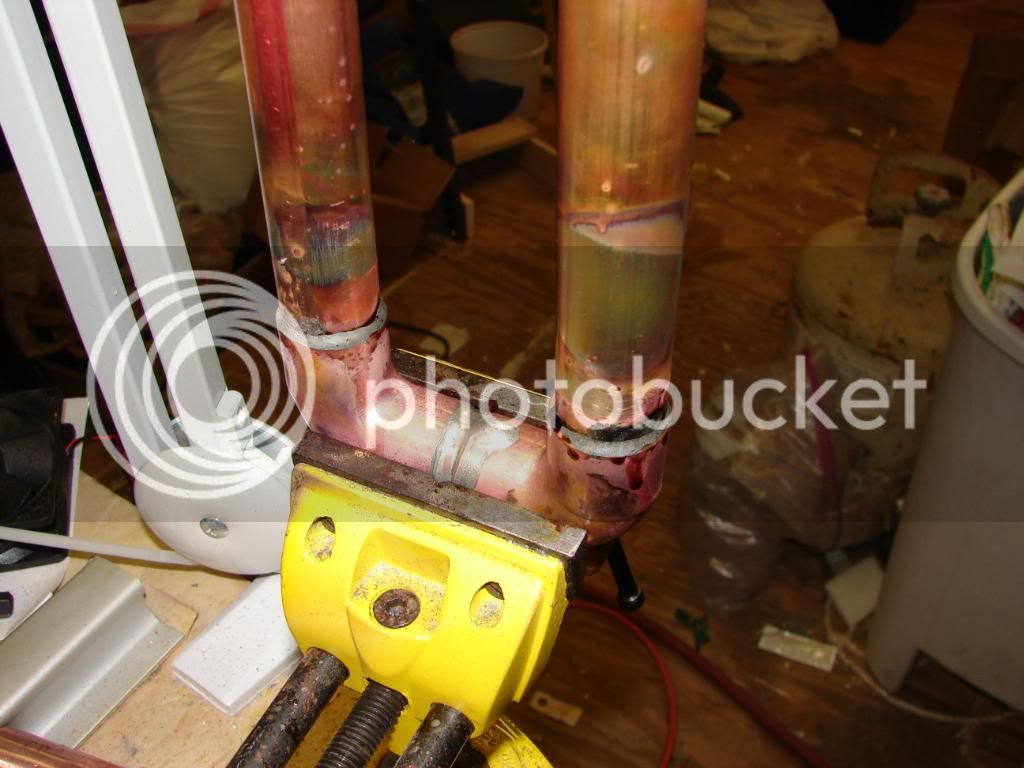
I slid the parts together and set them into the kettle to get a mock-up fit.
Used a pencil to put timing marks on the pipe to make sure I solder it in the right position.
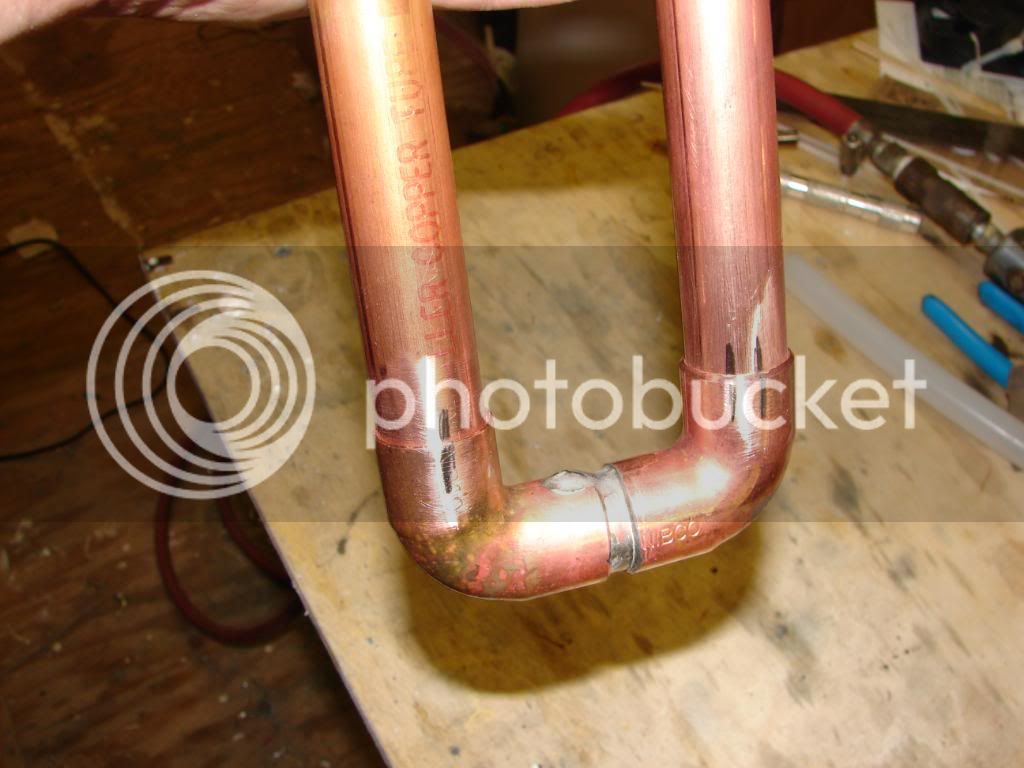
When I solder parts together I like to put the fittings in vertical position to ensure easy solder flow.
With clean parts, flux and heat all you have to do touch the solder to the copper and it will flow into the joint like water.
Using the ole die grinder to clean the exterior up.
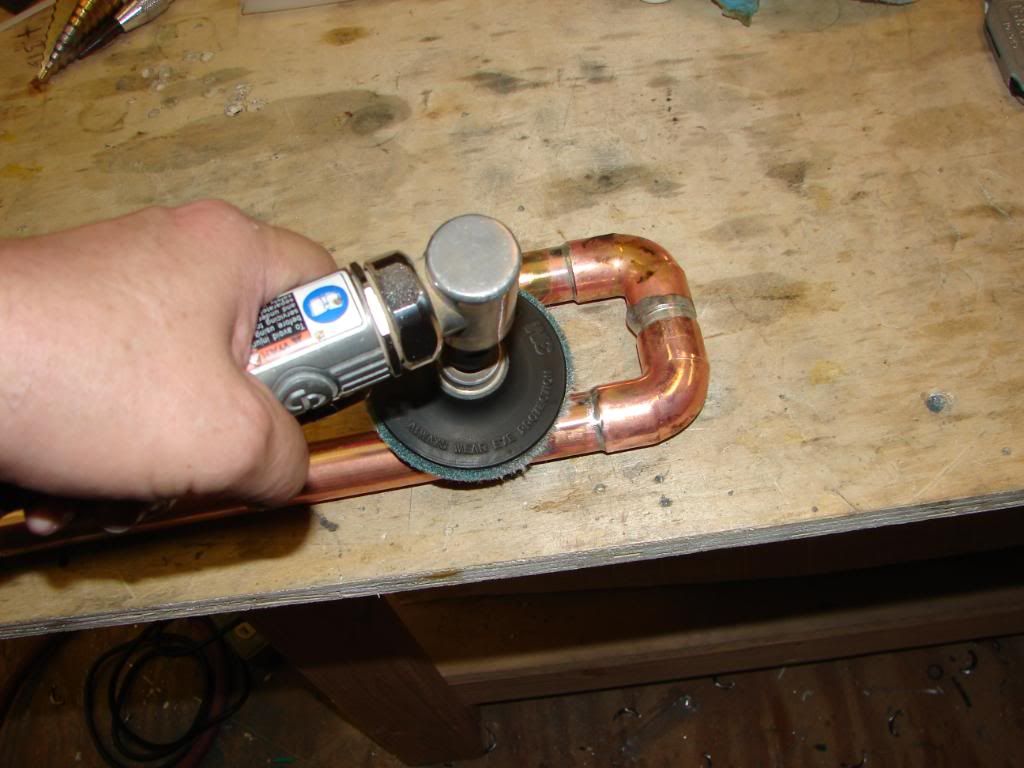
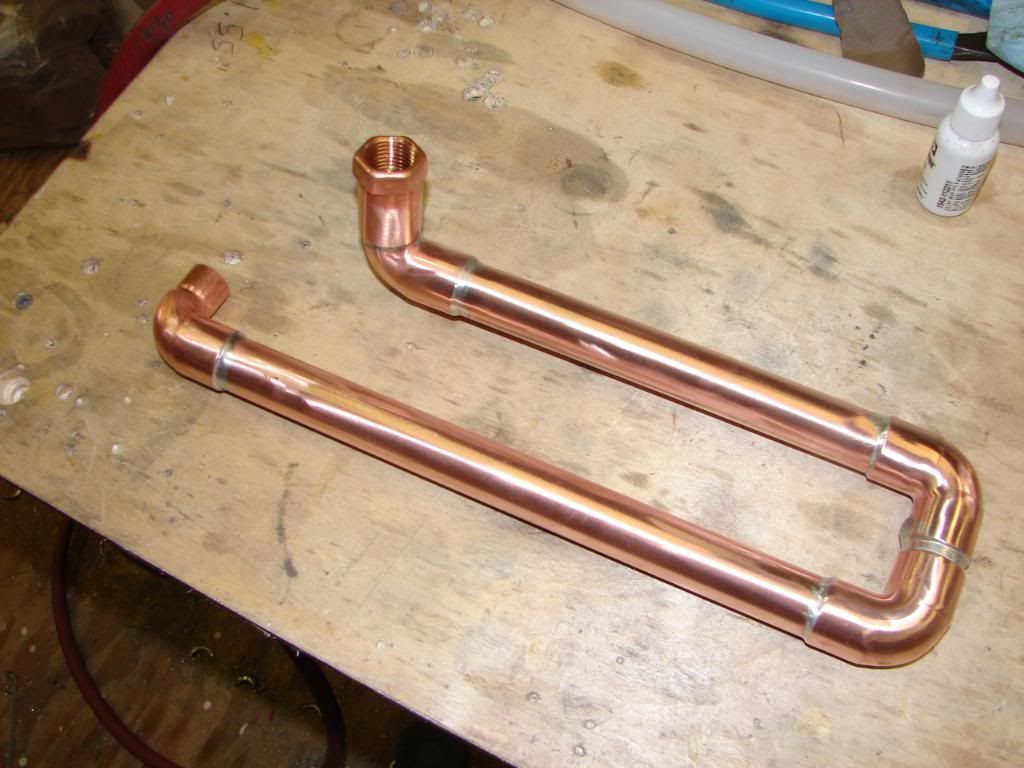
Can't wait to see how it works.
1 - Mueller Streamline 3/4 in. x 2 ft. Copper Type M Pipe
1 - NIBCO 3/4 in. x 1/2 in. Copper Pressure Cup x FIPT Female Adapter
1 - NIBCO 3/4 in. Copper Pressure 90-Degree FTG x C Street Elbow
2 - NIBCO 3/4 in. x 3/4 in. Copper 90-Degree Cup x Cup Pressure Elbow
1 - NIBCO 3/4 in. x 1/2 in. Copper Pressure 90-Degree C x C Reducing Elbow
Getting an idea where I want the whirl pool tube to exit.
Went ahead and soldered the main sections together.
I slid the parts together and set them into the kettle to get a mock-up fit.
Used a pencil to put timing marks on the pipe to make sure I solder it in the right position.
When I solder parts together I like to put the fittings in vertical position to ensure easy solder flow.
With clean parts, flux and heat all you have to do touch the solder to the copper and it will flow into the joint like water.
Using the ole die grinder to clean the exterior up.
Can't wait to see how it works.
flyingfinbar
Well-Known Member
Beautiful, beautiful work, man! Do you have a background in construction/wiring/engineering/ etc?
Yes, like the idea of the indicator lamp on the element box! Gotta add that to my list.
Me too:rockin:
OP
OP
aubiecat
Well-Known Member
Beautiful, beautiful work, man! Do you have a background in construction/wiring/engineering/ etc?
Thank you very much. It all kind of ties into the job I have had for the last 18 years. I work for an architectural metals company and it's a pretty interesting job. We have a crew working on the US capitol dome right now.
90% of everything we do is a custom job so I get to do a little bit of everything.
I guess it doesn't hurt that I am also into giant scale RC planes. There has been a lot of cross over between to two hobbies during this build.
My main responsibility at work is 3-D design, sculpture and CNC router.
This BIAB brewing rig has been one of the most fun things I have ever done.

The base of you element seems to have rusted quite a bit. On the first page of your build you had a magnesium anode, and you planning on installing it in the tee?
I wondering if the rusting issue is due to element type. I tend to see more people with the straight ULWD element have rusting issues than the ripp element. That could of course be my stupid brain making generalizations.
OP
OP
aubiecat
Well-Known Member
The base of you element seems to have rusted quite a bit. On the first page of your build you had a magnesium anode, and you planning on installing it in the tee?
I wondering if the rusting issue is due to element type. I tend to see more people with the straight ULWD element have rusting issues than the ripp element. That could of course be my stupid brain making generalizations.
Yes I am going to put the anode in the Tee. It slipped my mind because I got so involved in wiring the control panel and programming the PID. I need to cut the hex head off and retrace the threads from the other side since they are tapered to the anode side. I was amazed to see how fast the element started to rust from the first time I used it.
I wanted to use the rip element but I don't have the space under the steamer basket.
Hi,
I loved your idea of putting the indicator light in the gang box on the kettle.
I ordered the same lamp you have. Are you running them 220v? The website said 110/220... but on the lamp it says 110. I wired it up 220 and it lights up fine. However after having it on for 10 minutes, it was so hot it almost melted my hand! Whats your experience? Do they run hot for you? Are you concerned with the heat level in the gang box?
OP
OP
aubiecat
Well-Known Member
I am running it on 220v. Honestly I haven't felt of the lamp when it was working.
Next time I fire it up I will pay attention to the lamp and see what it does. It's supposed to be an LED and they don't usually emit too much heat.
One thing about it is mine seems to be dim. Did yours seem dim or normal? Maybe it's just me.
The heat level in the gang box should get pretty hot anyway because you have the kettle getting up to 212°.
Thanks for the reply.
Mine seems very bright. The lamp part is fine and cool, its the stem that was hot. I imagine there is something inside stepping down the voltage to the LED, that's probably whats getting hot.
I'll run mine again tonight and get a temp reading off the stem.. maybe I'm being too subjective on what 'hot' is.
OP
OP
aubiecat
Well-Known Member
Maybe it's the angle I'm looking at it or something. Hope I didn't get a bad one. I already had to return the temp. sensor for a new one.
I will run mine with the cover off and check it with my digital thermometer to see what we have.
I will run mine with the cover off and check it with my digital thermometer to see what we have.
OP
OP
aubiecat
Well-Known Member
aubiecat,
did you cut the electrical plug off of the pump and rewire it with the 15 amp twist lock? I see a regular 110V single outlet in the picture of all the parts on the table.
Yes I cut the plug off and put a twist lock on there. I was going with the regular plugs at first but when I made the final decision on my box layout I wanted the plugs on the bottom of the box. The twist locks are just a personal preference.
One draw back of using a twist lock for a 110v plug is you can't plug the pump into a regular outlet in a pinch.
One draw back of using a twist lock for a 110v plug is you can't plug the pump into a regular outlet in a pinch
I was setting here looking at my parts and had that same thought. I think I may go with the hospital grade single outlet facing down. I don’t think there will be enough strain on the wire to make it come loose. I am using your post as a play book and ordering all my supplies to follow along step by step. Just got off the phone with Auber 5 min ago. Thanks for blazing the trail for me!!
I like how you have the control panel at a slight angle. Since I won't have a drawer handy, I was thinking of possibly putting some rubber feet on the back and making something like a lectern that they have in church to prop it at an angle for easy viewing.
I can't thank you enough for posting this. I'm not afraid of doing the electrical work, but the idea of punching a hole in a brand new $100 kettle was rather unsettling. I will go with the Greenlee punches, since this is already costing me a small fortune. At the rate I'm going ($150 a month or so), it's a race between next winter and me brewing inside. I still need to buy the Auber parts, a cart, the stainless fittings and hoses and a pump. Pretty much all I will use of my current setup is the rope ratchet and my immersion chiller.
This really ought to be a sticky.
Since I won't have a drawer handy, I was thinking of possibly putting some rubber feet on the back and making something like a lectern that they have in church to prop it at an angle for easy viewing.I can't thank you enough for posting this. I'm not afraid of doing the electrical work, but the idea of punching a hole in a brand new $100 kettle was rather unsettling. I will go with the Greenlee punches, since this is already costing me a small fortune. At the rate I'm going ($150 a month or so), it's a race between next winter and me brewing inside. I still need to buy the Auber parts, a cart, the stainless fittings and hoses and a pump. Pretty much all I will use of my current setup is the rope ratchet and my immersion chiller.
This really ought to be a sticky.
OP
OP
aubiecat
Well-Known Member
I was setting here looking at my parts and had that same thought. I think I may go with the hospital grade single outlet facing down. I dont think there will be enough strain on the wire to make it come loose. I am using your post as a play book and ordering all my supplies to follow along step by step. Just got off the phone with Auber 5 min ago. Thanks for blazing the trail for me!!
The single outlet I had was originally going to use was one of those tamper proof outlets. They tend to hold on to a plug pretty well too. You will be just fine with what you want to do.
OP
OP
aubiecat
Well-Known Member
I like how you have the control panel at a slight angle.
I can't thank you enough for posting this. I'm not afraid of doing the electrical work, but the idea of punching a hole in a brand new $100 kettle was rather unsettling. I will go with the Greenlee punches, since this is already costing me a small fortune. At the rate I'm going ($150 a month or so), it's a race between next winter and me brewing inside. I still need to buy the Auber parts, a cart, the stainless fittings and hoses and a pump. Pretty much all I will use of my current setup is the rope ratchet and my immersion chiller.
This really ought to be a sticky.
Ha Ha, the last real hurdle is for me to mount the control box on a pedestal. I plan on coming off the front right post of the cart with a mount. I just need to sit down and think it out. It was laying on the drawer because I couldn't wait to get it up and running.
About punching a hole in a kettle, believe me, I know how you feel. When I first punched the holes in my kettle I felt almost nauseous. There is always that little gnawing feeling of doubt about if you put the holes in the right place. Then you start putting the fittings on and it all starts coming together.
Just sit down and look at everything and consider the type of element you'll be using. A ripple element has to be father off the bottom of the kettle because of its shape. You have to consider whether or not you're going to be using a steamer basket and is the element going to fit under it.
I put the sight glass and the valve outlet as close to the bottom as the washers would let me.
Plan, plan and plan. You'll never regret spending a few hours sitting down and contemplating your plan of attack.
BTW, the Greenlee punches are the cat's whiskers. They are worth every penny. A clean, perfectly round hole is a thing of beauty.
Similar threads
- Replies
- 11
- Views
- 968
- Replies
- 12
- Views
- 3K
- Replies
- 4
- Views
- 1K
- Replies
- 45
- Views
- 5K
