Single Tier Build - Stout HERMS

Homebrew Talk - Beer, Wine, Mead, & Cider Brewing Discussion Forum

Help Support Homebrew Talk - Beer, Wine, Mead, & Cider Brewing Discussion Forum:

This site may earn a commission from merchant affiliate links, including eBay, Amazon, and others.

wilconrad

Well-Known Member
Joined
Nov 14, 2012
Messages
508
Reaction score
180
Location
Quad Cities
I recently finished my single tier stand build and since I found all the pics and discussion here on HBT so helpful as I was designing it, I thought I'd pay it forward by posting some shots here. It's a 9.2gal HERMS system; the vessels are from Stout Tanks & Kettles and the frame is built out of 80/20 aluminum t-slot extrusions. A BCS-460 handles the water and mash temps via a Honeywell VR8200 gas valve, and drives the 2 chugger pumps (inline for water, center inlet for wort). The chiller is a stainless counterflow from Williams Brewing. I found pictures more helpful than words as I was researching here, so I'll toss up some pics and feel free to ask any questions if you have them.

Thanks to all of you who have done the same in the past, as this was extremely helpful for me as I built this system!

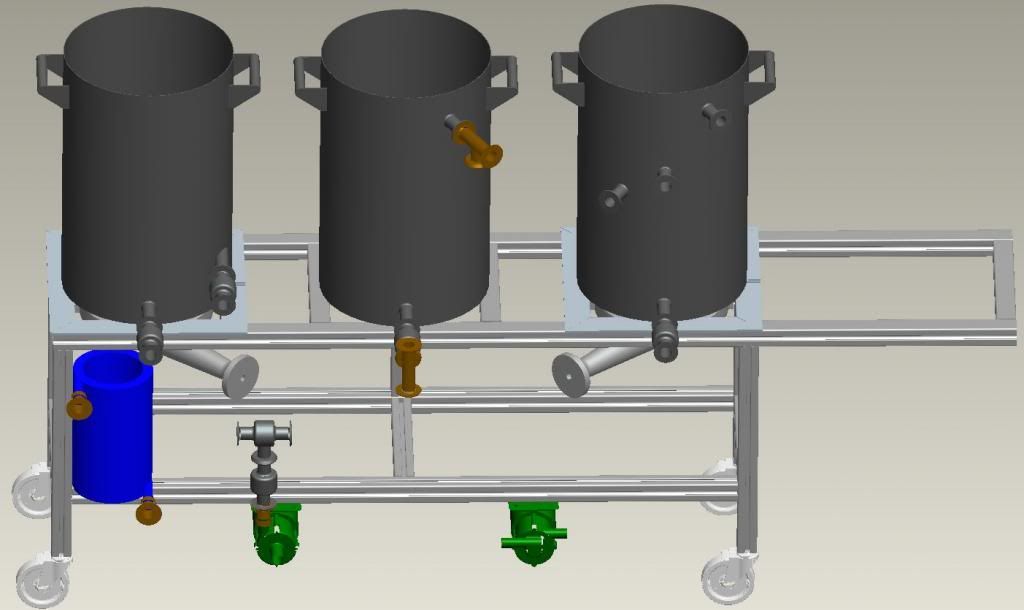
Pro/E model of the stand:
ProE_zpsb64c75a9.jpg


Frame taking shape. At first I tried to cut the 80/20 t-slot extrusions with a chop saw, but that made an ugly cut and the blade just saturated with aluminum rendering it useless. So I dropped by my local hardware store and they had a toothed non-ferrous blade on their chop saw for cutting window framing; it cut through this stuff like butter and left a nice clean cut.
IMG_1322_zps8ea63a53.jpg

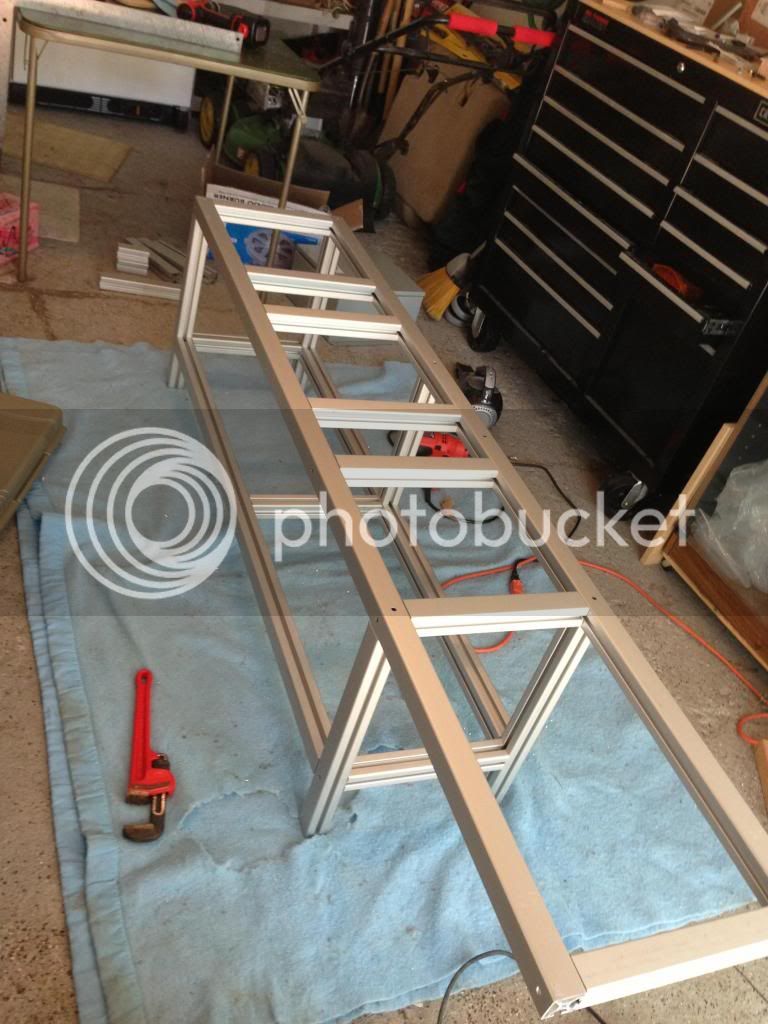
The frame is held together by socket head cap screws threaded into the ends of each extrusion section. The extrusions have a centered hole, so it's easy to run a 3/16-18 tap in and bolt it all together.

A few shots of the gas plumbing:
DSC00540_zpsc00f6c15.jpg

DSC00539_zpsa087cd66.jpg

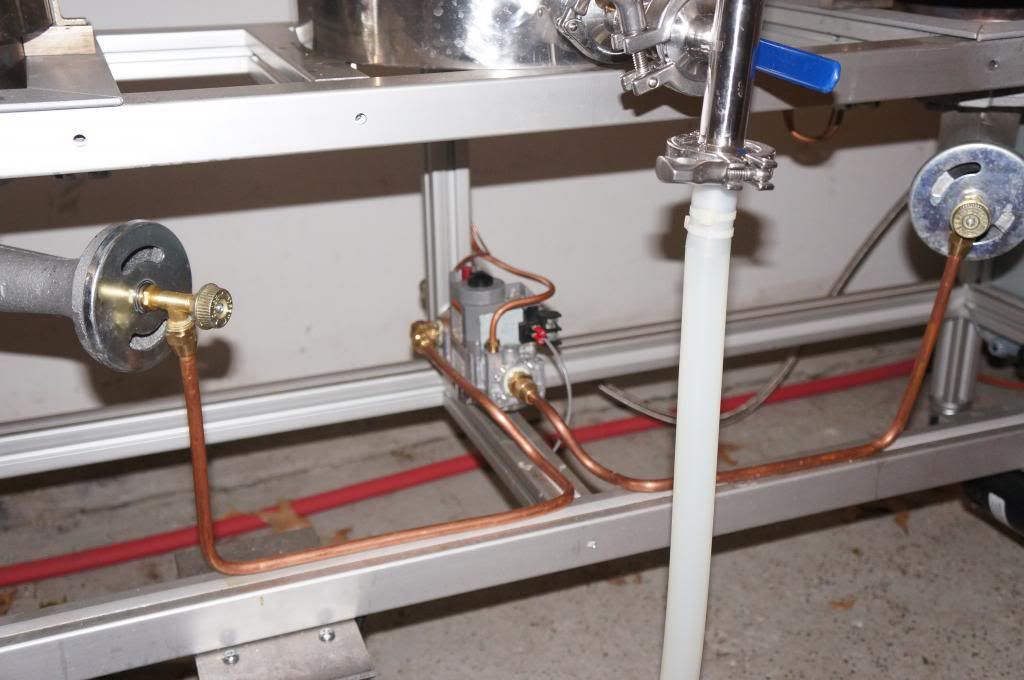
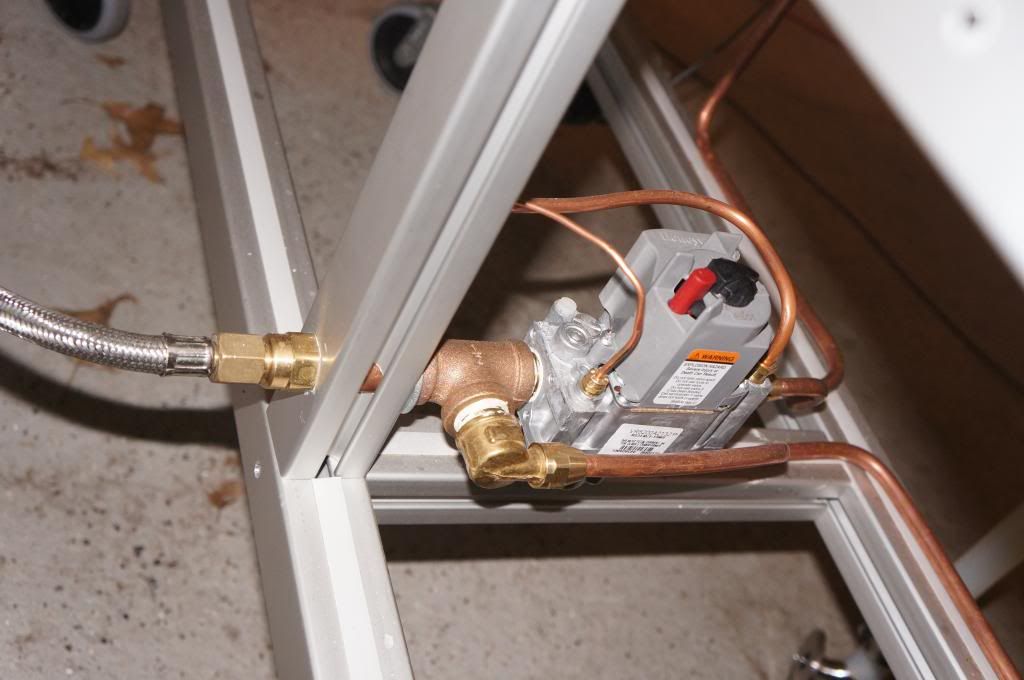
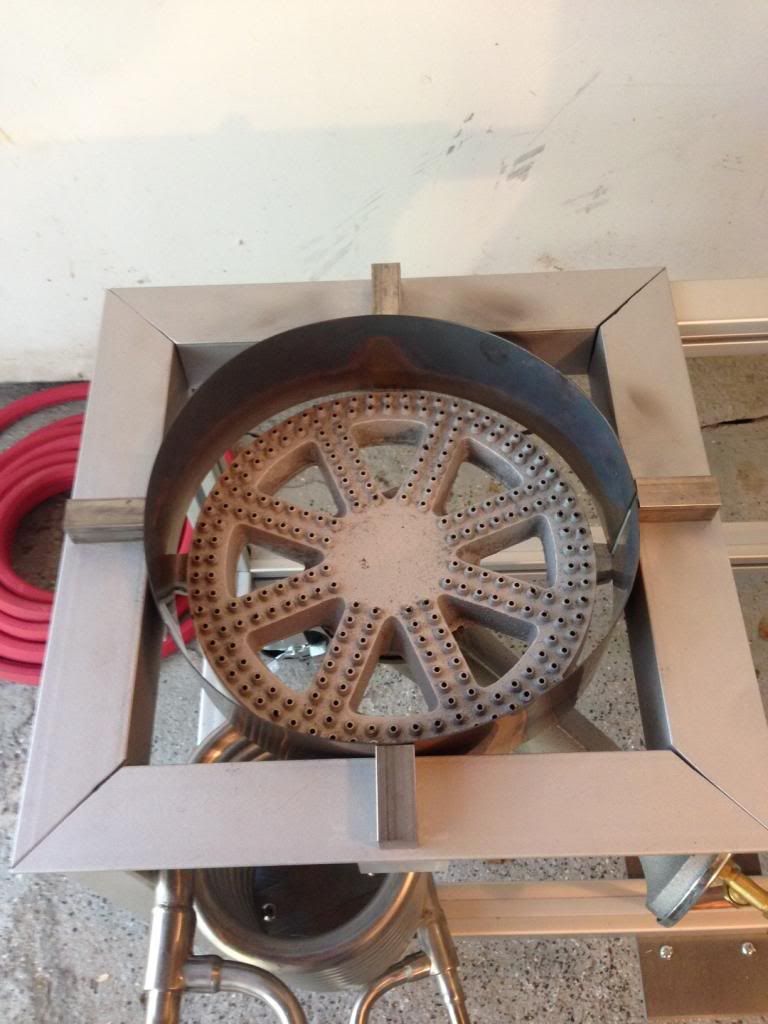
This system is running on low-pressure (11" WC) LP gas, the needle valves at each burner have an orifice that I drilled out to 5/64". This provides enough heat for a good rolling boil.

I didn't want to trust the aluminum framing to direct flame exposure, so I built some heat shields out of 2" angle iron (regular mild steel) and painted them up with VHT header paint. After curing these guys in the oven, they have put up with serious heat without issue. I also added a windscreen out of 20ga stainless sheet to direct the heat up to the kettle, and used 3/4" stainless square solid stock to support the pot and allow some "breathing room" for the burner.
Burner_zps6ce59ce2.jpg


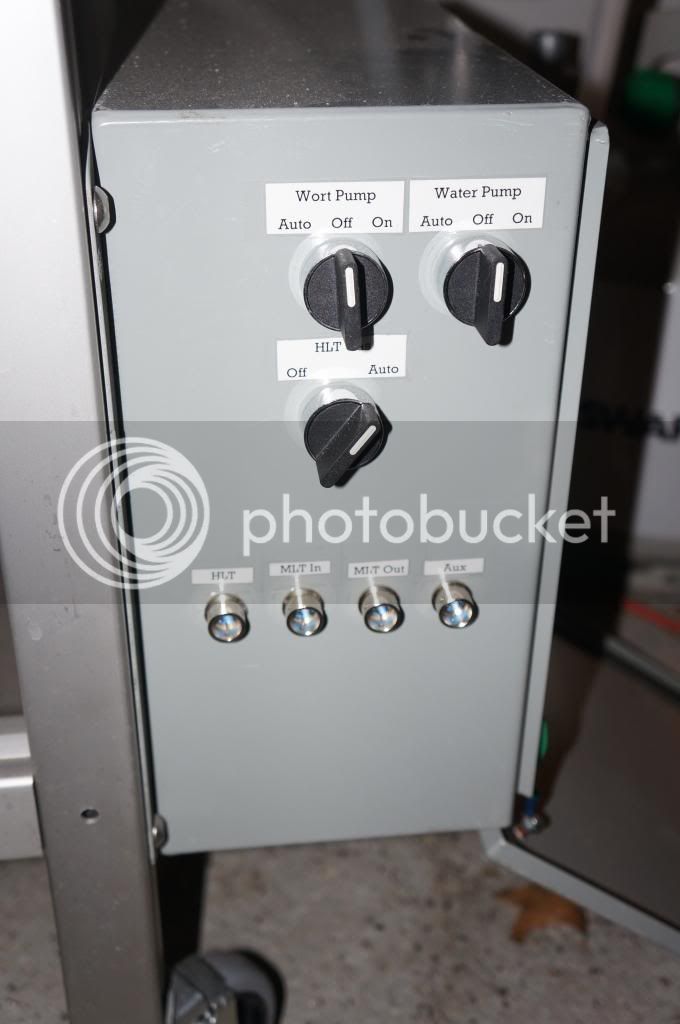
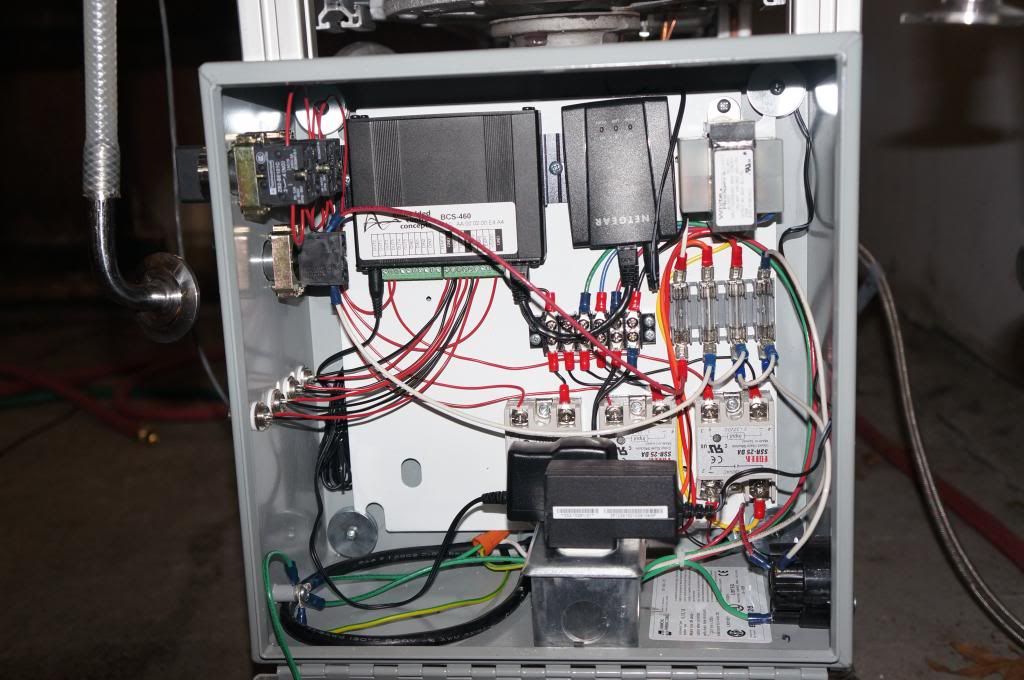
The electronics are mounted in a 12"x12"x6" NEMA 12 enclosure:
DSC00542_zps0947cbb4.jpg

DSC00541_zpsa205aa71.jpg


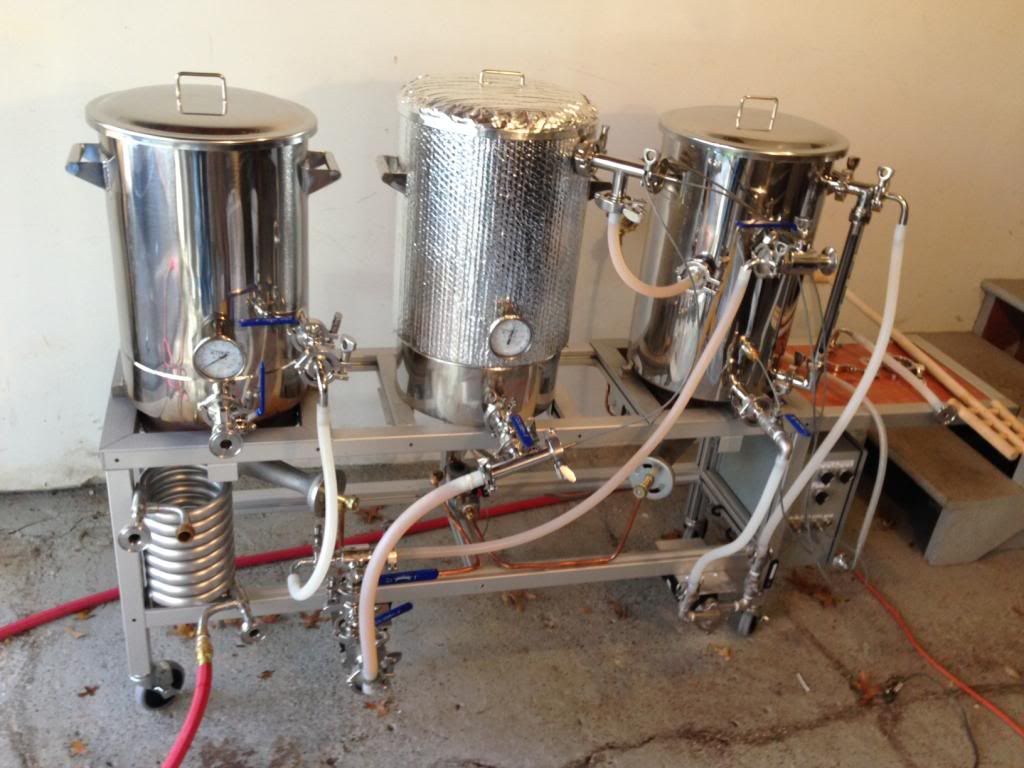
Here is the full stand, nearing completion. I stained/sealed a piece of birch for the shelf on the right side of the stand, which has proven to be a useful addition.
Stand_90_zps68760010.jpg


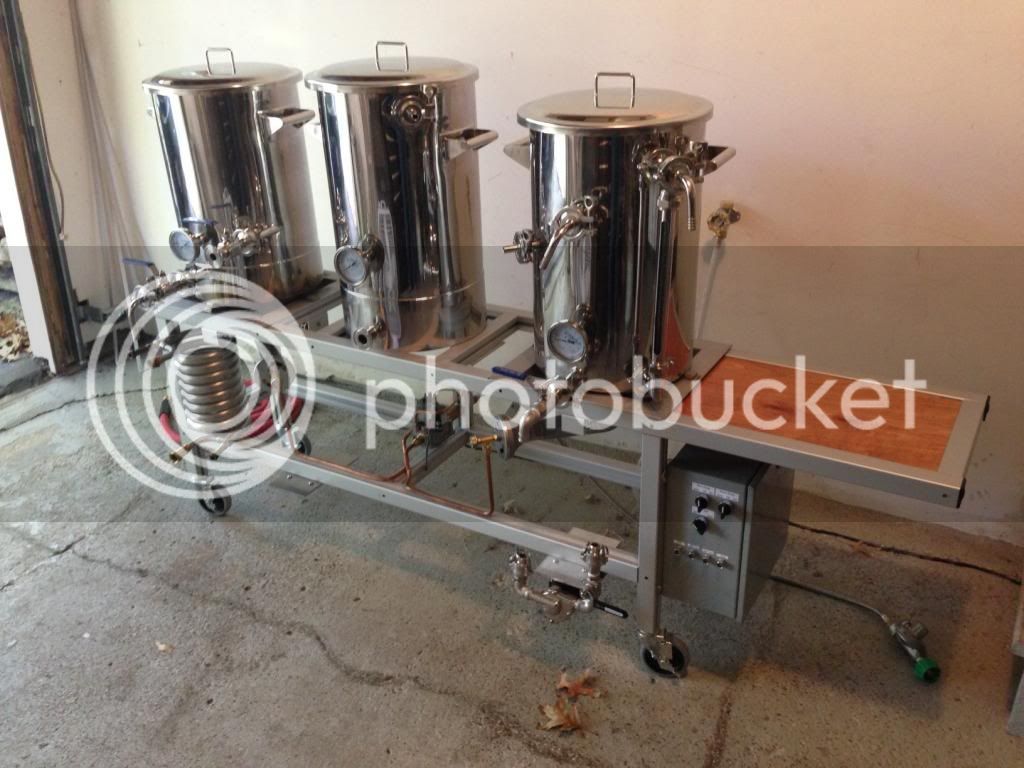
I brewed the first 3 batches this weekend and the stand performed well, here's a shot of it running the mash:
Stand_Running_zps46c3f14e.jpg


Thanks again to everyone who posted writeups on their builds!
 
very nice. I have been thinking of trying ways to get my copper to drop down 90 degrees from the orifice hookup. Your needle valves look great from that. Details on where they came from?
 
very nice. I have been thinking of trying ways to get my copper to drop down 90 degrees from the orifice hookup. Your needle valves look great from that. Details on where they came from?

I got the valves from Tejas Smokers. They also have regular elbows that go from flare to npt/orifice if you just want to make the 90 without adding a valve.

Here's a link:
http://tejassmokers.com/products/brassfittings.htm
 
Great build! I'm finishing up my planning on a very similar rig now and had a couple of questions.
1. Curious about using the 2 different chugger pumps
2. Any chance you have a parts list
3. Any chanced you have a wiring diagram for the control panel
4. Where did you source the 8020

I really like how you ran the gas as well, very clean. Thanks for posting this as well, really helped.
 
Thanks HopChef!

1. I was going to buy 2 chugger center inlets, but then I was able to pick up the inline, used, on this forum for $100. Both styles work just fine. I like the idea of a center inlet for wort just because it's a little more open on the inlet side, but frankly I doubt if it makes a big difference as long as you plumb correctly.

2. I didn't make a parts list but would be happy to, will try and put something together after the holidays.

3. Same as above, I didn't make a wiring diagram, but will draw one up, no problem.

4. I got the 80/20 off of eBay, direct from the manufacturer. They sell odd lengths and scratch/dent stuff there, so it's cheaper. I also got a quote for the new stuff from a local supplier just to see, would have been about 40% higher to go that route.
 
I appreciate it. I've been primarily going off a couple of PJs schematics for the wiring. I've also been trying to understand your temp monitoring as well. Looks like you have a temp probe on the input and the output for the MT and another in the thermowell for the HLT. Is there a specific calculation incorporating the top and bottom of the MT that factors into when the HLT burner fires to maintain your mash temp. I'm also going with the 2 burner configuration and my diagram has a monitor on the output of the MT and the thermowell of the HLT just to monitor the difference in the temp of the mash and the HLT. The honeywell valve would be triggered by the temp setting of the output of the MT during the mash and then on the HLT during sparging. I plan on operating the BK manually to heat strike water and to maintain the boil, which looks like your same set up as well.

Also curious about the performance of the stainless wort chiller. Sorry for the litany of questions, and thanks again for the help.
 
You're correct, I'm using both the input and output side of the MLT to drive the burner. The problem you run into if you use only the output is that the MLT doesn't come up to temp fast enough and you'll be boiling the HLT before you get the MLT stepped up. To get around this, I use the output side to drive the burner but have an upper limit applied to the input side, so if I'm stepping up to 150, I'll have a limit that only allows the input side to get up to 165 to avoid denaturing the enzymes. I do this with a PNP transistor ($1.99 at RadioShack). Once I'm home from thanksgiving, I'll draw up a schematic so you can see how it works, but that's the general concept.

There is a gradient between the hlt and MLT input, which is why I don't just apply this logic directly to the hlt.
 
On the performance of the stainless chiller, it seems to be good, not great. I've never owned a copper counterflow, so I can't make a fair comparison, but I was expecting more "wow" factor. It takes about 20 mins to chill 5 gal down to 70 from a boil, input water at around 60ish. I'm happy with it, but was really hoping to be blown away by it (wasn't).
 
Your running herms, but how are you running your recirculation and then your sparge arm without two separate fittings? Are you changing out the recirculation to sparge arm after your initial mash? Just wondering because I have a stout mash tun and getting ready to order their HLT with herms, but trying to figure out how to pipe the thing without a second recirculation fitting, because I didn't think of this when I ordered. Also before I order off their HLT and BK do you have any suggestions of things you would have done differently from their standard top of the line HLT and BK?
 
I don't uses sparge arm, I just sparge through the recirc tube. I don't think a sparge arm would make a ton of difference at our scale, but I could be wrong there. I just run the sparge so there's about 1"-2" of water above the grain bed and it seems to work.

On the HLT, I did drill a hole at the top of the sight glass elbow and soldered in a piece of tubing and a triclamp port, which I use as a recirc port (for the water, not the wort). I had Stout quote the addition of a dedicated recirc port, but it was more than I wanted to pay. Other than that, I haven't made any changes to their standard tanks and have been happy with the setup.
 
Are you affiliated with any of the clubs around town? Nice Rig!
 
Are you affiliated with any of the clubs around town? Nice Rig!

Thanks! I'm relatively new to the KC area, so haven't gotten very involved yet, but would like to. I joined KCBM and went to the October meeting and enjoyed it. I travel a lot for work, though, so I've missed all the meetings since. I'm planning to come to the Jan meeting and volunteered as a steward for the upcoming competition.

I also joined the "KC Nano Brews" group on facebook, but I haven't gotten involved with that group at all. Are there any other brewing groups in the area?

:mug:
 
Back
Top