Golddiggie
Well-Known Member
Before this I had been using a fridge I converted into a kegerator back in 2011. That could handle up to four 3 gallon kegs and had three taps through the door. With the freezer on top, for hops of course, it did a good job for what I wanted.
Since getting back into brewing, after about a six year break, I decided that it simply wasn't big enough. With brewing 9 gallon batches of my English IPA, and 6 gallon batches for the other beer recipes, I was limited as to what I could chill/carbonate at a time. Plus I decided that I wanted to be able to have some recipes on nitro mix.
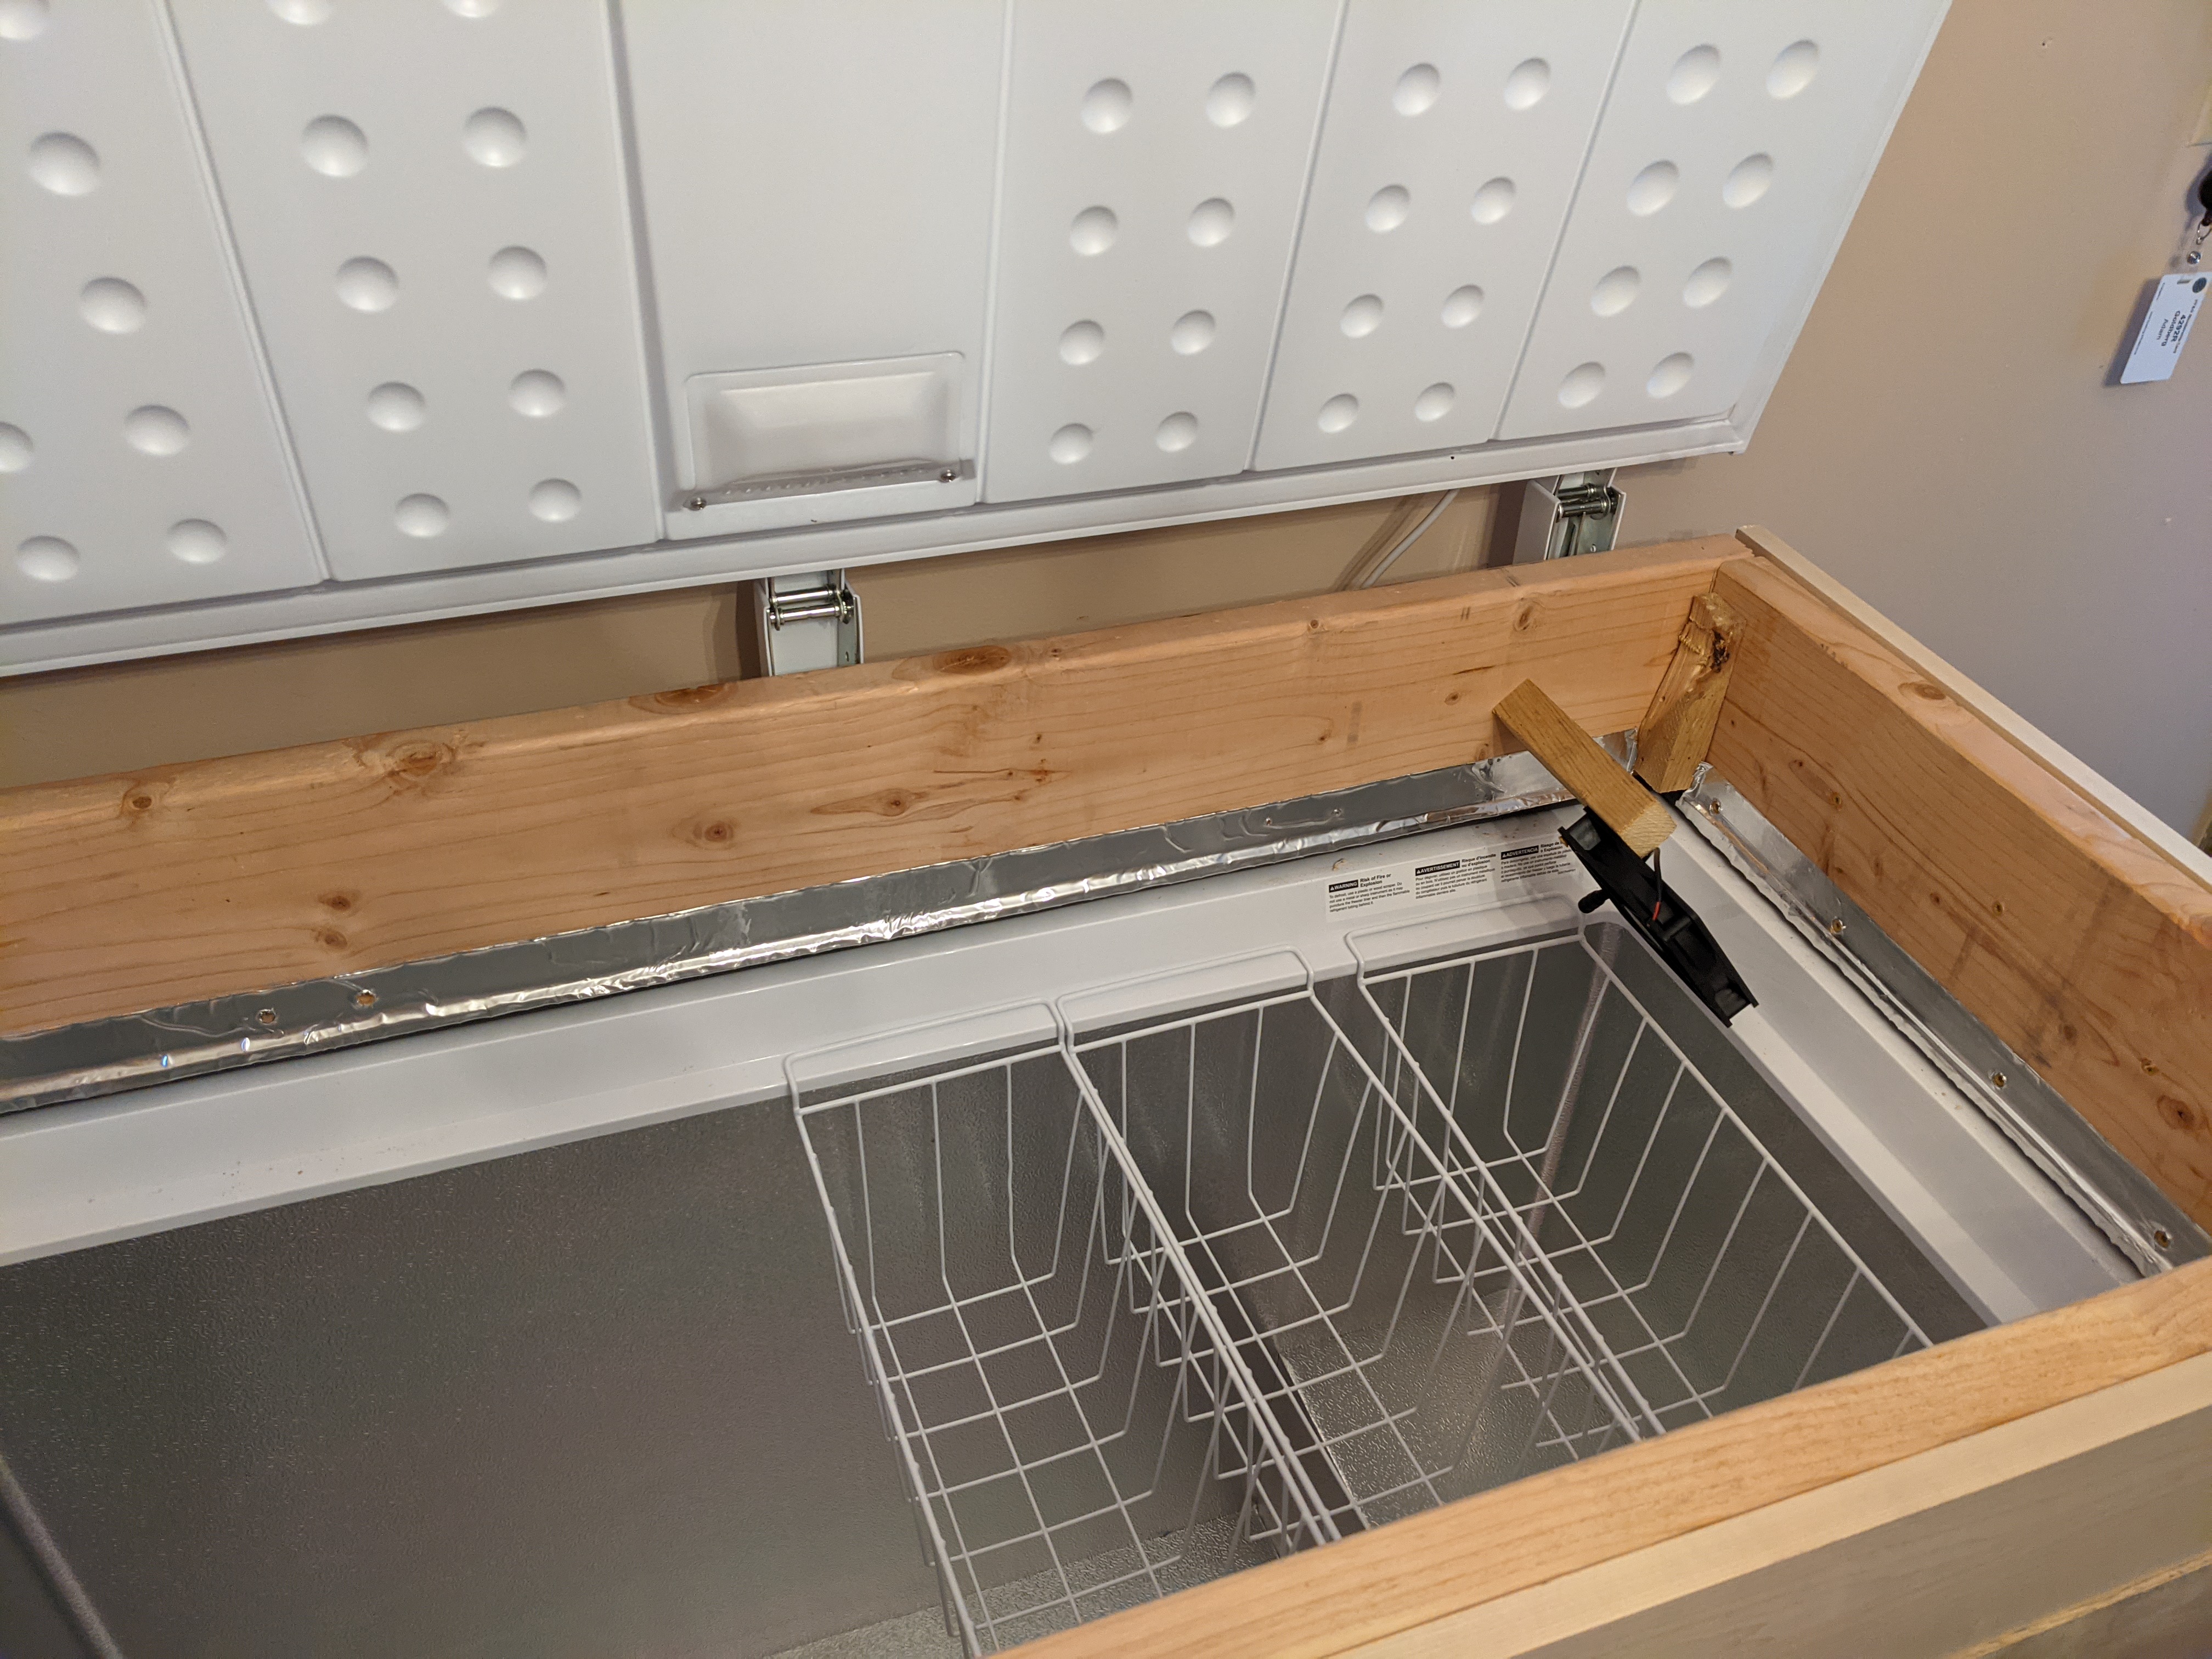
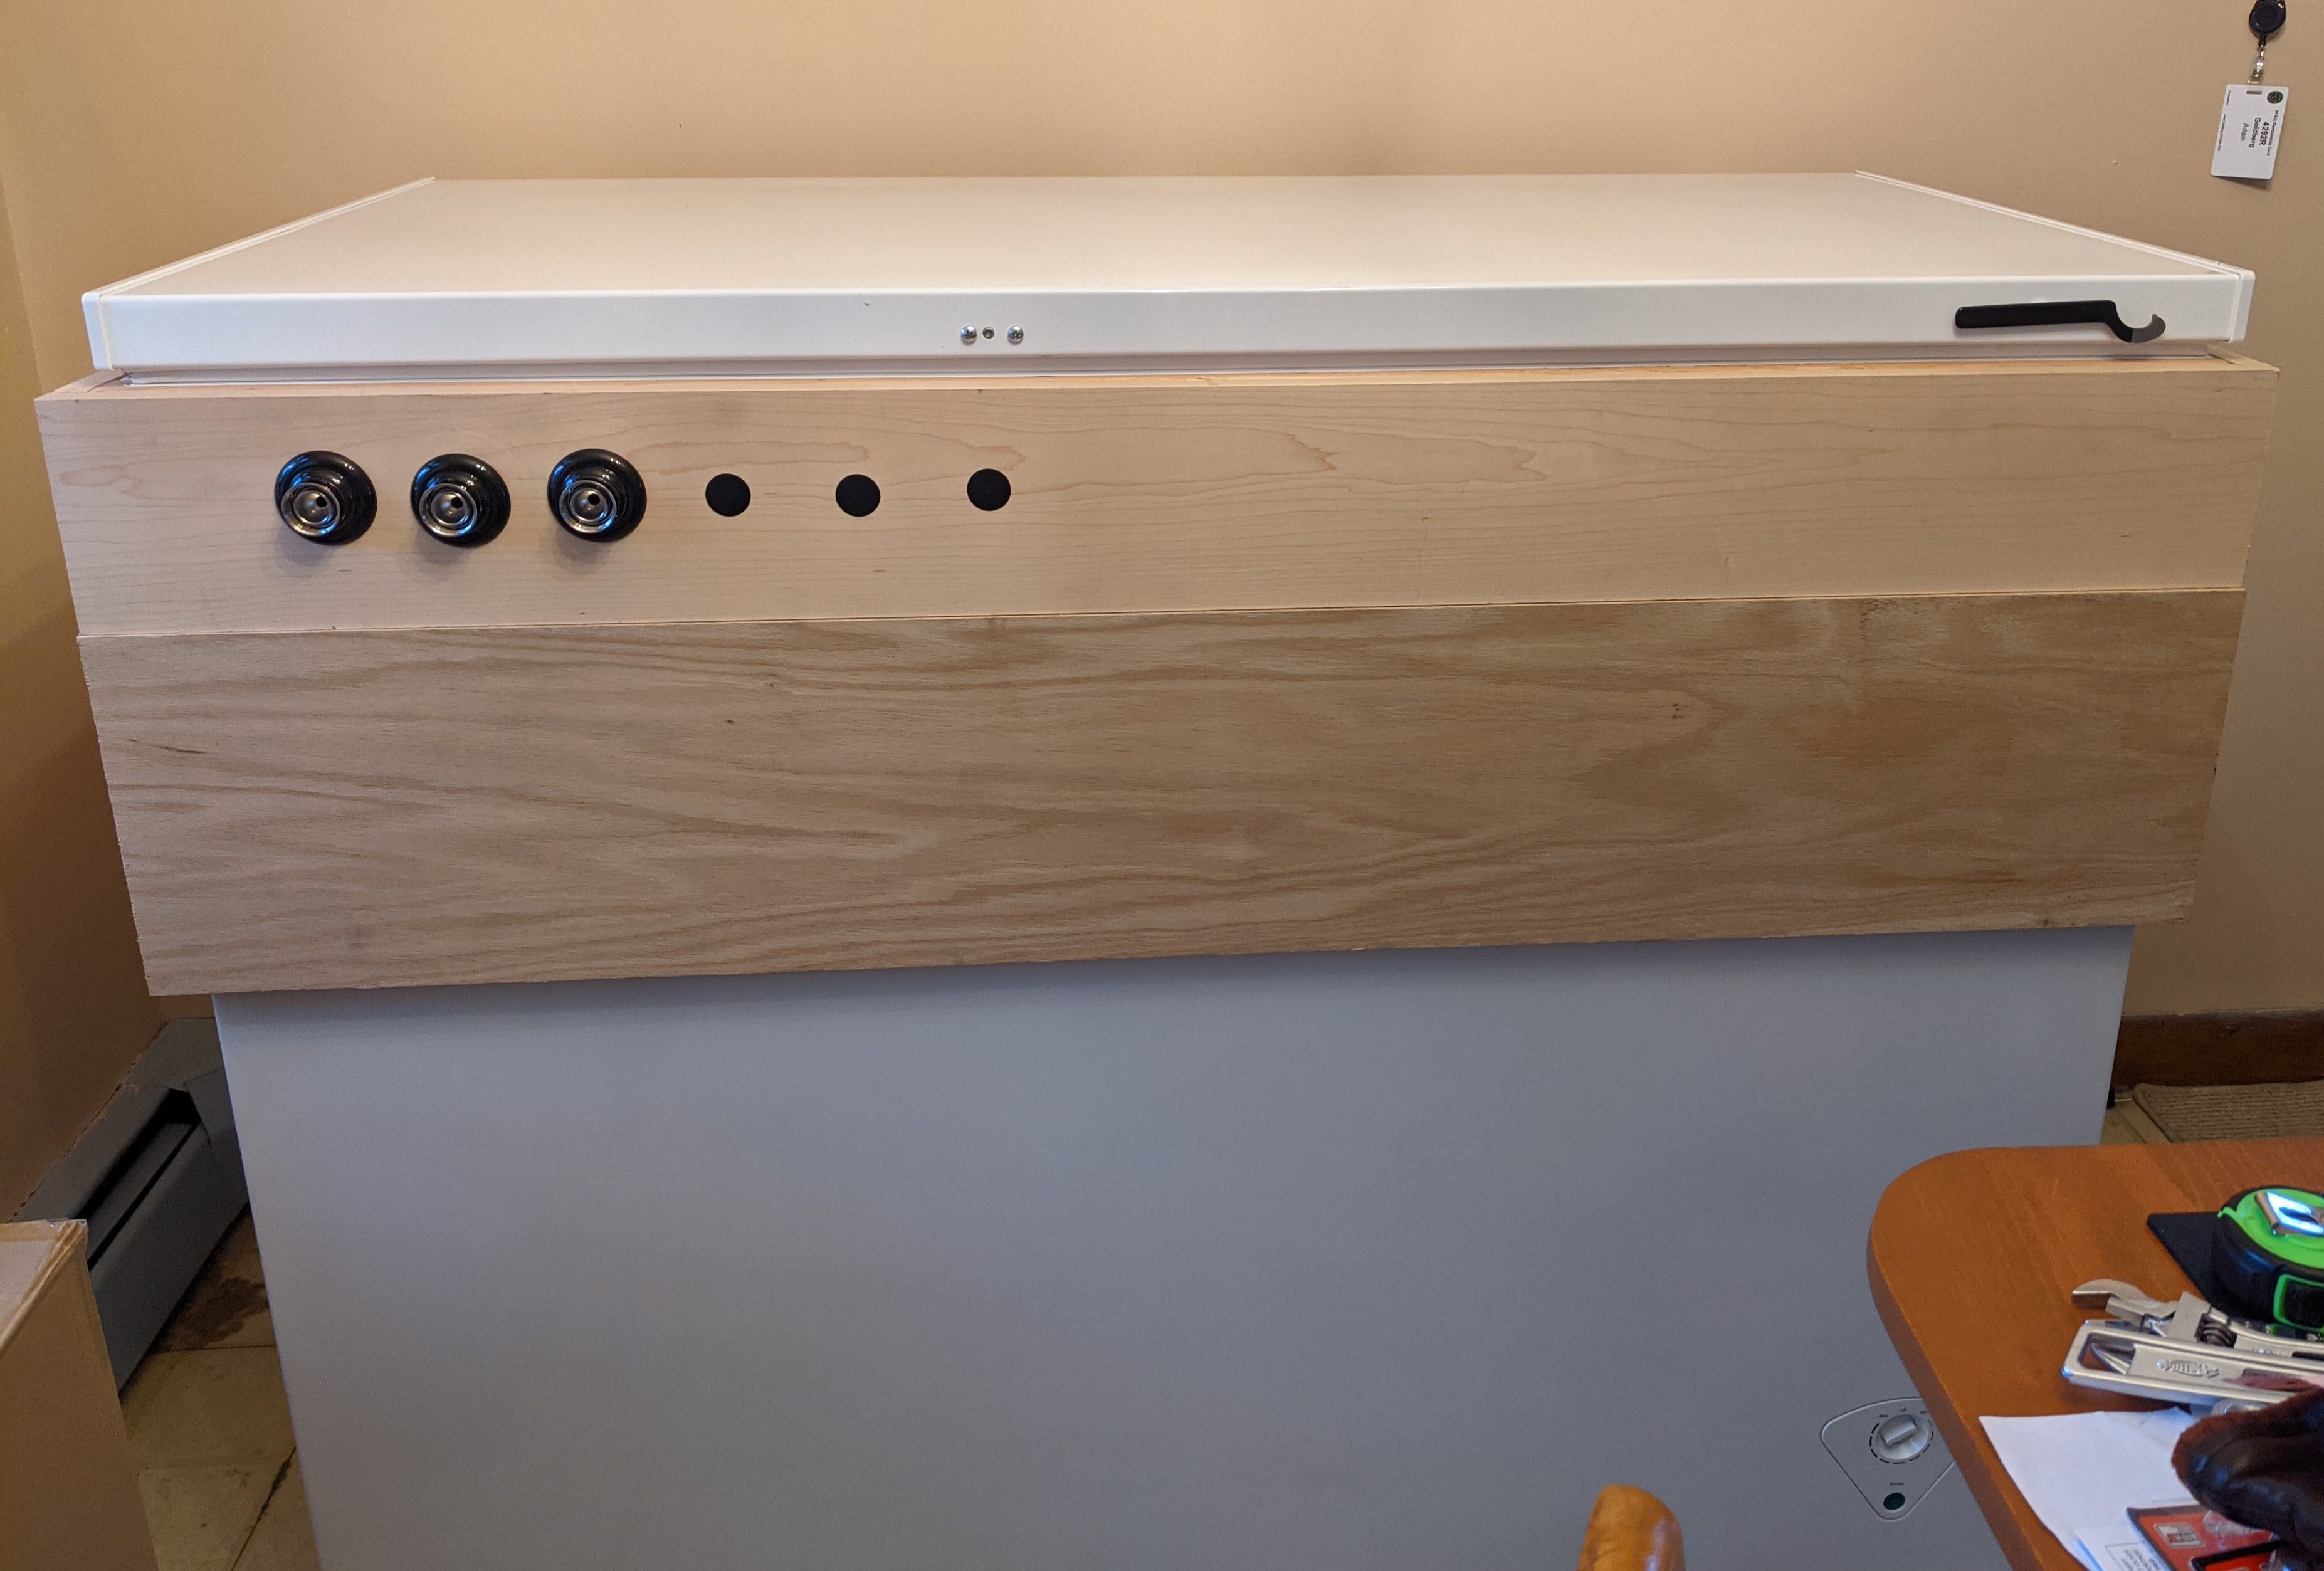
Started looking at what size made sense to me, for keg count, and seeing WHO had any in stock/available. Was looking at a 9.4 cubic from Homeless Despot, but it went OOS before I could pull the trigger. Ended up getting a 10.6 cubic foot (GE) freezer (free delivery, which I needed since I live alone). It arrived last Wednesday (11/4) and I picked up the wood to make the collar that Saturday. I purchased enough 2x8 for the main part of the collar, along with lengths of 1x6 maple and 1x10 oak for the outside "skin". I went with that much outside so that I could secure drip trays and have plenty of room for resting glasses under taps.
Put the main part of the collar together, then got some assistance getting it up from the garage (under the house) into the dining area (first floor). Said helper also gave a hand putting the oak pieces into position. The maple and oak go around the front and two sides/ends. There's only a couple of small pieces on the back to keep the collar from moving forward (at all).
I picked up an Inkbird WiFi ITC-308 to keep this at the temperature I wanted (38f is my current target). A hole was drilled in the back for the sensor it uses as well as for the 120v box fan that's set to keep the cold air circulating.
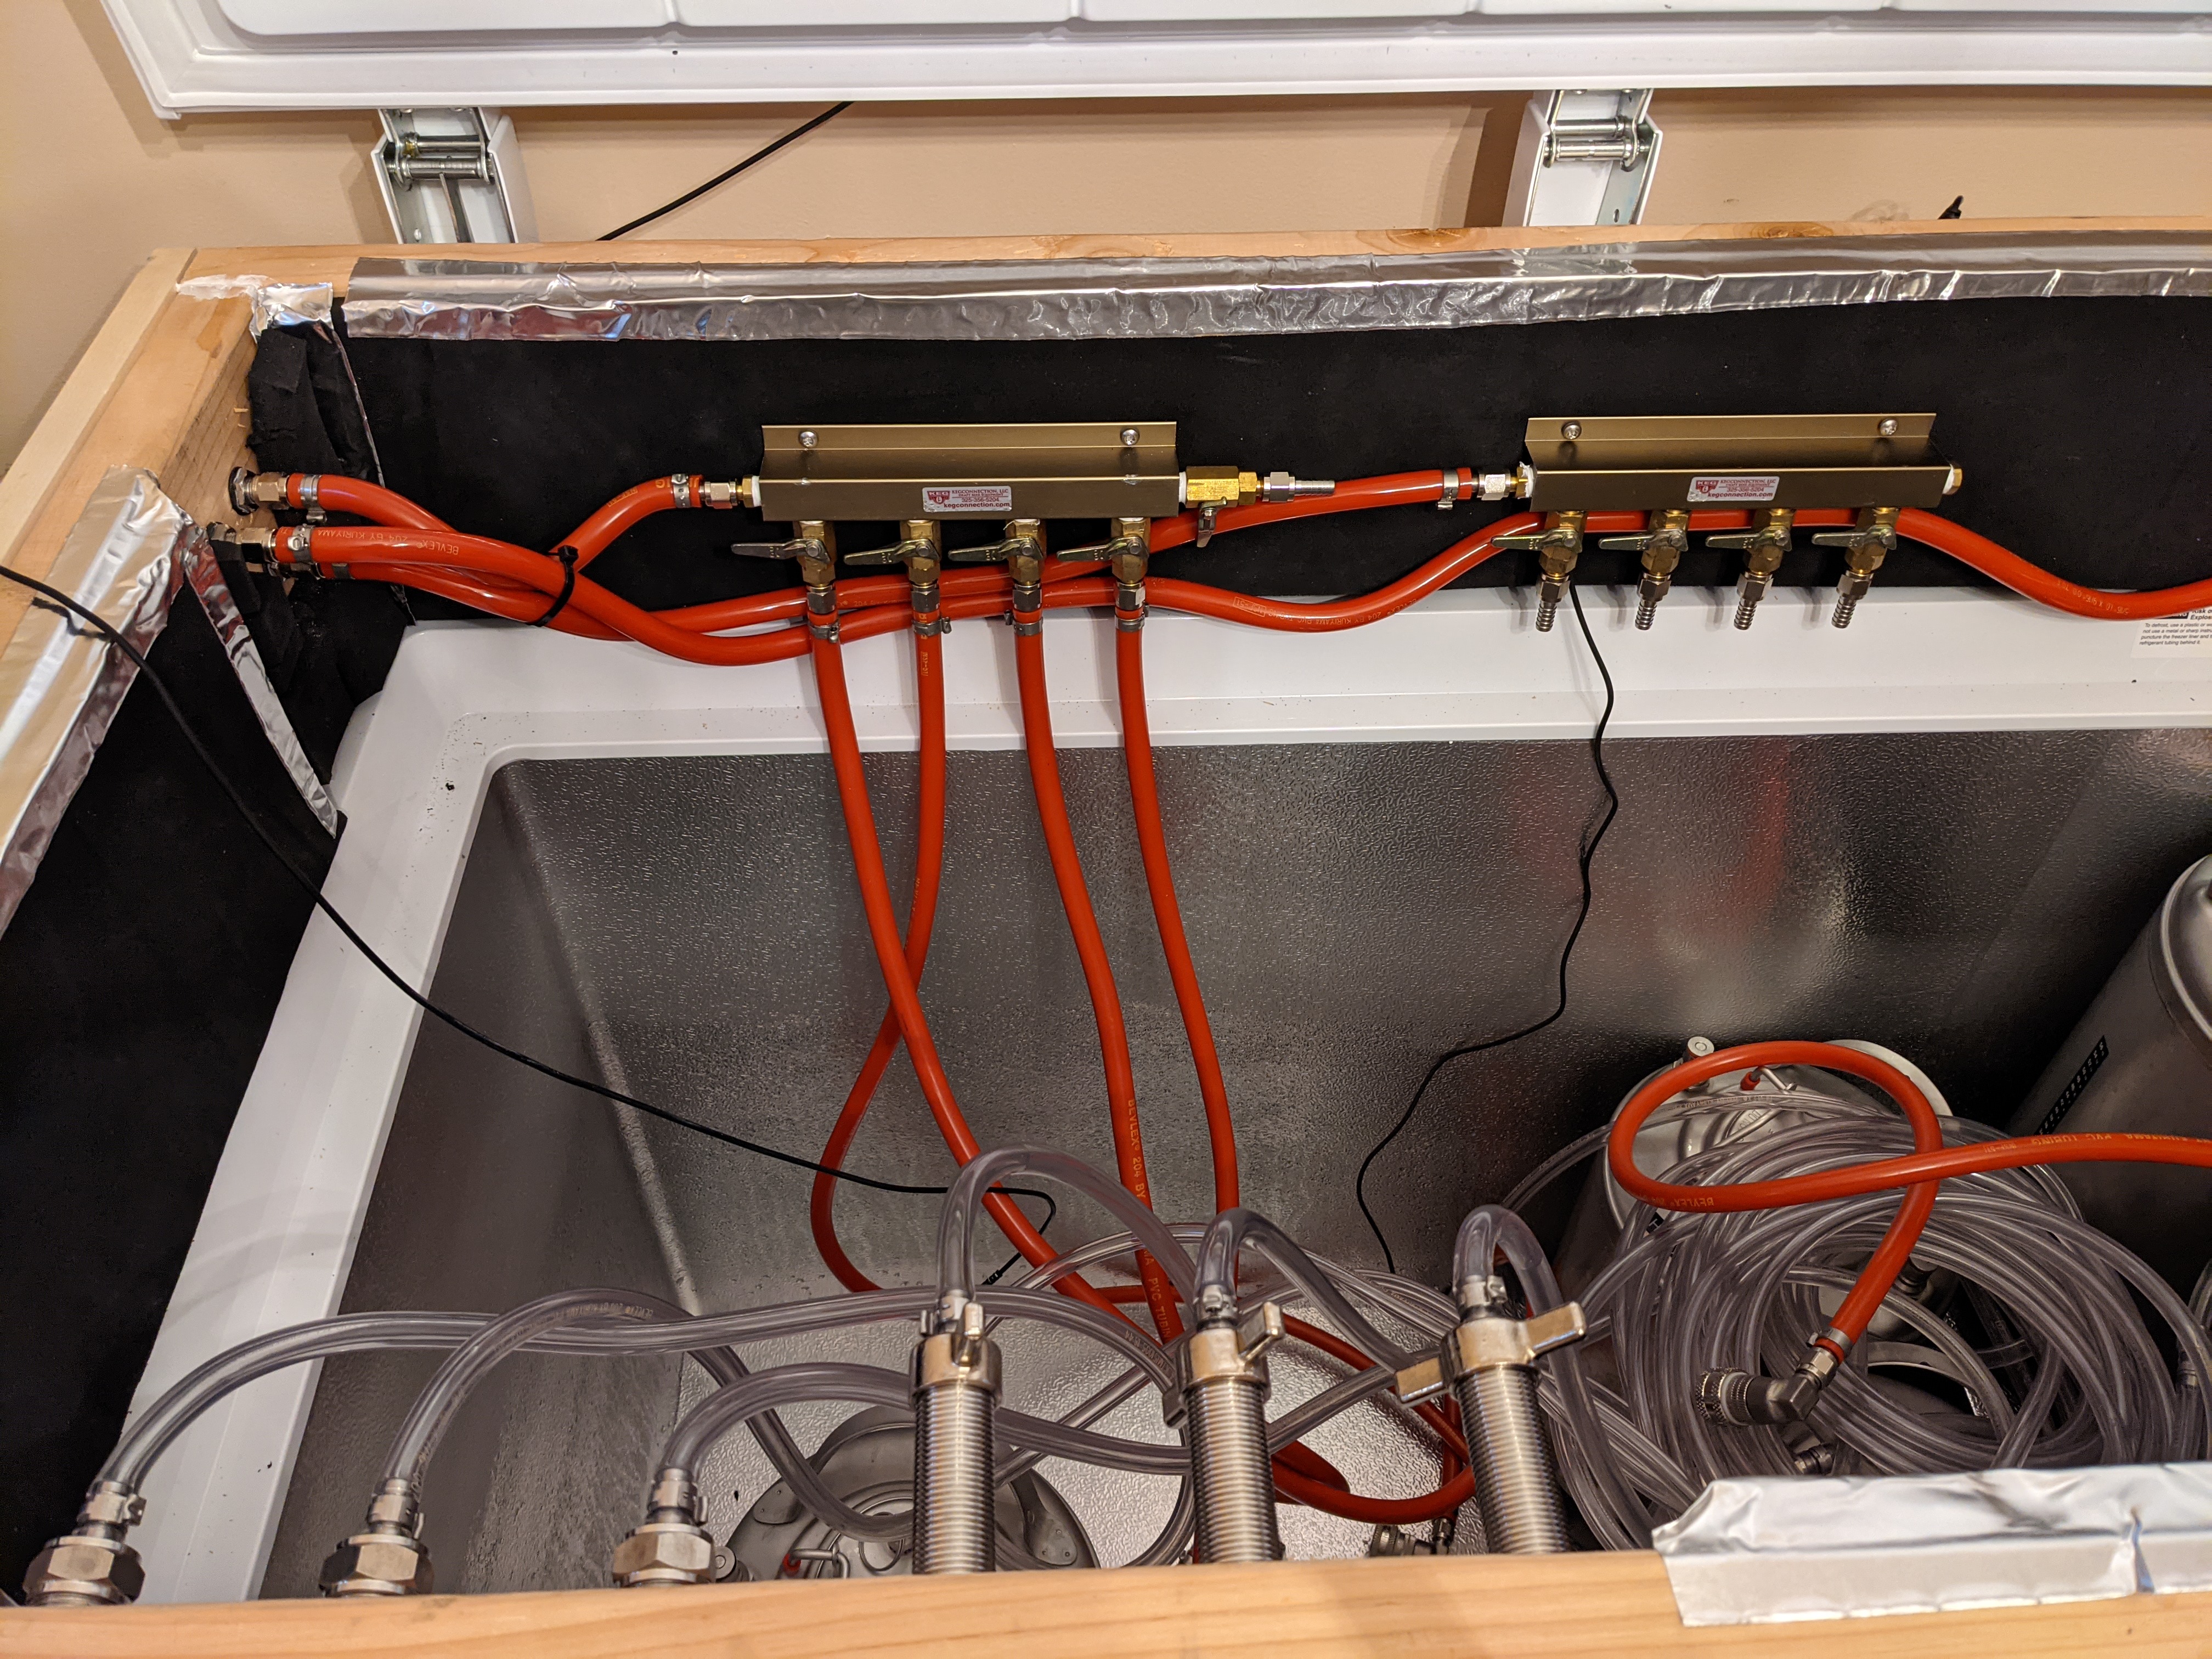
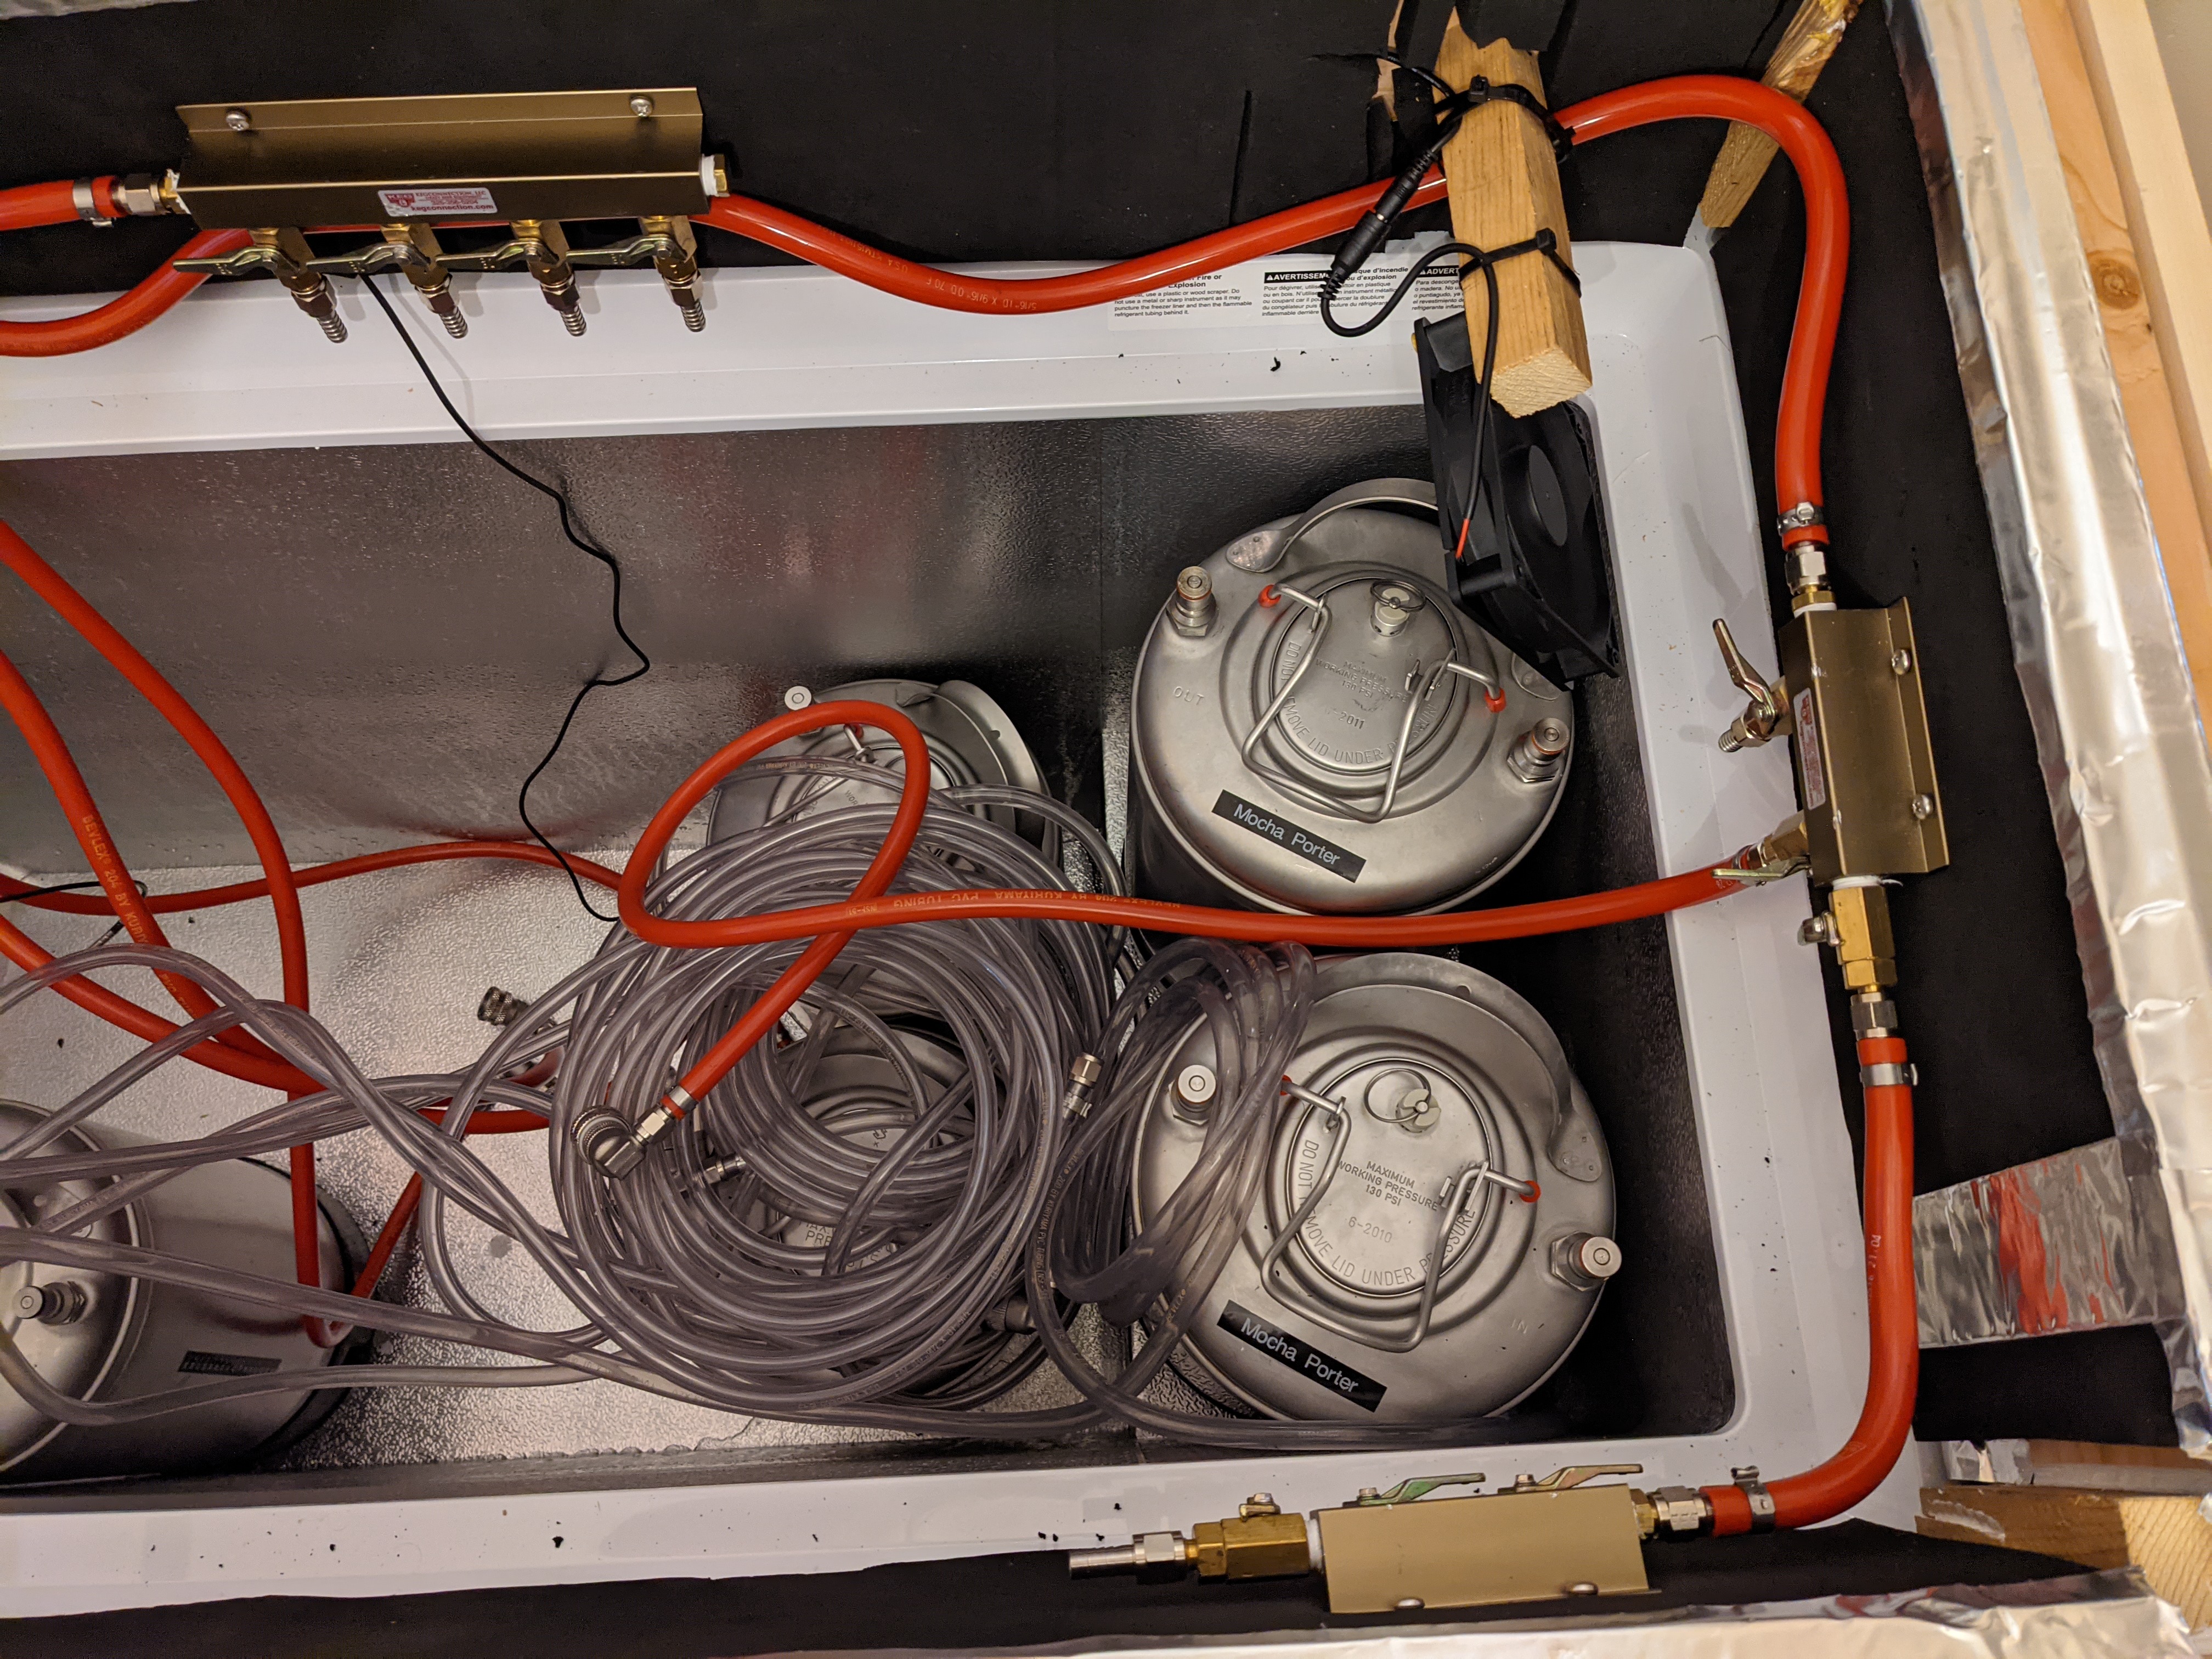
With the temperature swings I was seeing, I ordered up some 1/2" thick neoprene foam (adhesive backed) insulation and applied it to the inside of the collar. I then installed the manifolds for the gas distribution. I have a dual body regulator (Taprite) on my 20# CO2 bottle. Which gives me five feeds for the higher pressure set and four for the lower pressure set (or secondary set). I decided to use two of my [normally] two port manifolds for the nitro mix feed. Connected the two together and added a ball valve (with the check valve in it) into the port that normally has a plug in the second one. That gives me up to five connections for the nitro mix. I already had all of these manifolds on hand, plus valves and most of the fittings. I did order a few more of the 1/4" npt to mfl adapters for interconnecting the manifolds and such. Plus the bulkheads for sending the gas through the collar. I could have simply drilled holes in the collar and sent the tubing directly through. But, I wanted to be able to easily disconnect the gas feeds without having lines hanging off the side of the collar/keezer.
Temperatures are averaging 38F at this time. I have the Inkbird set for a 2 degree variance (kicks on at 40F, off when it hits about 37ish and it drifts to about 36F). It's a LOT quieter than the fridge ever was too. I have the fan spinning almost as slow as it will, so there's very little sound coming from that.
I had wanted to get some walnut for the top section of the collar skin, but that wasn't in store when I went to get the lumber. So I ended up with the maple and oak. I did place some adhesive foam on the underside of the collar where it contacts the freezer to help seal it together. I might add that to the top as well. I'm also probably going to remove the Inkbird sensor I have in the keezer since I'm pretty sure it's good to go as it sits now. I'll figure out what I'll use that for later. Maybe when I have two items fermenting at the same time, in the fermentation chamber, I'll have temperature readings for both.
The last thing I did was tighten up some of the fittings last night and let the CO2 pressure test until this morning. Zero change (using the 'standard' method of charging the system and turning off the tank). I then installed the beer QDs on the remaining lines that didn't have them and coiled it all up (used Velcro to secure them together). I might do something to better manage the gas lines down the road. I just need to think on it a bit.
Pictures:
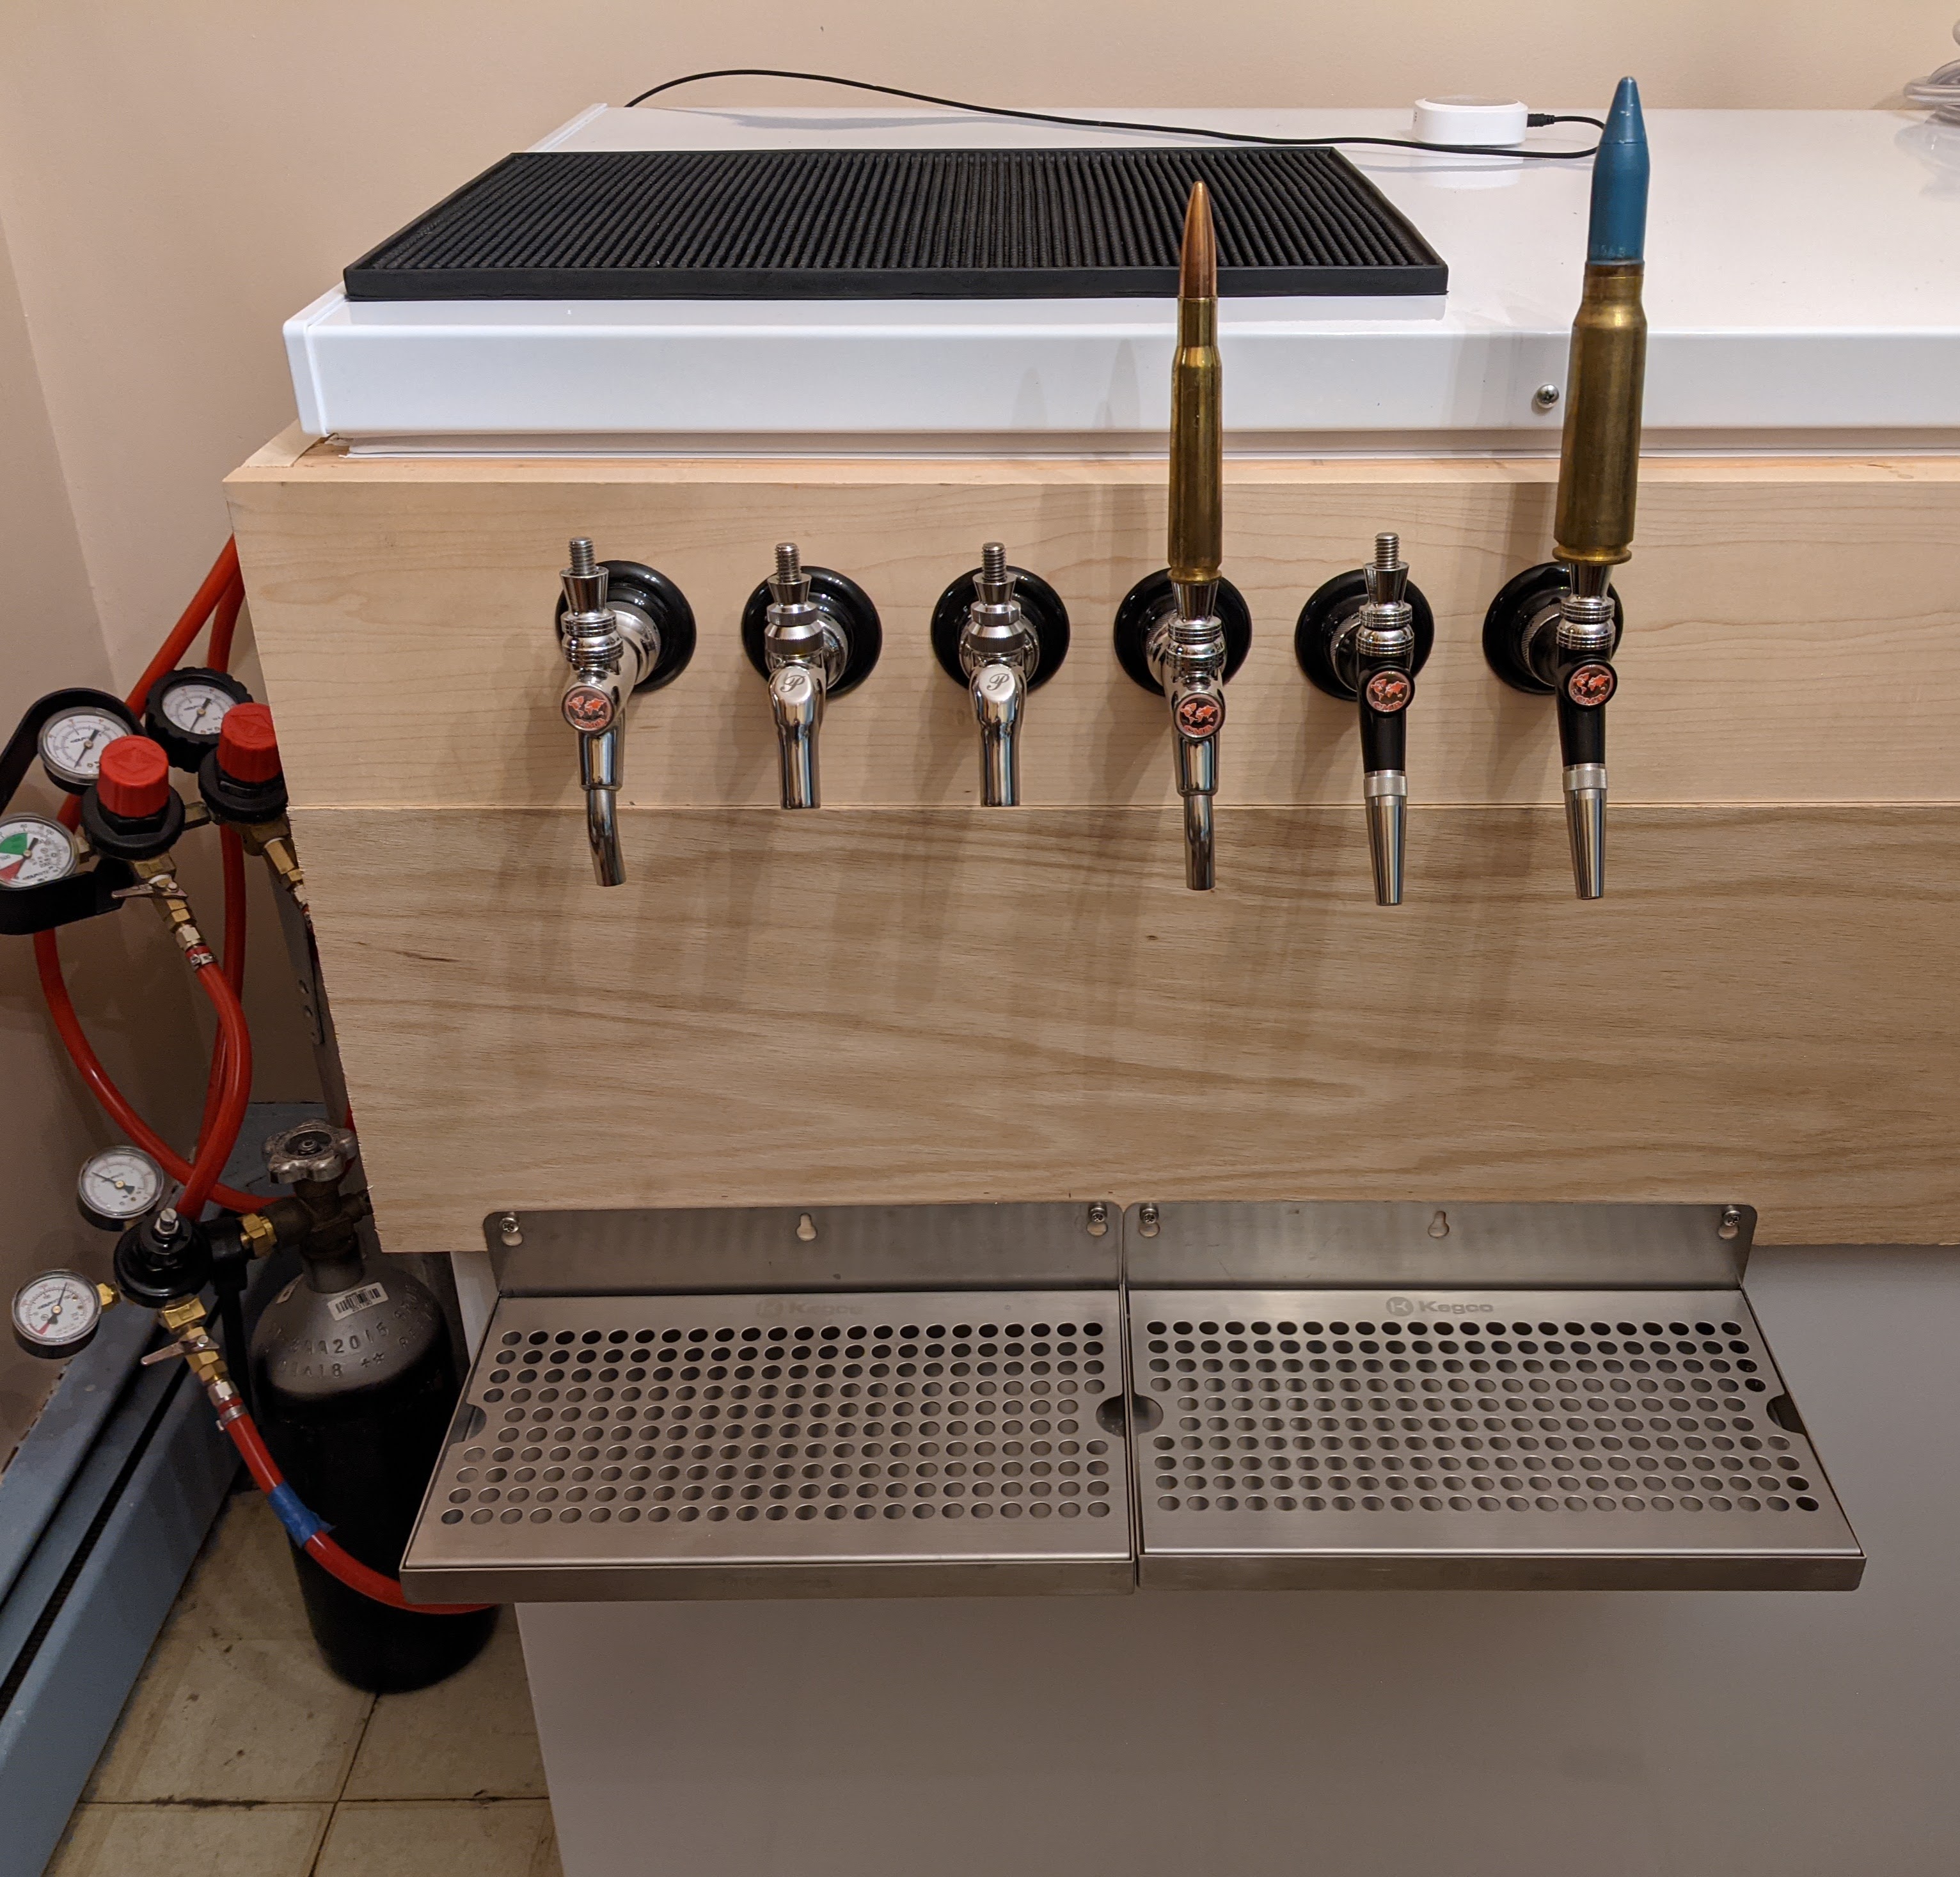

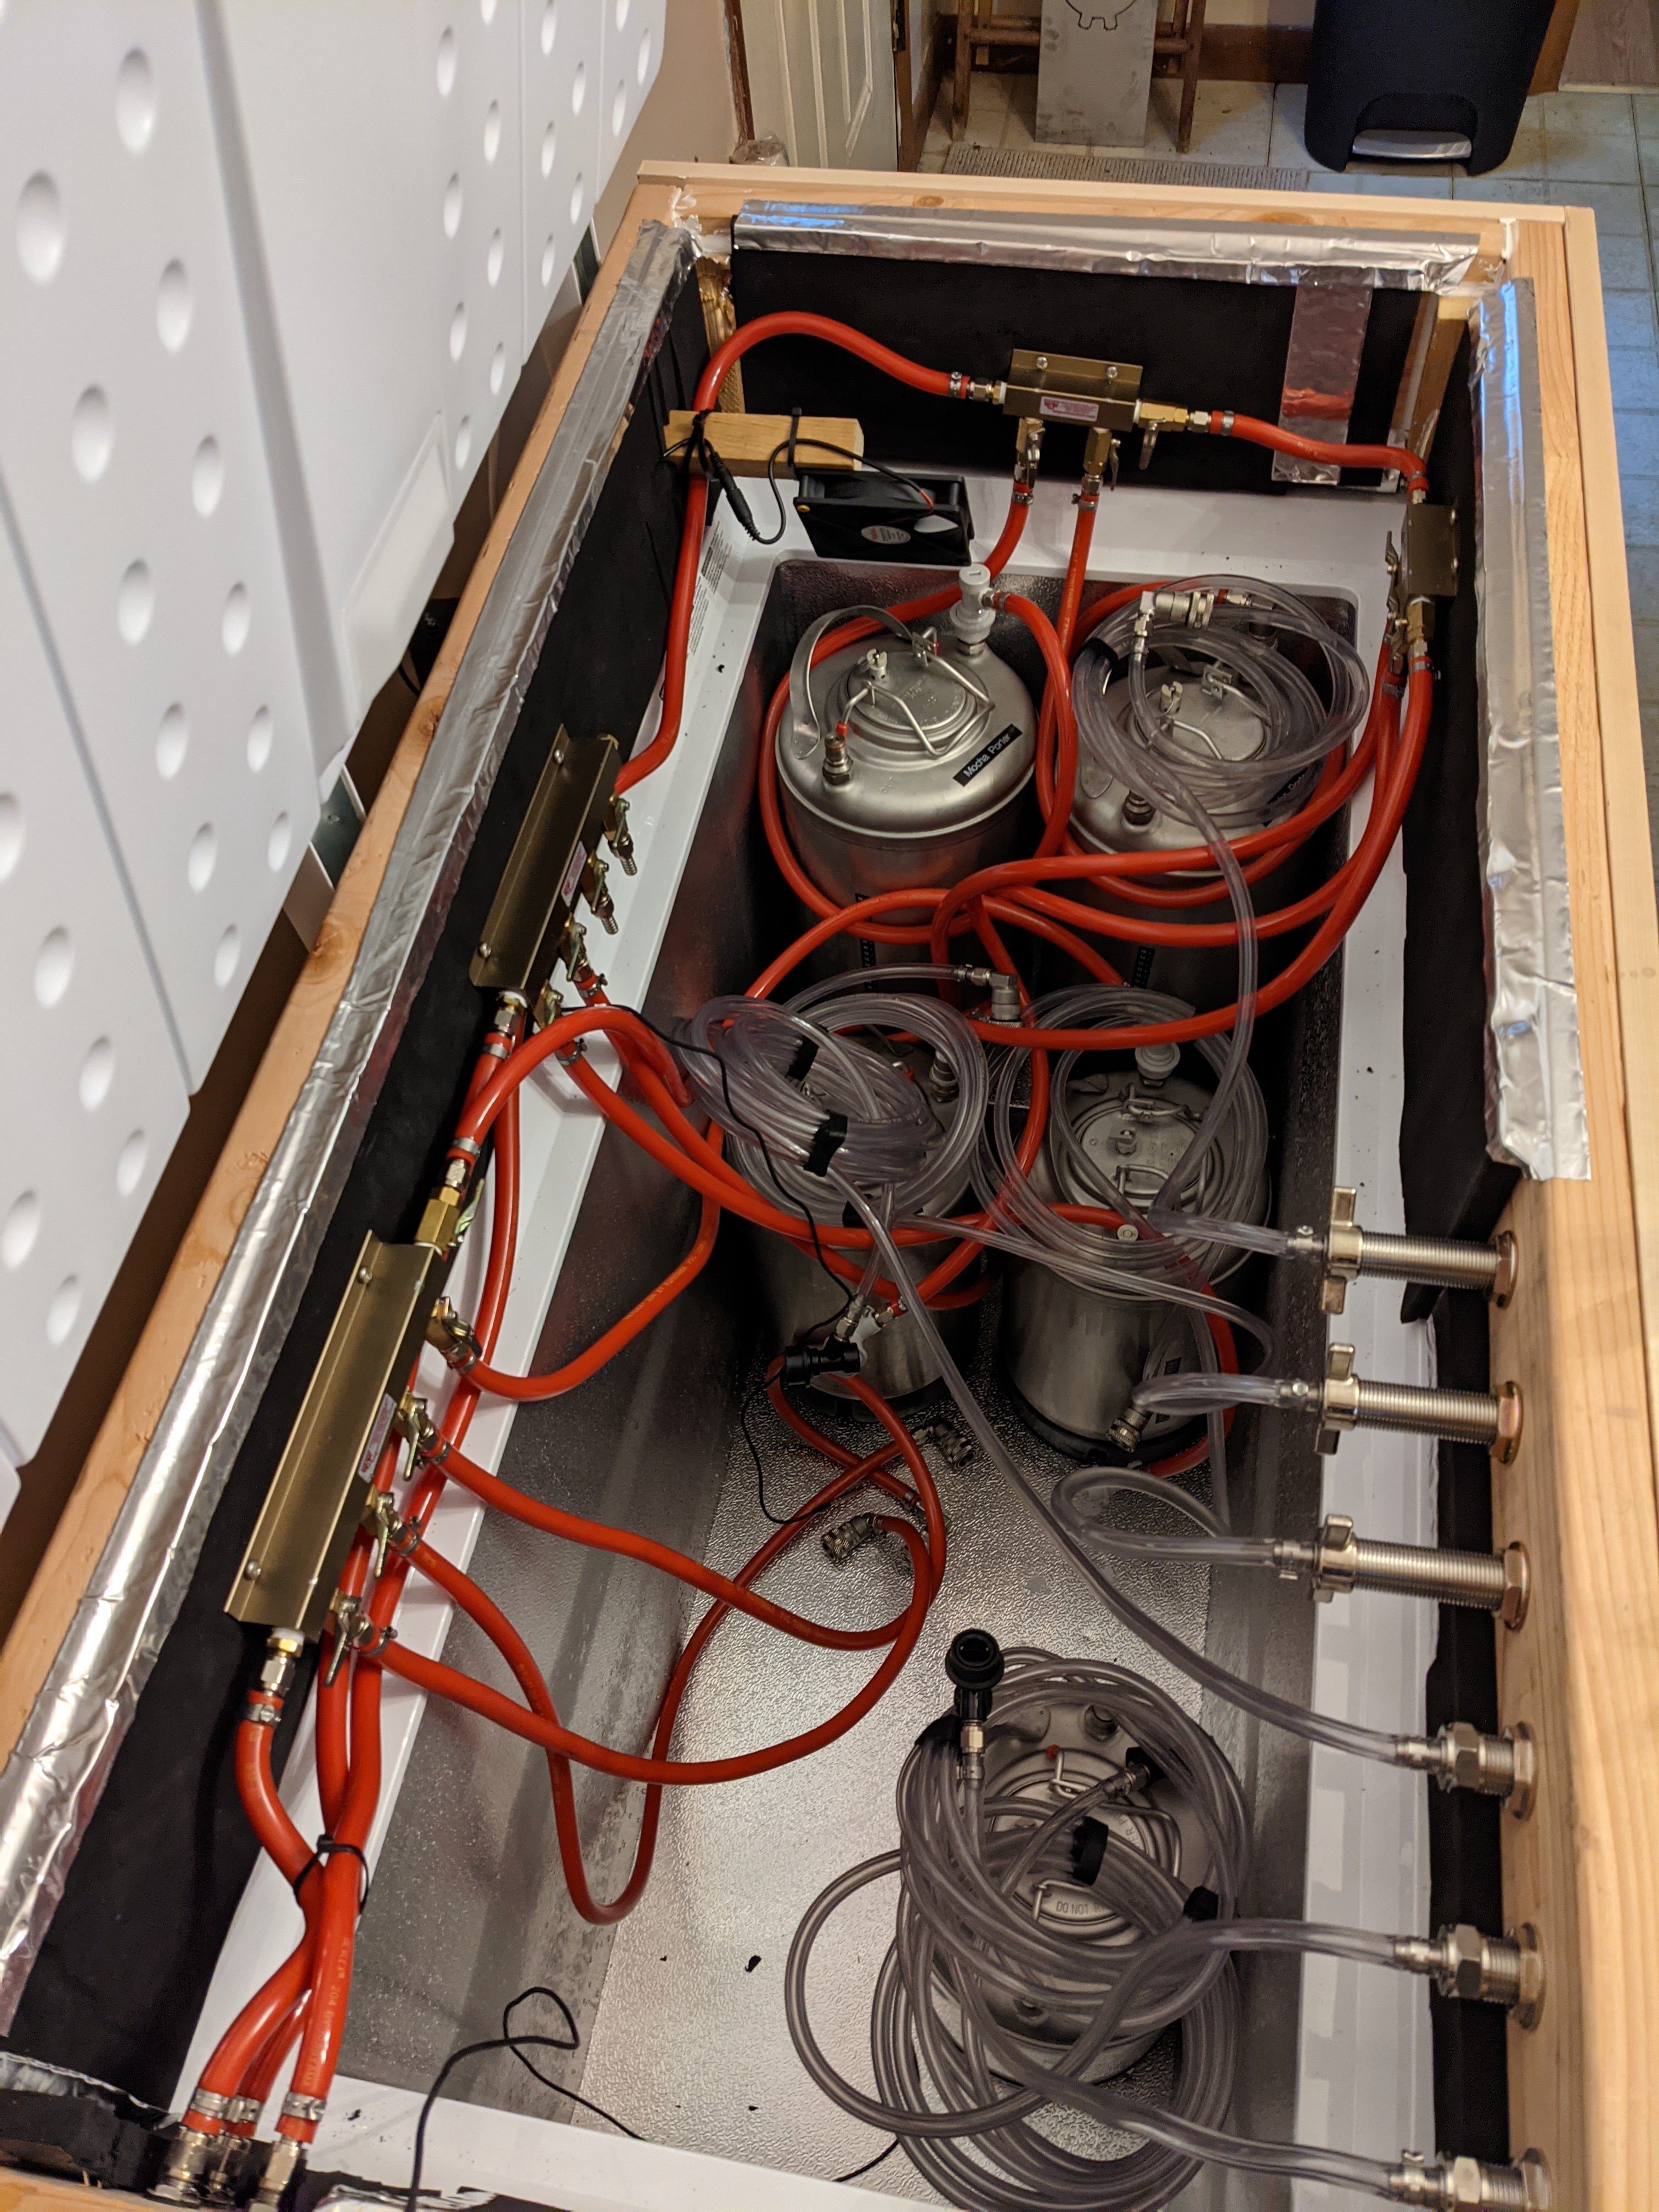
The two taps on the far right are stout faucets. The others are 'ceamer' style faucets since that's what I like using. I had the three longer shanks already, and ordered up the other three. All six are stainless steel shanks. I simply like those better than the chrome plated ones.
I had drilled the collar holes at 7/8" for the shanks. That was rather tight, so I then threaded them. Yes, I have a 7/8-14 tap on hand. Don't you??
Since getting back into brewing, after about a six year break, I decided that it simply wasn't big enough. With brewing 9 gallon batches of my English IPA, and 6 gallon batches for the other beer recipes, I was limited as to what I could chill/carbonate at a time. Plus I decided that I wanted to be able to have some recipes on nitro mix.
Started looking at what size made sense to me, for keg count, and seeing WHO had any in stock/available. Was looking at a 9.4 cubic from Homeless Despot, but it went OOS before I could pull the trigger. Ended up getting a 10.6 cubic foot (GE) freezer (free delivery, which I needed since I live alone). It arrived last Wednesday (11/4) and I picked up the wood to make the collar that Saturday. I purchased enough 2x8 for the main part of the collar, along with lengths of 1x6 maple and 1x10 oak for the outside "skin". I went with that much outside so that I could secure drip trays and have plenty of room for resting glasses under taps.
Put the main part of the collar together, then got some assistance getting it up from the garage (under the house) into the dining area (first floor). Said helper also gave a hand putting the oak pieces into position. The maple and oak go around the front and two sides/ends. There's only a couple of small pieces on the back to keep the collar from moving forward (at all).
I picked up an Inkbird WiFi ITC-308 to keep this at the temperature I wanted (38f is my current target). A hole was drilled in the back for the sensor it uses as well as for the 120v box fan that's set to keep the cold air circulating.
With the temperature swings I was seeing, I ordered up some 1/2" thick neoprene foam (adhesive backed) insulation and applied it to the inside of the collar. I then installed the manifolds for the gas distribution. I have a dual body regulator (Taprite) on my 20# CO2 bottle. Which gives me five feeds for the higher pressure set and four for the lower pressure set (or secondary set). I decided to use two of my [normally] two port manifolds for the nitro mix feed. Connected the two together and added a ball valve (with the check valve in it) into the port that normally has a plug in the second one. That gives me up to five connections for the nitro mix. I already had all of these manifolds on hand, plus valves and most of the fittings. I did order a few more of the 1/4" npt to mfl adapters for interconnecting the manifolds and such. Plus the bulkheads for sending the gas through the collar. I could have simply drilled holes in the collar and sent the tubing directly through. But, I wanted to be able to easily disconnect the gas feeds without having lines hanging off the side of the collar/keezer.
Temperatures are averaging 38F at this time. I have the Inkbird set for a 2 degree variance (kicks on at 40F, off when it hits about 37ish and it drifts to about 36F). It's a LOT quieter than the fridge ever was too. I have the fan spinning almost as slow as it will, so there's very little sound coming from that.
I had wanted to get some walnut for the top section of the collar skin, but that wasn't in store when I went to get the lumber. So I ended up with the maple and oak. I did place some adhesive foam on the underside of the collar where it contacts the freezer to help seal it together. I might add that to the top as well. I'm also probably going to remove the Inkbird sensor I have in the keezer since I'm pretty sure it's good to go as it sits now. I'll figure out what I'll use that for later. Maybe when I have two items fermenting at the same time, in the fermentation chamber, I'll have temperature readings for both.
The last thing I did was tighten up some of the fittings last night and let the CO2 pressure test until this morning. Zero change (using the 'standard' method of charging the system and turning off the tank). I then installed the beer QDs on the remaining lines that didn't have them and coiled it all up (used Velcro to secure them together). I might do something to better manage the gas lines down the road. I just need to think on it a bit.
Pictures:


The two taps on the far right are stout faucets. The others are 'ceamer' style faucets since that's what I like using. I had the three longer shanks already, and ordered up the other three. All six are stainless steel shanks. I simply like those better than the chrome plated ones.
I had drilled the collar holes at 7/8" for the shanks. That was rather tight, so I then threaded them. Yes, I have a 7/8-14 tap on hand. Don't you??


