FastFerment conical fermenter??????

Homebrew Talk - Beer, Wine, Mead, & Cider Brewing Discussion Forum

Help Support Homebrew Talk - Beer, Wine, Mead, & Cider Brewing Discussion Forum:

This site may earn a commission from merchant affiliate links, including eBay, Amazon, and others.
Any thoughts on how a raised 5 gallon bucket might work out as a stand? I'm thinking a bucket with a hole in the bottom big enough to fit the collection ball through sitting on a couple of wood blocks. Standard bucket diameters I've seen are around 12" which looks like it might sit right below the thermowell...
 
Any thoughts on how a raised 5 gallon bucket might work out as a stand? I'm thinking a bucket with a hole in the bottom big enough to fit the collection ball through sitting on a couple of wood blocks. Standard bucket diameters I've seen are around 12" which looks like it might sit right below the thermowell...

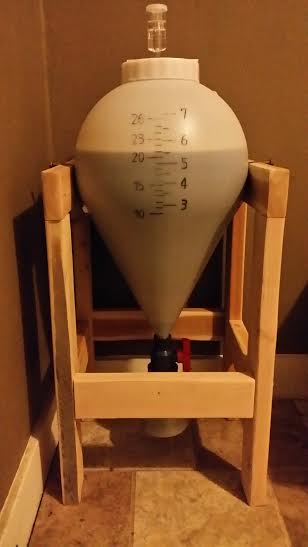
It's going to be pretty close to hitting the thermowell. Even if it clears, be careful with how you support the bucket and make sure it is secure and stable. I would hate to spend the time, money and energy into a brew only to have it end up all over the floor from an inadvertent bump... :(
 
I am getting ready to start my first brew using this fermenter tomorrow. It's a Bourbon Vanilla Porter so I have to do both a first and second because the vanilla bean gets added in the secondary. How much beer will be lost into the collection ball if I use it during both fermentations ? The collection ball is almost 24 oz. I don't think there would be that much lost on the primary but I think the secondary would be mostly beer in the ball. I am now beginning to think it would be better to just use the ball on the primary but not use it during the secondary and then drain any sludge from the secondary just using the hose. What does everyone think ?
 
I was not planning to reattach the ball after primary. I think the oxygen pickup would be worse than any benefit.

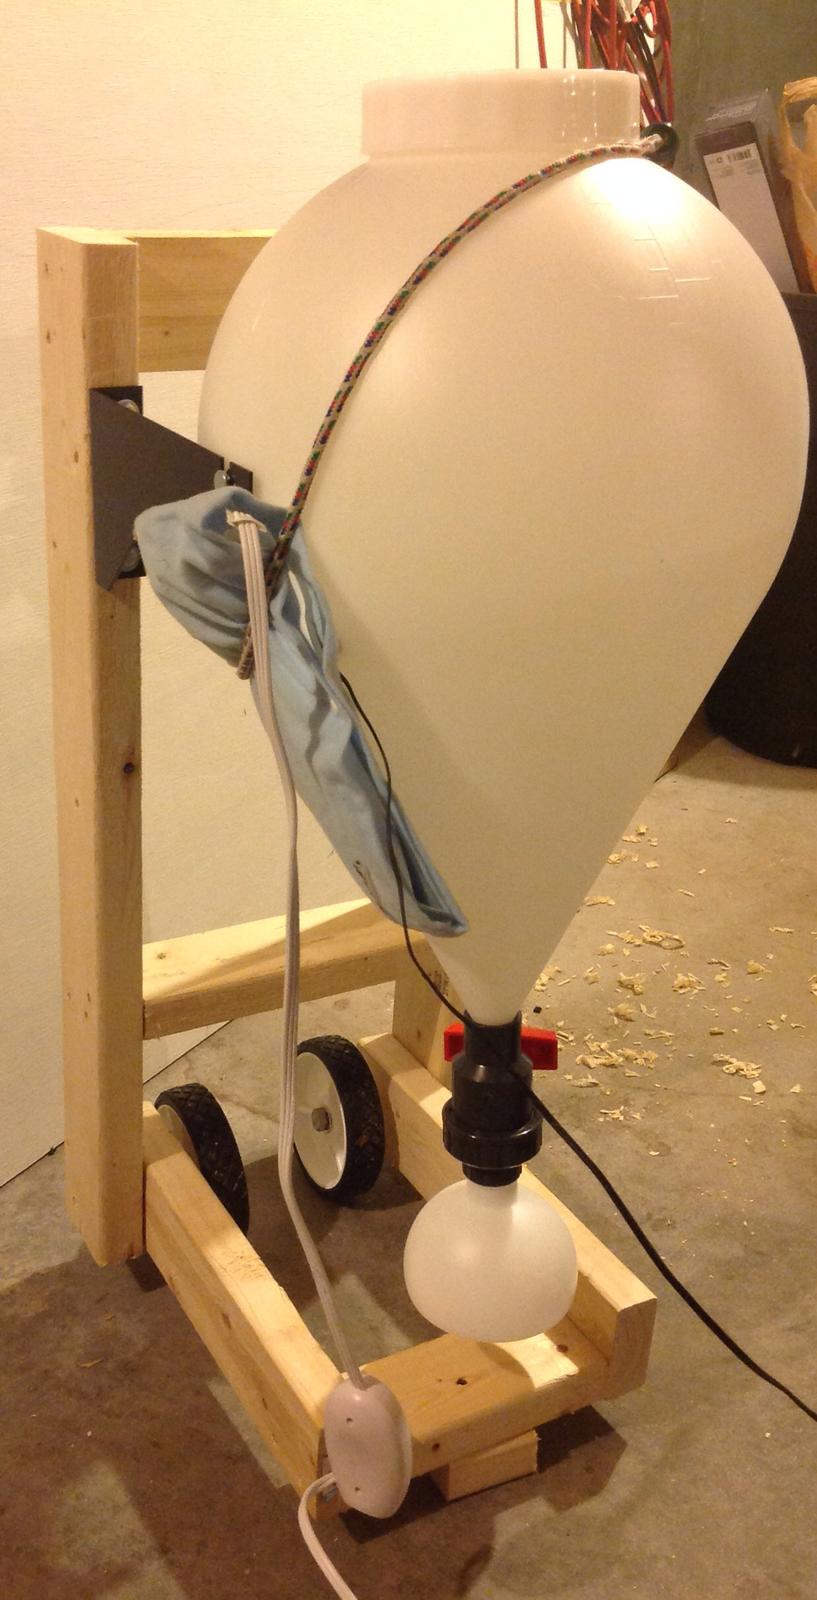
Here is a picture of the stand I threw together quickly for it. I have a heating pad strapped to it and the probe from an STC-1000 controller in the thermowell.

image.jpg
 
The only thing I haven't worked out very well is how to drain it into a keg, given that it is so low. How are it others planning to do this? I considered putting a second bracket on the wall or free standing that would be tall enough to put the keg under. That would mean I would have to lift it into the high stand, but I already lug around carboys so maybe it doesn't matter much.
 
Ace of Spades black IPA started today. Built a quick easy stand out of scrap 2X4's. I am going to build a ferm chamber similar to the son of fermentor to fit right around this but it is about 66 degrees in the basement right now so I figured I'd get a batch going.
I found that a fine sand paper folded a couple times worked perfectly for cleaning up the threads where the mold left a little extra plastic. My lid spins on so nice now.

When is everyone planning to do first trub dump?

fastferm.jpg
 
Now they have changed shippers here in Canada and are sending out via FEDEX. Unfortunately for me I will be away when they arrive. Hopefully they'll be here when I come back as I'm getting quite antsy.


Sent from my iPad using Home Brew
 
The only thing I haven't worked out very well is how to drain it into a keg, given that it is so low. How are it others planning to do this? I considered putting a second bracket on the wall or free standing that would be tall enough to put the keg under. That would mean I would have to lift it into the high stand, but I already lug around carboys so maybe it doesn't matter much.

Pressurize with CO2?
 
Could someone be kind enough to get a measurement for me?

I would like to know how tall it is from it's widest point to the bottom of the collection ball? I realize I need to add 1.5" to that measurement.

MUCH appreciated. Don't know if my fridge will handle it or not.
 
From the bottom of the ball to the mounting studs (which I think is the widest point) is 24 inches.
 
Anyone put any thought into how to attach a CO2 line to this thing for pushing beer or feeding co2 while cooling the finished beer down? I like the idea of just putting a ball lock connector on the hose and connecting it to the keg and pushing the beer over rather than picking stuff up and moving it around.
 
Anyone put any thought into how to attach a CO2 line to this thing for pushing beer or feeding co2 while cooling the finished beer down? I like the idea of just putting a ball lock connector on the hose and connecting it to the keg and pushing the beer over rather than picking stuff up and moving it around.

If the cap seals tight enough - I would think that you could just attach a bulkhead & reduce down to attach some type of connector. A ball lock would work well in my opinion....

http://www.saltysupply.com/PVC-Bulkhead-Fitting-1-2-Inch-Thread-x-Thread-p/rfp1320.htm

RFP1320-2T.jpg
 
I was not planning to reattach the ball after primary. I think the oxygen pickup would be worse than any benefit.

Here is a picture of the stand I threw together quickly for it. I have a heating pad strapped to it and the probe from an STC-1000 controller in the thermowell.

I Like the mobile stand!
 
I Like the mobile stand!

Mobility was a prime concern of mine since I generally brew in the garage but ferment in the basement. As much a I love lugging around big tanks of fluid, I am always looking for process improvements. This way I can just roll it into the temp chamber ( if I am cooling it ) from the garage.

Another thing to note about the stand is that the vertices only need to be 14.5" wide ( same as the conical ) instead of the 16" I had expected. I also can put a roasting pan between the horizontal pieces under the ball to catch the mess when detaching the ball full of stuff.
 
Still no reply to previous email. I have sent another, asking for for my shipping information.
Hopefully I will hear something soon.


Still waiting here in Texas. I sent them an email last week when I started seeing people on here get deliveries, they replied that all orders had been shipped and ups was dealing with a lot of packages and would send me a notification. A week later still nothing.
I sent them another email this morning telling them still no product or notification but I have not heard back yet.
 
I was thinking the round type stands for moving conical when full. No chance of slipping off the notches. Any thoughts on that??
 
Now they have changed shippers here in Canada and are sending out via FEDEX. Unfortunately for me I will be away when they arrive. Hopefully they'll be here when I come back as I'm getting quite antsy.


Sent from my iPad using Home Brew


Here in Canada my gear is scheduled to arrive on the east coast October 23 via FEDEX... They are trying to move the gear out folks...


Sent from my iPad using Home Brew
 
Here in Canada my gear is scheduled to arrive on the east coast October 23 via FEDEX... They are trying to move the gear out folks...


Sent from my iPad using Home Brew
 
I was able to move mine around full on the stand. I will probably add handles to the sides to make it easier....but I was able to go down several stairs and move it over 50 ft. It's cake walk with 2 people....doable with one.
 
So I put my first batch in the conical last night and pitched this morning. This evening, there is a steady stream of bubbles coming up and breaking on the surface of the wort ( it looks like the ferment is starting either in the ball at the bottom or at the bottom of the cone).

So far, it seems pretty nice however I do have a bit of confusion. There is no airlock activity at all, but the top is screwed on tight ( and the gasket is in there). Has anyone else started fermenting in it and have you had any issues getting the top to seal up? Given the stream of bubbles, the gas is getting out somewhere and around the top is pretty much the only other option.

On a totally separate note, looking at the. Fermenter with the heating pad working, got me thinking that the fluid in the ball is probably at a notably different temperature. Maybe in the future I will keep the valve closed until after growth is over and then open it so the yeast is at a more uniform temperature ( yes, this will put some O2 into it when the air bubbles up, but that should be scrubbed right out by the yeast ).

One other thing I did was to out the wort in there and then wait 10 hours or so for the grub/break/hop material to settle into the ball and then removed it before aerating and pitching. Seems better to get that stuff out if there to begin with so the harvested yeast later is cleaner.
 
The only thing I haven't worked out very well is how to drain it into a keg, given that it is so low. How are it others planning to do this? I considered putting a second bracket on the wall or free standing that would be tall enough to put the keg under. That would mean I would have to lift it into the high stand, but I already lug around carboys so maybe it doesn't matter much.

I am going to attach the brackets they sent up around 50 inches or so. Remove the fermenter from the stand, place it on the brackets and drain into a keg
 
So I put my first batch in the conical last night and pitched this morning. This evening, there is a steady stream of bubbles coming up and breaking on the surface of the wort ( it looks like the ferment is starting either in the ball at the bottom or at the bottom of the cone).

So far, it seems pretty nice however I do have a bit of confusion. There is no airlock activity at all, but the top is screwed on tight ( and the gasket is in there). Has anyone else started fermenting in it and have you had any issues getting the top to seal up? Given the stream of bubbles, the gas is getting out somewhere and around the top is pretty much the only other option.

On a totally separate note, looking at the. Fermenter with the heating pad working, got me thinking that the fluid in the ball is probably at a notably different temperature. Maybe in the future I will keep the valve closed until after growth is over and then open it so the yeast is at a more uniform temperature ( yes, this will put some O2 into it when the air bubbles up, but that should be scrubbed right out by the yeast ).

One other thing I did was to out the wort in there and then wait 10 hours or so for the grub/break/hop material to settle into the ball and then removed it before aerating and pitching. Seems better to get that stuff out if there to begin with so the harvested yeast later is cleaner.

Did you seal the threads on top with teflon tape ?
 
I also noticed there was no airlock activity after 2 days, but I could smell the fermentation. I put Teflon tape on the threads for the lid and the airlock started bubbling a few seconds later.
 
Sure enough that was the problem. I put one of the rolls of tape on it and now it Is bubbling away like mad.
 
I cleaned my threads with a little sand paper folded over several times to get the proper thickness. There was a lot of extra plastic material left where the molds seperate. After that I put a little vegetable oil on the threads and screwed the lid on?off about 20 times without the gasket in. After cleaning with the supplied cleanser plus star san I filled my keg. Pitched a few hours later and was bubbling by morning. A gasketed lid should not need teflon tape. I do not think that your lid is screwing on completely. I will say I am looking for a better gasket material though. The super thin white foam just isnt going to cut it for me.

Next batch will be at least 6.5 gallons, but I am also going to go with a 3/8" blow tube instead of the supplied airlock. I love this thing and want another.
 
...A gasketed lid should not need teflon tape. I do not think that your lid is screwing on completely. I will say I am looking for a better gasket material though. The super thin white foam just isnt going to cut it for me.

I agree that a gasketed lid should not need teflon tape. That means the gasket is not sealing against the top.

I had my fermenter out in the shop while I was working on my chamber. I turned it upside down and placed it on the table saw which has a very flat surface. The opening did not sit flat. I assume the molding process they use is not producing a flat opening. It may be round, but it's not flat in the same plane if that makes sense.

I was hoping that by screwing the top on tight, it would force opening flat so it would seal. Obviously that is not working for some.

Maybe a much thicker more substantial gasket would help. The gaskets that came with the fermenter definitely leaves a little bit to be desired...

I'm still looking forward to giving this thing a try. I'm pretty much done with my fermentation chamber. As soon as I bottle the batch I currently have cold crashing, I'm going to fire up the kettle and give it a whirl. Hopefully this weekend!
 
I've not used mine yet, but I found the threaded top to be less than a clean molding. I used an exacto knife to remove the molding flash in the threads before even trying to screw on the lid, and on the top surface. As jbb3 pointed out, I'll be checking the flatness now too.

The gasket seems cheap, and not well fitting. Mine has a distinct warp while in place due to being slightly too big. I will be looking for a flat rubber 'o ring' to replace it.

Otherwise I'm pretty happy with it for the money spent. Once I use it I hope to have the same opinion!
 
Just wanted to say thanks for all the reviews on here. Keep them coming. It sounds like a great product so far and I'm really enjoying the information/tips/complaints before I grab one up. The cost savings on this product versus a stainless conical fermenter seem quite obvious. Cool product. Cheers to the folks who designed it.
 
Just sanitized my fermenter for tomorrow and here is what I noticed.

Clean it out a few days before you want to use it, it's actually pretty clean, but a little stuff from manufacturing needs to be washed out.

Try to clean the threads on the lid with a knife or sand paper or whatever you can use will help make it easy to thread on.

I have done plumbing work before, but for those who haven't, using Teflon tape the correct way will save you tape and many headaches. Wrap the tape in the direction of the threads. I.e. The tape should wrap in the same direction as what screws onto the threads.

Use more tape than usual. I have been taught one wrap is enough. I noticed with these, wrap it up a little thicker and a much better seal is achieved.

Only wrap the threads on the fermenter. Teflon tape on white plastic, not on gray. You don't wrap threads on a union. It has a gasket seal.

Wrap Teflon tape on threads for the lid and you will get a great seal.

After you rack the beer to the fermenter, let it sit awhile before pitching yeast so you can dump the trub from collection ball and have an easier time re harvesting yeast.

Remove the airlock before opening valve on the collection ball to prevent sucking in the air lock water.

That is all I have. Other uses please let me know if anything I said is wrong, I will correct it to keep others from making the same mistake. I love this thing so far!


Sent from my iPad using Home Brew
 
Just wanted to say thanks for all the reviews on here. Keep them coming. It sounds like a great product so far and I'm really enjoying the information/tips/complaints before I grab one up. The cost savings on this product versus a stainless conical fermenter seem quite obvious. Cool product. Cheers to the folks who designed it.


It will pay for itself with the ability and ease to reuse yeast and to do primary and secondary in same vessel. If you get it, I would make your own stand if you can, and make it a height for kegging and bottling rather than buy it if you are crafty. Short stand is made for small places not so much for bottling and kegging. I will have to lift it above keg height and set it on something come keg time. Also get another collection ball will help with yeast collection.

Awesome fermenter though so far, and much less than stainless.


Sent from my iPad using Home Brew
 
Just sanitized my fermenter for tomorrow and here is what I noticed.

Clean it out a few days before you want to use it, it's actually pretty clean, but a little stuff from manufacturing needs to be washed out.

Try to clean the threads on the lid with a knife or sand paper or whatever you can use will help make it easy to thread on.

I have done plumbing work before, but for those who haven't, using Teflon tape the correct way will save you tape and many headaches. Wrap the tape in the direction of the threads. I.e. The tape should wrap in the same direction as what screws onto the threads.

Use more tape than usual. I have been taught one wrap is enough. I noticed with these, wrap it up a little thicker and a much better seal is achieved.

Only wrap the threads on the fermenter. Teflon tape on white plastic, not on gray. You don't wrap threads on a union. It has a gasket seal.

Wrap Teflon tape on threads for the lid and you will get a great seal.

After you rack the beer to the fermenter, let it sit awhile before pitching yeast so you can dump the trub from collection ball and have an easier time re harvesting yeast.

Remove the airlock before opening valve on the collection ball to prevent sucking in the air lock water.

That is all I have. Other uses please let me know if anything I said is wrong, I will correct it to keep others from making the same mistake. I love this thing so far!


Sent from my iPad using Home Brew
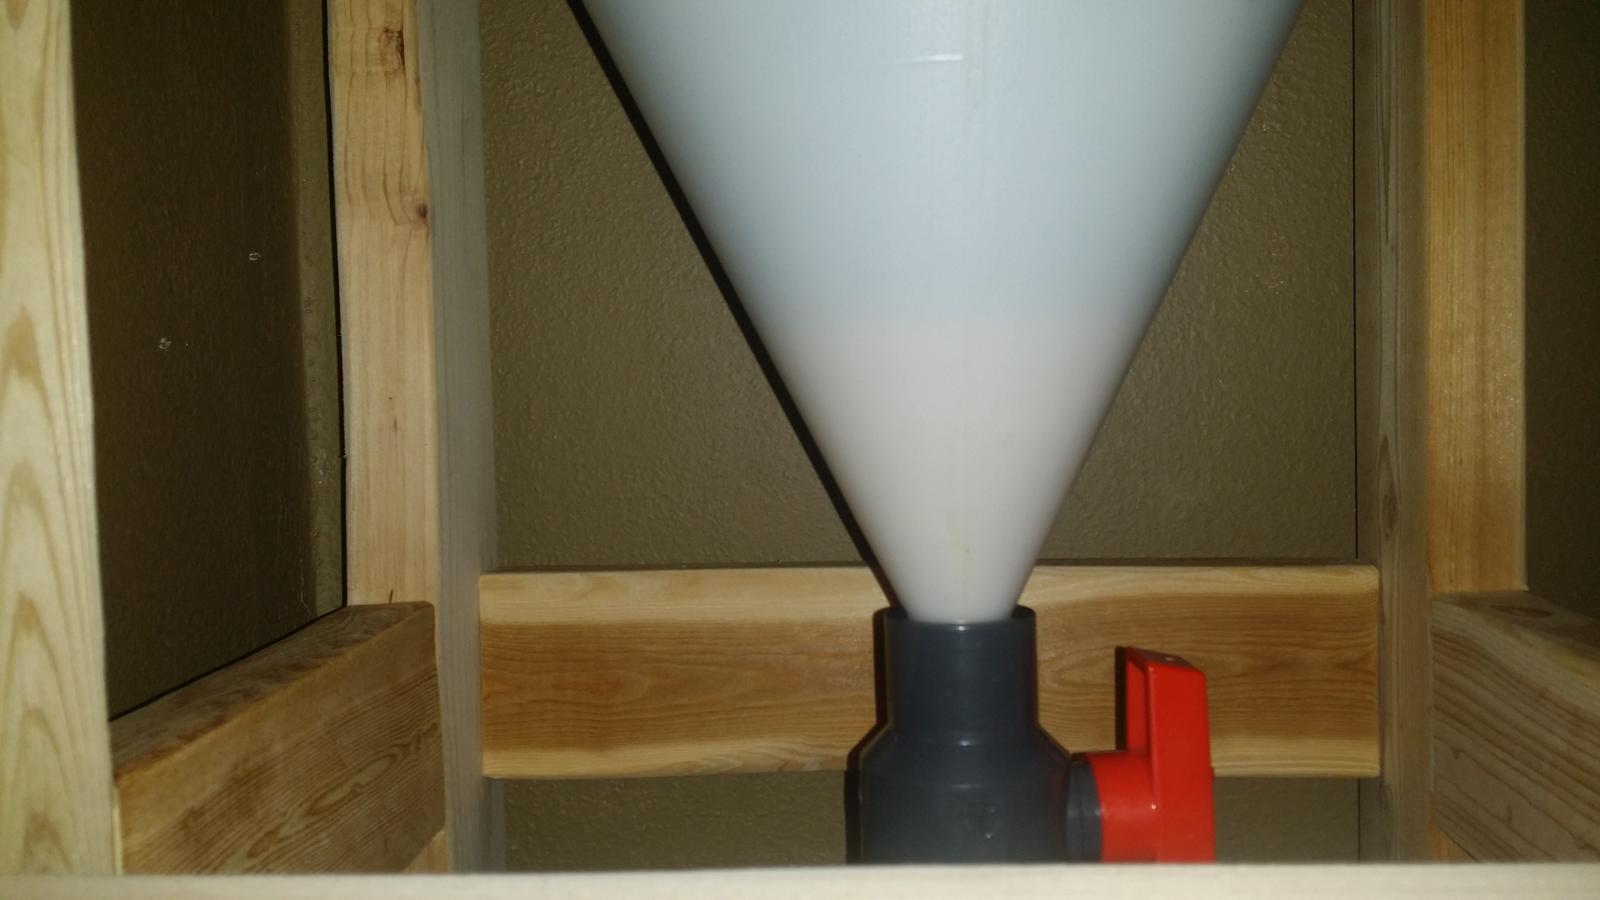
I was just about to do this since it seems to be a notorious issue that the lid doesn't seal properly. I know air lock activity isn't a good sign of fermentation but it was making me mad to not see it bubble. What needs to be done when you get the fermenter is take a piece of light sander paper and sand the mold lines near the lid and in between the threads. I did that today, screwed the lid back on and instantly my air lock was bubbling. I'm using mine for a wine kit right now hoping to not have to rack it once, we'll see how it goes.
 
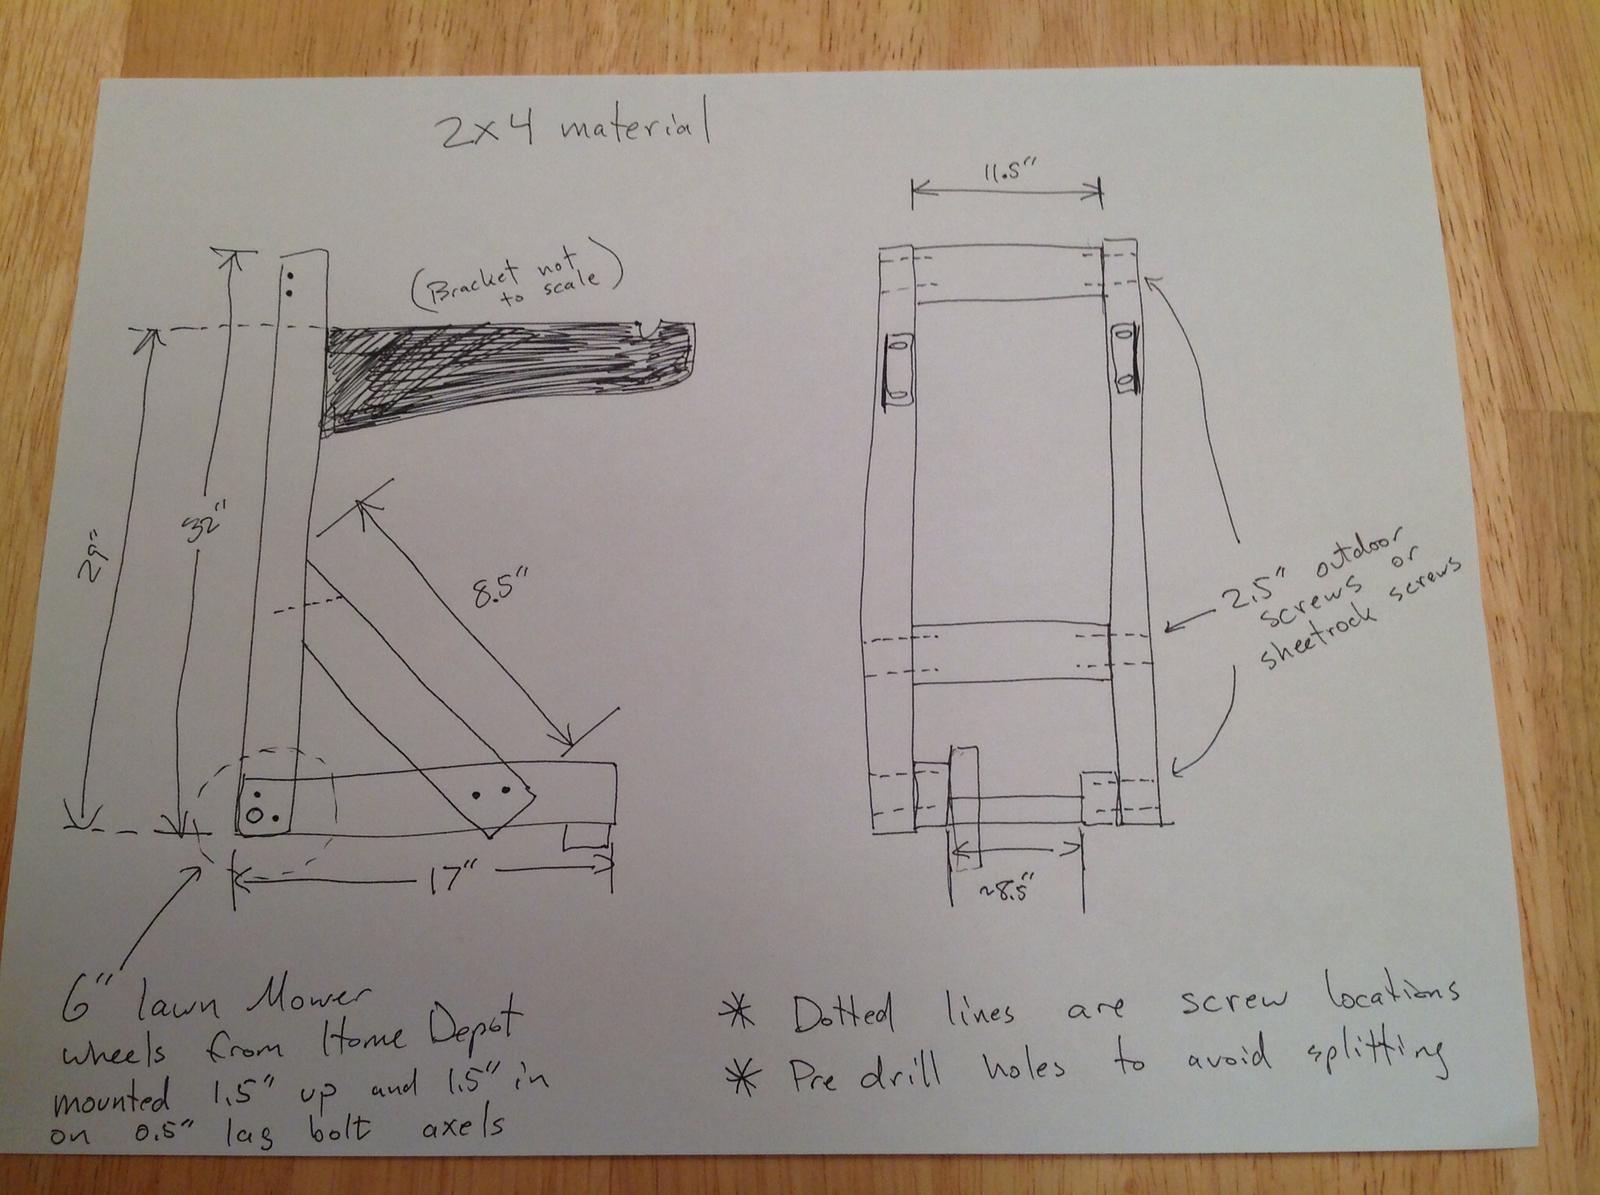
Since someone asked for this, I will post it here. This is the rough drawing for the stand that i showed earlier. I had to add 2 45degree braces to hold the weight of the fermenter when full. Otherwise, it seems to be working well. I put the wheels on the inside so it would stay narrower than the fridge that I build my ferment chamber out of, but they could just as easily go on the outside.

image.jpg
 
One week in and the bubbler has all but stopped.....yeast has dropped out with trub below in the bottle. Time to dump the trub???
 
Are you going to run it out through the hose attachment? If you dump the stuff in the ball and reattach you will get a lot of o2 going up though the beer when you reopen the valve. I don't know how much it would really matter, but it is a bit sub optimal.
 
Are you going to run it out through the hose attachment? If you dump the stuff in the ball and reattach you will get a lot of o2 going up though the beer when you reopen the valve. I don't know how much it would really matter, but it is a bit sub optimal.

C02 is heavier than O2. Whatever is in the ball is only going to be about 21% O2. I can't imagine that the minimal contact as it bubbles up and the CO2 resting on the surface of your brew forces the O2 out the airlock is going to have any noticeable effect.
 
Like I said, I don't know how much difference it would make...but it is regular practice for many to flush bottles, kegs, lines, filters, etc with CO2 before using them. I think I would be more concerned about the O2 in the head space and dissolving since the CO2 isn't going to push it out very fast since it will get all swirled up during the bubbling. It would be interesting to let it bubble up through and then take a match or lighter or something and put it down into the headspace at 1 minute intervals to see how long it takes for it to settle out. I regularly use the lighter/match test to see if have a good CO2 flush on my kegs and it seems to work pretty well.
 
Back
Top