building a brew sculpture...

Homebrew Talk - Beer, Wine, Mead, & Cider Brewing Discussion Forum

Help Support Homebrew Talk - Beer, Wine, Mead, & Cider Brewing Discussion Forum:

This site may earn a commission from merchant affiliate links, including eBay, Amazon, and others.

hungrymonkey

Well-Known Member
Joined
Nov 24, 2008
Messages
360
Reaction score
6
Location
south of Eugene, OR
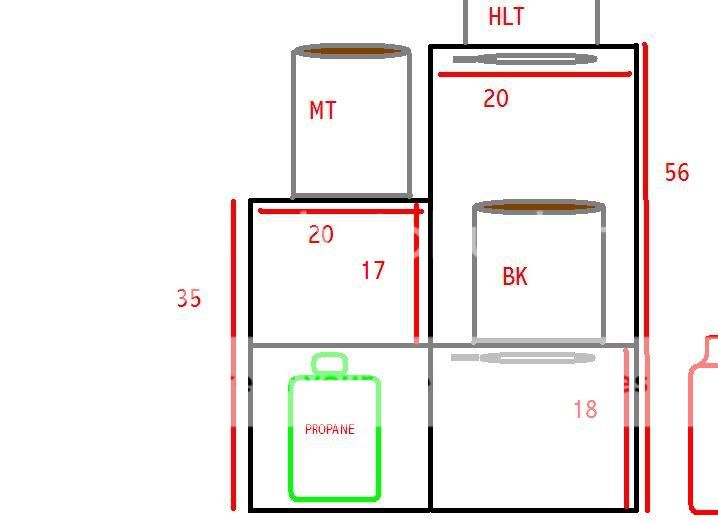
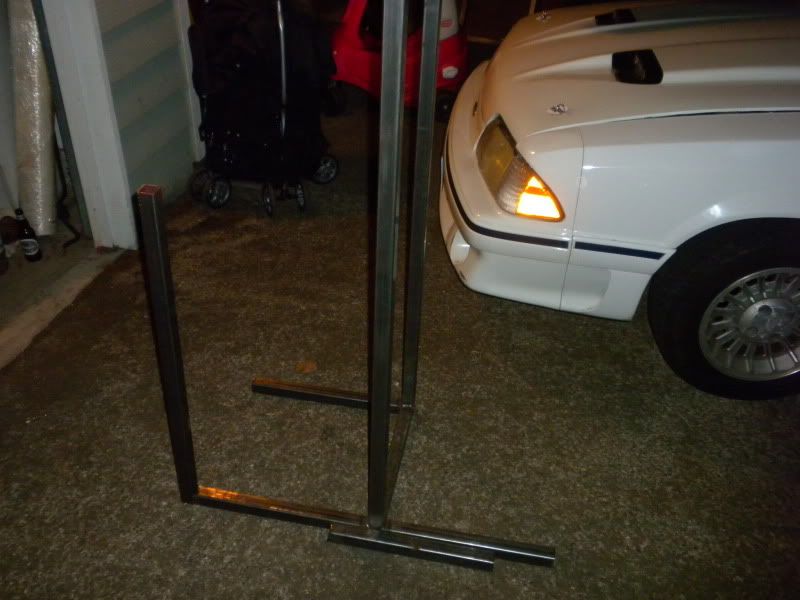
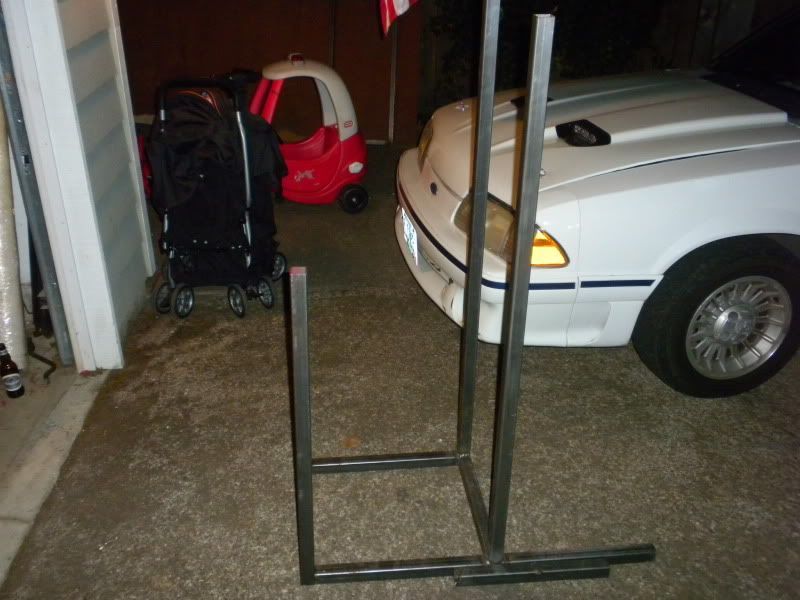
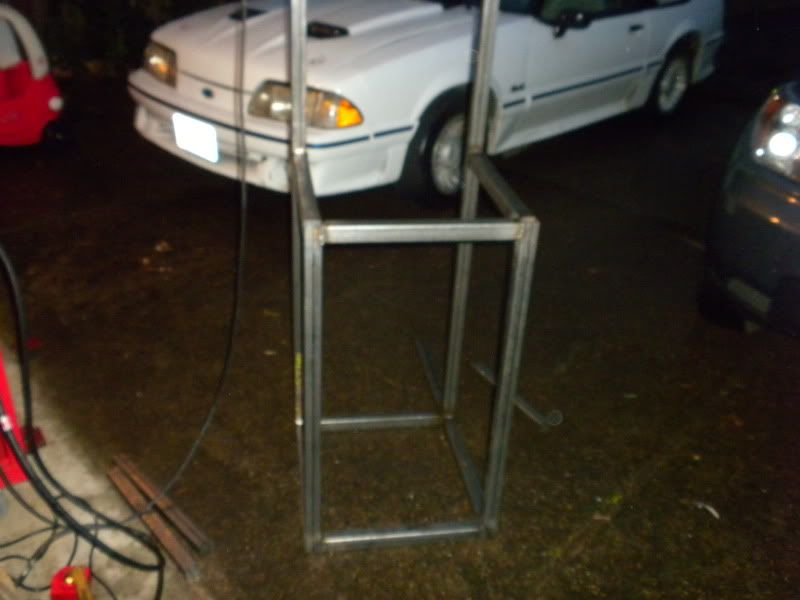
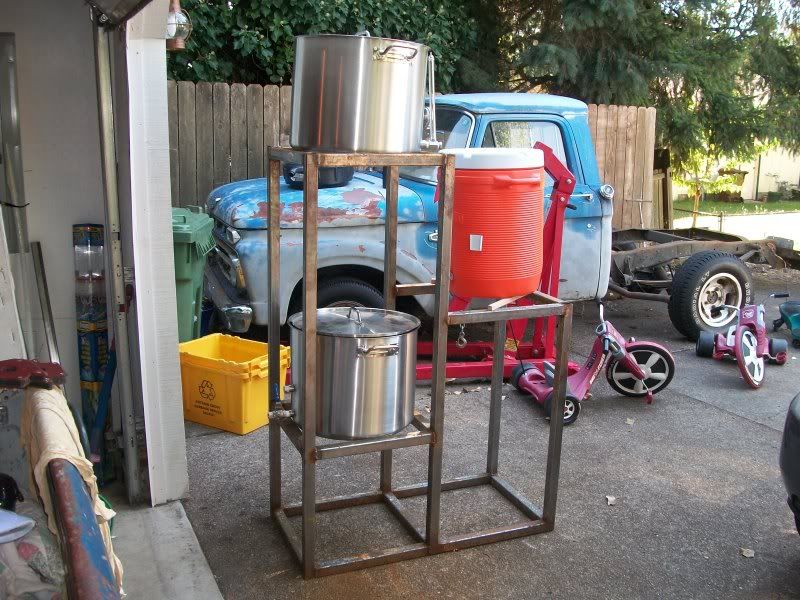
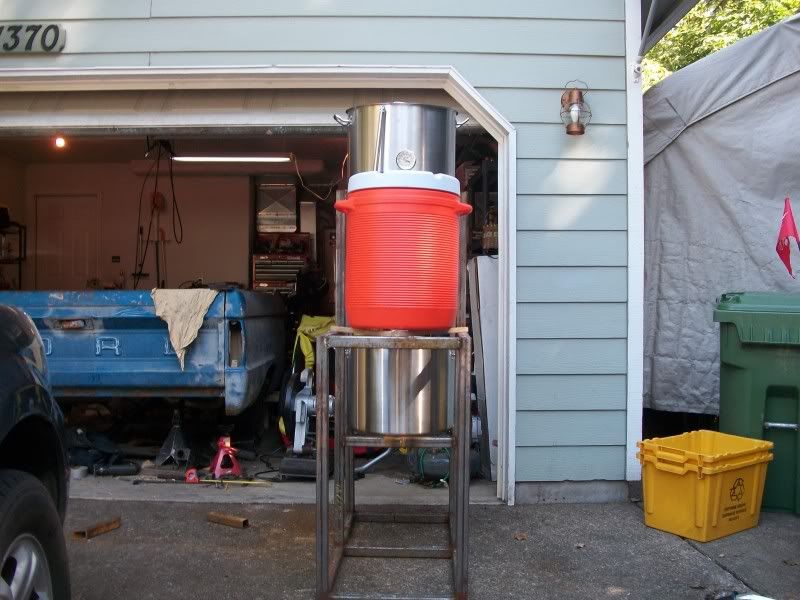
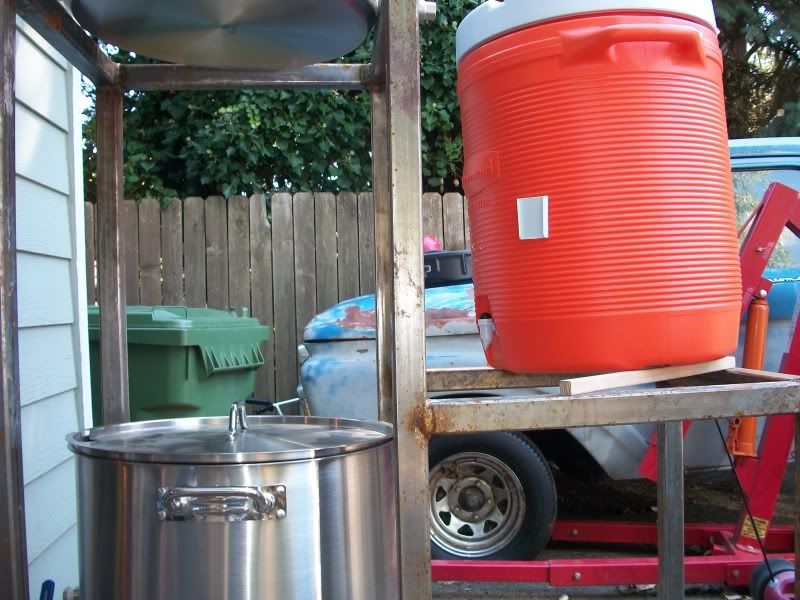
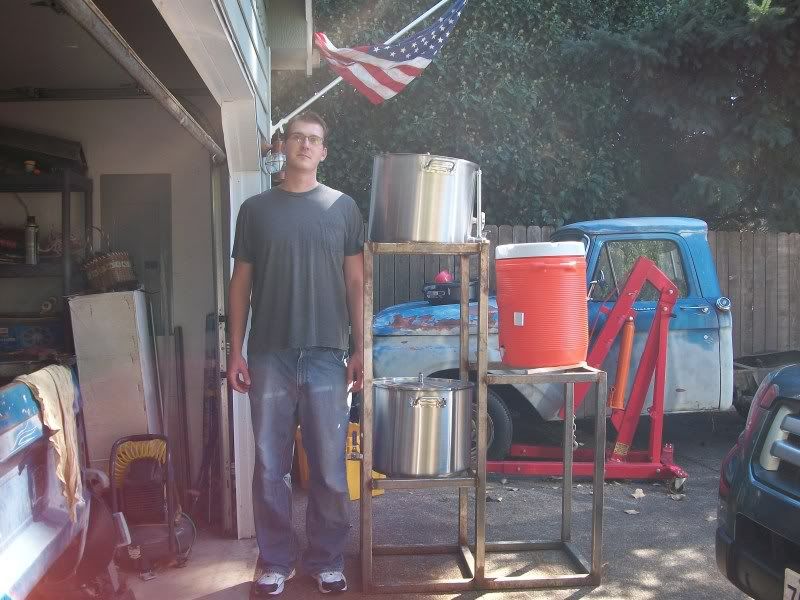
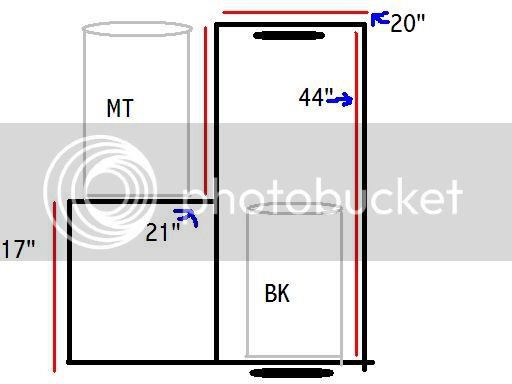
Here is my plan so far. This will be with 1.5" square tubing. Using hurricane burners and hopefully kettles.

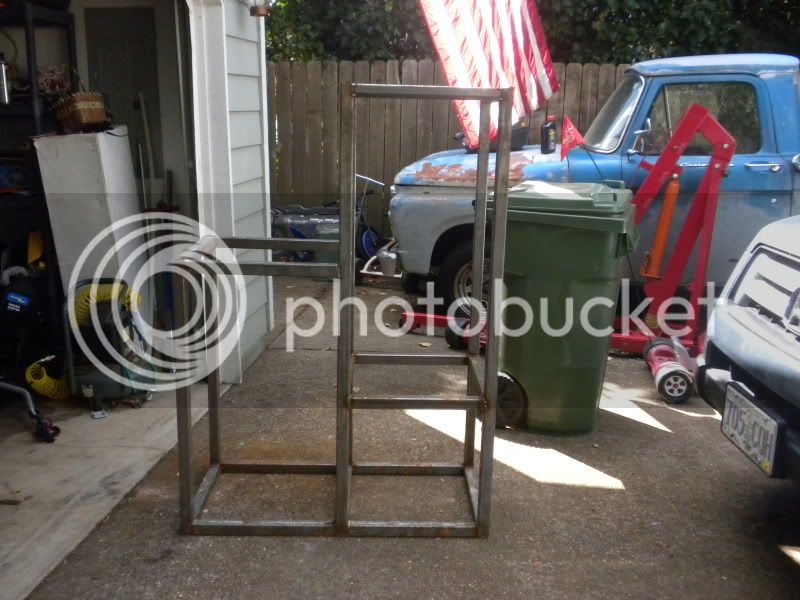
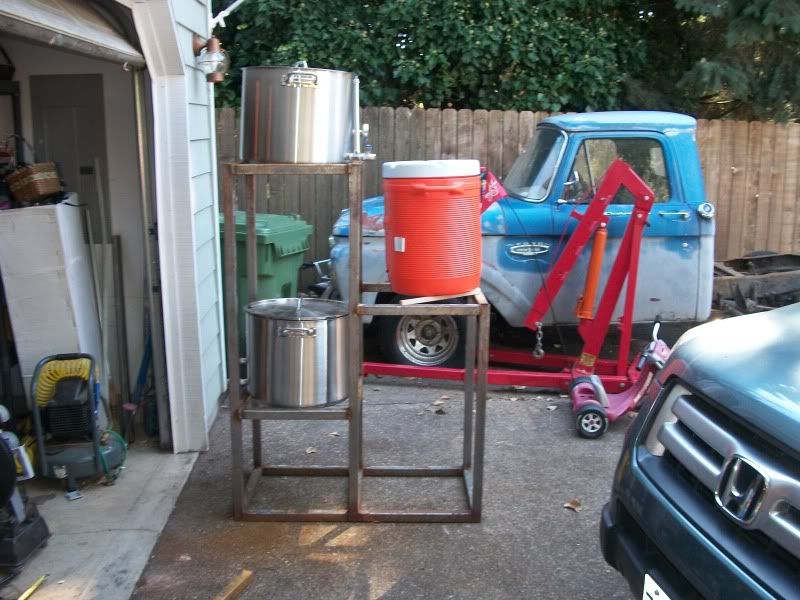
The kettles I found through morebeer are 14" tall. I gave it 3 extra inches for the boil kettle, in case I use a keggle. The cooler mash tun is an approximate 21" for a converted 10 gallon cooler.

I put the boil kettle low. I am contemplating movie it up high enough to clear a carboy to make it easier to transfer.


Thoughts, opinions, or criticism is greatly appreciated.

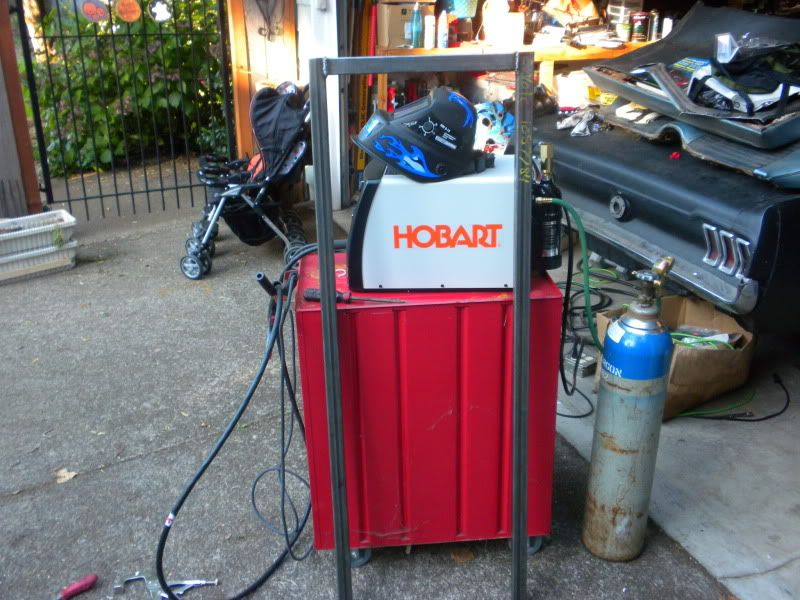
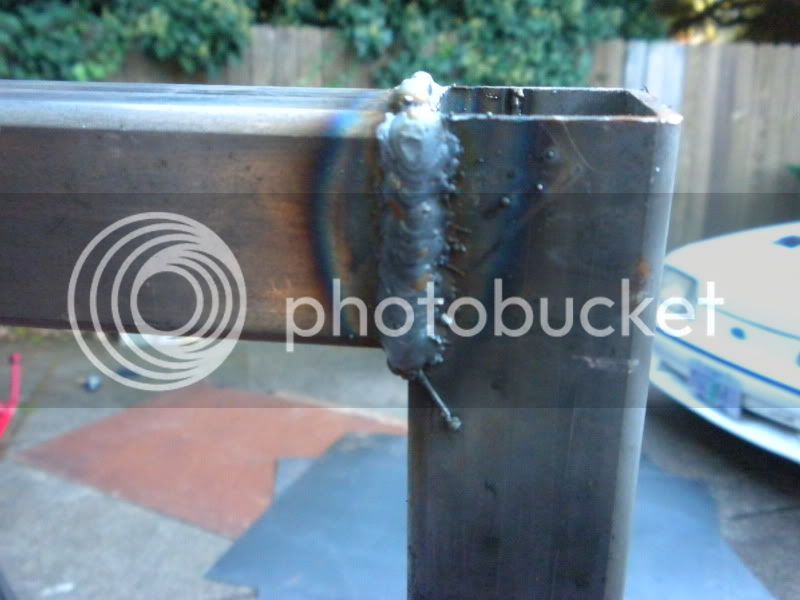
I do have a mig and the ability to cut the tubing.


brewsculpture.jpg
 
forgot to add 6" for the bottom. It is to clear the burner and give enough room for the flame.

I will use sheet metal to box in the area under the MT and keep the propane bottle there. It well eventually have casters to help move it around.
 
added 18" to it. This should give me enough height to fill a carboy from the boil kettle.
If this works. Then I can place the kettles and mt inside of the frame for storage.

BREWUPGRADED.jpg
 
I would just suggest to keep it as short as possible, if your kettle is only 14" tall, you don't need 17" drop from the MT, if you plan on filling the kettle you need 14"...but even less if you are not going to fill the kettle all the way which you likely won't. Additional height on a three tier makes brewing more difficult IMO.
 
forgot to mention that I am 78" tall. :D

I do see what you mean. The kettles I have been looking at are 15 gallons with dimensions of 14"tallx18"wide. I plan on brewing up to 10 gallon batches.
I believe that I added some height in case I was going to use a keggle. But I cannot find a keggle for less than $175. Which is about the same price for a decent kettle.

How much height could I wack off (that sounds bad). Before I start having issues with incompletely draining the MT?
 
Well at 6' 6" maybe you're not concerned w/ overall height...just that I have seem some three tiers w/ wasted height that likely required a stepstool. IMO the drop does not need to be any higher than the height of the kettle.
 
The dimensions I chose let me stack the pots inside the of the sculpture. I do think I will raise the first shelf 1". Since the propane tank is right at 18.5". This will give me a half inch to slide it in, then with the 1.5" tubing. I should have about 2" of room to move my hand around.
 
I cut the metal today. The steel is 1.5"x1.5". I cut the support 17". Thinking it would be a dead on 20". But it ended up being 20 1/16" :doh:


The first part is going together. I just have to wait for my wife to come home to watch the kiddos, then I can get back out there.
DSCN1091.jpg


Here is my weld. Which is the first time on this machine, and about six years since I last used a mig welder.
DSCN1090.jpg
 
Heat on 4, speed on 40.

Think I should try to bump it down to 3? or monkey with the speed. The chart inside of the welder said it should be on 4.

The extra bit of wire was from me being to lazy to find the dykes to clip it off.
 
Here is my plan so far. This will be with 1.5" square tubing.
...

Hey hungrymonkey, hope you don't mind a question

I've been tinkering with design ideas for my own rig, not all that unlike yours. I was dreaming up a way to have three stackable "cubes" of equal dimensions sitting on an "undercarriage" on wheels. Bolts and wingnuts would secure one cube #1 on top of #2 and, cube #3 to the undercarriage on brew day, creating a three-tier structure. When not in use, the cubes can be used for storage, stacked one on top of the other, with the undercarriage flipped on its side next to them.

Here's a very early schematic:

brewstand.jpg


The objectives are of course
1) Have a three tier structure for my AG setup
2) Make it sturdy but portable for Big Brew day
3) Minimize storage footprint to keep wife happy and garage clear


Do you think it'd be feasible/advisable to use square tubing of a smaller dimension than 1.5 x 1.5"? If I can safely use 0.5" or 1.0", it'll reduce both the cost and weight of the final product.

Also, instead of welding, do you think using square tube connectors like http://img-europe.electrocomponents.com/largeimages/R621691-21.jpg will work (not aluminium, of course, but with a steel core)?

Thanks so much for any thoughts and good luck with your project!
 
Hey hungrymonkey, hope you don't mind a question

My concern with using bolts would be flexing of the framing. Especially with a few hundred pounds of hot liquid.

IMO the connectors would be great, if you welded them. They would require a pretty tight fit to keep from coming apart.

I considered using 1" square tubing, but I figured if I was going through the hassle of building it. Might as well make it as big and sturdy as I could.
 
A little more complete. I had to take a break when I got a hot chunky in between my wedding ring and my finger. I got lazy and did not put on gloves.

DSCN1146.jpg
 
If you see a post by "LEHR" follow his instructions, he knows his S---! Also, its a little to late by looking at your welds but i wanted you to look at www.brotherhoodbrew.com. This guys rig is 1.5 stainless. Click on his rig photo and it will lead to his build. Also, below his rig picture is an attachment that you can print. you are past this point but if you get frustrated with your design, go single tier. Brotherhood brew's stand took 2 golds in this years national homebrew competition in oakland. Of course you have to have a good recipe, but hey. I have seen this build in action and his ideas were used on my single tier. Keep workin,looks good and have fun.
Snake10
 
I wanted to test the strength of the sculpture, so I hopped up onto it and did about 20 dips with all my weight.

I weigh 230 pounds. It held without budging.


I do have to say that my ability to keep things level and square is lacking. I have a 20 inch square on the bottom, and 20.5" at the top. :D I figured I would heat it up with a torch and gently bend it back into spec. Fortunatly, metal is pretty forgiving of mistakes.
 
I just have to clean up my welds, mount the burners, add some casters, and paint it.
Then Its brew time!

I should be done within the next couple of weeks. Unfortunately I picked up several extra shifts at work. So my free time is only at night. Which is when my neighbors complain about grinding :D
 
I had my 11 year old take my picture next to it. So there could be a size reference.

It took him ten minutes to find his shoes, then another fifteen to take the darn picture.

102_0309.jpg
 
Back
Top