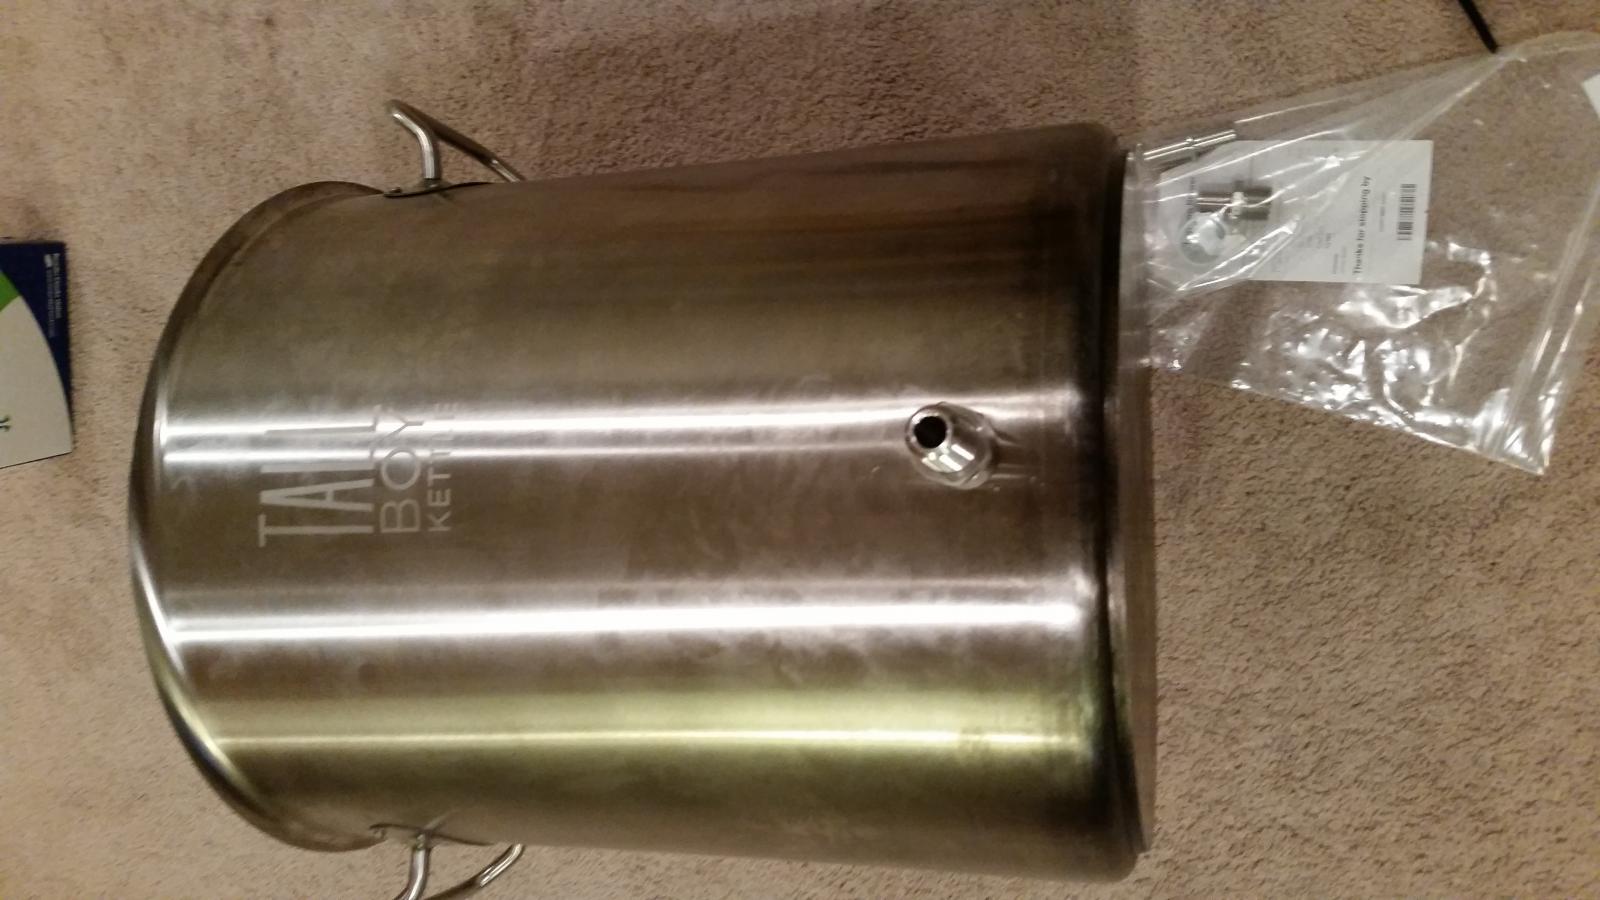
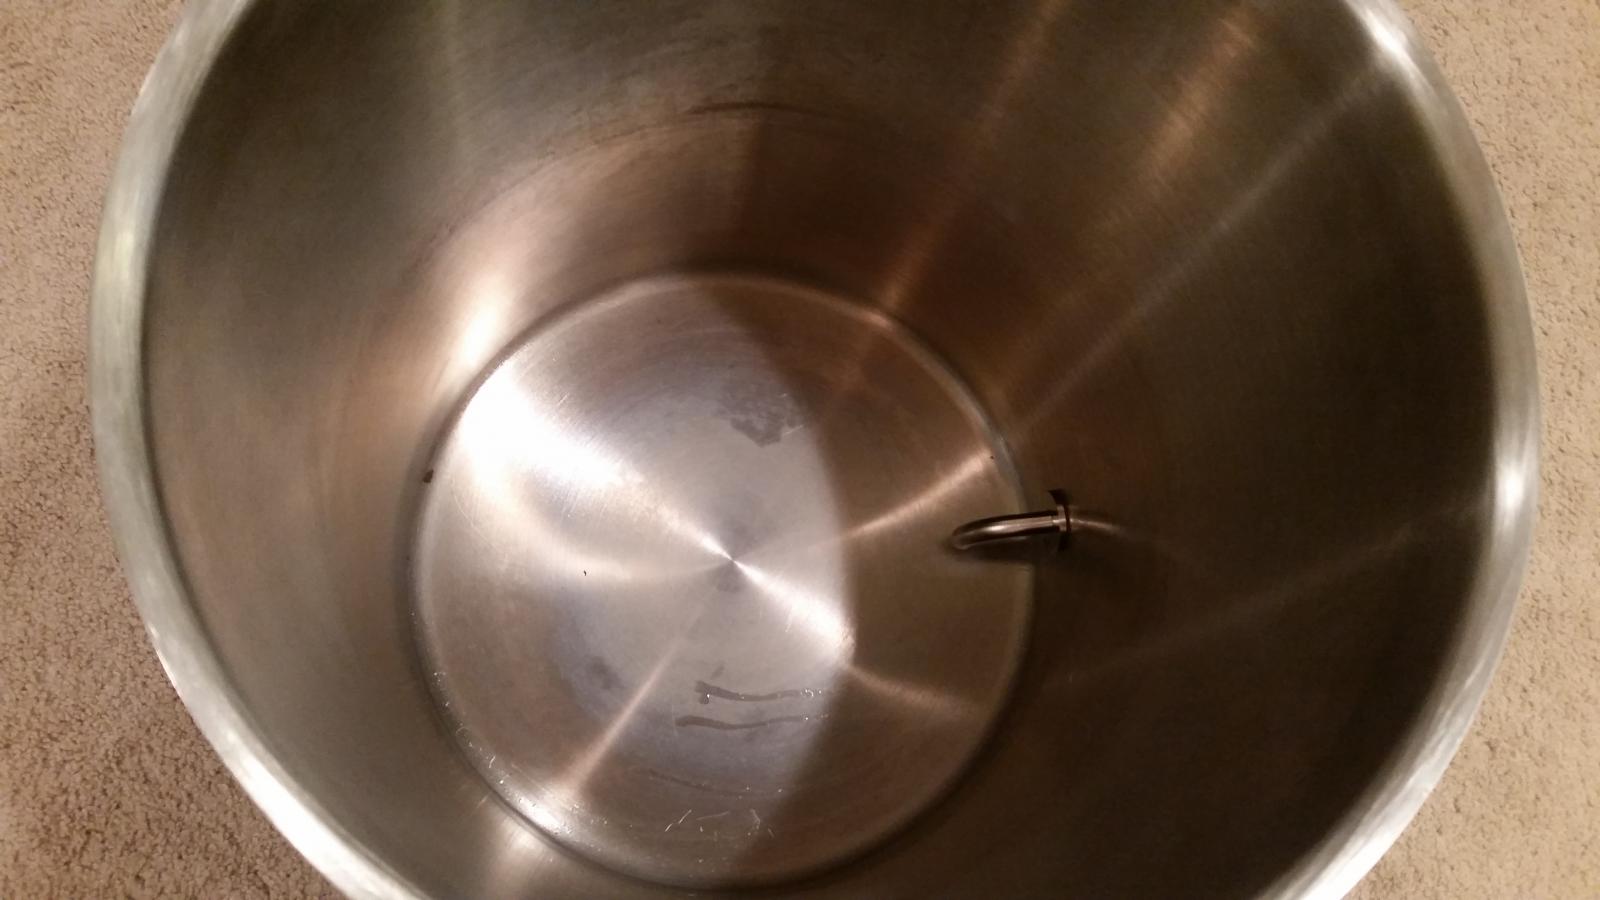
Adding ball valve to kettle

Homebrew Talk - Beer, Wine, Mead, & Cider Brewing Discussion Forum

Help Support Homebrew Talk - Beer, Wine, Mead, & Cider Brewing Discussion Forum:

This site may earn a commission from merchant affiliate links, including eBay, Amazon, and others.

bosster01

Well-Known Member
Joined
Dec 29, 2015
Messages
216
Reaction score
23
Hello!

I'd like to add a weld less ball valve to my 10 gallon kettle. I have no experience drilling stainless steel. I have seen different guides recommending step drill bits vs hole cutters.

My goal isn't to do this in the cheapest manner possible, my main goal is to do this in the most effective and easiest manner.

Does anyone have any suggestions regarding specific drill bit and specific ball valve assembly to purchase?

I would appreciate links if possible. Also appreciate recommendations regarding hole placement etc.

Thanks!!
 
I'd recommend a weldless bulkhead from Brew Hardware. @Bobby_M does an amazing job, with videos of installation on many of his projects.

https://www.brewhardware.com/category_s/1838.htm

For ball valves, a 3 piece can be disassembled and thoroughly cleaned. https://www.brewhardware.com/product_p/3pbv.htm If you're on propane or NG, get this as well. https://www.brewhardware.com/product_p/hs.lg.bv.htm

There are 3 ways to make the hole. Either a punch, a step bit, or a hole saw. Bobby sells step bits and hole saws. The punches tend to be expensive but make a very clean hole, with no issue obrounding and very few burrs. If you're not real mechanically inclined, but can turn a wrench, get a punch. http://www.amazon.com/dp/B002NQWZWU/?tag=skimlinks_replacement-20

Finally, I like to offset my valve from the handles. Some people put it directly between the handles, as it typically looks good (symmetric) but then I bang my knees on it hauling it to the sink to wash out. Offsetting means I don't care which side I grab the pot on, because I don't have the interference.
 
Last edited by a moderator:
I will read the entire links after work but I had one question.

NB sells a weldless ball valve assembly that they say is easy to clean for 44 bucks. It's stainless. I'd prefer to buy from them since I live right by.

Theirs requires a 7/8th inch hole. I read that a thermometer requires a 1/2 inch hole.

So my understanding is I should use a 3/16 inch bit to make my pilot hole then a 7/8th step bit for the valve.

Is there a specific step bit that you'd recommend? I like the idea of a step bit because then I only need one bit for both holes. Will any step bit work I see expensive and cheap ones on amazon and I'm unsure which is suitable
 
I've made a few, and that's what I did. Remember to use oil. I used cooking oil on mine, since I didn't have any 3-in-1, and it worked great.

Will this cheap bit do the job? http://www.amazon.com/gp/aw/d/B000FZ2UOY/ref=mp_s_a_1_2?qid=1457462472&sr=1-2&pi=AC_SX236_SY340_FMwebp_QL65
 
I just did this last week and used a $15 step bit from Amazon. Worked great.

Here is the bit I used.

http://www.amazon.com/gp/product/B000RP82F8/?tag=skimlinks_replacement-20

FWIW, I went with parts from Brewhardware.com. Prices were better and there were more options compared to NorthernBrewer. Plus there are very useful and practical instructions online and included with the parts. Makes sense to go with NB if it is local to you, though.
 
Last edited by a moderator:
I just did this last week and used a $15 step bit from Amazon. Worked great.

Here is the bit I used.

http://www.amazon.com/gp/product/B000RP82F8/?tag=skimlinks_replacement-20

FWIW, I went with parts from Brewhardware.com. Prices were better and there were more options compared to NorthernBrewer. Plus there are very useful and practical instructions online and included with the parts. Makes sense to go with NB if it is local to you, though.

Do you mind posting which valve assembly you used?

Also what type of bit did you use for the pilot hole? Just any regular bit or was it special?
 
Last edited by a moderator:
I just used a regular 1/8 inch drill bit for the starter hole.

I used the 3-piece ball valve, the same as the earlier poster recommended.
https://www.brewhardware.com/product_p/3pbv.htm

Here is the bulkhead I used. Haven't brewed with it but I was able to place it low enough that only a pint of water is left after draining without tipping.
https://www.brewhardware.com/product_p/truebulkheadelbarb.htm


Just for completeness sake, I also installed this sight glass/thermometer combo on my boil kettle and just the thermometer on my HLT.
https://www.brewhardware.com/product_p/tp.htm

Thank you so much. I don't understand the purpose of the sight glass.

Also with the bulk head do you use tubing to transfer to fermenter or do you just drain it?

I didn't realize the bulk head was a thing, thanks for all the links man.
 
When you go to drill it with a step bit, use (or make) a proper cutting oil. At your local "box store", thread tap oil is as close as it gets. Either that or oil, detergent and water also works (Google it). Use a cordless drill on a LOW setting or use a hammer drill (on non-hammer drill mode!). You want to be between 100-500 RPM with about 250 being ideal. When the oil starts to smoke...STOP for 30 seconds. If you do this you'll cut through both holes in less than 10 minutes. If you don't you will work harden the stainless and bugger up your bits. Good luck.
 
I seem to be in the minority but I like the three piece valves. http://www.mcmaster.com/#4632k143/=11gbn0v

Everytime I disassemble a valve I find either trub (boil kettle) or grain (mash tun) stuck inside the ball.

Antidotal but also http://brulosophy.com/2014/11/13/problem-identification-or-helping-a-buddy-stay-in-the-hobby/

2015-11-21 14.19.25.jpg
 
Does the NB one I posted count as 3 piece? It says it is easy to clean!

I'm a little confused about the bulk head vs the ball valve. That's why I like the one from NB seems to come with both and it specifies the size of hole that I need.
 
I just did this last week and used a $15 step bit from Amazon. Worked great.

Here is the bit I used.

http://www.amazon.com/gp/product/B000RP82F8/?tag=skimlinks_replacement-20

FWIW, I went with parts from Brewhardware.com. Prices were better and there were more options compared to NorthernBrewer. Plus there are very useful and practical instructions online and included with the parts. Makes sense to go with NB if it is local to you, though.

Just ordered the bit. I think ill pick up the NB assembly unless someone thinks it's dumb. I'm going to get it on my way home and I can always return if need be.
 
Last edited by a moderator:
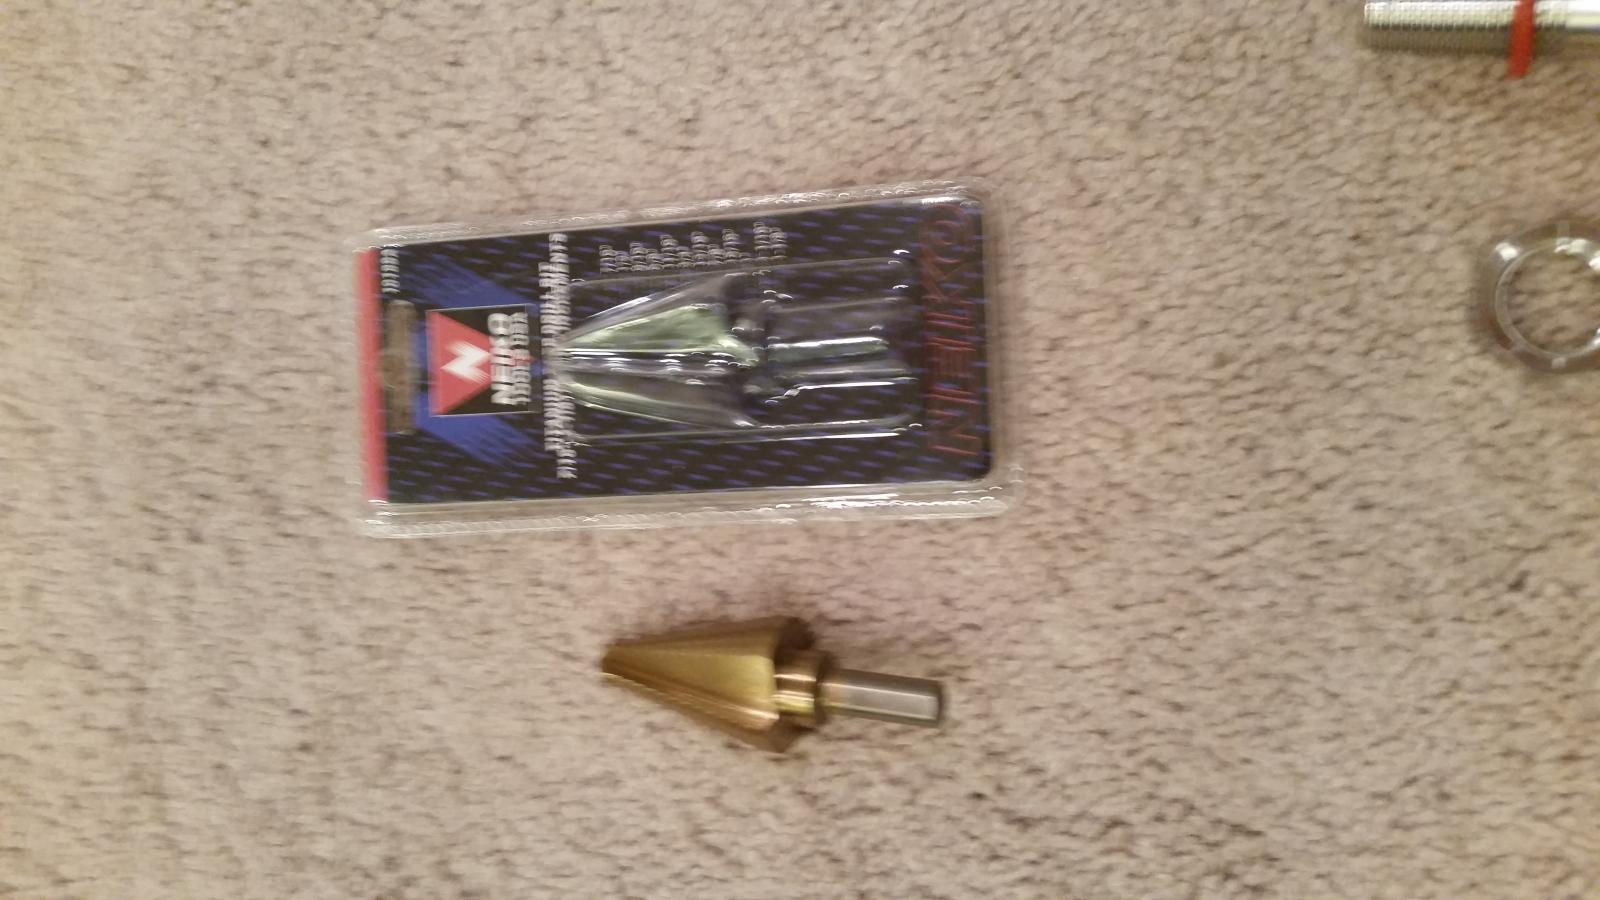
Drill bit on the way, and I picked up my entire assembly with a connector used for a false bottom as well for 44$ total with tax.

Seems like a good deal to me!

Once my drill bit arrives I'll get to the install and post pics.

Thanks for all the help.

20160308_171528.jpg
 
Does the NB one I posted count as 3 piece? It says it is easy to clean!

I'm a little confused about the bulk head vs the ball valve. That's why I like the one from NB seems to come with both and it specifies the size of hole that I need.

The one you listed must be twisted apart as an assemly.

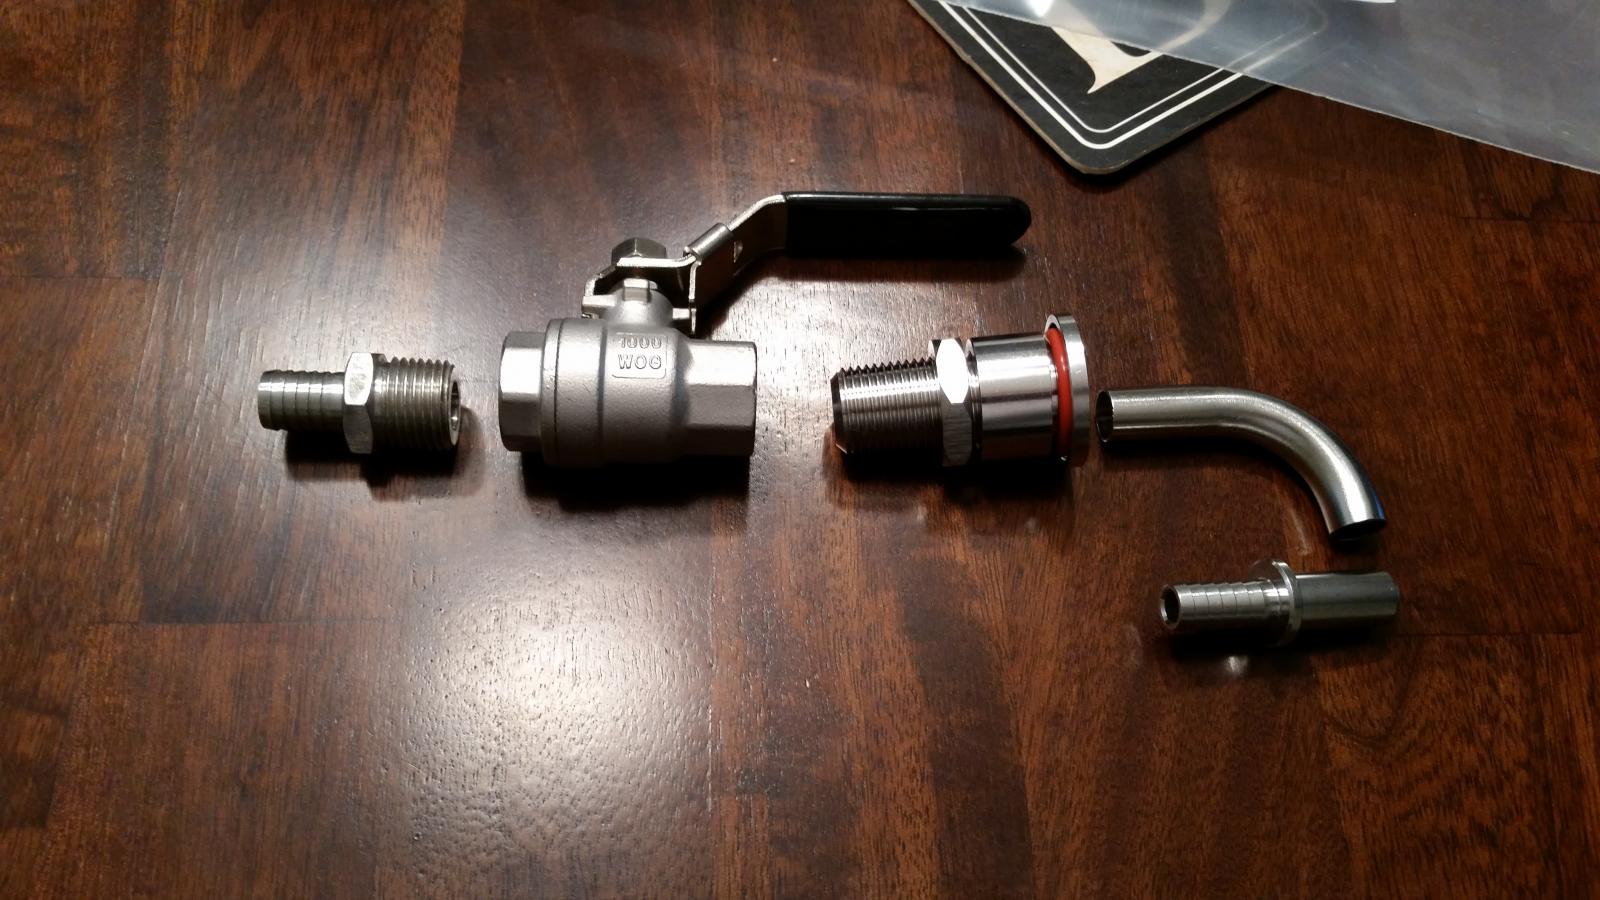
The bulk head is the (normaly) nipple, coupling, o ring, washer and nut that secure the valve to whatever. The valve is the valve.
 
Thanks for the responses/help. I now understand what the parts are. I mistakenly didn't get the 3 piece, but from what I've read people really like the flush mount bulk head that I purchased... and the guy at NB said it's not really much of a hassle to disassemble. Still waiting on my drill bit (should be here friday) then I'm going to get to work! I'm a little concerned about the curvature of the pot and how the bulk head will fit flush against that.... but I'm assuming the designer accounted for that.

It's interesting that my bulk head only has 1 o ring. I guess it's a new design that doesn't have any threads on the inside of the pot, which is supposed to be pretty cool.

All I have to research now is proper height for the ball valve. I'm assuming that you want the dip tube thing to be right above the bottom of the pot to get as much wort as possible.

If this goes well I'm planning on adding a thermometer/sight glass to my pot in the near future.

ALSO - I'm thinking about purchasing a pump. To just pump my wort to my fermenter to save on back strain.
Keep us posted. I'm following this thread because I need/want to add a valve to my kettle as well. I just don't know what I want to add. And at first I was confused about bulk heads, ball valves, etc. and what the differences were. But this thread has helped clear up a lot of that confusion! So thank you for that.
 
Keep us posted. I'm following this thread because I need/want to add a valve to my kettle as well. I just don't know what I want to add. And at first I was confused about bulk heads, ball valves, etc. and what the differences were. But this thread has helped clear up a lot of that confusion! So thank you for that.

Will do! Right now I'm just trying to figure out proper placement etc. I plan on posting pics with how the process goes this weekend.
 
I just kinda eye balled the height of the ball valve, and with the dip tube on I ended up having a finger width of space which I think is perfect.

Things I learned:
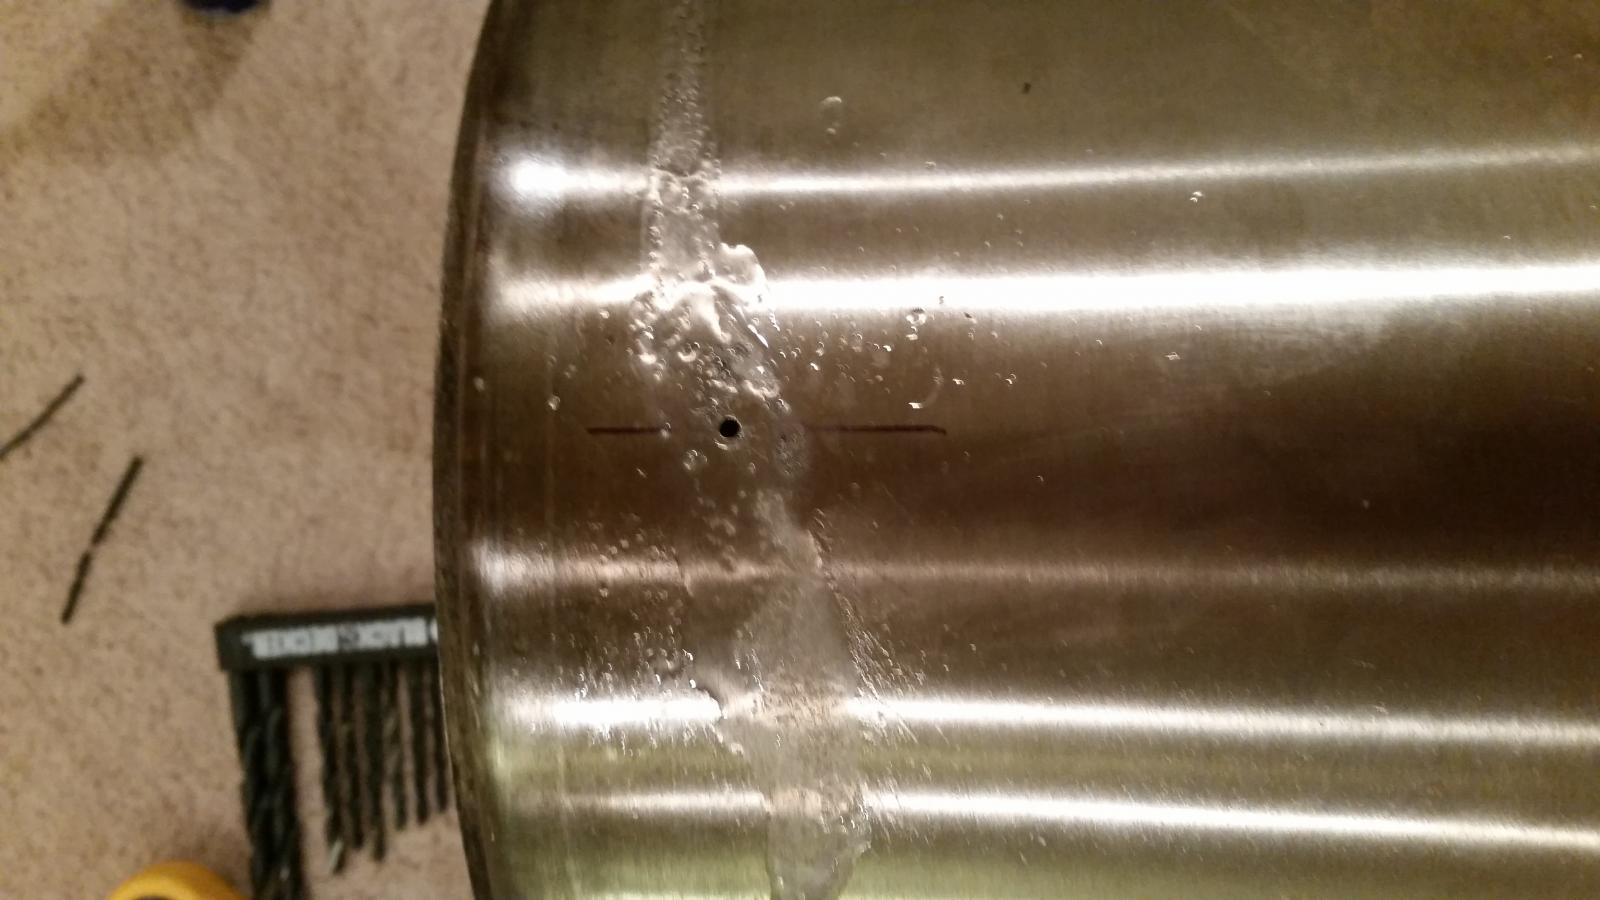
1. I was pushing way to hard and going way to slow when I was doing the pilot hole. With the pilot hole the drill can do the work. I ended up breaking 4 bits.

2. I used WD40 which worked fine.

3. I was worried because I thought I used too much pressure and ended up bending my pot. It kinda looked like I had a small bend, but I didn't have an issue with the seal. Might be a small bend, but unsure of it'll end up being of any significance. But would be careful next time.

4. Overall the bit that the previous poster recommended worked like a champ! and still looks like it's ready to drill more holes.

Things I'm confused about:

1. the ball valve doesn't screw all the way back because I have so much thread space. Am I supposed to use the white tape stuff on all the threads even on the threads where the nut meets the kettle?

2. It looked like I shredded the O ring some due to the sharp pot. I was wondering if I could double O ring it? On this design only thing on the inside of the pot is an O ring and a built in washer to the bulk head.

3. I'm having difficulties tightening everything and still having the ball valve in the right position. My washer thing has to be oriented in a specific way and whenever I try and tighten it spins. How tight does it need to be?

4. I filled it up with a bunch of oxy clean didn't see any leaks. Are there any more tests I should do before I end up using this? Would hate to wreck a brew day.

5. Where all should I use the plumbers tape?

6. Do I need to take this apart of clean it before every brew?

Any other tips appreciated, thanks for the help everyone. Couldn't have done this without y'all.

20160310_184601.jpg


20160310_185358.jpg


20160310_185451.jpg


20160310_194442.jpg


20160310_194704.jpg
 
Here it is with ball valve attached.

I plan on taking it apart and doing the teflon tape. I just don't know if the tape only goes on ball valve threads or also on the nuts threads? Any tips?

One tip I read online is that these things don't need to be crazy tight. Well I tightened the crap out of it. I'm probably going to get a new o ring for the inside.

20160310_205917.jpg
 
Here it is with ball valve attached.

I plan on taking it apart and doing the teflon tape. I just don't know if the tape only goes on ball valve threads or also on the nuts threads? Any tips?

One tip I read online is that these things don't need to be crazy tight. Well I tightened the crap out of it. I'm probably going to get a new o ring for the inside.

Tape goes on the male threads wrapped counterclockwise.
 
Nice pictures. Glad it seems to be working for you! Just thought I would add my thoughts about your new questions. My REPLY is in CAPS.


1. the ball valve doesn't screw all the way back because I have so much thread space. Am I supposed to use the white tape stuff on all the threads even on the threads where the nut meets the kettle?

DON'T WORRY THAT THE VALVE DOESN'T SCREW ALL THE WAY UNTIL IT IS TIGHT. JUST USE THE WHITE TEFLON PLUMBERS TAPE ON ALL THE TREADS (COUNTERCLOCKWISE, AS MENTIONED) AND TWIST UNTIL SNUG AND IT ALIGNS. IF YOU GET LEAKS YOU WILL JUST HAVE TO MESS WITH IT TO TIGHTEN THINGS UP.

2. It looked like I shredded the O ring some due to the sharp pot. I was wondering if I could double O ring it? On this design only thing on the inside of the pot is an O ring and a built in washer to the bulk head.

I WOULDN'T DOUBLE O-RING IT. IT MIGHT NOT SEAL CORRECTLY AND CAUSE A LEAK. IF IS DOESN'T LEAK, DON'T MESS WITH IT. IF IT DOES LEAK BECAUSE OF THE SHREDDED O-RING, JUST BUY A NEW O-RING.

3. I'm having difficulties tightening everything and still having the ball valve in the right position. My washer thing has to be oriented in a specific way and whenever I try and tighten it spins. How tight does it need to be?

IT DOESN'T NEED TO BE SUPER TIGHT, JUST SNUG. THE TEFLON TAPE WILL TAKE CARE OF THE REST.

4. I filled it up with a bunch of oxy clean didn't see any leaks. Are there any more tests I should do before I end up using this? Would hate to wreck a brew day.

I DID A TRIAL RUN ON MINE, LETTING A FULL POT OF WATER SIT OVERNIGHT. I LIKE THE OTHER POSTER'S SUGGESTION TO DO A BOIL WITH JUST WATER AND SEE WHAT HAPPENS.

5. Where all should I use the plumbers tape?

USE IT WHEREVER THERE ARE MALE THREADS. DON'T BE SKIMPY WITH THE TAPE.

6. Do I need to take this apart of clean it before every brew?

I'M NOT SURE. PERSONALLY, I DON'T PLAN ON TAKING THINGS APART ON MINE VERY OFTEN. MAYBE ONCE A YEAR, IF AT ALL. I MIGHT TAKE THE VALVE OFF MORE OFTEN AND CLEAR IT OUT. HOPEFULLY OTHER PEOPLE WILL CHIME IN.
 
Last edited:
6. Do I need to take this apart of clean it before every brew?

I'M NOT SURE. PERSONALLY, I DON'T PLAN ON TAKING THINGS APART ON MINE VERY OFTEN. MAYBE ONCE A YEAR, IF AT ALL. I MIGHT TAKE THE VALVE OFF MORE OFTEN AND CLEAR IT OUT. HOPEFULLY OTHER PEOPLE WILL CHIME IN.

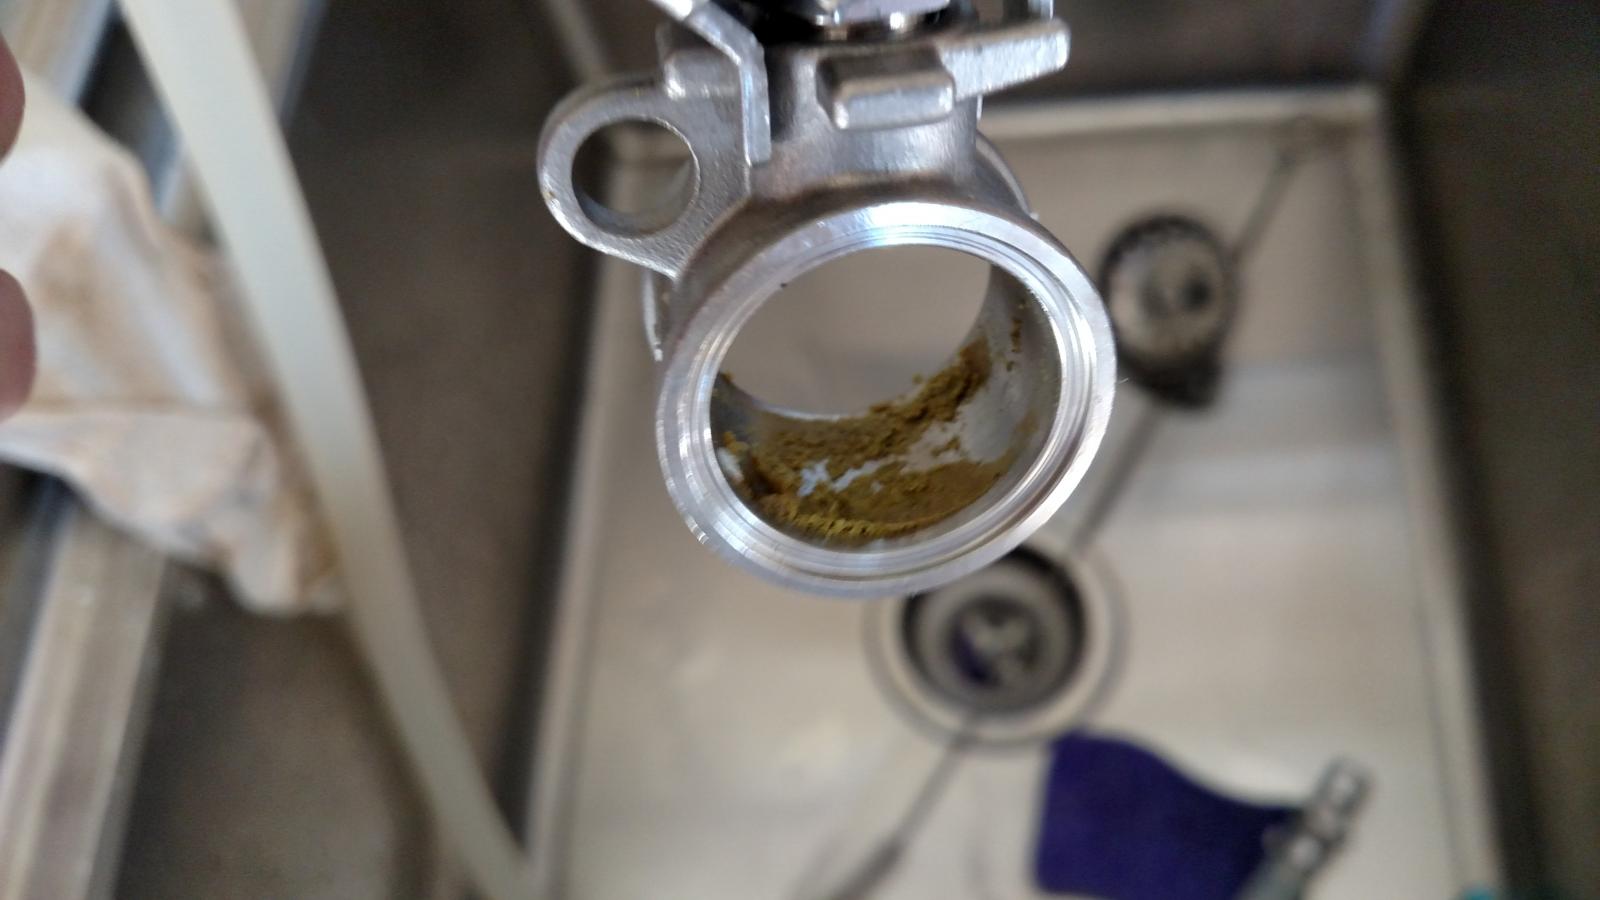
I pull my kettle valves off every brew. All the others and pumps every 3 months or so. However, I also do a whirlpool so I have lots of trub circulating during the end of the boil. The photo I shared earlier in this thread is the boil kettle out valve....after I had re-cirulate water through the system to clean the pumps/heat exchanger/ HERMS coil. I did open/close/partial open the valve during the rinse process.
 
Another update - I added my plumbers tape and I flipped the internal O ring. It got shredded a little because I pushed too hard with my drill and I kind of have a tiny lip on the inside of the kettle.

This time I tightened it less aggressively, just hand tightened with one turn with a wrench. I will test it for leaks this weekend.

FOR THE LIFE OF ME, I was unable to get the dip tube to push through the 2 O rings in the bulk head. I even tried wetting it and using keg lube. Idk wtf is wrong.

I was able to easily get the inner attachment that is meant for a mash tun inside though. And I think I'll just resolve to tipping the kettle for the last bit of wort, because it was way too much effort trying to push that thing in (prob tried for like 30 minutes).
 
I clean valves 1 time per year because I don't want to have to clean and reapply Teflon tape that much...

Got a closer pic of the dip tube and where it should mount? I'd expect it to be a compression fitting, not an o ring fitting.
 
Another update - I added my plumbers tape and I flipped the internal O ring. It got shredded a little because I pushed too hard with my drill and I kind of have a tiny lip on the inside of the kettle.

This time I tightened it less aggressively, just hand tightened with one turn with a wrench. I will test it for leaks this weekend.

FOR THE LIFE OF ME, I was unable to get the dip tube to push through the 2 O rings in the bulk head. I even tried wetting it and using keg lube. Idk wtf is wrong.

I was able to easily get the inner attachment that is meant for a mash tun inside though. And I think I'll just resolve to tipping the kettle for the last bit of wort, because it was way too much effort trying to push that thing in (prob tried for like 30 minutes).

So I will be testing out the kettle for the first time since adding the ball valve today. Lets hope for no leaks.

I was able today to get the dip tube installed. It was impossible before... but what I ended up doing is I had the mash tun barb connected into the bulk head for the last couple weeks because I was going to settle on using that. Well when I took everything apart today to make sure I was ready for brewing - I took off the mash tun barb, and it must have stretched out the O rings, because now the dip tube fit in just fine!

Just adding this in case anyone reads this and has the same problem.
 
Back
Top