Show us your Kegerator

Homebrew Talk - Beer, Wine, Mead, & Cider Brewing Discussion Forum

Help Support Homebrew Talk - Beer, Wine, Mead, & Cider Brewing Discussion Forum:

This site may earn a commission from merchant affiliate links, including eBay, Amazon, and others.
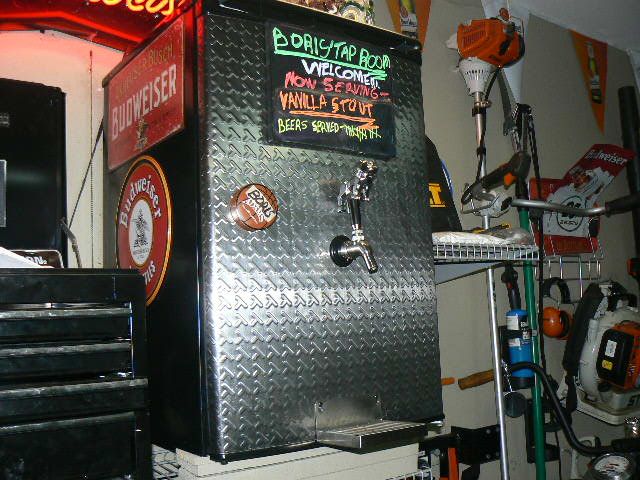
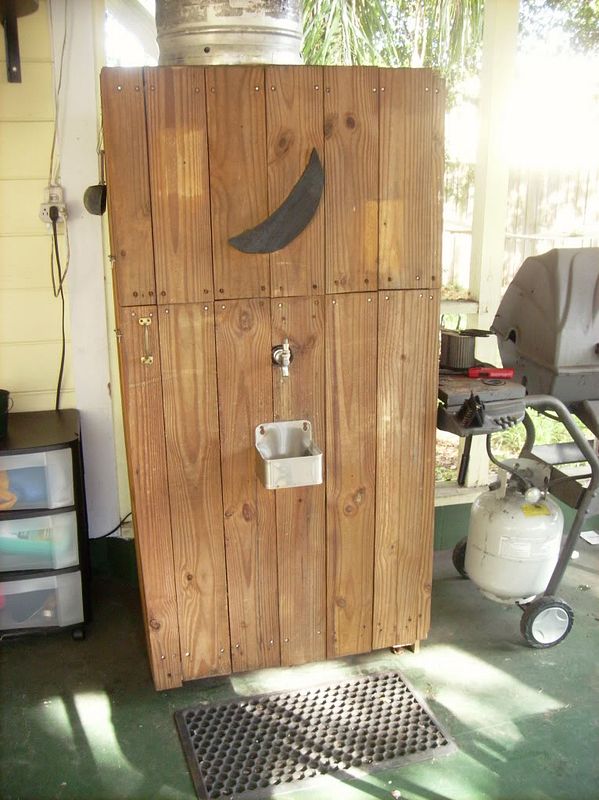
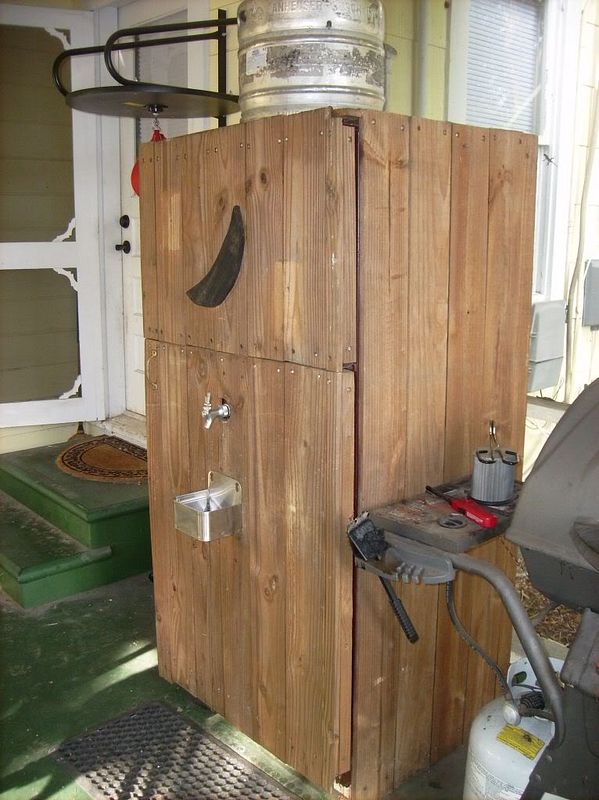
Lucky, this looks good! Are the spacers/nailers to allow space between the paneling and metal because the sides act as heat-sinks?

-Tripod

Hey Tripod,

Sorry it took so long to respond. I unsubscribed to this thread.

You are correct. I wanted a place for the heat to escape. I keep the lid off when I don't have friends over so that the heat has a place to go. There's not a ton of heat, but the better it is dissipated, the longer the freezer will last.
 
Rick500, I may have missed this somewhere, but I had not heard of anyone just setting the collar/lid combo on top of the freezer without adhesive (edit: I have seen people hinge both the collar and the lid, in which case, they did not do anything outside of the hinge itself to secure the collar to the freezer). Is there really no cause for concern when you fully open the lid? Any air leakage? If not, this sounds like a great solution for me as one of my goals is to modify the freezer as little as possible. It sounds like your design avoids all modifications to the freezer itself (except removing the bolts for the hinge).

It hasn't presented any problem so far. The collar and lid assembly is heavy enough to press on the weather stripping and make a good seal. I stuck the weather stripping to the collar, so that's the only adhesive involved.
 
Thanks, guys! I actually ordered the Kenmore 8.8 a while back. It's at Sears just waiting for me to take it home (had trouble fitting the freezer into my SUV). I'm glad to hear that it will fit 6 cornies. That will give me plenty of room to expand. For now though, four cornies and a carboy will be ideal. Two questions for you schweaty: (1) Do you think the CO2 tank might fit in there as well? and (2) is that an 8" collar?

Yeah, the CO2 tank will fit in there as well but don't plan on putting anything else in there. It is crowded enough with the six cornies and the 5lb tank will crowd things up even more. I opted for the tank on the outside so that I could put bottles of beer and hops on the inside. Yes its a 2x8 collar.

For me personally I never plan on using the freezer for anything but a keezer as long as I have it. Thats why I just went and used adheasive and silicone. Plus I wanted to make sure that it had an airtight seal.
 
I went and picked up my freezer today. I'm pretty happy with it overall. It looks like 6 will fit without a problem once I get a collar on there. I've got a couple projects that I need to do first, but I'm going to get the keezer running as soon as I can fit it in.
 
I started mine over the weekend . Its a 5 cf magic chef that I have had for about 7 years and wasn't being used little small but I can get 3 cornys in it or 2 BB for fermentation.

kegerator41.jpg


fermentation11.jpg


fermentation3.jpg


Now I will have the capacity for 5 kegs . I bought A Vissani kegerator at HD for 150 bucks on Saturday
 
Awesome! I love me some gauges!

I couldn't do without now that I have them. I have another 2 bank set up in the upright freezer that I am presently using. Now SWMBO will have a second fridge since she keeps putting non beer related items in it anyway.
 
Nice! I have a single body- dual gauge, but am trying to figure out what would be the best bang for my buck to push 4 kegs...manifold? I dunno...
 
Nice! I have a single body- dual gauge, but am trying to figure out what would be the best bang for my buck to push 4 kegs...manifold? I dunno...

I would get at least another secondary . Set the primary at say 30 psi with a tee and this way you can force one keg while you can set the other to serving pressure to a manifold.

This is the other setup when I bought it .The primary has two outlets one goes to the secondary gauges and the other I can hook up to a keg. The secondary thats hooked up to the manifold I can have six at say 12psi and the two off the other secondary anywhere from 0psi to the set point of the primary that I leave at 30 psi at the time

manifold5.JPG
 
Magic Chef 4.6CF Home Depot special-$99.00 Kegerator kit from KegConnection.com. New Italian SS Ball Lock Keg, CO2 Bottle, Perlick Faucet upgrade and Drip Tray

P1010627.jpg


P1010624.jpg


P1010625.jpg
 
Magic Chef 4.6CF Home Depot special-$99.00 Kegerator from KegConnection.com. New Italian SS Ball Lock Keg, CO2 Bottle, Perlick Faucet upgrade and Drip Tray

P1010523.jpg


P1010528.jpg

I like the Beers Served tally. Easy way to keep track of where you are at in the keg.:mug:
 
Magic Chef 3.6cf frigde with 2x12" cuff around the front. Casters inset under front of the cuff to make it semi mobile. Painted with Kilz latex then the Rustoleum Hammer Finish. Drip pan made from leftover galvanized. Door re-attached using original hardware screwed into top and bottom of cuff.

Keggerator_Build_006.jpg


Holds three kegs with no room to spare. Gas line, temp probe for Johnson analog controller and wiring for muffin fan scavenged from computer go through top left corner in back of frigde. No lines there, whew.
Keggerator_Build_007.jpg


Frigde free. Kegging system, regulators, CO2 tank, hoses, taps and 3 kegs, $300. Tap tower finally arrived from ebay purchase, SS two tap tower, shanks, faucets and handles $80. SS smoker drip tray, $10. Having made my own kegerator and taping my first beer... Priceless!:mug:
Keggerator_done_001.jpg
 
I like the Beers Served tally. Easy way to keep track of where you are at in the keg.:mug:

Thanks Demon.

Not as much how much is in the keg but knowing how much I drank the night before.

Hey, do I need to be a premium member for my pics to show up in my post?
 
Magic Chef 3.6cf frigde with 2x12" cuff around the front. Casters inset under front of the cuff to make it semi mobile. Painted with Kilz latex then the Rustoleum Hammer Finish. Drip pan made from leftover galvanized. Door re-attached using original hardware screwed into top and bottom of cuff.

Keggerator_Build_006.jpg


Holds three kegs with no room to spare. Gas line, temp probe for Johnson analog controller and wiring for muffin fan scavenged from computer go through top left corner in back of frigde. No lines there, whew.
Keggerator_Build_007.jpg


Frigde free. Kegging system, regulators, CO2 tank, hoses, taps and 3 kegs, $300. Tap tower finally arrived from ebay purchase, SS two tap tower, shanks, faucets and handles $80. SS smoker drip tray, $10. Having made my own kegerator and taping my first beer... Priceless!:mug:
Keggerator_done_001.jpg


Awesome job TB!

Does it hold good temps w/o insulating the 2 x 12's? How did you attach the 2 x 12's to the fridge?

Pretty neat set-up you got there!
 
:) Thanks! I really like the steel handles, too. I've got to get out in the shop and start making some more.

-Joe

Cool...you made that one? I used to be a metal fabber and I've always wanted to do some custom handles like that.

:mug:

-Tripod
 
I did! I also made a few more steel ones and all the wood ones. My vendor username is FisherWoodcraft and I'm even running a sale at the moment.

-Joe

Very nice! I'm a fan of both wood and steel. I almost said "I like your wood" but then thought twice! :D

As a metal guy...I would lean toward the steel but the wooden handles are beautiful. Especially the ones with the "marble" looking wood grains. Reminds me of guitar shopping! If I ever get a rig built up I'll take another look at your taps for sure..

-Tripod
 
I really like the "?" shaped one, I'll have to keep an eye on your other thread to see when they're available!
 
What's up guys? Ayways, I finished mine today and this is what I've come up with. It's a Danby Millennium with a two tap tower.

Full view:
DSC09790-1.jpg

DSC09789.jpg


Top View:
DSC09792.jpg


On the inside I have 2 5gal cornies, 5lb Co2 tank/regulator and 20' of beer line:
DSC09791.jpg


Kegging my own beer is just about the coolest thing I've ever done. If you're reading this and wondering if it's worth the steep price tag, IT IS!

Thanks,
Jacob
 
I took off the single tap and put on a 2 tap tower w/ perlicks
DSC00106.jpg


Inside I have two 5 gal. cornies and a 5 lb tank. I might look into seeing if I can squeeze in a 10 lb tank.
DSC00107.jpg


And yes, it is sitting right next to my recliner! Watching football just got a hole lot easier!!!!:rockin:

I like the wheels. I think I'm going to put some on mine.
 
I finally got around to taking a few pics of the 'Outhouse'.

I'm trying to decide on the handle for it. It has to be less then 4inches tall to accomodate the freezer door. The first brew going in is Yuri's Pumpkin Ale, so something along the lines of a baby pumpkin might be appropriate.

Any other ideas?

Kegerator.jpg

Kegerator2.jpg

Just in time for Halloween...
Kegerator3.jpg
 
I finally got around to taking a few pics of the 'Outhouse'.

I'm trying to decide on the handle for it. It has to be less then 4inches tall to accomodate the freezer door. The first brew going in is Yuri's Pumpkin Ale, so something along the lines of a baby pumpkin might be appropriate.

Any other ideas?

Dude that is sweet! You got to go with a roll of TP for the handle. Just get a dowel that is the same diameter as the tube and sink a knurl into it.:mug:
 
lol

That's a pretty good idea...it'd come in handy to clean up the drip tray too!

What do you guys use to attach the custom handles...couplers? nuts? I checked out using a coupler, but I'd have to bore a 3/4" hole to accomodate it...
 
lol

That's a pretty good idea...it'd come in handy to clean up the drip tray too!

What do you guys use to attach the custom handles...couplers? nuts? I checked out using a coupler, but I'd have to bore a 3/4" hole to accomodate it...

I used these on my custom handles:
gpmq3368.jpg


You drill, then screw them into the hole, and the inside of the fitting is threaded to fit you faucet. I used oak which was a little tough to screw the insert into. A softer wood would be easier.
 
Back
Top