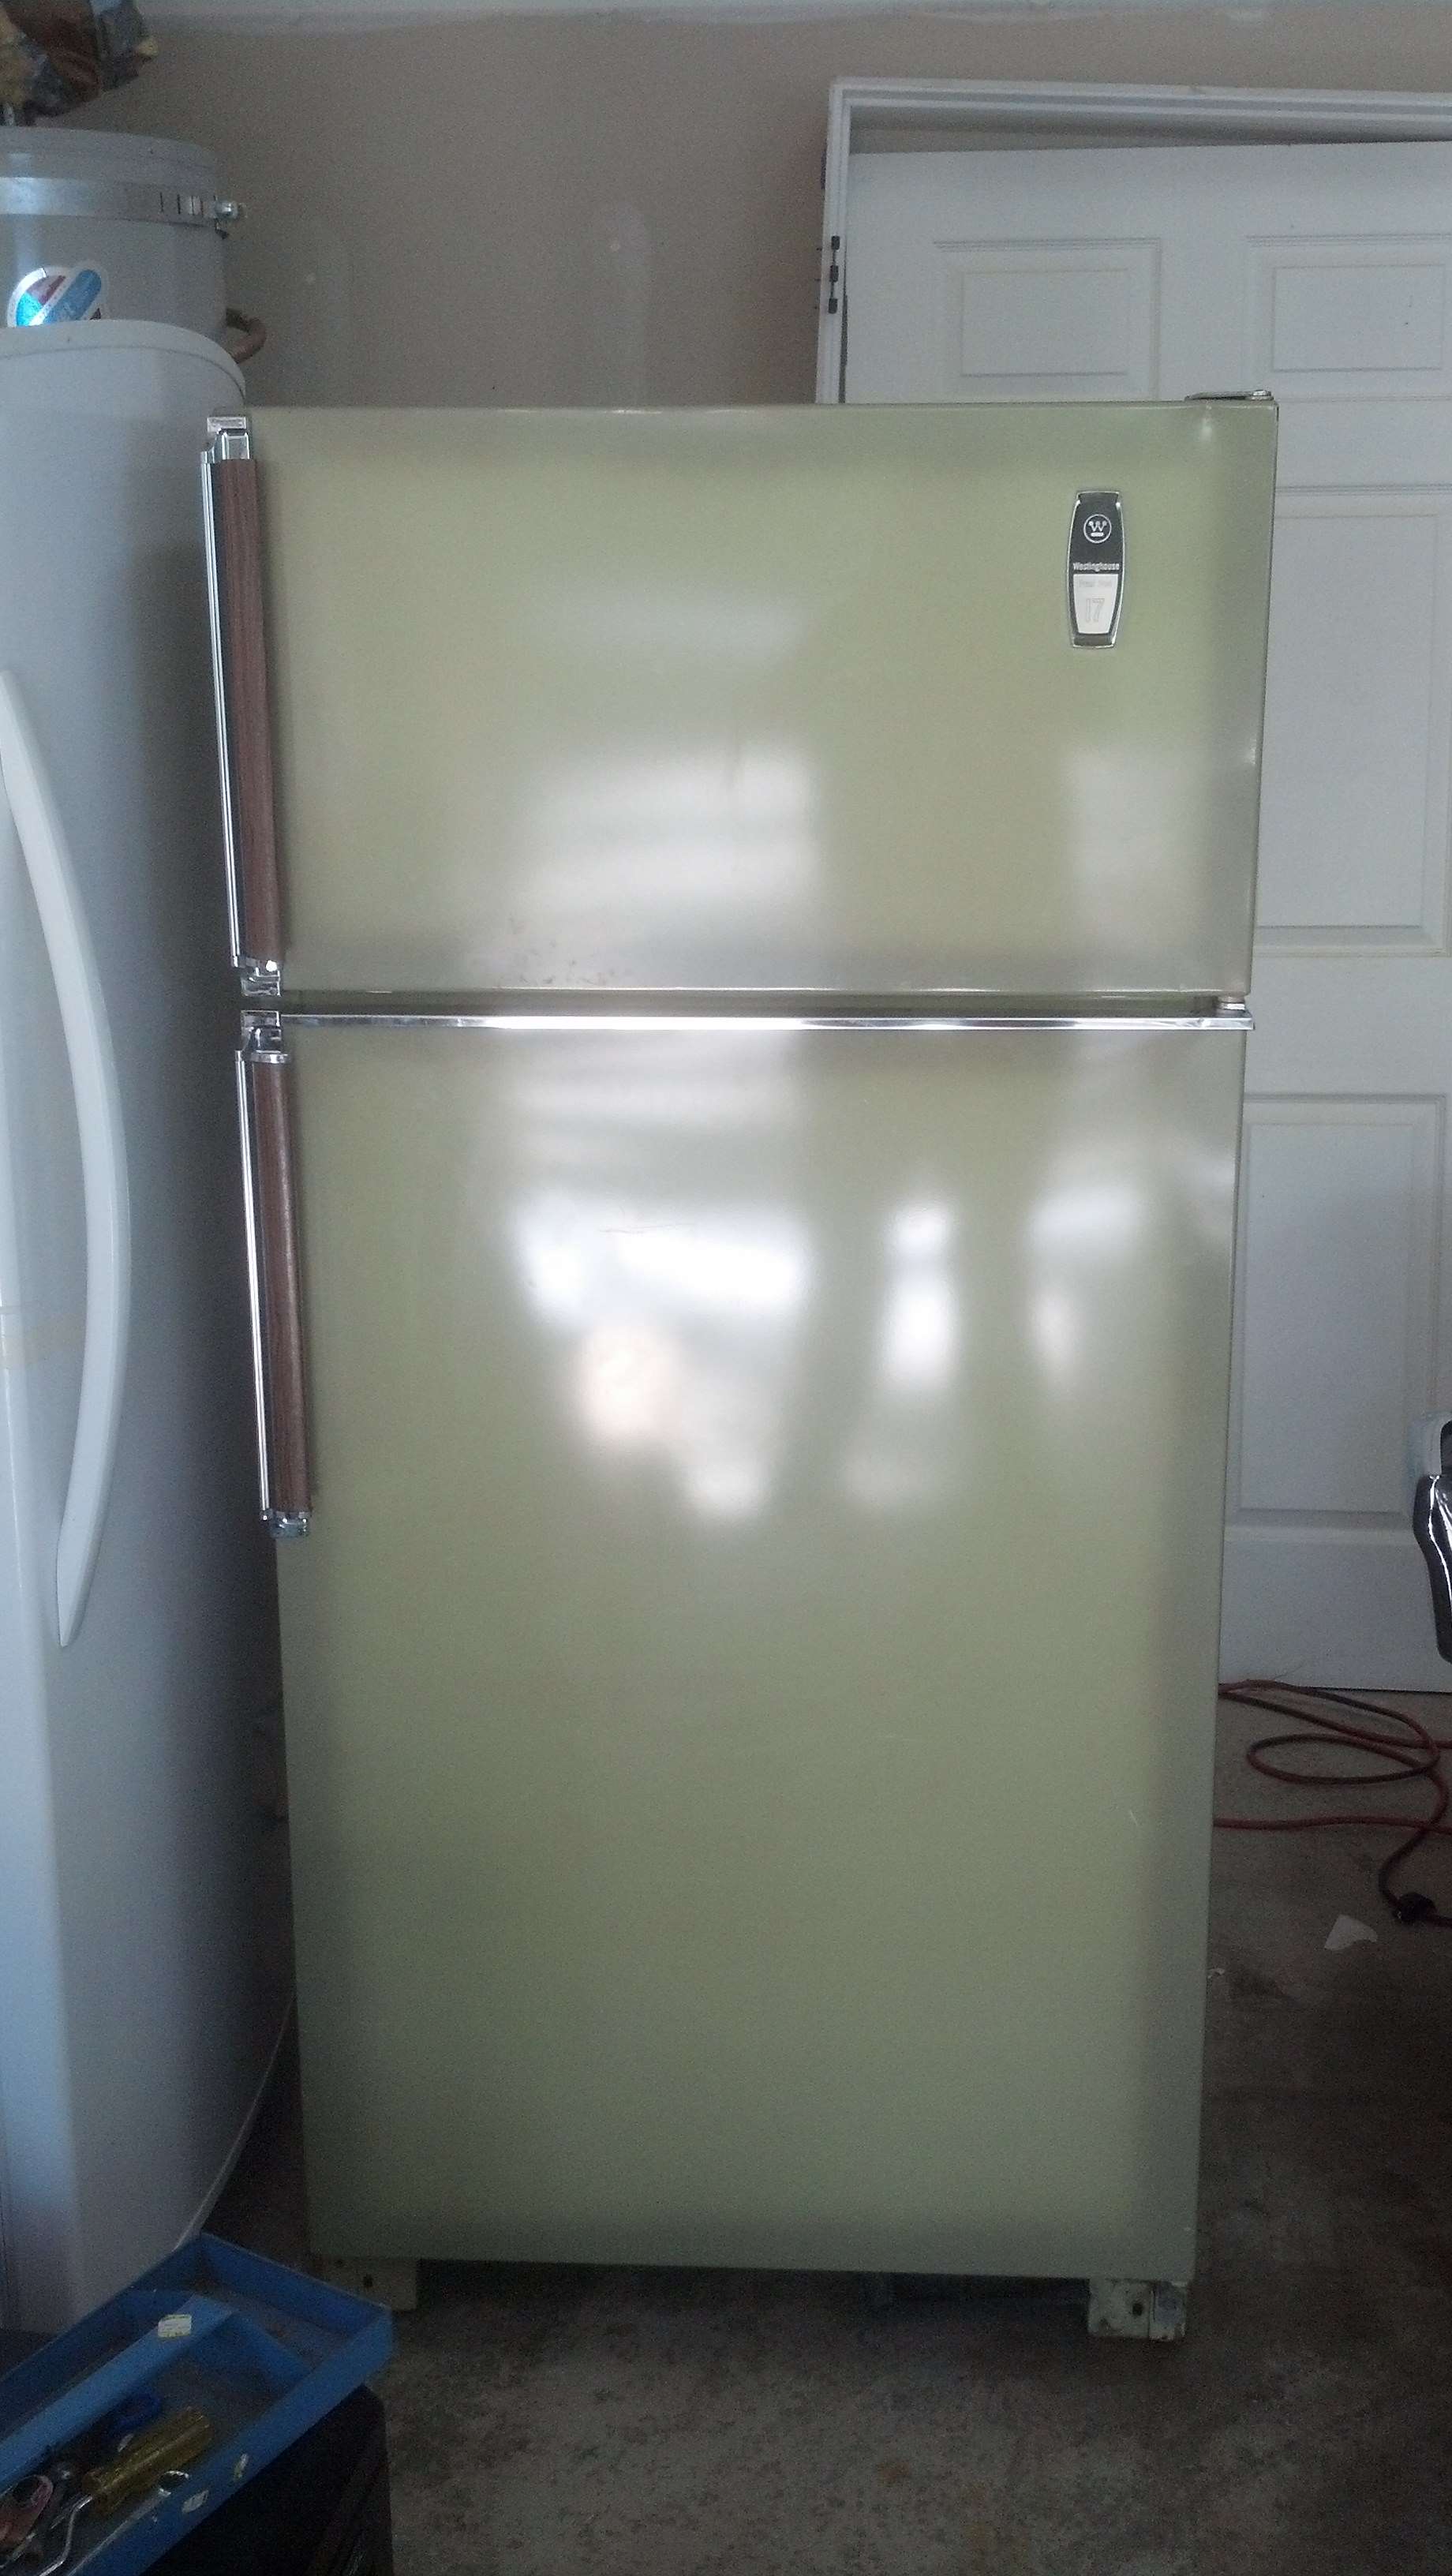
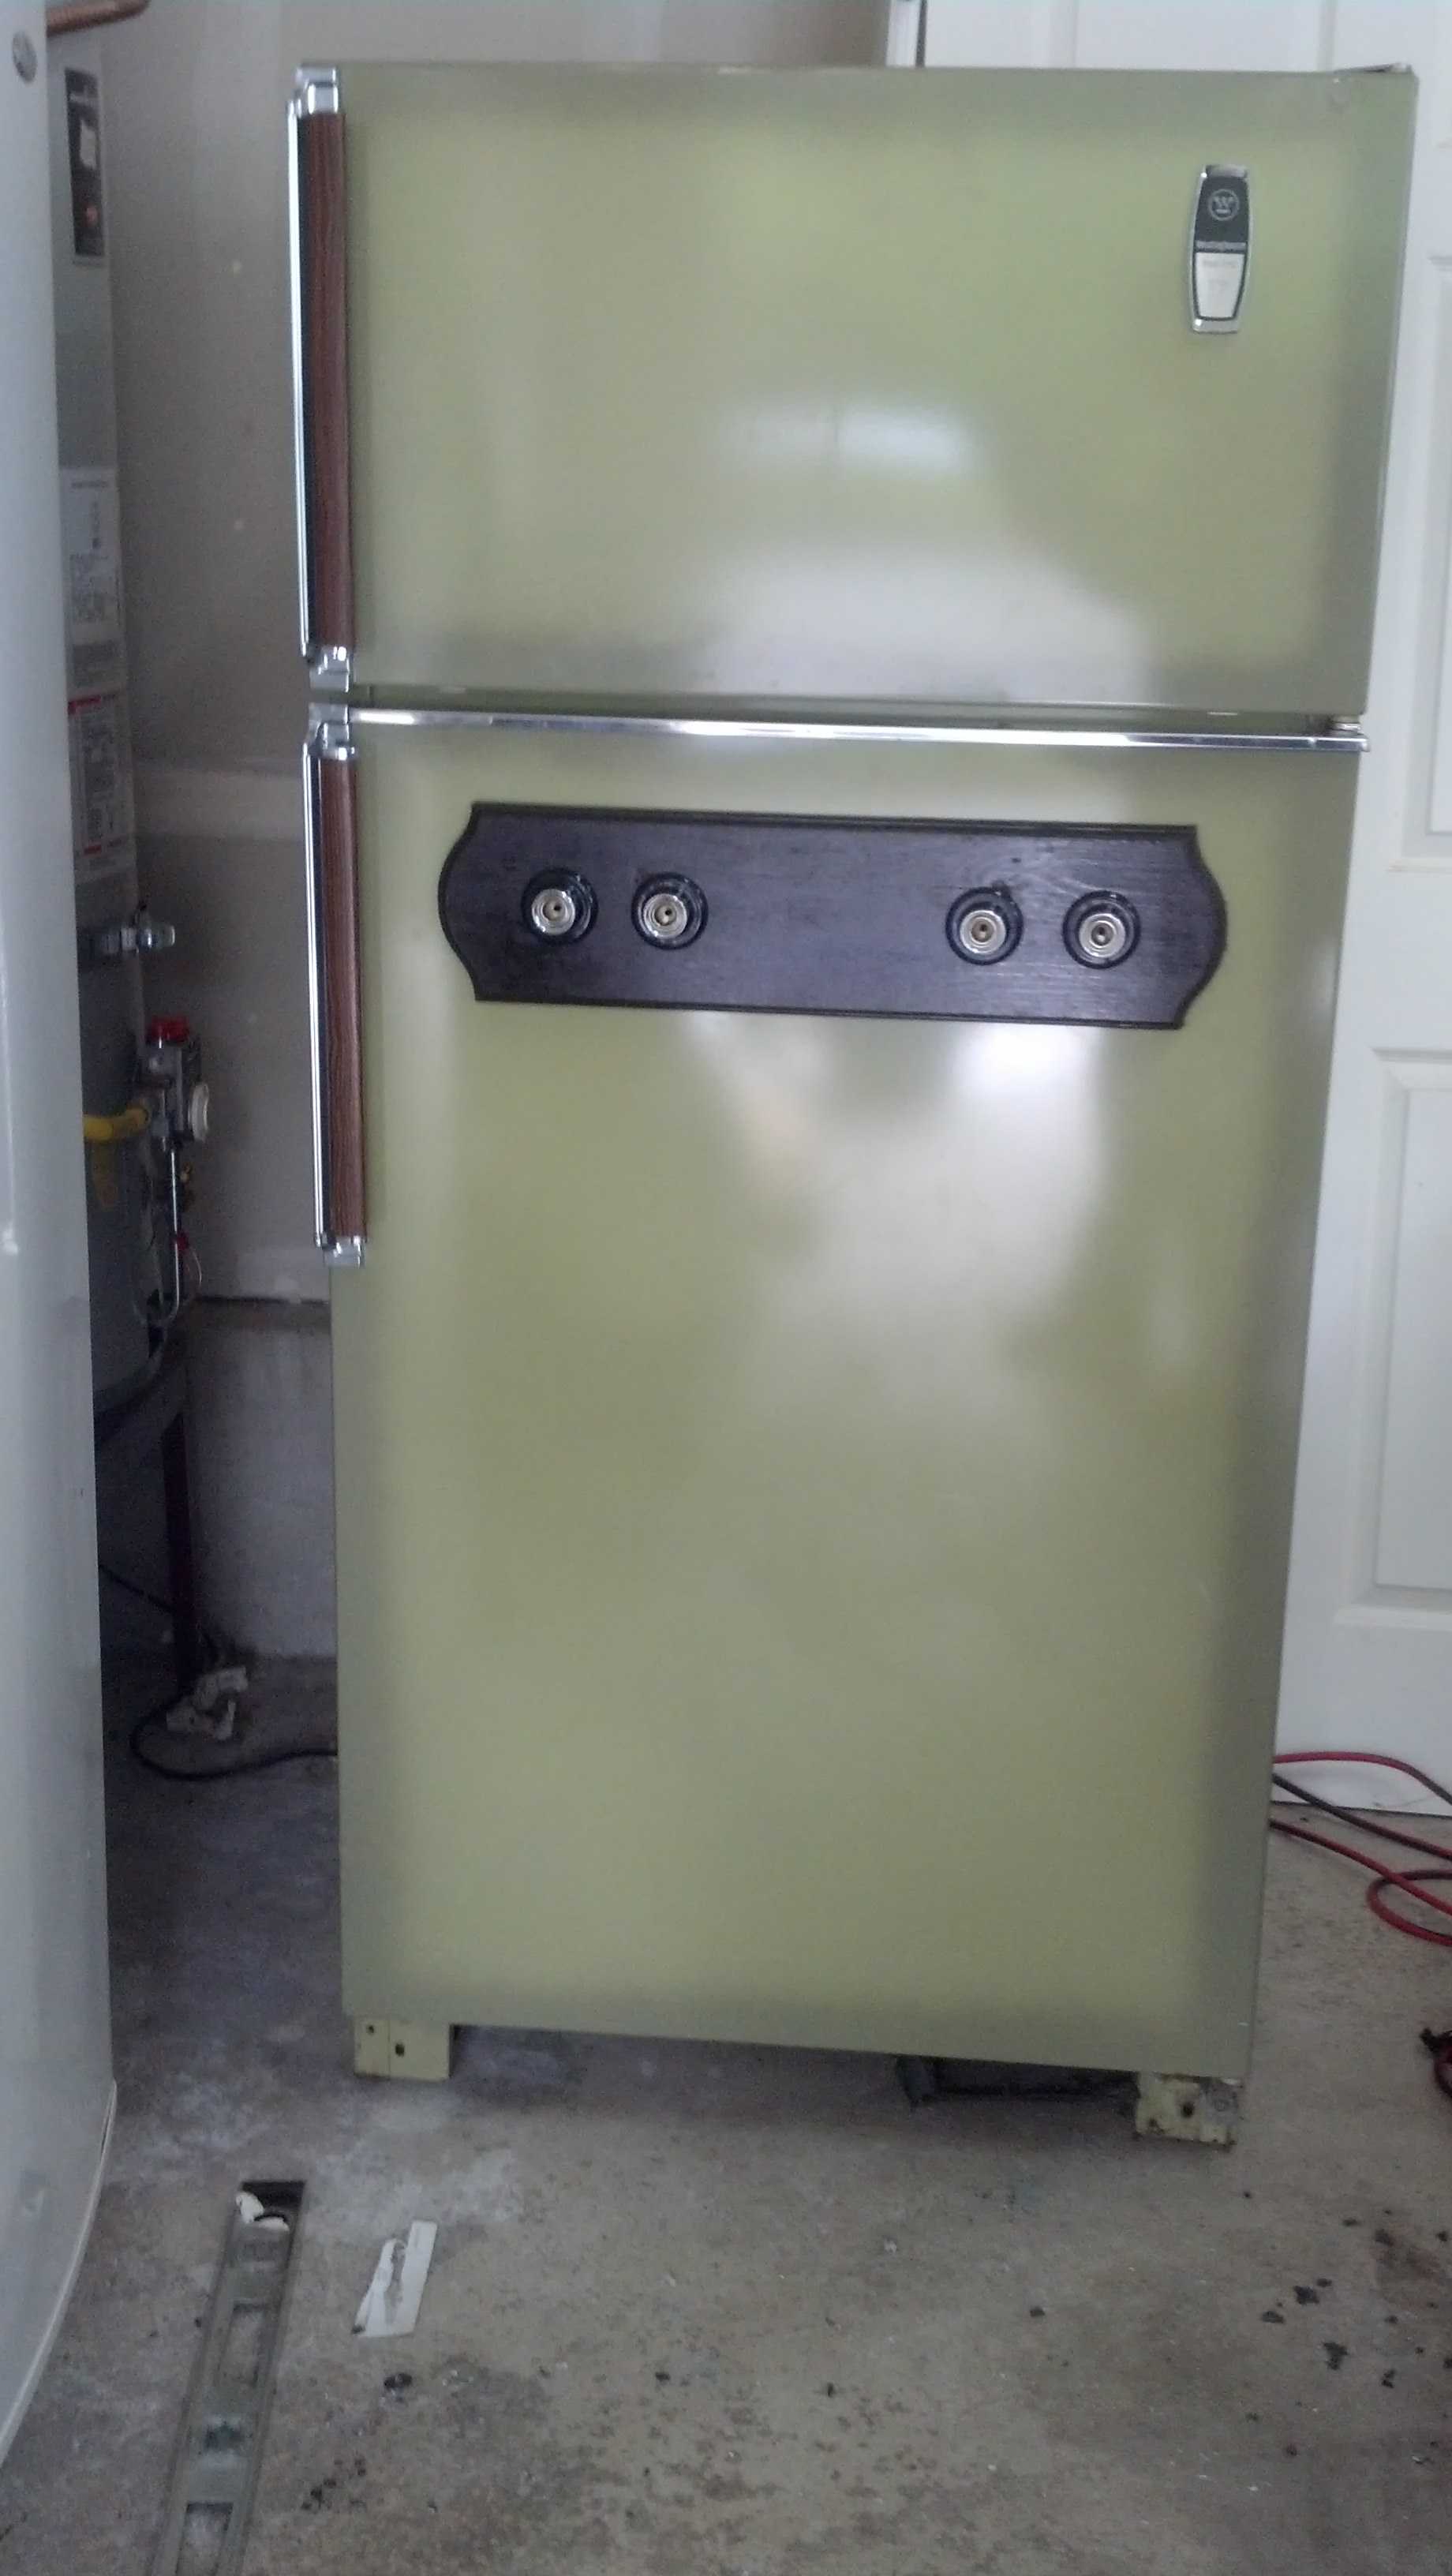
A while back I posted asking for help with a proposed keezer build. Very basic. I was falling in love with the possibilities of personal touches and essentially making it my own creation. However thanks to what I had hoped was originally an improbability drive but turned out to be my better half those plans changed and I ended up buying a very retro looking green beast from Westinghouse. I've no idea the year on this model but we'd guess it's around the mid 70's at the least. It survived a heart stopping slip and hard landing from the bed of a truck to the driveway and still powered up perfectly.
I was left between being semi let down I wouldn't be going with my grand design for a keezer, and trying to come up with a good look and unique touch for this beast of a machine.
 Uploaded with ImageShack.com
So I began buying a few things here and there, all for fairly cheap. With the color of the fridge I thought about one of my favorite places here in Seattle, an Irish pub A Terrible beauty. So with that inspiration and a nice stout I made a trip to Home Depot and...Michaels Craft.
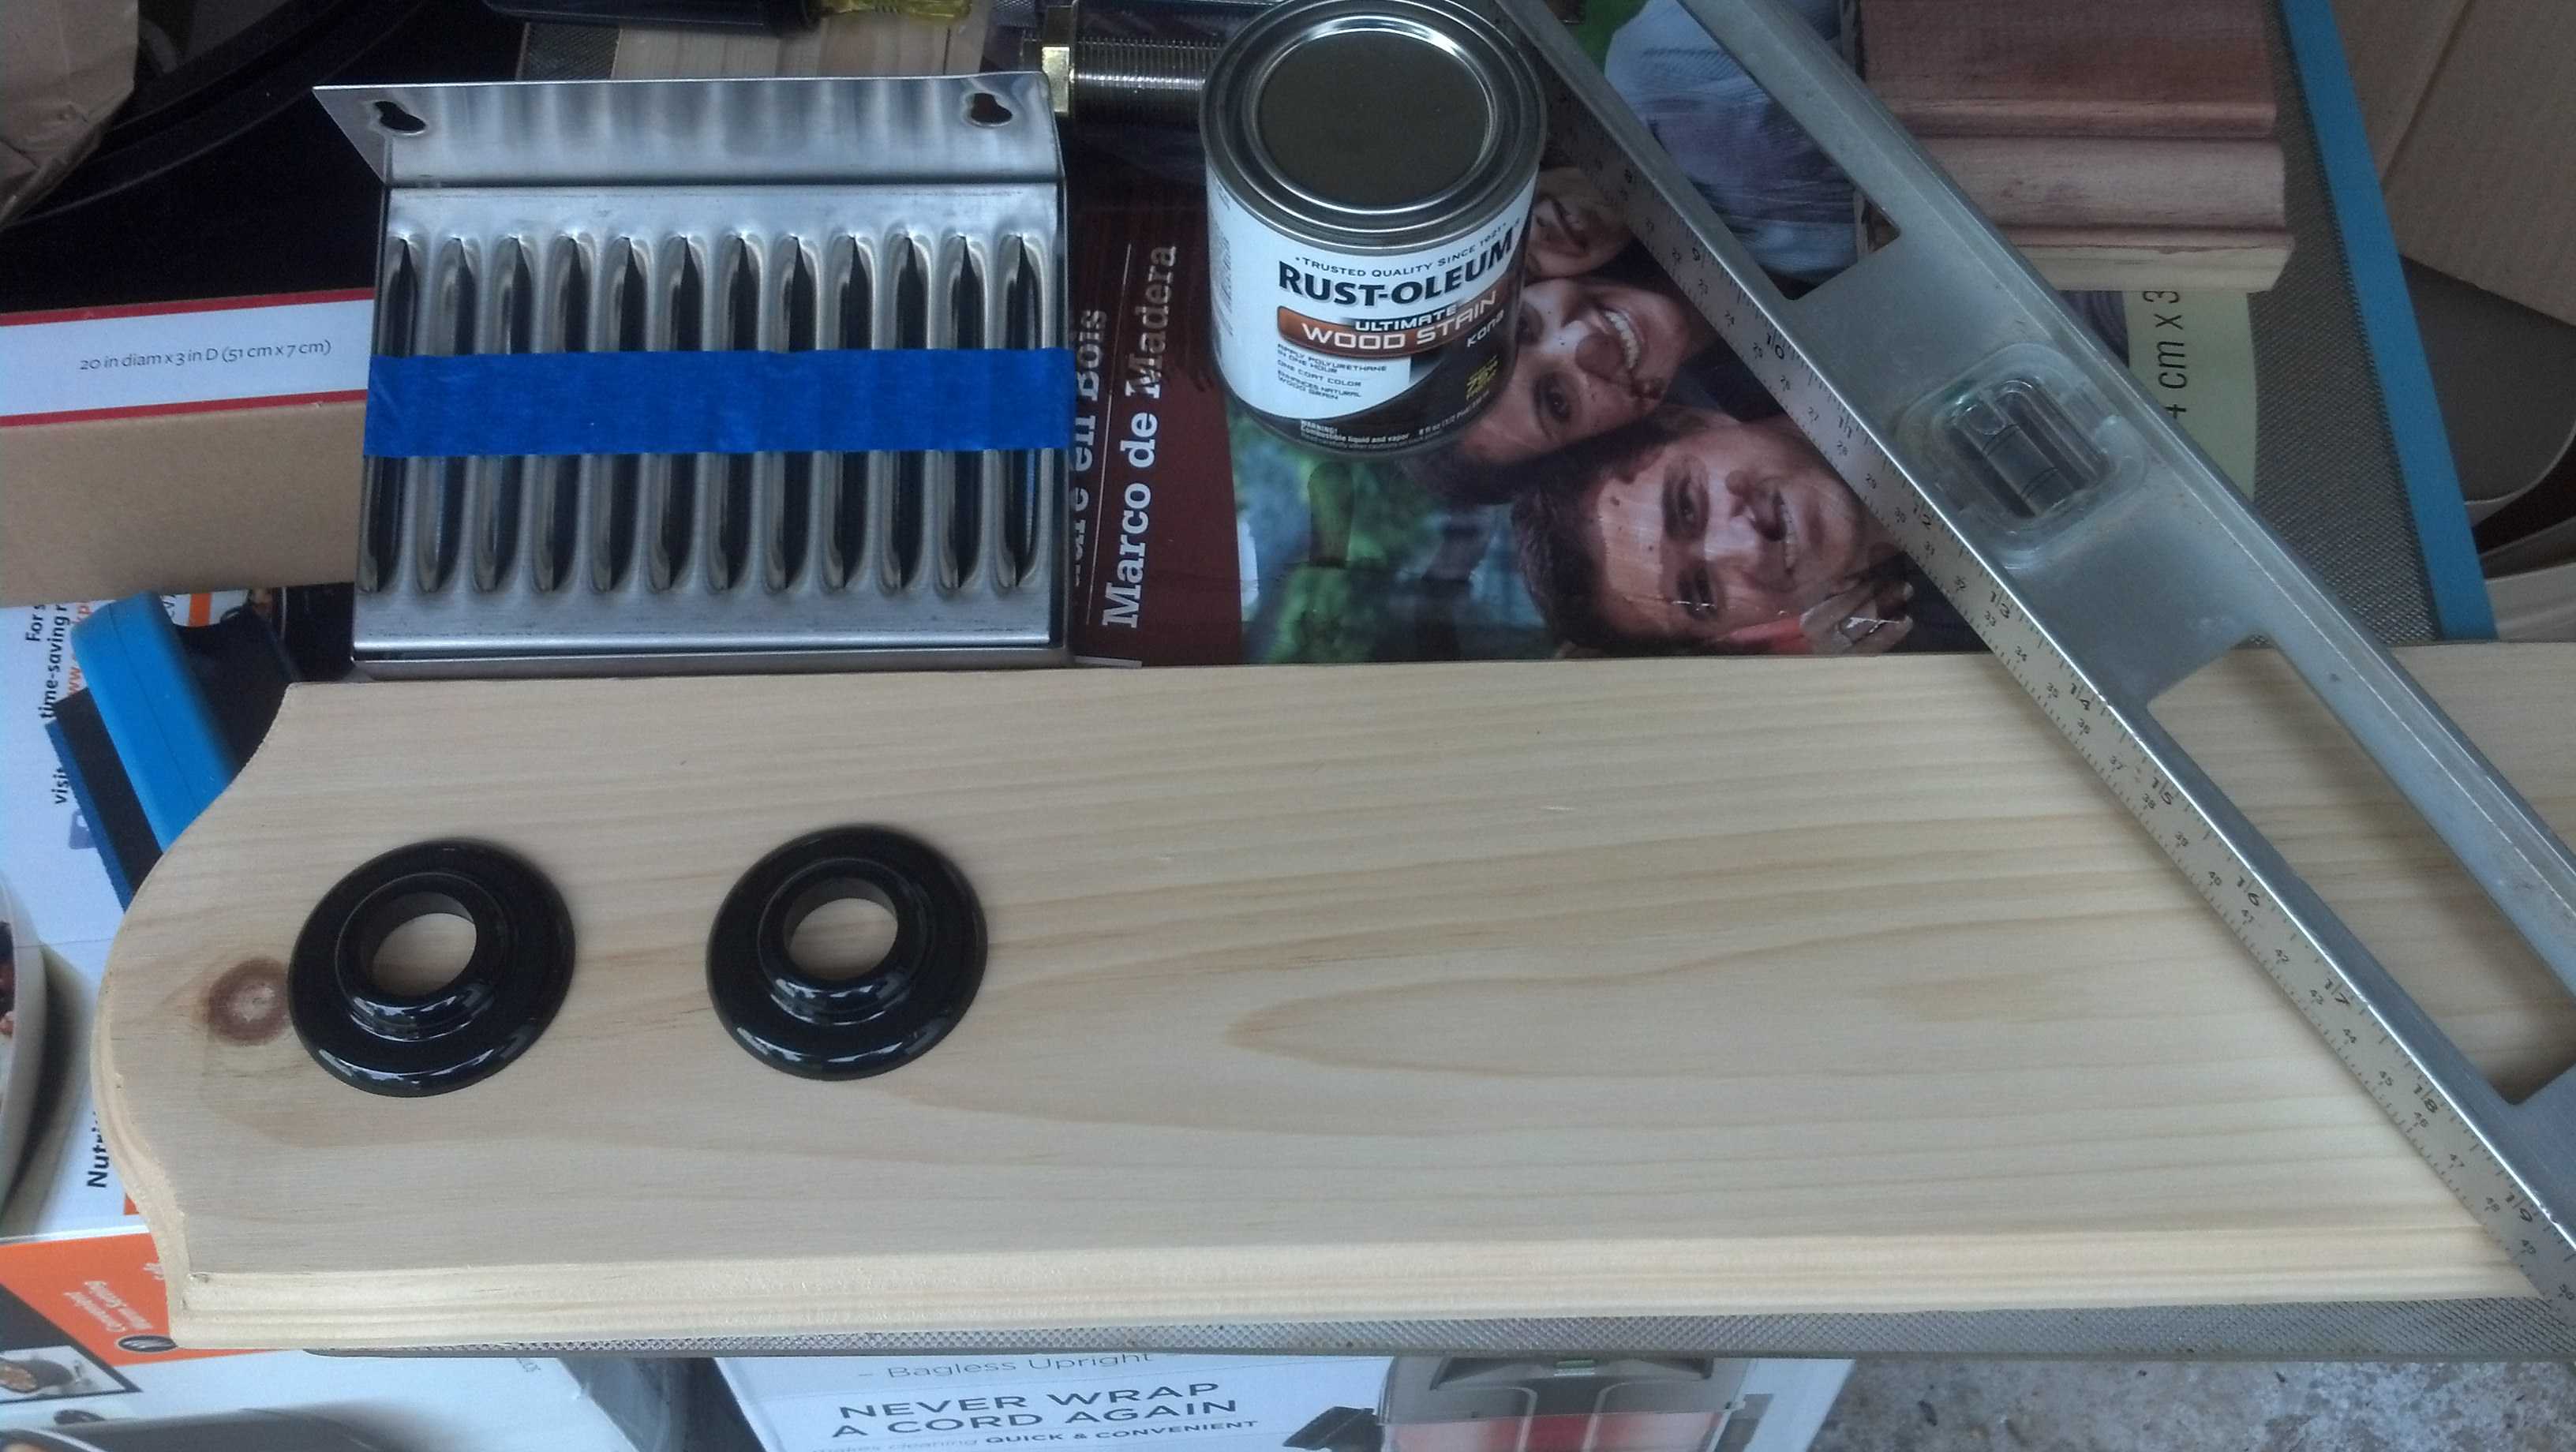
From Michaels I was able to pick up for $7 what I decided would make for a nice base for the taps
 Uploaded with ImageShack.com
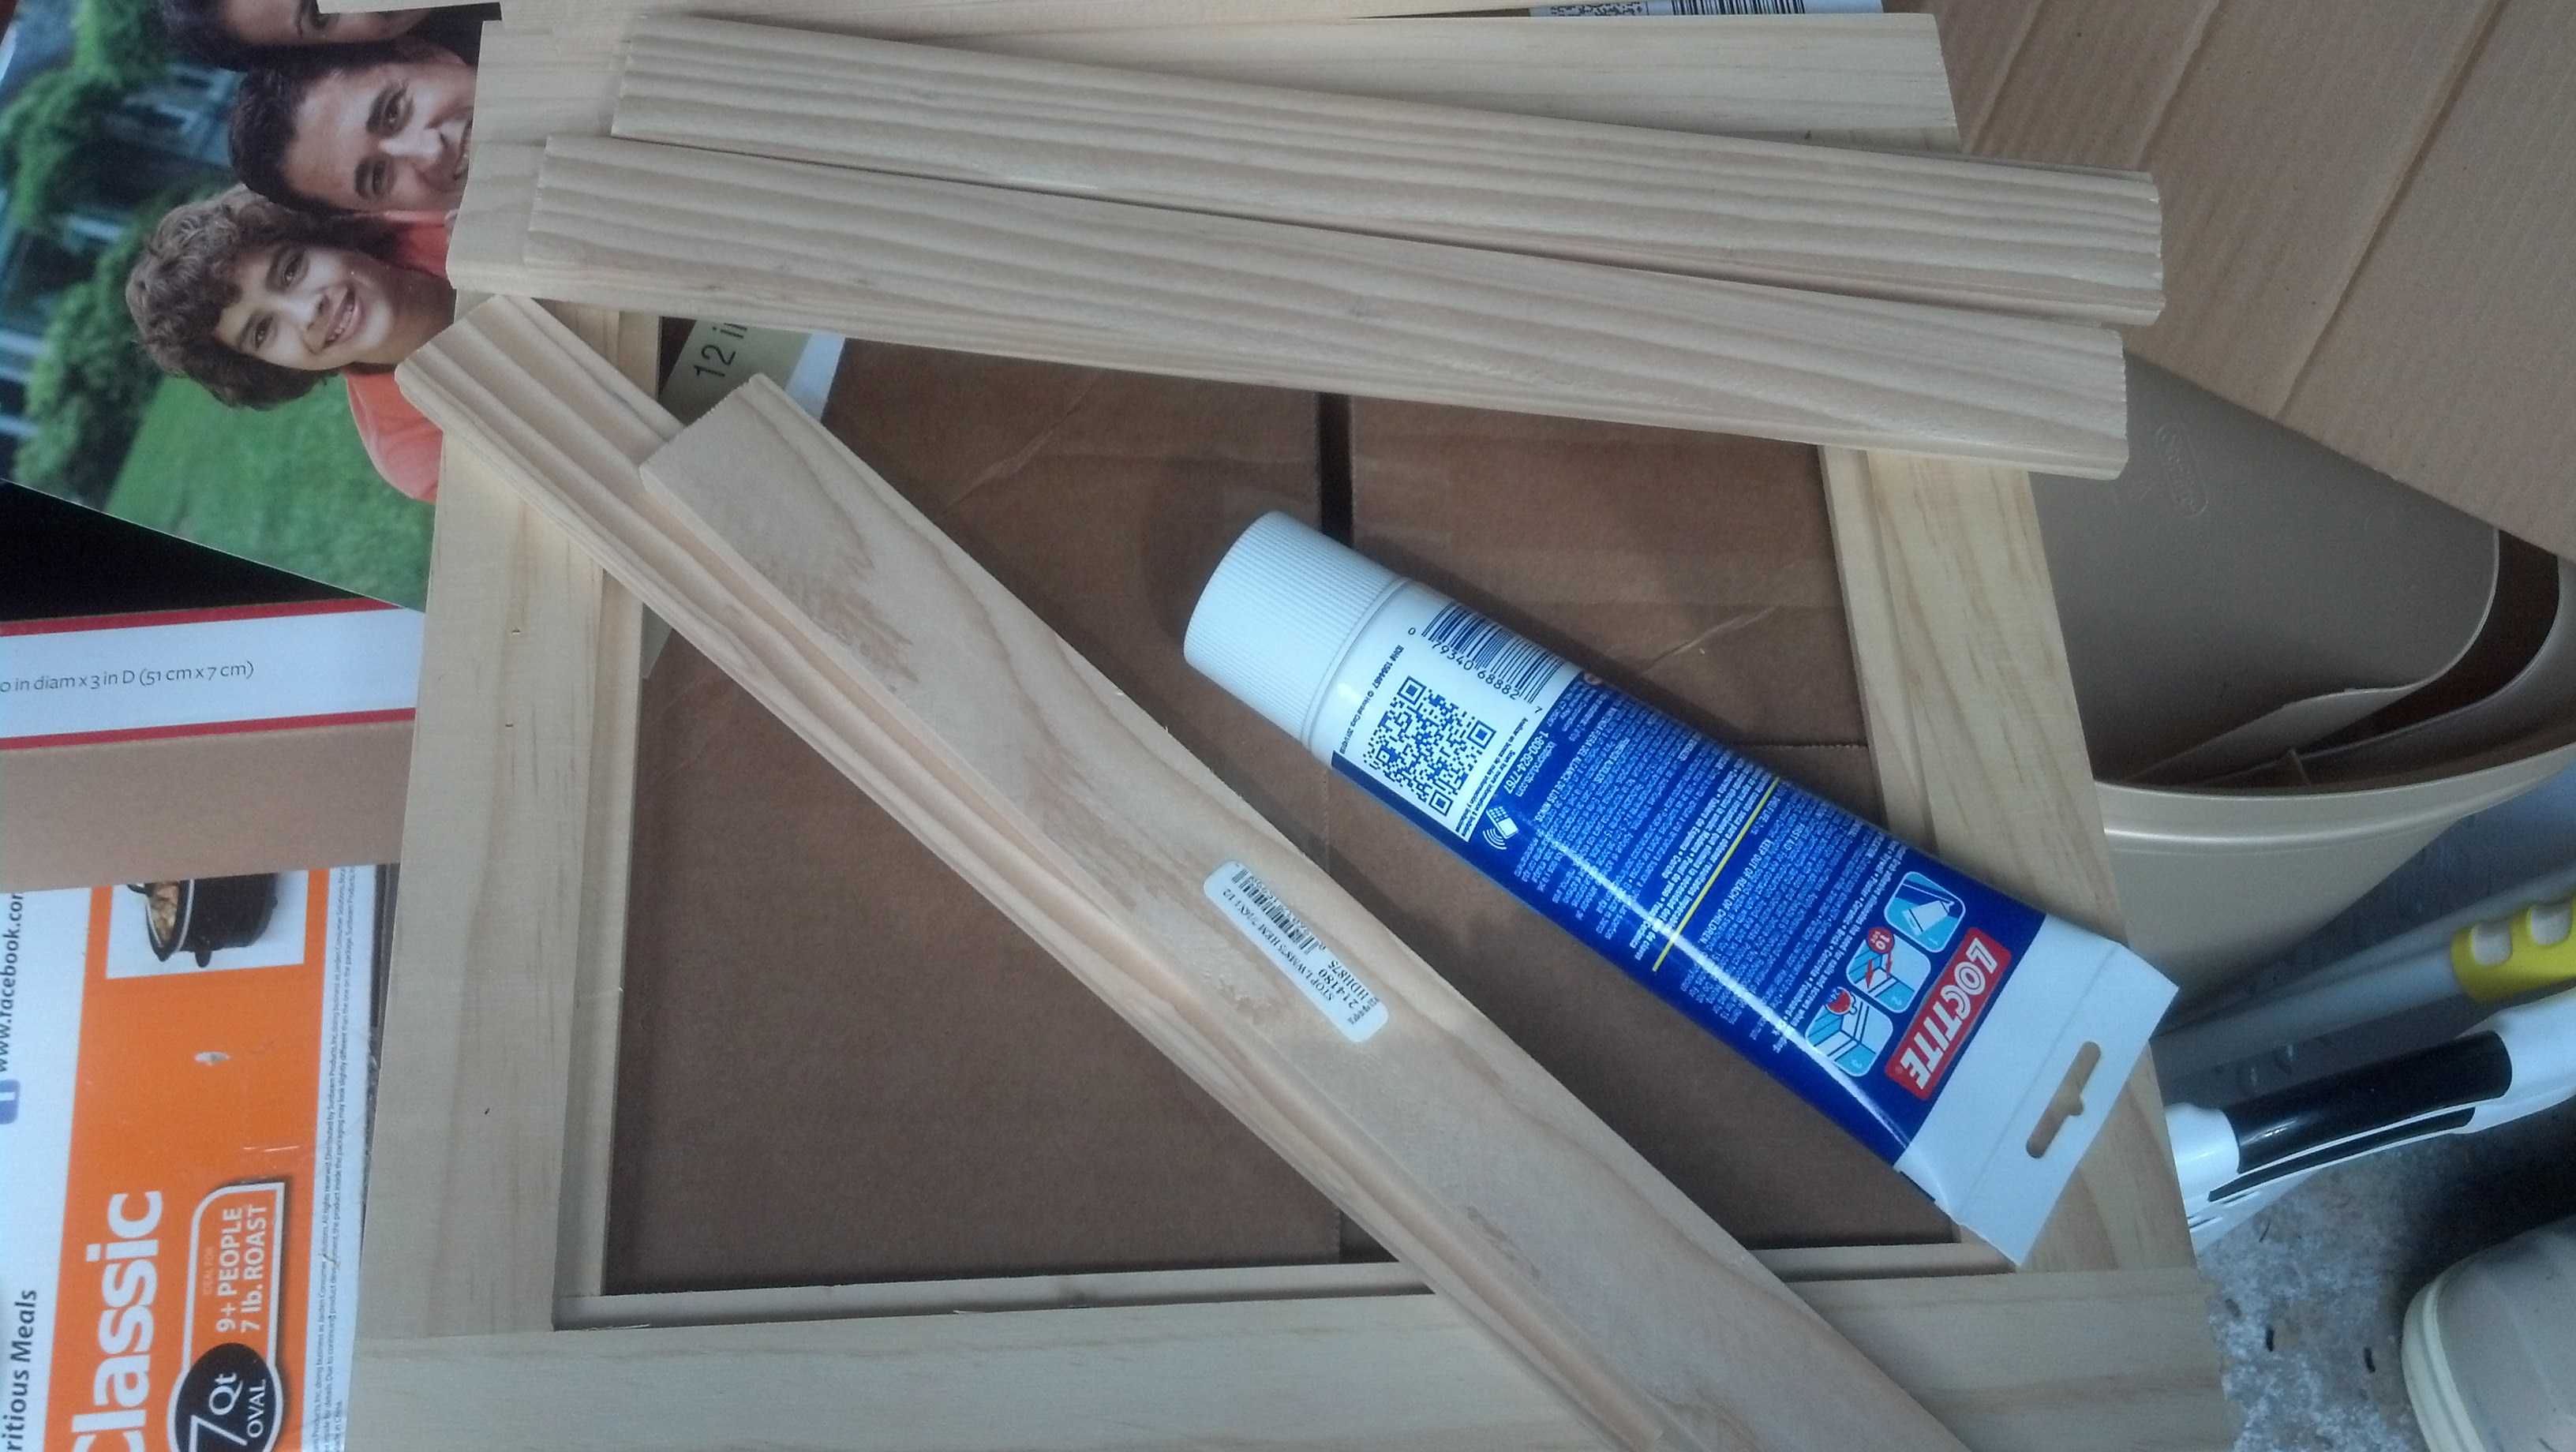
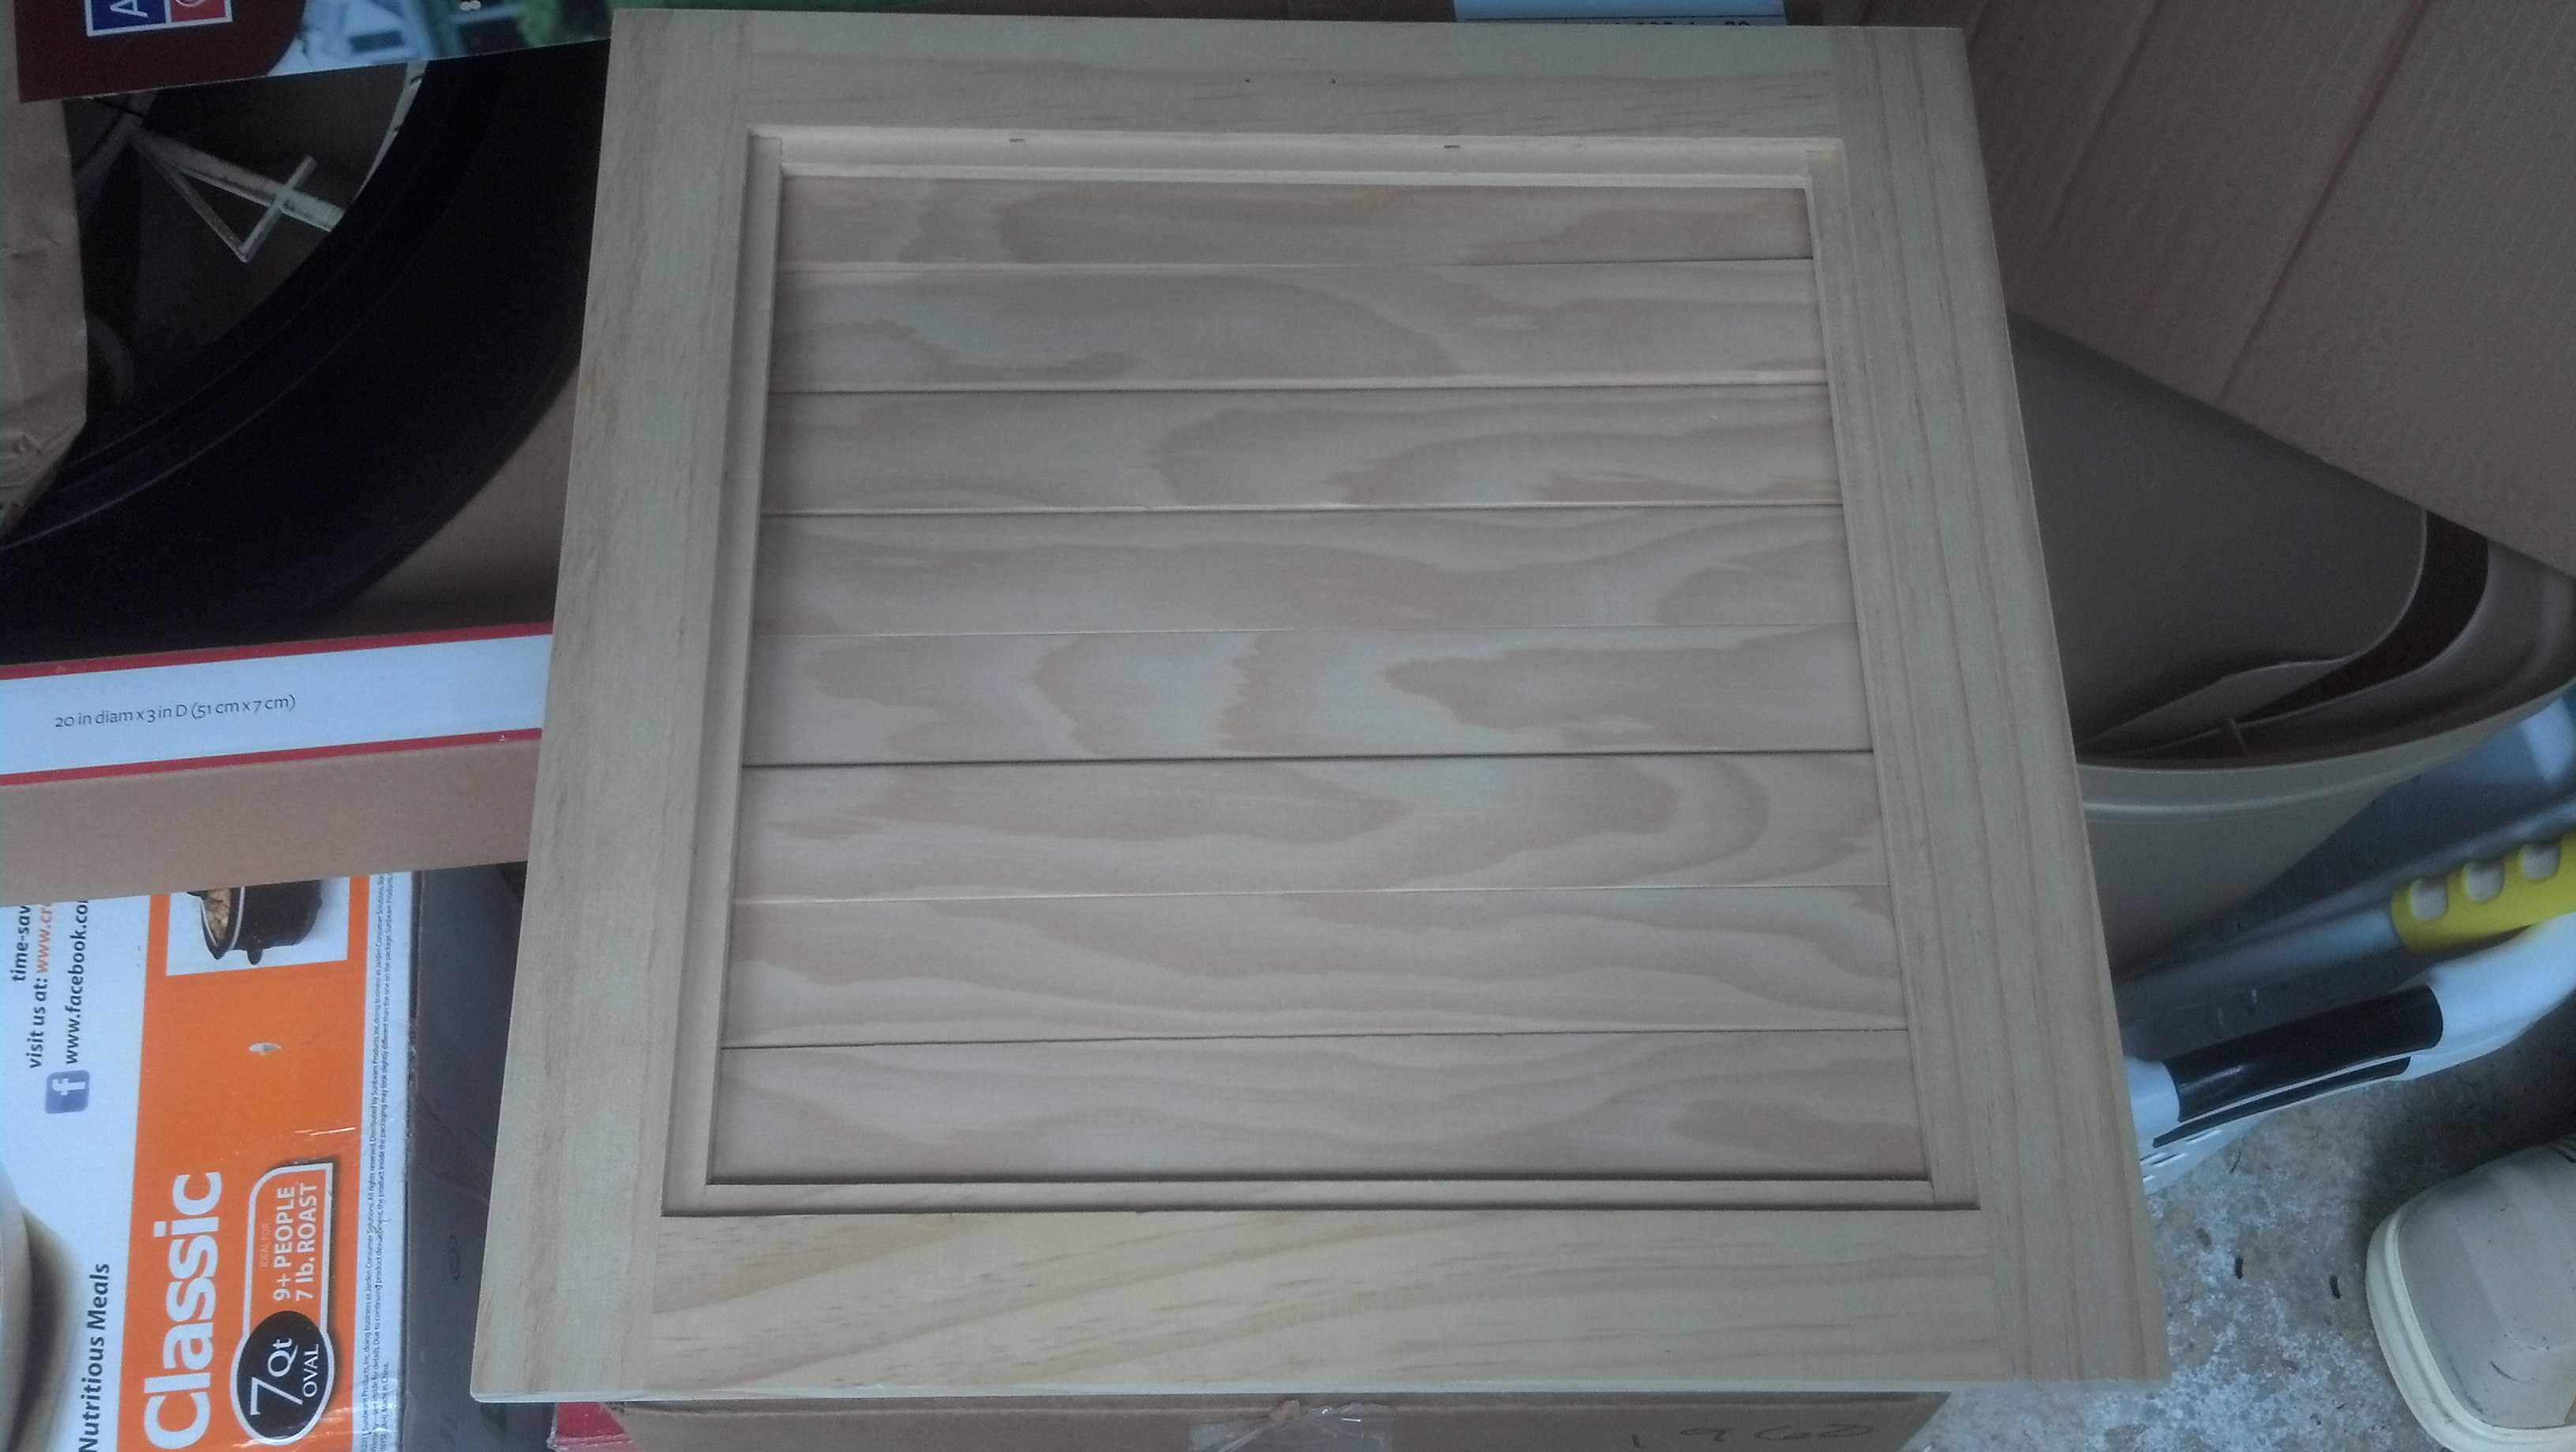
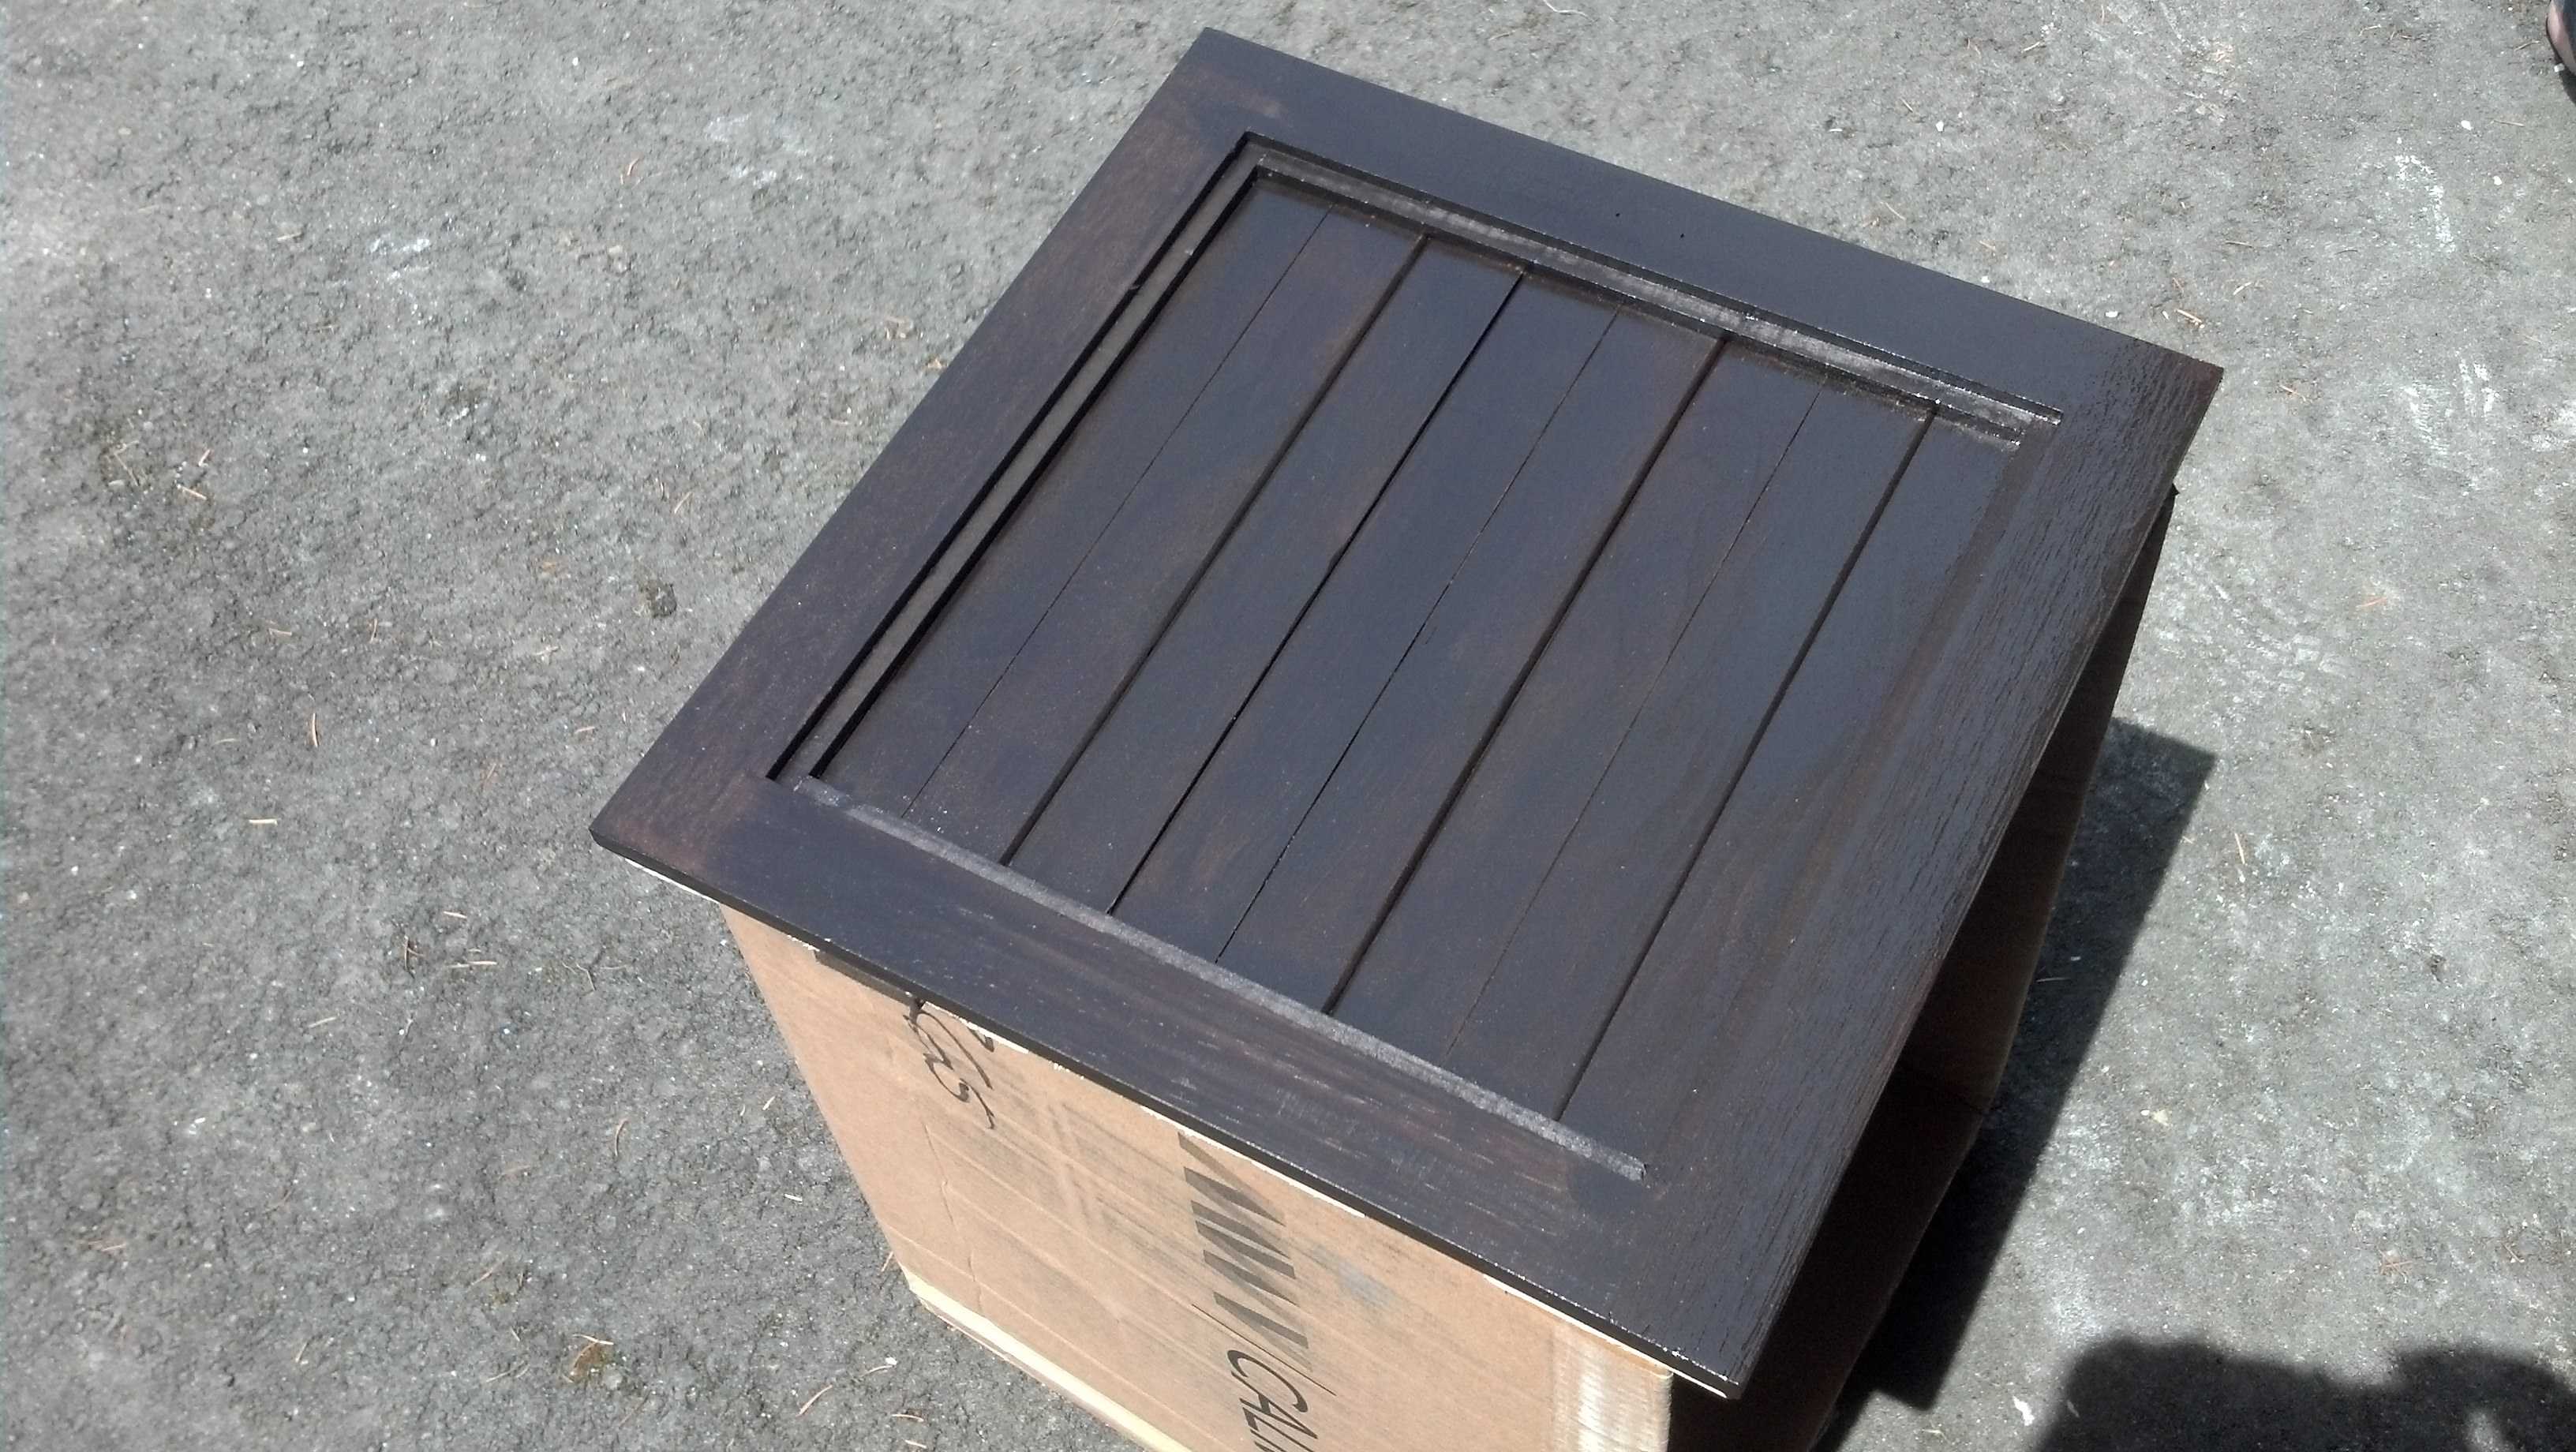
Also from Michaels I found a cheap wood frame ($4) which gave me an idea I saw someone here do but on a much grander scale. My plan was to take the frame and create a box top using molding from Home Depot(which came to about .99 a foot, bought close to 8 feet)
 Uploaded with ImageShack.com
 Uploaded with ImageShack.com
Filled with a sense of knowing half of what I was doing, where I was going and a bit more homebrew I felt pretty good at the direction this all was heading. the girlfriend decided to help here and there as well.
 Uploaded with ImageShack.com
 Uploaded with ImageShack.com
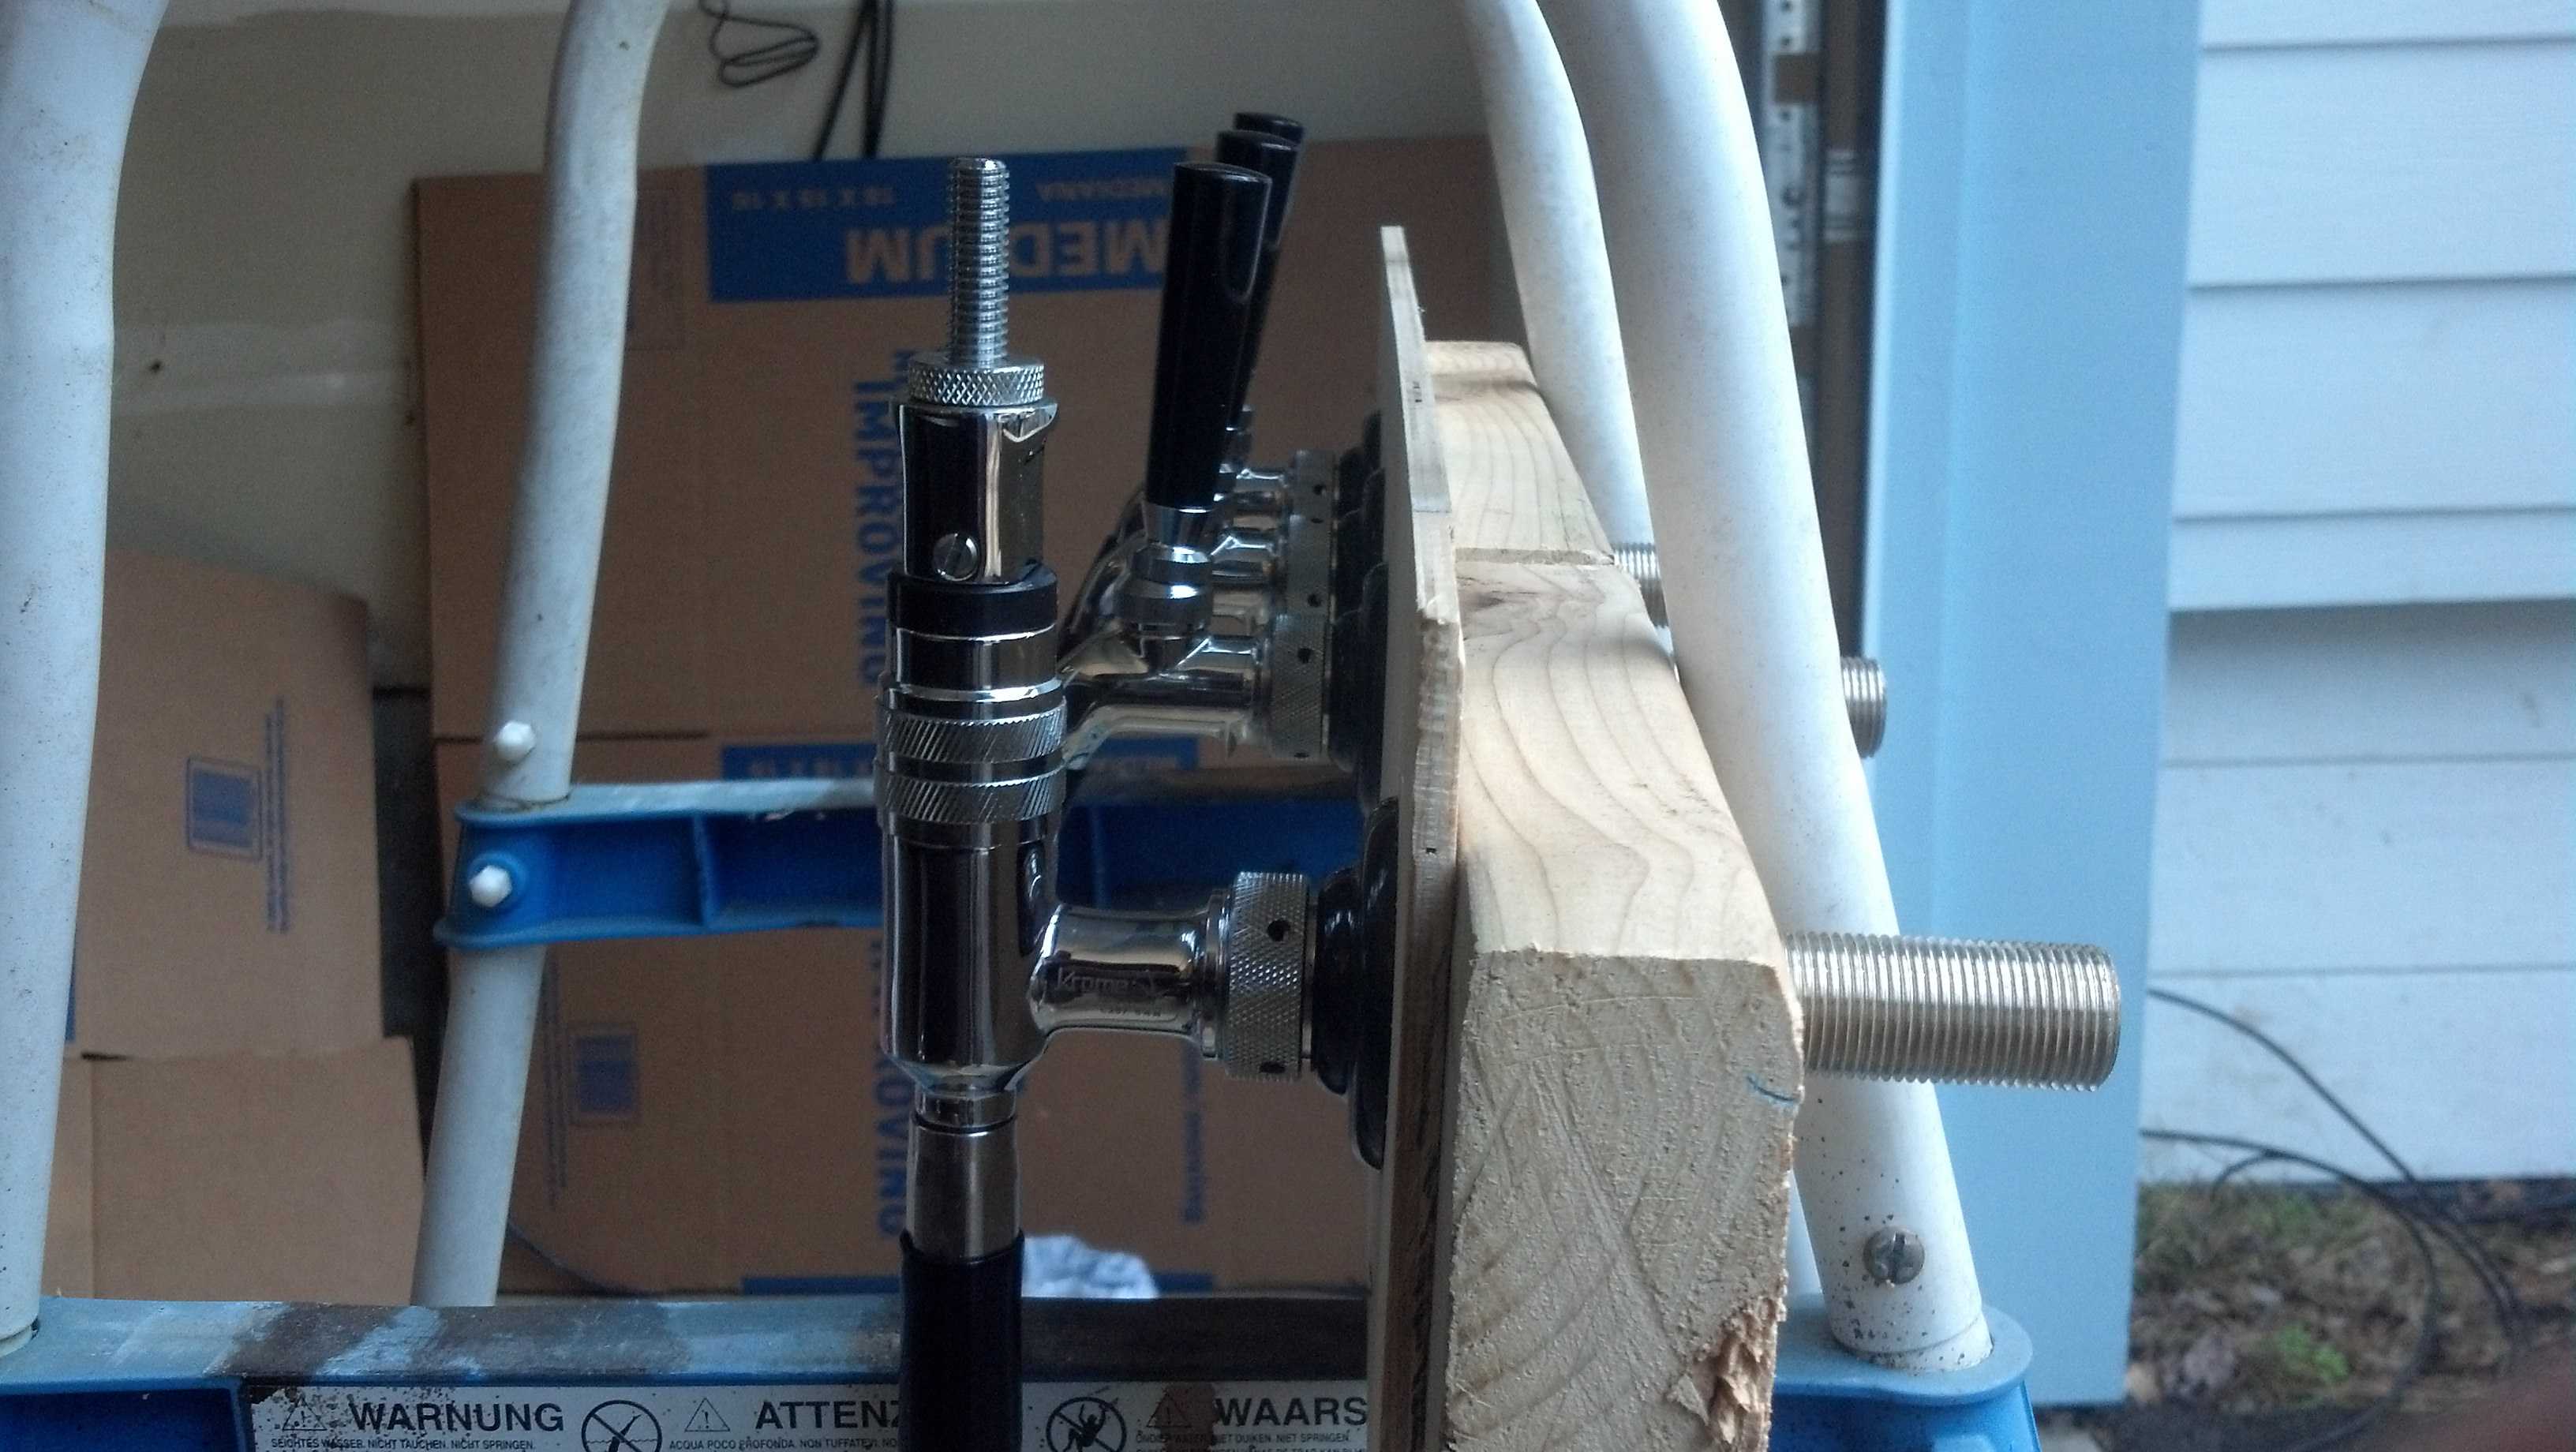
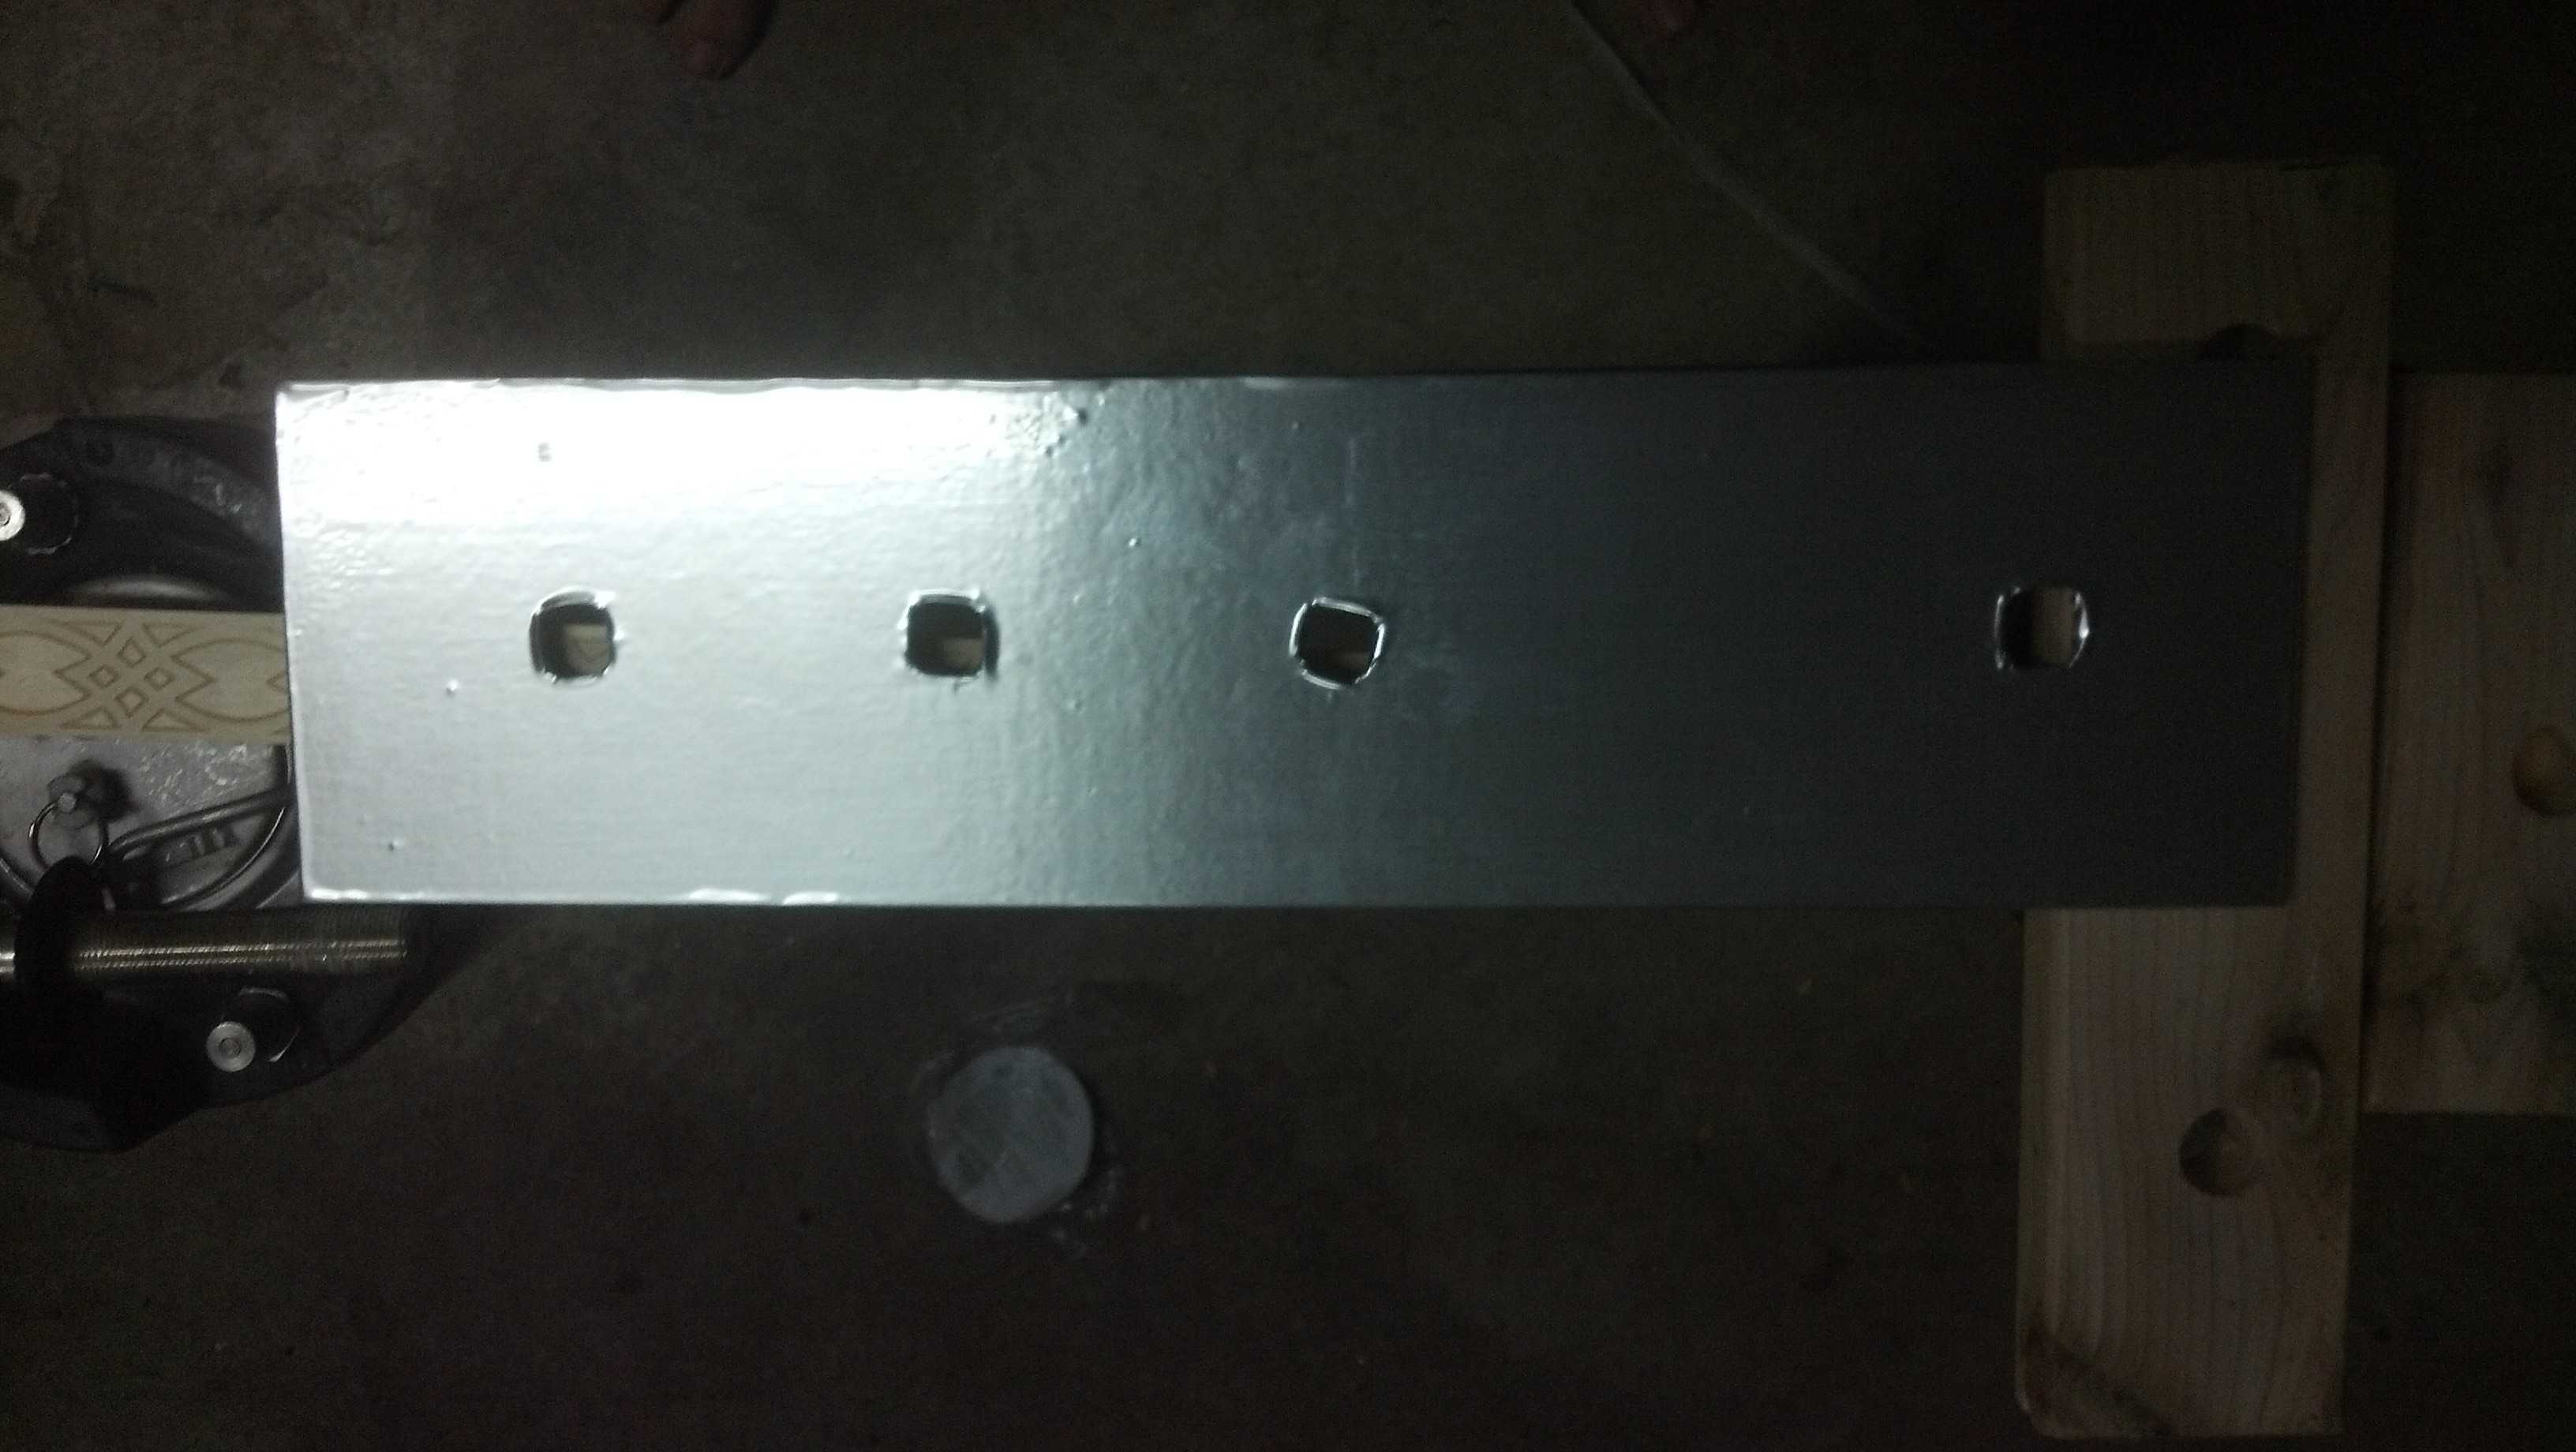
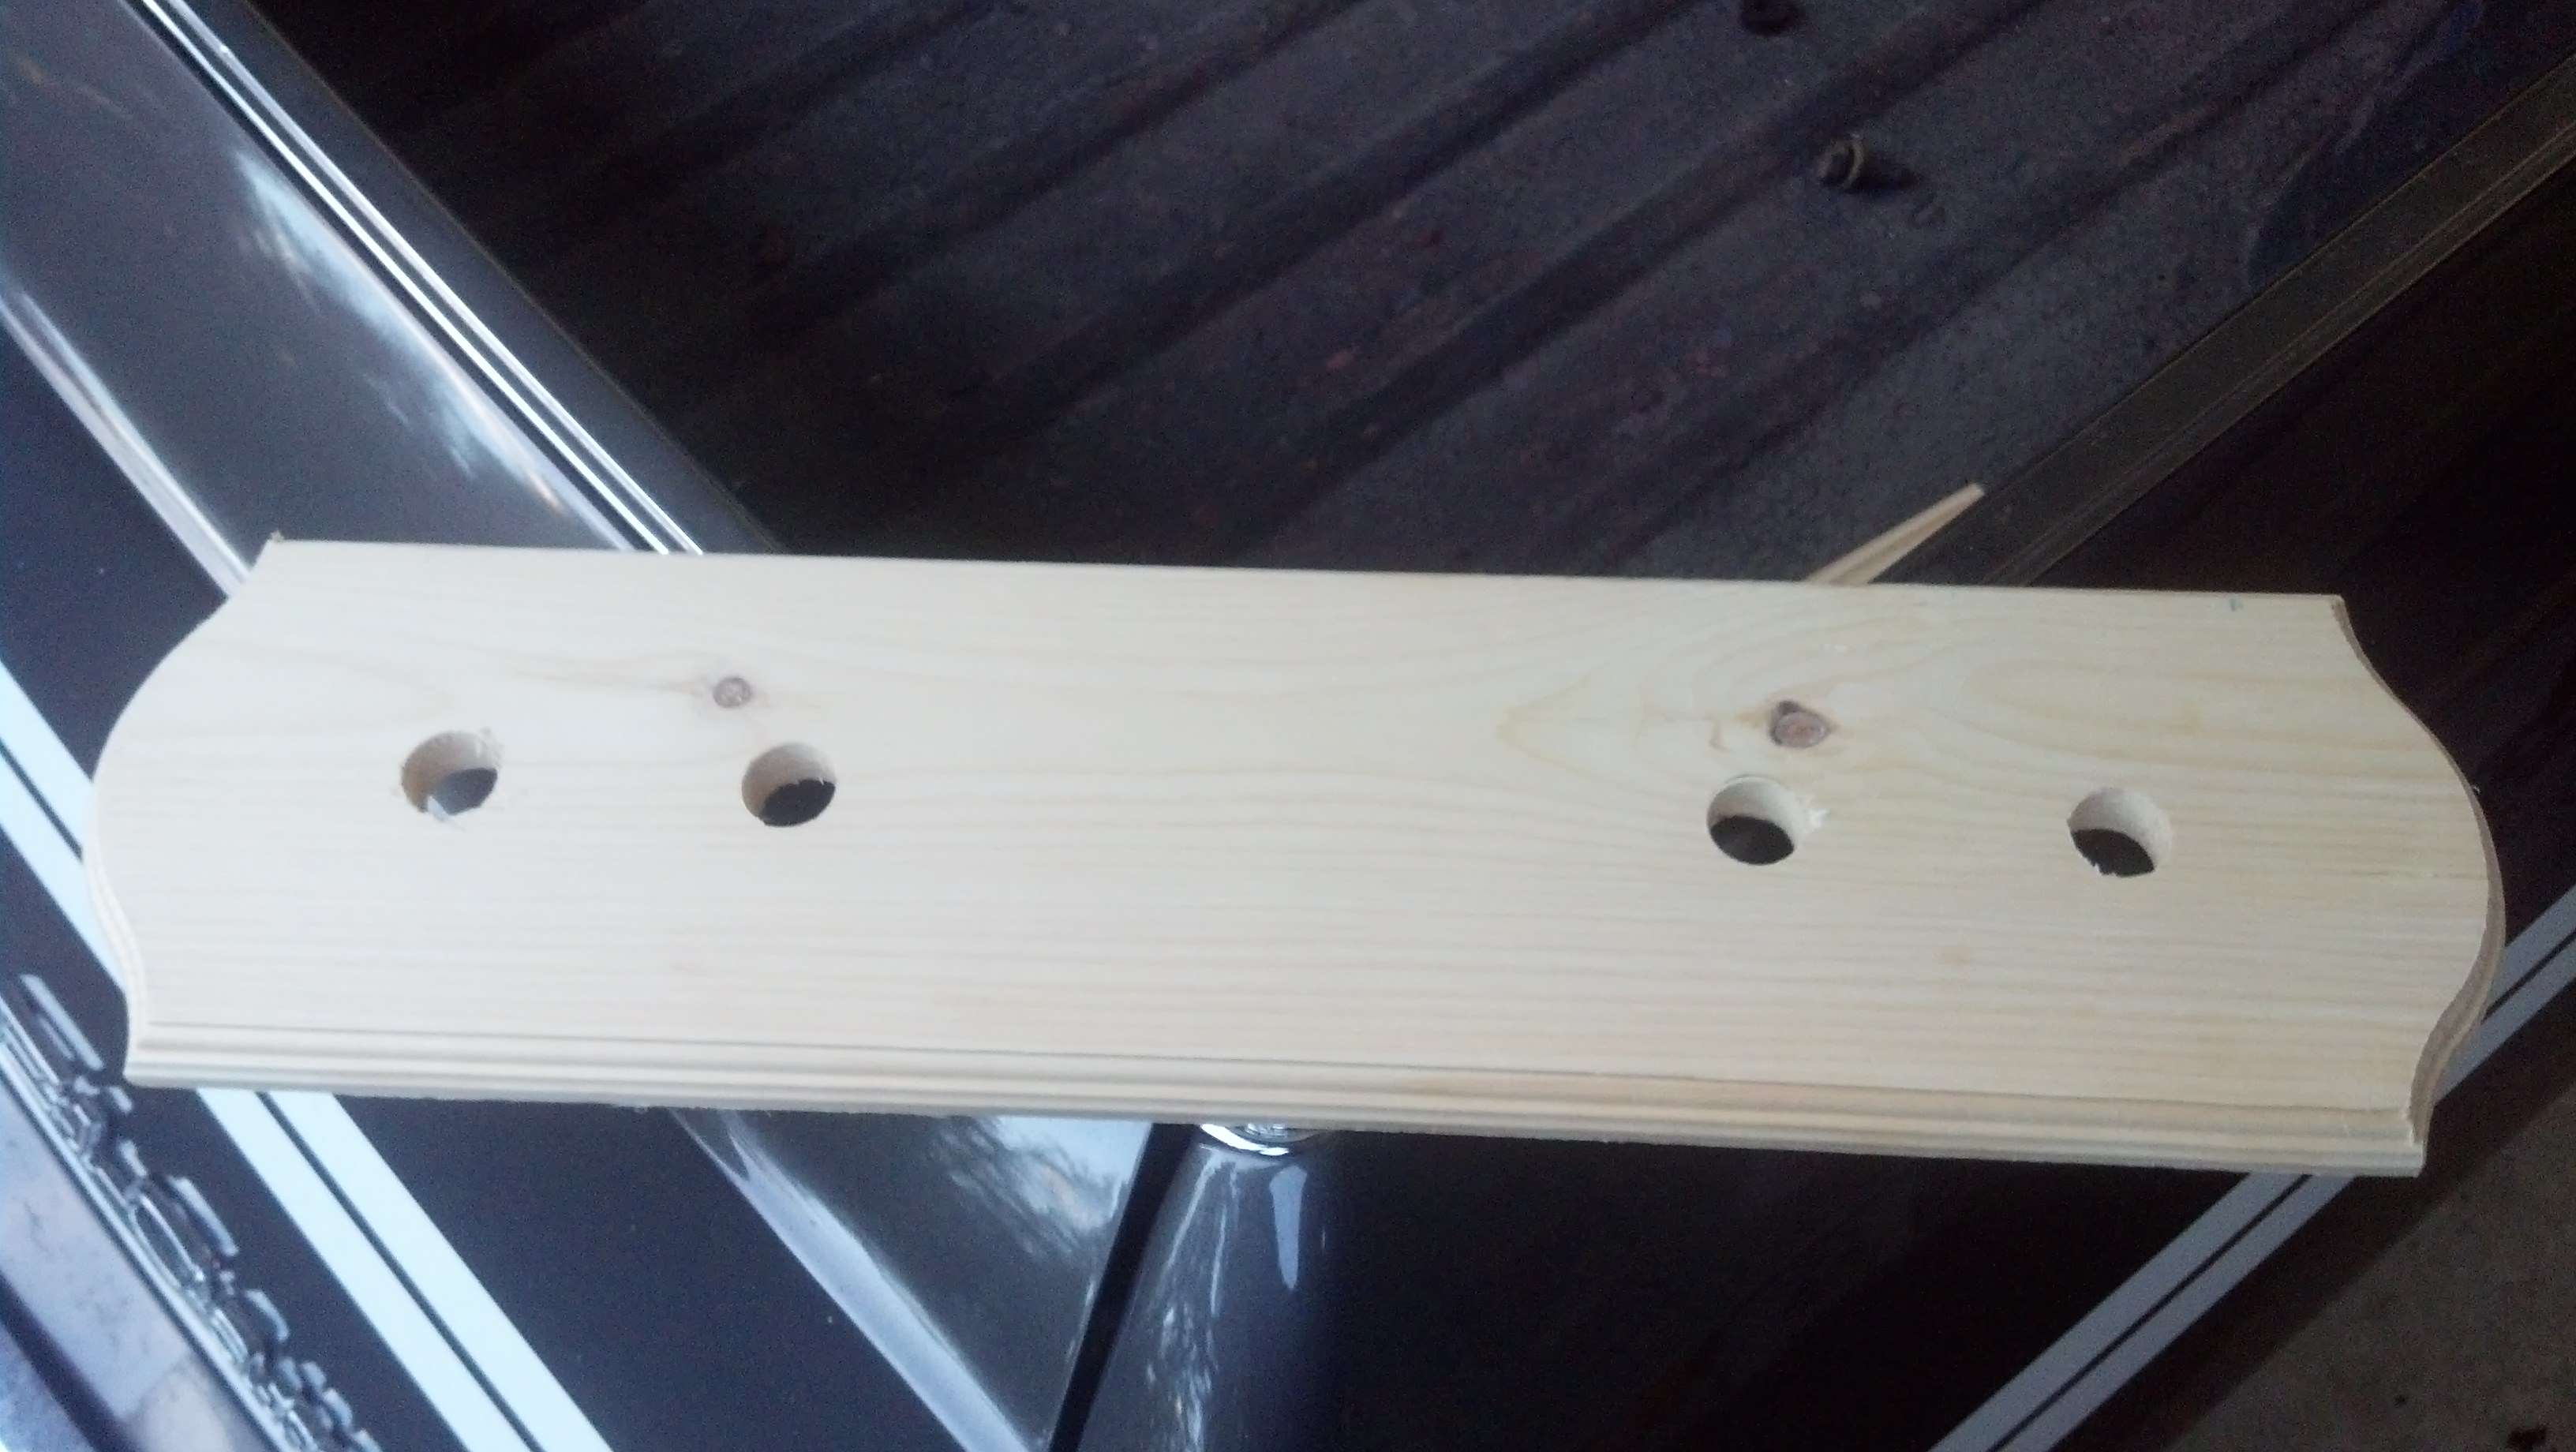
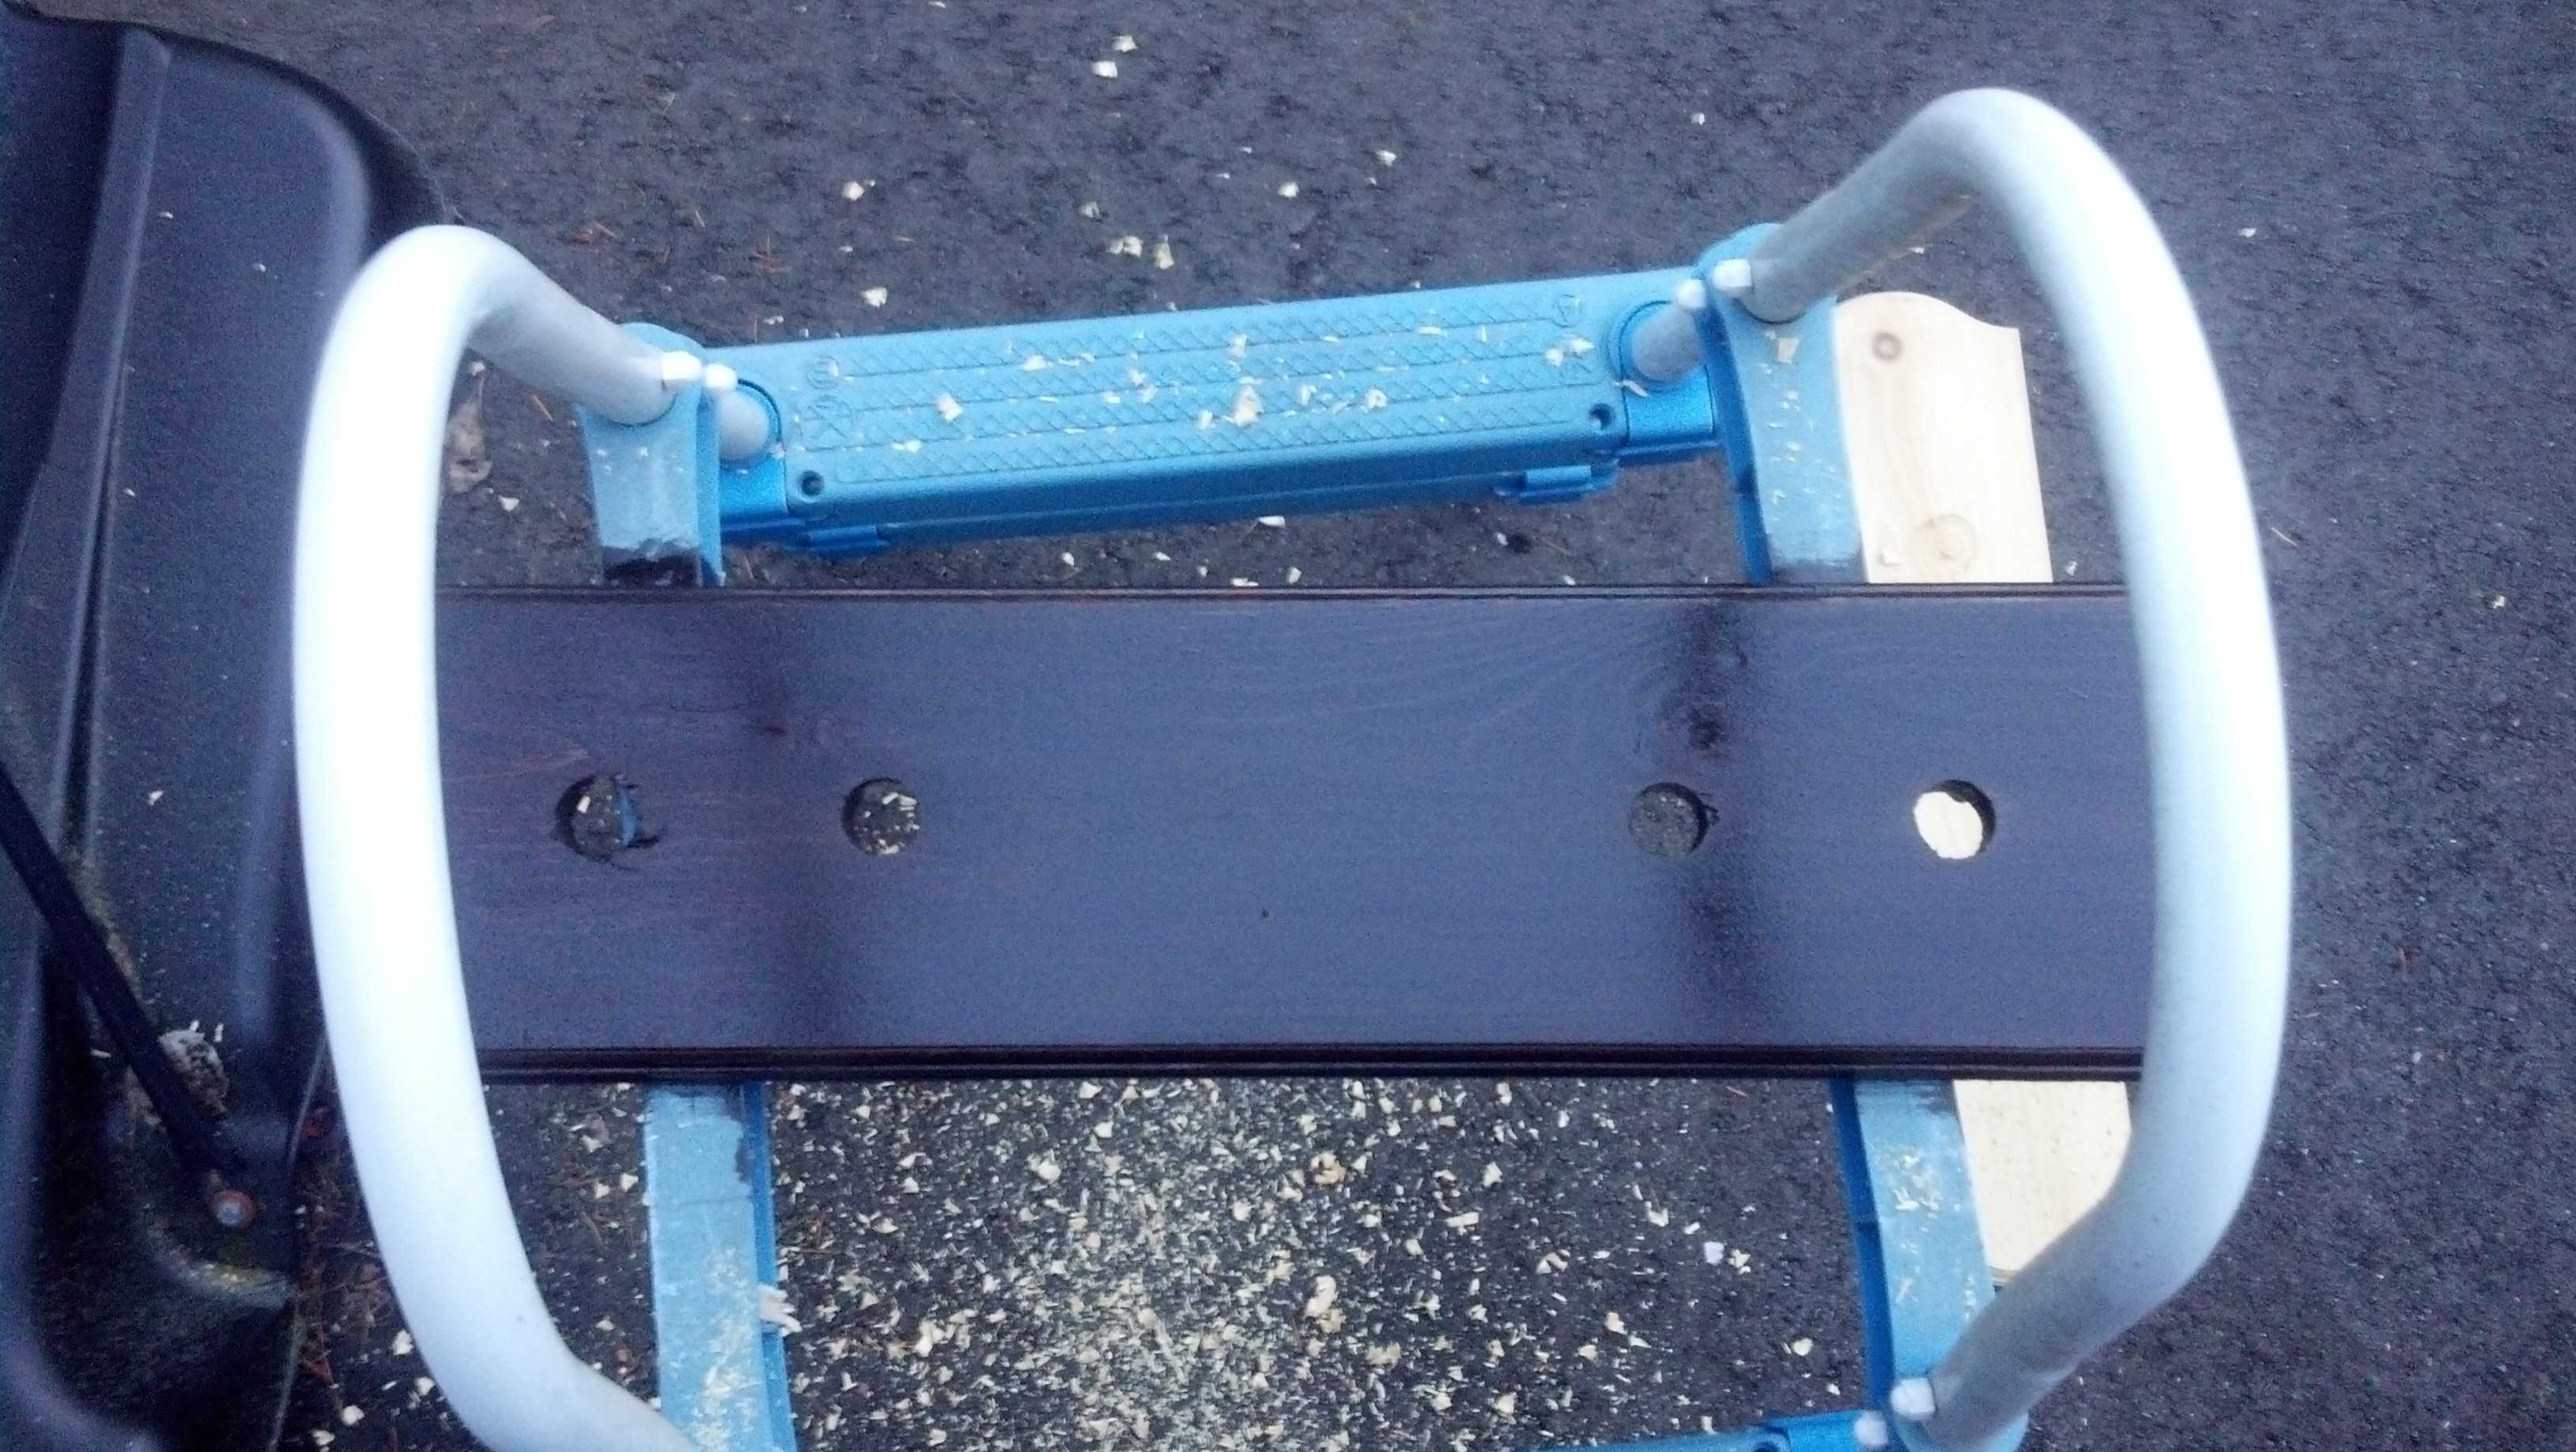
Spaced out and drilled the holes using I believe a 7/8ths drill press. Also no I did not drill it on the back of the El Camino.
 Uploaded with ImageShack.com
 Uploaded with ImageShack.com
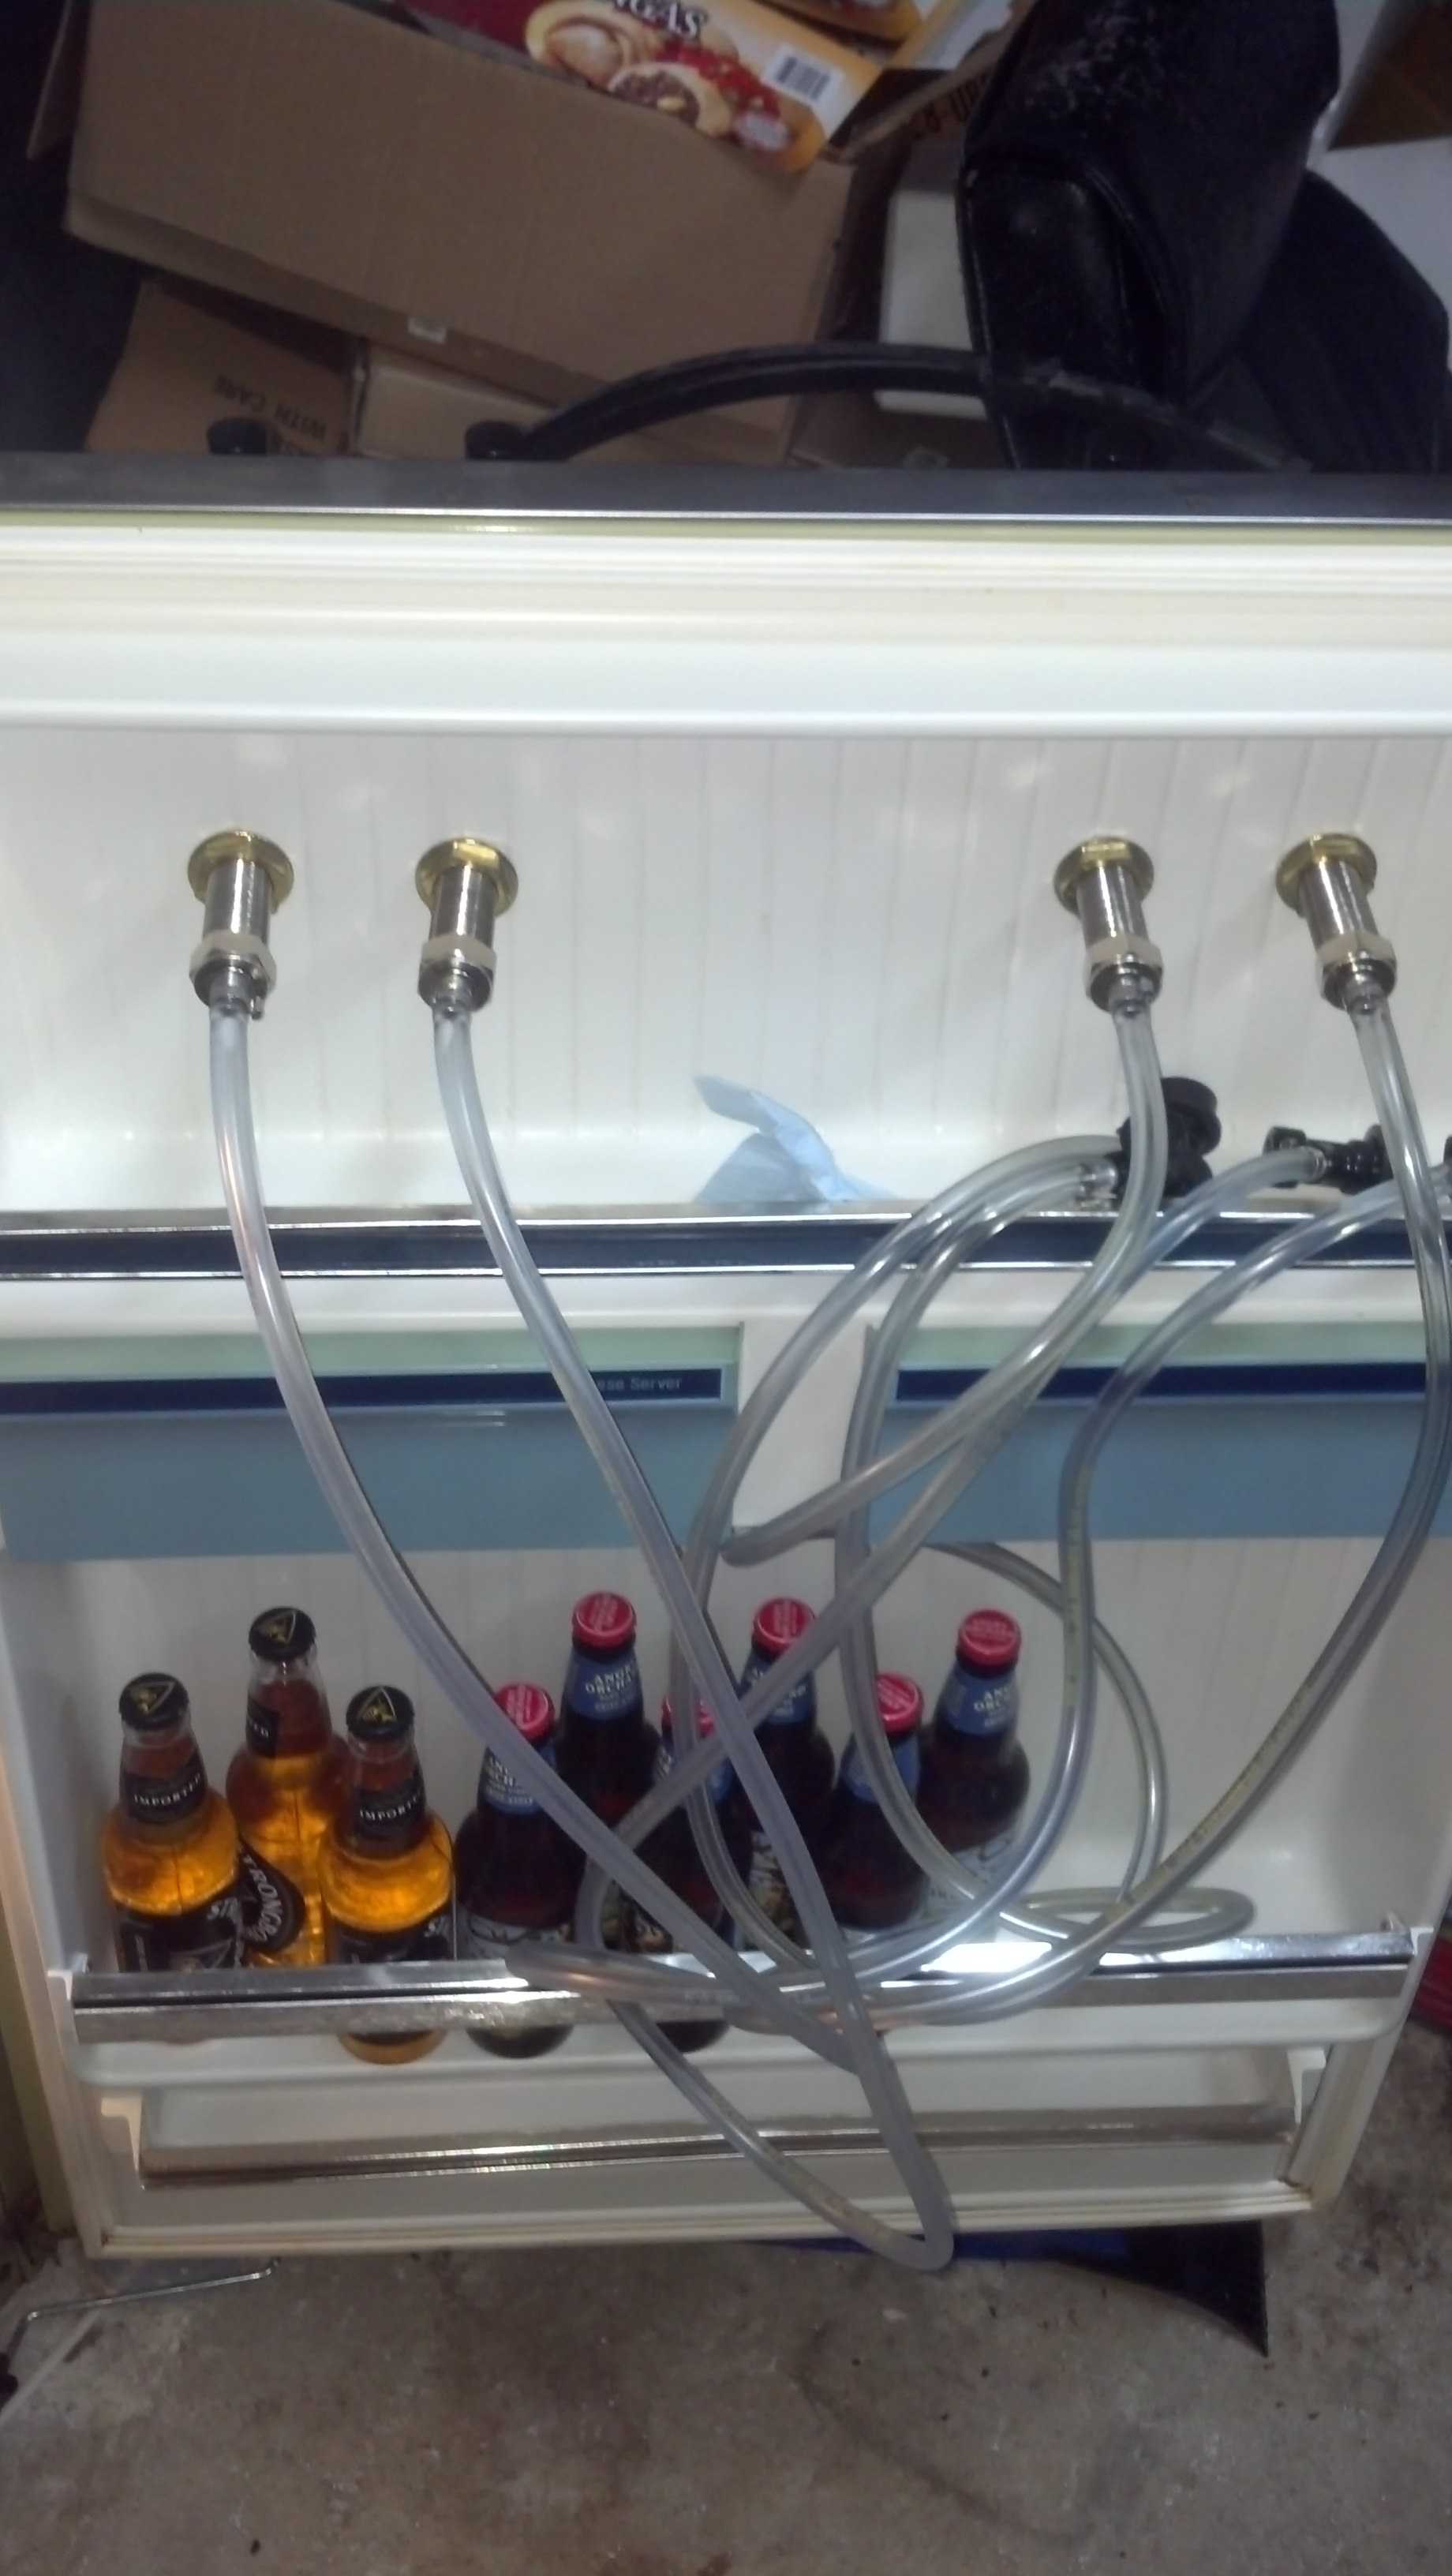
Took a week off to help folks move into a vacation house over in Seaside Oregon, when I came back I learned the Perlicks I'd ordered to replace the taps included with my kit were currently out of stock so those will have to wait. But never the less I took my frustrations out on the fridge. Which proved much easier than initially thought.
 Uploaded with ImageShack.com
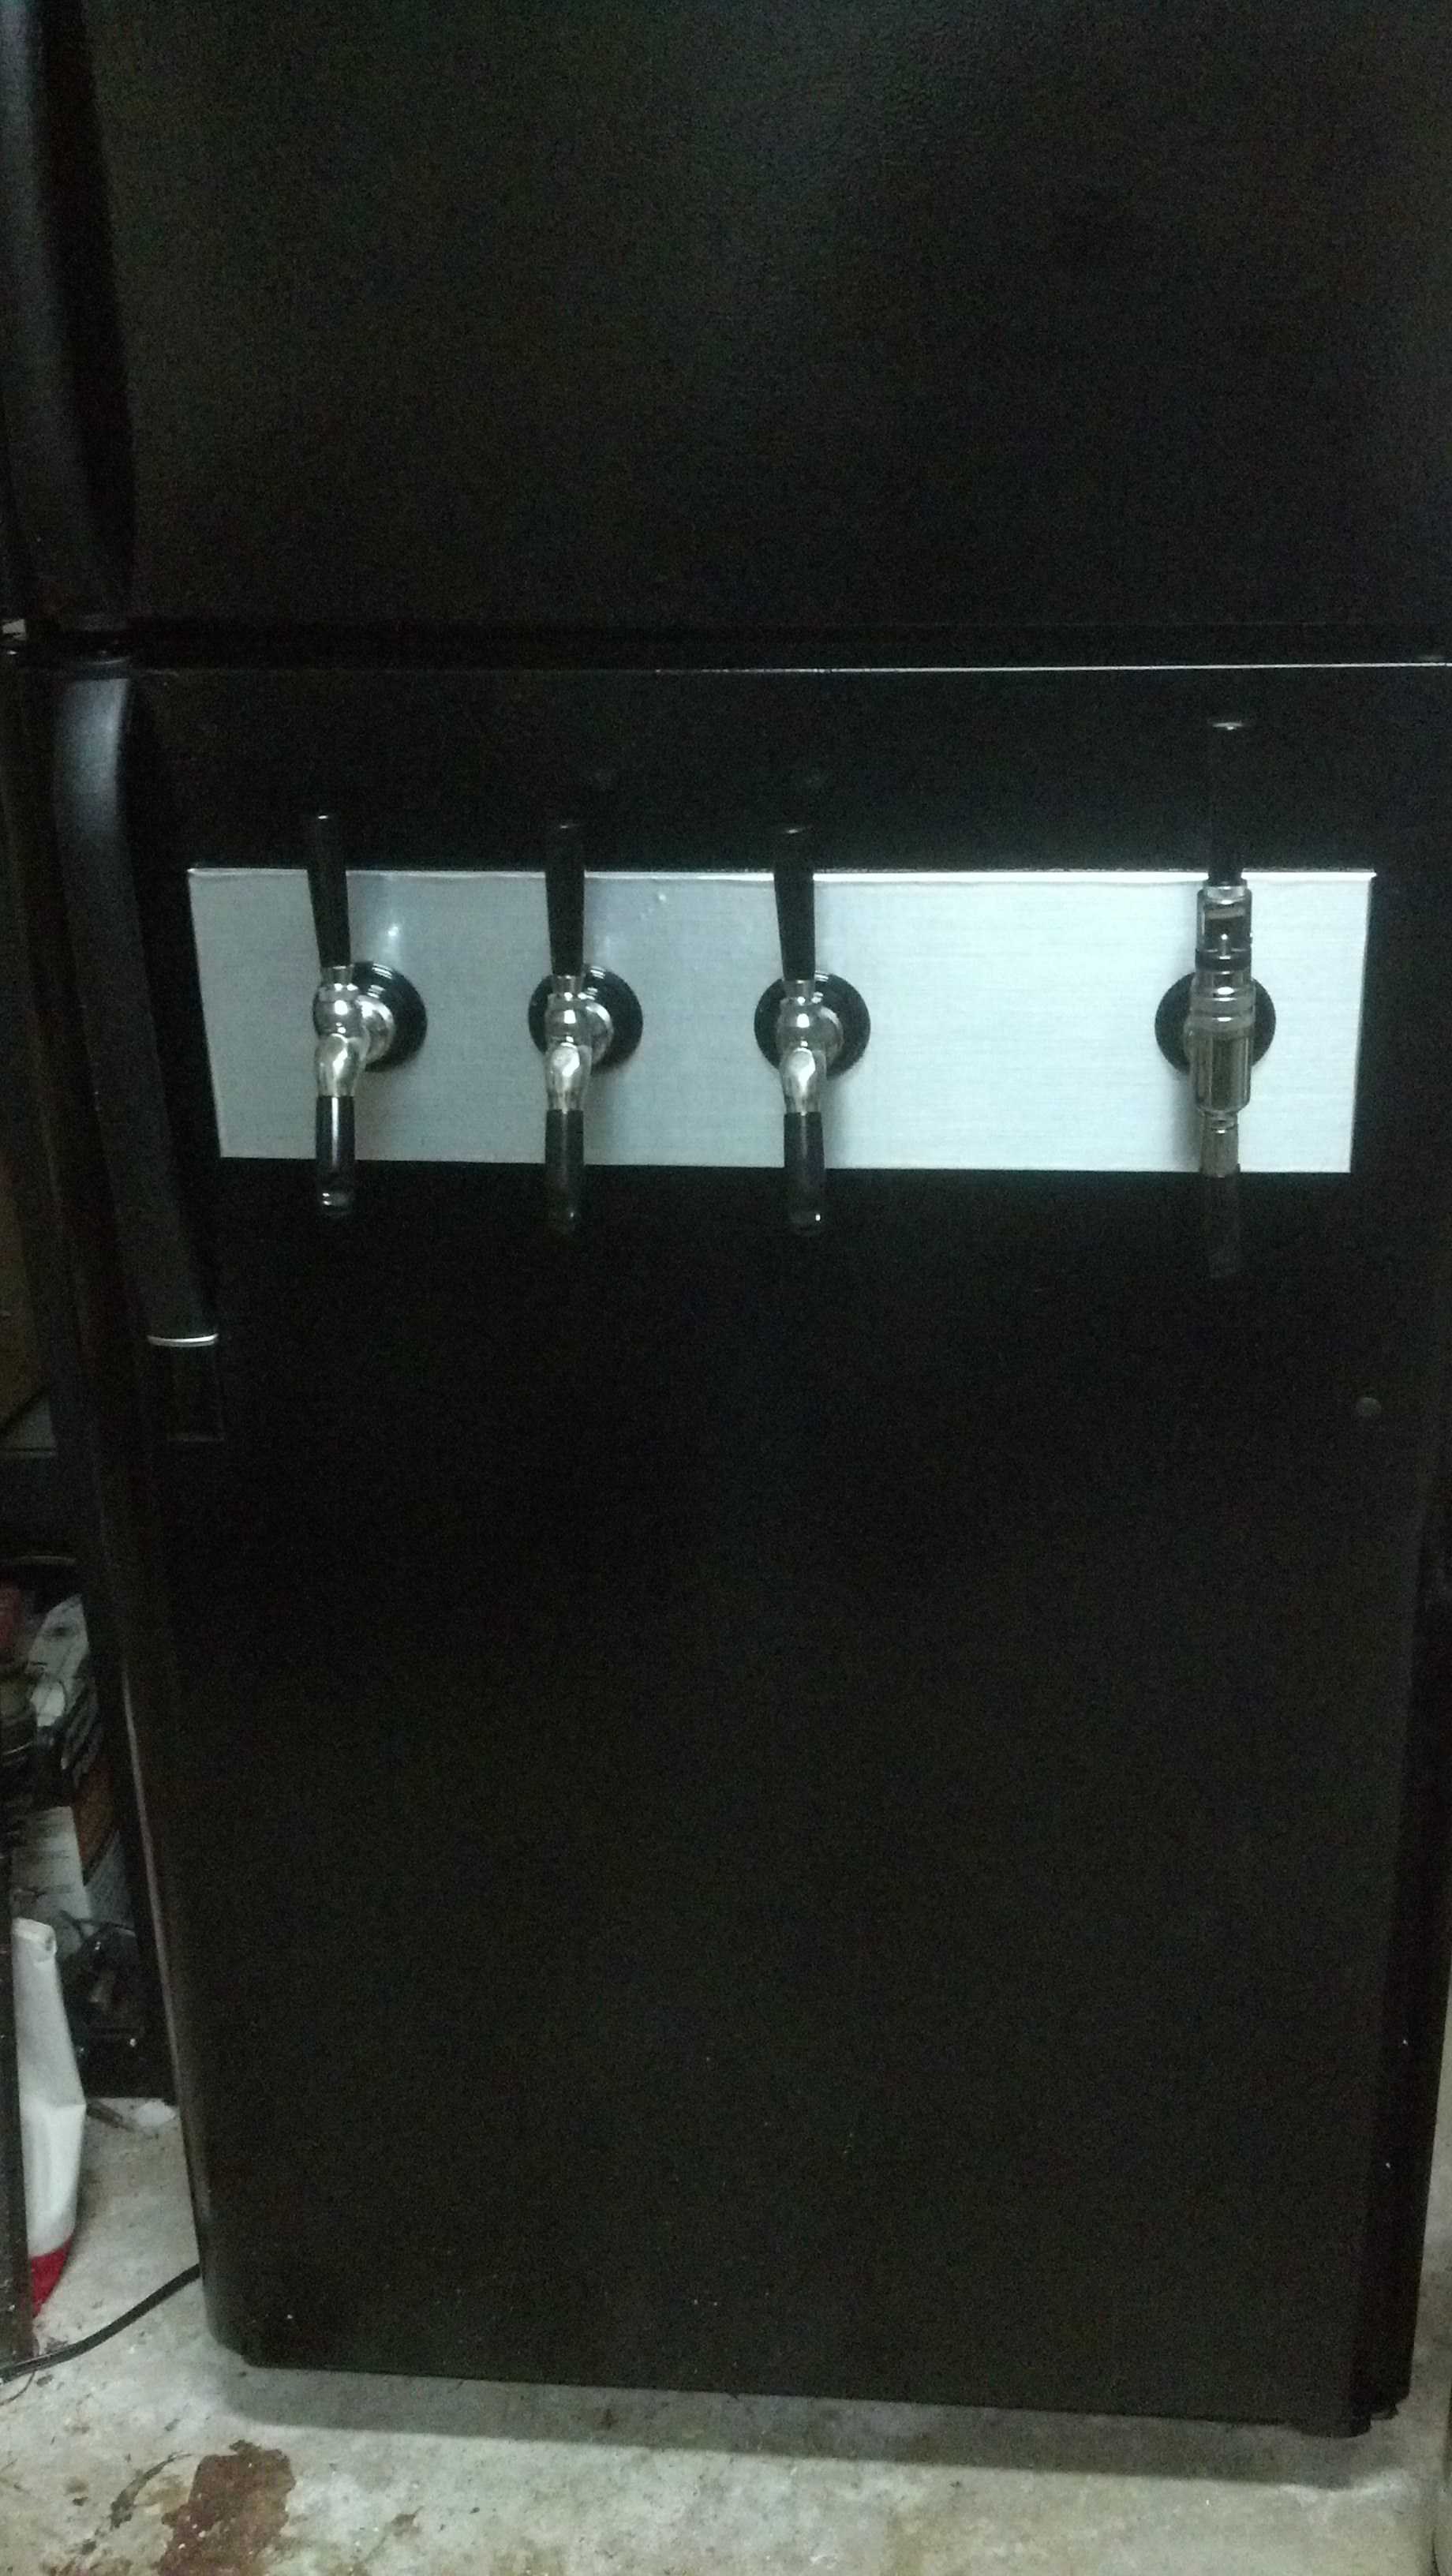
To make sure I was actually doing something 'right' given my construction skills peaked with lincoln logs I decided to put the stained wood base up and make sure things lined up correctly which was a big fear. Being the only one home at the time I opted to use a level against the top rim of the fridge door as an even spacer above the base to keep things leveled. Apparently it did work out pretty damn spot on.
 Uploaded with ImageShack.com
Now I am stuck at a dilemma. I still have two drip trays to put on. The box top I made will either go on the freezer door, or a foot or so under the base of the taps. The GF thinks it would look better with the top beneath the faucets and drip trays sitting above it. The top isn't big enough it could sit both drip trays evenly. If I go this route I will need something on the freezer. I'd thought about a cheap framed small mirror and making a spray on chalkboard, but I think it may look slightly out of place. I'd be open to ideas while my mind conjures a few of its own up.
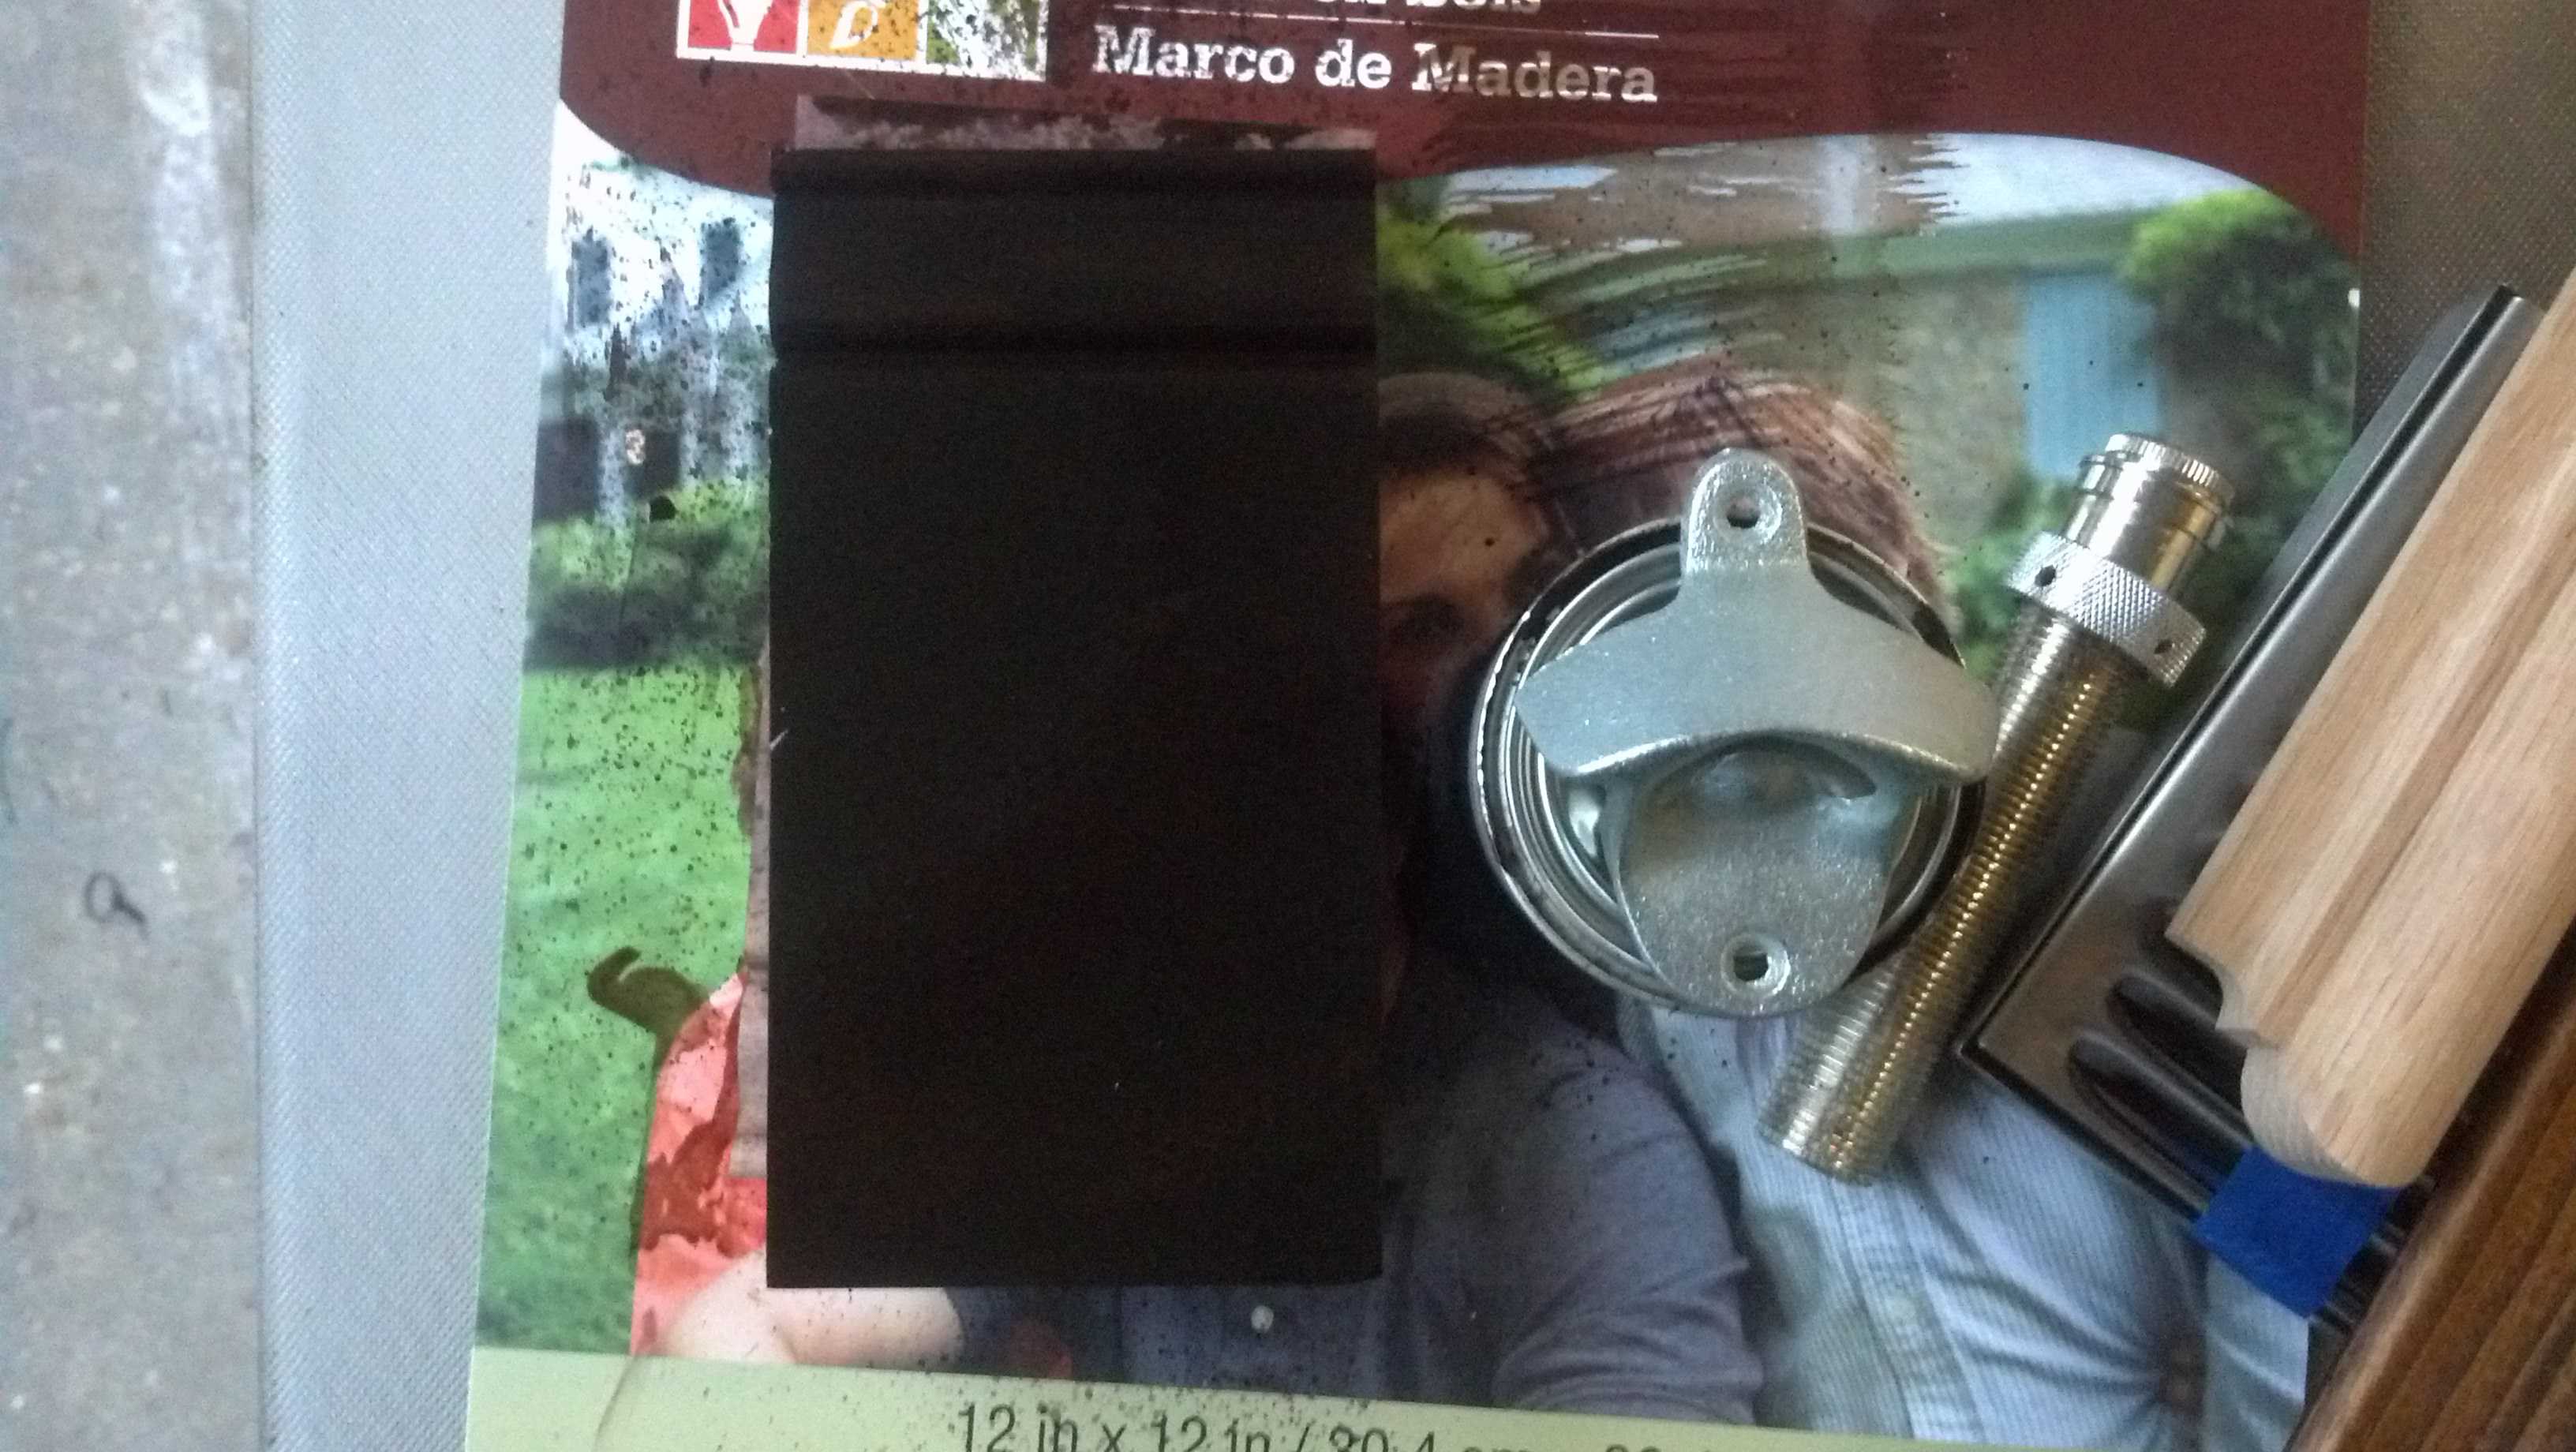
I also while digging around a garage sale came up with a bottle opener .45 cents, decided to stain a small piece of wood I'll drill and fit the opener to and place maybe on the side of the fridge.
 Uploaded with ImageShack.com
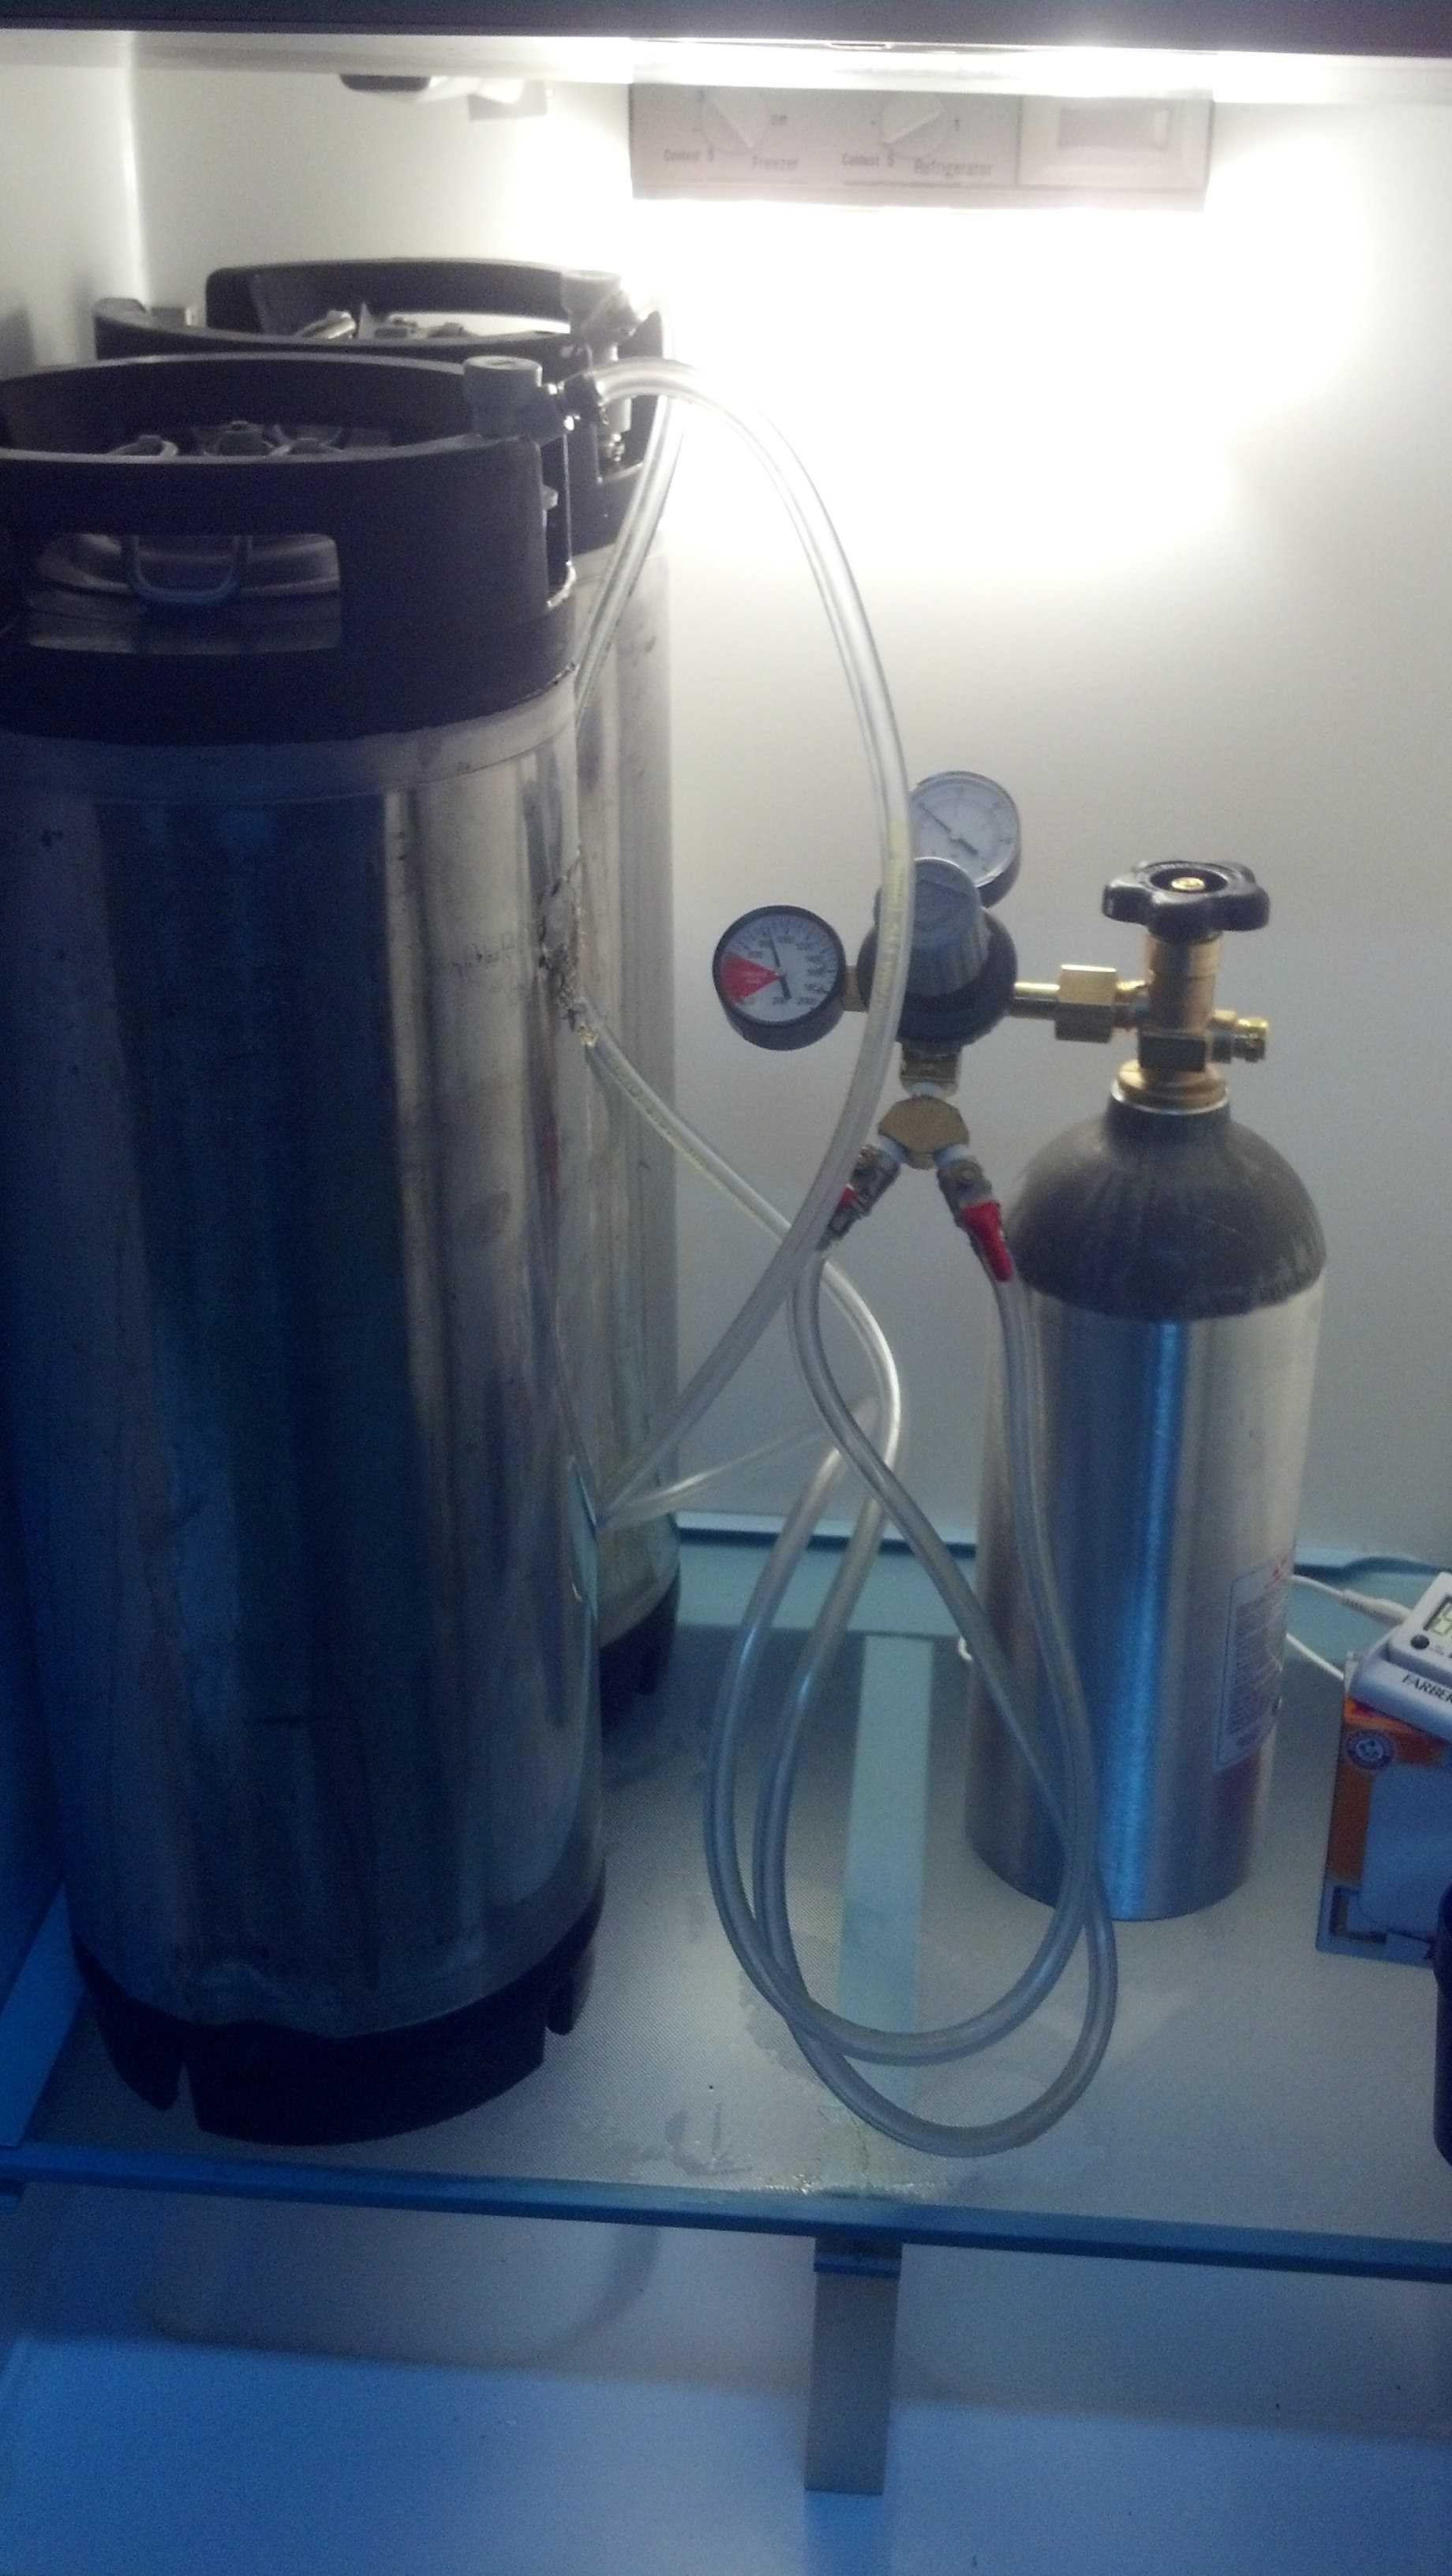
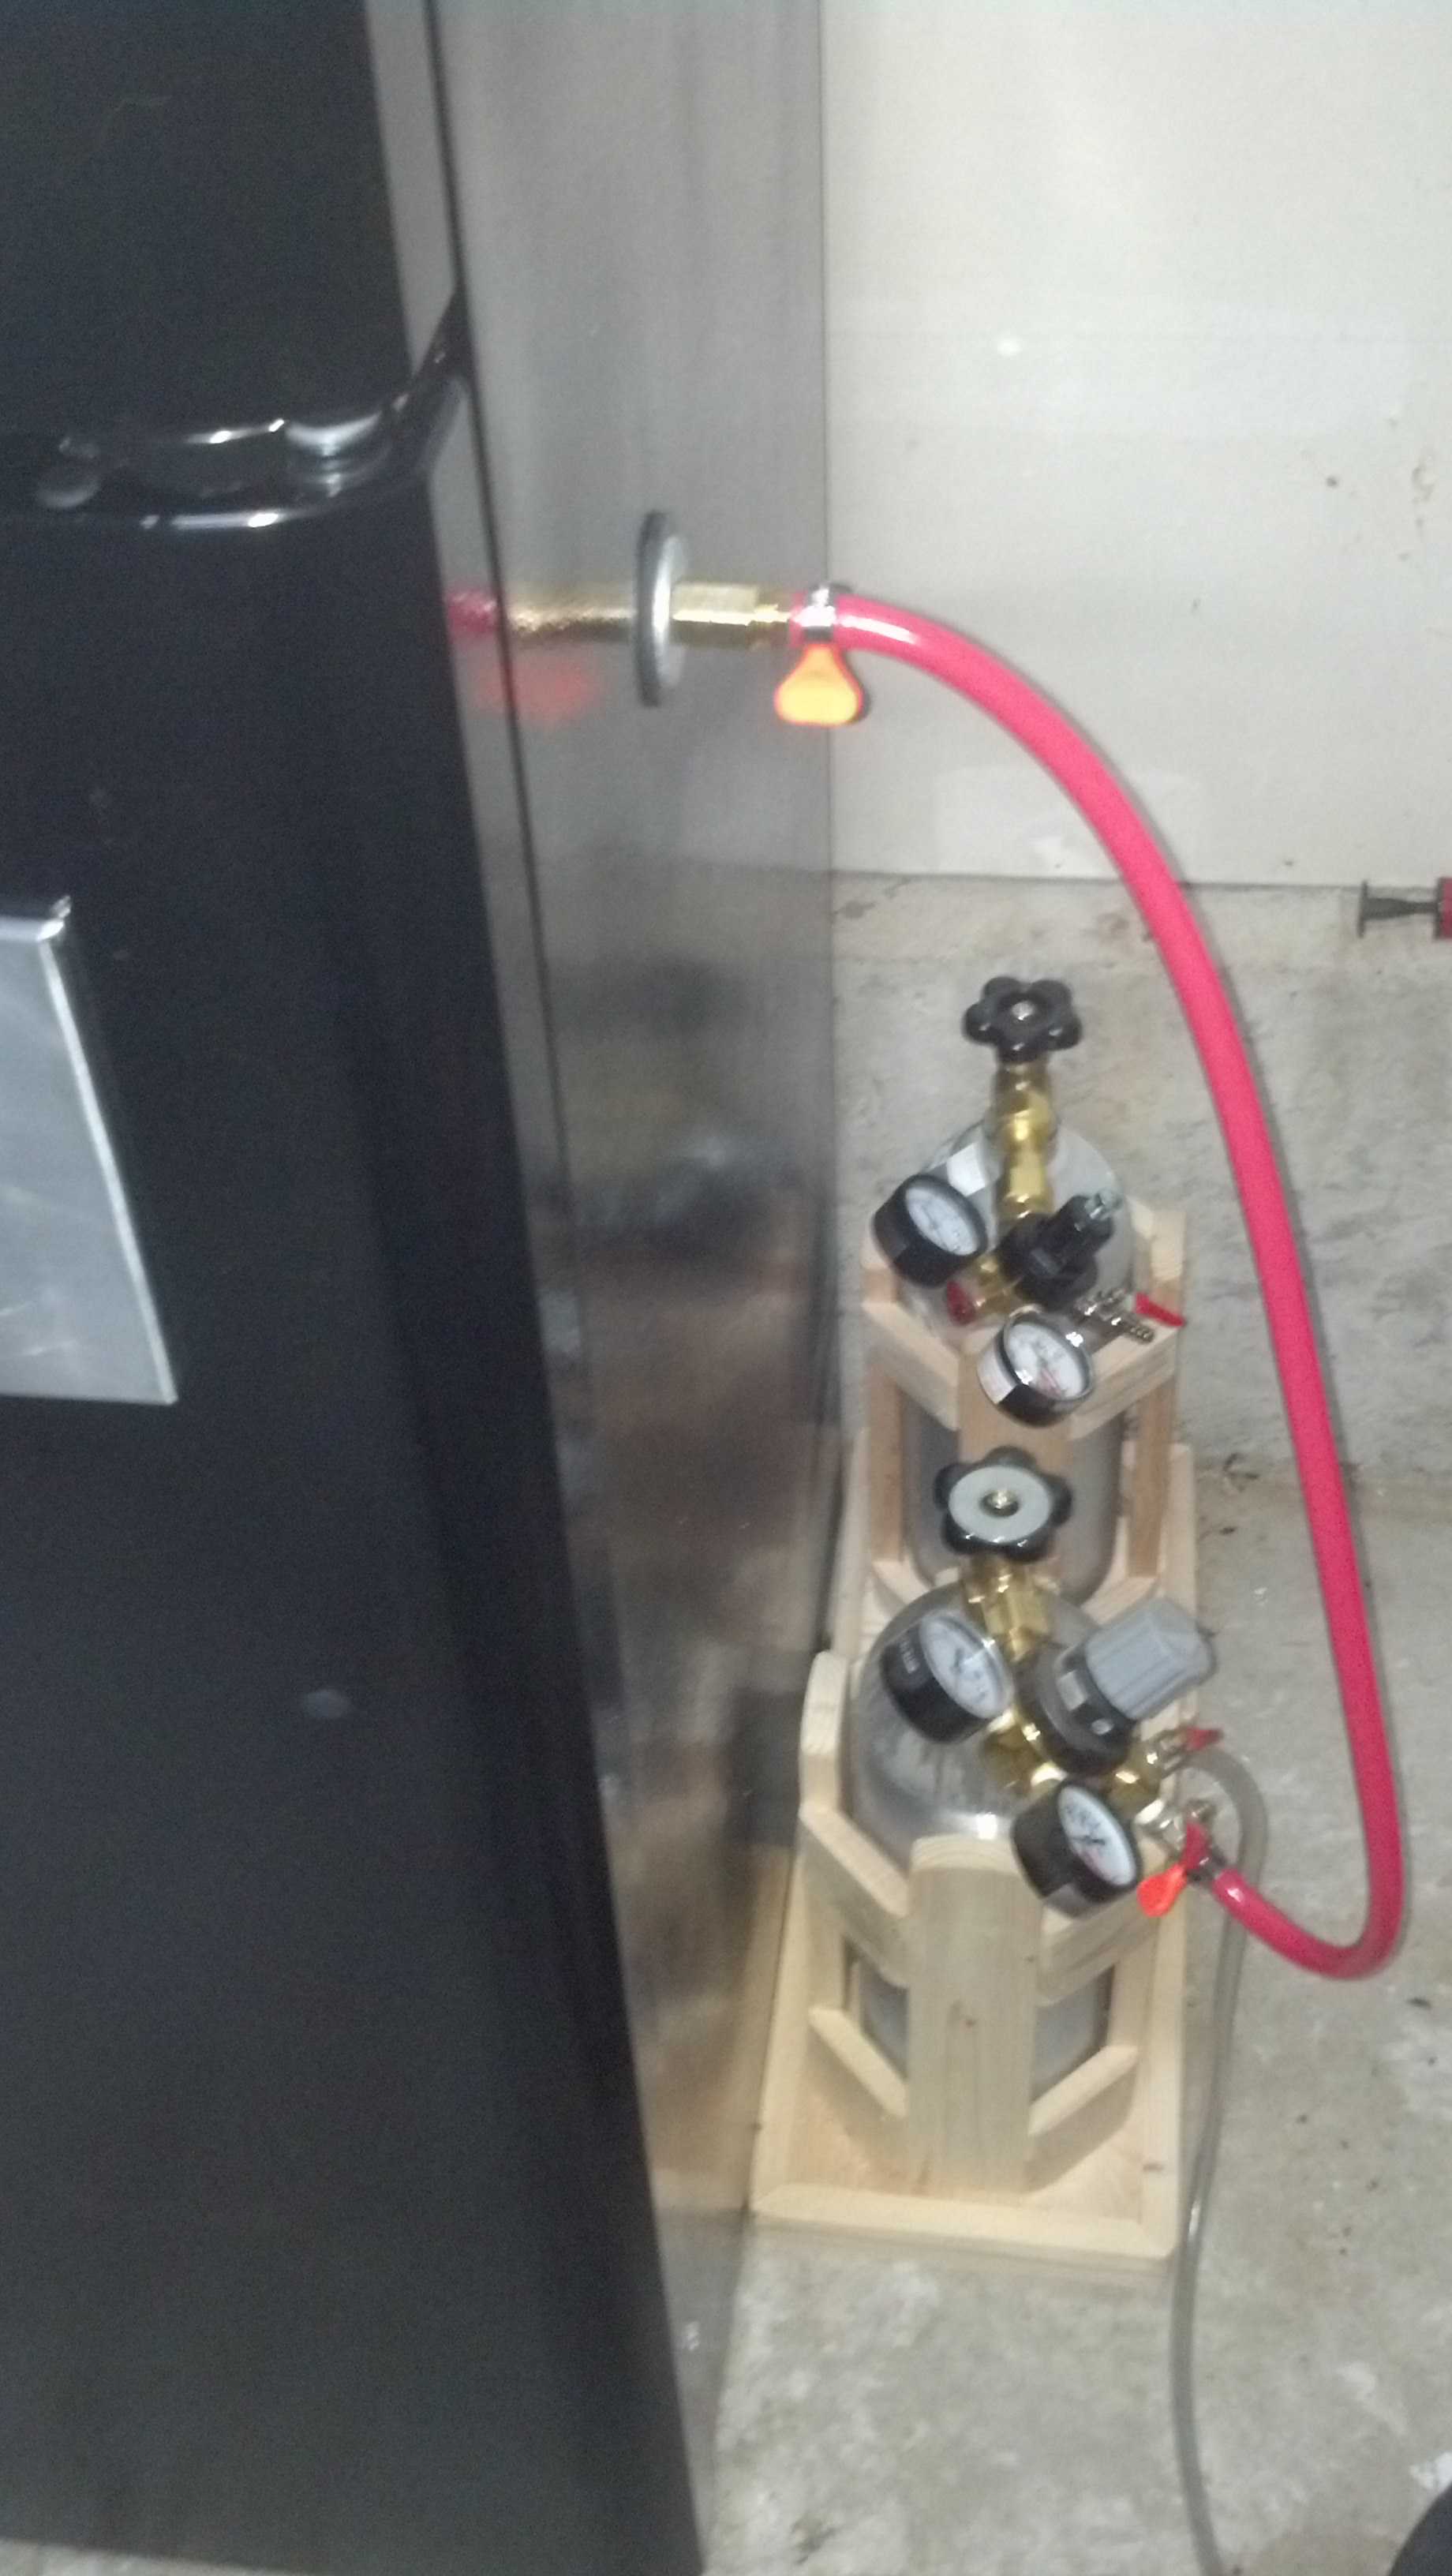
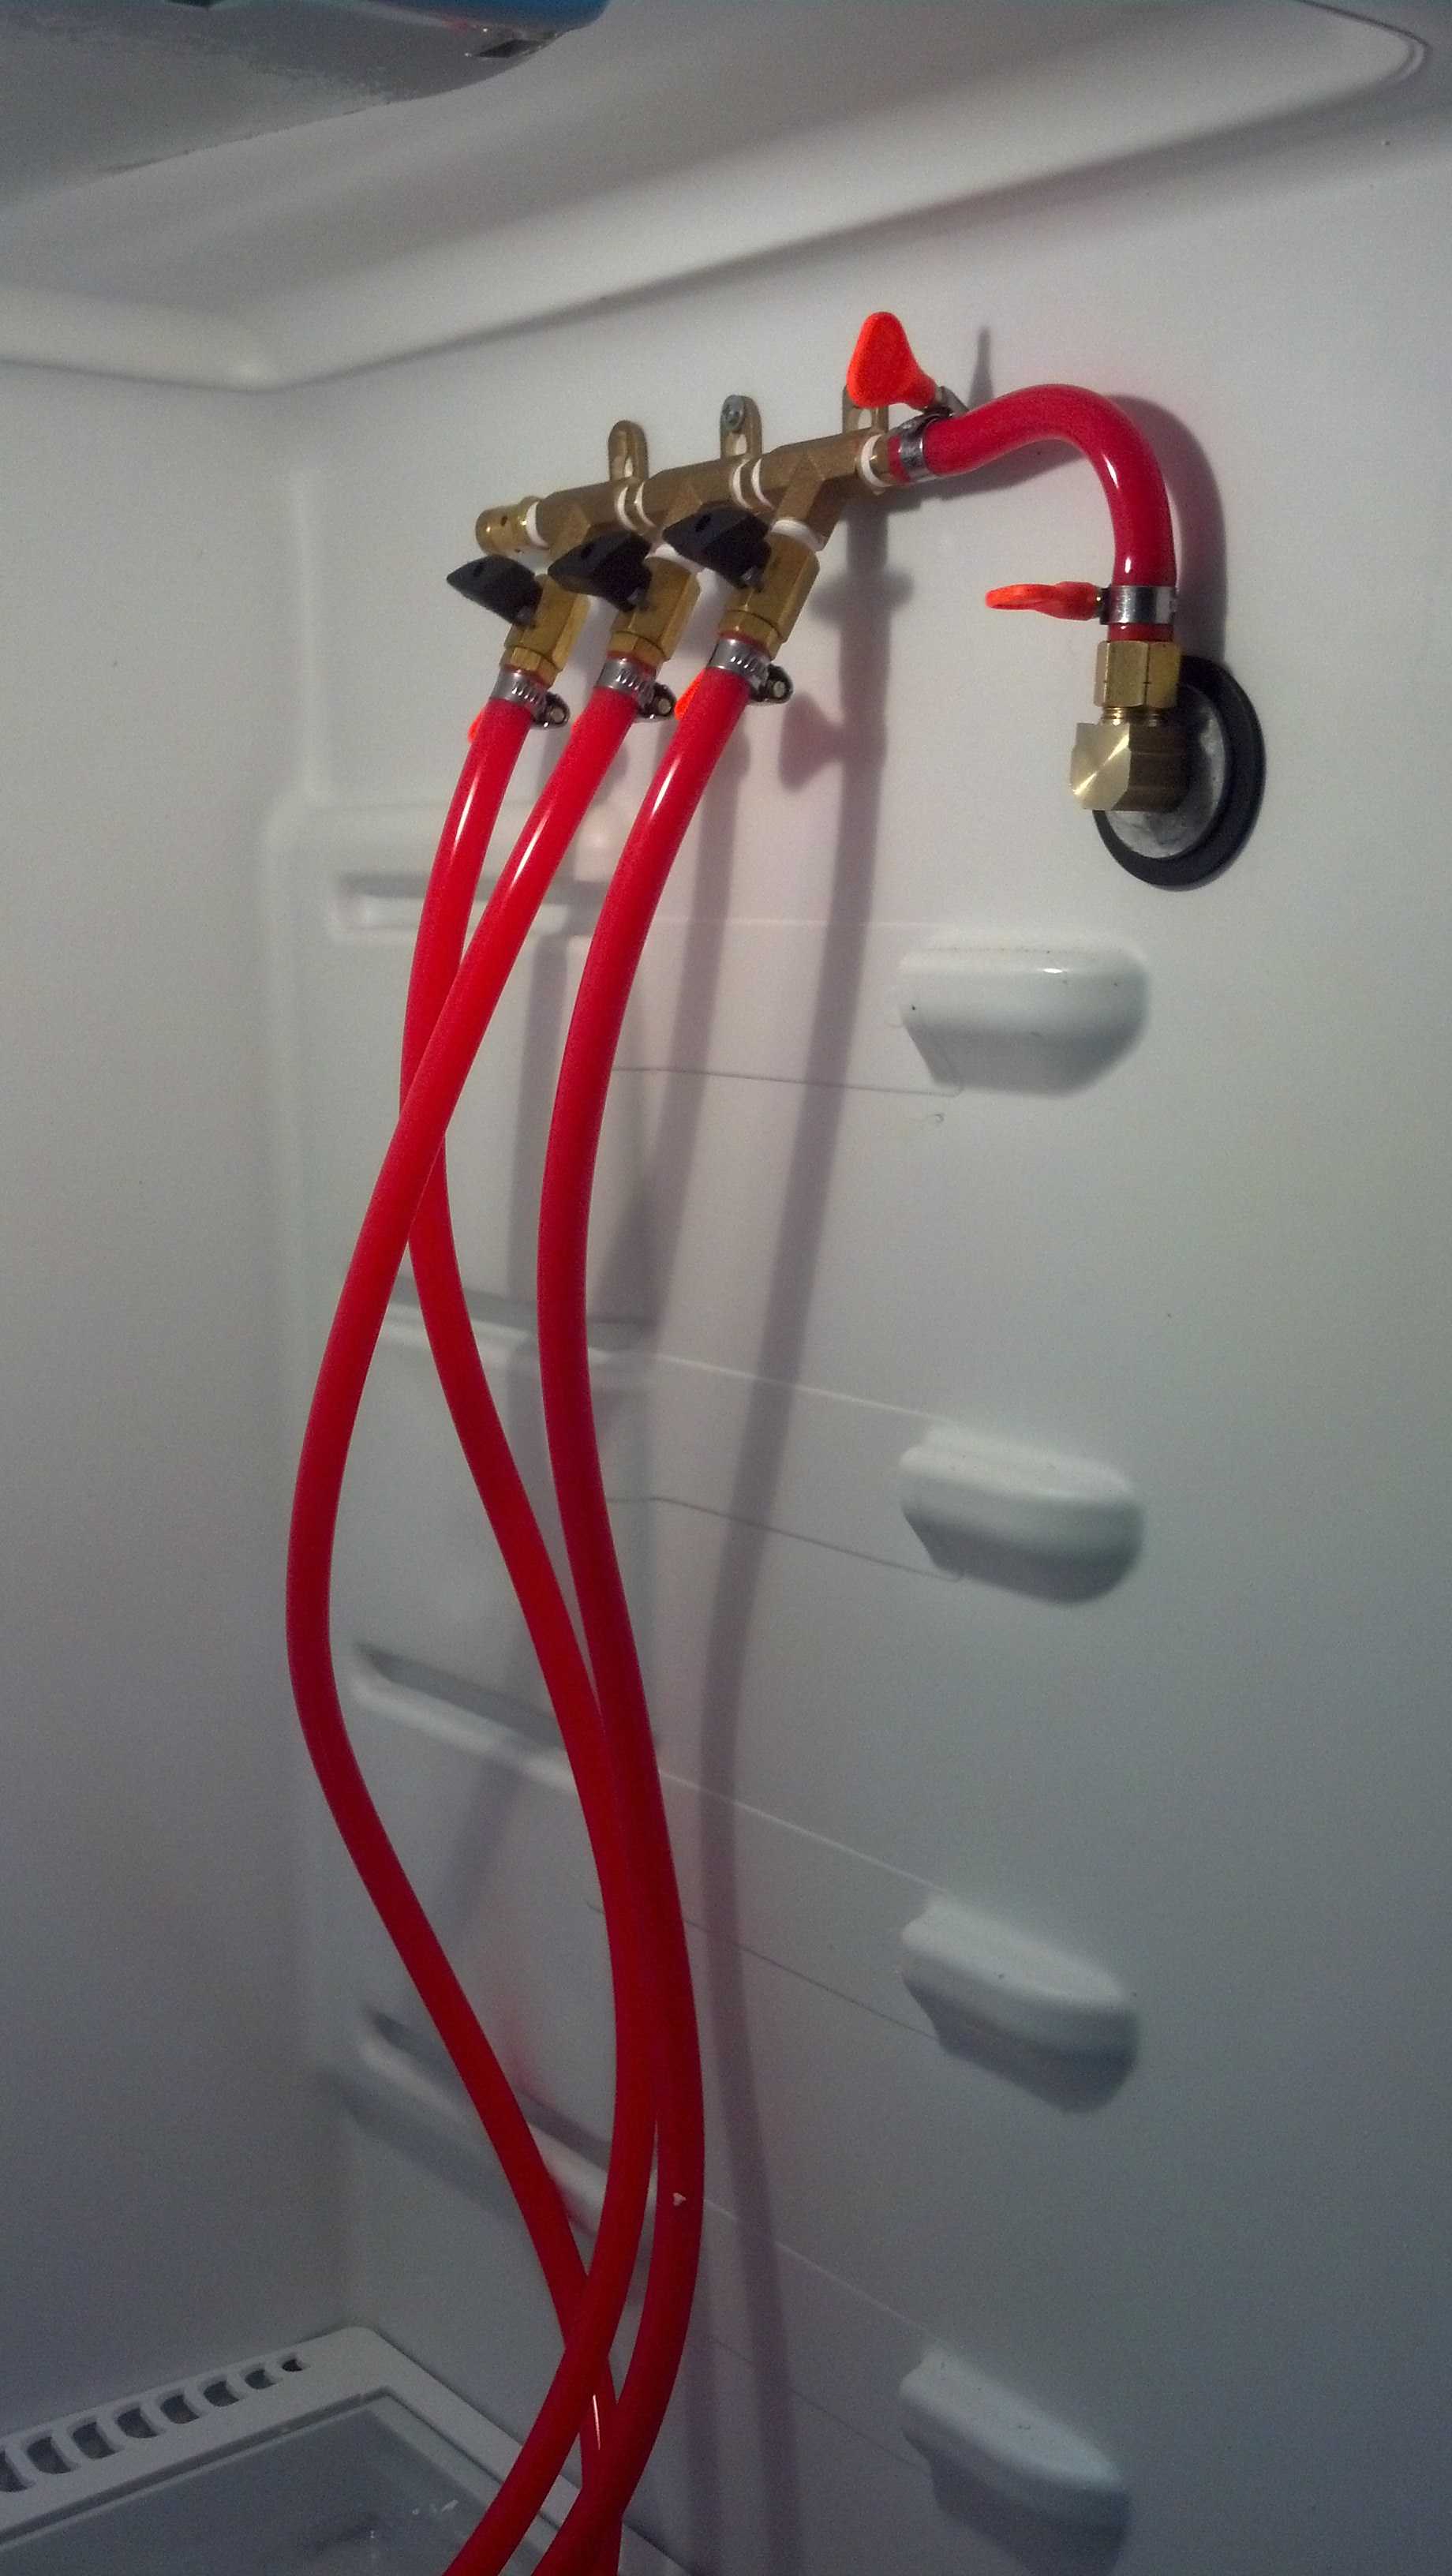
I just felt like sharing as this whole summer project grew from one grand idea and project into something I'm still fairly proud of and will find a way to add some Star Wars love to it. If I had to ask something of the forum it would be suggestions as mentioned above on the board placement and drip trays. A good adhesive perhaps to mount wood to metal. Also how easy/difficult might it be to replace the door handles? Thanks for the help in advance and hope I did alright overall. If anyone ask this is the keg setup I ordered x2, Deluxe 2 tap system from Midwest Supplies $355 (http://www.midwestsupplies.com/homebrew-deluxe-2-tap-system.html)
As long as it serves cold beer and cider, I'll say it was a success.
I was left between being semi let down I wouldn't be going with my grand design for a keezer, and trying to come up with a good look and unique touch for this beast of a machine.
Uploaded with ImageShack.comSo I began buying a few things here and there, all for fairly cheap. With the color of the fridge I thought about one of my favorite places here in Seattle, an Irish pub A Terrible beauty. So with that inspiration and a nice stout I made a trip to Home Depot and...Michaels Craft.
From Michaels I was able to pick up for $7 what I decided would make for a nice base for the taps
Uploaded with ImageShack.comAlso from Michaels I found a cheap wood frame ($4) which gave me an idea I saw someone here do but on a much grander scale. My plan was to take the frame and create a box top using molding from Home Depot(which came to about .99 a foot, bought close to 8 feet)
Uploaded with ImageShack.com
Uploaded with ImageShack.comFilled with a sense of knowing half of what I was doing, where I was going and a bit more homebrew I felt pretty good at the direction this all was heading. the girlfriend decided to help here and there as well.
Uploaded with ImageShack.com
Uploaded with ImageShack.comSpaced out and drilled the holes using I believe a 7/8ths drill press. Also no I did not drill it on the back of the El Camino.
Uploaded with ImageShack.com
Uploaded with ImageShack.comTook a week off to help folks move into a vacation house over in Seaside Oregon, when I came back I learned the Perlicks I'd ordered to replace the taps included with my kit were currently out of stock so those will have to wait. But never the less I took my frustrations out on the fridge. Which proved much easier than initially thought.
Uploaded with ImageShack.comTo make sure I was actually doing something 'right' given my construction skills peaked with lincoln logs I decided to put the stained wood base up and make sure things lined up correctly which was a big fear. Being the only one home at the time I opted to use a level against the top rim of the fridge door as an even spacer above the base to keep things leveled. Apparently it did work out pretty damn spot on.
Uploaded with ImageShack.comNow I am stuck at a dilemma. I still have two drip trays to put on. The box top I made will either go on the freezer door, or a foot or so under the base of the taps. The GF thinks it would look better with the top beneath the faucets and drip trays sitting above it. The top isn't big enough it could sit both drip trays evenly. If I go this route I will need something on the freezer. I'd thought about a cheap framed small mirror and making a spray on chalkboard, but I think it may look slightly out of place. I'd be open to ideas while my mind conjures a few of its own up.
I also while digging around a garage sale came up with a bottle opener .45 cents, decided to stain a small piece of wood I'll drill and fit the opener to and place maybe on the side of the fridge.
Uploaded with ImageShack.comI just felt like sharing as this whole summer project grew from one grand idea and project into something I'm still fairly proud of and will find a way to add some Star Wars love to it. If I had to ask something of the forum it would be suggestions as mentioned above on the board placement and drip trays. A good adhesive perhaps to mount wood to metal. Also how easy/difficult might it be to replace the door handles? Thanks for the help in advance and hope I did alright overall. If anyone ask this is the keg setup I ordered x2, Deluxe 2 tap system from Midwest Supplies $355 (http://www.midwestsupplies.com/homebrew-deluxe-2-tap-system.html)
As long as it serves cold beer and cider, I'll say it was a success.