Wiring Question - Homemade Dryer Cord Splitter/Extension

Homebrew Talk - Beer, Wine, Mead, & Cider Brewing Discussion Forum

Help Support Homebrew Talk - Beer, Wine, Mead, & Cider Brewing Discussion Forum:

This site may earn a commission from merchant affiliate links, including eBay, Amazon, and others.

specialkayme

Well-Known Member
Joined
Jul 26, 2015
Messages
430
Reaction score
164
Location
Central North Carolina
Planning/pricing an eBIAB setup with a Spike kettle (check https://www.homebrewtalk.com/forum/threads/designing-a-spike-kettle.657014/ if you want more information). I'll need to do my own wiring to the kettle.

Currently I don't have a 210v outlet in my kitchen/dining room, where I'll likely brew. My laundry room is 10 feet away though, and it has a 210v dryer outlet. I could pigtail a series outlet in the wall, but I don't feel comfortable doing that, and I don't want to pay the $1k for the electrician to come out and do it. So I'm thinking I'm just going to build an extension cord/splitter.

I'm thinking I take one of these dryer plugs (https://www.amazon.com/dp/B00IPUA5ZW/?tag=skimlinks_replacement-20) which will go from the current outlet and wire it to go into a junction box (https://www.amazon.com/dp/B075DKNQSM/?tag=skimlinks_replacement-20). On one side of the junction box, I'll install a standard dryer outlet (https://www.amazon.com/dp/B000BQSU8C/?tag=skimlinks_replacement-20) and pigtail it to the outlet that will serve the heating element on the other side of the box (https://www.amazon.com/dp/B00002NAT9/?tag=skimlinks_replacement-20). Then I hook up a GCFI extension to that plug (https://www.amazon.com/dp/B00OZY2Y4C/?tag=skimlinks_replacement-20) and an extension cord from that to the heating element (https://www.amazon.com/dp/B00DMGSQSC/?tag=skimlinks_replacement-20).

Total cost appears to be roughly $255.98, plus some 10/3 wiring to do the pigtail connection in the junction box. More than half of that is the GCFI cord, but it's about the same price as installing a GCFI breaker, and at that point I don't have to go outside to the breaker to reset it in the event it trips.

Does that seem about right? Is there a cheaper option I should be considering?

Is there an (not so expensive) option available for varying the power to the heating unit now, or should I wait to consider adding that later?
 
Last edited by a moderator:
Why not just create an extension cord that has a male plug on one end and a female on the other that will plug the GFCI extension into it? Get one of these and connect it to the end of the dryer cord. Skips the junction box and outlet altoget

As for power regulation, I think it's a really good idea. What's the power of the heating element you are going to use? How big of a boil (in gallons) are you planning. Being able to back off on the boil rate is very useful. The EZ Boil is a decent option for that. You need a SSR, heat sink, and an enclosure to put it all in so the cost can start to add up.
 
Last edited by a moderator:
Why not just create an extension cord that has a male plug on one end and a female on the other that will plug the GFCI extension into it? Get one of these and connect it to the end of the dryer cord. Skips the junction box and outlet altoget

The outlet it's going into is currently being used by the dryer. Which is, well, behind the dryer. If I made that type of extension cord, I'd have to move the dryer out of the way, crawl behind the dryer, plug in the extension cord for the boil, then when I'm done crawl back behind the dryer, reverse the cords, and push the dryer back. Making this splitter lets me keep the dryer plugged in all the time. Then whenever I brew, I pull the extension cord up and over the dryer, boil, then hang it back up behind the dryer.

As for power regulation, I think it's a really good idea. What's the power of the heating element you are going to use? How big of a boil (in gallons) are you planning. Being able to back off on the boil rate is very useful. The EZ Boil is a decent option for that. You need a SSR, heat sink, and an enclosure to put it all in so the cost can start to add up.

I haven't purchased yet, but I'm planning on using a 5500w 210v heating element in a 15 gallon kettle to do 5 gallon batches (I don't know what the boil off rate will be, but I'm assuming about 7 gallons pre-boil, 6 gallons post boil, about 5.5 gallons into the fermenter, and about 5 gallons out).

So you need to build the EZ Boil, instead of purchasing it?
 
Last edited by a moderator:
The outlet it's going into is currently being used by the dryer. Which is, well, behind the dryer. If I made that type of extension cord, I'd have to move the dryer out of the way, crawl behind the dryer, plug in the extension cord for the boil, then when I'm done crawl back behind the dryer, reverse the cords, and push the dryer back. Making this splitter lets me keep the dryer plugged in all the time. Then whenever I brew, I pull the extension cord up and over the dryer, boil, then hang it back up behind the dryer.

Ah, I get it now. That should work - just remember that you can't brew and run your dryer at the same time or else you'll blow the circuit breaker.

I haven't purchased yet, but I'm planning on using a 5500w 210v heating element in a 15 gallon kettle to do 5 gallon batches (I don't know what the boil off rate will be, but I'm assuming about 7 gallons pre-boil, 6 gallons post boil, about 5.5 gallons into the fermenter, and about 5 gallons out).

So you need to build the EZ Boil, instead of purchasing it?

5500w for 5 gallons is a lot of power. Full power is great for rapidly heating up the kettle to boiling, but once it starts boiling, you really need to back off on the power. I do 5 gallon batches, and I recently switched from 5500w to 4500w and I still back off the heater during boiling to around 50% power. Any more than that, and the boil is WAY too vigorous, which leads to too much water evaporated as well as a very high risk of boilovers (even in a 15 gallon kettle!).

Yes, you'd need to build the EZ Boil. Auber sells enclosures with the hole pre-cut for the EZ Boil, SSR's, and Heat Sinks. I would recommend adding some kind of on/off switch rated for 30 amps so you can shut it off in a hurry. Auber also sells kits & pre-assembled controllers but they are a lot more expensive and have a lot of capabilities you don't really need with the type of system you are considering. Of course, that would help you future proof the system too...

My first electric setup used a Crydom variable relay with a variable resistor that allowed me to adjust the boil power. I installed it (with the heat sink and a small computer fan to cool it) in a plastic toolbox. Worked ok, but it was hard to be consistent with the setting on the variable resistor to make sure I had repeatable power levels during different brew sessions. That's about as simple as you can get, and it still ends up being close to the cost of an assembled EZ Boil.
 
Last edited:
Ah, I get it now. That should work - just remember that you can't brew and run your dryer at the same time or else you'll blow the circuit breaker.

Yup. Understood :)

5500w for 5 gallons is a lot of power.

I was contemplating going with one 1500w 110v unit as supplemental power on the stove, or going with two 1500w 110v units, to back down on the power from the 5500w choice. But I think my goal is to get away from the stove, and putting two heating elements in place makes future temp control somewhat difficult.

Yes, you'd need to build the EZ Boil. Auber sells enclosures with the hole pre-cut for the EZ Boil, SSR's, and Heat Sinks.

Their link to the kits doesn't appear to be working (I just get this https://www.auberins.com/index.php?main_page=product_info&cPath=58_59&products_id=620), and I can't find it in a search.

Sorry, but my brain is hurting at the moment from all of the various options, upgrades, and other options, but I would essentially need to get an EZ Boil (this https://www.auberins.com/index.php?main_page=product_info&products_id=560 for $47) plus an SSR (this https://www.auberins.com/index.php?main_page=product_info&cPath=53&products_id=444 for $35), a heat sink (for a few dollars(?)), some wiring, and a housing enclosure, for a total cost of about $100?

The only thing I'm seeing on their website is $350+ premade units.

The price on eBIAB really starts to add up fast. ~$400 for the kettle with all welded ports, ~$150 for all the clamps/valves/tubes, ~$100 for the heating element, ~$260 for the power cord, and $100 for the temp regulator, comes to about $1,000. And that doesn't even get me into any mash recirculation, whirlpool recirculation, or false bottom.
 
The price on eBIAB really starts to add up fast. [...] And that doesn't even get me into any mash recirculation, whirlpool recirculation, or false bottom.
Which is why I am still on propane, unfortunately. Also, my electric panel is full and I would need to replace that first, and upgrade the wiring out to the garage . . .

At $1,000 you could also buy a Grainfather and have $200.
 
Sorry, but my brain is hurting at the moment from all of the various options, upgrades, and other options, but I would essentially need to get an EZ Boil (this https://www.auberins.com/index.php?main_page=product_info&products_id=560 for $47) plus an SSR (this https://www.auberins.com/index.php?main_page=product_info&cPath=53&products_id=444 for $35), a heat sink (for a few dollars(?)), some wiring, and a housing enclosure, for a total cost of about $100?

The only thing I'm seeing on their website is $350+ premade units.

The price on eBIAB really starts to add up fast. ~$400 for the kettle with all welded ports, ~$150 for all the clamps/valves/tubes, ~$100 for the heating element, ~$260 for the power cord, and $100 for the temp regulator, comes to about $1,000. And that doesn't even get me into any mash recirculation, whirlpool recirculation, or false bottom.

Yeah, it can get expensive. When jumping into 240V, it really complicates things, which makes it expensive. You pretty much have the scope of what you'd likely need.

You "could" stick with 2000W and 120v/20 amp standard wall outlet and successfully brew 5 gallons, which would really simplify things and keep the cost a lot lower. The trade-off would be much slower times to heat up to boiling, but as stated before, you really don't need much power to maintain the boil.

Which is why I am still on propane, unfortunately.

I hear you on that, but I'm never going back to propane! The ability to brew independent of the weather is the whole reason I moved to electric in the first place and it's worth all the expense in my opinion.
 
Which is why I am still on propane, unfortunately.

Being on stovetop currently, I'm not able to generate enough heat to get a full 7 gallons to a rolling boil. Eventually I planned on getting a real kettle, so about $250 of the total eBIAB cost would be spent anyway.

I was looking at switching to propane, but figured it would probably end up running me about $250 ($150 for the Hellfire, $50 for the legs, and $50 for a spare propane tank). So I could either spend $250 now, and then perhaps one day spend another $[insert number] to go electric, or just go electric now.

At $1,000 you could also buy a Grainfather and have $200.

I'm not much of a fan of fully automated, prepackaged systems like the Grainfather. You're forever tying yourself to a company for replacement parts. In five years, if they upgrade their system and one of your parts breaks, you very well may have to buy a whole new system, instead of spending the $50 on that one part, because they don't make it anymore.

But if I were to do one of those all in one systems, I'd do the Unibräu. Of course, at $1,200 I'm better off building it myself (although the Unibräu does come with a pump included in the price).
 
You "could" stick with 2000W and 120v/20 amp standard wall outlet and successfully brew 5 gallons, which would really simplify things and keep the cost a lot lower. The trade-off would be much slower times to heat up to boiling, but as stated before, you really don't need much power to maintain the boil.

What type of times would I be looking at?

I lived with the stovetop for 15 years. I know I can make better beer with a rolling boil, but that's actually not what's causing the move. My brew day (with a 60 min mash, a 60 min boil, about 20 min cool down, and 20 min cleaning) is taking me about 6-7 hours at the moment. It takes about an hour and a half to get the water up to strike temp, and another hour and a half to get the water to (close to, at least) boiling, plus or minus. Poor stove is doing its best, but it just can't put out enough heat. With a 2 year old at home, it's getting tough to carve out 7 hours for a brew day. If I can get it cut down to 4 or 4.5 hours, I'll be happy.

Well, a lot depends on a lot of things but I can give you some general idea.

First of all, the heater selection is key: You can find a 2,000W heating element BUT they tend to be short, which means you have a high chance of scorching your wort on the element. You can take a 5,500W 240V ripple style heating element and hook it up to 120V power, which will have basically no chance of scorching, but you cut the actual wattage by a factor of 4 when you do.

Let's assume you do that, and have 1,350W going into the wort. Without going into the math, to heat up water from 70F to about 150F for mashing will take about 45 minutes in this scenario. To go from 150F (mashing temp) to boiling will take another 35 minutes.

That's a rough idea; it will probably take a little longer than that due to losses, but it'll be in the ballpark. A bigger heater will go faster but as i said, it's hard to find a 2,000w 120V heating element that has enough surface area to avoid scorching the wort.

EDIT: Bobby at brewhardware.com sells a 2200W 120v foldback element that might be ok - it's "Low Watt Density (LWD)" when ideally you want "Ultra Low Watt Density (ULWD)". Using that element would get you about 30 minutes from 70F to 150F and 22 minutes from 150F to 212F
 
Last edited:
Let's assume you do that, and have 1,350W going into the wort. Without going into the math, to heat up water from 70F to about 150F for mashing will take about 45 minutes in this scenario. To go from 150F (mashing temp) to boiling will take another 35 minutes.

. . .

EDIT: Bobby at brewhardware.com sells a 2200W 120v foldback element that might be ok - it's "Low Watt Density (LWD)" when ideally you want "Ultra Low Watt Density (ULWD)". Using that element would get you about 30 minutes from 70F to 150F and 22 minutes from 150F to 212F

Hmm. That's not bad at all. Will I be able to get a good, rolling boil with 1,350W in 7 gallons of water?

At $25 for the heating element, plus some cash to turn it into a TC fitting, plus some cash for the wiring, it might not be a bad idea as an interim until I can afford to drop another $600 on a 240v heating element (and controller, and cord with GCFI). If I"m not getting enough temp out of it, I might just stick it on the stove WITH the electric element.
 
You can take a 5,500W 240V ripple style heating element and hook it up to 120V power, which will have basically no chance of scorching, but you cut the actual wattage by a factor of 4 when you do.

Let's assume you do that, and have 1,350W going into the wort.

Wait, doing that won't trip the breaker? One in the kitchen is a 15A and the other is a 20A.
 
Use the 20 amp circuit with nothing else on it: 2,200W/120v = 18.3 amps; 1375W/120v = 11.5 amps , so no, it won't trip the breaker.

Wrap foil insulation around the kettle, and keep the lid on as you are raising the temperature and you'll be fairly close to those times (take the lid off for boiling unless you have some fancy steam condenser...)

As for the rolling boil, you'll probably be ok. I have a 4500W element in my kettle, and I dial it back to 50% and the boil is still plenty strong. That's almost the same as the brewhardware element at 2,200W.
 
As for the rolling boil, you'll probably be ok. I have a 4500W element in my kettle, and I dial it back to 50% and the boil is still plenty strong. That's almost the same as the brewhardware element at 2,200W.

Awesome. Thank you so much for all the help.

I actually found this one too https://www.brew-boss.com/120-Volt-2250-Watt-Foldback-Heating-Element-p/htr-2250-foldback-l6-30p.htm

It's ULWD, 2250 watt, 110v, with a 1.5" TC fitting. At $65, all I need is an extension cord and I'm good to go. A great entry into the eBIAB system. After a while, if I want to increase to 240v, I can drop the other ~$500 to do so.

Happy as a clam at the moment :D

Nice find! I didn't know about that one.

Sounds like you've got a good plan to get started. I will warn you however, that upgrading your brewing system is habit forming! :rock:
 
Rather than a splitter, make a switchbox that connects power to one plug or another. You should never allow a situation where a circuit can be overloaded. Breakers are there as a last ditch backstop.

I'll respectfully disagree with you on this one Brundog. A typical 120v circuit in your house has multiple 15 amp outlets on it with a 15 amp breaker protecting the circuit. Do you have a switch to turn off your TV, computer, lamps, etc. whenever you want to run the vacuum cleaner? A standard duplex outlet allows you to plug two 15 amp devices into it at the same time!

It's up to the user not to overload the circuit by properly operating the equipment that's connected to the circuit. The breaker is there to protect the wiring.

I do agree you shouldn't deliberately overload a circuit, but multiple outlets on a single circuit is 100% acceptable, even on 240v circuits. See my post in this thread: Wiring question
 
Last edited:
Rather than a splitter, make a switchbox that connects power to one plug or another.

In an ideal world, I would agree that this would be a better option than a splitter cable. And in due time, I may do it anyway. But the problem is more of a space consideration. The only location the switchbox could be is in the dryer closet, against the far wall or against the right side wall. I can't reach the far wall (up and over the dryer), and the right hand wall is covered in storage. I'd have to dig out the outlet every time I want to make the switch.

Plus, practically speaking, I typically only brew about once every 3-4 weeks for a few hours (hopefully) at a time. Draping an extension cord over the dryer for an afternoon once a month seems like a reasonable "warning flag" not to turn the dryer on, at least during that time.
 
I will warn you however, that upgrading your brewing system is habit forming! :rock:

Sadly, I'm already aware. I'm planning on putting ports in the kettle that can allow for a recirculation/whirlpool pump at a later date. I don't have any plans to do it now, but in the event I want to later I'd rather have the TC ports available.

Upgrading the heating element to 240v at ~$500, installing a whirlpool pump at ~$250 . . . It's obvious this will eventually run me a few grand in the end. But at least I'm not dropping it all at once :p
 
Allow me to throw in my 2 cents. Or 34 cents, judging by how long this ended up being.

I just upgraded to electric brewing, and it's not cheap. I looked at all sorts of controllers and it was a daunting task to figure it all out. I know just enough about electricity to do some wiring, but not confident enough to design it myself.

One thing that guided me a bit was not wanting to buy cheap and wish, a year later, that I hadn't sunk money into something that was now sitting in a box someplace as I upgraded.

And yet...not made of money. There were only three choices that made any sense financially to me.

One was the Stilldragon controller. It's inexpensive. In retrospect, I might well have gone that way though I had uncertainties about it. Those have since been resolved by people on this board, but the price difference is huge. The Stilldragon is $41 plus shipping, and will use a sort of dial controller to adjust power to the element:

http://stilldragon.com/index.php/diy-large-controller.html

Not a bad way to dip your toe into the water, and I suspect if you assembled it well, it perhaps could be sold (assembled) for what you had in it.

The other options were the Auber Instruments kits, like so:

The first is their standalone "Cube" DIY kit, that sits on the bench or counter. This could be an option but in my case I have fairly limited space, and I wasn't quite comfortable with having it where it could be splashed with a boilover or worse.

https://www.auberins.com/index.php?main_page=product_info&cPath=64_66&products_id=719

(here's the Cube already assembled, which costs about $100 more: https://www.auberins.com/index.php?main_page=product_info&cPath=64_65&products_id=701 )

The second is the wall-hanging version, which I did have room for, and which fit my space parameters much better:

https://www.auberins.com/index.php?main_page=product_info&cPath=64_66&products_id=678

The cost of the "Cube" is $355, the All-in-One BIAB kit is $370. The Cube has an optional wiring kit for $25, which IMO is worth getting unless you want to chase around finding wire and terminals. The other one doesn't have an optional wiring kit, which I find odd. I had to get that stuff myself.

Since you expect to brew in your kitchen/dining room, a permanently installed controller like the last one is probably out, so something like either the Stilldragon or Cube would probably make more sense.

One last note: cords are expensive. Brewhardware has such cords mostly assembled, you have to add a plug, and that's probably the way to go. A cord from a controller to the boil kettle will run you $40 or so, give or take.

************

I ended up doing the BIAB-kit controller, the DIY version. BTW, I'm not using it for BIAB, though it might eventually be used for that. I'm doing LODO stuff, so it's basically a controller of the element. It took me about 6 hours to wire it, not all at once, over about a week. Lots of double-checking and triple-checking, running out for wire and terminals, like that. The wiring diagram they include is clear, if you know what you're looking at. If not, you have to puzzle it out a bit, but it's not terrible. There were a few things with which I was unfamiliar (terminal blocks, for instance), but the wiring diagram includes clear pics of the various parts.

One thing that was important to me was a keyed shutoff which you must turn on to get the unit going. I could envision a buddy with me on brew day and they just turned it on to see what's what, and burning out the element in a dry kettle. I suppose I could have added one to the Stilldragon, but wasn't exactly sure how, so it was a less desirable option for that reason--though in your case, maybe not.

Below are a few pics, a couple showing the wiring process of my unit, and the other the end result.

panelassembly1.jpg panelassembly2.jpg panelfinished2.jpg setup2.jpg
 
Thank you for taking the time to write that up Mongoose.

What's the essential difference between the Stilldragon and the Cube? It appears to me that the Stilldragon works essentially like a dimmer switch, while the Cube allows you to preprogram designed temps. Does that sound about right?

You're right that I don't have the wall space available. At least not in the house. I have a 16'x16' workspace that I can wire whatever I want into it. I could hang it on the wall in that space, but it's unheated, no AC, and I use it as a woodworking shop occasionally. If I have to stand there in the heat, the cold, and protect against drifting sawdust, I'd probably be better off using propane on the back porch. The joy of homebrewing in the kitchen for me involves setting it to a boil, checking on it every 10 min or so while I relax over a beer with a friend and/or a football game.

I'm also generally speaking a KISS type person. At this time I'd prefer not to have a controller to set a temp on the mash or boil. I understand the value of it, and maybe in the future I"ll move in that direction, but for the time being I enjoy the simplicity of homebrewing.
 

Do you mind if I ask about the ports you selected on the Spike? Why did you choose what you chose?

I've been trying to decide what to do on my own Spike. I originally was thinking I'd go with 3 ports on the bottom and one on top. One bottom port would be for output, one for thermometer, and one for the heating element. Should I decide to hook up a recirculation pump or whirlpool pump in the future, I could use the output and top port for that function.

Spike sent the attached spec back as their suggestion. I'm not sure why they suggested 4 ports on the bottom (I'm awaiting their response). I also asked for the back to be clear, so I could push the pot against a wall if I needed to, or carry the pot without having ports jab me in the stomach. I'm not sure why the placed the ports where they did.

I'm also wondering if it would make sense to offset some of the ports, perhaps have two at 2" off the bottom and one (or two, if I need the 4th bottom port) at 3" off the bottom. In theory, if I need to have two heating elements (110v) at a time, I might be able to fit one in the 2" and one in the 3" port. Maybe not though. But I figured having them staggered might give me more options than having them all at the same level.

But then again, I don't really know what I'm doing in designing this :D
 

Attachments

  • TC eBIAB.png
    TC eBIAB.png
    167.2 KB · Views: 55
Do you mind if I ask about the ports you selected on the Spike? Why did you choose what you chose?

My original Spike kettle had just the two low horizontal ports. One was for the ball valve, the other for a thermometer. I added the third between and above them when I wanted to do whirlpooling with my pump.

To accommodate electric, I needed to add a 4th port--Triclover--on the bottom, which is what you see on the left where the cord is plugged into the element. The fifth one on the upper right is also a Triclover, but that's solely for the use of the steamslayer arrangement sold at BrewHardware that will let me brew in the garage in the winter without all that moisture from the boil going into the air.

If I were doing some sort of BIAB recirculation setup, I probably could use that upper port as a wort return line after it goes through my RIMS setup--though I have a separate mash tun for that.

I've been trying to decide what to do on my own Spike. I originally was thinking I'd go with 3 ports on the bottom and one on top. One bottom port would be for output, one for thermometer, and one for the heating element. Should I decide to hook up a recirculation pump or whirlpool pump in the future, I could use the output and top port for that function.

I don't know either.

And unless you're completely set up for TC ports, why go with those as they're more expensive? IIRC, the 1/2" MPT ports are only $30, while the TC ports are $50. I have the two on mine because I needed the one for the element, and the other for the steamslayer. But the others? No need for TC.

I also note you don't have a port you could use for a whirlpool should you want to do that. Something 4" or so up from the bottom is what you'd need for that.


Spike sent the attached spec back as their suggestion. I'm not sure why they suggested 4 ports on the bottom (I'm awaiting their response). I also asked for the back to be clear, so I could push the pot against a wall if I needed to, or carry the pot without having ports jab me in the stomach. I'm not sure why the placed the ports where they did.

What they're presuming mostly is that you'll feed the electric to the back of the kettle. They did the same thing for mine initially, and I did NOT want it on the back--my bench is against the wall, and while full the back of the kettle is difficult to access.

Further, when I clean that out--my sink is just to the right of the setup--I lay that kettle on its back and spray it out. A port on the back would make that very difficult, and how you plan to clean that kettle should play into where you put your own ports.

I'm also wondering if it would make sense to offset some of the ports, perhaps have two at 2" off the bottom and one (or two, if I need the 4th bottom port) at 3" off the bottom. In theory, if I need to have two heating elements (110v) at a time, I might be able to fit one in the 2" and one in the 3" port. Maybe not though. But I figured having them staggered might give me more options than having them all at the same level.

Depends on how long the elements will be. I don't recall seeing how large a kettle you're getting, though the price you mentioned suggests a 10-gallon.

You're simply going to have to figure out the lengths of those elements and lay it out on paper. The safe thing to do, of course, is to stagger them by an inch. I'd also make sure they were relatively close to each other so as to reduce the cords lying around.

But then again, I don't really know what I'm doing in designing this :D

Who does? But you're doing the right thing by asking for ideas and options.
 
And unless you're completely set up for TC ports, why go with those as they're more expensive?

In part, I hate scrubbing threads. Yes I realize the kettle doesn't need sanitation to the level of fermenters, but I can't stand unthreading something and finding gunk. The TC would be significantly easier to clean.

But mostly it's due to the universality of the ports, and the interchangeable nature it provides. If I think the heating element will work better over here, or over there, I can move it. If the heating element is TC but the others are MPT, I'm picking where my heating element goes now. Which I don't really know about. Same holds true for future recirculation outputs, inputs, ect.

I can convert a TC to a threaded port if I need to with the right accessory. I can't go the other way around though.

Yes, the TC costs $20 more (actually more than that with the clamps and such), but I consider that fairly minor in the grand scheme of things (even x4).

Maybe I'm making things more difficult though. I thought I was making it simpler.

I also note you don't have a port you could use for a whirlpool should you want to do that. Something 4" or so up from the bottom is what you'd need for that.

My plan was to use the top port for that. Should I choose to whirlpool, I'll buy a tube that drops down to to ~the 4" mark. That way I can use the top port for either a whirlpool, or put a different attachment and use it for a mash recirculation return, or even a steamslayer. Heck, I could use it for all three in the same brew if I wanted to.

Depends on how long the elements will be. I don't recall seeing how large a kettle you're getting, though the price you mentioned suggests a 10-gallon.

I was actually planning on the 15 gallon kettle. I figured the added space would allow me to do some full volume mashes at higher gravity.

You're simply going to have to figure out the lengths of those elements and lay it out on paper. The safe thing to do, of course, is to stagger them by an inch. I'd also make sure they were relatively close to each other so as to reduce the cords lying around.

The one thing I can't tell is how thick most of those elements are. They all describe their length, but not their thickness.

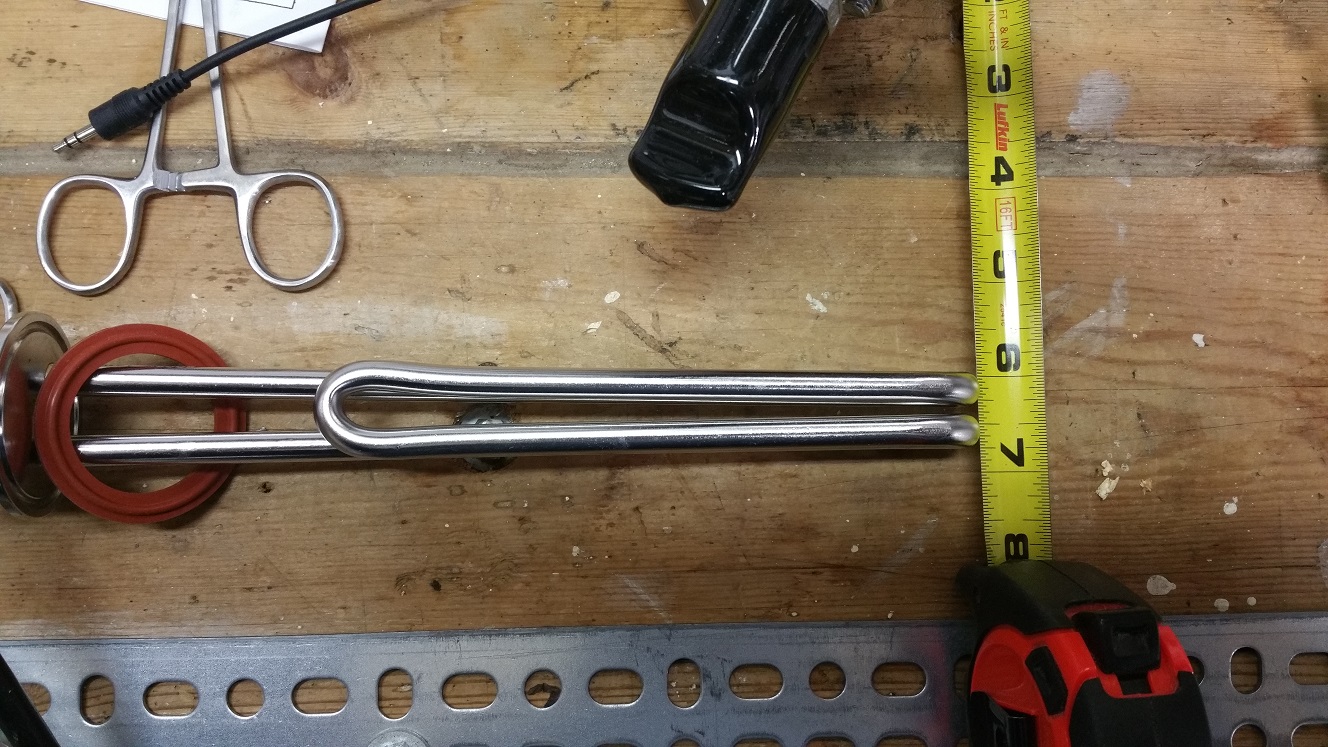
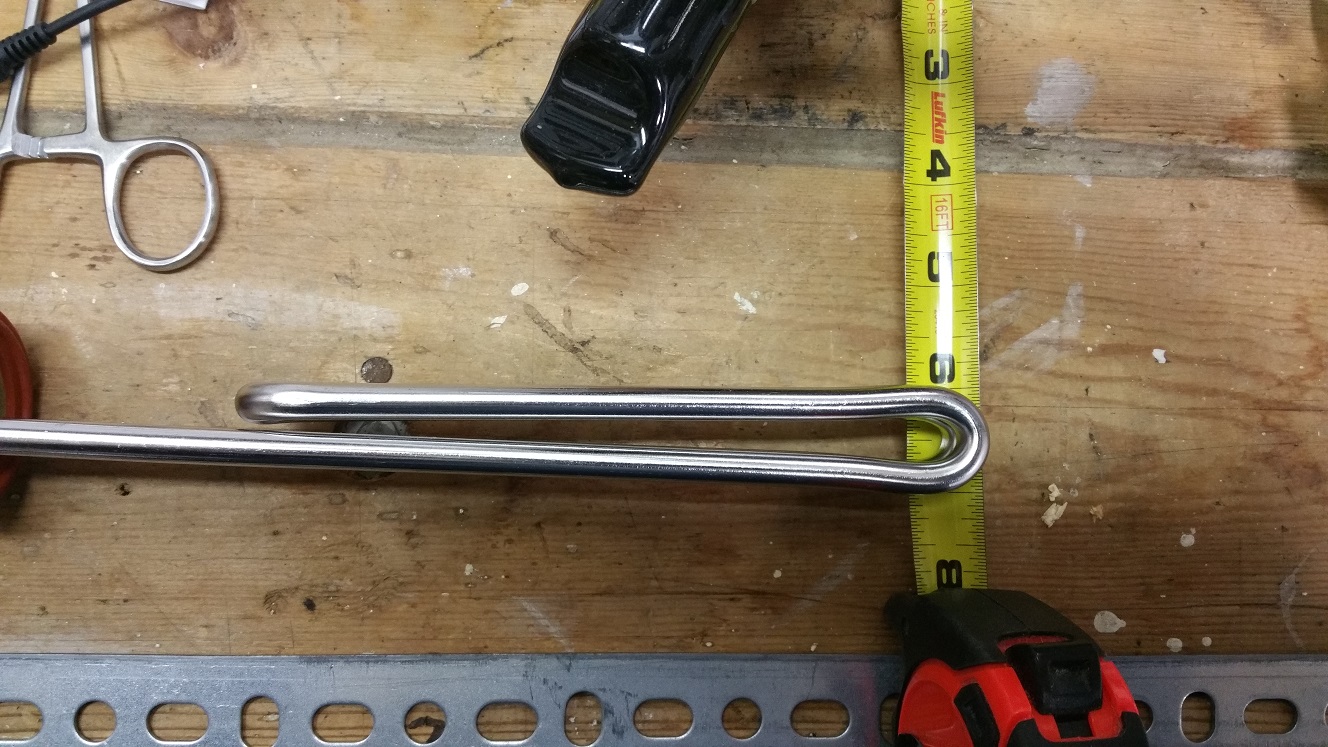
Even still, the 15 gallon kettle has an ID of 15.8". The 2250W element runs in at 9" long (although it appears the lesser wattage, 1450W, versions are the same length), which means I'm going about an inch further than halfway. So there realistically speaking isn't any option to have two elements at the same height (I could use a longer 9" element and a shorter 4" element at the same level, but I'd be too afraid the 4" would burn the wort). Staggering an inch higher may work though.

It appears that the 2" mark on the pot should hit at the 1.5 gallon mark, and 3" would hit at the 2.5 gallon mark (4" hits at the 3.5 gallon mark). So I could put two ports at the 2" mark (one for the heating element and one for the output) and one at the 3" mark (for the thermometer) and still be able to do half batches comfortably. If I need to have a fourth port at the bottom (I don't think I need it), I could put it at the 4" mark (which gives me the protection that I could put one heating element at the 2" mark and one at the 4" mark with the thermometer at the 3" mark, although realistically speaking if I need two heating elements I'll probably spend the time working on the 240v option).

So I'm thinking having one 2" port be at 9 o'clock, one 3" port at 7:30, and one 2" port at 6 o'clock. If I need a fourth, it'll be 4" at 4:30. The top port could be at 4:30. That way I can put the pot on the side to clean it without any issues.

Who does? But you're doing the right thing by asking for ideas and options.

What I find so frustrating is there aren't many intermediate "plug and play" options. There are basic kettles and pots with an outport valve on the low end, there are high end "all-in-one" units on the upper end, and everything in between is like "IDK, figure it out." You'd think there would be some optimal setting for most of the placements of these ports, wiring options, heating elements, ect. In part I guess not having an "optimal set up" makes it somewhat more interesting, and reduces some of the stress (if everyone has a different set up but it still works great, there shouldn't be much pressure in me getting it "right"). But when you're dropping $400 on a kettle, you don't want to set it up wrong and have to drop that kinda cash twice.
 
I don't unscrew the ball valve and temp probe ports. I have them to where I want them, and especially with the ball valve, it's hard to get it so the handle is on top where I need it. There's also that nice disconnect on the inside for the pickup tube and whirlpool tubes.

Since I'm boiling, and ultimately running both boiling water and boiling wort through the pump and chiller, I'm sanitizing everything that way.

I also learned something about PBW: it cleans far better at 140 degrees than, say, 115 degrees. I used to fill the kettle partway with 115-degree water (about what I could stand to put my hand it in to clean) and then use PBW. But once I just did 140 degrees, and I was shocked at how well it did. I've since read that others will go to 160 or even 180 for cleaning, and I've tried the higher temps, and it leaves the kettle sparkling. It's getting at the threads too, and I have no concerns at all about contamination. YMMV.

About element "thickness." I believe they're about 1" "thick." I'll be home later and I'll try to remember to measure. I have two, a 120-v element and a 240-v element, but they're pretty close in thickness as I recall.
 
Thanks Mongoose, I'd appreciate the measurement. I'm assuming if it's a little more than 1" thick, I may be able to "bend" the elements a little bit, maybe a few degrees (one up and one down) so they provide a little bit of clearance between the two.

Of course, I may just use a heatstick if it comes down to needing two 120v elements. Time will tell.

Spike just got back to me, and they suggested the 4th bottom port as a dedicated whirlpool pickup, which I don't believe I need. I can't figure out the need to have a dedicated whirlpool pickup, and I can't find any threads or anything on it. So I'm assuming it isn't necessary.

Keeping that in mind, here's what I'm going to suggest in changing the kettle design to:

Essentially keeping one TC@2"@6:00, one TC@3"@7:30, one TC@2"@9:00, and one TC@2" from Top@7:30. That would leave ~75% of the pot without a fitting, so I can roll it around to clean it. The 2" and 3" ports would allow an offset for a second heating element, if needed.

Thanks for all the assistance. SUPER helpful.
 

Attachments

  • TC eBIAB v2.pdf
    54.6 KB · Views: 27
Thank you for taking the time to write that up Mongoose.

What's the essential difference between the Stilldragon and the Cube? It appears to me that the Stilldragon works essentially like a dimmer switch, while the Cube allows you to preprogram designed temps. Does that sound about right?

You're right that I don't have the wall space available. At least not in the house. I have a 16'x16' workspace that I can wire whatever I want into it. I could hang it on the wall in that space, but it's unheated, no AC, and I use it as a woodworking shop occasionally. If I have to stand there in the heat, the cold, and protect against drifting sawdust, I'd probably be better off using propane on the back porch. The joy of homebrewing in the kitchen for me involves setting it to a boil, checking on it every 10 min or so while I relax over a beer with a friend and/or a football game.

I'm also generally speaking a KISS type person. At this time I'd prefer not to have a controller to set a temp on the mash or boil. I understand the value of it, and maybe in the future I"ll move in that direction, but for the time being I enjoy the simplicity of homebrewing.

Yeah, that's essentially the difference. The nice thing about the cube and the wall-mounted unit is that they allow you to control the boil (the EZ boil will let you dial in a percentage of max power--say, 22 percent, which might be enough for a nice simmering boil). The EZ B also has a timer function and some other stuff I haven't used. And an alarm.

They also allow you to control a couple of pumps, assuming you've set it up as a 4-wire system. I'm not certain where I'll end up with mine, so future flexibility and expansion were also considerations.

But they're more expensive, obviously, and the wall-mounted panel requires assembly. I actually had fun assembling it and learning how to do it, so there was some enjoyment there, as well as pride of ownership and feeling of accomplishment. But that's not everyone's cup of tea, either.

There's one other issue here: sounds like you want to use two smaller 120-v elements. I don't have any idea if any of the above (Stilldragon, Cube, Panel) can even do that. Since you're going to have 240-v power, IMO you'd be better off getting a 5500-watt element. It costs more, but you'd save money on having one fewer port. Mine cost circa $75 from BrewHardware.

Mine, heating 8+ gallons of water using the 5500-watt element, raises temps by something like 5 degrees a minute. Smaller amounts, faster yet. If simplifying and shortening the brew day is part of the goal (it was for me), then faster is better. And at that point you can use the Stilldragon as the simplest, cheapest way to run that element.

To clarify, I think I've decided to start off with one 120v power source and a plug. That's it. At 2250W it should allow me to get a good boil out of 6 gallons. Although not the fastest option. If I have problems, I'll put the kettle on the stove and use both the 2250W and the stove for heat.

From there, I may wimp out and get a second 120v power source, although probably not. Eventually I think I'm going to move to a 5500W system. At that point I'll need to get a Stilldragon or Cube. But it's tough for me to justify the cost at the moment (best guess is about $75 for the heating element, $270 for the wiring from the outlet to the Cube, about $50-350 for the power regulator, brings me to $400-700 to use 240v power, on top of the cost of the custom kettle [maybe $400?]). Instead I'll just shell out the $65 for the 2250W system for now, and upgrade as time moves on.

It would be nice to have 240V power, a regulator, a whirlpool pump, a mash recirculating pump, and a steamslayer, and eventually I might get it. But I think it would be more fun to slowly add on then to have a pot that I can't use because I'm trying to rewire an outlet, and then when I'm done I can't help but thinking "I'm going to have to brew a SH*T TON of beer to justify this $1,500 investment." When you buy it in pieces, it creeps up on you more.
FYI, if you're looking to do 240v on the cheap(er), I got one of the 5500w elements (and a cable) described in this thread for $49 shipped from China. Of course, your point still stands as to all of the other stuff you'd have to do/buy to get started with 240v. I was always planning to jump in with both feet on my electric build and I've still spent substantially more than I originally anticipated. And I ain't made a drop of wort yet...
 
FYI, if you're looking to do 240v on the cheap(er), I got one of the 5500w elements (and a cable) described in this thread for $49 shipped from China.

I appreciate the link, but it isn't really much of a savings. I can get the same element domestically, shipped, for $75. Yes, I'd be happy to save $26, but the cost of the element isn't what's giving me heartburn. It's the other $300-700 worth of electrical wirings.

In theory, I could get the 240v set up for about $69 (If I just straight up cut the current dryer cord, pigtail tied it to 10 feet of 10/3 cord [$15] put a plug end on it [$5] and connected it to a chinesse heating element [$49]). But of course I wouldn't be able to control the boil, so I'd have a dangerous pot, and no GCFI connection. I think it would make more sense to just wait till I'm comfortable to drop a good $500 on doing it right.
 
I keep seeing all these high dollar amounts being paid for electrical cord. Ridiculous. I'd never pay that much. Buying the stuff by the foot from a big box store is just highway robbery. Harbor freight has good prices on 10g cords, when you catch a sale and and have a coupon. I've also got some cheap cords from local RV places that have a crap ton of used ones. They are usually dirty and have to be cleaned, but I have got 10/4 from them for $0.40/foot.
 
I keep seeing all these high dollar amounts being paid for electrical cord. Ridiculous. I'd never pay that much. Buying the stuff by the foot from a big box store is just highway robbery. Harbor freight has good prices on 10g cords, when you catch a sale and and have a coupon. I've also got some cheap cords from local RV places that have a crap ton of used ones. They are usually dirty and have to be cleaned, but I have got 10/4 from them for $0.40/foot.

Wish I'd known this in August. :(
 
I've also got some cheap cords from local RV places that have a crap ton of used ones. They are usually dirty and have to be cleaned, but I have got 10/4 from them for $0.40/foot.

For 10 gauge/30 amp, the RV cords are fairly flexible so it's a decent option. Keep in mind, however, that typical RV 30 amp service is 30 amp/120V so it's rare to find 4 wire RV cord in 10 gauge. Almost all of the 30 amp RV cords are 3 wire (black, white, and ground). Can't use that on a 240V 4 wire 30 amp dryer outlet.

50 amp RV service is 4 wire BUT the 6 gauge cords are not very flexible compared to SJOOW, especially when they are cold. I have 6/4 RV cords for my trailer; they're heavy and hard to move around when I need to do so. For the short lengths us brewers use for cord, I've gone with the more expensive SJOOW cord just because of how flexible and easy to handle they are. I've been tempted to change out my RV cords to SJOOW, but I have two 25 feet long cords, and that isn't worth the cost difference.
 
Last edited:
Thank you for the pics Mongoose. In theory I should be able to fit two 120v units, although I doubt I'll need to.

The wiring was never really the expensive part. It was the GFCI portion. The inline GFCI runs about $140. I can get a spa panel with a GFCI breaker for $78 (which is crazy to me that the panel with the breaker is cheaper than the breaker itself, as I could just put the GFCI breaker where my current dryer breaker is, but if its cheaper to get the panel too why not).

So, if I build the cord myself (HD has it for $1.89 a foot, and at 15 feet I'm not really that concerned with driving around town to save $15, but I appreciate the help), I guess I could get it down to about $210 +/-:

Dryer plug (https://www.amazon.com/dp/B00IPUA5ZW/?tag=skimlinks_replacement-20 $13.11) feeding into a spa panel (https://www.amazon.com/dp/B000BQT1AS/?tag=skimlinks_replacement-20 $77.36), one dryer outlet coming out (https://www.amazon.com/dp/B000BQSU8C/?tag=skimlinks_replacement-20 $9.88) and one heating element outlet coming out (https://www.amazon.com/dp/B00002NAT9/?tag=skimlinks_replacement-20 $12.39), one Stilldragon controller (http://stilldragon.com/index.php/diy-large-controller.html $41), two plugs (https://www.amazon.com/dp/B00002NARX/?tag=skimlinks_replacement-20 $13.35 and https://www.amazon.com/dp/B00208WSDW/?tag=skimlinks_replacement-20 $15.35) and about 15 feet of SJOOW wire (https://www.lowes.com/pd/Southwire-10-3-Black-SOOW-Power-Cord-By-the-Foot/50148254 $27.90).

Plus the heating element ($50-75), of course (so probably $280 all in). Not crazy. But pricier than I originally anticipated (especially after the ~$400 for the kettle, and ~$100 in kettle accessories).
 
Last edited by a moderator:
Instead of a spa panel, which comes with a 50 amp gfci breaker, why not just replace your existing dryer breaker with a 30 amp gfci breaker?

https://www.homedepot.com/p/Square...gclsrc=aw.ds&dclid=CKvYu4Lmkt4CFRmqyAodyiMDdQ

Yes, it costs more than the spa panel but only a little bit more. It’s a whole lot less work to install and won’t take up the space that a spa panel will. Plus, you have less plugs and cord to buy.
 
Also, if you’re planning on going with a bigger heating element in the future, make sure your kettle and port arrangement will fit the larger ripple style element.

Most sites list those around 14-14.5 inches long.
 
Instead of a spa panel, which comes with a 50 amp gfci breaker, why not just replace your existing dryer breaker with a 30 amp gfci breaker?

Due to the cost.

I'm' going to have to get the plugs and cords anyway. I can either put in a second outlet, or create a splitter cable. The splitter will cost less, and provides me more flexibility (I could travel with it at that point, although I doubt I will).

I could just get the breaker at $100 (with tax). But then I'd have to get a housing box to fit the two outlets anyway. Not an expensive option (~$15), but it ends up putting the cost at about $40 more than the spa box. And I don't think the wiring will be all that much simpler. I'm either wiring a pigtail outlet into a spa box, or wiring a pigtail outlet into a junction box. Not really much of a difference.
 
Also, if you’re planning on going with a bigger heating element in the future, make sure your kettle and port arrangement will fit the larger ripple style element.

Most sites list those around 14-14.5 inches long.

Thank you for checking on that. The kettle's ID is supposed to be 15.8", so I should be good.

I got the quote from Spike for the 4 ports, and I think I'm going to pull the trigger on it. I don't think the'll be any difference between ordering it today or ordering it over the weekend, as they won't get started on it until next week anyway, so I think I'm going to mull it over for a day or so.

Whenever I order the kettle, I'll need to make sure I"m ordering the ball valve, TC clamps, two TC caps, and heating element. So at that point I need to figure out if I'm getting a 120v 2250W power unit for $65, or go for the full build-out now on the 5500W unit for $280. Decisions decisions. :)
 
Thank you for the pics Mongoose. In theory I should be able to fit two 120v units, although I doubt I'll need to.

The wiring was never really the expensive part. It was the GFCI portion. The inline GFCI runs about $140. I can get a spa panel with a GFCI breaker for $78 (which is crazy to me that the panel with the breaker is cheaper than the breaker itself, as I could just put the GFCI breaker where my current dryer breaker is, but if its cheaper to get the panel too why not).

So, if I build the cord myself (HD has it for $1.89 a foot, and at 15 feet I'm not really that concerned with driving around town to save $15, but I appreciate the help), I guess I could get it down to about $210 +/-:

Dryer plug (https://www.amazon.com/dp/B00IPUA5ZW/?tag=skimlinks_replacement-20 $13.11) feeding into a spa panel (https://www.amazon.com/dp/B000BQT1AS/?tag=skimlinks_replacement-20 $77.36), one dryer outlet coming out (https://www.amazon.com/dp/B000BQSU8C/?tag=skimlinks_replacement-20 $9.88) and one heating element outlet coming out (https://www.amazon.com/dp/B00002NAT9/?tag=skimlinks_replacement-20 $12.39), one Stilldragon controller (http://stilldragon.com/index.php/diy-large-controller.html $41), two plugs (https://www.amazon.com/dp/B00002NARX/?tag=skimlinks_replacement-20 $13.35 and https://www.amazon.com/dp/B00208WSDW/?tag=skimlinks_replacement-20 $15.35) and about 15 feet of SJOOW wire (https://www.lowes.com/pd/Southwire-10-3-Black-SOOW-Power-Cord-By-the-Foot/50148254 $27.90).

Plus the heating element ($50-75), of course (so probably $280 all in). Not crazy. But pricier than I originally anticipated (especially after the ~$400 for the kettle, and ~$100 in kettle accessories).

The GFCI 30-amp breaker in my sub-panel cost me $103. That was a bit of a "gulp."

The problem is that going electric is pricey; what you describe above will work, and frankly once you get to doing it, I think you're going to like it. I switched from propane to electric, and I wouldn't go back.

I hesitate to even tell you what I have in this. Of course, there are wiring costs, panel costs, breakers and GFCI breaker costs, I needed surface conduit built and installed, then there was the control panel, the cords....

Part of the puzzle is determined by where we are in our life cycle. I'm an empty-nester so it's not a big hurt to dedicate some resources to this. But 15 years ago? No chance, not even 10 years ago. I can fully understand where others have fiscal responsibilities still, and that dictates what's available.

That said, i've sold off some stuff to help pay for all this, and when I get everything working just right, I'll sell off my Jaded Hydra and my Hellfire burner. That'll pay for the electrician and the GFCI breaker. :)
 
Last edited by a moderator:

Latest posts

Back
Top