Old thread but I'm just seeing it for the first time so I thought I'd comment on a few things....
First decide what your brewing process will be and then build a panel to accommodate that.
A few of you have said this and I feel this is very critical to getting the panel that works best for you. There's no "one best" panel out there for everyone.
If you're curious about my brewing process for which my panel was designed around, see my BREW DAY STEP BY STEP article here:
http://www.theelectricbrewery.com/brew-day-step-by-step
The point I was trying to make was that if the master on/off switch is easilly accessed and shuts down all equipment, then an ESD is not needed.
In industrial applications an ESD switch is used when the normal controls are not able to shut down the system quickly or are physically located away from the process.
Agreed 100%. This is why I never included an emergency shutoff in my panel.
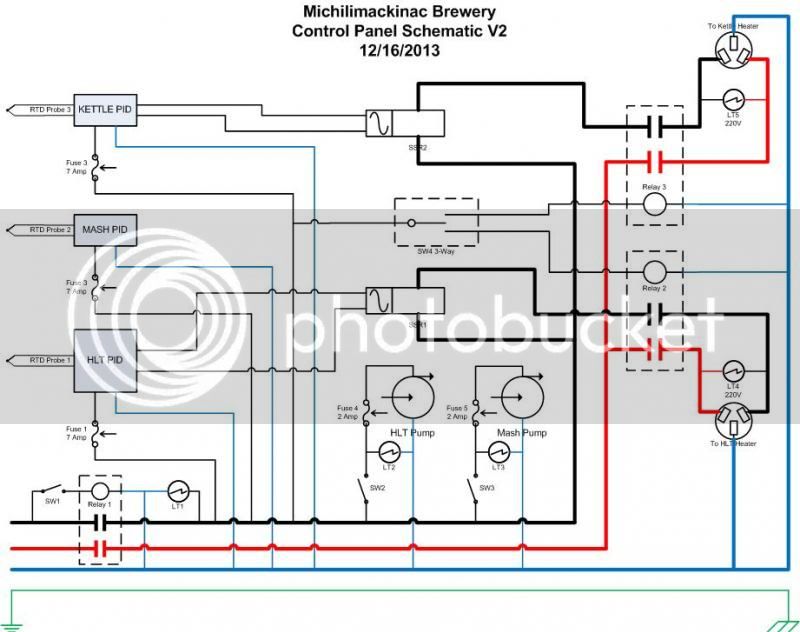
I think the 3 PIDs are overkill (one should be sufficient).
You'd have to reprogram the PID temp probe offset values every time you switched probes (assuming you use more than one), along with the the P/I/D values if you want to do things like extended hop stands. If you only want to use the boil kettle for boiling and don't care about alarm features or extended hop stands (and other conveniences), one PID could be made to work with some cable switching during the brew day. So like mentioned earlier, it all depends on your process.
The pid for the mash does not control anything, it is just a temp gauge. You could remove it if you wanted.
Correct, but without you wouldn't know when your mash reaches temp as the HLT reaches the target temp before the MLT. The MLT PID tells us how far behind the MLT is lagging. Useful for mashouts, step mashes, etc.
I chose to use a 1/16 PID instead of a single line display 1/32 PID (smaller) to have a backup PID, consistency of look, and because they're only about $9 more.
Do you really need a volt / amp meter? What are you going to do with that information?
Handy for knowing that you've wired things correctly. I find it *very* valuable when helping troubleshoot for people who email me with issues, mostly on the power supply side (ie: they see 208V so we know right away that their building is 3-phase which means reduced power output). I also didn't know how much the pumps would actually draw in use so it's nice to see (the first time) that things are within the limits that I wanted them to be. The volt/amp meter are the first things I tell people to cut if they're looking to save as they're directly not involved with the brewing process.
Do you really need an LED that lights up when the element is being fired? The PID has a little integrated LED that lights up when it's firing.
Correct. Though the green PID "out" lights are hard to see on an angle/from a distance.
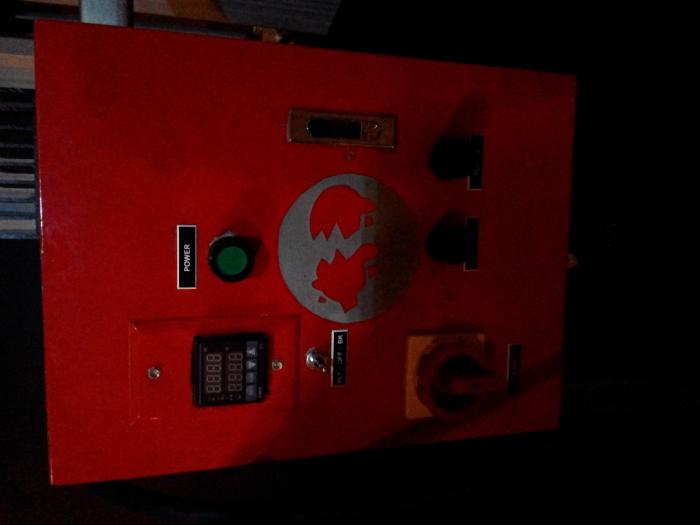
Do you really need a logo or handles?
Logo, nope. Top handles handy for carrying, bottom ones protect some of the connectors (debatable). Front ones protect switches. I had my panel fall onto the front at least a few times while I was building it so the guards helped. Once built it's darned heavy and having it fall over could shear off some things. In some locations it'll be handy from things hitting switches (commercial/industrial locations).
Heck, you could get by with 1 PID for both the HERMS / HLT and the boil kettle, and just write down what the P/I/D values are for each tank and manually reprogram the PID every time you use it, then you'd only need to switch the wire over to the temp probe from one kettle to the other and plug in the appropriate heating element.
Yup - that's what I was was mentioning above.
One thing that Kal's box doesn't do that I added to mine is to have a temp display unit for the chiller. If you're going all electric, why depend on an analog dial for your chiller under your table?
I considered this but I control the temperature of the wort with the valve on the pump. I adjust this valve until I get the temp I want. Because of this, I want the display to be down where my valve is. So I didn't want it up high on the control panel.
Kal made disconnects at the control panel for the heating elements but no quick disconnects near the pots. From a functional standpoint I think it should be reversed. Hard-wired into the box, and quick disconnects near the pots.
I did this way on purpose to keep everything around the kettles waterproof. I also never need to unplug the heating elements, even when cleaning. The HLT only ever has water so never needs cleaning. The Boil Kettle gets tilted 90 degrees into the sink (no cables unplugged). So I thought this was the best solution for me and the waterproof box avoids getting any water or wort in there in case of a boil-over.
I'd also recommend adding some SS float switches to the HLT and BK that are hooked into the wire between the PID and the SSR, so if the liquid levels on either vessel get too low then they'll stop the element from firing. It's a cheap insurance policy.
Again - look at your brewing process. It doesn't always make sense.
On my process the water or wort level is *never* dropping while the elements on on.
If you follow my brewing process (link above) you'll see that I purposely turn off the HLT element at the start of sparging once the sparge water and mash are at 168F. The sparge water starts at 168F and slowly cools throughout the 60-90 minute sparging process while it rinses the sugars from the grain. By the end of the sparge the mash will be about 20 degrees cooler. This is completely intentional. A lower temperature near the end of the sparge helps minimize tannin extraction from the grain husks as it is most likely to occur when the mash has low sugar and higher pH. By the end of sparging the mash has very little sugar left so the drop in heat does not affect the flow (the primary reason for using hotter water to sparge).
Turning off the HLT element during sparging means that you do not need to worry about having the HLT element fire once the water level drops and exposes it to air.
Same goes for the boil kettle. Then the safe start interlock ensures that neither element can be on when you first turn on the control panel. Someone could turn on the panel and then fire up an element without any water in it, but I think the chances are rare if you have a good process as you'd have no reason to do this.
One of the other reasons I wanted to stay away from float switches too was that there are basically no good ones available for under $100-200. The cheap $10-40 ones get gummed up, stick, etc. You need to take them out after every brew and give them a good cleaning to ensure they don’t stick because they’re completely mechanical – especially true in the boil kettle with sticky wort and hop bits. The boiling action could also cause the switch to activate turning off the boil kettle heating element, so you need to put in another switch in the panel to override. But then you may forget to turn this off in the first place making the float switch useless in the first place. They’re a pain.
Less equipment = less cost, less wires to get in the way, less complexity, less time spent cleaning.
If this thread has shown anything, it's that YMMV! Good luck!
Kal
P.S. Did you ever build your panel?


![Craft A Brew - Safale BE-256 Yeast - Fermentis - Belgian Ale Dry Yeast - For Belgian & Strong Ales - Ingredients for Home Brewing - Beer Making Supplies - [3 Pack]](https://m.media-amazon.com/images/I/51bcKEwQmWL._SL500_.jpg)


