• Please visit and share your knowledge at our sister communities:
  • If you have not, please join our official Homebrewing Facebook Group!

    Homebrewing Facebook Group

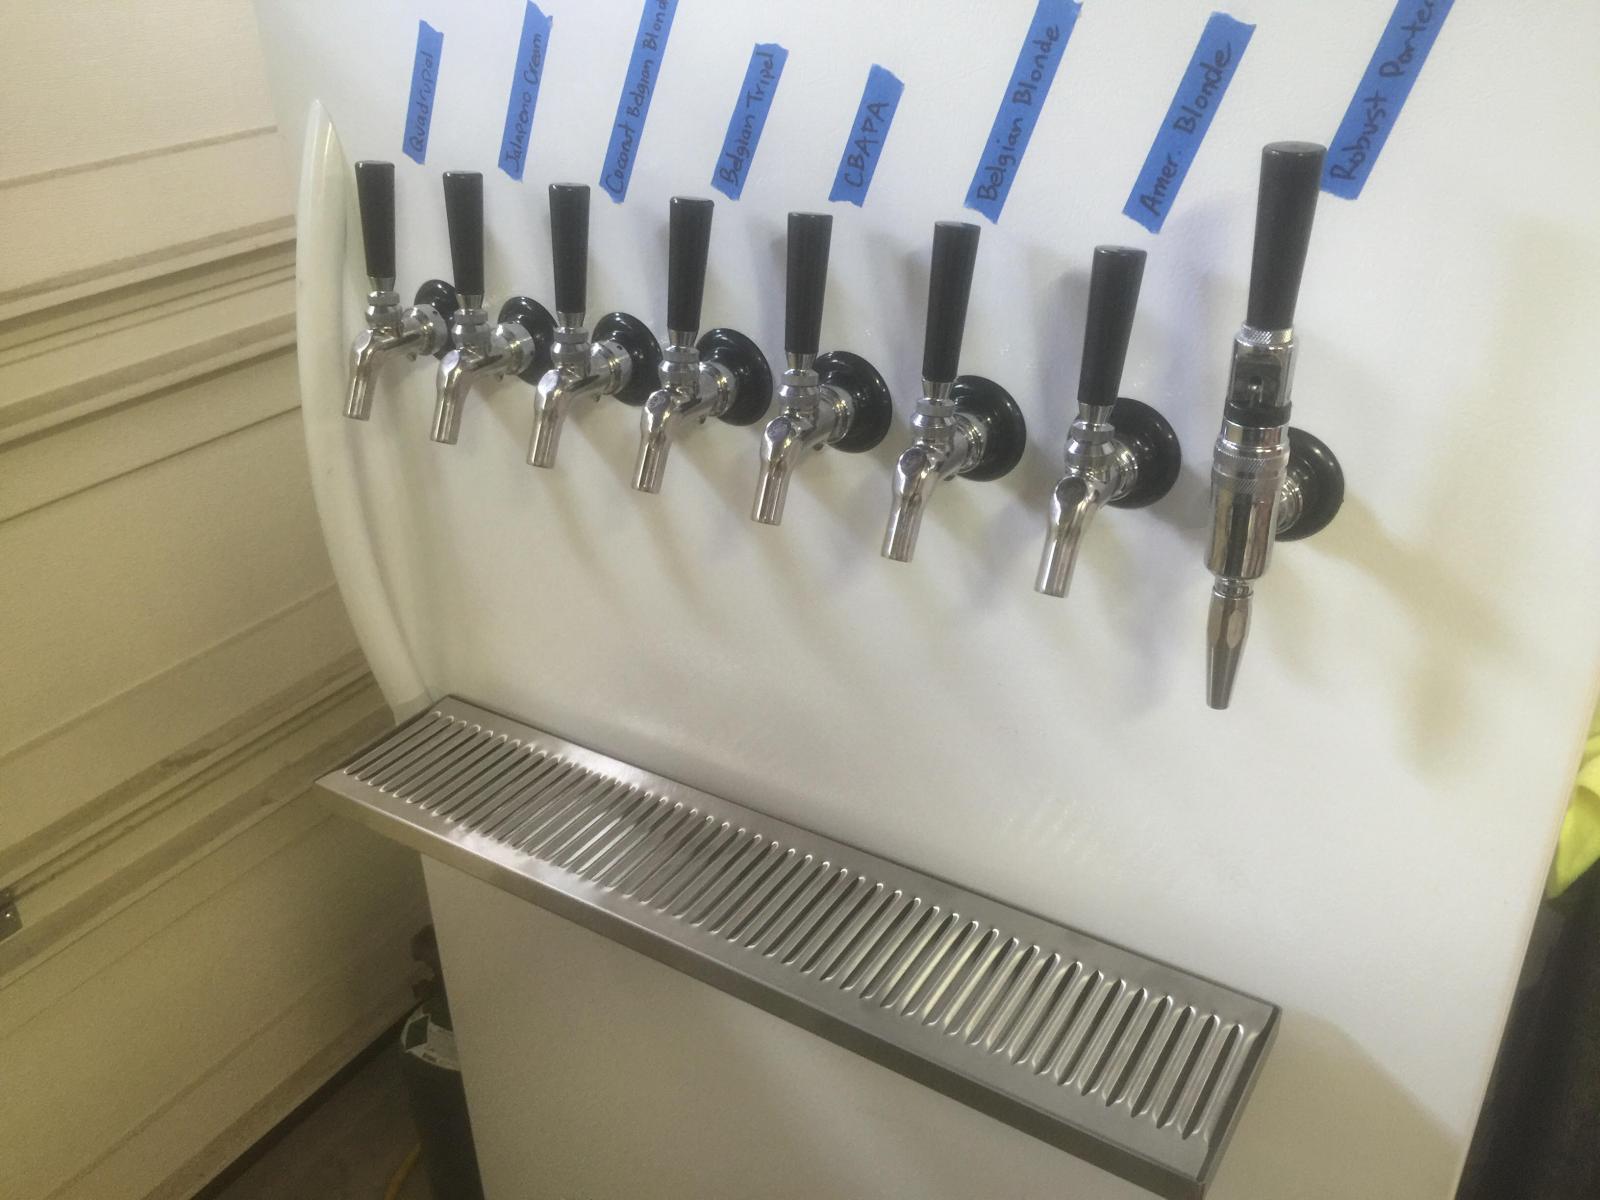
Upright Keezer, 8 taps, 11 kegs

Homebrew Talk

Help Support Homebrew Talk:

This site may earn a commission from merchant affiliate links, including eBay, Amazon, and others.
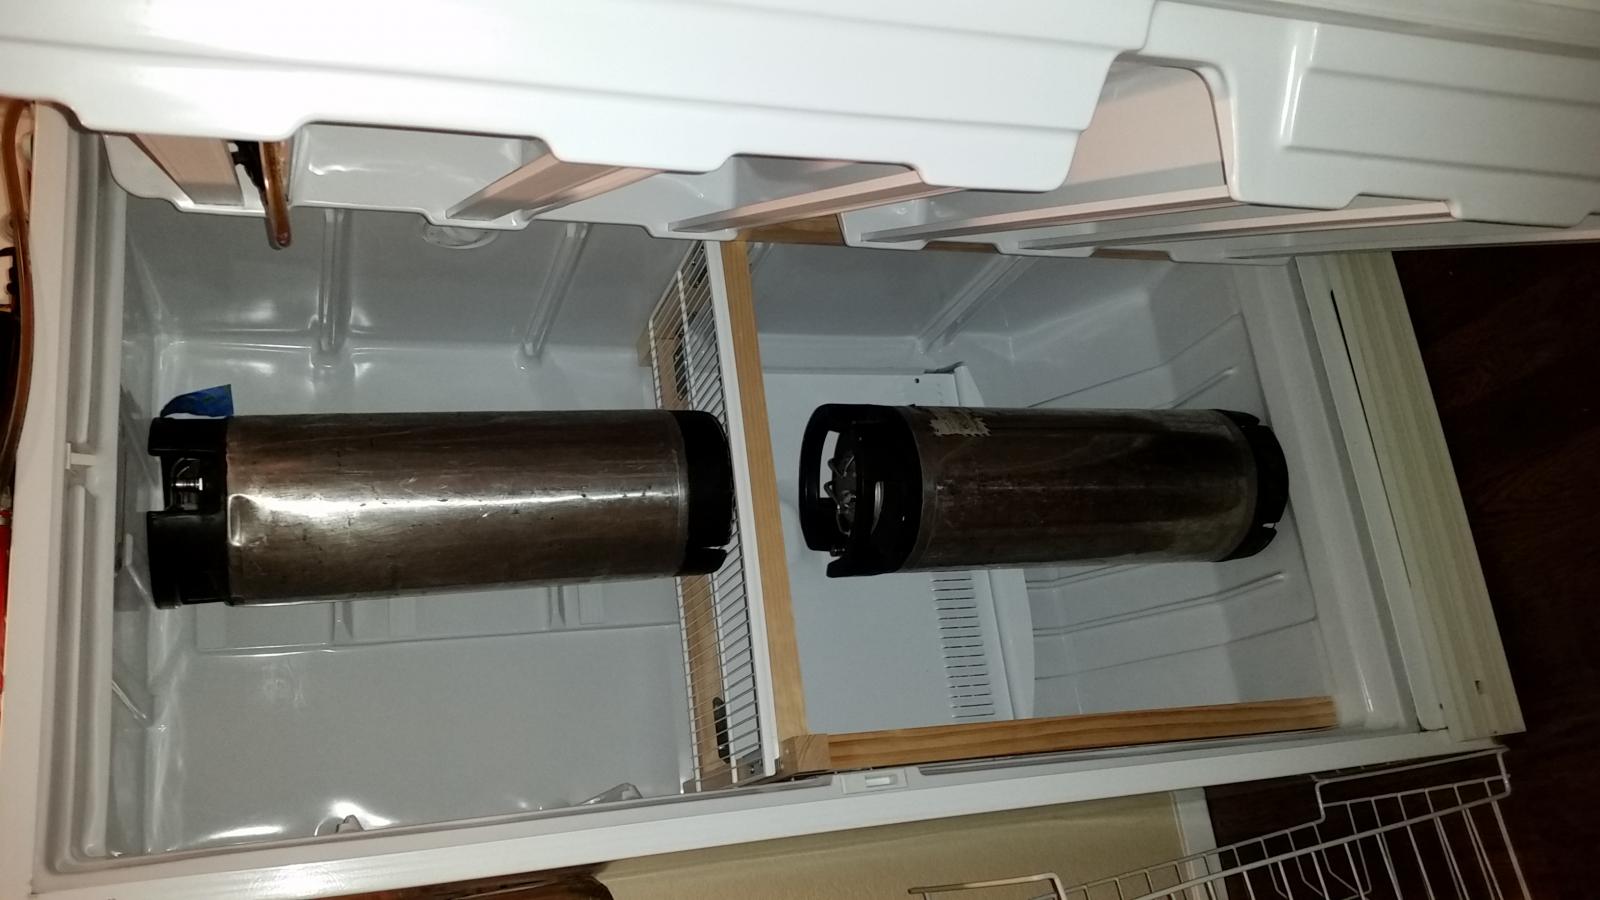
Got my shelf built last night while my Texas Rangers were giving me heart palpitations!

20150930_065618.jpg
 
Looks great Huaco! Did you go taller on the bottom to fit a sankey? If all goes as planned, I should be building mine out this weekend thanks to Bobby M. and some bent ss pieces!!
 
Looks great Huaco! Did you go taller on the bottom to fit a sankey? If all goes as planned, I should be building mine out this weekend thanks to Bobby M. and some bent ss pieces!!

No, had to match the height of the hump in back. It levels off in back and I was able to eliminate 2 rear legs on the shelf I built. It is really sturdy.
 
Well, I finally saved up enough cash and bought everything I needed. Just finished the majority of the build, but may work on building my STC-1000 into the door. It's functional at this point though, at least.

I did remove all of the door shelves after all. Especially after the door slammed closed on me while trying to load a keg into it and broke a couple of bottles that I had stored there.
I also skipped on the 90 degree tailpieces as the line bends just fine and may even take up less space. Plus, I couldn't find the 90's for a decent price anywhere.

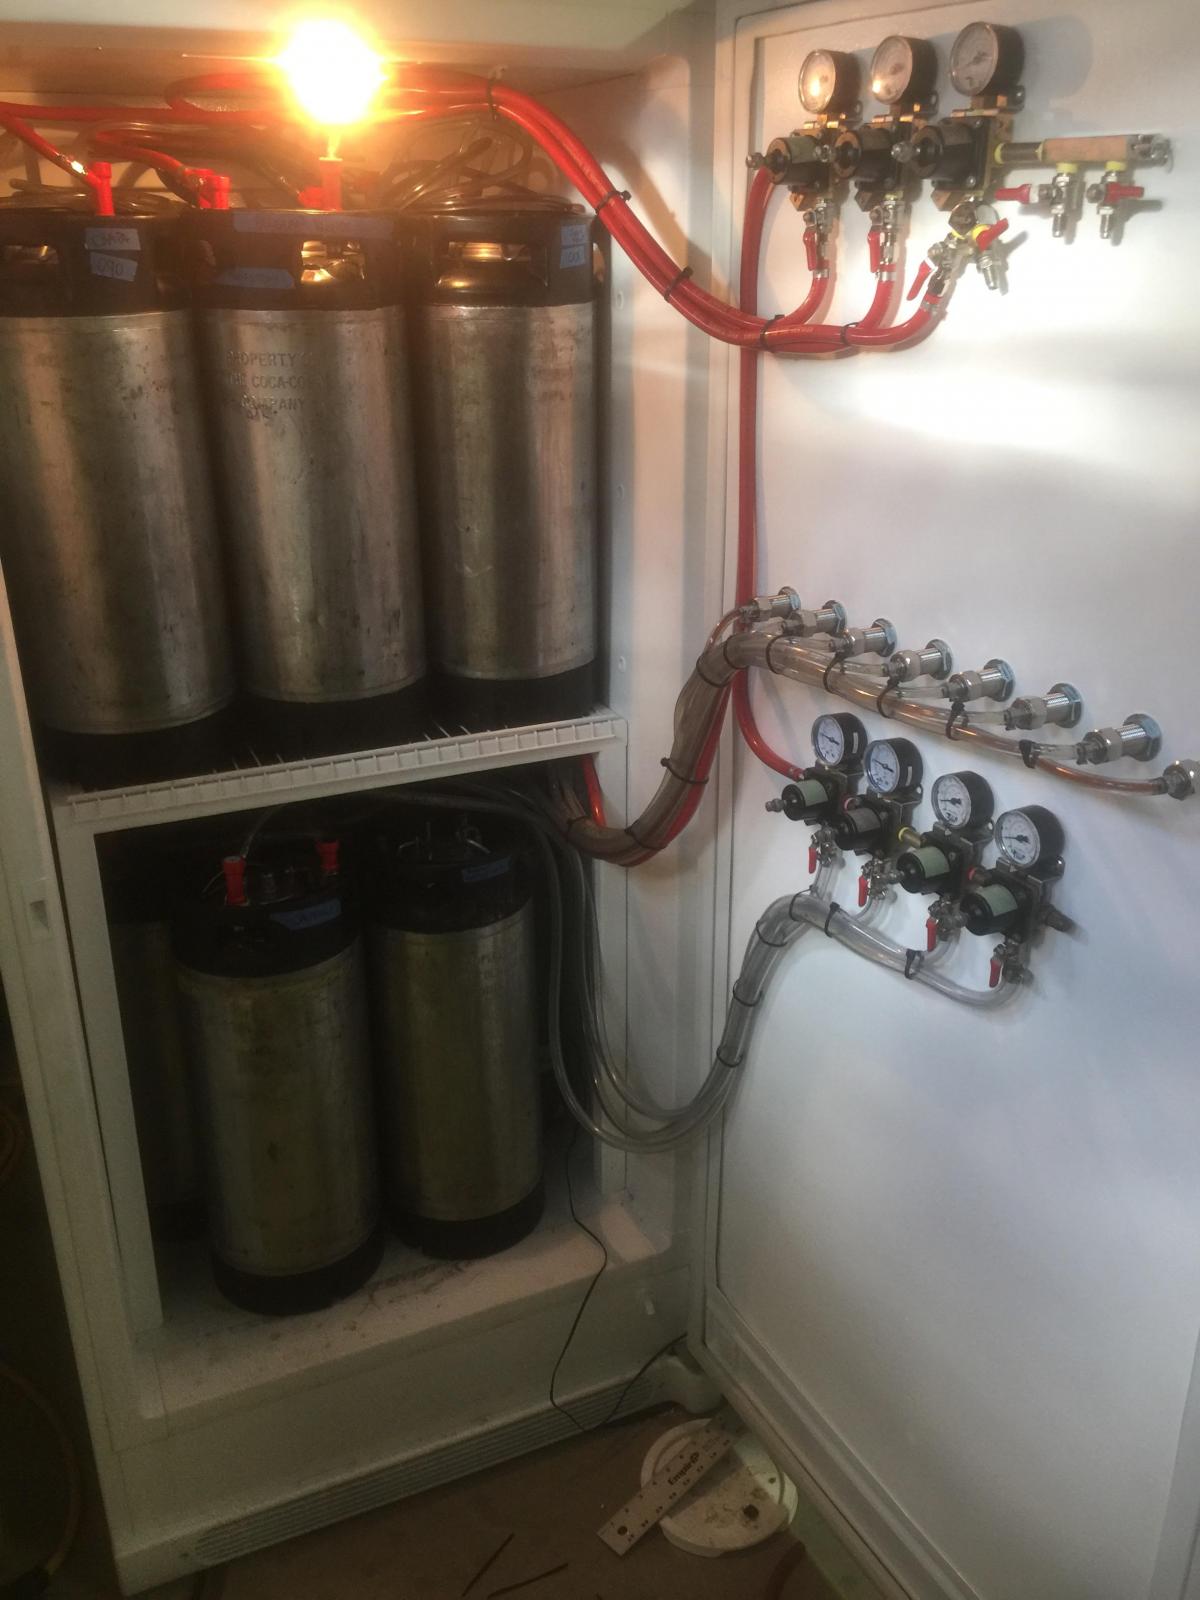
I have 7 Co2 secondary regulators mounted to the door, one with a splitter in case I need to serve all 8 taps on Co2. I also have two outputs on the high side for carbonating.
There is also a nitro tank and regulator on the outside for the nitro tap.

I did 10' feet of 3/16"ID line for all kegs and the pours have been greatly improved in comparison to the 5-6' lines I had in my previous kegerator.

Honestly, the hardest part about my build is that I'm a bit OCD and had to have matching 525SS faucets to match the ones I already had. Those were a bit of a challenge to acquire.

Kegerator1.jpg


kegerator2.jpg
 
I've done similar on my second-hand freezer. Taken the door panel off as CrazyDave has. I also replaced mine with the white FRP panel. It's good stuff. My magnetic gasket was all janked up so I'm going to try to simply use some foam weather strip to seal the gap in place of the magnetic seal. I'll also use latches to secure the door closed.

My question for CrazyDave... How did you secure your gas system to the FRP board? It seems a like a screw would simply pull out of the plastic.

I have decided to use 5 taps on my Kegerator and came up with a really strong way to mount the taps. See below:

1. I located and each tap 3" on center. I drilled a small pilot hole.
2. (with the inner panel off) I used a speed square and a piece of straight metal rod to push through the foam insulation in the door to locate the hole in the foam on the inside of the door.
3. I used a hole saw to make a hole for each tap but only through the metal front of the door.
4. Using PVC large enough to fit a shank through the I.D., I made crude saw teeth on the end and "sawed" out the foam insulation.
5. I cut the PVC to length (depth of the door without the inner panel mounted) and inserted the pieces inside the door.
6. Mount New FRP Board flat panel.
7. Locate hole locations on inner panel and use the 7/8" hole saw to create holes for shank.
8. Mount shank and tighten with lock nut.

This produces a significantly more stable tap mount because you have something to actually compress against (the PVC pipe). Rock solid... Just wanted to share for someone else building in the future.
 
My question for CrazyDave... How did you secure your gas system to the FRP board? It seems a like a screw would simply pull out of the plastic.


I didn't use FRP for the exact reason you mention. I actually used lauan plywood which is at Home Depot as "underlayment". I cut it to size and coated both sides heavily with a good quality semi-gloss latex paint.
Lauan is good for areas of high humidity and as it's about 1/4" thick, there's enough there for the screws to hold on to.
Also, as a bonus, the sheet of underlayment was only $10 vs. the $30-35 that FRP was.
 
^^^^
Annnnnd... I'm kicking myself now! lol! I didn't have paint on hand. I would likely have cost me nearly the same in the long run anyway.
I'm still considering a location for my gas distribution system. Maybe I can carve out a small section of door foam about 1/4" deep and inlay some ply in there under the FRP. That would get some nice traction for some screws to hold onto.


Or just gorilla glue a sheet of something to the back of the FRP for the screws to hold onto. You can get a quarter sheet of lauan for pretty cheap...
Since it'll be behind the FRP anyway, you shouldn't really need to paint it.
 
Ok. Frustrated. I suppose I just need to suck it up and buy a new gasket, but the weather stripping didn't work. Any idea on how to seal the door on this upright freezer? I've heard there's universal gasket kits out there but I don't know if they are any good. The factory gasket for this door is PRICEY!
 
Ok. Frustrated. I suppose I just need to suck it up and buy a new gasket, but the weather stripping didn't work. Any idea on how to seal the door on this upright freezer? I've heard there's universal gasket kits out there but I don't know if they are any good. The factory gasket for this door is PRICEY!


Have you checked eBay for the factory kit?
Even the universal kits run about $40 for something that may turn out crappy. Not sure though as I've never used one myself...
 
I may clean up the old gasket, use some white vinyl tape to mend the torn area of the overcoating and see if I can get it to work. Thanks for the reminder about fleaBay... I'll try there too!
 
I may clean up the old gasket, use some white vinyl tape to mend the torn area of the overcoating and see if I can get it to work. Thanks for the reminder about fleaBay... I'll try there too!


I read somewhere that you can use silicone to patch torn areas also. Apply silicone, then use wax paper to form it and close the door with the wax paper in place until it dries.
My luck though, it would end up looking horrible if I tried that.
 
I read somewhere that you can use silicone to patch torn areas also. Apply silicone, then use wax paper to form it and close the door with the wax paper in place until it dries.
My luck though, it would end up looking horrible if I tried that.

That would make sense... It is a flexible material. I'll re-mount my gasket and try this before ordering a new gasket! Thanks for the tip.

I've got to get to the bottom of what caused the crushed/ripped problem in the first place. I examined the door in the closed position and it appears the door is racked/warped. The bottom corner opposite the hinges is spaced much more than the top. Looks like I'll be removing the taps, pulling the door off the hinges and laying it on the floor to see just how bad it is warped.
 
It's been a while since I've posted on this site so bear with me. I recently purchased a Fridgidaire 20 cu ft model (frost free-no coils in the shelves) to convert like the OP. I have gone over all of the replies from everyone here. My concern is that do I really want to drill a few holes in the back of the unit just to run CO2 lines? I know I can easily put my 20 lb tank inside and go from there. But then I'm taking room away from the other keg(s) that I may put inside. Also, kinda worried about hitting something when drilling through the back plate to run the lines. A good pep talk and some reassurance from those that have the same model and have already drilled might help out. I'd appreciate the boost.
 
Google your unit's model number. A little digging should produce a PDF of the manufactures diagram for the freezer. It will give you a good idea of where the refrigerant lines run. You can also use corn starch mixed with rubbing alcohol. The heat from the lines will dry the alcohol producing a distinct powdery finish at the location of each line. Smear on the thin "batter" and plug in the unit. Spread over a wide area for a better idea of the pattern of the lines.
 
Thanks for the reply back. Yes, I'm familiar with the old cornstarch method of finding the coolant lines. Used to have a little Sanyo two corny keggerator that was sweet before it bit the dust. That seems like a long time ago when everyone on here was doing that type of conversion. Then came keezers and such. Been trying to find a PDF or something online that would show me where they would be located. So far it's been nil. Still looking!
 
It sounds like we may have the same unit. Personally I just drilled two holes (one for CO2, one for beer gas) next to the drain for the defrost, there was plenty of room to look under the back to see what we there.
 
I drilled two holes in the back similar to the OP. I wasn't concerned with coolant lines back there, as when it's running, it's pretty apparent that the sides and top get warm while the back doesn't.
 
I did remove all of the door shelves after all. Especially after the door slammed closed on me while trying to load a keg into it and broke a couple of bottles that I had stored there.
I also skipped on the 90 degree tailpieces as the line bends just fine and may even take up less space. Plus, I couldn't find the 90's for a decent price anywhere.

Was it difficult to get the shelving off as cleanly as you have? I like the look of yours with the regs on the door.

I've just ordered my freezer and it arrives on Monday.
 
No, it took me all of about two minutes with a sharp razor knife.
Keep in mind that the plastic around the edge of the doors holds the gasket in place, so you have to leave enough there for it to continue functioning as a solid clamp.
I also intentionally left a little extra on mine to hold the board that I replaced the shelves with.
I did find the remaining strip of plastic to break easily if you bend it too much, so be careful getting that board in if you do it like I did.

To get the board in, I removed all of the screws from three sides of the door and slid it in. Then screwed it back on being careful not to tweak the gasket or plastic.
 
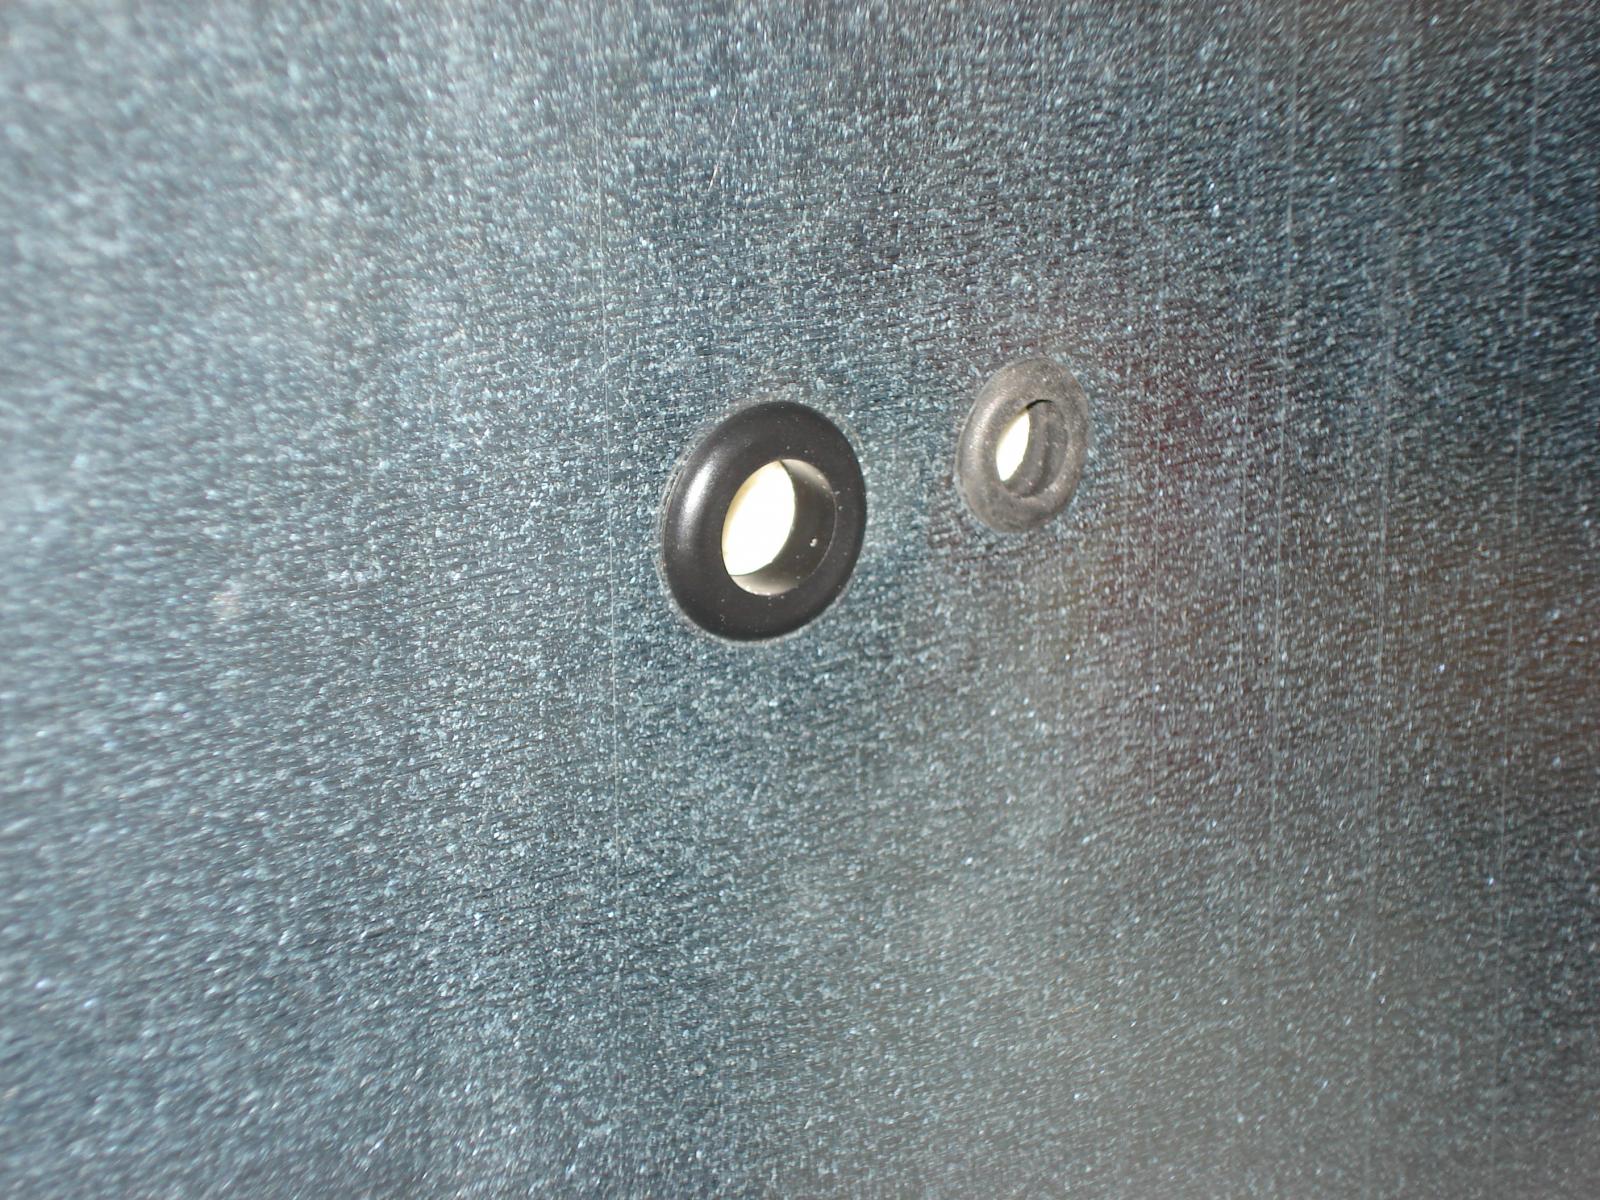
Bit the bullet and made two holes to the right and above the inside back panel (hump). This was done with a 1/8" bit and barely drilling through. Then I used a 12 gauge bare copper wire to probe the hole. Nothing but insulation so I enlarged the hole using a larger bit that was the same diameter of an awl. The awl was pushed through and stopped at the back panel from there I pushed it through. I continued probing the hole with the awl and did not find any refrigerant lines. Success! Holes were enlarged to accommodate one 1/2" (inside dia.) grommet for the CO2 tubing and one 3/8" (inside dia.) grommet for the temp probe. The back panel holes were also trimmed out with the grommets also. So, in essence my task was accomplished after much deliberation from info and replies found here. My thanks to the OP for starting this thread and to others that have posted their info and pics to boot. Here's a pic of my work.

DSC00892.jpg


DSC00891.jpg
 
Nice job. For others using the same style upright freezers, that is the perfect location for bringing in your lines.

I used a 3/8" SS tubing bent in a 90 to go through the wall. That way the 90 elbow is on the outside and gives me a tight turn on the tubing so I can push the freezer right up against the wall and not kink anything. The 5/16" gas lines press on and seal to the 3/8" tubing for a good tight seal. I also used an oetiker on the lines.
 
Man, those grommets really make the job look nice. Good job!

So, I had planned on reinstalling my factory seal on my Kegerator's door this weekend. I looked around with no success and finally asked the wife where it was. "I threw that thing away" she said...

Well, looks like I get to order a new seal weather I wanted to or not.
 
Jon,
You don't have any trouble with leaks on the gas side? It seems like the tube just slipped over the straight wall of the SS tube would leak even though it's clamped. I have 2 SS bulkheads I was going to use...
 
Jon,
You don't have any trouble with leaks on the gas side? It seems like the tube just slipped over the straight wall of the SS tube would leak even though it's clamped. I have 2 SS bulkheads I was going to use...

No, I had to soak the gas tubing in hot water to get it over the SS tubing. Very snug even before I sealed with the Oetiker clamps.
 
Any worries about leaving the fan running 24/7 in these freezers? I picked up a fffh20f2qw model and I've wired the compressor to an STC-1000 but both the compressor and the fan are on the same line.

My thought is to cut the defrost, splice the power from that into the fan, and replace the defrost timer with a 12/12hr one vs the 23:30/30min it has now.

Until then it's 100% fan. I know it wasnt supposed to run at full duty, but are any of you doing the same? Any issues with it failing early?
 
I wouldn't really see an issue running the fan 24x7 and if it did go out, I'd imagine their pretty generic and cheap to replace. As long as you're going to hack into the wiring, I'd suggest making sure the light comes on when the door opens. Not a huge issue, but my light only comes on if the unit is currently chilling and I open the door. It's on my to-do list of things to change.
 
As long as you're going to hack into the wiring, I'd suggest making sure the light comes on when the door opens. Not a huge issue, but my light only comes on if the unit is currently chilling and I open the door. It's on my to-do list of things to change.

I had that issue when I had the STC-1000 powering the whole fridge.

I now have power going to both the normal fridge circuitry and the STC-1000. The relay separately triggers the hot side of the compressor wire. I get the normal door switch/light action.

Only issue is the fan being at 100% because the #1 setting on the fridge is 10.2*F so it thinks it's trying to chill.
 
JonW do you mind sharing where you sourced that drip tray from? I have been looking all over the place and all the drip trays I find are really small. I need something like you have that is around 22"

Thank you! I built a model based on your post and I am loving it!
 
Back
Top