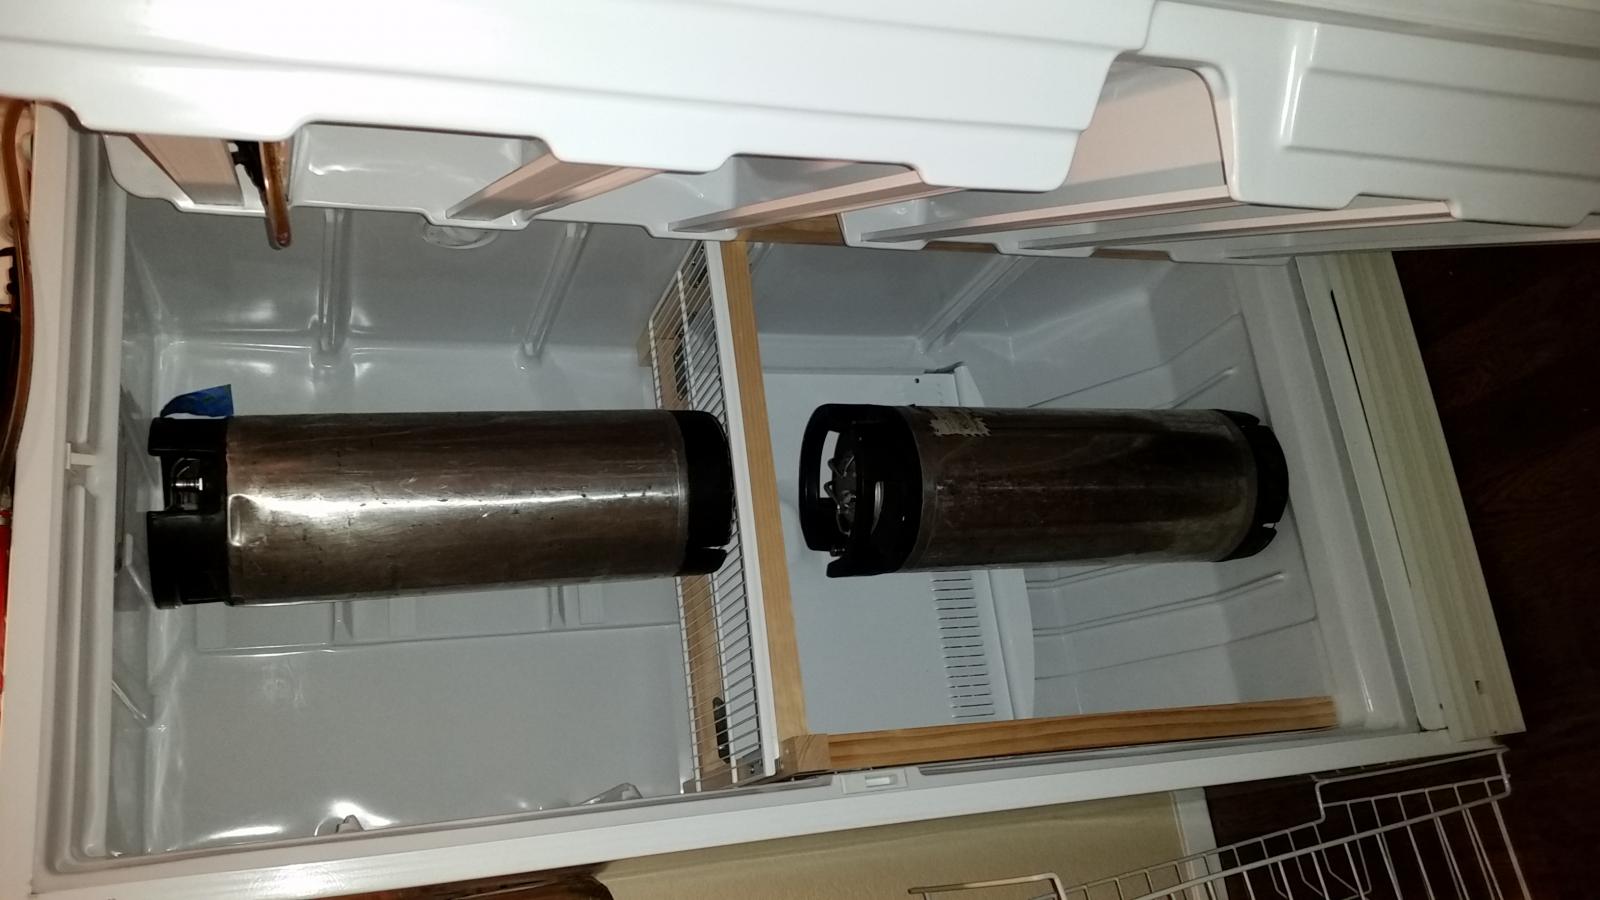
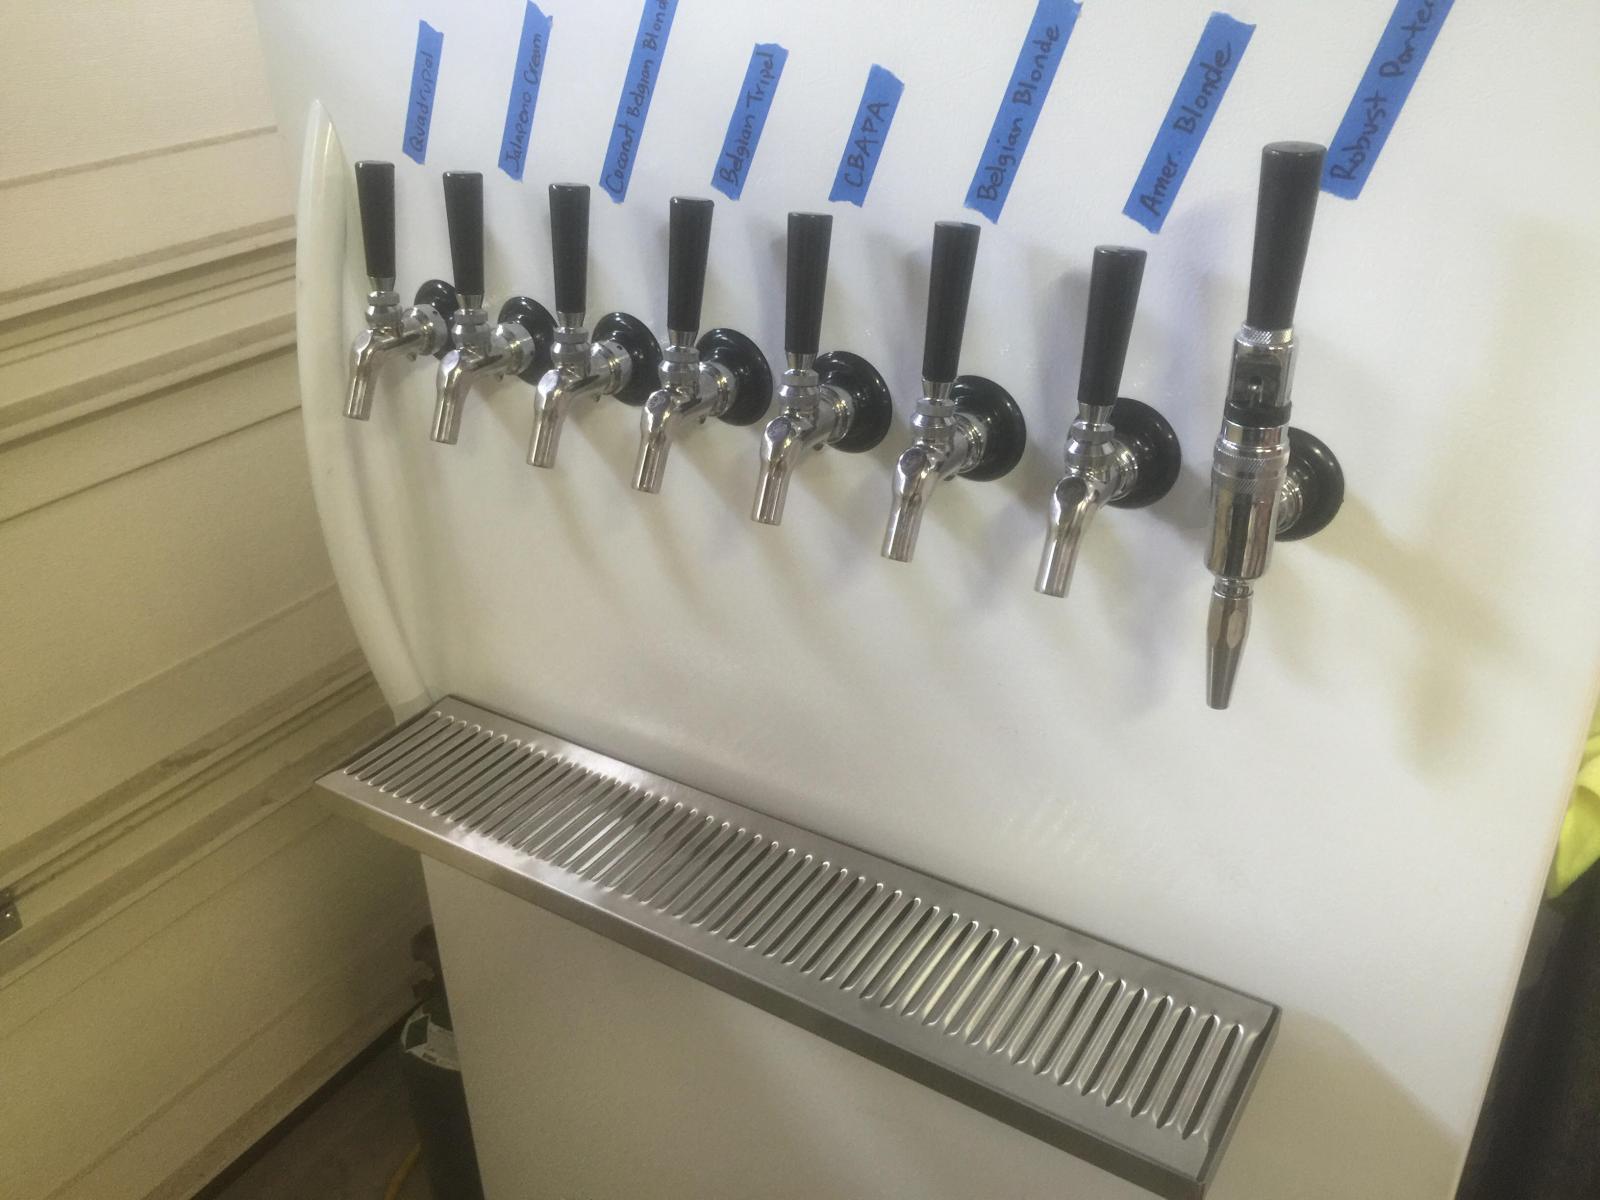
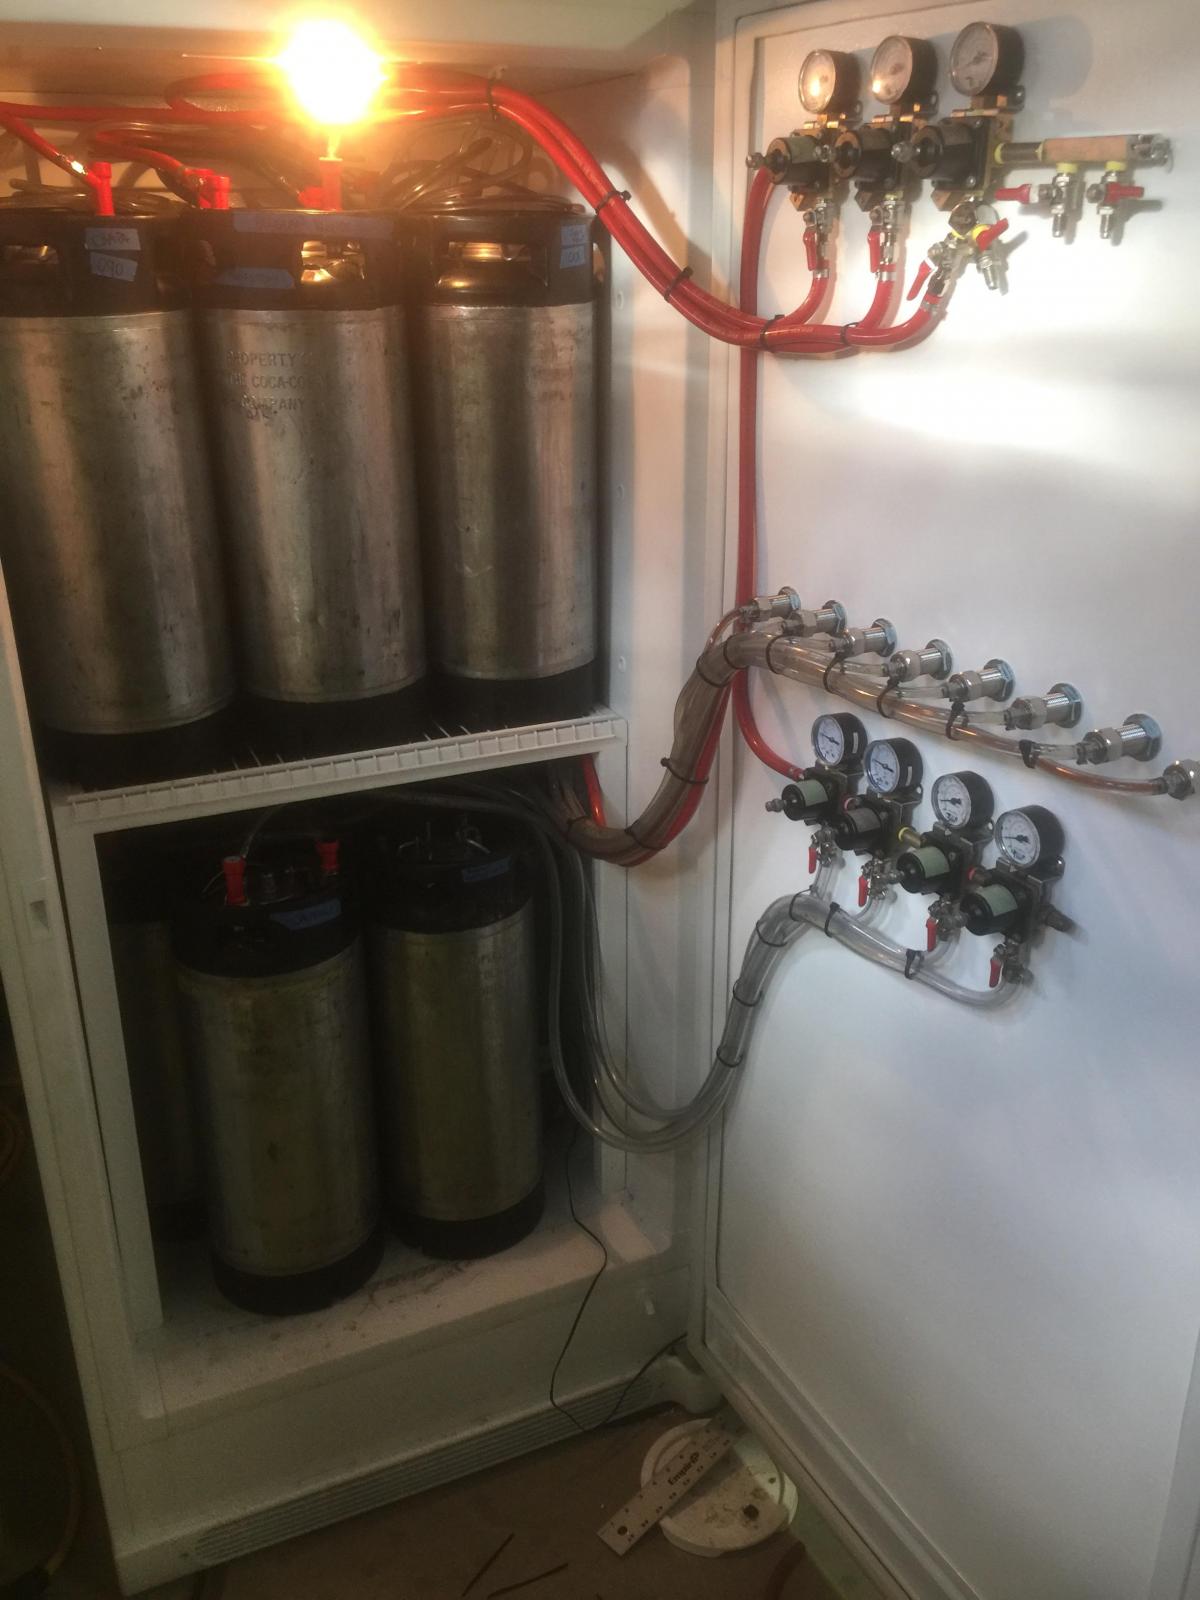
Upright Keezer, 8 taps, 11 kegs

Homebrew Talk - Beer, Wine, Mead, & Cider Brewing Discussion Forum

Help Support Homebrew Talk - Beer, Wine, Mead, & Cider Brewing Discussion Forum:

This site may earn a commission from merchant affiliate links, including eBay, Amazon, and others.
Ok. Frustrated. I suppose I just need to suck it up and buy a new gasket, but the weather stripping didn't work. Any idea on how to seal the door on this upright freezer? I've heard there's universal gasket kits out there but I don't know if they are any good. The factory gasket for this door is PRICEY!


Have you checked eBay for the factory kit?
Even the universal kits run about $40 for something that may turn out crappy. Not sure though as I've never used one myself...
 
I may clean up the old gasket, use some white vinyl tape to mend the torn area of the overcoating and see if I can get it to work. Thanks for the reminder about fleaBay... I'll try there too!
 
I may clean up the old gasket, use some white vinyl tape to mend the torn area of the overcoating and see if I can get it to work. Thanks for the reminder about fleaBay... I'll try there too!


I read somewhere that you can use silicone to patch torn areas also. Apply silicone, then use wax paper to form it and close the door with the wax paper in place until it dries.
My luck though, it would end up looking horrible if I tried that.
 
I read somewhere that you can use silicone to patch torn areas also. Apply silicone, then use wax paper to form it and close the door with the wax paper in place until it dries.
My luck though, it would end up looking horrible if I tried that.

That would make sense... It is a flexible material. I'll re-mount my gasket and try this before ordering a new gasket! Thanks for the tip.

I've got to get to the bottom of what caused the crushed/ripped problem in the first place. I examined the door in the closed position and it appears the door is racked/warped. The bottom corner opposite the hinges is spaced much more than the top. Looks like I'll be removing the taps, pulling the door off the hinges and laying it on the floor to see just how bad it is warped.
 
It's been a while since I've posted on this site so bear with me. I recently purchased a Fridgidaire 20 cu ft model (frost free-no coils in the shelves) to convert like the OP. I have gone over all of the replies from everyone here. My concern is that do I really want to drill a few holes in the back of the unit just to run CO2 lines? I know I can easily put my 20 lb tank inside and go from there. But then I'm taking room away from the other keg(s) that I may put inside. Also, kinda worried about hitting something when drilling through the back plate to run the lines. A good pep talk and some reassurance from those that have the same model and have already drilled might help out. I'd appreciate the boost.
 
Google your unit's model number. A little digging should produce a PDF of the manufactures diagram for the freezer. It will give you a good idea of where the refrigerant lines run. You can also use corn starch mixed with rubbing alcohol. The heat from the lines will dry the alcohol producing a distinct powdery finish at the location of each line. Smear on the thin "batter" and plug in the unit. Spread over a wide area for a better idea of the pattern of the lines.
 
Thanks for the reply back. Yes, I'm familiar with the old cornstarch method of finding the coolant lines. Used to have a little Sanyo two corny keggerator that was sweet before it bit the dust. That seems like a long time ago when everyone on here was doing that type of conversion. Then came keezers and such. Been trying to find a PDF or something online that would show me where they would be located. So far it's been nil. Still looking!
 
It sounds like we may have the same unit. Personally I just drilled two holes (one for CO2, one for beer gas) next to the drain for the defrost, there was plenty of room to look under the back to see what we there.
 
I drilled two holes in the back similar to the OP. I wasn't concerned with coolant lines back there, as when it's running, it's pretty apparent that the sides and top get warm while the back doesn't.
 
I did remove all of the door shelves after all. Especially after the door slammed closed on me while trying to load a keg into it and broke a couple of bottles that I had stored there.
I also skipped on the 90 degree tailpieces as the line bends just fine and may even take up less space. Plus, I couldn't find the 90's for a decent price anywhere.

Was it difficult to get the shelving off as cleanly as you have? I like the look of yours with the regs on the door.

I've just ordered my freezer and it arrives on Monday.
 
No, it took me all of about two minutes with a sharp razor knife.
Keep in mind that the plastic around the edge of the doors holds the gasket in place, so you have to leave enough there for it to continue functioning as a solid clamp.
I also intentionally left a little extra on mine to hold the board that I replaced the shelves with.
I did find the remaining strip of plastic to break easily if you bend it too much, so be careful getting that board in if you do it like I did.

To get the board in, I removed all of the screws from three sides of the door and slid it in. Then screwed it back on being careful not to tweak the gasket or plastic.
 
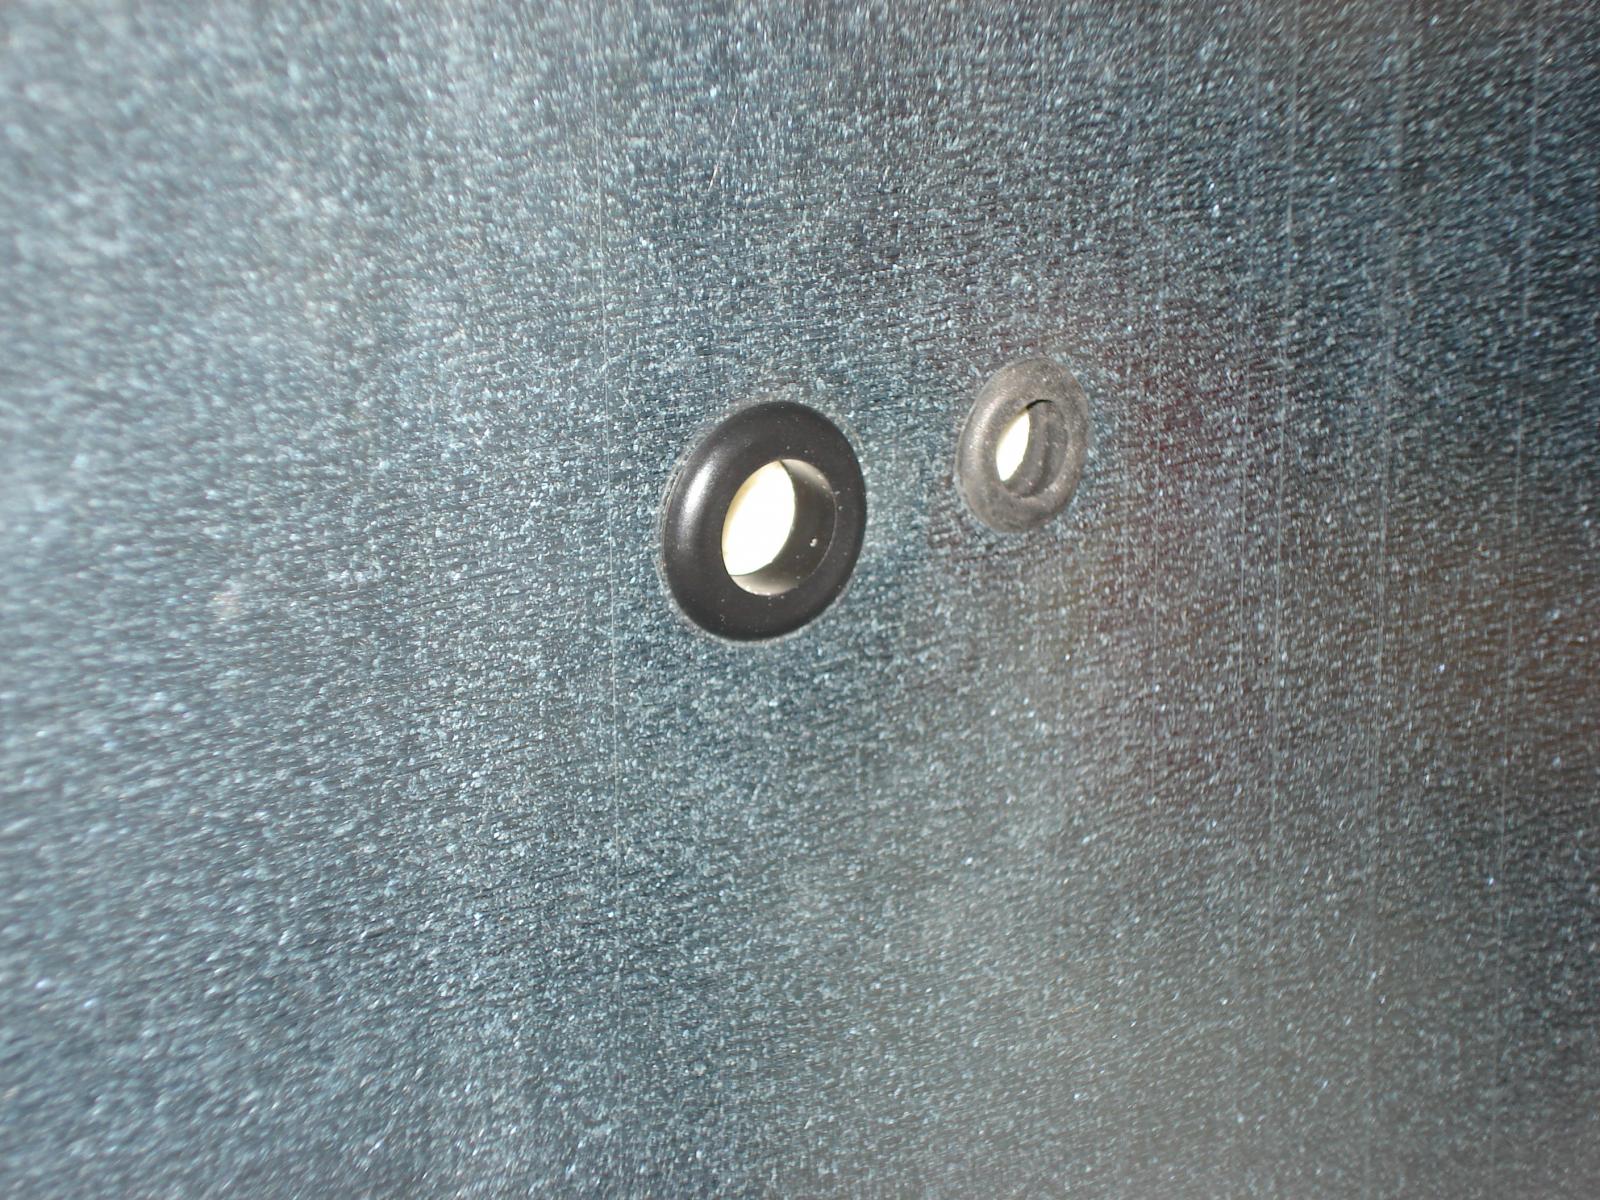
Bit the bullet and made two holes to the right and above the inside back panel (hump). This was done with a 1/8" bit and barely drilling through. Then I used a 12 gauge bare copper wire to probe the hole. Nothing but insulation so I enlarged the hole using a larger bit that was the same diameter of an awl. The awl was pushed through and stopped at the back panel from there I pushed it through. I continued probing the hole with the awl and did not find any refrigerant lines. Success! Holes were enlarged to accommodate one 1/2" (inside dia.) grommet for the CO2 tubing and one 3/8" (inside dia.) grommet for the temp probe. The back panel holes were also trimmed out with the grommets also. So, in essence my task was accomplished after much deliberation from info and replies found here. My thanks to the OP for starting this thread and to others that have posted their info and pics to boot. Here's a pic of my work.

DSC00892.jpg


DSC00891.jpg
 
Nice job. For others using the same style upright freezers, that is the perfect location for bringing in your lines.

I used a 3/8" SS tubing bent in a 90 to go through the wall. That way the 90 elbow is on the outside and gives me a tight turn on the tubing so I can push the freezer right up against the wall and not kink anything. The 5/16" gas lines press on and seal to the 3/8" tubing for a good tight seal. I also used an oetiker on the lines.
 
Man, those grommets really make the job look nice. Good job!

So, I had planned on reinstalling my factory seal on my Kegerator's door this weekend. I looked around with no success and finally asked the wife where it was. "I threw that thing away" she said...

Well, looks like I get to order a new seal weather I wanted to or not.
 
Jon,
You don't have any trouble with leaks on the gas side? It seems like the tube just slipped over the straight wall of the SS tube would leak even though it's clamped. I have 2 SS bulkheads I was going to use...
 
Jon,
You don't have any trouble with leaks on the gas side? It seems like the tube just slipped over the straight wall of the SS tube would leak even though it's clamped. I have 2 SS bulkheads I was going to use...

No, I had to soak the gas tubing in hot water to get it over the SS tubing. Very snug even before I sealed with the Oetiker clamps.
 
Any worries about leaving the fan running 24/7 in these freezers? I picked up a fffh20f2qw model and I've wired the compressor to an STC-1000 but both the compressor and the fan are on the same line.

My thought is to cut the defrost, splice the power from that into the fan, and replace the defrost timer with a 12/12hr one vs the 23:30/30min it has now.

Until then it's 100% fan. I know it wasnt supposed to run at full duty, but are any of you doing the same? Any issues with it failing early?
 
I wouldn't really see an issue running the fan 24x7 and if it did go out, I'd imagine their pretty generic and cheap to replace. As long as you're going to hack into the wiring, I'd suggest making sure the light comes on when the door opens. Not a huge issue, but my light only comes on if the unit is currently chilling and I open the door. It's on my to-do list of things to change.
 
As long as you're going to hack into the wiring, I'd suggest making sure the light comes on when the door opens. Not a huge issue, but my light only comes on if the unit is currently chilling and I open the door. It's on my to-do list of things to change.

I had that issue when I had the STC-1000 powering the whole fridge.

I now have power going to both the normal fridge circuitry and the STC-1000. The relay separately triggers the hot side of the compressor wire. I get the normal door switch/light action.

Only issue is the fan being at 100% because the #1 setting on the fridge is 10.2*F so it thinks it's trying to chill.
 
JonW do you mind sharing where you sourced that drip tray from? I have been looking all over the place and all the drip trays I find are really small. I need something like you have that is around 22"

Thank you! I built a model based on your post and I am loving it!
 
JonW do you mind sharing where you sourced that drip tray from? I have been looking all over the place and all the drip trays I find are really small. I need something like you have that is around 22"


Thank you! I built a model based on your post and I am loving it!


He got his from eBay.
I found it for less on Amazon though.
There's a link to the eBay seller back in this thread someplace, but he had raised his price from $30ish to around $50.
I got mine on Amazon for around $35.
If you need the dimensions, let me know.
 
He got his from eBay.
I found it for less on Amazon though.
There's a link to the eBay seller back in this thread someplace, but he had raised his price from $30ish to around $50.
I got mine on Amazon for around $35.
If you need the dimensions, let me know.

I couldn't find one on amazon, mind linking me?
 
Last edited by a moderator:
JonW do you mind sharing where you sourced that drip tray from? I have been looking all over the place and all the drip trays I find are really small. I need something like you have that is around 22"

Thank you! I built a model based on your post and I am loving it!

I got this 19" tray and it's quite nice. I still have yet to install it, but I've only got one tap working right now anyway so it's not too big a problem.

http://www.amazon.com/gp/product/B002NQIROA/?tag=skimlinks_replacement-20

4108v2KP6uL.jpg
 
Last edited by a moderator:
Different style drip tray, but if you want a nice big one with a backsplash, I got mine from http://www.acumetalfab.com/ They will custom do just about anything you want. Mine has a backsplash with eight holes predrilled for my shanks. Ill have pictures in my own thread in a few weeks (or whenever I get around to putting it all together).
 
FWIW I have the same freezer and tap setup as JonW and the 24" width is perfect. I have a 19" one on my old kegerator and its too small for the door IMHO. If I had to use a shorter one, I would have to put the taps a little too close together for my liking (think collars nearly touching).
Those extra 4-5" make a big difference (that's what she said!) ;)
 
FWIW I have the same freezer and tap setup as JonW and the 24" width is perfect.

Agree! If you go 8 taps, you need the 24" model. That puts your taps on 3" centers. If you want fewer taps, you can go with a smaller model, but calculate it based on at least 3" centers. Anything less really cramps the taps.
 
Agree! If you go 8 taps, you need the 24" model. That puts your taps on 3" centers. If you want fewer taps, you can go with a smaller model, but calculate it based on at least 3" centers. Anything less really cramps the taps.

Thanks for the dimensions, that really helped my search. I was able to find one here
http://www.webstaurantstore.com/curtis-dt-24-stainless-steel-24-drip-tray/945DT24.html

for $50.

Any suggestions on how to mount these to the front of the freezer?
 
Thanks for the dimensions, that really helped my search. I was able to find one here

http://www.webstaurantstore.com/curtis-dt-24-stainless-steel-24-drip-tray/945DT24.html


for $50.


Any suggestions on how to mount these to the front of the freezer?


I used some angle brackets from the local hardware store, roughed them up with some sandpaper. Also taped off the freezer where they would go and roughed up the paint with the sand paper there also.
Then attached them with two part, five minute epoxy (also found at the same hardware store).
The tray is then attached to the brackets with Velcro so I can clean it.

Built a few kegerators using this method and never had any fear of the bond being weak. They'll hold up full growlers without issue.
 
Any suggestions on how to mount these to the front of the freezer?

I originally used 3M tape that held up for about 9 months. I now use what is called a keyhole bracket. There is a single screw behind each bracket through the front of the freezer (no worry about hitting anything there).

It required that I routed out the back of the wood triangle a bit to fit the keyhole bracket in there, but the installation is clean with no visible screws.

Here's what the keyhole bracket is: http://www.homedepot.com/p/OOK-20-lb-Large-Keyhole-Hangers-2-Pack-50236/100018911

b0193680-dc1b-4b61-a3bf-ab63ff7a8a32_400.jpg
 
I have seen others that have used the angle brackets, paired with a wooden frame of sorts and then loaded it up with rare earth magnets to attach. I am not sure if it will cause slippage though if you put weight on it. Though I have found with strong magnets if you put something like a piece of tape below where they are sticking they will not jump on top of it to start sliding.
 
I'm working on hanging mine in a way I've not seen done yet. I'll wrap it up in the next few days and make sure I photo-log it as I go so I can do a nifty write-up.
 
Ok. So, I finally got around to mounting my drip tray this evening. I used galvanized 1/2" pipe flange, nipple, and street elbow with another flange. I'll add some Velcro™ that has some skookum holding power under the tray. I don't want it sliding off.
I'm going to eventually drill a hole in the door at the center of the right-hand mount and pass a vinyl drain tube through the pipe to drain into a vessel for collecting dips and leaks.

EDIT: Also, I thought it would be VERY convenient to have it sit low enough to attach a piece of silicone tube to a tap and fill a growler with it sitting on the tray...

20160211_213947.jpg


20160211_214227.jpg


20160212_071937.jpg
 
I originally used 3M tape that held up for about 9 months. I now use what is called a keyhole bracket. There is a single screw behind each bracket through the front of the freezer (no worry about hitting anything there).

It required that I routed out the back of the wood triangle a bit to fit the keyhole bracket in there, but the installation is clean with no visible screws.

Here's what the keyhole bracket is: http://www.homedepot.com/p/OOK-20-lb-Large-Keyhole-Hangers-2-Pack-50236/100018911

b0193680-dc1b-4b61-a3bf-ab63ff7a8a32_400.jpg

Can you give me any details on what you used for the wood triangle?
 
I used 3M double sided automotive moulding tape (I got it at an auto parts store) and it's been holding for over 2 years. I used a 3/4" curved and routed shelf bracket (from Lowes) that I cut to fit the shelf width. So far, they've been holding strong. I use a 1 gallon container for recirculating beer line cleaner that I use three or four times a year, so I know it will hold at least 8 or nine pounds.

IMAG0698.jpg


IMAG0699.jpg
 
Back
Top