Turning your Fermonster into a complete closed transfer system for cheap!

Homebrew Talk - Beer, Wine, Mead, & Cider Brewing Discussion Forum

Help Support Homebrew Talk - Beer, Wine, Mead, & Cider Brewing Discussion Forum:

This site may earn a commission from merchant affiliate links, including eBay, Amazon, and others.
Could I do this with a bottling bucket instead of a fermonster?
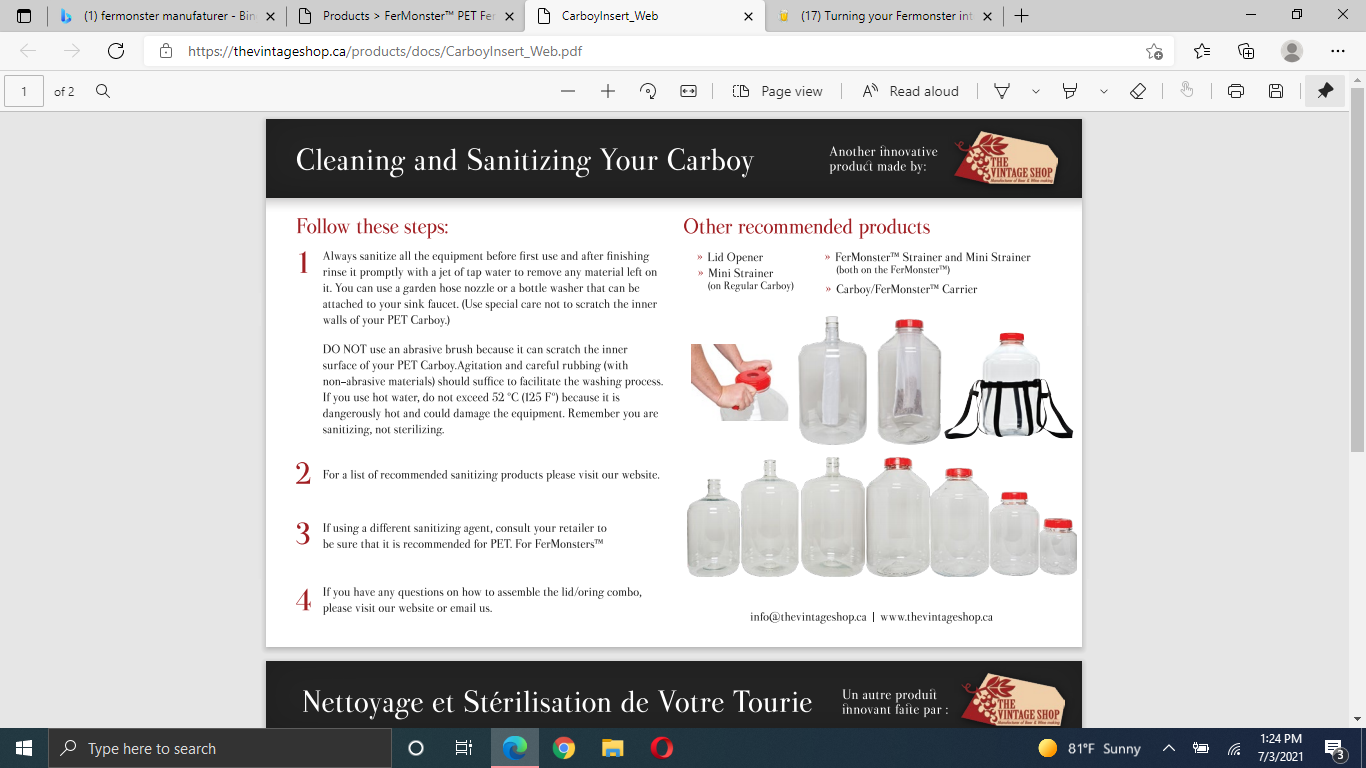
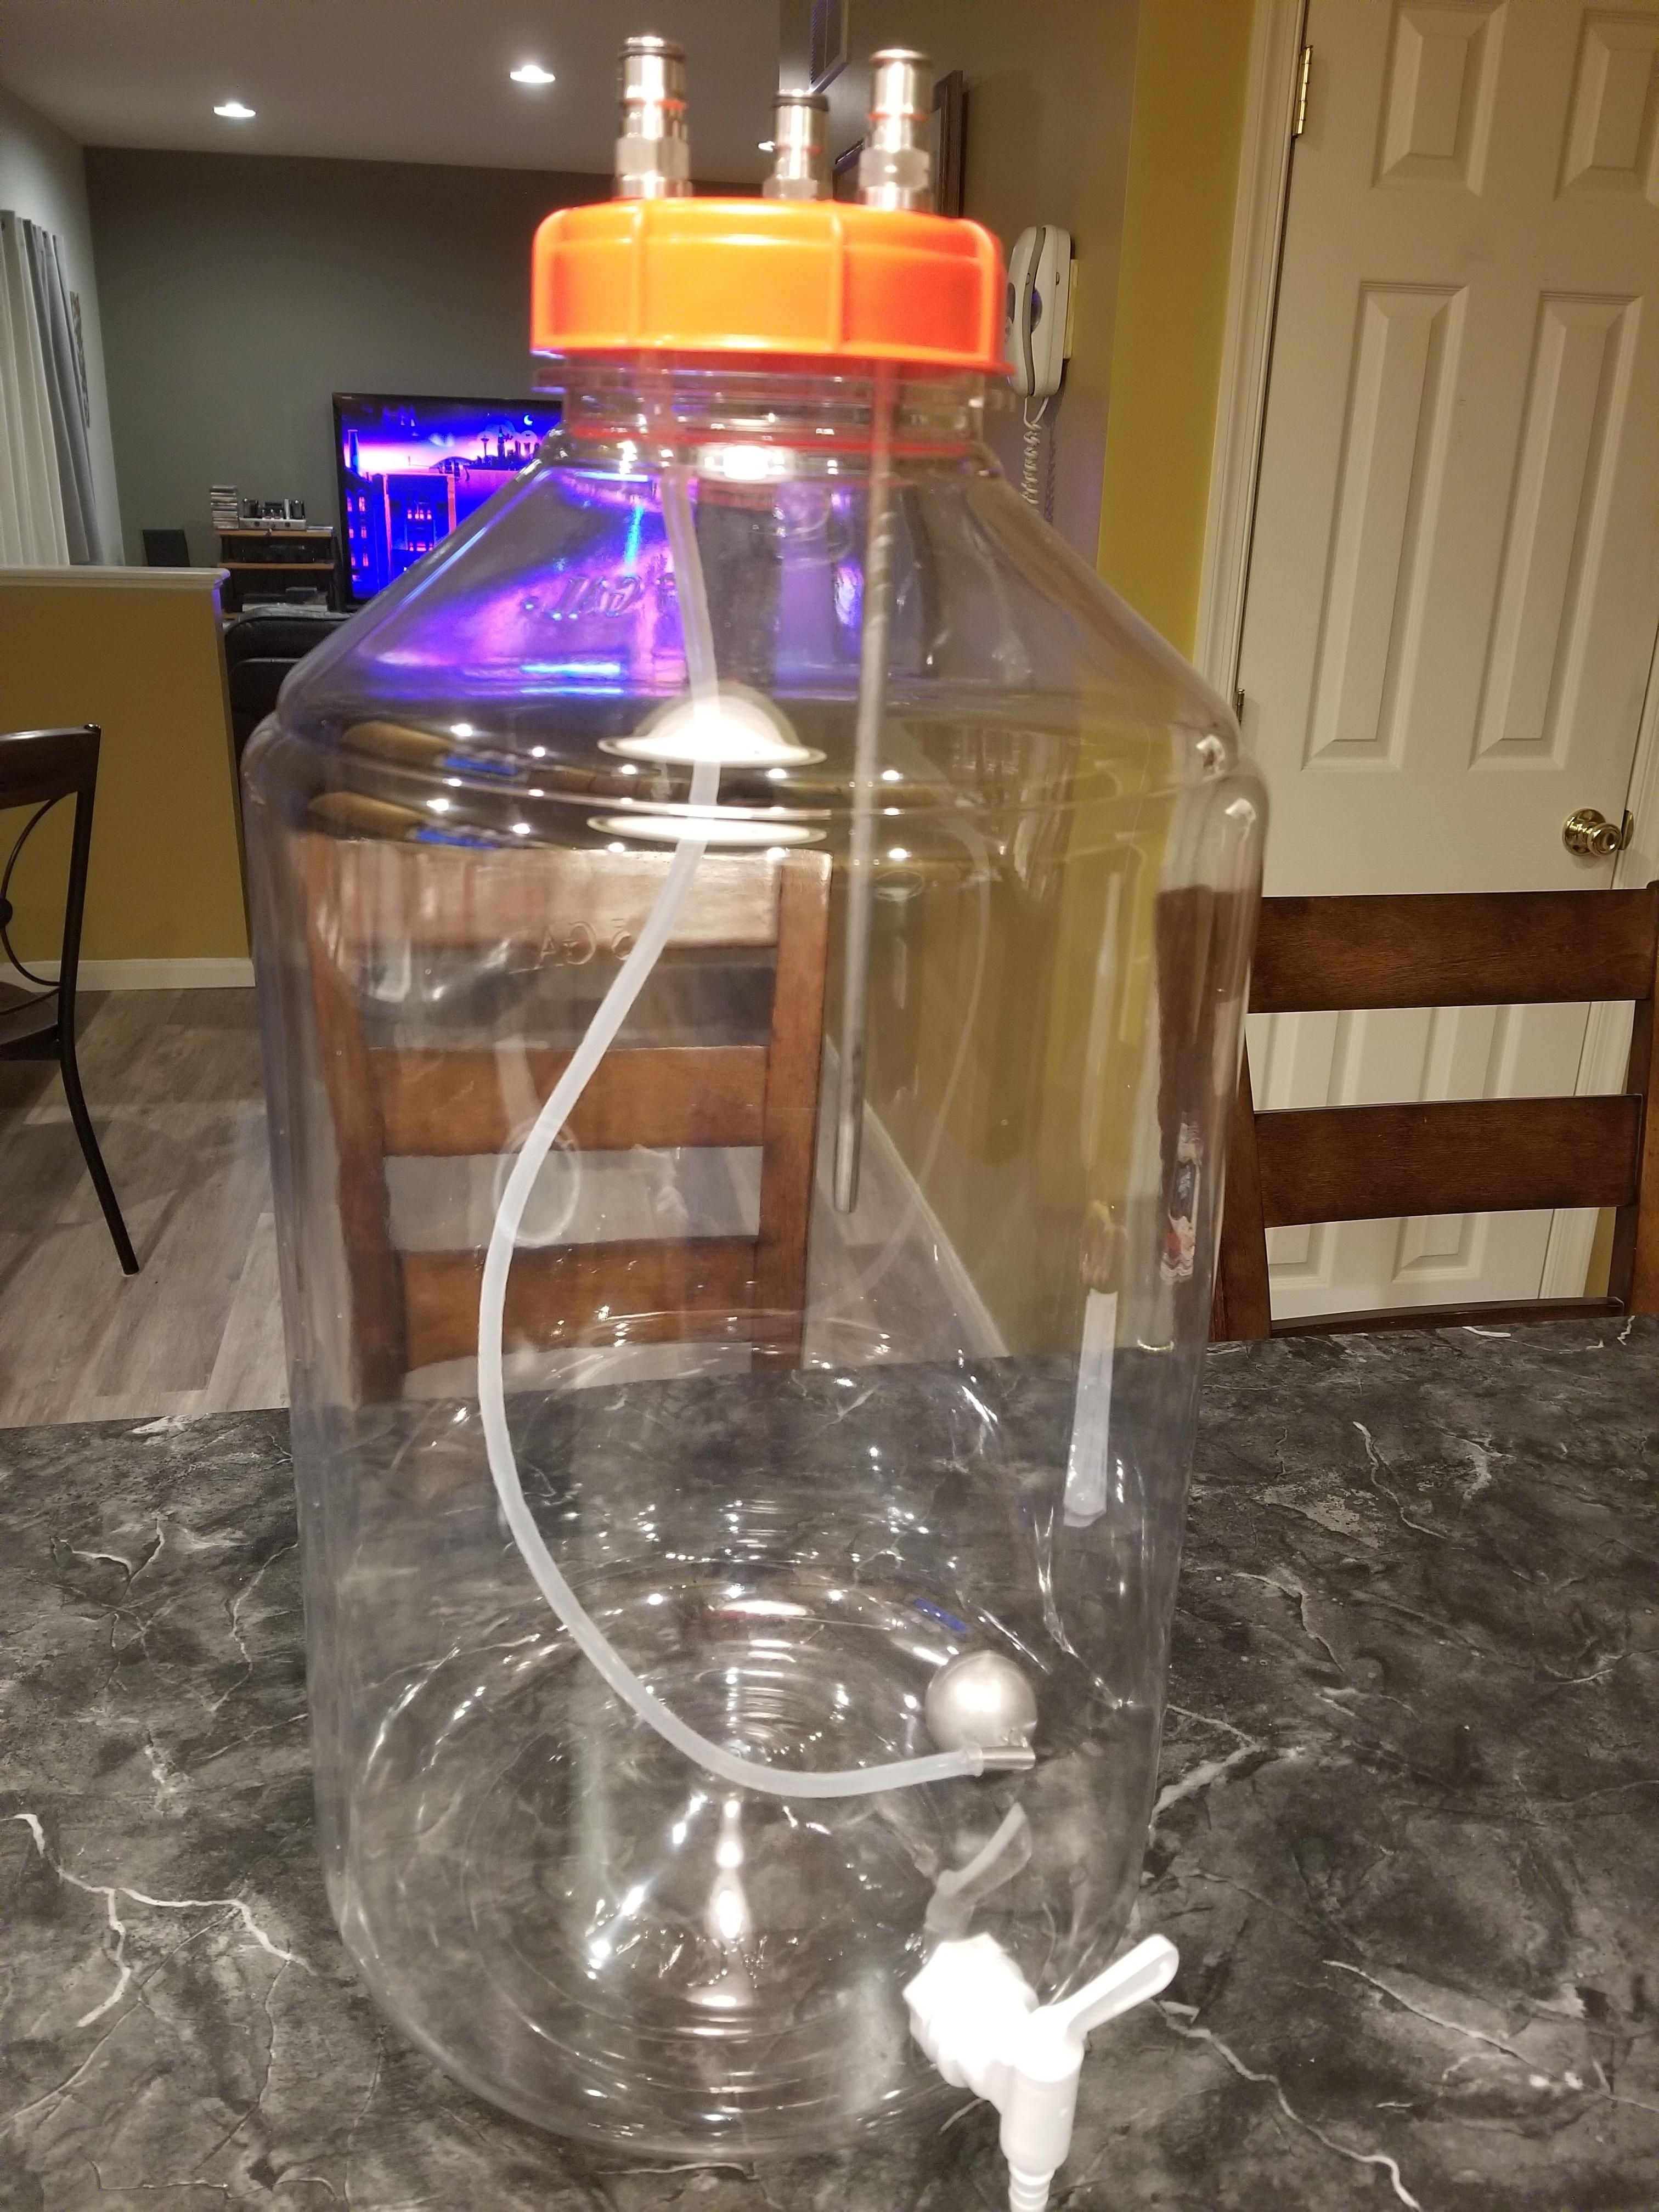
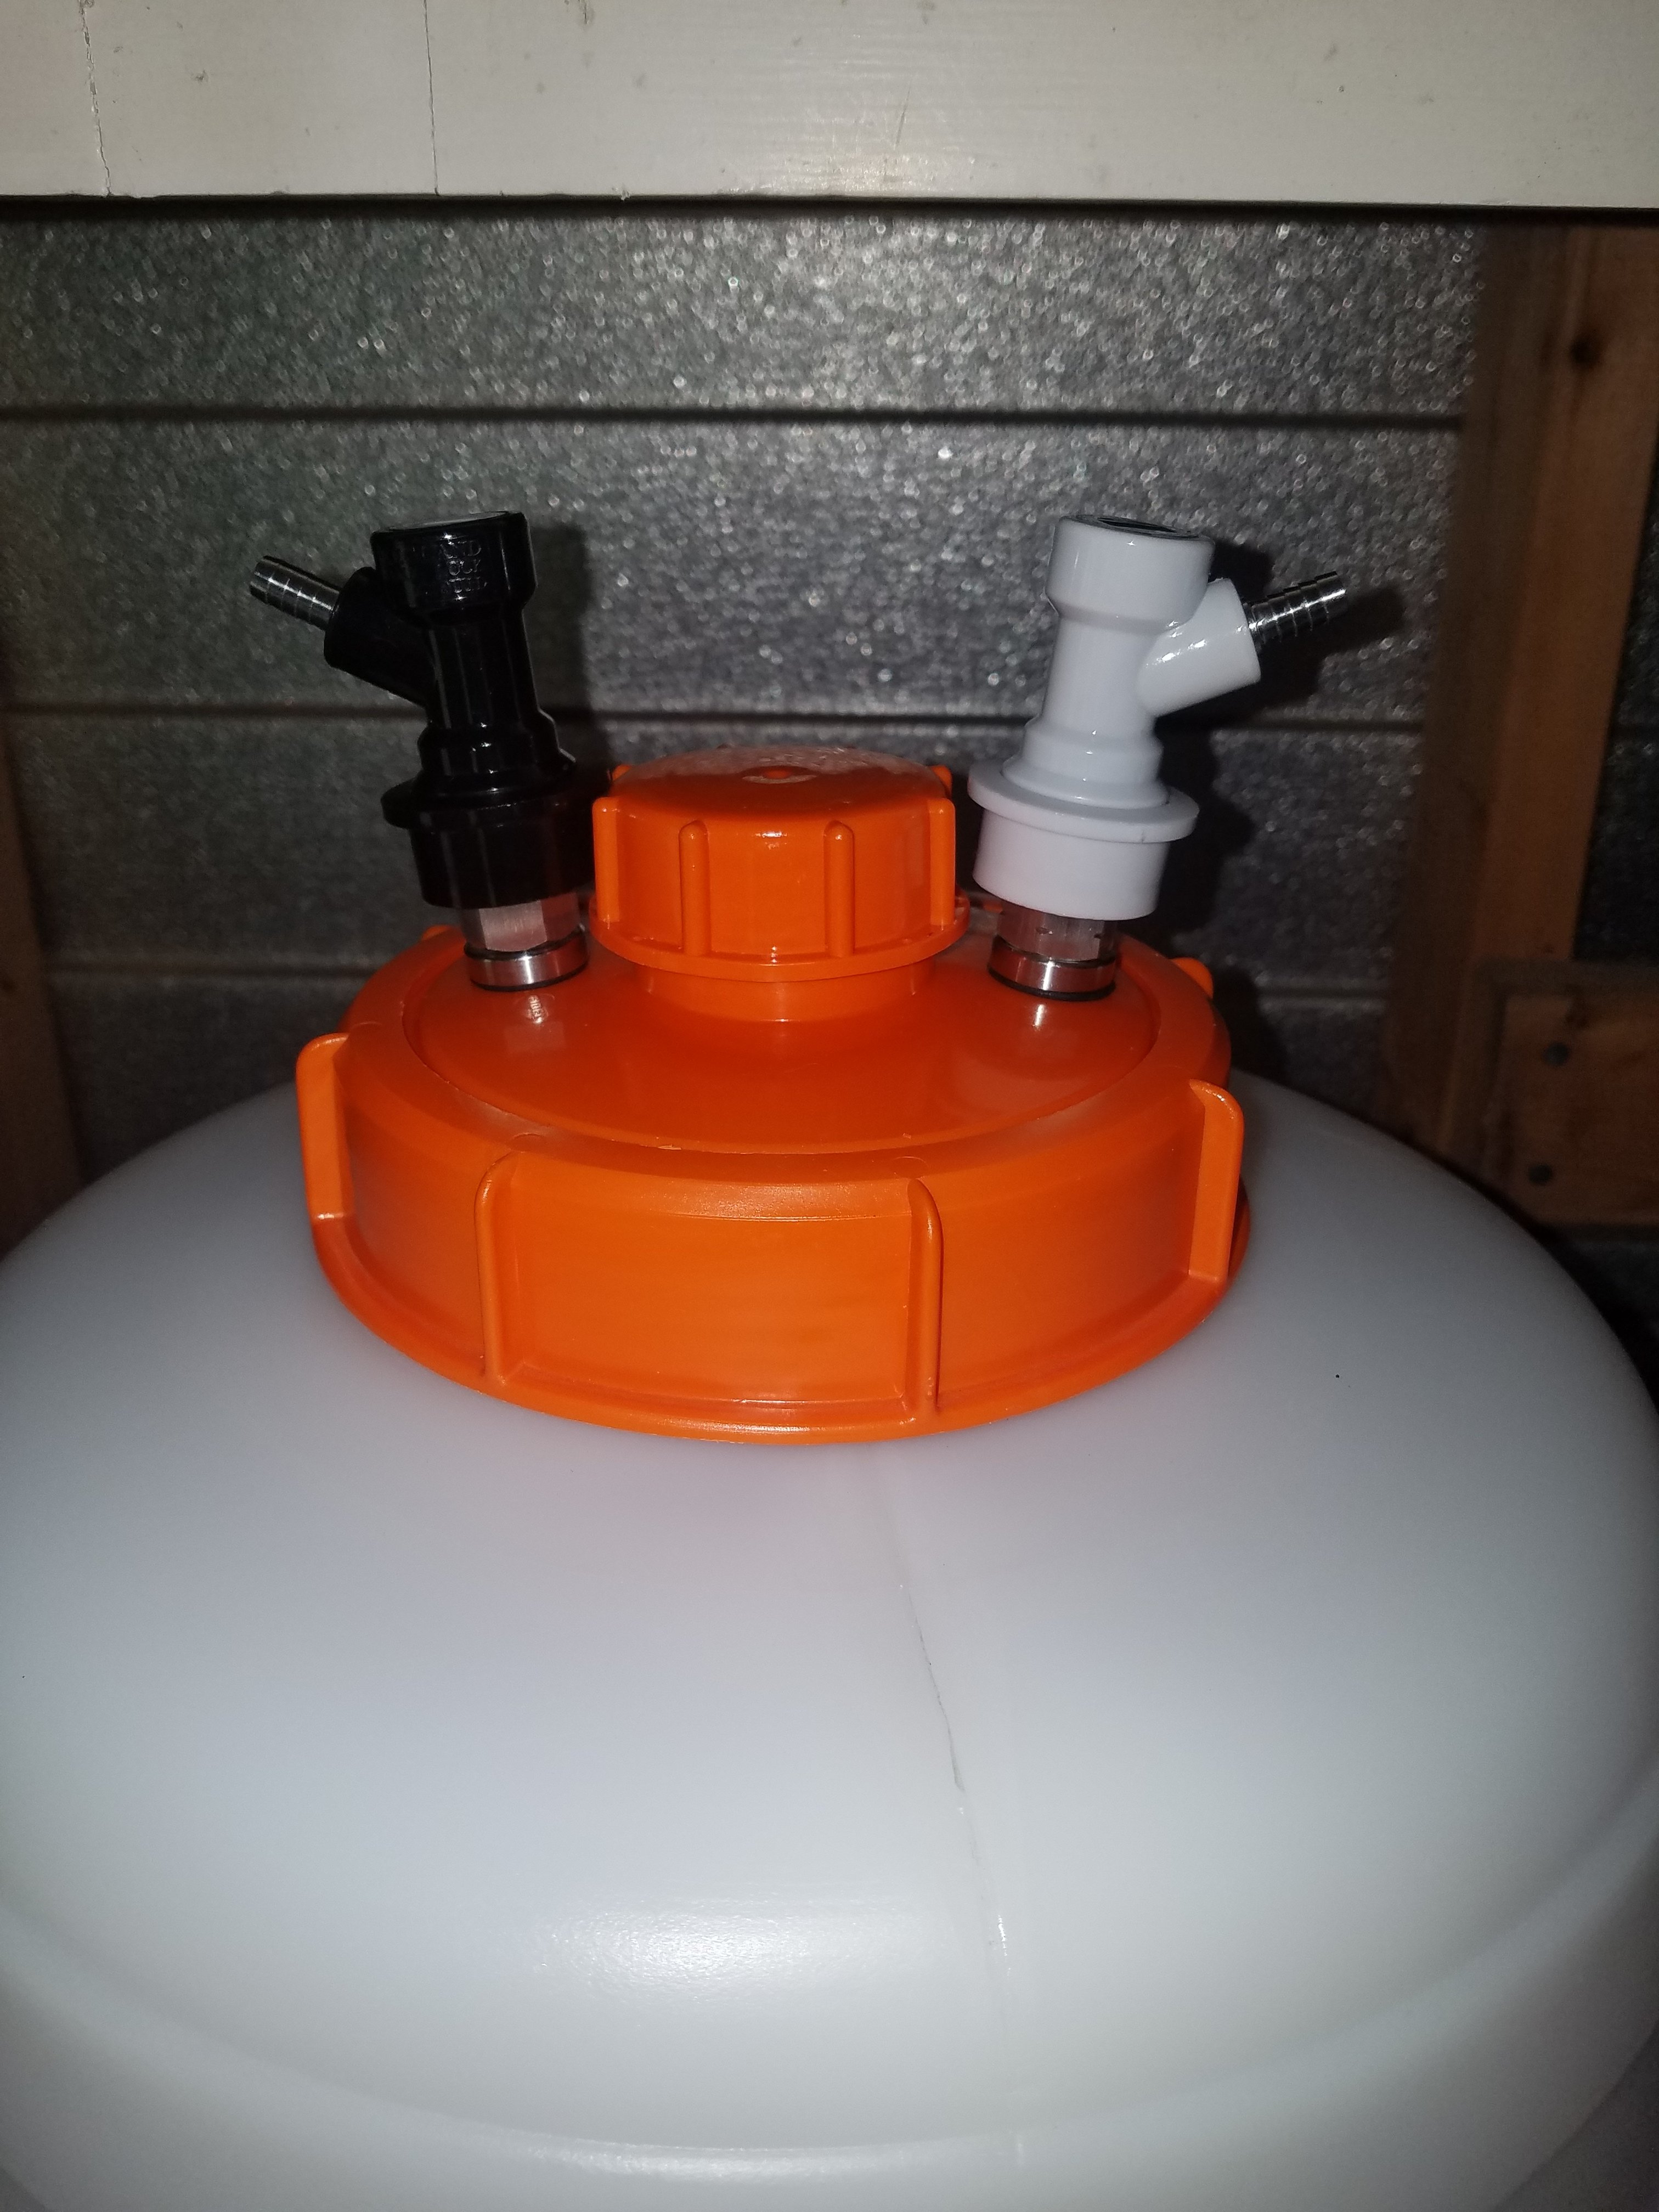
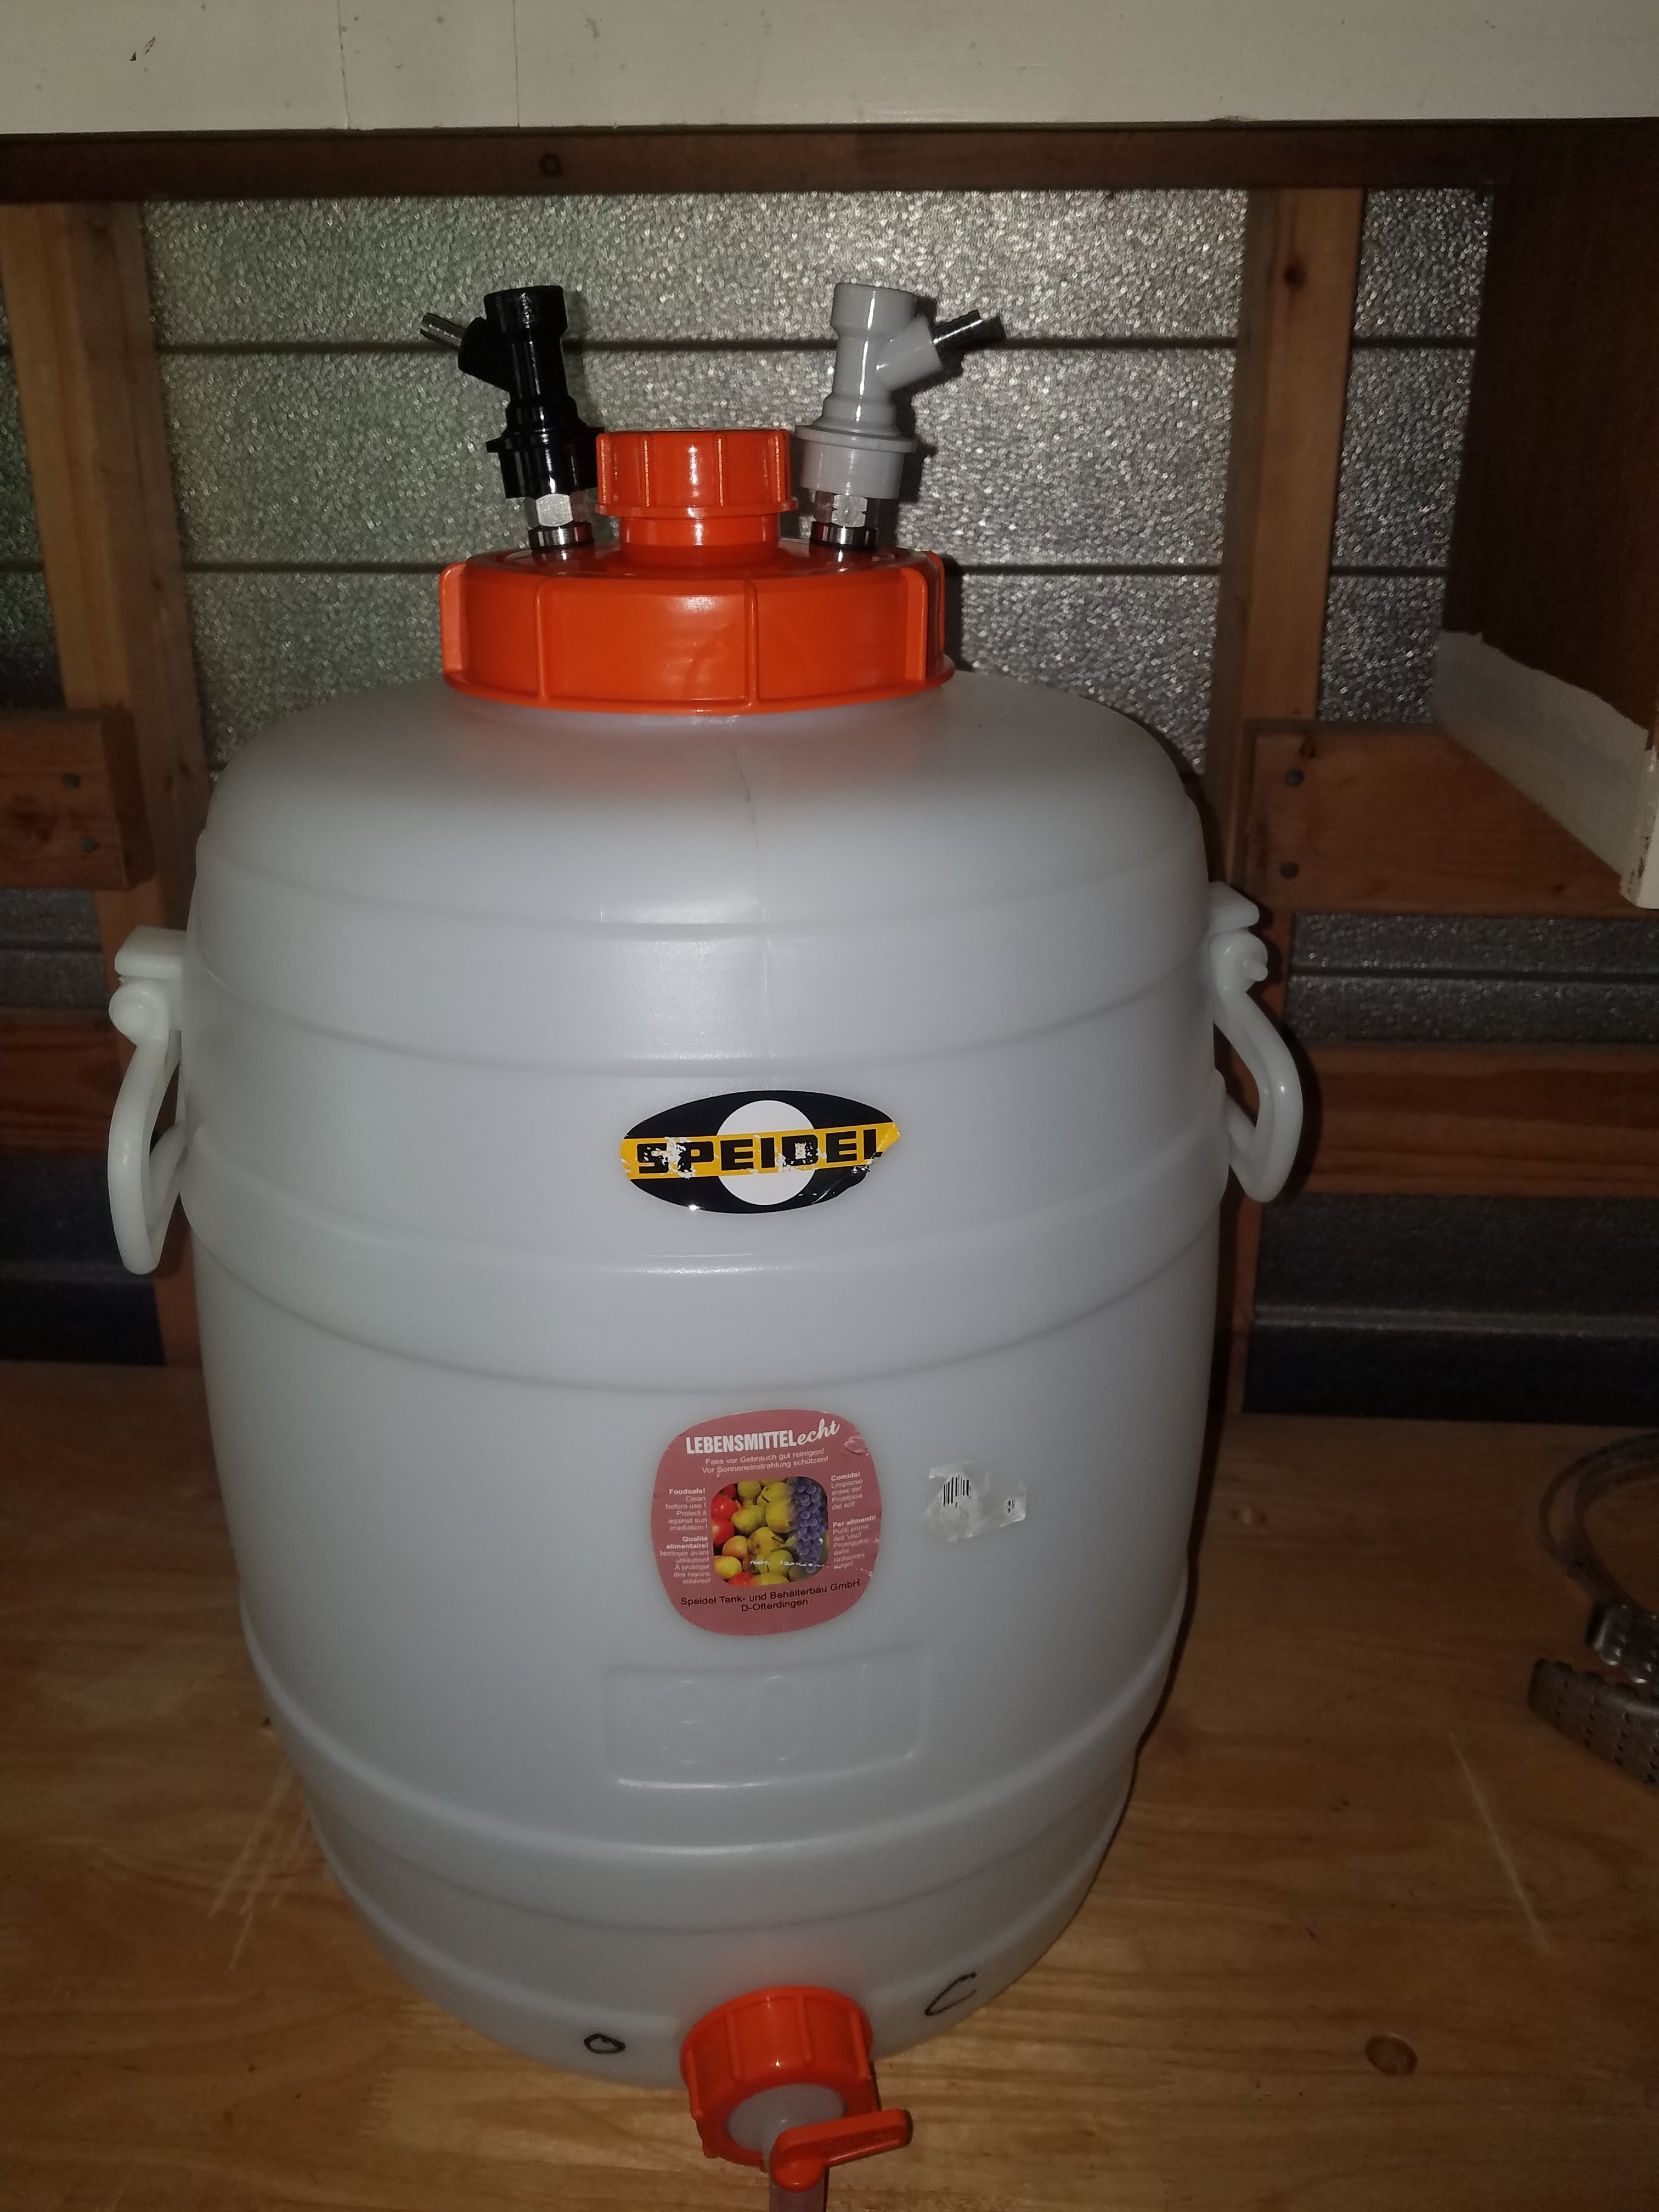
No chance of holding more than 3 psi without the lid popping, but if your careful I’m sure you could make it work enough as long as you have a good regulator that is sensitive enough to work within 3 psi and kick itself back on during crashing
 
Thanks for the responses. I can’t find a full lid Fermonster or the pressure kit at any reasonably local HB store. I guess I’ll have to go through the internet.
 
I have a grave yard of old cracked lids from these. They all eventually split where the top meets the side where the gasket is. Kind of skimmed threw this thread and maybe I missed it but are others having this same issue. I literally keep a sack of lids on hand waiting for the next one to split. It always splits mid fermentation during a blow off period. Thinking you guys using these for pressure transfers has no one had this trouble? Maybe the solid lid that everyone is modifying is tougher than the one with the hole already in it?
 
I have a grave yard of old cracked lids from these. They all eventually split where the top meets the side where the gasket is. Kind of skimmed threw this thread and maybe I missed it but are others having this same issue. I literally keep a sack of lids on hand waiting for the next one to split. It always splits mid fermentation during a blow off period. Thinking you guys using these for pressure transfers has no one had this trouble? Maybe the solid lid that everyone is modifying is tougher than the one with the hole already in it?
You must be getting krausen blocking your co2 post or it must not be running properly out of the fv to what ever means you use for an airlock with this system, keg/bucket. I’ve only cracked three lids in 2 years and they were my own fault not watching my regulator properly when transferring
 
I use a blow off tube every time and 8 out of 10 batches do blow out some as I usually get 6 to 6.25 gallons in as I like a little extra beer at kegging time so I always get a full keg and a bit more to quick carb in 2 liter bottles. I basically use the bottom of an s trap bubble cut off inserted into the bung and a hose off the other side in to a jug of starsan. It flows easily out the tube and into the starsan if it gets to blowing off. I've been using these for 6 years and have probably been through 8 to 10 lids. It isn't like they aren't getting used a bunch before they die. Normally I'm running 4 at a time so maybe my numbers aren't that out of line I just figured you guys would be having issues with the lids . I clean the jug only with water and sanitize with starsan, but the lids usually get a soak in PBW. They say not to use PBW on the jug as it will eventually crack it, but maybe it is tougher on the lids than I thought. I don't use a wrench or anything to put them on but I go pretty tight by hand for sure.
 
Last edited:
Pretty sure I went to the manufacturers website like 6 years ago when I first started using them. They go on about how just water and your hand or a nonabrasive sponge is all that is needed. Then some comment about using cleaner like PBW ( again 6 years ago so might just have said cleaner but PBW rings in my head) can lead to micro cracks and product failure or something to that effect. I have followed there cleaning advice ever since.

I don't think "fermonster" has a web site. Does anyone know who the actual manufacturer is?
 
This looks different than I remember from 6 years ago. I just took a second to google PBW on PET plastic and there is the statement I do remember about PBW type cleaners. "But it is not recommended to use PBW or Oxy-based cleaners for PET carboys because it causes stress corrosion, and eventually will lead to clouding or failure of the PET carboy. "
 

Attachments

  • Screenshot (7).png
    Screenshot (7).png
    291.3 KB · Views: 30
Thanks! So their manual seems to say they should be washed with only waater. And the fermonster page on the Wintage Shop site lists the following "sanitizers":
  • Iodophor BTF Sanitize
  • GA Pro-Zyme
  • CGA Super Pro-Zyme
  • CGA Bio-Zyme
  • Potassium metabisulfite
  • Sodium metabisulfite
  • One Step No-RinseCleaner Aseptox
Though it seems like they are mixing cleaners and sanitizers in their list.
 
If anyone can remember there was a post on a thread about cleaning PET carboys from about the same 6 year ago period when I started using these, where a guy was like" Soooo I shouldn't be using a brillow pad to clean my carboy?" Then he has a picture of what should be a clear carboy and that thing was scratched almost pure white. That is the hardest I ever laughed on a thread here. Link it if anyone knows what I'm talking about so others can enjoy!
 
I have a grave yard of old cracked lids from these. They all eventually split where the top meets the side where the gasket is. Kind of skimmed threw this thread and maybe I missed it but are others having this same issue.

I have been fermenting primarily in Fermonsters for the past 2.5 years (a pair of 3-gallon and a 7-gallon). I recently noticed that one of my lids has a crack in the location you mention.
 
Is the pressure transfer kit needed or is their a way to repurpose old corny posts
 
Last edited:
3) 7/16” or 1/2” drill bit so you can drill out the solid cap for the posts. Make sure you measure so that have them far enough a part so both ball lock fittings can go on at the same time but close enough when you maintain the stability of the lid. $2.

I decided to put one of these together, with an added thermowell, as a cheap backup fermenter for when my conical is in use, but I want to brew a batch in parallel. I don't have to do that often, except during festival season, so this seems like a good (cheap) solution.

So I drilled a test hole in a similar (but throw away) lid with a 7/16" bit. The bulkhead threads had to be literally force threaded (turned) through the hole, which bends the surface of the plastic enough that I don't think the gasket can make a good seal.

I don't own a half inch bit, so before I go buy one, has anyone had any problems with fit/seal with a 1/2" hole?
I'm pretty sure that is what I used, the 1/2 inch paddle bit. I still had to screw the bulkheads onto the lid, but I have not had any issues. :mug:
 
I don't own a half inch bit, so before I go buy one, has anyone had any problems with fit/seal with a 1/2" hole?

I'm pretty sure that is what I used, the 1/2 inch paddle bit. I still had to screw the bulkheads onto the lid, but I have not had any issues. :mug:

This reminded me that I do have a 1/2" spade bit. So I tested that and then used it for my lid. The fit is loose enough to not have to screw the bulkheads into place, but tight enough that it looks like the gaskets will cover with no problems. I'm planning to use gaskets on the inside of the lid as well as the outside.

Here's mine, all fitted out. I added a third corny post type bulkhead, for a thermowell. The thermowell is a shortened corny liquid dip tube with a SS slug welded in the end. Just remove the poppet spring/head from the corny post and there's the entry point for a controller's probe.

yQgPRoQ.jpg
 
I brew my first beer today and I am using this setup outside with kviek voss yeast. while it is pushing the starsan out of the keg it seems the fermonster is imploding some what. I can pull the pvr and the fermonster goes back in shape but I don't want to keep doing that as it will suck o2 in. Any suggestions.
 
I brew my first beer today and I am using this setup outside with kviek voss yeast. while it is pushing the starsan out of the keg it seems the fermonster is imploding some what. I can pull the pvr and the fermonster goes back in shape but I don't want to keep doing that as it will suck o2 in. Any suggestions.

If it's outside, is it possible there was a temperature drop that caused the liquid inside the fermonster to contract? Even then, if you are running a gas line from fermonster to a keg, then purging liquid from keg into a bucket (or something else), you shouldn't get negative pressure inside the fermonster. It would just pull air/CO2 back from the keg. My only other guess would be liquid that was too hot was put in the fermonster, and it warped (or maybe even just hot sunlight).
 
l
I brew my first beer today and I am using this setup outside with kviek voss yeast. while it is pushing the starsan out of the keg it seems the fermonster is imploding some what. I can pull the pvr and the fermonster goes back in shape but I don't want to keep doing that as it will suck o2 in. Any suggestions.
Did you pick up the hose at all and then drop it in the bucket? Sounds like your keg has created a siphon and is drawing more starsan out than the co2 volume that can naturally replace it so it’s pulling the air out of the fv. You need to pick up the hose and let some air into it to break the siphon.
 
Last edited:
I brew my first beer today and I am using this setup outside with kviek voss yeast. while it is pushing the starsan out of the keg it seems the fermonster is imploding some what. I can pull the pvr and the fermonster goes back in shape but I don't want to keep doing that as it will suck o2 in. Any suggestions.
HA! Did your FV look like an hour glass? lol I had this happen to me once when I started brewing, the siphon was strong but my keg that was being purged was 2 feet lower than the FV in its minifridge. When I saw it I about sh*t my pants lol. So now I just elevate my keg some to stop a solid siphon from occurring. Glad you figured it out and also glad this is PET grade plastic which can warp somewhat but return to shape easily.
 
Is there any reason I couldn't use my speidel to do this?

I have read this thread several times and don't know how I missed your post, but yes it can be done. You just need to make sure you drill the holes as close to outer part of the lid so the QD's will not hit the center cap. I have done 2 of the fermonsters and my speidel. I drilled mine a little to close to center but it works fine.
 

Attachments

  • 20210727_172845.jpg
    20210727_172845.jpg
    1.2 MB · Views: 22
  • 20210727_172840.jpg
    20210727_172840.jpg
    1.1 MB · Views: 23
Last edited:
interesting, does speidel not offer a solid cap? I wonder if the speidel is a little more rugged, holds more pressure, or less prone to cracking?

I've been looking to upgrade from 10g keg fermenters I have the funds and approval to go spike conical and new fridge to hold it (about a $1k upgrade)... But I'm wondering if I would be just as happy or even happier with this set up. Easier cleaning, less parts to clean, keep my smaller fridge and still have good pressure transfers and low o2 dry hopping… all for under a hundred bucks. Hmm 🤔
 
As far as I know they do not make a solid cap for the 7.9 gal. As far as pressure I've had not had a chance to test it yet as I have recently put it together and have beer fermenting in 3 fermonsters and have no more room to do anything ( but it will probably be more room after the Wifey's family visits this weekend). Only downside I see so far is not being able to see what going on inside when it is fermenting.
 
Last edited:
Looks like morebeer no longer sells the pressure kit, but they sell another one where the posts look significantly bigger ( for fermzilla ). Where have you folks bought the posts? I see Williamsbrewing sells individual posts as does brewhardware. This is what morebeer sells now. Stainless Steel Pressure Kit for FermZilla | MoreBeer

If I remember correctly I got mine from morebeer. With that being said: I've never had the chance to use mine. Unfortunately I've barely even unpacked it so I would be happy to part with it if you would get more use out of it than I have or will in the foreseeable future. If you're interested shoot me a PM to avoid further hijacking this thread.
 
Yeah, you're right. Wonder why such a big change?

The original kit was for the Fermentasaurus, not the FermZilla. A google search for "fermentasaurus pressure kit" turned up a couple vendors listing the product for different prices (some in stock, some on backorder). I see an eBay listing for $28.

I picked up the kit, but personally I was really more interested in just adding a quick disconnect post to the top of my Fermonster (in combo with the spigot for closed transfers). I think you would be able to build the full setup with the following parts (plus the solid cap):

Gas Post: Gas In Ball Lock Post with 1/4" Bulkhead Assembly - KL03179
Liquid Post: Beverage Out Ball Lock Keg Post with 1/4" Bulkhead Assembly - KL03162
Floating Tip Tube: Torpedo Keg Buoy Floating Dip Tube - Pour the Clearest Kegged Beer

MoreBeer also has most of these items, but I don't see a Floating Dip Tube with the "dip tube post" and I am not sure this one Dip Tube for Corny Keg - Gas In (Stainless) | MoreBeer is long enough.
 
Back
Top