• Please visit and share your knowledge at our sister communities:
  • If you have not, please join our official Homebrewing Facebook Group!

    Homebrewing Facebook Group

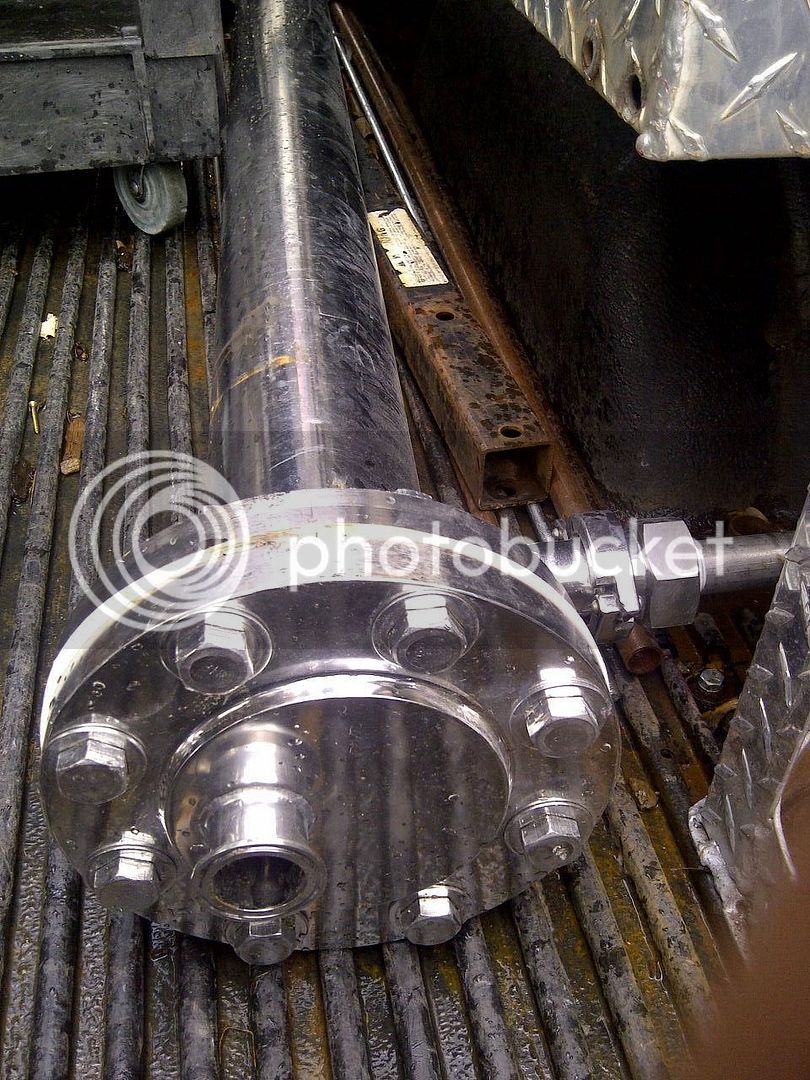
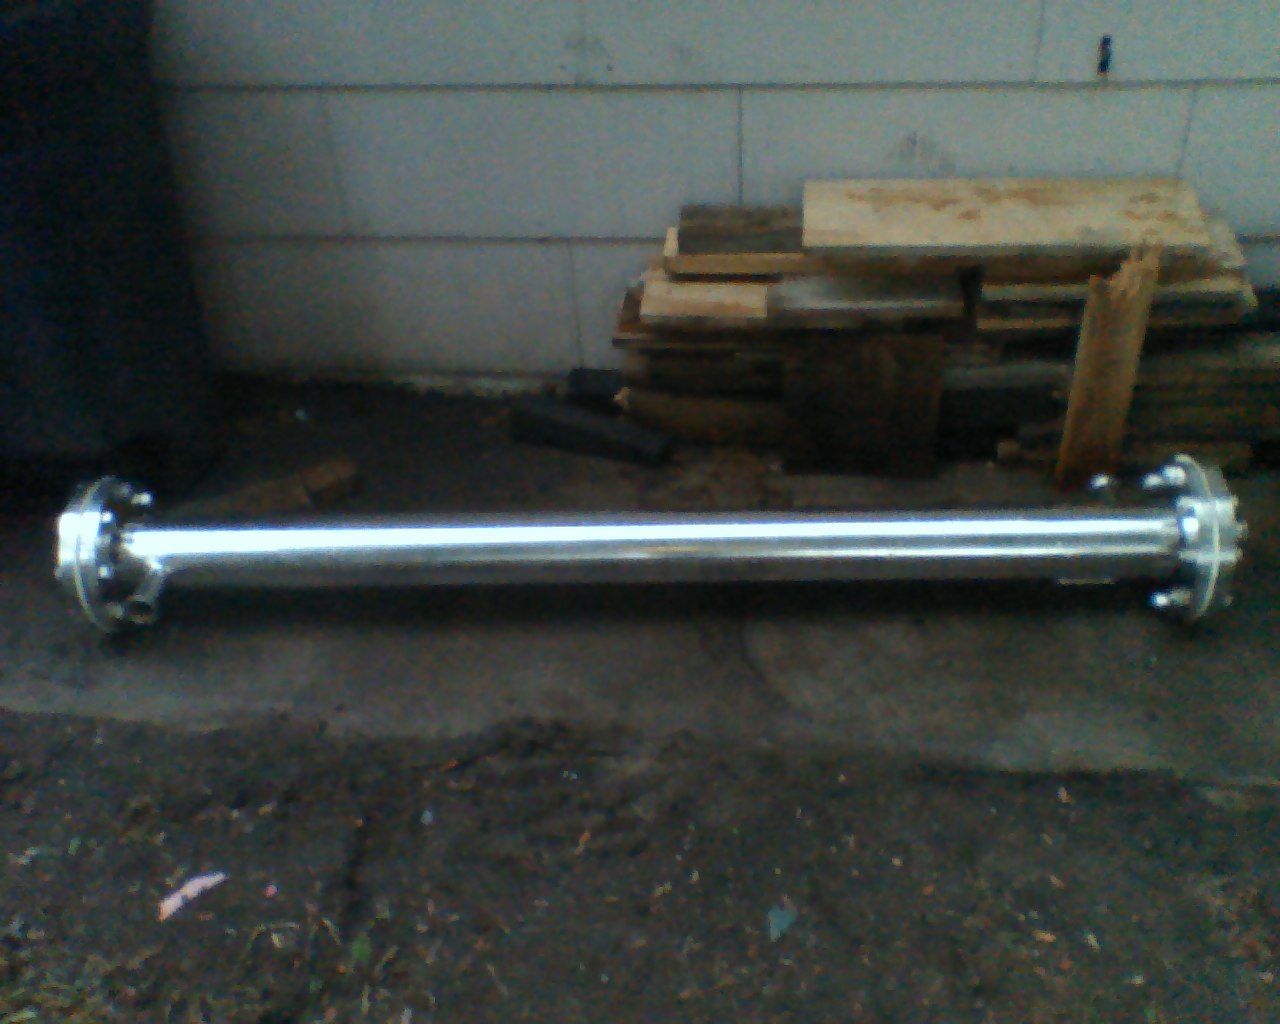
Tube & Shell Heat Exchanger

Homebrew Talk

Help Support Homebrew Talk:

This site may earn a commission from merchant affiliate links, including eBay, Amazon, and others.
So you're running wort through the tubes, and filling the shell with water? I guess because of where your ins and outs are located it works better that way. Do you have a way to increase the turbulence of the wort flow?
 
I too am very interested in how it cools. I always wanted to build one out of PVC and copper like the other guy did here on the board, but I always thought there should be a cleaner way to do it. Build looks great!
 
Very cool! Working at a chemical plant, I see heat exchangers all the time. Very cool what you are doing and I admire your ability to try new things and learn. Keep up the good work!
 
I it doesn't end up working I'll trade you my spare and see i I can make a go at getting it right....
drunk4zc.gif


I'm assuming you will be mounting it horizontally with the water connections pointing up to fully flood the shell, but with the wort out at the center of the cap will your tubes only fill to just above half and then become air bound since the air can't be vented from the top tubes above the wort outlet? Would an outlet cap with the connection all the way at the top allow all the air out of the tubes?
 
So I absolutely did not need another project to start but this has got my attention peaked. Great job so far, I might have to borrow from the concept and start my own. Can't wait to see how it turns out.
 
WPStrassburg said:
I it doesn't end up working I'll trade you my spare and see i I can make a go at getting it right.... http://s9.photobucket.com/user/w_strassburg/media/Beer/Untitled.jpg.html http://s9.photobucket.com/user/w_strassburg/media/Beer/0603122034a.jpg.html I'm assuming you will be mounting it horizontally with the water connections pointing up to fully flood the shell, but with the wort out at the center of the cap will your tubes only fill to just above half and then become air bound since the air can't be vented from the top tubes above the wort outlet? Would an outlet cap with the connection all the way at the top allow all the air out of the tubes?

I'm curious about this too. My experience with shell and tube is in steam cookers. The steam runs through the tubes at constant pressure, and the shell is filled with product from bottom to top in a vertical arrangement. That type usually has baffles in the tube to create turbulence and improve performance. Short residence time is key. Not exactly necessary to run it that way. Distillation condensers run the opposite way, with water filling the jacket that surrounds the coil. There, path length is critical. It just depends on application. Cool project.
 
IMO wort should be in tubes, and apparatus should be designed with large tri-clover fittings so tubes can be cleaned between uses with bottle brush. Propylene glycol or preheat water to HLT through shell.
 
This is fantastic!!!! I have a similar design that I've had drawn up in Solidworks for some time now but I couldn't figure out a good way to close the ends down to one point and the triclover ferrule is perfect! My design will include baffles, they don't need to be perfect like the pro versions but they do increase utilization significantly (if I remember right from my Thermodynamics courses in college:confused:). My plan is to use cooled refrigerant through the tubes and beer through the shell. It looks like you are doing beer through the tubes and water through the shell, am I right? I am not sure that beer through the shell is better but it minimizes the amount of refrigerant I have to use. Great work man! I'm sure you can't wait to get this thing working. By the way, you are right, this design is tough to build but I think it really is the best of all worlds although it still wont be as easy to clean as an IC but it'll be wayyy better than a plate chiller! I would look into cooling using refrigerant or glycol now that you have such a sealed system; with glycol or refrigerant you could use this year-round with no temperature difference.
 
By the way, you are right, this design is tough to build but I think it really is the best of all worlds although it still wont be as easy to clean as an IC but it'll be wayyy better than a plate chiller!

I'm really interested to see the HEX perf out of this thing. Would it be safe to classify this as a sub-category under "counterflow chiller"? -Seems like it to me, but just curious what the consensus is.

This should be far easier to clean than either a plate OR a double tube/ hose counterflow chiller as the wort flows through straight pipes; the flow restriction should be very low so it makes a good performance chiller that can be used with recirculation back into the kettle. It can also be easily cleaned with a dip tube brush down each tube.

It is also less work to tear it down and it takes less space than some of the new style counter flow chillers (not sure what to call these): http://jadedbrewing.com/collections/counterflow-chillers/products/jaded-counterflow-chiller-cfc

The tube and shell design should involve less restriction than the Jaded-style CFCs, too as you don't have those constant 180 degree turns in the wort flow.


Adam
 
I do think you're missing out on the REAL potential for this kind of hardware, though. (Expensive bit of equipment to use for CHILLING.)

This thing is just DYING to be used as an external calandria ESPECIALLY if it's heavy duty like this and can withstand a bit of pressure (but providing steam to it would be the challenge). Note: If anyone tries this remember that you're essentially building a pipe bomb and hoping that you don't pressurize it enough to ACTUALLY EXPLODE... Dangerous business...

I might be a giant weirdo but I dream of home brew-level steam both for amazing control over mashing AND for gentle boiling and things like an external calandria. External calandrias could work AMAZINGLY well in home brew whirlpool-capable kettles. You can get WAY higher hop utilization when using a calandria but I haven't calculated what kind of pump you'd need to recirculate the whole volume but you need to recirculate the entire volume 7 - 12 times in an hour (probably way easier at home brew scale than professional scale). You also get way more volatilization and higher boil-off rates so DMS quickly becomes a non-issue and you can possible reduce your boil time down to 45 min depending upon the temp / pressure in the calandria.

You also get way better circulation in the kettle this way.


External calandrias could really benefit micros the most, IMHO as again it uses technology that most micros already have (whirlpool / kettle combo tanks) AND it can increase hop utilization and throughput in the brewhouse; running both the normal kettle heat (direct fire or steam) plus the calandria recirculation could also get you up to boil faster and require a shorter boil. -It's the engineering side of the equation that's the problem: you need right sized pipes, the right amount of surface area, fast enough pumps, and high enough velocity so that the thing doesn't get super fouled up.

If a HEX like this can provide enough surface area for a micro and be adapted to use steam as the heat source you've got something pretty amazing as it's dead simple to clean by popping off the tri clamps and running a brush through the tubes every once in a while and just a CIP caustic cycle in between. --Can you use caustic on silver solder, though, I wonder? What about acid sanitizers (I'm thinking specifically of peracetic acid if that helps)?


Adam
 
OMG this thing could be used as a HEX for HERMS (or even external steam-based recirculation mashing!).

I SOOO want one of these plus an appropriately sized (small) steam generator for my home brewery. Think about what you could do with it:

1. Provide external HERMS-like temperature stepped mashing capability for recirculated mashes (with the gentleness of HERMs and the performance of RIMS)
2. Use it as an external calandria for boiling
3. Use it has a HEX for chilling


Even without steam, this thing could ROCK for #1 and #3 - just recirculate hot water through the shell and wort through the tubes during the mash and then cold water through it during the chilling cycle. (recirculate boiling wort through it for the last few minute of the boil to sanitize in between) --Much like some folks on here do with their convoluted counter flow chillers today.

If you want to send this to me for a couple of weeks I could certainly test it in a HERMS setup for you.... ; ) (Can't blame me for trying.)

Adam
 
Now I'm wondering whether we could just use stainless swimming pool heat exchangers for this exact purpose....

http://www.ebay.com/itm/Outdoor-Woo...985?pt=LH_DefaultDomain_0&hash=item232a8a5c21

For $149 this thing is a lot cheaper than convoluted copper counter flow chillers AND it's stainless...
Plus it's rated for pressure so low pressure steam seems like an eventual future possibility. (Sanitary tri clamp fittings would seal the deal.)

[Edit] And a copper alternative for only $85: http://www.ebay.com/itm/Side-Arm-He...8275258?_trksid=p2047675.m1982&_trkparms=aid% 3D333005%26algo%3DRIC.FIT%26ao%3D1%26asc%3D177%26m eid%3D3212828654009685649%26pid%3D100009%26prg%3D1 088%26rk%3D3%26rkt%3D5%26sd%3D151037565985%26

Adam
 
WTF? How did I miss all these posts?! Great discussion so far....

WPStrassburg: Lol, I'd love to have a chunk of SS like that in my garage...just to look at and fondle :D Good point about the "water out" port...we'll see how it performs...I'm only losing an inch or so to air. Could possibly plug the existing port (or use for thermowell) and install one higher on the other side.

Biertourist: Hadn't even considered a calandria. Sounds like you're interested in steam...it can definitely be done, I know Yuri made a go of it.

I've been playing around with other projects lately (welding up a B3 1550 clone out of some spare strut i had). I will order the water fittings today and hopefully do a test this weekend. I'm still unhappy with the hack job I did on the welding....I may slice off the ends and buy fresh triclovers...trick would be to get a flat surface again (I could machine it flat but it is a very odd shape and I don't know how to clamp it right).
 
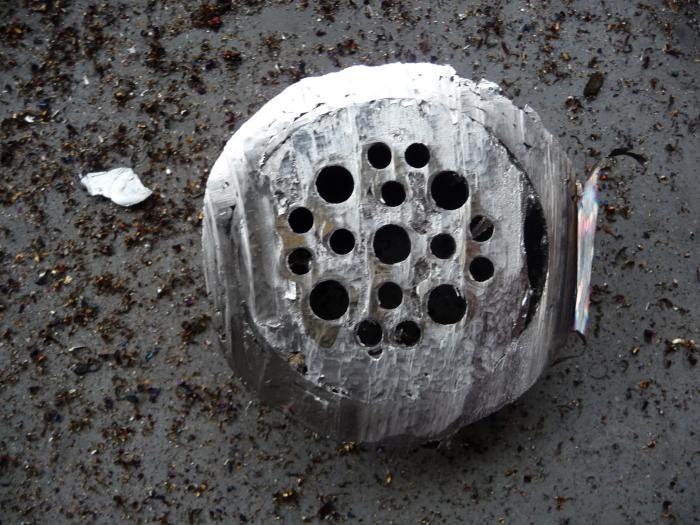
Okay, so here's the latest....decided to chop the ends off and try again. I couldn't stand how ugly it was..solder was a pretty ghetto way to cover up imperfections and as you can see in the pics there was still some small spots of corrosion because I overheated the SS. It's all a learning experience for me, so I guess it's fine. TIG welding and machining are pretty complex skills, and I just don't have enough time with either to call myself competent. At any rate, I bought the rest of the fittings I'll need and I'll do some things differently this time around.

I had a hell of a time cutting through....not only is it 316SS, but it has been welded, which makes the steel harder than woodpecker lips! Notice how the solder basically melted off and kind of came off in globs? :pipe: I thought I was going to burn out my saw...popped the breaker a few times...definitely need to buy another blade for the Rage 2 saw...not cheap.

P1050339.jpg


P1050340.jpg


P1050342.jpg


P1050345.jpg


P1050347.jpg
 
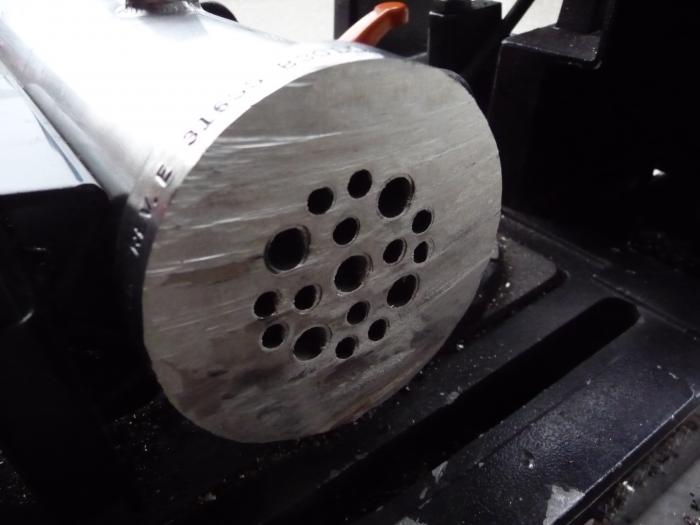
I have no idea if the silver solder wicked down deep enough to still provide a joint around the individual tubes....I doubt it. The saw cut created a very irregular surface on the ends, which will make welding the ferrules on a lot harder....so I need to machine them flat somehow.

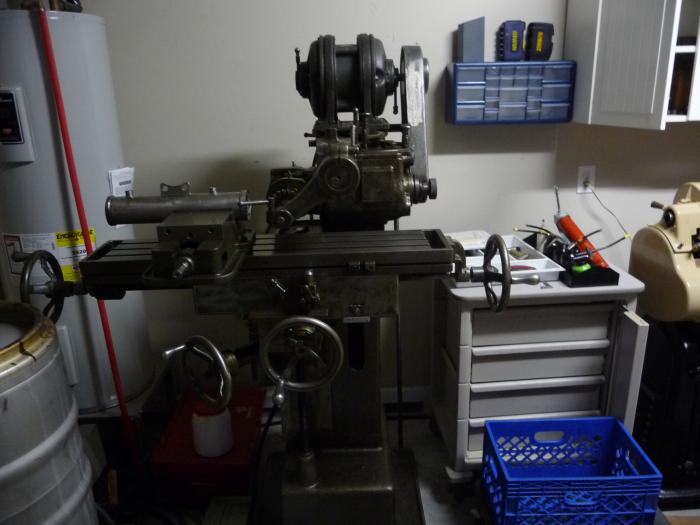
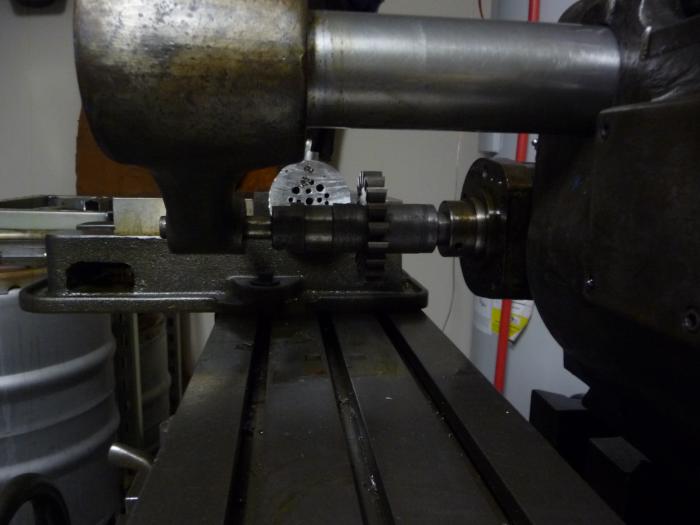
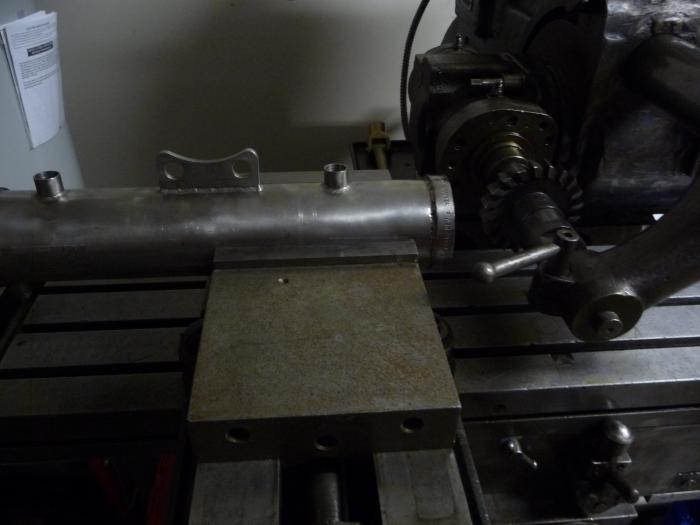
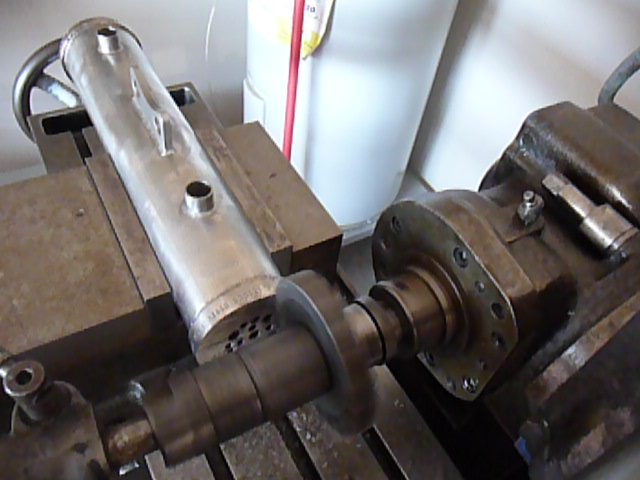
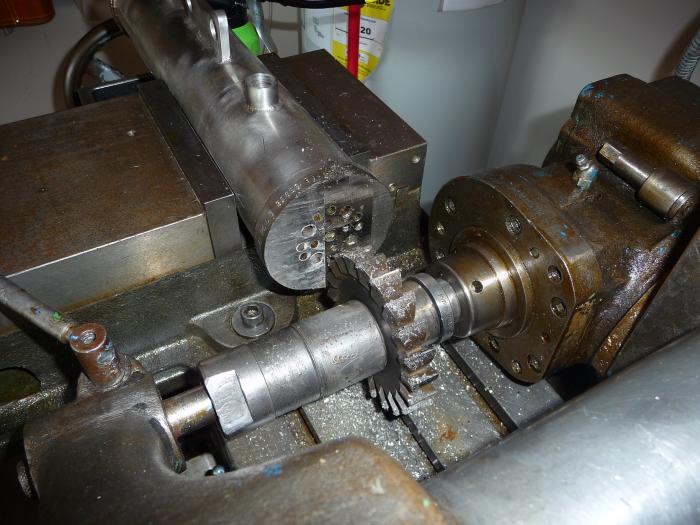
Ideally, i could use a fly cutter to square off the ends, but that will not be possible because of the length of the chiller. After staring at things for a while, I decided I would use my milling machine in horizontal mode and use a wide cutter. I'd really like to use a facing mill or shell mill...but that would be quite expensive and tooling is very rare for my machine. So, let's keep our fingers crossed :)

I have everything set up and will most likely try to square things off in the next few days.

P1050349.jpg


P1050350.jpg


P1050351.jpg


P1050352.jpg
 
Why do you need to machine it? Just get a big file to do the rough work. Draw file it flat and smooth...if you're careful it will be as flat and smooth as from a surface grinder.
 
Because the sawblade deflected quite a bit since it was such hard material....there is a noticeable angle to the ends....plus there are some significant ridges. No way in h#ll am I going to stand there with a file and try to do it....at least not until I am done with re-soldering the tubes, etc. This will be a 1/16" DOC with just a few passes per side, so I am pretty sure the HSS cutter can handle it. Looking into proper feeds and speeds right now.
 
me thinks that is going to end ugly. The lift from the cutter may end up lifting the piece out of the vice. Any chance you can spin your vice 90* and chuck up the fly cutter with the mill in horizontal mode to face the ends off? the lathe not big enough to turn it down? If you're putting a ferrule back on all you really need is a small shoulder turned around the circumference not the whole face true.
 
I hear ya.....going to take light cuts. The picture doesn't show, but the tube is well within the vise. The lathe is big enough, it's the fittings on the side that will create a dangerous runout. I feel safer running the horizontal mill with a skimming cut. As far as the vise, this one is too wide...it can only be in the Y axis...only 3 T-slots this one was probably designed for 4. If I could rotate 90 degrees, you bet I would be looking at a flycutter!

FWIW, I probably should have gone with a 3-4" ferrule just to decrease the size of the shoulder....too late though...I ordered some short ferrules this time and plan to purge these much better....also going to use smaller rod and tungsten....if I get cold feet i may just tack it with the TIG and solder the rest of the perimeter.
 
Well, got sidetracked by several other projects, and had some problems with the motor on my mill. I replaced the motor, adjusted the pulleys, etc. and took a crack at smoothing the ends out. It worked pretty well, the vise held everything nicely. However, there were areas that the cutter "grabbed" for one reason or another, and there are a few small depressions. Should be okay, because I can fill those in. Here's what I have so far...planning on TIGing in the very near future!

P1050446.JPG


P1050448.jpg
 
Rotate the vise 90 degrees on the table and put a face mill in the horizontal . . .


edit:
shuda read more. WPStrassburg beat me to it. :drunk:


Thought the 1996 Fadal stuffed in my one car garage was impressive.
That machine is a piece of art.
:mug:
 
Yeah, this particular vise is too wide....and it doesn't have mounting holes fore/aft. I got a pretty good deal on it, considering it is a Kurt and shipping is usually the dealbreaker. It's probably too big for the mill, but it's hell for stout.

Ironically, I sold the lathe pictured above....got a larger one. I can put the whole thing in the lathe now and do a basic cleanup. I think I will machine a "shoulder" at each end...that way the triclover ferrule will fit over it and I can silver solder it. Because the endcaps are so thick and the ferrules are so thin, I really don't trust myself to TIG it.....I'm sick of fiddling with that part of the project, and they have to be done correctly or the chiller will rust.

Before I can use the lathe, I have to machine the toolpost to fit the compound....which requires me to fiddle with the milling machine some more...the new motor is causing some overcurrent issues since it is 3 HP. Eventually, I hope I can get all the bugs ironed out!
 
If you can find a cheap piece of steel plate, think about making a subplate so you can mount the vise perpendicular to the head. You'll find lots of advantage to having the capacity to face mill.
 
I actually do have a pretty large chunk of 1/2" steel plate...long enough and probably wide enough. It was part of an old machine acquisition, full of holes tapped for mounting this, that, and the other thing. I use it on my wooden workbenches to "persuade" things with a hammer. I have been avoiding chopping it up, so maybe I can use it for just this purpose. Thanks for the idea ;)
 
Back
Top