• Please visit and share your knowledge at our sister communities:
  • If you have not, please join our official Homebrewing Facebook Group!

    Homebrewing Facebook Group

Thermometer in a BK - why?

Homebrew Talk

Help Support Homebrew Talk:

This site may earn a commission from merchant affiliate links, including eBay, Amazon, and others.
Guinness FES is a stronger, and IMO, thicker feeling version of their dry Irish Stout. I suspect they use the same Ale yeast strain in both. Ale yeast generally works best at 58-75F temps, but the ideal temps depends on the particular strain and the beer style you are brewing. Generally I recommend 62-68F for most of them, with exceptions in a few cases.

Lager yeasts tend to ferment best at 50-55 (Although I don't have as much experience with those strains) and lagers in general are aged several weeks down close to freezing after several weeks primary fermentation. These "rules" are still argued about, but considering where you are brewing, you might be best served not worrying too much about Lagers and focus on what will work well, especially to start with: Ales.

And if you are not versed in the very basics of yeast, I HIGHLY recommend you buy a copy of YEAST, from Brewer's Publications. It's a really good book on how to work with yeast, and goes into a lot more detail than I can here. IMO it may be the most useful specialty homebrew book out there. it's been said many times that the most important step in brewing is giving the right yeast, the right conditions to do their thing. Not only can different strains give different flavors, different conditions (Temp, pH, food supply, chemistry) can greatly impact the flavors that your yeast will give you. It's really worth some study, especially in a more challenging environment.

Depending on batch sizes, you might consider buying a chest freezer or fridge with a controller on it, rather than spend $$ on a large inefficient walk-in. Less space to chill.
 
Dcpcooks:
In the back of my mind a question has been stirring but I haven't paid any attention to it.


I've wondered what people do that need various temperatures and maturation times that tie up a cooling resource. How do people handle this issue?[/QUOTE]


If you have a walk-in cooler then you have a cooling water source. A 30 gallon food grade garbage can, two small pumps with solenoids, a stc switch and some form of heat exchanger either in or around your fermentors and you good to go with any beer style.

I would say that yeast is more than warm or cold. Take saison II for example. At 68 it will be spicy but subtle. At 82 it's juicy fruit and bold.

A DIPA with cali yeast may give you bliss at 66--67 and a butter bomb at 69--70.

Since fermentation is exothermic, early and consistent control is an important part of crafting good to great beers. Most of the flavor development takes place in the first three days.

Edit didn't see your electric costs. A chest freezer would be a better option for your $$$$.
 
1. Speeds up the process.
2. Cooling.
3. Hop stands at a specified temp.
4. Whirlpool filtering.

Notes ...
2. ... low dissolved oxygen ...

#1 I got that from a few videos. Makes sense.
#2 I've got plenty of ice handy all the time. I believe I can cool to any required temp in one pass IF I can get the proper exchanger design.
#3 This I'll have to check out. Thanks.
#4 Since you brought it up - whirlpooling the wort only does a partial job. The electrical heating element involved and its placement also affects the outcome. I like Blickmann's Boil Coil because it's out of the way for whirlpooling and it is certainly low density given its surface area. Once the solids are heaped towards the center, I haven't figured out what people do with it.

If a rippled coil is in the way, there's little that can be done. Even with the perimeter coil, any attempt to isolate the mound would probably lead to disaster. I conclude that one simply accepts the inevitable solids that come out with the wort via the drain near the kettle side. I have yet to see anyone try to filter the wort once it's outside the kettle but I believe such filtering would be beneficial for clarity as well as taste.

Do people pump the wort through a counterflow exchanger after whirlpooling or do they let gravity do it more slowly? I've seen it done both ways in videos, but never knew if whirlpooling was done beforehand or not. I suspect pumping it out would draw in more solids, but I really don't know.

Filtering the COLD wort through a micron filter would do the job in a pressurized situation, but it seems to me there's no reasonable way to sanitize the filter for reuse making that an expensive proposition. I suppose filtering through a commercial coffee filter in a gravity situation could work, hot or cold, as long as there's not too much of the really fine suspended solids but I suspect that's exactly the case. What's the solution?

Notes #2: Oh oh. Now what? Thanks for the heads up, but you're making my life very difficult. Ignorance is bliss, you know. :) I TIG weld, and can bend and braze copper. Bending SS inside SS is another matter entirely. I can TIG SS to avoid "sugaring" but the bending is problematic. I know of no SS inside SS exchanger suitable for a food application - do you?
 
I wouldn't sweat getting perfectly clear wort going into the fermentor. Anything large enough to be caught by a filter is going to settle quickly in a fermentor. Watch what happens after a good boil. The hops debris and hot and cold break material settle quickly leaving a very clear wort floating on top. If it settles that quickly in the bk before putting in the fermentor, it will settle quickly when the yeast are done stirring up the wort in the fermentor. (It can churn pretty good while they are eating and excreting...)
 
mongoose33:
Although I haven't given any serious thought to the fermentation stage, I've watched numerous videos, read quite a bit about it and came to the conclusion I wasn't going to go with an actual conical fermenter, probably ever.

I looked at those, they seemed difficult to move, it wasn't clear they'd fit easily in my fermentation chamber, and at this point I don't harvest yeast.

I'll start with glass jugs as I hate plastic.

Me, too. Except in this case. You might take a gander at this search and see if anything changes:

https://www.google.com/search?q=site...hrome&ie=UTF-8

All I needed was to hear the horror stories about people injured by carboys breaking. My favorite--or least, actually--story involves someone carrying a carboy in their arms, squeezing it hard because it was heavy. They hit a corner on a counter, the carboy broke in their arms and because they were squeezing it so hard....you can imagine the lacerations.

They're harder to clean due to the narrow neck, heavier than plastic, dangerous if they break. Some have had them break as they added wort to them, just cracked and broke.

There are two main plastic fermenters people use. I have the BigMouth Bubbler from Northern Brewer. I love it, though it's more expensive than the Fermonster from MoreBeer.

I continue to use the BMB because I have carry straps for it, it works well, etc. etc. A sort of inertia, if you will.

But if i were starting over, I'd get the Fermonster.

Both have wide mouths which means you can reach inside to clean or to remove the spigot. You can get them without the spigot, but I've done it both ways and I like the spigot.

About the only value IMO to a glass carboy is if you're doing very long term aging; they're oxygen-impermeable. If they're all you have, they're all you have, but having worked with both, not a chance in the world I'd go back to glass.

I'm also going the keg route. Bottling is too much work with too much chance of messing up the batch. Once I discovered what corn sugar was I lost interest in it altogether.

Bottling off a keg is actually quite easy. I'm taking some of my bottled beer to a wedding reception this weekend; easy to get a variety. If I had help capping I could do two bottles a minute, maybe a bit faster. I use a growler-filler to fill bottles, also use the poor-man's beer gun attached to a picnic tap.

Of course, you can also fill growlers if you need to take your beer somewhere. I do that as well, depending.


I happen to have a walk in refrigerator that hasn't been used in over a year and I can temporarily use it to store kegs and bulk grains. Getting consumable supplies (grains, hops, etc) shipped in is another area I have to check out.

Wish I had one. But my electricity is almost 1/3 of what you pay, so I can see a desire to not run it much.


I have an issue most people don't. I'm on an island.

I suspected something like that. Maybe the 90-degree tap water had something to do with it... :)

It takes 30 to 45 days to move product here and that involves clearing customs, all sorts of fees and paperwork. There are no local brewers I can consult with. I checked with Northern Brewers and BrewHardware to see if they've ever shipped any product to Roatan and both said no. Therefore everything I do is strictly based on my own final judgement.

Well, not completely. You're getting a lot of advice here, and the advantage to that over videos is it's interactive. For instance, my comments about your "glass jugs" decision above.

But as always, it's your life, and you can embrace or ignore the advice here as you see fit.

I have to make a maximum effort to bring in as close to the ultimate system as possible, including every nut and bolt required to brew a batch. There's no Home Depot or Lowes I can rely on. There's no local brew store available to quickly pick up a chemical, a piece of hose or a repair part. I'm on my own.

No, you're not. You have us. :)
 
Homercidal:
I added the Yeast book to my wish list on Amazon. I noticed they have Malt, Hops and Water also so I tagged them too.

Dcpcooks:
Till you mentioned it, I forgot fermentation is an exothermic reaction. I'll do some research on fermentation cooling and let my subconscious mull it over for a while.
 
Homercidal:
I added the Yeast book to my wish list on Amazon. I noticed they have Malt, Hops and Water also so I tagged them too.

I have all four of them--and I think all four are well-worth getting.

Dcpcooks:
Till you mentioned it, I forgot fermentation is an exothermic reaction. I'll do some research on fermentation cooling and let my subconscious mull it over for a while.

Depending on the kind of beer and ambient conditions, you might, early on, be able to control ferm temps with a fermenter kept in a vessel of water and kept cool using frozen water bottles that are replaced as needed. I've used a swamp cooler approach that helps. You'd need something to monitor temps to see where you're at, but it's cheaper than running a walk-in cooler w/ electric rates at 32c/KWH.

Given your background, you probably can gin up something using an air conditioner or refrigerator or whatever you have available to you.

Here's mine: I need a heat mat to raise temp when garage temps are cold, but the Inkbird 308 will control both heat and cooling. There's enough room in mine to handle two fermenters.

The temperature probe is held against the fermenter by the piece of insulating blue foam so it's picking up wort temp instead of ambient.

fermchamber.jpg
 
Homercidal:
Yeah - I keep looking under the bed for the monster. I guess its my education that just naturally causes my mind to go looking for problems if there's even the slightest hint one might exist. It's a good thing to have people throw some water over my head to cool me off. Thanks.

mongoose33:
That link didn't bring up anything relevant. I'll look up those two devices.

Boy can you paint a nasty mental picture. Squeezing a 50lb load that suddenly turns into shrapnel is one ugly image. About a year ago I wasn't paying attention and cut my forearm with an angle grinder. That put me out of commission for weeks.

I was planning on cleaning the inside of the glass jugs using salt as an abrasive. That's what I did previously and never had an issue. I haven't seen a large glass jug in years, so maybe they're less robust today. The ones I had way back when were really thick glass, so thick they had a slight blue tinge to them as they bent the light.

Ok - I'll reconsider. I don't need any more down time.

I figured that bottling from a keg just to conveniently move the beer for an occasion and quickly consume it would work OK. I just wasn't interested in bottle bombs and the tedious filling as my mainstay. My wife's business has cases of brown glass empties laying around from the local Cerveceria. I could clean and "borrow" them for a while if necessary. They are sturdy.

I got to admit, you guys are great. Without this valuable input and bringing me back to earth I'd probably never get anywhere.
 
#1 I got that from a few videos. Makes sense.
#2 I've got plenty of ice handy all the time. I believe I can cool to any required temp in one pass IF I can get the proper exchanger design.
#3 This I'll have to check out. Thanks.
#4 Since you brought it up - whirlpooling the wort only does a partial job. The electrical heating element involved and its placement also affects the outcome. I like Blickmann's Boil Coil because it's out of the way for whirlpooling and it is certainly low density given its surface area. Once the solids are heaped towards the center, I haven't figured out what people do with it.

If a rippled coil is in the way, there's little that can be done. Even with the perimeter coil, any attempt to isolate the mound would probably lead to disaster. I conclude that one simply accepts the inevitable solids that come out with the wort via the drain near the kettle side. I have yet to see anyone try to filter the wort once it's outside the kettle but I believe such filtering would be beneficial for clarity as well as taste.

Do people pump the wort through a counterflow exchanger after whirlpooling or do they let gravity do it more slowly? I've seen it done both ways in videos, but never knew if whirlpooling was done beforehand or not. I suspect pumping it out would draw in more solids, but I really don't know.

Filtering the COLD wort through a micron filter would do the job in a pressurized situation, but it seems to me there's no reasonable way to sanitize the filter for reuse making that an expensive proposition. I suppose filtering through a commercial coffee filter in a gravity situation could work, hot or cold, as long as there's not too much of the really fine suspended solids but I suspect that's exactly the case. What's the solution?

Notes #2: Oh oh. Now what? Thanks for the heads up, but you're making my life very difficult. Ignorance is bliss, you know. :) I TIG weld, and can bend and braze copper. Bending SS inside SS is another matter entirely. I can TIG SS to avoid "sugaring" but the bending is problematic. I know of no SS inside SS exchanger suitable for a food application - do you?

While not necessary to clear the wort before transferring to the fermenter I like to do it because:

1. I have conicals and often harvest the yeast. Clear wort means "cleaner" yeast.
2. It makes cleaning the fermenter easier when I am done. Cleaning the BK is easy.

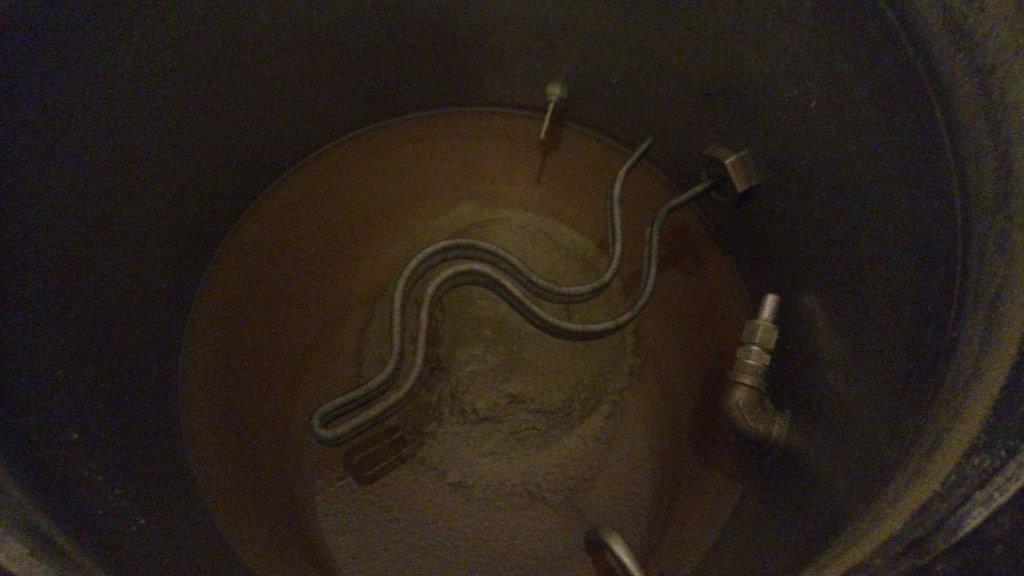
See below picture; I get good "cone-ing" in the center of the BK even with the element. I see no reason to use a micrn filter.

My cooling process is:
1. At 15 minutes before the boil ends I hook the BK discharge to the wort pump then to the hx and then to the whirlpool port and begin circulating wort and sanitize the cooling loop.
2. At flameout I keep the pump running and turn on the cooling water.
2.a I cool my conicals with a closed loop glycol system. I've taken to filling the empty conical with water when the brew day starts and using the cooling loop to create a fermenter full of nearly freezing water. I then use this to drop the last 50°F or so. Really speeds up cooling during the summer here in "hot" North Carolina.
3.Turn off cooling water and wort pump allowing for a 10-15 min rest.
4.Sanitize the fermenter and sanitize a connection piece to the bottom.
5. Disconnect the return whirlpool line and hook it to the fermenter in. Then pump the wort to the fermenter.
6. When the boil kettle reaches the point where I can get no more wort out turn off the pump close the valve and push the wort that remains in the pump, hx and lines into the fermenter with the "utility" CO2 line.

I've seen counterflow stainless and plate and frame heat exchangers for sell on brewing supply websites. Low dissolved oxygen on the hot side is not something that many people worry about (and I only do for some styles) but is is one of the things that I eventually changed with my system that "had I known" I would have done different first go around.

..... kinda like you (although I am in the US) I was full into a dedicated brewery room, Kal inspired electric system before we made our first beer. Although I did a lot of research before hand I've changed a lot of things as I learn more, and would change even more if starting from scratch. While I love designing and building I think I would have ended up with a better system design and spent WAY less money on redesigns if I had done some "old school" non automated brewing first. (although I wouldn't have had nearly as much fun)

2016-08-25 02.02.16.jpg
 
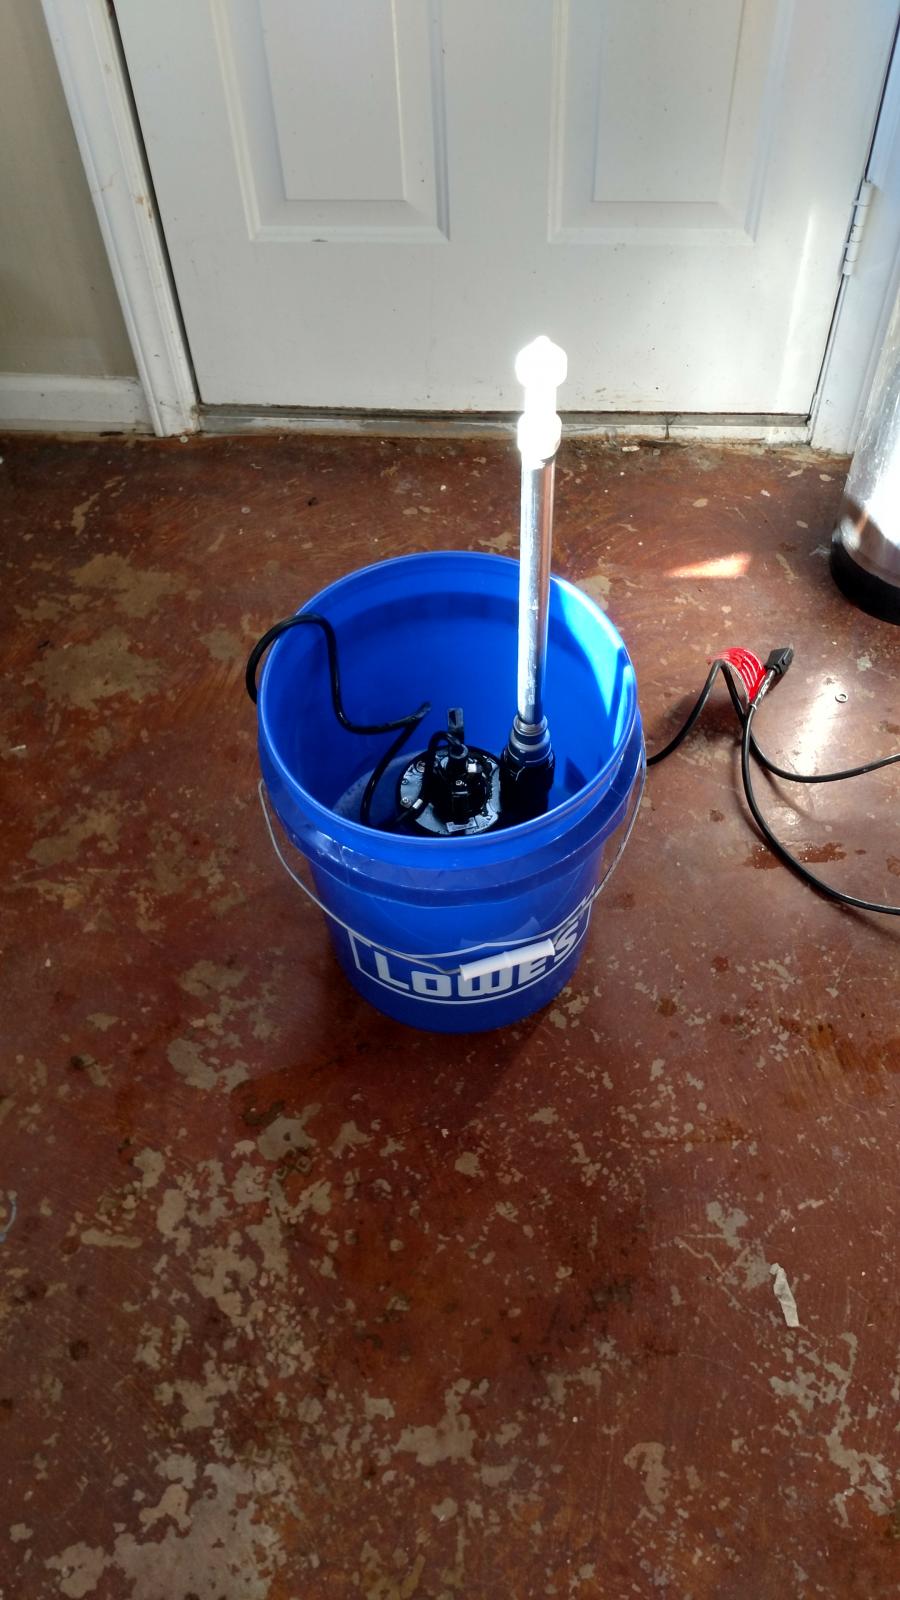
Cleaning inside fermenters is really easy with a pump, clean in place spray nozzle and Oxyclean or whatever similar you have available.

2016-09-23 16.12.52.jpg


2015-02-04 18.36.48.jpg
 
mongoose33:
That link didn't bring up anything relevant. I'll look up those two devices.

Boy can you paint a nasty mental picture. Squeezing a 50lb load that suddenly turns into shrapnel is one ugly image. About a year ago I wasn't paying attention and cut my forearm with an angle grinder. That put me out of commission for weeks.

I was planning on cleaning the inside of the glass jugs using salt as an abrasive. That's what I did previously and never had an issue. I haven't seen a large glass jug in years, so maybe they're less robust today. The ones I had way back when were really thick glass, so thick they had a slight blue tinge to them as they bent the light.

Ok - I'll reconsider. I don't need any more down time.

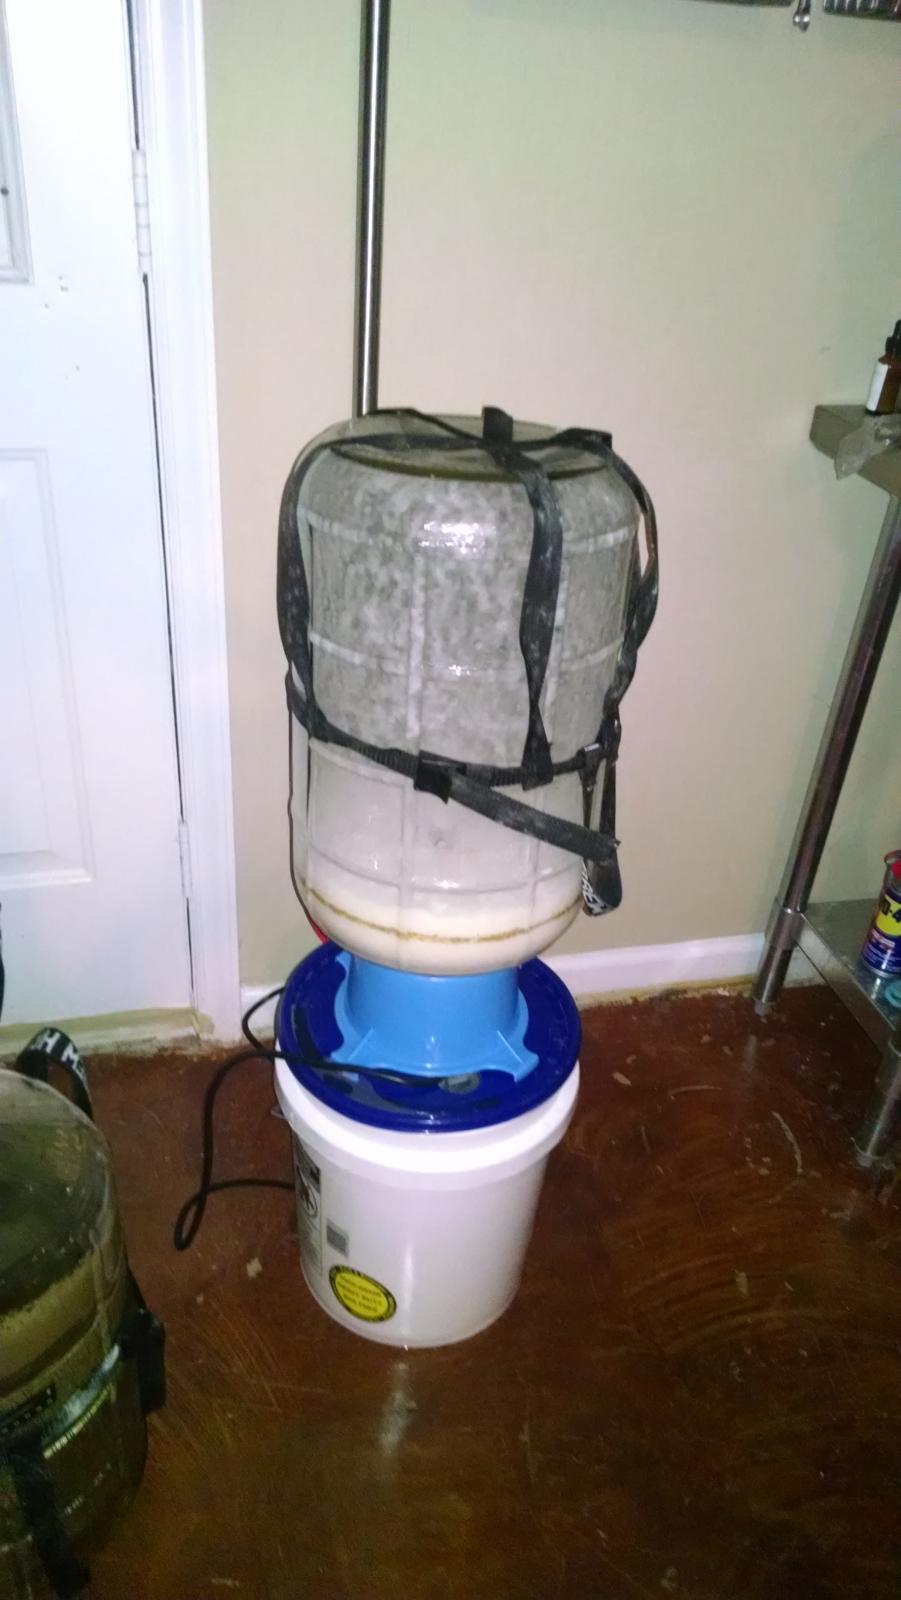
A lot of people use the glass carboys and there's nothing in them that precludes producing good beer. And it may not be as much an issue for you, but lifting full carboys of beer is getting to be more and more difficult. I have a lifting harness for mine (godsend), and if you have to lift them over the lip of a freezer, say, or a keezer, it's hard. Depends on our physical capacity.

I figured that bottling from a keg just to conveniently move the beer for an occasion and quickly consume it would work OK. I just wasn't interested in bottle bombs and the tedious filling as my mainstay. My wife's business has cases of brown glass empties laying around from the local Cerveceria. I could clean and "borrow" them for a while if necessary. They are sturdy.

I did bottle carbing 3 times then said "the hell with this." You may end up using growlers or who knows what? Try it all, see what works best.

Growlers work well if the beer is going to be consumed in one sitting or a short time period. Bottles portion better. I'm submitting a new beer (for me) to a competition at my LHBC next week, need bottles. And a few extra in case others want to try it.

I got to admit, you guys are great. Without this valuable input and bringing me back to earth I'd probably never get anywhere.

This is why I hope you can document what you do, either in photos or just posts. You're walking a different path than many of us have to consider, and we can learn from your conditions and how you adapt to and overcome them.
 
#1 I got that from a few videos. Makes sense.
#2 I've got plenty of ice handy all the time. I believe I can cool to any required temp in one pass IF I can get the proper exchanger design.
#3 This I'll have to check out. Thanks.
#4 Since you brought it up - whirlpooling the wort only does a partial job. The electrical heating element involved and its placement also affects the outcome. I like Blickmann's Boil Coil because it's out of the way for whirlpooling and it is certainly low density given its surface area. Once the solids are heaped towards the center, I haven't figured out what people do with it.

If a rippled coil is in the way, there's little that can be done. Even with the perimeter coil, any attempt to isolate the mound would probably lead to disaster. I conclude that one simply accepts the inevitable solids that come out with the wort via the drain near the kettle side. I have yet to see anyone try to filter the wort once it's outside the kettle but I believe such filtering would be beneficial for clarity as well as taste.

Do people pump the wort through a counterflow exchanger after whirlpooling or do they let gravity do it more slowly? I've seen it done both ways in videos, but never knew if whirlpooling was done beforehand or not. I suspect pumping it out would draw in more solids, but I really don't know.

Filtering the COLD wort through a micron filter would do the job in a pressurized situation, but it seems to me there's no reasonable way to sanitize the filter for reuse making that an expensive proposition. I suppose filtering through a commercial coffee filter in a gravity situation could work, hot or cold, as long as there's not too much of the really fine suspended solids but I suspect that's exactly the case. What's the solution?

Notes #2: Oh oh. Now what? Thanks for the heads up, but you're making my life very difficult. Ignorance is bliss, you know. :) I TIG weld, and can bend and braze copper. Bending SS inside SS is another matter entirely. I can TIG SS to avoid "sugaring" but the bending is problematic. I know of no SS inside SS exchanger suitable for a food application - do you?

A data point for you: I just got up and running with an electric kettle, 12.5 gallons, 15.75" diameter, 5500 watt ripple element, side (low profile) dip tube, and whirlpool arm. I'm cooling with a counter flow chiller. Like you I had concerns that all the junk in my kettle would inhibit the whirlpool's ability to create a trub mound. Turns out it works great and leaves a nice mound of trub in the middle despite the heating element. I used this system for the first time and fermented in a corny keg, I just transferred to a serving keg and didn't find that any hops in the yeast cake that made into the fermenter... so I'd call that a success.

Because I'm fermenting in corny kegs I have to be careful to keep hop debris out so they don't clog my narrow tubes and poppets. In the future I'll probably also attach a hop sack to the end of the transfer hose to catch any stray hops as they fall into the fermenter. That said, note that anecdotal evidence shows that trub making it into your fermenter will NOT inhibit the flavor or clarity of the finished beer.

You might be interested to read some of the articles over at http://brulosophy.com/

Also, I have no thermometer in the BK but it sure would have been nice to have one during the chilling.
 
mongoose33:
This "hobby" is going to take up quite a bit of floor space. The hot table, a work table, a fermentation chamber and a keg dispensing unit is what I've identified so far plus some odds and ends storage space for stuff not in immediate use. Did I forget anything? I'll use our existing huge SS sink for clean up.

jddevinn:
Conicals - that's plural. Harvesting yeast - are you in the brewery business? I get the impression this is more than just a hobby or a way to satisfy your personal beer needs. Is "Bad Decisions Brewery" a real commercial brewery?

I've seen some mention made for glycol chillers but figured I'd circulate water in my 100G water storage tank to be the water I pump through a Counter Flow Chiller as my first pass and use ice from my freezers for the in line second stage Counter Flow Chiller and dump all the heated water into the 100G tank that always has some head room available. That then made me recollect that I put up the 100G water storage tank and pressure system plus RO system because we have so many power outages here that I needed a steady supply of water for the wife's bakery. I use a 3.6kW inverter and 900lbs of batteries to power critical circuits. Then it hit me that I'm looking at 5.5kW ELECTRIC heaters where the local grid is a joke ( I used to work for Con Ed in NY ).

I'll go looking for SS heat exchangers as I'd rather buy than build that anyway.

That gadget to clean the carboys is interesting. I thought about using my 3500 PSI electric pressure washer, but I think it would destroy a plastic carboy.
 
mongoose33
I've got two 1000lb electric winches that I use as needed on my metal projects. I could allocate one to a gantry type setup in the brew area to do the heavy lifting. I agree that wrestling heavy stuff above waist high is an issue; I'm not Schwarzenegger.

Before I started researching beer brewing I had never heard of a "growler". I've seen pictures of them and it would seem they're intended for short term storage.

When I get to the point of actually doing something, I fully intend to video it. I've been considering putting up a YouTube channel for some pretty unique things I've done welding that others might find of value. Beer and welding go together - don't they?

thekraken:
Congratulations on your first use of your new system.

It never occurred to me to ferment in a corny keg. How do you allow the CO2 to escape and with such a small head space how do you handle the kreusen? I have to believe you MUST use a blow off tube.

That's certainly an interesting idea and would allow using CO2 to push the beer to another keg, possibly already flooded with CO2, to reduce oxidation potential. That second keg could already be inside a refer and would avoid any heavy lifting. I like it.

Here is a write up that I loosely based my fermentation process off of: https://www.homebrewtalk.com/showthread.php?t=600563

Minimizing oxygen/contamination exposure is my main motivation for trying this out.

You do loose a little bit in capacity. I guesstimate I have about 4 1/4 gallons of beer in the serving keg now. It's my first time, hopefully I can tighten this up. You do need to use an anti foaming agent such as FermCap S to keep the krausen down. I used a pressure relief valve to ferment under controlled pressures, presumably the added pressure also helps to keep the krausen down. I did get some blowoff but I was prepared for it, I used a water filter housing as a makeshift airlock that also caught the blow off. The author of the write up I posted above says he rarely gets blowoff.

There are others that ferment in corny kegs without pressure, they might remove the gas side fittings all together and just shove a hose on there and place the other end into a starsan bucket for blowoff. There are plenty of ways to skin a cat.
 
thekraken:

Speaking of skinning a cat ...

I immediately thought of getting a second one of those oval locks and gasket that normally seal up the top of a corny keg and just drill a hole in it for a standard air lock or a blow off tube. Having never actually seen a corny keg in my presence I really don't know if that would work, however.

Edit - I just read that other thread and see there's much more to this than I originally expected. I subscribed to the thread. It's a winner.

Haha, down the rabbit hole you go.
 
thekraken:

Speaking of skinning a cat ...

I immediately thought of getting a second one of those oval locks and gasket that normally seal up the top of a corny keg and just drill a hole in it for a standard air lock or a blow off tube. Having never actually seen a corny keg in my presence I really don't know if that would work, however.

That would work, there was a thread about that around here started the other day... You can just buy one already made too http://www.homebrewing.org/Corneliu...dLLf4vuEznVot8COe1-GAId9wqx9ovIKNWRoCN5Pw_wcB
 
mongoose33:
This "hobby" is going to take up quite a bit of floor space. The hot table, a work table, a fermentation chamber and a keg dispensing unit is what I've identified so far plus some odds and ends storage space for stuff not in immediate use. Did I forget anything? I'll use our existing huge SS sink for clean up.

Oh, you're probably forgetting something but maybe you could just fabricate it. :)

Brewing can use up a lot of floor space but it doesn't have to. If you can dual-purpose things like a prep table, and have a place very close by to store your stuff, instead of leaving it out, that may help.

As I think about my brew day, I have a 3x2 foot table (pic below) on which I put my plastic toolbox full of hydrometers, water additions, and so on, and where I keep my refractometer and PH meter. It's big enough but 4x2 feet would be better. I have the burner and boil kettle (you'll be electric w/ a brewing sculpture), and...that's about it. My sink is right there in the garage, and that's important to me--when I have stuff I need to rinse quickly, that's very handy. Saves steps, saves time.

If you can tie this to location your stainless sink somehow, you'll thank yourself later. I'm dumping out or rinsing things like cups that hold PH calibration fluids, a turkey baster I use to draw wort for PH testing, a little colander I use to press into the mash to allow me to draw off wort and not grain, and so on. I'm getting an upgrade to it with a sprayer so I can move my chiller right from the kettle to the sink and immediately rinse it off.

Hard to say not knowing your space, but one thing that I worked on was getting all my stuff together in one place, so I'm not running around like a nut grabbing this and that. Used to store most of it in my basement and I swear I must have run up and down those stairs 15 times each brew day--and then had to schlep the stuff back down there.

I bought a rolling cabinet (72"h x 36"w x 18"d) that I could roll out next to my brew space in the garage, and it's big enough to store everything except the mash tun, which sits on a shelf above my workbench. I roll it back into a corner when I'm done. (pic below) Maybe that will give you some ideas on space needed and how to configure it.

I wanted enclosed storage so insects wouldn't get into my brewing stuff. I hate flies and the fly-specks they leave behind. I didn't have a place to hang cabinets with doors, so this worked well. So as you go forward, think about where you're going to store your stuff so as to keep it handy and accessible, yet well-stored.

At times I'm a little bit efficiency-obsessed, in that I don't want to waste time or steps I don't have to. That leaves me time, during the brew day, to ponder the universe and sample previous batches of my beer (strictly for quality control, mind you).

mongoose33
I've got two 1000lb electric winches that I use as needed on my metal projects. I could allocate one to a gantry type setup in the brew area to do the heavy lifting. I agree that wrestling heavy stuff above waist high is an issue; I'm not Schwarzenegger.

A quick back-of-the-envelope calculation tells me that may be enough. You know yourself and what you're able to do physically. A hoist above my keezer would be nice. Wouldn't do much for the decor in my basement, but it would be nice. :)

Before I started researching beer brewing I had never heard of a "growler". I've seen pictures of them and it would seem they're intended for short term storage.

That's exactly what they're for. If you cap them on foam and store cold, they can keep for a week or more. Otherwise, it's a way for me to take my beer to a party or my LHBC meeting.

When I get to the point of actually doing something, I fully intend to video it. I've been considering putting up a YouTube channel for some pretty unique things I've done welding that others might find of value. Beer and welding go together - don't they?

Use pictures too, if you can. A great example of someone documenting their brewing build is here:

https://www.homebrewtalk.com/showthread.php?t=594411

cabinet2.jpg

toolbox.jpg
 
thekraken:

Speaking of skinning a cat ...

I immediately thought of getting a second one of those oval locks and gasket that normally seal up the top of a corny keg and just drill a hole in it for a standard air lock or a blow off tube. Having never actually seen a corny keg in my presence I really don't know if that would work, however.

Edit - I just read that other thread and see there's much more to this than I originally expected. I subscribed to the thread. It's a winner.

Why buy a second lid and drill a hole in it when the existing lids can have a hole easily by removing one of the posts? Just get a hose that slips over the threads and run that puppy down into a blowoff jar. When the big ferment is over you can put the post back on and let it carb up, or push the beer to secondary if you wish.
 

Latest posts

Back
Top