THE POLs $3 MLT & HLT Sight Gauge!!

Homebrew Talk - Beer, Wine, Mead, & Cider Brewing Discussion Forum

Help Support Homebrew Talk - Beer, Wine, Mead, & Cider Brewing Discussion Forum:

This site may earn a commission from merchant affiliate links, including eBay, Amazon, and others.

The Pol

Well-Known Member
Joined
Feb 12, 2007
Messages
11,390
Reaction score
117
Had to correct my original thread, it is not $10... it is $3.13

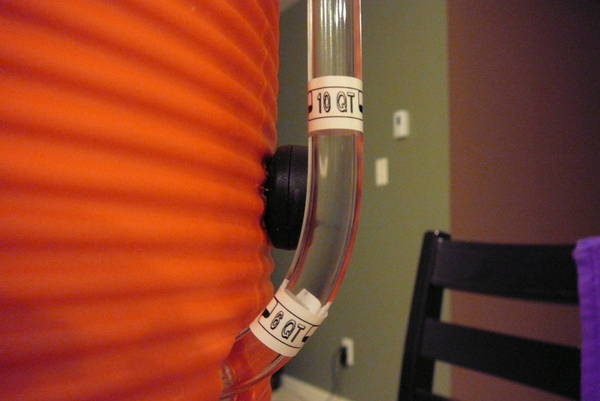
I will have a complete write up on this, including materials, instructions etc. at BREWERSFRIEND.com in the coming weeks. You can actually read about many of my DIY projects, experiments and musings over at brewersfriend.com


P1020416.JPG


P1020419.JPG
 
Guessing this is pretty recent since theirs no other respsonse and I didn't see anything at brewersfriend. Look forward to details. I plan on doing the same EHLT as you and that looks like a nice looking and simple sightglass.
 
It is excellent, I used the cooler handle as the support for the gauge. I will have details on how to properly and accurately bend the tubing etc. I learned a few things. My silicone hoses show up in two days, then I do the Aussie no chill thing.
 
The silicone? It is 1/2" ID tubing from AHS. The sight gauge is polycarbonate
 
The sightglass is what I was asking about. Thanks. Looking forward to details. I've started keeping an eye open for 10G Round Rubbermaids to go on sale. Hoping to build soon. I'll be keepin an eye out and referencing your build thread(s) for my HLT build
 
I have multiple, lenghty threads about all of my builds. I warn you, there is A LOT that went into this beast, there is a lot to read and learn.
 
So how did you do this? I just got a 5 gallon Rubbermaid from HD and will be setting it up to do partials until I feel comfortable with AG. For $3, I definitely want to do the sight glass. I looked on your site but do not see anything.
 
Since it is likely that Pol is out making a dime, I'll pitch in on this. I did the same thing on mine.

I got some polycarbonate (rigid) tubing from McMaster Carr. You'll have to buy 8'.
The way that worked best foe me was to use a heat gun. Just warm it up and bend a 90* on it. It took 5 minutes.

I also did one by placing it in a 350* oven for 30 min or so, then used a jig to bend the 90.

How do you cut the polycarbonate tubing? Will a hack saw work? Do you need to clean up the edges after cutting?
 
I'll have to get some (long overdue ) pics up, but I used a drilled stopper (#5? ).

I put a little aquarium cement on it to make sure, but I doubt I needed it.
Drill the hole with a step drill, and put the cork on from the inside of the cooler.
The water pressure actually tightens the seal.

I've had these on (and a thermowell done the same way ) with no leaks for quite a few brews.
 
This is such a simple solution. Get a drilled stopper, something like a #2 or 3 would be fine. Drill a hole into the cooler small enough that the stopper with the 1/2" OD tubing inserted fits nice and tight. Put a 90 degree bend in a piece of polycarbonate by locally heating at the bend location. The stopper gets inserted into the wall from the inside of the cooler.
 
Yup, been out dodging thunderstorms...

You guys basically covered it.
 
Back
Top