Suggestions on How to Seal the Thermowell Hole in the Lid of a Conical Fermenter

Homebrew Talk - Beer, Wine, Mead, & Cider Brewing Discussion Forum

Help Support Homebrew Talk - Beer, Wine, Mead, & Cider Brewing Discussion Forum:

This site may earn a commission from merchant affiliate links, including eBay, Amazon, and others.

pvpeacock

Supporting Member
HBT Supporter
Joined
Mar 20, 2013
Messages
2,280
Reaction score
1,792
Location
Palos Verdes Estates
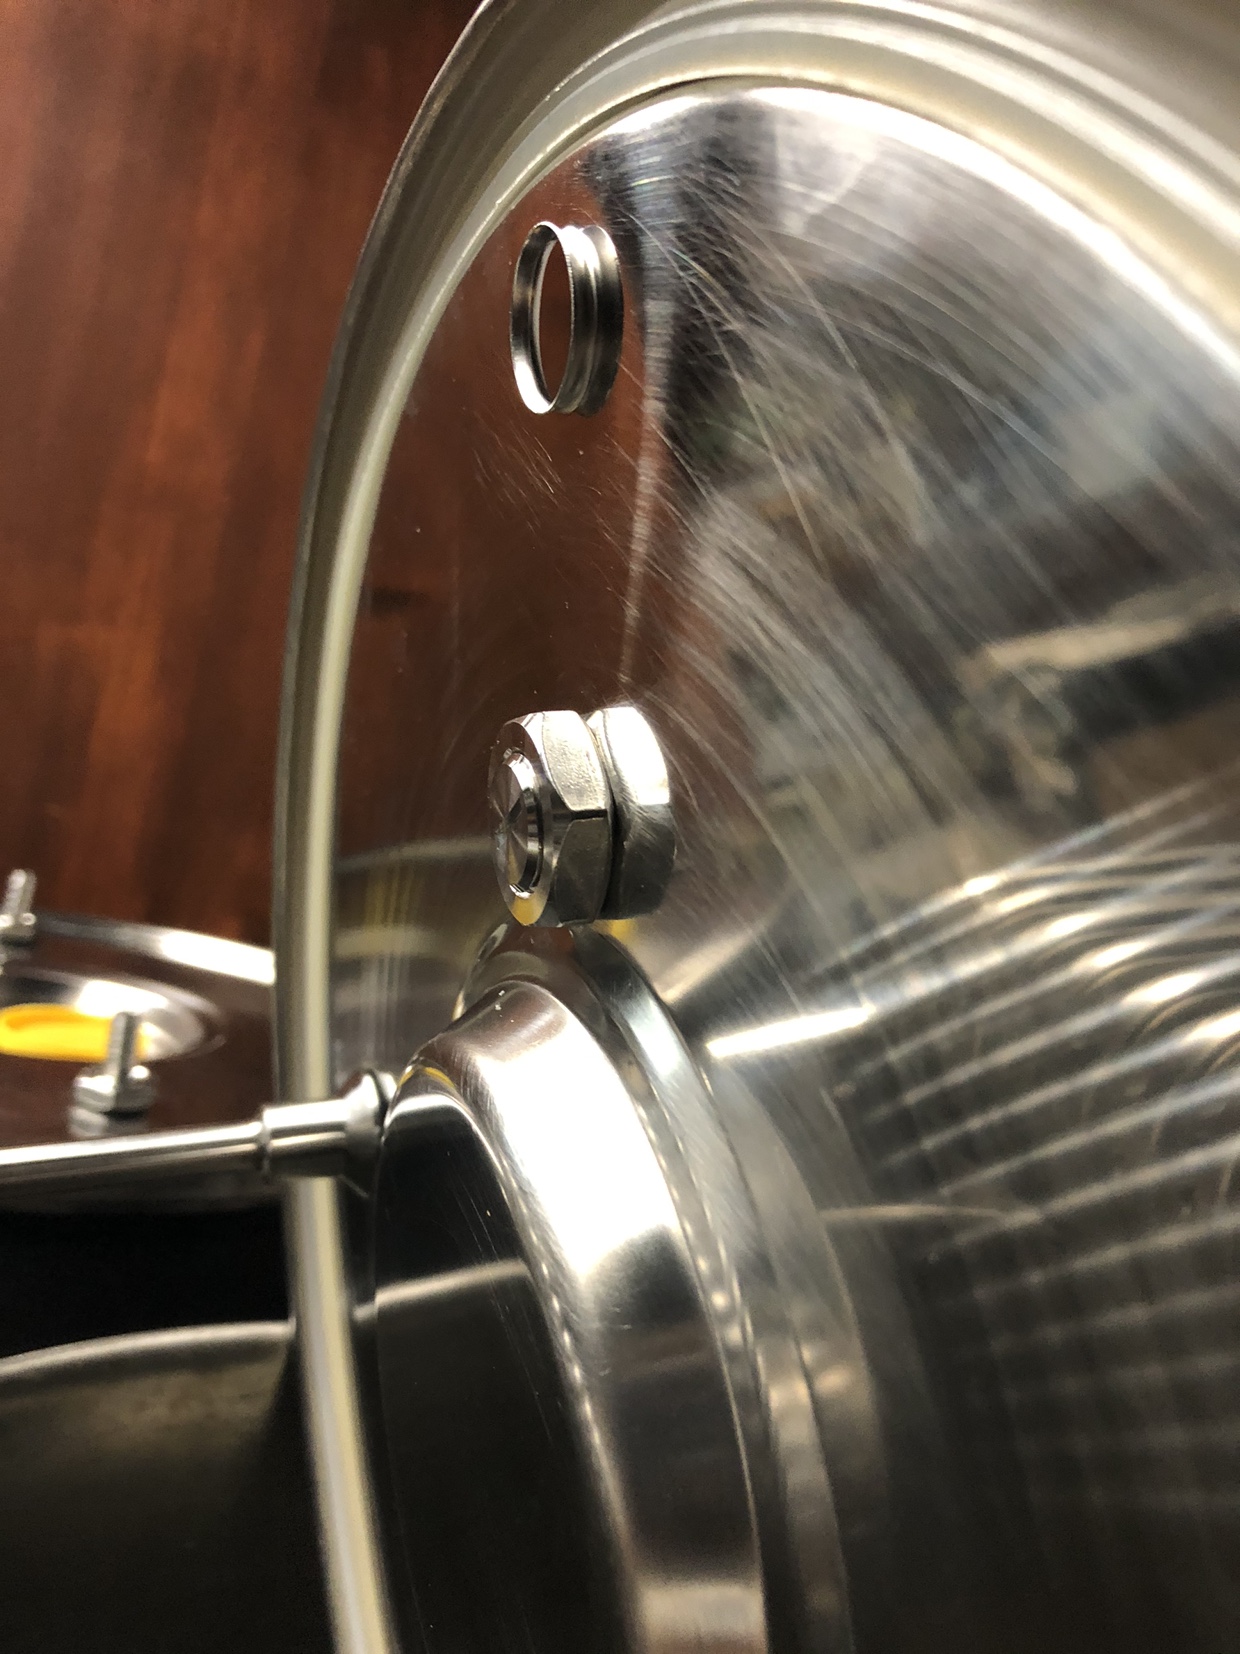
I have 2 SS Brewtech 7 gallon conical fermenters with the FTSS temperature controller kits. The lids that come with the kit are flat with 4 holes: 2 for the cooling coil, 1 for an airlock/blow off tube and one for the thermowell. See the underside below.
SSBrewTech_FTS_Assembled-400x400.jpg

I recently bought the FTSS controller brackets so I can mount my controllers on the front of the conical using that thermowell instead of the thermowell in the lid. My preference would be to remove the thermowell in the lid and seal the hole rather than leave it in place. Any suggestions on how to seal it without it looking like a hack job? Thanks.
 
Last edited:
A few general questions about that system.
I was wondering about the coil, at what volume is it completely covered?
Those bucket have a volume of 7 gallons, is that to the rim?
 
I thought about a stainless bolt with o-rings. I think the hole is 17mm.
My memory is that 7 gallons is almost to the rim. I usually fill it to 5 1/2 gallons and only occasionally to 6 gallons.
 
Check w: Bobby M at brewhardware.com

He will likely have what you need....

Rather than a bolt, a more elegant solution is a weld less threaded bulkhead and a plug...but Bobby will know better...
 
If the hole is 17mm in diameter you could use SSB's compression plug which doesn't look so bad once installed:

https://www.ssbrewtech.com/collections/accessories/products/17-mm-chiller-coil-hole-plug

Vale71 is right. Ssbrewtech offers a plug specifically made to plug the holes. What you're finding is the reason why the BME brew bucket is a worse purchase than the regular one. Now that you've got the ftss2, you have 2 thermo wells ... or an extra hole that does nothing for you.

Just as a FYI, if it were me, I'd use the lid thermowell and not the front. Not much of a difference I guess, but the lid well is longer and gets more to the center of the beer.

Use the cap, its seal will be better
 
Now that you've got the brew bucket and ftss2, you could always go a few steps further and completely upgrade it.

You can do the following if you're interested.

1- Buy the cap that vale71 linked.
2- Buy a weldless TC bulkhead
3- Buy the carbide hole saw linked below
4- Buy a pressure transfer fitting

With all these you can do pressure transfers and cold crash in the brew bucket without any suck back. As long as you keep the pressure very low, you only need about 2-3 psi to make it work. This also let's you have a blow off for bigger fermentation rather than just an air lock. Use the cap for the airlock hole.

Brewhardware sells a 1.5 TC blow off cane instead of using the pressure fitting if you're worried about it clogging.


https://www.ssbrewtech.com/products...ss-1-5-tc-fitting?_pos=1&_sid=f5a36e26b&_ss=r

https://www.ssbrewtech.com/collections/accessories/products/1-5-tc-pressurized-transfer-fitting
 
Now that's a worthwhile upgrade! Brilliant!


Fyi, if you do decide to do all these upgrades ... do NOT installed the weldless bulkhead in the center of the lid. It will not work. If you install it there in the recessed center portion, the tri clamp itself will hit the raised ridge. You won't be able to tighten it up. Install it anywhere that works best for you anywhere on the lid besides the recessed center portion.
 
Now that you've got the brew bucket and ftss2, you could always go a few steps further and completely upgrade it.

You can do the following if you're interested.

1- Buy the cap that vale71 linked.
2- Buy a weldless TC bulkhead
3- Buy the carbide hole saw linked below
4- Buy a pressure transfer fitting

With all these you can do pressure transfers and cold crash in the brew bucket without any suck back. As long as you keep the pressure very low, you only need about 2-3 psi to make it work. This also let's you have a blow off for bigger fermentation rather than just an air lock. Use the cap for the airlock hole.

Brewhardware sells a 1.5 TC blow off cane instead of using the pressure fitting if you're worried about it clogging.


https://www.ssbrewtech.com/products...ss-1-5-tc-fitting?_pos=1&_sid=f5a36e26b&_ss=r

https://www.ssbrewtech.com/collections/accessories/products/1-5-tc-pressurized-transfer-fitting


Good suggestions, but let me suggest one more: a lid mounted PRV. SS Brewtech sells a pop-up PRV designed to release around 2~2 ½ psi. Make sure you get that one and not one of the ones that More Beer or Brewers Hardware offer unless you are SURE they aren't set to release at 5 psi. The Brew Bucket is only advertised to hold 2 psi pressure. If you take it much past 3 psi, there's no guarantee that one or more of the four latches won't fail and the lid will blow off.

Both 2 psi and 5 psi PRVs look identical. The release point can be changed by adjusting the compression on the spring. Unfortunately, after doing that, the only way you know exactly where the PRV will release would be to test it (or be assured by the supplier that you have the right set point; there are no external markings). There's also an aftermarket pop-up PRV that looks almost identical, but it's release point is 20 psi. It's spring is much thicker and hard to compress, but the overall design and physical size of the PRVs are the same.

Still, given those caveats, that PRV can be your very best friend. It can give you cheap yet very reliable protection from both a major miscalculation or an average brain-fart on a 24/7 basis, and also save you from a ruined brew vessel, a really messy brew area, and potentially very serious injury. If you can operate a drill, you can install it in literally 2 minutes, spending more time finding your drill and inserting the drill bit.

Brooo Brother
 
I thought about that as well, but if I put the button side (as opposed to the thread side) on the underside, then the o-ring is also on the underside. In other words, if krausen reaches the lid, it will either cling to the threads and nut or will get under the button and onto the o-ring. Either way, I would have to remove and clean/sanitize it. I thought about flipping it and still using the o-ring on the top, by SS Brewtech recommends against using the o-ring on the same side as the nut because it tends to contort when you tighten the nut. I have this same problem with the o-ring on the top of the coils when tightening the nut.
 
To all the brewers here: thank you for the input.

Yesterday I removed the spiral from the boiler and mounted the original SS mm Brewtech sealing plugs (round side incl. O-ring on the outside, nut on the inside). Then I filled the kettle with warm water and PBW, rinsed with water, filled with water and phosphoric acid and then rinsed well with water.

No Leaks !


Now I have to think about how I will realize the heating;

There are still some triclamps on the way from China... Can't wait for them to arrive.

John
 
Back
Top