STC-1000 Setup - For Beginners

Homebrew Talk - Beer, Wine, Mead, & Cider Brewing Discussion Forum

Help Support Homebrew Talk - Beer, Wine, Mead, & Cider Brewing Discussion Forum:

This site may earn a commission from merchant affiliate links, including eBay, Amazon, and others.
I do not have any extension cords to sacrifice and would rather just buy one, can a standard outlet be subbed for the two female with 14ga wire? I am assuming yes but do not have any experience with this.
 
You mean like this?
show_image.php
It works great! I made mine using an outlet. You will still need a power cord to supply power to your STC1000. The outlet is wired such that you plug the fridge into one and the heater int the other.


Drinking = Lucky Red ale
Kegged = Tomahawk Amber ale
Secondary = test batch IPA
 
That is exactly what I was thinking, I like the way you did that - will probably copy your design...I was planning to use the project box but will probably go with the electric box (is that what it is called or is there another name?)
 
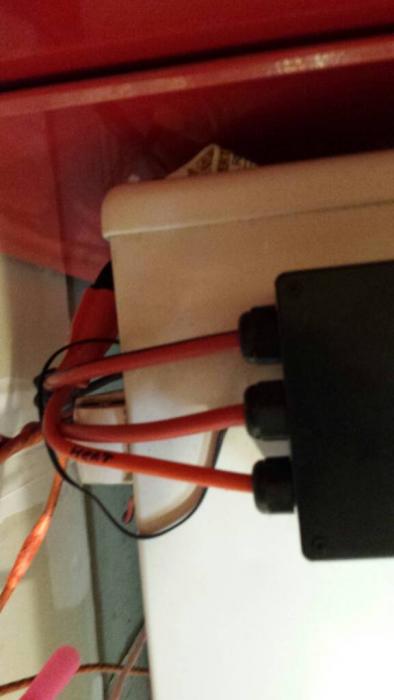
That picture isn't my design, but from the website I got my instructions from. ImageUploadedByHome Brew1398396885.492184.jpg Here's what mine ended up looking like.
It was in a 3-switch box from Lowes. I don't know the correct name of the box. 😬


Drinking = Lucky Red ale
Kegged = Tomahawk Amber ale
Secondary = test batch IPA
 
That picture isn't my design, but from the website I got my instructions from. View attachment 195417 Here's what mine ended up looking like.
It was in a 3-switch box from Lowes. I don't know the correct name of the box. 😬


Drinking = Lucky Red ale
Kegged = Tomahawk Amber ale
Secondary = test batch IPA

Could you link me to the directions you used? I am assuming there is something special I need to do in order to get the top outlet to be the only one activated when the temp sensor wants to cool and vice versa for the heater
 
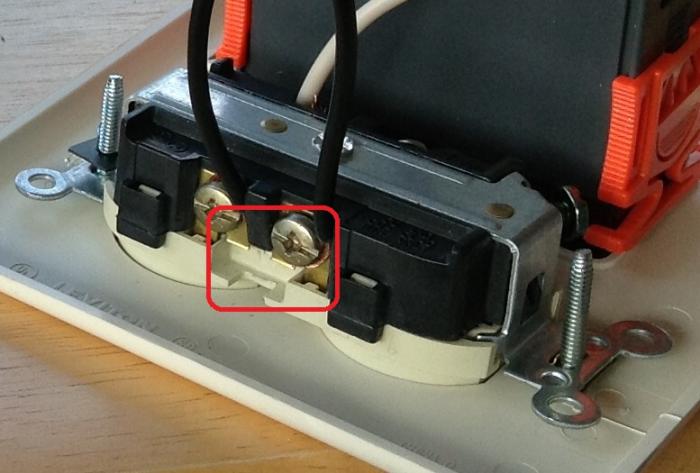
I am assuming it is as simple as breaking off the brass tab, can anyone confirm?
 
I am assuming it is as simple as breaking off the brass tab, can anyone confirm?

That is correct. Built a STC controller recently and you have to break off the brass tab so that each outlet is independent.
 
Quick question I don't see addressed so far.

The orange clamps on the side, do you remove them and put them back during installing into the project box? They seem to be the same dimension as the screen so I assume so.

How to do so with braking the plastic tabs?

Nevermind, I'm silly.
 
Quick question I don't see addressed so far.

The orange clamps on the side, do you remove them and put them back during installing into the project box? They seem to be the same dimension as the screen so I assume so.

How to do so with braking the plastic tabs?

Nevermind, I'm silly.


Yes you remove them. You lift up on the middle tab and slightly slide them towards the screen then they will easily slide back off the stc
 
Okay so everythings working out well except cutting the square hole out for the screen.

Having drills, bits, a jig saw (but no blade), a coping saw, two table saws, and a thick rusty hand saw.
Tried cutting through with a work blade (xacto style). PITA!
Tried drilling circular holes into the corners, and using the coping saw. Too difficult and unsteady to cut straight. Ended up terrible.

Should I just go buy a new jig saw blade tomorrow?

Do I need to sand/file down the edges of the drill holes so they don't scrape the extension cord parts, or don't worry too much about it?


I used a Dremel tool with a cutoff disc. But, a new jigsaw blade is better than an old one. The electrical box I used already had holes in it to feed the power and temp probe wires through. It wouldn't hurt to smooth the holes out.
 
I used a hacksaw blade for mine. I drilled the corners, and on the smaller hole for the power cable, I drilled a series of holes.
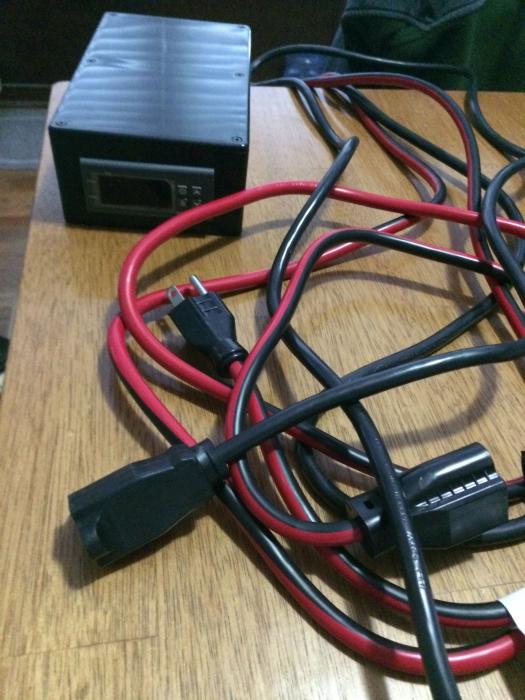
I used a PC power cable and an outlet for the cable. I didn't want just the cable running out of the box.
ImageUploadedByHome Brew1398862231.016884.jpg
ImageUploadedByHome Brew1398862269.910758.jpgImageUploadedByHome Brew1398862303.736706.jpg


Sent from my iPhone using Home Brew
 
I used a jig saw for mine. Got everything done in just about 2 hours. And I made sure the cords were extra long. This is such an easy project :D

photo (29).jpg
 
Finished my build. Hooked up, looks like it's working. Tested with a light fixture, checked the temp reading against a calibrated thermometer.
Plugged into the giant chest freezer (up to 28 gallons capable!)

Waiting for the giant thermal mass to cool down to 15.5c (60F).
Pics to be followed
 
ImageUploadedByHome Brew1399247870.871820.jpg

These plastic boxes and plastic cover fit the controller and two plugs perfectly.


Sent from my iPhone using Home Brew
 
View attachment 197506

These plastic boxes and plastic cover fit the controller and two plugs perfectly.


Sent from my iPhone using Home Brew


Where did you get that box?


Finished my build. Hooked up, looks like it's working. Tested with a light fixture, checked the temp reading against a calibrated thermometer.
Plugged into the giant chest freezer (up to 28 gallons capable!)

Waiting for the giant thermal mass to cool down to 15.5c (60F).
Pics to be followed


How did your build work out??
 
Checking in.... still going strong after 6 months of pretty much non stop fermentation and cold crashing!

1401869943610.jpg


1401869967813.jpg


1401869988338.jpg
 
I've got to say I appreciate all the great info that all you guys have posted re: these units. I've been using one of those pricey units they sell at the LHBS for less than a year and today it decided to take a dirt nap. Thanks to all the great info on these threads I was able to get the parts ordered and will (hopefully) be up and running in less than a week.

Cheers!
 
don't forget to adjust the compressor delay function. i wasted 3 hours checking and rechecking wires before i read the instructions
 
For those that used the 3-prong (computer/monitor) cord - is there anything tricky with the wiring (black/white/green must go ____) also, my outlet that I bought says 240, but its just a piece of metal so it should be fine for 110 right?
 
Green goes to the grounding screw on outlet you are wiring. Some of the schematics indicate it goes to one side of the outlet. If you do that, you'll trip a GFI outlet when you plug it in.
 
Thank you so much for posting this! I had no idea a controller like that could be had at such a nominal price. As a mechanical engineer, most things electronic are "magic boxes" to me. The STC-1000 is actually not all that magical after all. The instructions were incredibly simple. I used push-in connectors instead of wire nuts. I'm also going to seal the unit to protect from condensation and am excited about some other ideas I've got for retrofitting the fridge. Great post! Lagering, here I come!
 
It looks like something killed the images on the original post! Any chance someone has a copy of this guide saved somewhere that would include the images you could send me? I was really hoping to do this build :(
 
Back
Top