Spike Conical- observations and best practices

Homebrew Talk - Beer, Wine, Mead, & Cider Brewing Discussion Forum

Help Support Homebrew Talk - Beer, Wine, Mead, & Cider Brewing Discussion Forum:

This site may earn a commission from merchant affiliate links, including eBay, Amazon, and others.
Ok:
#1- love the dog! Great helper!
#2- like the cart. Very nice. Great that its on wheels.

I was moving the cf5 from my kitchen outdoors, down 3 steps, into the upright freezer. Heavy.
Then i moved- now i can gravity flow right into the cf5, plug in the coils, and go.

I had temps probably around 70-78. I am cheap and dont run ac durig the day. Norcal heat this time of year.
I was able to maintain 50 easily with two 1-gallon plastic water jugs frozen. Swapper once when i got up, one when i came home, once when i went to bed. 3x a day. I could have easily only done 2x a day.
I was able to get down to about 40 for cold crash, but it required many ice swaps.
I want a glycol chiller but cannot justify the price. And i hear they can be noisy.

Instead, i "crashed" as good i could, racked to a keg, and put it in my upright keezer at about 34 or so. It worked.

What i really liked was the constant temp the coils give you. Cant wait to do an ale next.

Yeah love the sight glasd but not sure i need it. I just dump yeast after primary and have started racking from the 1.5" racking port. Leaves most junk behind. Cheers

You can also go DIY on the glycol chiller. I have a chest freezer I had been using but after getting the cf5 I didn’t really want to mess with selling it and buying a upright as I still use it for my ss brew bucket. It was a fun project and cost me around $100 (craigslist AC). I plan on getting another cf5 and running the glycol lines to a quick disconnect manifold where I can just plug in the conical chiller lines into the manifold....at that point I will sell my freezer and ss bucket. I will say it is louder than a fridge/freezer but it’s in my basement and can’t hear it when another room.

Another benefit I found is to to just transfer wort to the fermenter at around 80-90F when chilling starts to slow when groundwater temp is higher in the summer and run the glycol chiller for a 10min or so to pitch temp saving water. I’m also cold crashing down to 32F with it.
 
Ok:
#1- love the dog! Great helper!
#2- like the cart. Very nice. Great that its on wheels.

I was moving the cf5 from my kitchen outdoors, down 3 steps, into the upright freezer. Heavy.
Then i moved- now i can gravity flow right into the cf5, plug in the coils, and go.

I had temps probably around 70-78. I am cheap and dont run ac durig the day. Norcal heat this time of year.
I was able to maintain 50 easily with two 1-gallon plastic water jugs frozen. Swapper once when i got up, one when i came home, once when i went to bed. 3x a day. I could have easily only done 2x a day.
I was able to get down to about 40 for cold crash, but it required many ice swaps.
I want a glycol chiller but cannot justify the price. And i hear they can be noisy.

Instead, i "crashed" as good i could, racked to a keg, and put it in my upright keezer at about 34 or so. It worked.

What i really liked was the constant temp the coils give you. Cant wait to do an ale next.

Yeah love the sight glasd but not sure i need it. I just dump yeast after primary and have started racking from the 1.5" racking port. Leaves most junk behind. Cheers
Thanks!
 
Hmmm not sure exactly what you mean about the carb stone going in from the top. It would need to be on a pretty long pipe or hose to reach all the way down similar to the stainless aeration stones. Do you have any pictures of what you have? Cheers

@Blazinlow86
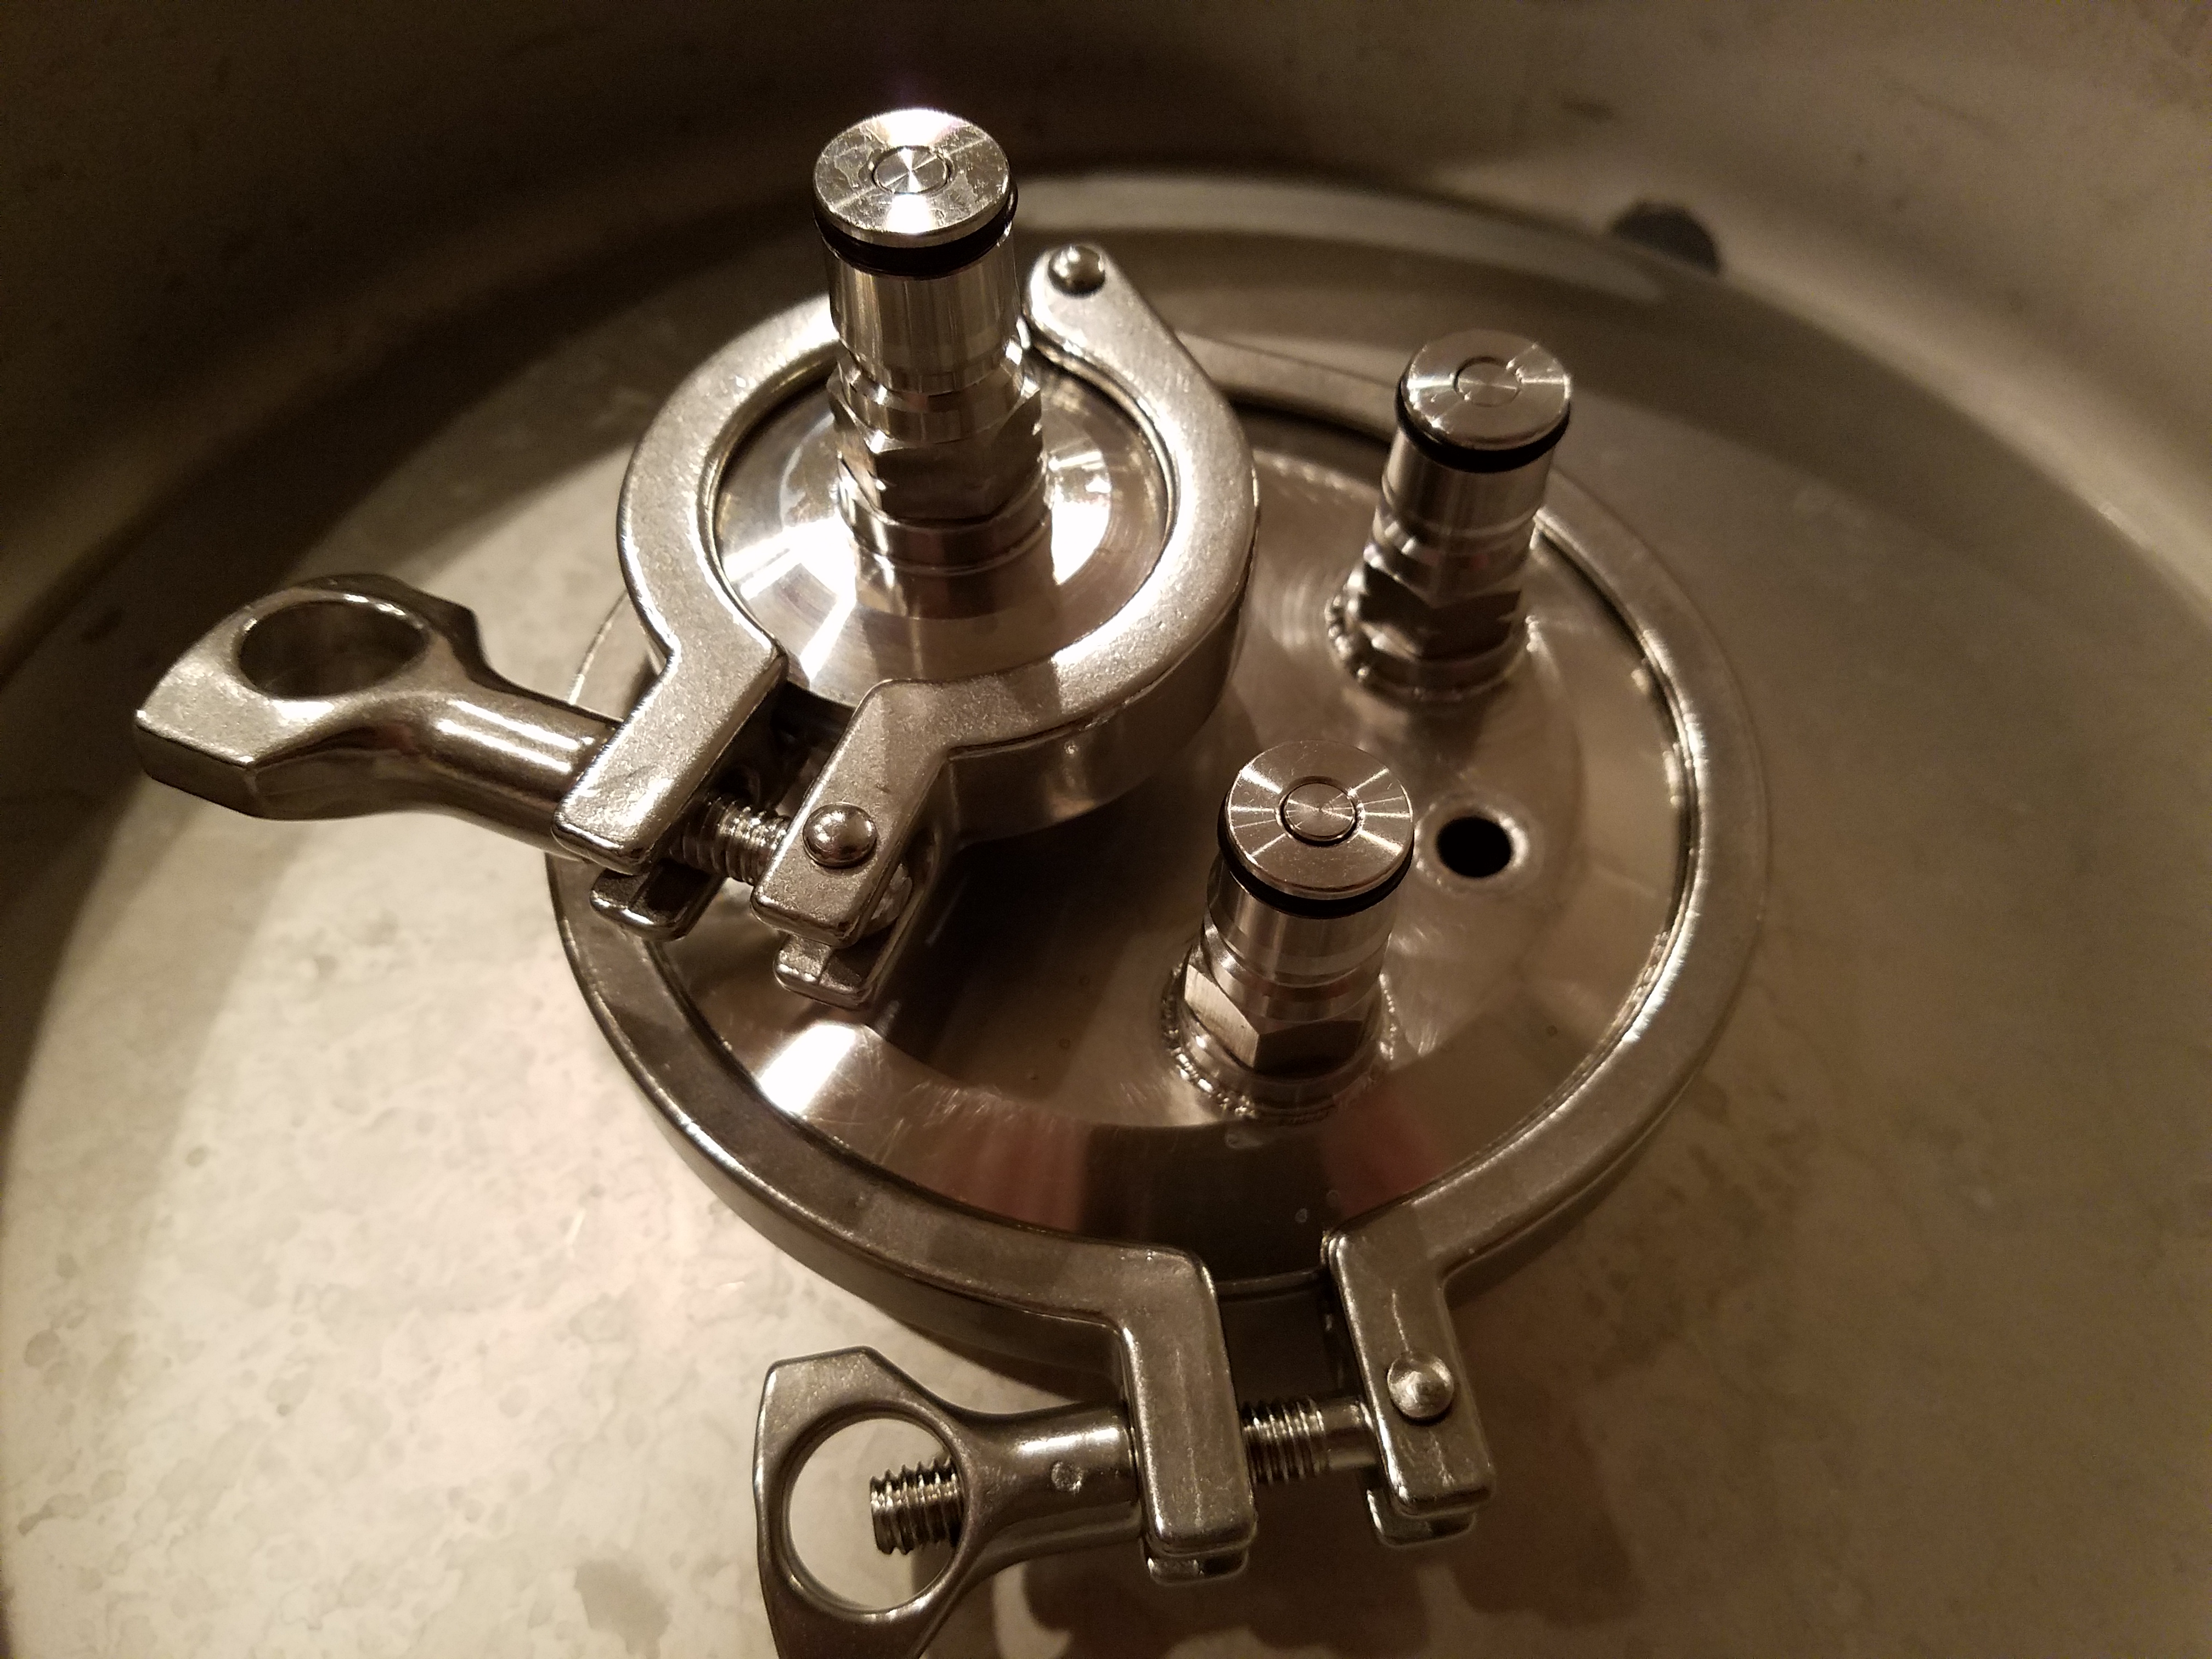
Here's a picture of the top of the 4" TC lid I'll use. It has 2 ball lock posts, a thermowell and a 1.5" TC ferrule, all welded on. Ideally I be able to put a compression fitting on the end of a long corny diptube and hook up a carb stone to that. If I can't find the parts for that, I will use a silicone tube from a short corny diptube and hook up a carb stone with a barb to the other end of the silicone tube. That will let me keep the 1.5" ferrule free to add dry hops without removing any other caps. And I can put the gas manifold with the PRV on the 1.5" ferrule on the Spike lid.
lid.jpg
 
@Blazinlow86
Here's a picture of the top of the 4" TC lid I'll use. It has 2 ball lock posts, a thermowell and a 1.5" TC ferrule, all welded on. Ideally I be able to put a compression fitting on the end of a long corny diptube and hook up a carb stone to that. If I can't find the parts for that, I will use a silicone tube from a short corny diptube and hook up a carb stone with a barb to the other end of the silicone tube. That will let me keep the 1.5" ferrule free to add dry hops without removing any other caps. And I can put the gas manifold with the PRV on the 1.5" ferrule on the Spike lid.
View attachment 632682
Ah is see I what your doing. Can't see any reasons it wouldn't work. Cheers
 
@Blazinlow86
Here's a picture of the top of the 4" TC lid I'll use. It has 2 ball lock posts, a thermowell and a 1.5" TC ferrule, all welded on. Ideally I be able to put a compression fitting on the end of a long corny diptube and hook up a carb stone to that. If I can't find the parts for that, I will use a silicone tube from a short corny diptube and hook up a carb stone with a barb to the other end of the silicone tube. That will let me keep the 1.5" ferrule free to add dry hops without removing any other caps. And I can put the gas manifold with the PRV on the 1.5" ferrule on the Spike lid.
View attachment 632682

Looks like a great accessory, especially if you can work out the carb stone idea on one of the built in posts. Then, like you said, you can have the PRV manifold on one 1.5” TC and dry hop through the other. Cool deal. Where’d ya get that thing?
 
@Beardless Had it custom made by Norcal Brewing. He's here on HBT. Goes by the username Jaybird. I use it with a short sanke keg fermenter now and luckily Spike's lids have a 4" TC cap so I can transition it over without needing to spend any additional cash. The thermowell extends about 9" below the cap so I don't know how far down into the liquid it will go, so that part may not be useful. I had that piece designed so I could purge, dry hop, ferment under pressure, and do pressure transfers all with only having to open the 1.5" cap. It's pretty versatile.
 
Anyone bottle straight from the conical using a beer gun? I just did a Westy 12 Clone and really would like to bottle condition half the batch and keg the other half to see if there is any difference. I have the closed transfer kit so I see no reason I can’t do this?
 
Anyone bottle straight from the conical using a beer gun? I just did a Westy 12 Clone and really would like to bottle condition half the batch and keg the other half to see if there is any difference. I have the closed transfer kit so I see no reason I can’t do this?
I was thinking the same thing. I also just ordered a beer gun. I don't see why not as long as you have the pressure cap right?
My only .02 is would you be picking up any sediment from cf5 right to bottle? I have found that after i rack to a keg and the keg sits for a day or so the first 8 ounce or so pour tends to have some minor junk that has settled in the keg.
 
I finally got to use my cf5 with my diy chiller . Transfered wort into cf5 it was about 90 degrees . The pump kicked on and brought the wort down to 67 pretty quick. The beer has been staying right at 67 - 68 degrees . I dont think the chiller is coming on hardly at all . Its holding its temp very well. I am really pleased with this set up.
 
So I got my CF5 yesterday. Haven't had a chance to open and clean it yet. My plan was to use an upright freezer as a fermentation chamber, but after reading this thread and all the temp control talk, I'm wondering if it makes more sense to do some sort of chiller setup. I'll be fermenting in my attached garage. It can be down into the mid 30s in the winter all the way up into the 90s in the summer in my garage so I will need heating and cooling capabilities.

With an upright freezer, there seems to be less maintenance. Just put the fermenter in, fill it, set the controller, plug in the freezer and light bulb, and wait for it to finish. Plus I have an extra freezer if the need ever arose. I could certainly keep my hops in there to appease SWMBO.

With a chiller, the setup would be more portable if for some reason I was allowed to ferment in the house, and it would be scalable if I ever upped my batch sizes. I don't anticipate going to 10 gallon batches but who knows. I'd need to buy the chiller itself, a Spike coil, and presumably a jacket and a Spike heat wrap. Maybe other stuff?

So, if you were starting from scratch, would you go with a chamber style temp control, or a chiller setup? I have the freezer picked out and it's $550. Can I buy a chiller setup for that price or less, and would it be better than a freezer? I don't have much interest in the DIY route so I'd like to buy something ready to go with minimal effort.
 
If your not willing to DIY chiller then I'd go the freezer route . I'm not sure if you could get a chiller at that price . I would have got a stand up freezer if I had the room . So I went DIY window ac chiller that cost about 240$. I will say this the cf5 is awkward heavy . I roll it into my room and have to go over a closet threshold. I'm not sure about lifting into a stand up freezer . I guess it just depends on the height you have to lift. Stand up freezer is your cheapest route .

I guess you could fill after you put it in the freezer if applicable
 
I guess you could fill after you put it in the freezer if applicable

Yes, that is the plan. The freezer will be right next to my brewing setup so the CF5 will be in the freezer before I fill it. I do EBIAB so it's a stationary setup for the most part.
 
hezagenious, do you mind telling me (us) what freezer you have picked out? I've been considering this route but the options are underwhelming...
 
@RCope
GE FUF14DLRWW

Internal measurements above the crisper drawer are 21" W, 18" D, 41" H. It will require a ledge to be built where the crisper panel goes plus some sort of support under that ledge. That shouldn't be too difficult. There might even be enough room on the bottom once you take out the crisper. I think the depth at the bottom is about 13". I need to check the measurements on my CF5 and go measure the freezer again to see if it can fit on the bottom. That would be ideal.

That model is literally the only model I've ever seen with measurements that seem to work. It seems like as you increase the cubic footage, the height and width increase and the depth decreases. I've yet to find an all-refrigerator that works outside of the those really expensive display fridges. Oh, and the beauty is this model is all the door trays come out so the inside of the door becomes basically flat.
 
I use a standup freezer and it works excellent. Glycol won't make better beer but it could be better depending on your specific setup. It's definitely more complicated for the same end result if you don't need it. Admittedly I only payed 50-70$ for my freezer and if I had to spend 500$ I may have gone glycol. Cheers
 
What freezer is that @Blazinlow86 ? Can you share a picture of the fermentor in the freezer?
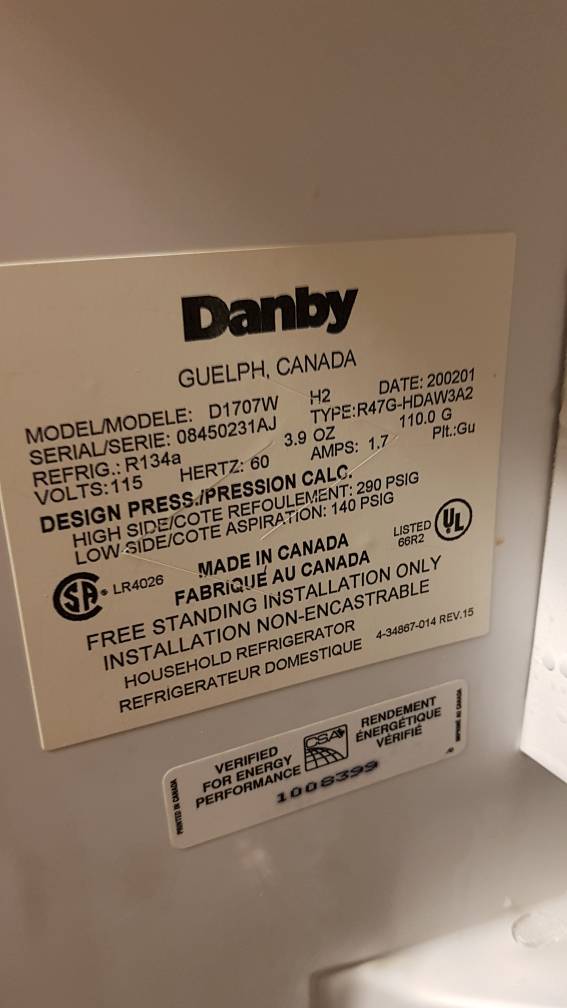
I'll have to take a picture for you when I get home. Its a Danby convertible which as far as I know means it can be used as a freezer or fridge. It has a water collection gutter which is nice. Cheers
 
Yeah- honestly the problem is now I have a garage freezer with all my hops, meat, etc... man is it handy to have a spare freezer! Also great for freezing water bottles.

Question- I had the freezer set to the least coldest setting possible. How does one keep the freezer from getting too cold? My experience was that by the time the interior liquid hit the desired temp, and the controller shut off the freezer, it was getting much colder.

So- to sum up- what is the proper way to "setup correctly" the chest freezer?
Thanks!

I ferment in a fridge now. When I went from 6 gallon carboys to a 16 gallon spiedel I started getting undershooting like you are describing, which would then be followed by overshooting when my reptile heater came on and added back in too much heat. Especially a problem early in the brew before the yeast activity was keeping things in the fermentor well mixed.

I found an Auber temperature controller that has two probes. One goes in or on your fermentor and the other measures the air in your chamber. If I want to set my fermentor for 68F I will have it turn on the refrigerator at 68.5 (beer) and run so long as the beer is above 68 and the air in the fridge stays above 63. The heater will come on if the beer hits 67.5 and stay on so long as the beer is below 68 and the air in the fridge is lower than 73. By keeping the air in the fermentor not too far from where you want the beer to be I completely eliminated the overshoots. Used a couple temp datalogger to confirm this on multiple brews and subjectively the off flavor that made me go down this rabbit hole dissappeared. Here is the controller https://www.auberins.com/index.php?main_page=product_info&cPath=8&products_id=671

In addition to going with the dual prove controller I mounted a computer fan in the fridge to keep the air mixed.
 
I'll have to take a picture for you when I get home. Its a Danby convertible which as far as I know means it can be used as a freezer or fridge. It has a water collection gutter which is nice. Cheers
curious about the model number too if you can grab that
-- I've been thinking going conical means going glycol but an upright freezer using my existing control gear could be a an easier migration for me.
 
That controller is slick. I've been wanting something like that but never knew it existed. I was trying to come up with a way to run Inkbirds in series to add that type of control.
 
curious about the model number too if you can grab that
-- I've been thinking going conical means going glycol but an upright freezer using my existing control gear could be a an easier migration for me.
No problem I'll get it for you when I'm home along with the pictures. Cheers
 
That controller is slick. I've been wanting something like that but never knew it existed. I was trying to come up with a way to run Inkbirds in series to add that type of control.

It really is an awesome controller. I was really thinking about BrewPi Spark for a long time to provide similar functionality but the non DIY version was pricy and DIY was way over my head.
 
I did the DIY BrewPi with Fermentrack, and if you can solder the rest isn't too bad.

People in that thread are super helpful.
The level of control is far beyond.
 
Would someone with a CF5 mind taking a measurement from the front of one of the front legs to the back of the backleg? And also from the outside of the front leg to the outside of the other front leg? I'm trying to figure out if i can fit it in my ferm chamber and the breakout diagram at spike only seems to show the dimensions of the tank without taking in to account the legs. It's going to be tight but i'm hoping i can get it in there.

Thanks!

12" across from the left side of the left front leg to the right side of the right front leg
11.5" from the back of the back leg to the front of the front leg

Left front leg

1.jpg


Right front leg

2.jpg

Distance from back of rear leg to the line tangential to the front of both front legs
3.jpg
 
12" across from the left side of the left front leg to the right side of the right front leg
11.5" from the back of the back leg to the front of the front leg

Left front leg

View attachment 633963

Right front leg

View attachment 633964
Distance from back of rear leg to the line tangential to the front of both front legs
View attachment 633965

Hey all. Might need to account for measurements with all the hardware attached too. I am away from my cf5 right now but *think* the valves, etc. might protrude further than legs.
Just fyi. I bet someone here can help.
 
Hey all. Might need to account for measurements with all the hardware attached too. I am away from my cf5 right now but *think* the valves, etc. might protrude further than legs.
Just fyi. I bet someone here can help.

Nate's right. You might be able to turn it sideways to accommodate those "protuberances" but they do stick out a fair amount.

Here's a pic of the CF5:

cf5.jpg
 
If you look at my picture of have to offset mine about 30 degrees in order to use the carb stone. Cheers
 
Hey all. Might need to account for measurements with all the hardware attached too. I am away from my cf5 right now but *think* the valves, etc. might protrude further than legs.
Just fyi. I bet someone here can help.

Definitely, my ferm chamber is a freezer top fridge that i modified by taking the shelf out and putting in a lower shelf. I put kegs in the top and built fans with ducting to the bottom and a return to create a ferm chamber in the bottom. My concern was it has a very large compressor hump in the back which was no problem with carboys but could be a problem with the CF5. It's 14" to the hump and 24.5" to the back and the hump is only 4" tall so it should accommodate the CF5 since the space expands quite a bit after the legs. It's also 26" across so plenty of room. My concern was really just the legs to accommodate the bump and none of the measurements spike has actually shows the size of the legs they just list the diameter of the tank at 15".

Thanks for the help guy, especially hezagenius who took the time to take measurements and even pics of the measurements so there was no confusion. I'll be getting a CF5 for my birthday in September =).
 
Welp I’m just about to order my CF10 with a slew of accessories.

Stoked about participating in here. Didn’t take long to realize this is the one to pick over the SS Chronical
 
My first is, I’ll be getting the shorty leg extensions and bracket with casters. I know it says not to roll it while full. Is that still true even with the shorty extensions and brace??
 
My first is, I’ll be getting the shorty leg extensions and bracket with casters. I know it says not to roll it while full. Is that still true even with the shorty extensions and brace??

I have a CF10 with the long leg extensions and shelf and casters. You have to be careful when full, but it can be done. Make sure the extensions are tight and the setup is not wobbly. Make sure, also, that the locks on the casters are undone. You can also, as I do, put a counterweight on the shelf on the bottom where the casters are. I use a coffee can filled with lead (use your imagination). Then, when moving it, do not push with your hands on the top half of the conical; use your foot to push it from the bottom, holding on to the top with your hands to ensure you don't run into a pebble and causing it to tip over.

Use caution, then add about 10 percent to that, and you should be OK.

Here's a pic showing that coffeecan on the bottom shelf:

pressuretransfer.jpg
 
Oh wow man thanks for that!! Loving this thread already!!

Also is it best to order through Spike directly or are there some better options out there? I’m in South texas.

Thanks again!
 
Oh wow man thanks for that!! Loving this thread already!!

Also is it best to order through Spike directly or are there some better options out there? I’m in South texas.

Thanks again!
I don't think Spike has authorized re-sellers- I am aware of none. I suggest through them.
 
My first is, I’ll be getting the shorty leg extensions and bracket with casters. I know it says not to roll it while full. Is that still true even with the shorty extensions and brace??

I didn't know they say not to roll it when it's full, kind of defeats the purpose of the casters to me. I have the CF15 with shorty leg extensions, bracket and casters, and roll it about 20 ft from where I fill it up to where I ferment. I pull it from the back leg down low with one hand and keep my other hand on top to keep it stabilized.
 
Back
Top