Side by side kegerator/fermentation fridge: Please Help

Homebrew Talk - Beer, Wine, Mead, & Cider Brewing Discussion Forum

Help Support Homebrew Talk - Beer, Wine, Mead, & Cider Brewing Discussion Forum:

This site may earn a commission from merchant affiliate links, including eBay, Amazon, and others.

brewzombie

Well-Known Member
Joined
Oct 16, 2010
Messages
262
Reaction score
2
Location
Vancouver, BC Canada
First off, thanks in advance for any help. I am a bit out of my depth on this one.

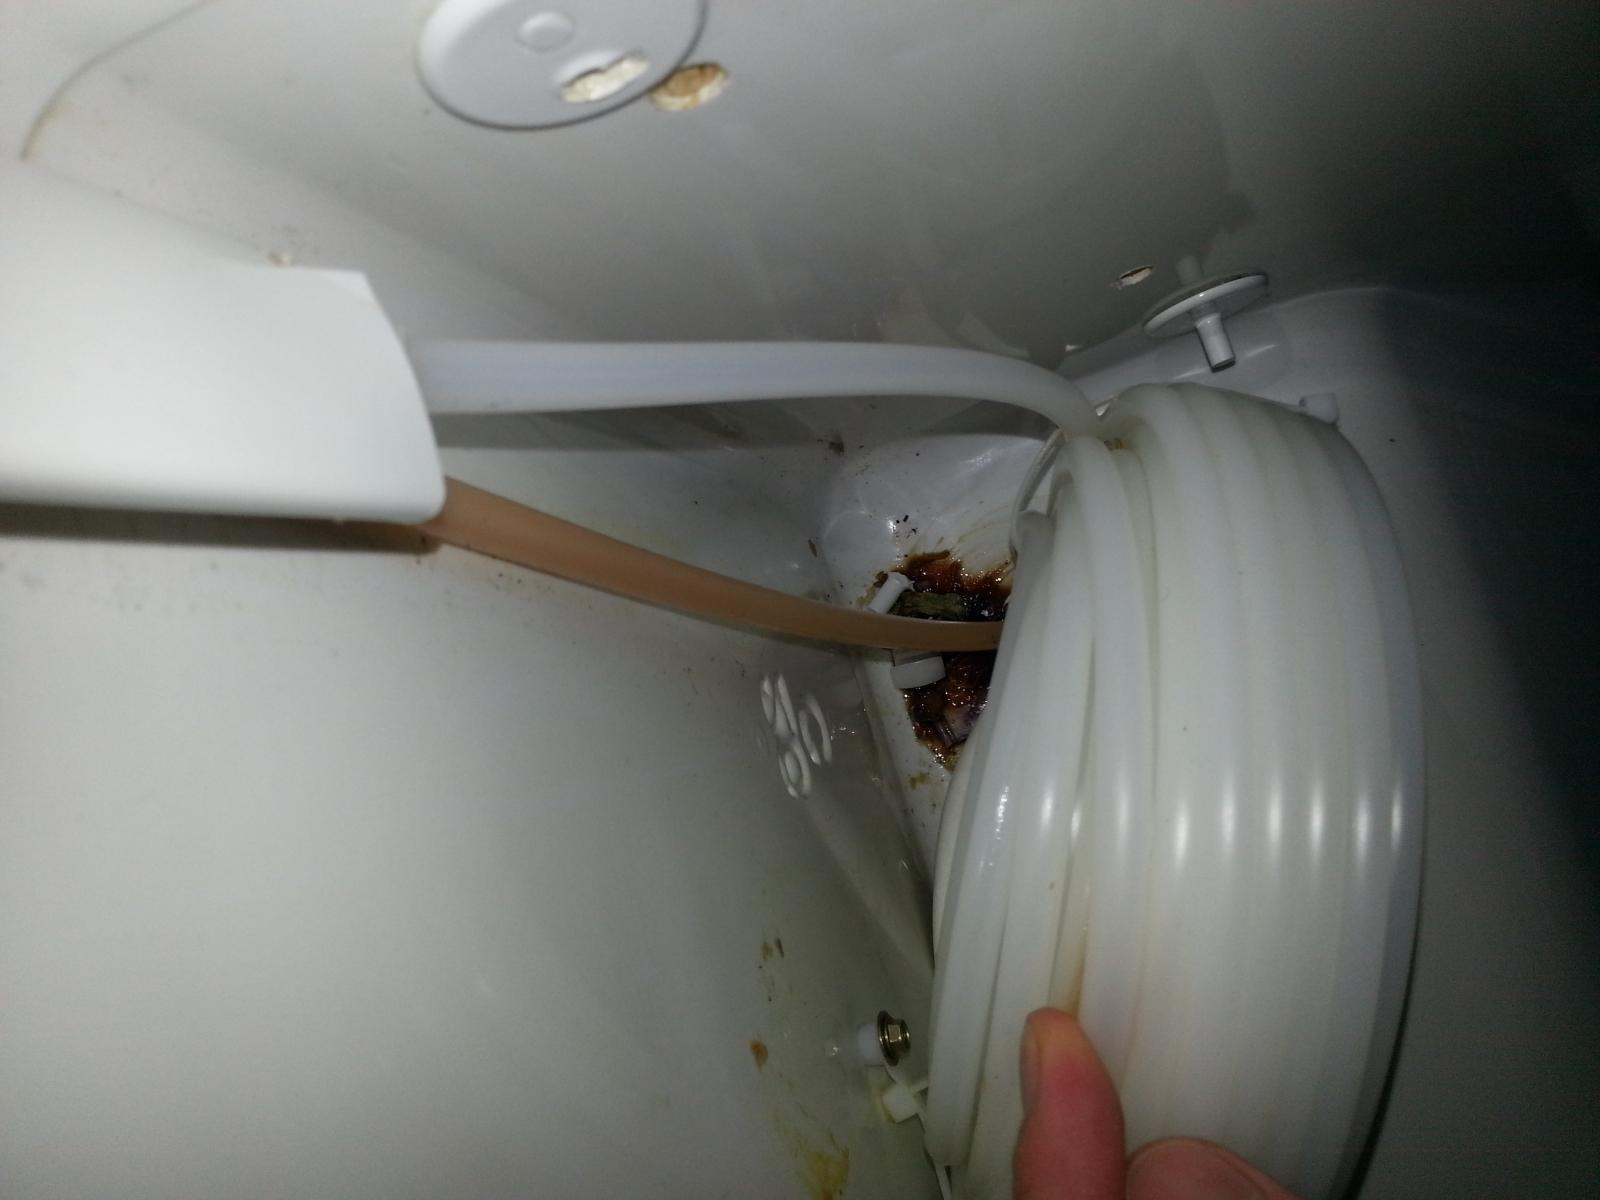
I am the proud owner of a used side by side fridge and hope to convert it to a fridgenstein. The fridge looks serviceable, but when I got it home I noticed it leaking oil...dribbling brown stuff from the front. I took the bottom front and back panels off and can see some brown grease residue (see pics) although It's not dripping any more. I transported the fridge upright in a trailer so it bounced around a lot, but was never on its side and at most only 45 degrees when using the dolly. Can anyone guess what the source of the oil would be and suggest what steps I should take to investigate/fix it?

I found a link to the wiring for my fridge, although I don't think it will be helpful yet. http://manuals.frigidaire.com/prodinfo_pdf/Anderson/240389613.pdf

front.jpg


back.jpg
 
:(It's compressor oil. Along with the refrigerant there is oil in there that keeps the compressor lubed. It might run forever like that. It might run for a week.
 
It may not be oil but some other brown substance left in the fridge that has a greasy residue. The inside of the fridge has this gooey stuff tucked away in an icky corner. Anyone able to identify what these lines are for and what the brown one is? Should I just start cleaning the fridge and move forward or what?

The fridge was cold when I grabbed it so it did work.

fridge.jpg
 
It may not be oil but some other brown substance left in the fridge that has a greasy residue. The inside of the fridge has this gooey stuff tucked away in an icky corner. Anyone able to identify what these lines are for and what the brown one is? Should I just start cleaning the fridge and move forward or what?

The fridge was cold when I grabbed it so it did work.

Those are the water lines. The dirty one is the feed to the filter. The clean one goes to the water tap on the front. The one in my kitchen looks like that too. The gooey stuff is probably Coke or something that got spilled in there.
Clean it up good and let it run for a while.
 
Those are the water lines. The dirty one is the feed to the filter. The clean one goes to the water tap on the front. The one in my kitchen looks like that too. The gooey stuff is probably Coke or something that got spilled in there.
Clean it up good and let it run for a while.

Thanks. I will be ripping out all the water lines as part of the build, but I'll wait to verify that it still runs properly and report back.
 
So the brown greasy substance is not compressor oil. I cleaned it out and it and saw that it dripped down from where the water tubing left the bottom of the fridge side. So that problem is solved.

I turned the fridge on and it seems to get cold (there's frost on the coil inside)...however, 2 more issues:

(1) The evaporator fan does not seem to turn even if I depress the inside door switches or open the door real fast (to catch it before it turns off), so some electrical part or the motor must be broken. I suppose I could repair it with a replacement motor ($40 part) or maybe rig up a pc fan?

(2) There is an issue with the seal of one of the doors. The doors is misaligned because either the plastic bottom bearing is broken ($10 part) and/or because the hinge is possibly warped ($40 part). Where it currently sits, the seal around the door is barely maintained (if at all) because it should sit almost an inch higher. I could probably rig something to fix this or do the proper repair.

Obviously, I got a dud of a fridge, but can (should) I try to salvage this thing? If I start over, I'm out about $150 in fridge/transport costs. The fridge (Frigidaire/Electrolux) is made in 2003 (old) so it's not too surprising its having issues, but it's a great size and has pretty decent stainless steel doors.
 
With the money already invested it would be worth fixing. Check the adjustment bolts on the hinge. May have just loosened up and slid out of place.
 
Actually, the evaporator fan part looks to be over $100 alone to replace. I just tested it with a volt meter and got nothing. Then I wired it with a plug...no movement. Sigh.

Ok. As I understand it, the function of the evaporator fan is to blow/suck air from the coils in the freezer section to the fridge section when the damper vent is open. Does it serve any other function? I mean, if I am going to replace the damper vent with two ac axial fans between the two chambers anyway, then do I even need to replace the evaporator motor? Maybe it helps with constant temperatures in the freezer side too (warm/freezing spots?), in which case I could potentially wire up another ac axial fan in its place for $10 instead of buying a new evap motor for $100? Any thoughts?
 
Alright. I have a new evap motor ($20 jobby not $100: phew!) and 2 STC-1000s on order. I also am confident I can mend the hinge for mere pennies. So, now for the fun part.

Can anyone help me with the wiring (http://manuals.frigidaire.com/prodinfo_pdf/Anderson/240389613.pdf)? From what I've read of other members' builds, a good option would be two ac axial fans between the chambers (in opposite directions) with dryer vents to reduce cold/warm air bleed over, and a heat source in the fridge chamber (ie fermentation chamber). I apparently don't need to bypass the defrost function although I should somehow increase the time between defrosts.

As for the fans, I noticed that the existing holes between the chambers are behind the plate in the freezer that separates the freezer coils / evaporator fan from the main freezer chamber. I am inclined to fill these holes and make new ones in the main freezer chamber. For one, the holes are smallish (about 2-3") and could not easily be expanded because of the size of the metal plate. Second, being behind the plate may mean that the the airflow from the evaporator fan will push open the dryer vents a little every time the compressor turns on (increasing bleed over into the fridge/ferm chamber). Did anyone else run into this issue?
 
Last edited:
You probably already know this, but one STC should replace the thermostat controlling the compressor. This controls the temp on the old freezer side.

The second STC controls heat/cooling (fans) for the fermentation chamber. The cooling as you mentioned between the freezer side and the fridge side (new fermentation chamber).

For mine, I sealed up the existing holes and cut my own. Round on one side and square on the other with holes for the screws to mount the fan. Also made a small notch on the side to run wires for powering the fan.

I don't have a shot with the fan installed on my laptop and I'm out of town but can take a pic of the finished installation when I'm home next week.

I put some wire mesh on the "round" side to keep anything from falling into the fan, and then put the dryer vent on the square side.

Cooling%20Fan%2020140308_183642.jpg
 
You probably already know this, but one STC should replace the thermostat controlling the compressor. This controls the temp on the old freezer side.

The second STC controls heat/cooling (fans) for the fermentation chamber. The cooling as you mentioned between the freezer side and the fridge side (new fermentation chamber).

For mine, I sealed up the existing holes and cut my own. Round on one side and square on the other with holes for the screws to mount the fan. Also made a small notch on the side to run wires for powering the fan.

I don't have a shot with the fan installed on my laptop and I'm out of town but can take a pic of the finished installation when I'm home next week.

I put some wire mesh on the "round" side to keep anything from falling into the fan, and then put the dryer vent on the square side.

Thanks ulnpiper! I love the round/square cutout idea: I'll copy that. It's good to know my instincts were correct with cutting new holes. How did you fill your oldholes? Did you use the plastic cutout/insulation from the new holes? What type of sealant? Silicone or fiberglass fabric/epoxy?
 
For the one at the top, I used it to run wires through from one side to the other (for the thermostat to the STC and power) . Then I have some foam that came from the inside of a tool box stuffed in it to fill the gap. It's the kind of foam that comes in little squares and you can shape the foam for tools by tearing off individual squares.

I imagine almost any kind of weather seal type insulation should work fine.

The bottom hole was just a grill about 3" x 4" so I put a couple of strips of duct tape over it.

All the little holes that were in there for various shelving attachments, water lines, etc. I used plain white caulk to seal up. I had a few rusty spots as well, and sanded those and sprayed them with some rustoleum appliance paint.
 
Back
Top