• Please visit and share your knowledge at our sister communities:
  • If you have not, please join our official Homebrewing Facebook Group!

    Homebrewing Facebook Group

Robobrew/Brewzilla Discussion

Homebrew Talk

Help Support Homebrew Talk:

This site may earn a commission from merchant affiliate links, including eBay, Amazon, and others.
Couple of more question before I pull the trigger on the Brewzilla:
1. Do I need to get the whirlpool arm? Does it actually help?
2. I will brew mostly only 10L batches. Given this, would the hop spider even reach that depth? And hence the question - should I buy this?

Thank you.
I use a large nylon bag for my hops. You can get the smaller reusable ones too and just use multiple. I like the bags because you can squeeze the wort out of them before transferring. Every drop counts! 😄

They're also nice for filtering out small particles after the mash while it comes up to a boil.
 
Couple of more question before I pull the trigger on the Brewzilla:
1. Do I need to get the whirlpool arm? Does it actually help?
2. I will brew mostly only 10L batches. Given this, would the hop spider even reach that depth? And hence the question - should I buy this?

Thank you.

1. You don't need it, but I like seeing the hop cone. You can't whirlpool and chill at the same time unless you have a second pump.

2. Hop spiders are nice...i started using mine then threw then in commando and haven't turned back.
 
Couple of more question before I pull the trigger on the Brewzilla:
1. Do I need to get the whirlpool arm? Does it actually help?
2. I will brew mostly only 10L batches. Given this, would the hop spider even reach that depth? And hence the question - should I buy this?

Thank you.
1. Whirlpool arm not needed, but I like having it. I think that whirlpooling during chilling helps to cool the wort, no testing done or evidence, it just makes sense to me that it would.

2. I don't think a hop spider would be needed as the false bottom catches almost all of the hop matter, at least if you whirlpool. May not reach low enough to be in your wort anyway...
 
Couple of more question before I pull the trigger on the Brewzilla:
1. Do I need to get the whirlpool arm? Does it actually help?
2. I will brew mostly only 10L batches. Given this, would the hop spider even reach that depth? And hence the question - should I buy this?

Thank you.
(First post).

Just another way of tackling two problems at once…..

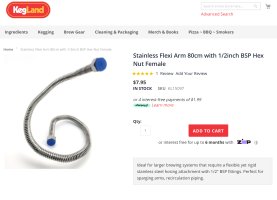
I have the stainless flexible arm in the photo and added camlock ends - acts as my recirculating hose and a whirlpool arm. Grab a dust cap and drill a small hole to increase whirlpool velocity. I have a second dust cap with a larger conical hole for normal recirculation of the mash ( like a Clawhammer). Works fine for my 35L Brewzilla and any plumbing outlet will have longer hoses for the 65L or when using extenders..

Cheers.
 

Attachments

  • 5AE9D2C0-1713-47D3-A1E7-5D7E40044C20.jpeg
    5AE9D2C0-1713-47D3-A1E7-5D7E40044C20.jpeg
    412.1 KB
@TheCountAU

Ingenious and effective I'm sure, a little sticky when you fish it out after whirlpool to pump into the fermenter? or do you drain via the tap?
No mess so far…. Just disconnect from the return pipe, lift, invert the wort drops out. It’s usually too hot to pull the dust cap off. Wort into fermenter via tap, yep..

I’ll add more info on the weekend with photos of gear etc etc.. but in short, I bought the 3.1.1 two and a half years ago after doing extract for 26 years and I’m really pissed at myself for not going all grain earlier!
 
Slightly tangential but please do bear with me:

OK so I ordered the 3.1.1. Now, the thing is that before I bought it, I had a conversation with the owner of the store (I live in India and this is one of the two official Kegland suppliers here). In India, it is fairly expensive (~400USD) and so I had to do my due diligence. Also, I only required it a couple of weeks later (traveling until then). Today, the store owner called me up and said that he had only one 3.1.1 left and, as luck would have it, someone else ordered one from the online store at the same time. He asked me if, since I could wait, he could give the one to the other person and that he had a new shipment coming in a couple of weeks. Well, that worked fine for me since I was in no particular hurry and the other person was. All good so far but here is the catch.

The new shipment that he was getting was for the Gen 4. And, obviously, it would cost more. How much more? In actuality, about a hundred dollars more. But, long story short, he offered a discount and, well, I got it for $470, which, I thought, well, a one-time purchase that should last me quite a few years, and long (perhaps unnecessary) story short, I now am the owner of a Gen 4 system and await delivery.

I look forward to brewing but any tips would be most appreciated! Have an excellent weekend everyone!

Sounds like the brewing gods were in your favor! Nice pick up!
 
I have seen a lot of efficiency numbers throughout this thread, but it is never clear whether that is Mash Efficiency or Brewhouse Efficiency.

For the Gen 4 120v Brewzilla, what is your typical:

1. Brewhouse efficiency;
2. Mash efficiency;
3. Boil off rate; and
4. Mill gap size.

I know there are a lot of variables, but I'm only looking for ballpark figures.

Thanks.
 
Last edited:
I have seen a lot of efficiency numbers throughout this thread, but it is never clear whether that is Mash Efficiency or Brewhouse Effiency.

For the Gen 4 120v Brewzilla, what is your typical:

1. Brewhouse efficiency;
2. Mash efficiency;
3. Boil off rate; and
4. Mill gap size.

I know there are a lot of variables, but I'm only looking for ballpark figures.

Thanks.
My brewhouse efficiency is usually 73-83%.

I don't measure the rest. But I usually only lose .5-1 gallon to boil off.
 
I have a quick question for those with the 3.1.1 and a jacket. How in the Sam Hill are you supposed to get that jacket on? If I had six hands, I could probably get it on there pretty easily, but the way they hide the seam under the recirc pipe makes it damn near impossible.

Anyone have a good way of getting it done?

Thx

Lon
 
@Teufelhunde - Yeah, I've wondered about the logic of having the jacket seam right under the recirc pipe. First, way easier with metal recirc pipe (thinner, tougher) than poly sight glass (thicker, breaks if you look at it funny). Second, I find it's best to just get any part of it velcroed near the top and bottom (to hold in place), then smooth your hands along the whole exterior from opposite sides (kind of like pushing up/bunching up a carpet) to force enough slack to get the whole velcro strip attached. It may also get a little looser with time, but not much.
 
Last edited:
I have a quick question for those with the 3.1.1 and a jacket. How in the Sam Hill are you supposed to get that jacket on? If I had six hands, I could probably get it on there pretty easily, but the way they hide the seam under the recirc pipe makes it damn near impossible.

Anyone have a good way of getting it done?

Thx

Lon
Slide the flap under the pipe first and hold it in place while sliding the other side under it. Fasten the Velcro in the middle and work your way out.
 
I just lob the hop pellets in the kettle and rely on the trubtrapper to catch them all and the trub.
Tried this for a Fuller's LP clone and it worked pretty well. The flow decreased at one point but the pump was easy to clear with a little backflow. The clone recipe called for a large late hop addition and a 30 minute whirlpool. I think I may have been better off using the spider for that part because the hops settled quickly and didn't get much circulation. The Brewzilla whirlpool arm isn't long enough, IMO.
We did another batch with whole hops and the wort was noticeably clear into the fermenter.
I whirlpool via a 90 degree and small pipe fitted onto the inside of the tap and then initially ran the recirc pipe back through the tap in reverse. Later converted to a larger ball lock as a replacement and fitted a three way half way up the metal recirc pipe so I could divert to whirlpool or over the top or both. This does mean I can have whirlpool on during mash which mixes the dead space between the malt pipe and the vessel wall. This improves efficiency.
 
@Bottoms_Up - If you sparge, you will get decent efficiency. But I also try to stay under 12-13 lbs of malt in the 35L. If there is more than that, I split it up and do a reiterated mash.
So you sometimes do a mash, save it later for the boil, do another mash, then add both for the boil all on one brewday?

Have you considered using more grain, but a lower water-to-grain ratio for the mash? I think you can go as low as about 1 quart per pound of grain. Then you would make up the rest during the sparge. Using 1 quart of mash water per pound of grain, you will end up with a total volume (mash water + grain) of about 34 quarts. The Gen 4 has a total capacity of 37 quarts, so that would still give you 3.2 quarts of room at the top, which is a little tight but still doable. If, rather, you use 23 pounds of grain, your total volume will be about 31.3 quarts, which is well below the top level. Thus you should easily be able to do a high gravity beer with the Gen 4, comfortably up to about 23 pounds of grain, using 23 quarts of mash water.
 
Last edited:
I use the 3.1.1. The Gen 4 may be different, but there is a real physical limit for grain/mash capacity in the 3.1.1 before wort (and anything else) begins flowing into the side holes of the malt pipe. And if the grain gets too compacted , the recirc just carves channels under the top screen, and you don't get the full benefit of recirc.

If I have more that 12-13 lbs of grain, I will just mash the first half (leaving 6-7 lbs of base grain aside). Then pull the malt pipe and BIAB mash the last 6-7 lbs in the wort from the first mash. Then boil it all. I've found it is much easier to just mash twice than to deal with an overstuffed malt pipe.
 
Last edited:
For those of you that switched from a more traditional AG system (for me...cooler, pot for heating sparge water, boil kettle, gas burner) to a brewzilla or similar AIO system, what gear were you able to purge from your set up? It looks like an AIO will certainly simplify and maybe speed up brew day, but for me storage and cleaning are the biggest issues I have...and for me to justify the upgrade just wanted to see if anyone was able to get rid of a bunch of stuff or if most of your older gear still remains in service? I'd imagine I can get rid of the boil kettle/burnder/mash cooler and just keep a 3 gal pot for stove heating my sparge water.

Also, in terms of brew day, was anyone able to cut their time down or spread it out easier with an AIO? The way I see it is I can likely get water and system ready night before, heat the mash water when it works...brew as usual over a few hours and transfer. I was wondering if anyone saw some time savings with a different cleaning regime with the AIO or if that remained about the same? CIP or leaving BZ overnight with PBW or something? Along with the small house I have 2 little kids, so time is also a bit of a premium!

Thanks for any input, buying a BZ gen 4 is likely my target, and the cost doesn't really put me off, its more am I spending money for no real tangible upgrade.
 
see if anyone was able to get rid of a bunch of stuff or if most of your older gear still remains in service?

So I tried selling my old BK/Cooler mash tun set up and nobody bought it so it sits in a plastic bin my basement. I still bring up the old cooler with ball valve just in case the pump get clogged but hasn't happened in about a year. Long story short I don't use my old set up at all.
Also, in terms of brew day, was anyone able to cut their time down or spread it out easier with an AIO?

The biggest time saver for me is setting up the night before. My strike water is ready to go at 6 AM and I'm mashed in by 6:30. I have three kids (6 and twin almost 3 yo) so while the mash is going i can help get them up if they are awake...we were lucky this summer as all three slept until 8!

I'm usually done brewing and transferring by 11-11:30. Pitch yeast, fill the Brewzilla will water and PBW and let it run while I help with lunch and nap time. When I get back around 1:30 i dump water and put everything away.
 
For those of you that switched from a more traditional AG system (for me...cooler, pot for heating sparge water, boil kettle, gas burner) to a brewzilla or similar AIO system, what gear were you able to purge from your set up? It looks like an AIO will certainly simplify and maybe speed up brew day, but for me storage and cleaning are the biggest issues I have...and for me to justify the upgrade just wanted to see if anyone was able to get rid of a bunch of stuff or if most of your older gear still remains in service? I'd imagine I can get rid of the boil kettle/burnder/mash cooler and just keep a 3 gal pot for stove heating my sparge water.

Also, in terms of brew day, was anyone able to cut their time down or spread it out easier with an AIO? The way I see it is I can likely get water and system ready night before, heat the mash water when it works...brew as usual over a few hours and transfer. I was wondering if anyone saw some time savings with a different cleaning regime with the AIO or if that remained about the same? CIP or leaving BZ overnight with PBW or something? Along with the small house I have 2 little kids, so time is also a bit of a premium!

Thanks for any input, buying a BZ gen 4 is likely my target, and the cost doesn't really put me off, its more am I spending money for no real tangible upgrade.
I'm planning to get rid of two 10-gallon insulated coolers that I used for mashing - they take up a lot of room. I can't get rid of my boil kettle since I purchased a 110v Brewzilla. It's fine in the late Spring, Summer and early Fall, but will be inadequate for our very cold winters (I brew outdoors). Thus during the Winter months I plan to use the Brewzilla for mashing purposes only, and drain the wort to my boil kettle and heat it over a propane burner. Thus I cannot get rid of my boil kettle.
 
I'm planning to get rid of two 10-gallon insulated coolers that I used for mashing - they take up a lot of room. I can't get rid of my boil kettle since I purchased a 110v Brewzilla. It's fine in the late Spring, Summer and early Fall, but will be inadequate for our very cold winters (I brew outdoors). Thus during the Winter months I plan to use the Brewzilla for mashing purposes only, and drain the wort to my boil kettle and heat it over a propane burner. Thus I cannot get rid of my boil kettle.
That's actually a pretty good call, I'm in Canada so I'll also be dealing with cold winters, I like the idea of brewing indoors but not sure if I can make that a reality, so hanging onto the kettle and burner for a while will likely be the path I will take. Like you I have a 10 & 5 gal cooler that I'd like to get rid of, huge space takers and likely no need for them going forward.
 
That's actually a pretty good call, I'm in Canada so I'll also be dealing with cold winters, I like the idea of brewing indoors but not sure if I can make that a reality, so hanging onto the kettle and burner for a while will likely be the path I will take. Like you I have a 10 & 5 gal cooler that I'd like to get rid of, huge space takers and likely no need for them going forward.
Brewing indoors is not an option for me. My stove has one of those fake vents - no vent to outside, it only blows the steam back into the kitchen. However, mashing doesn't produce enough steam to worry about, so I will mash inside with the Brewzilla during the winter and boil outside in the garage over a propane burner.

There is a steam condenser hood you can get for the Brewzilla, so you can use it indoors without needing a vent, but it is expensive, and uses a lot of water. It's hard enough to justify the water usage when wort chilling, so to add to it by condensing does not seem ethical. Also, rather than starting to chill the wort immediately after I turn off the heat, I now wait until the wort chills naturally in the air to about 160 F before using the chiller. There's no worry about bacteria infection at that temperature (anything over about 140 F is safe). It saves a lot of water, and doesn't take that much extra time. I use that time to add flavour hops for about 20-30 minutes. This greatly improves the flavour of the beer, much better than adding hops at 10-20 minutes left in the boil, which causes many of the aromas to boil off.
 
Well, in my campaign to make every Brewzilla mistake, I hit another (particularly tricky) milestone - I stepped away for too long and managed to leave the grain in so long that even the 120v 35L hit 200F before I caught it.

To be clear, the 120v heats so slowly that you usually have a very generous window to get the grain out. I just had too many things pop up in that roughly 1 hour window. It still had 15 minutes of programmed mashing at 150 and and 20 at 159 when I left - but I guess I was gone a bit over an hour. I'm thinking maybe it actually heats faster if the hot grains are still in.

Oh well, it's a red ale, so the additional astringency may not be too bad of factor. Will see.
 
On the topic of 120V Brewzillas, can you brew outdoors with the 35L/120V version when it's cooler out? I'm not talking deep freeze but spring or fall mornings when it's maybe 5C/40F out.
 
Well, in my campaign to make every Brewzilla mistake, I hit another (particularly tricky) milestone - I stepped away for too long and managed to leave the grain in so long that even the 120v 35L hit 200F before I caught it.

To be clear, the 120v heats so slowly that you usually have a very generous window to get the grain out. I just had too many things pop up in that roughly 1 hour window. It still had 15 minutes of programmed mashing at 150 and and 20 at 159 when I left - but I guess I was gone a bit over an hour. I'm thinking maybe it actually heats faster if the hot grains are still in.

Oh well, it's a red ale, so the additional astringency may not be too bad of factor. Will see.
In only one hour, with a 120 Volt system, the temperature rose to 200F??? What was the ambient temperature?
 
Back
Top