ReuFroman
Well-Known Member
As I start to consider my inner workings and wirings of my panel I wanted to see what others are doing.
So show me your pids!
So show me your pids!


![Craft A Brew - Safale S-04 Dry Yeast - Fermentis - English Ale Dry Yeast - For English and American Ales and Hard Apple Ciders - Ingredients for Home Brewing - Beer Making Supplies - [1 Pack]](https://m.media-amazon.com/images/I/41fVGNh6JfL._SL500_.jpg)


As I start to consider my inner workings and wirings of my panel I wanted to see what others are doing.
So show me your pids!

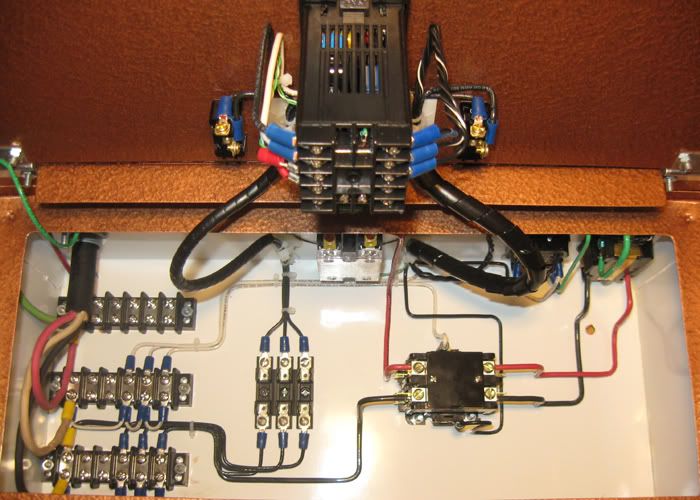
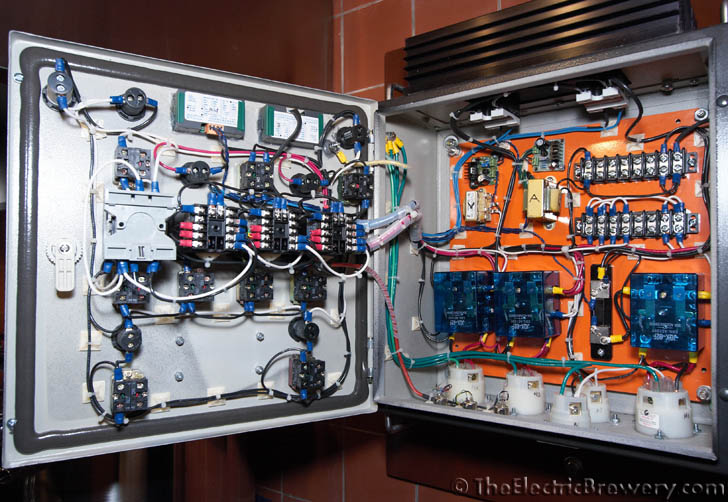
kevink said:It's not exactly a panel, but here's mine. I added a fourth fuse block and switch for for a second pump after these photos were taken.
I like how you bring it in on the right then move logically down through on the left. Would you change that layout?
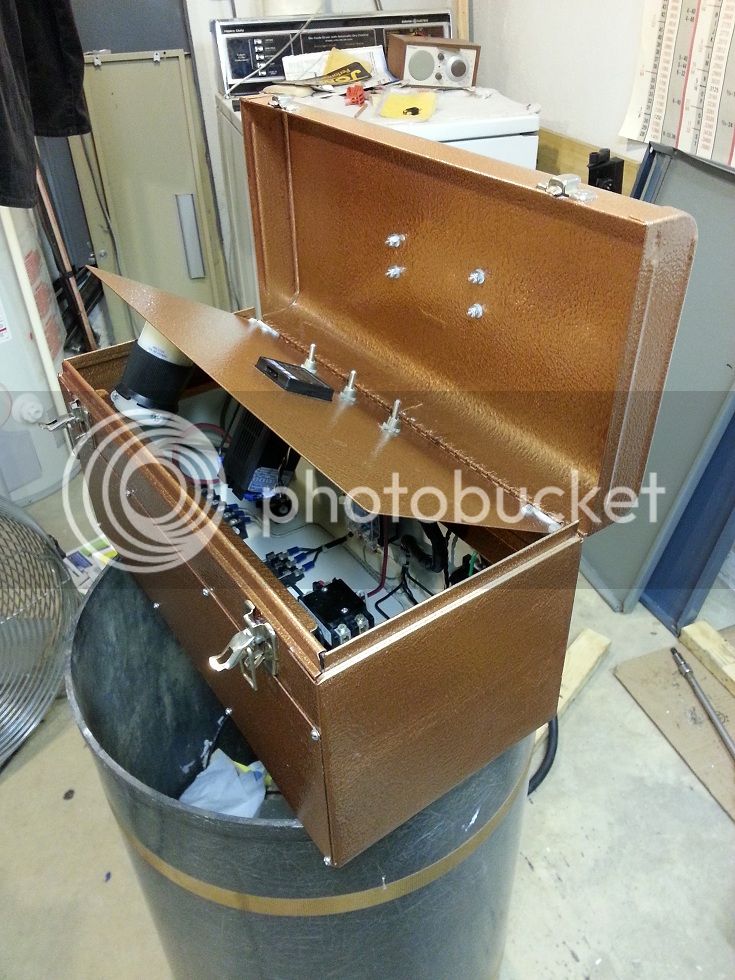
Flomaster said:I scored a free panel it measures 24H x 18W x 8D would this be to large of a box to use? now measure your box and open it up for me -=Jason=-
Never. I once saw a 24" x 24" x 10".
As most things big is never big enough.

Flomaster said:Cool I'll keep it than.. It even came with a large fan in it.
You have a few options. You can leave it IF you are mounting it where water or liquid will not be reaching it (not recommended). You can remove the 4 screws and purchase plastics or metal to make a cover plate. Lastly you can remove it and use it as your starting hole for your heat sink.
")

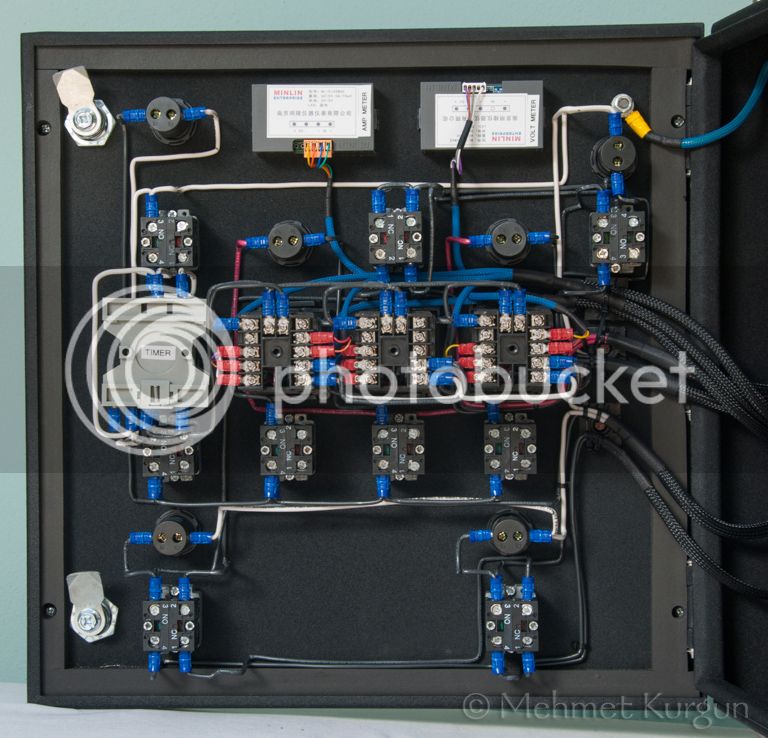
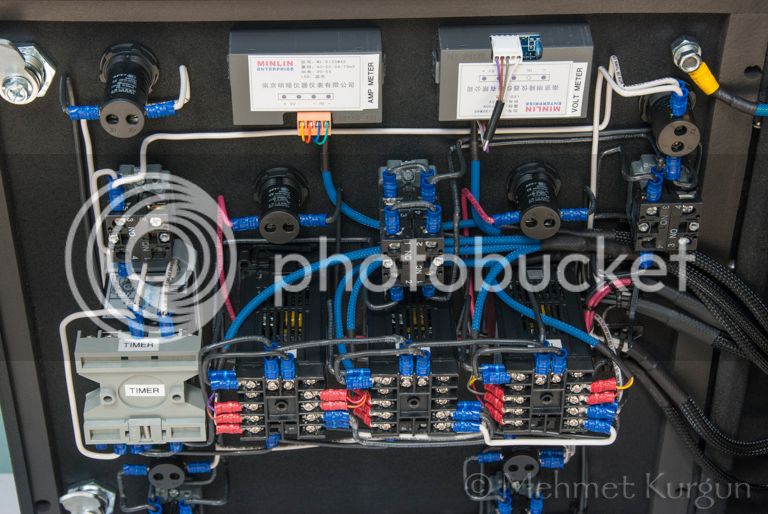
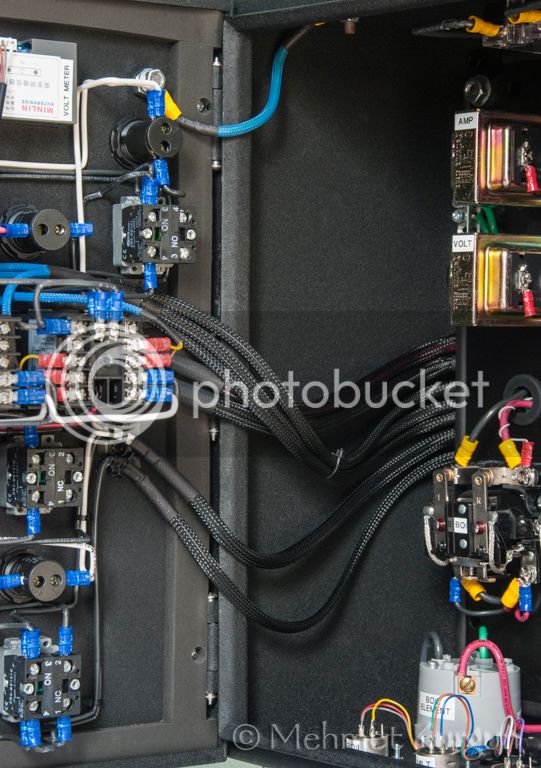
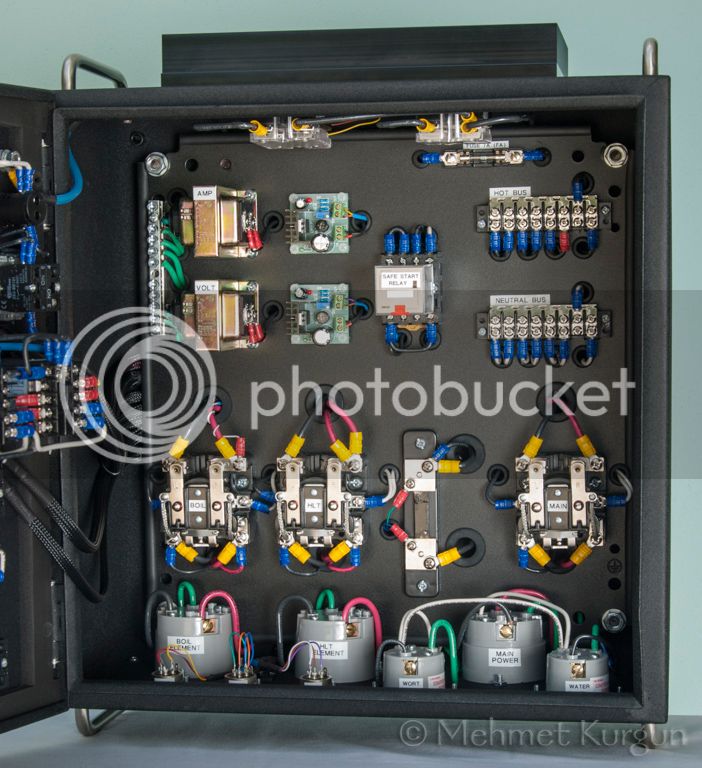
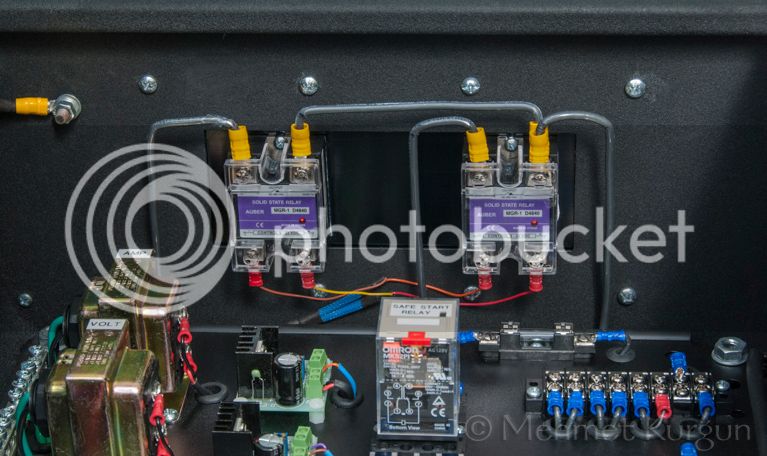
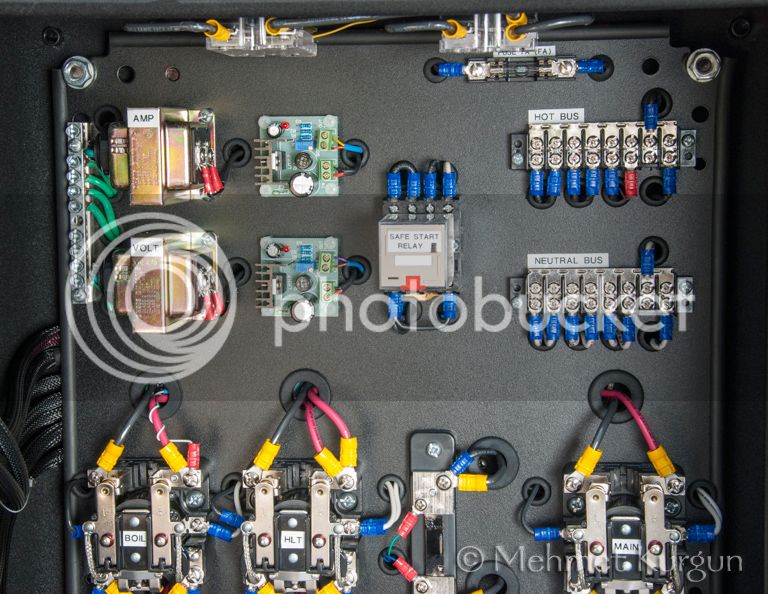
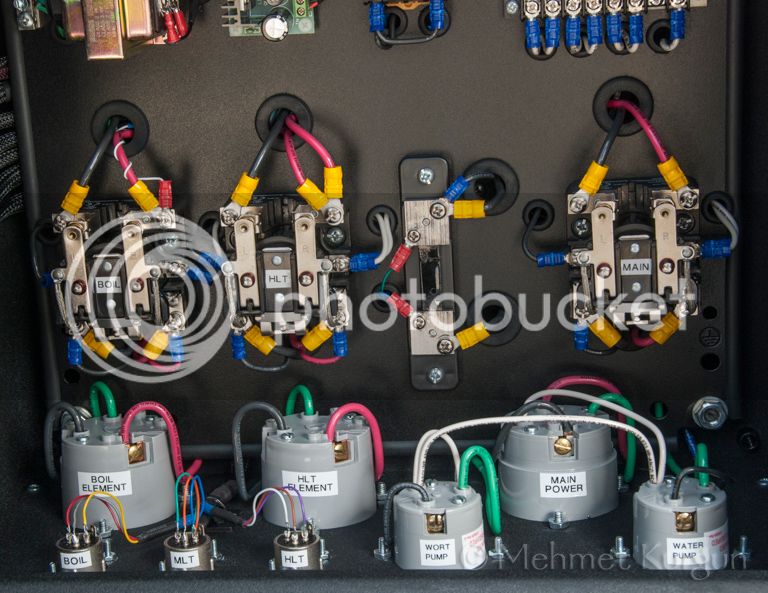
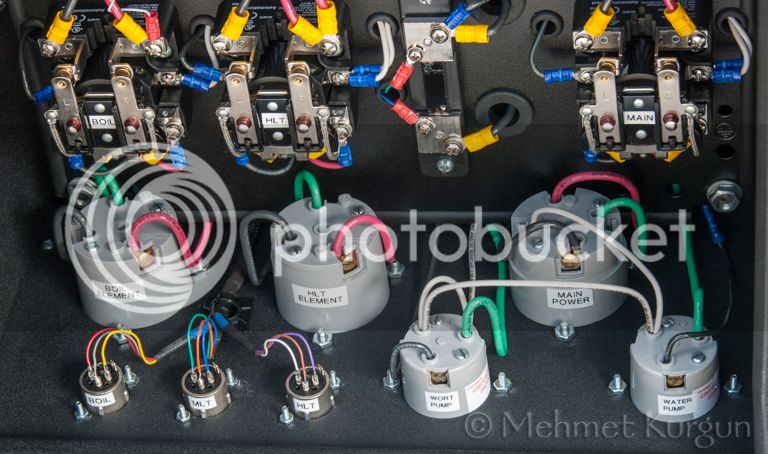
kal said:If you want some REALLY clean wiring, take a look at these pics that someone sent me:
Talk about clean! (Not to nit-pick but some of the bends may be too sharp to keep CSA/UL approvers happy but it's nice work otherwise).
He posted more pics here.
Kal


I have seen a panel where they run the wires under the mounting panel with holes and grommets. Who was that, why, and is it worth it? It seem that could be pretty nice for showing off components.