• Please visit and share your knowledge at our sister communities:
  • If you have not, please join our official Homebrewing Facebook Group!

    Homebrewing Facebook Group

North Wall Brewing Electric Brewery Build

Homebrew Talk

Help Support Homebrew Talk:

This site may earn a commission from merchant affiliate links, including eBay, Amazon, and others.

SookeBrewing

Well-Known Member
Joined
May 20, 2011
Messages
69
Reaction score
8
Location
Sooke
Hey gang - I'm working on a PROJECT!

I've finally gotten to a point in my build that I have some pictures of stuff that I want to share. When we bought this house about 2 years ago, I knew that it was PERFECT for a larger, purpose-built brewery. I discovered TheElectricBrewery.com some time last year and have been salivating over it ever since.

Right now, I brew using some pretty basic equipment - a turkey fryer burner, big-ass aluminum pot and a cooler mash tun with stainless braid. I'm lucky enough to have gotten a free 100lb propane tank, and my equipment fits nicely in my well house, which, obviously, has a readily available source of water (its foundation is a 2500gal concrete cistern). The room is also small enough and very well insulated (to prevent freezing) that it works well as a fermentation room since there is already a heater in there (needed in the winter but not the summer, of course).

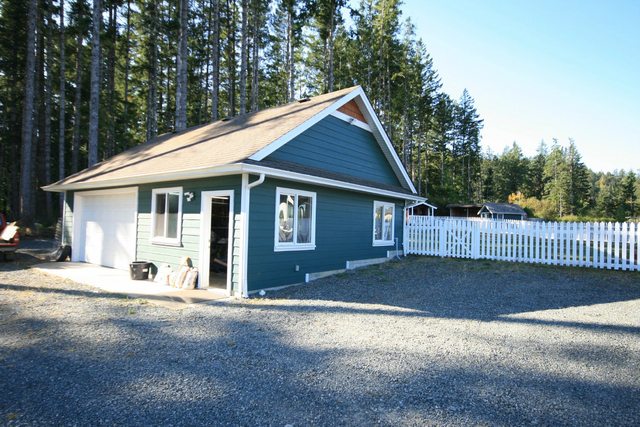
This is the new home of brewery 2.0, tentatively called "North Wall Brewing," since it occupies the north wall of my garage.

d5CyQl.jpg


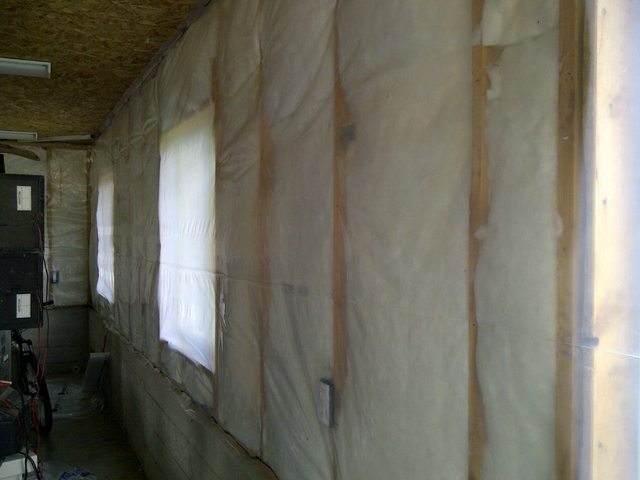
When we bought the place, the garage was neither insulated nor heated, so temperature swings are pretty wild in all seasons, especially the late spring and early fall when it's chilly at night and warm in the day. First order of business was to insulate and put up some walls:

G7v6yl.jpg


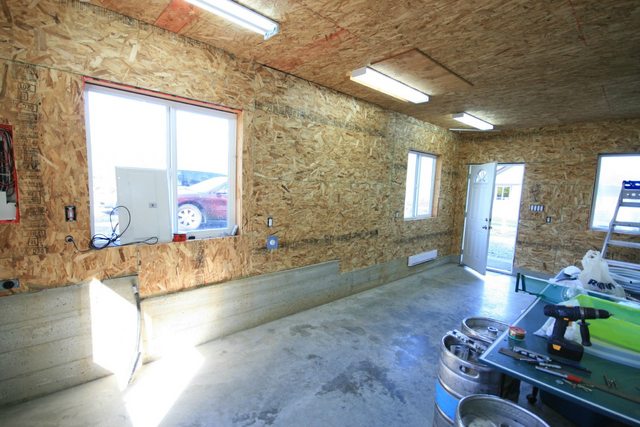
We had an electrician run the lines for the heat before we did this. Due to a very, very busy summer I didn't have as much time as I'd liked to work on it, but finally managed to get the last of the OSB up a few days ago. This is the area NWB will occupy:

Hfqhal.jpg


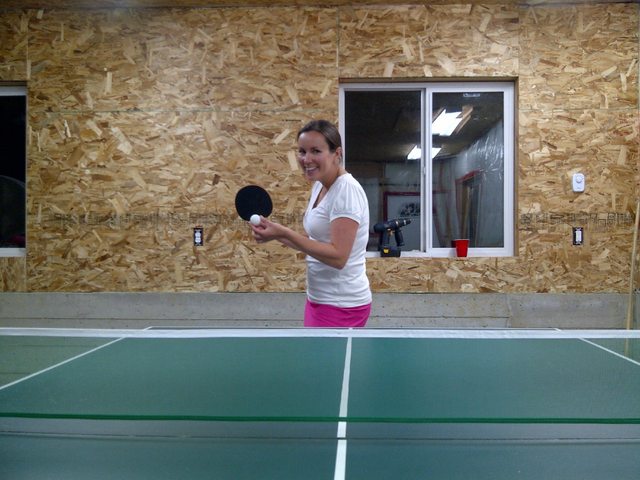
SWMBO wanted a ping pong table. She's better than I.

qQvsYl.jpg


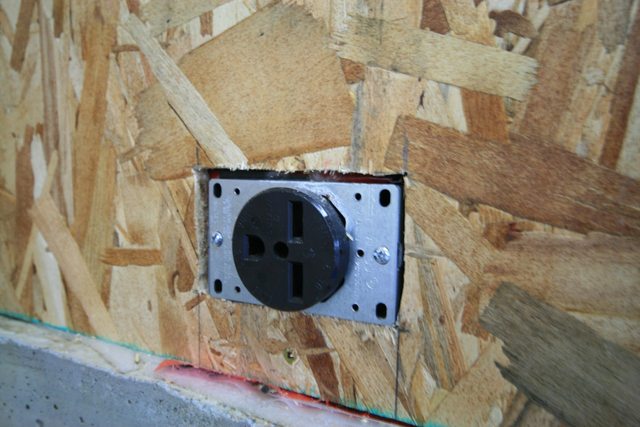
When I first thought about building the brewery, I assumed I'd be able to use this existing 220V outlet, but as you can see, it is a welding-type one that is only good for that purpose, something I learned from reading this and other forums and sites, thanks! Thankfully, I realized this before I put up the walls in the garage in that spot.

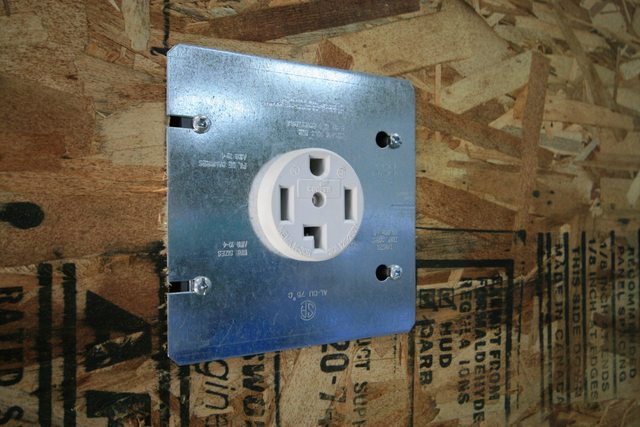
So I installed a new dryer outlet with the proper 30A 4-wire cabling, and ran it back to my panel where it now sits, waiting for a very expensive GFI breaker (at least $250) :-(

J0tFvl.jpg


fhxwTl.jpg


4zL6bl.jpg


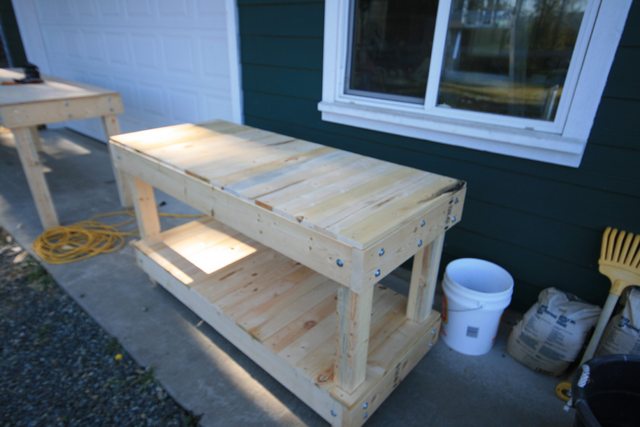
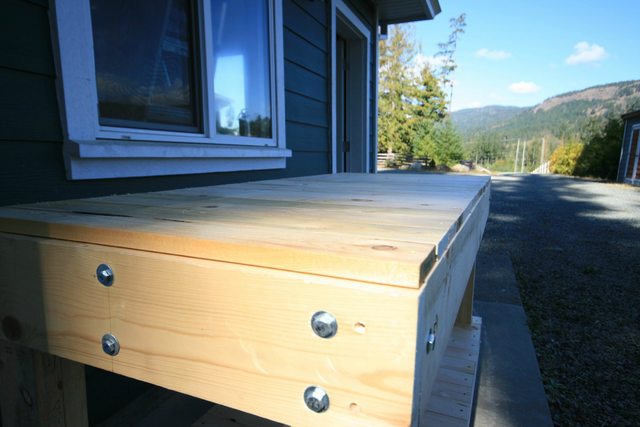
I got to work building the brew stand. First, I built a larger, modified version of it as my general-purpose work bench. A little higher, with a plywood top, and no bottom shelf, 8 feet long. Once that was done, I set to work on my stand. I'm really happy with the way it turned out.

Both stands, before sanding and staining:

nmfzLl.jpg


Vn3xcl.jpg


6V73Bl.jpg


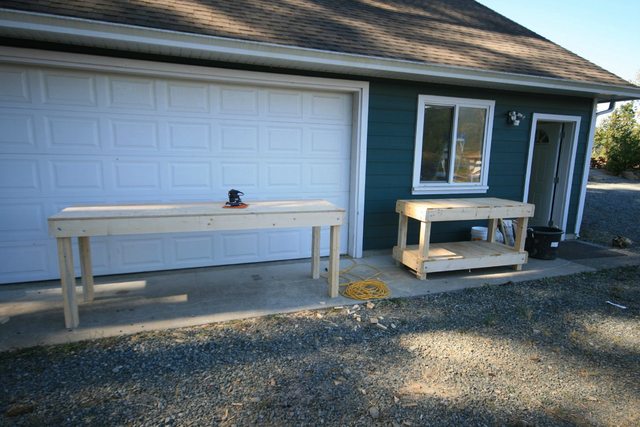
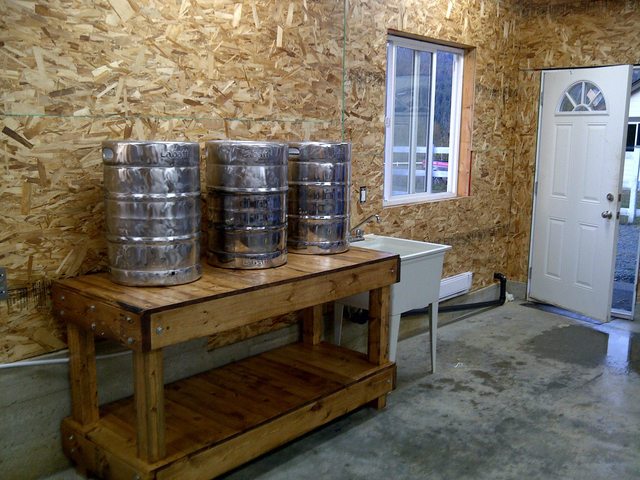
I finished staining them last night, and I love the results. I used Minwax stain, Early American colour. We had cabinets with this stain at our last house. I love it.

YB9Itl.jpg


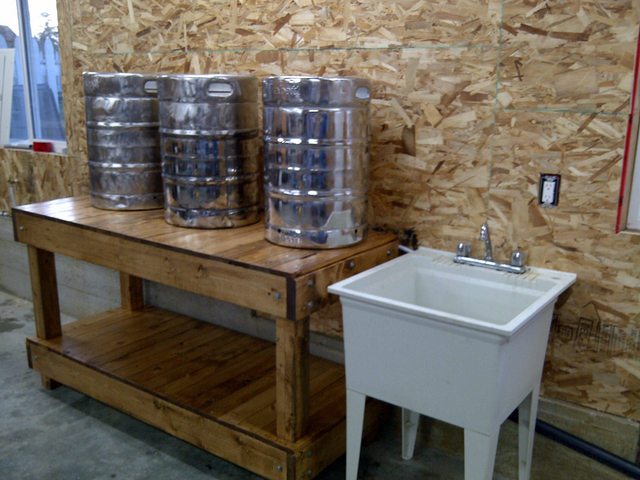
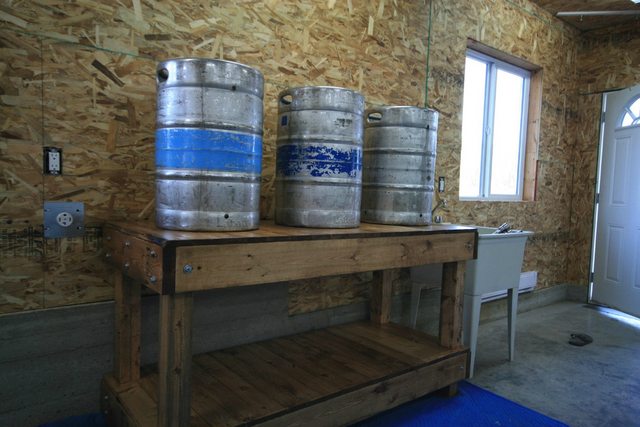
I got that laundry sink for free - it's nearly brand-new. Since I'll really only be draining water and yeasties and non-toxic cleaning stuff, I'm going to run the drain for this either out the door into the grass, or through the wall and to a conveniently-located perimeter drain cleanout which drains the rainwater to a ditch below my property (probably the latter).

I got my hands on 3 used Sanke kegs, so I couldn't pass up the opportunity to convert them and save some major bucks on this build. I guess I can always upgrade later. I cut the tops off them and I'll be ordering fittings soon. I will also be shining them up like a boss.

tLBwhl.jpg


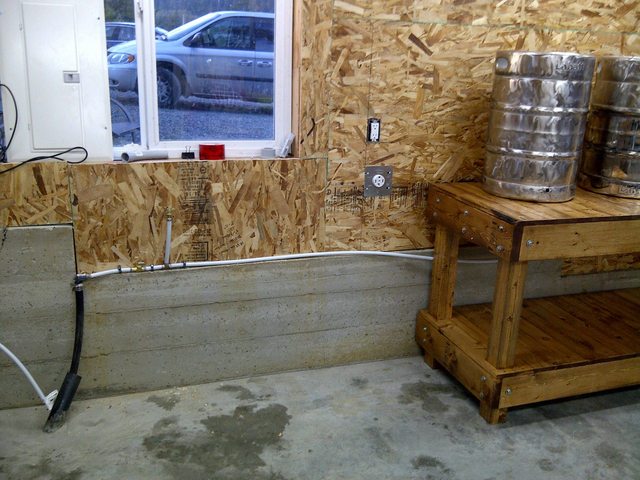
In the left of the following photo, you can see my 1" water line that will be connected soon - then I will run 1/2" pex to the sink and create connections for the HLT and chiller. Just cold water, for now.

Lv0k8l.jpg


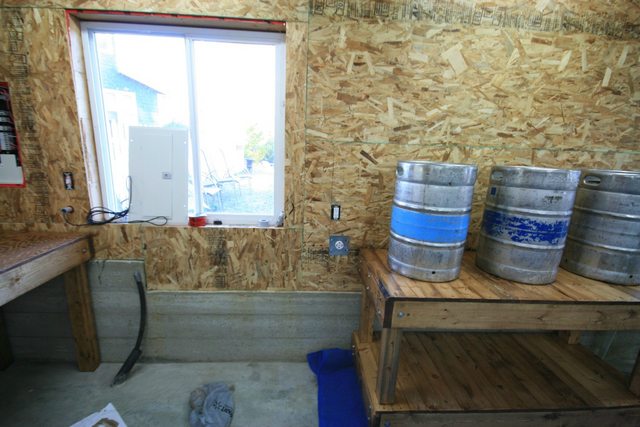
I am considering (ie, pretty damn sure) I'm going to tile the wall behind the brew stand for ease of cleaning and of course protection - OSB doesn't like wet. I'll be building a wooden vent hood lined with some sort of waterproof paneling (likely the next project as it's quick and easy to do while I wait for parts to arrive).

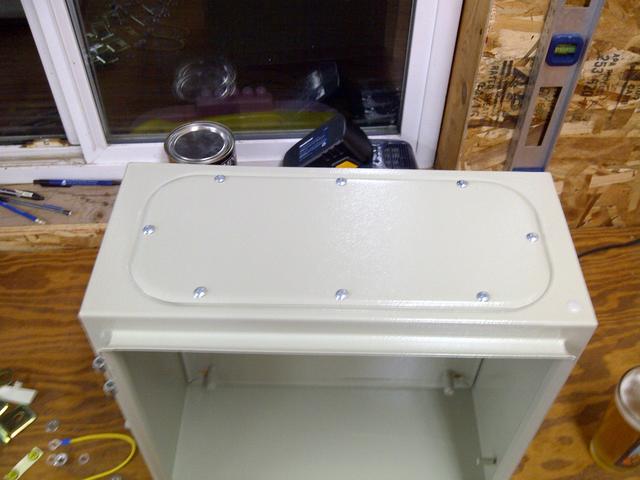
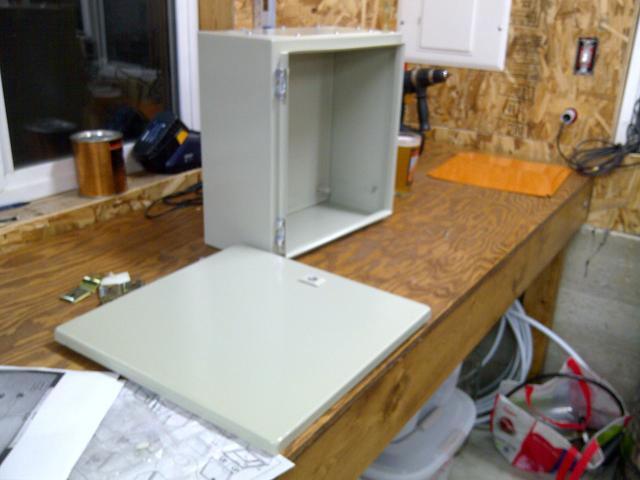
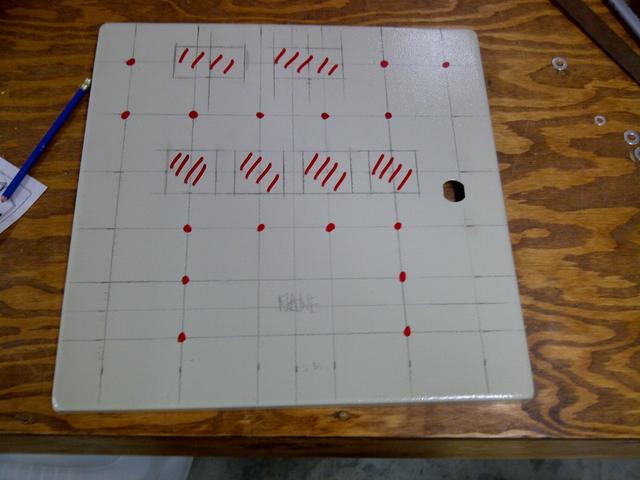
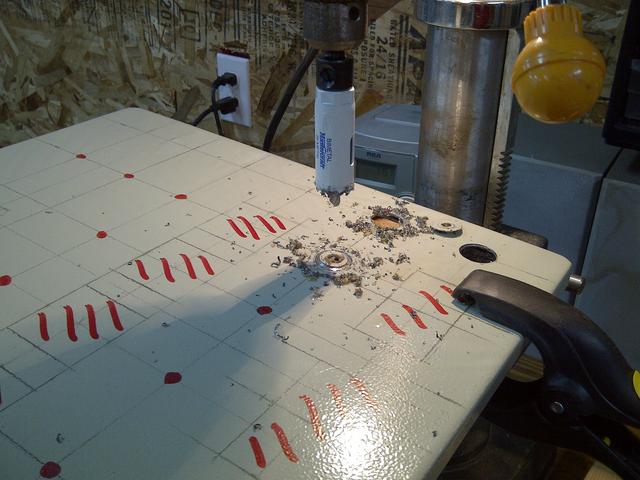
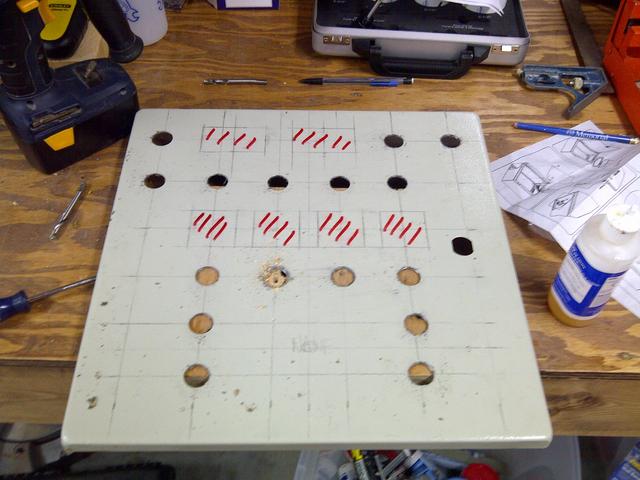
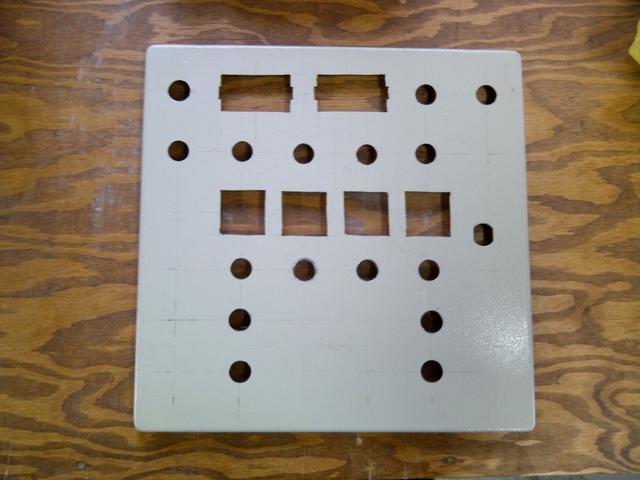
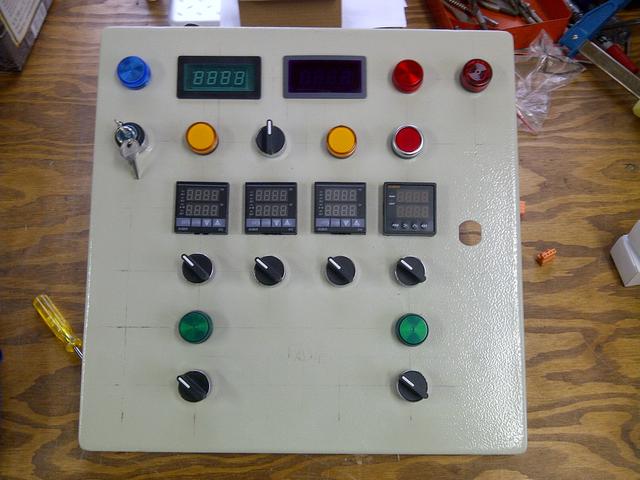
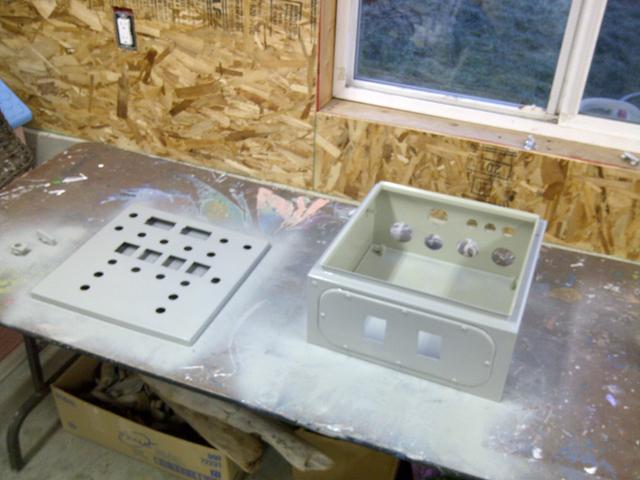
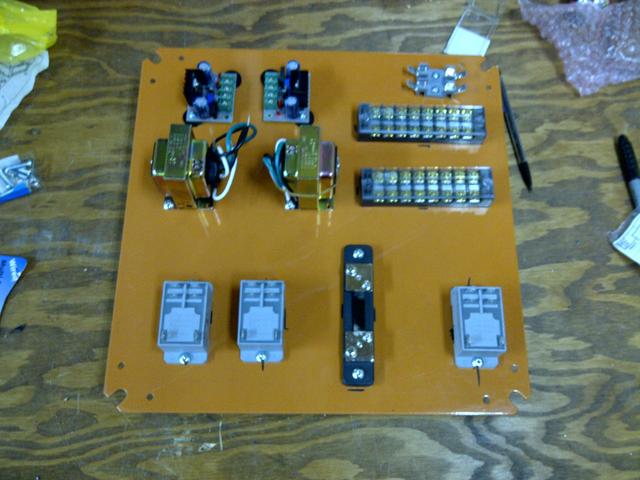
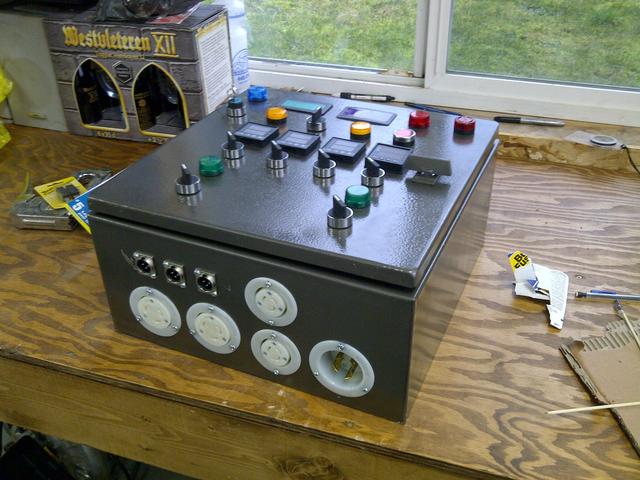
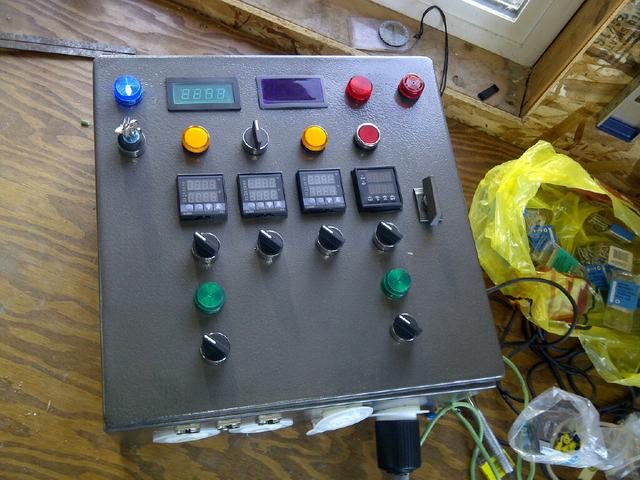
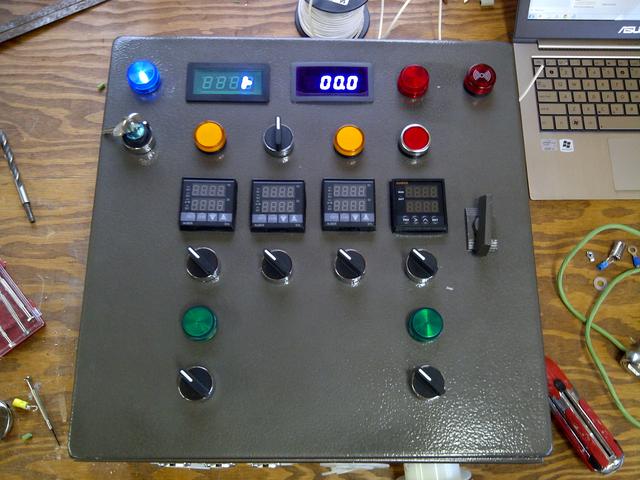
I have ordered nearly all the parts for the control panel and I'm working on sourcing and pricing all my keg fittings. I can't WAIT to get this thing together!
 
Looking fantastic! Can't wait to see more progress.

Sooke is a beautiful place. I've visited a few times for long weekends.

Thanks! I love Seattle - basically the whole Pacific coast is pretty sweet, right? How about this September weather eh?
 
Very nice work so far! I'm working on a similar project, so I'll be following along and stealing all of your ideas. :D Keep up to great work! :mug:
 
Oh....one more thing. Definitely slap some cement board up on the wall and tile behind the brew stand. I'm using a combination of polished and tumbled travertine stone to match my basement bar build. Also, check out my ventilation hood if you need a couple of DIY ideas. I just couldn't bite the bullet and purchase a commercial hood, so I built my own. Here's the link if interested.

https://www.homebrewtalk.com/f170/hoppos-e-brewery-build-283510/

Good luck and keep the pics coming! :mug:
 
Thanks Hoppopotamus - I am planning to use drywall behind the tile as this won't be a very wet area like a bathroom floor or shower.

I already had a look at your build for the vent hood - nice job. I'm going to build a simple box and construct it with similar lag screws and washers and of course stain it to make it match my stand.
 
Over the weekend I connected the water from the crawlspace under the house to the line to the garage. What a headache trying to get a leak-free connection between the black poly water main and the 3/4" pex in the crawlspace! I think I finally got it.

All other connections were easy as pie, including the laundry tub and its drain, and a new exterior water tap for our driveway and kids' play area.

uaWc5l.jpg


I also shined up those kegs somewhat. What a tedious, dirty job. I did NOT enjoy it at all, and quit before they were mirror shiny, plus I burned through all my Gator Grit finishing and polishing pads. One or two more sets of polish pads should make them look a little better.

scsNNl.jpg


BQ74ml.jpg


I'm going to build the ventilation hood next, and tile the wall behind the sink and brew stand.

Speaking of that - I have exactly 4 feet of clearance between the top of my keggles and the ceiling in the garage. I'm building the vent hood out of either doubled-up (stacked) 2x8s or 2x10s (so the height of the hood will either be 14.5 or 18.5 inches). Where do you think I should put the hood? Right on the ceiling? Or mounted on the wall a few inches below? Obviously the balance is having enough room to work with above the kettles, but not so much that the steam billows out before getting sucked into the hood.

I think I will screw it into the wall anyway since the ceiling joists run parallel to that wall and might make it harder to secure into the ceiling anyway. But height is the question, yeah.

Thoughts?

Thanks!
 
I spent way more time than I care to admit thinking about the height of my hood over my brew stand (see link in sig). I even added additional cross braces between the studs above and below where the hood is currently mounted so I could move it up and down if necessary in the future. In the end, I'm quite happy with exactly where I have it mounted. Our setups are pretty similar, so I'll take a precise measurement for you when I get home tonight and let you know.

What size fan are you planning to use in the hood?
 
... I'll take a precise measurement for you when I get home tonight and let you know.

What size fan are you planning to use in the hood?

Thanks - I would appreciate that - got some feedback from Kal over at TEB.com, I'd love to see how yours is too.

Planning to use a 6" Vortex fan. It won't be a long run at all (straight out the wall) so I may even consider a smaller unit. I live on Vancouver Island, BC, and apparently those fans are the choice of the, um, "indoor horticulturalists" (the ones the police love so much), :fro: so they're easy to find locally.

I just hope I don't end up on some watch list when I buy it!
 
MY FIRST CONTROL PANEL PARTS SHOWED UP TODAY!

Relays, 3 of them, from Future Electronics. Wow, talk about fast - I ordered them yesterday and the UPS man just came by.

Now, just to wait for the rest of the 4000 parts and an enclosure to install them in.

Still. SO. EXCITED.

PS, fall-line did you ever measure your hood height above your kettles?
 
Doh, Sorry! I forgot! I've move everything out of the garage in preparation for painting, but the brew stand is still there. I'll measure it this evening.
 
Probably way late to help you now, but I got the stand positioned back under the hood and measured. It is 22inches from the top of the keggle to the bottom of the hood.

How's the build going?
 
Probably way late to help you now, but I got the stand positioned back under the hood and measured. It is 22inches from the top of the keggle to the bottom of the hood.

How's the build going?

Not too late - I've been on holidays the last 10 days or so. I believe I'm planning on 20 inches between the keggles and the hood, so that should work fine.

Build is coming along - I'm taking a break from sourcing parts at the moment for budgetary reasons, but I returned from vacation with a mailbox nearly overflowing with little packages from China and the USA!

I now have in my possession ALL the parts for the control panel with the exception of the amp meter and the enclosure itself (it's on order).

SO MANY SWITCHES AND LIGHTS AND FUN STUFF.

I hope to spend a little more time in the garage next weekend to get the hood finished. Still trying to find some more Gator Grit polishing pads to shine up my keggles - for some reason they're not stocked in any of the usual places around where I live.
 
Just a general question, why is it that all the stands are built so tall? Why wouldn't you put them so you can easily look into the kettles and stir the mash?

Yeah, I have wondered this as well. I cut my ss brewing table down, so that the working surface is only 24" tall. This allows for plenty of room underneath for my pumps, but allows me to pour grains and stir the mash/BK at a comfortable height. I've seen several builds where guys have to use a step stool to see inside of their keggles. Good question. :mug:

SookeBrewing - any ideas how much $ you will have wrapped up in the control panel when all is said and done? I'm really leaning towards Kal's panel at www.electricbrewery.com. I may just bite the bullet and purchase the unassembled unit from him, so that I am sure to have everything that I need to build a panel that is far more advanced than I would have designed myself. From what I have read, purchasing his unassembled package is actually cheaper than sourcing the components and parts myself and his assembly instructions are wonderful. Since I don't have a back ground in system controls, it's probably much safer and wiser for me to go that route. Just curious how much you are into it sourcing everything independently. Thanks man....and keep up the great work! :mug:
 
How's it going up there on the island? Curious minds (who are trying to distract themselves from their own project) want to know! :)

Not bad - not a lot of action lately - All my parts are in for control panel construction except the box itself. Was hoping for that this weekend, but I received word that Pioneer Breaker had a delay in their shipment, so we're looking like mid-to-late December.

Been busy with some work-and-pleasure related travel over the past 6 weeks so I haven't had a huge heap of time to devote to the project anyway (nor brewing, and my kegs are getting low!)

I did, however, construct part of the ventilation system. I decided to go with 2x8s, doubled up for a total hood depth of 14.5". I glued-and-screwed them together, counter-sinking the screws on the inside so they don't poke through. I've sanded and stained it to match the brew stand.

Next step is to seal the stain, and put a top on it using plywood. I'm going to see if I can borrow a router to sink it flush with the top of the 2x8s if possible. I will then cut a hole in the side of it for the vent, and line the inside with some sort of plastic or fibreglass panelling, and caulk it to waterproof.

Hopefully I can start on the control panel over Christmas, assuming some member of my family can pick up the shipment for me in Point Roberts and bring it across to me. I had planned to pick it up this weekend when I'm visiting my parents in Vancouver (and seeing Bruce Springsteen!!!), but the shipping was delayed.
 
Update!

I know it's been a while, but I am still working away on my system. As of last update I was just waiting on the box to come in from Pioneer Breaker. It came in over Christmas and I got a chance to get out in the garage tonight to do a little work on it.

As previous builders have noted, the cable plate is a little different on the "new" version of the box. I don't really care if the thing is flush and smooth, and I'm using 2 small heatsinks so I just used the included gasket and self-tapping screws and attached the cable plate to the top of the box:

q0389.jpg


After that I took off the door and marked it all up:

cWeFp.jpg


While drinking a home brew, of course.

wdBVG.jpg


I got to use my new drill press! I opted for hole saws, since Crappy Tire (for those not in the know, that's a term of endearment for Canadian Tire) had a decent set of bimetal hole saws on sale for less than one step bit. The 22mm one is pretty much toast now.

BnpoU.jpg


All went well, except for the two holes that I could not use the drill press for (the work area was not deep enough). I ruined 2 pilot bits (I'm still not sure how - I wasn't using a whole lot of pressure) and destroyed what was left of the hole saw. One hole is pretty ugly, but the switch should cover up most of the damage. I also noticed that the switches/lights seem to be ever-so-slightly too large for the holes, but that is nothing that a little bit of filing won't take care of.

vVWWc.jpg


I plan to cut the square holes and the holes on the bottom tomorrow, as well as move the grounding post.

This is FUN.


And then:

Good progress today! I cut out the rest of the holes for the PIDs and Volt/Amp meters. It went amazingly well, actually. I was worried that my cheap-o jigsaw would have trouble cutting through the panel, but the bimetal blades I bought went through it just as easy as plywood!

Once I had all the holes cut I set to work filing them smooth and fixing any lines that weren't straight. The holes I cut for the volt and amp meters were not quite big enough, but a little filing fixed that. As I mentioned above, the 22mm holes were slightly too small, which I took care of with a grinding stone on my rotary tool.

Here's what the panel looked like all cleaned up:

kkPrC.jpg


And here's what it looks like with components dry-fitted. As you can see I went with the Auber timer, and unfortunately my volt and amp meters are not a matching set - they are both blue though. It bugs me enough that I may order another so I can have them match.

UhjkQ.jpg


I hope to get a little more time out there tonight or this week at some point to get the heatsinks cut and the bottom of the panel drilled.
 
Very nice work! Living near the US border, I use a parcel depot to save plenty of shipping costs as well.
 
Looks like a great project! If you decide to have a brewery open house let me know, I'm just down the road in Victoria and would be interested in getting some tips for my(not nearly as nice gas powered) build.
 
Looks like a great project! If you decide to have a brewery open house let me know, I'm just down the road in Victoria and would be interested in getting some tips for my(not nearly as nice gas powered) build.

Are you a member of BrewVIC? A couple guys there have similar systems that they could show off. I'll likely host a Big Brew Day when my system is done.

https://www.facebook.com/groups/brewvic/
 
I am a member but just recently and I am yet to make it to any of the meetings. Looking forward to meeting some of these guys though. What sort of heating elements are you going to run in your setup? I was contemplating and may still do an electric build and was looking for a local supplier of ULWD elements, did you find anyone?
 
What sort of heating elements are you going to run in your setup? I was contemplating and may still do an electric build and was looking for a local supplier of ULWD elements, did you find anyone?

I took a cursory look around, but I ended up buying the CAMCO elements on Amazon as per the instructions on The Electric Brewery site. I had to get a whole bunch of other stuff from Amazon and they were cheapest by far for the elements.

My mother lives in Tsawwassen, so I had all my US items shipped to Point Roberts, WA just across the border to save big on shipping.

I have heard of people in Victoria using Seawings or even the Victoria Clipper ferry to receive shipments for them for much less than paying shipping and brokerage to Canada.
 
It makes sense with customs/duty/etc, but is nevertheless ironic that shipping to an address in Point Roberts is cheaper than to Tsawwassen.. considering the US originated freight has to go through two border crossings to get there.

Then again, Point Roberts is quite an oddity no matter how you look at it.
 
Update!

A few weeks ago (during the Christmas break) I got quite a bit done!

I drilled all the holes in the bottom of the box - this required some, uh, creative drill press work - I had to put some lumber underneath it to get more height and clamp it down. All went pretty well though.

4Athx.jpg


Then I moved the grounding post, primed and painted the box, and installed all the components on the door and backplate:

1QmD6.jpg


mfDDr.jpg


reuij.jpg


I started some of the wiring yesterday - but had to stop when I realized that some of my components (relays and fuse block) need quick-connects not spade terminals.

I also punched and drilled the boxes and back plates for my heating elements.

Then a few days later:

It's ALIIIIIIIIIVE!

Well, the blue light turns on and the relay goes CLUNK when I turn the key. First bit of wiring is a success!

l17UYVW.jpg


And then, a setback....

Lr26pzf.jpg


You're looking at the Amp and Volt meters powered up and working.... right before the AC to DC converter let out the blue smoke for the Amp meter....

I have no idea what happened. I turned on the switch and it was fine. Turned it off for a few seconds and turned it back on.... FIZZZ POP SMOKE.

I suspect maybe it was a bad AC to DC converter as I had trouble with it. When I was setting the output voltage it wouldn't go lower than 11.5 or 12V. But I noticed that the voltage changed when I pressed down on the probes of my multimeter. So I took it off the back plate and tested it off the plate and it worked fine. I was able to set the voltage to 4.9 volts, no problem.

So I thought maybe it wasn't seated right on the plate. I added another plastic washer before I put it back on the backplate - tested it, 4.9V, perfect. So I hooked up the rest of the wires and fired it up.

As the picture shows, the Amp meter was working fine and the volt meter was displaying something odd (Haven't completed the loop to the boil relay yet).

So it seems it was fine. Well after that happened I thought I'd try the amp meter with the remaining good power supply to ensure it wasn't fried also... and it was displaying 2-4 amps so I guess it's fried too.

Sucks - everything was going so well and now I have to wait for more parts :-(

My O-rings, spacers and lock nuts for the elements are arriving next week - I was hoping to be able to fire it up soon thereafter.
 
The panel looks fantastic. Sorry about the smoky setback. Keep on it, you'll have it up and running in no time!

I love my natural gas fired setup, but someday I'd love to build an electric brewery too.
 
Back
Top